-
-
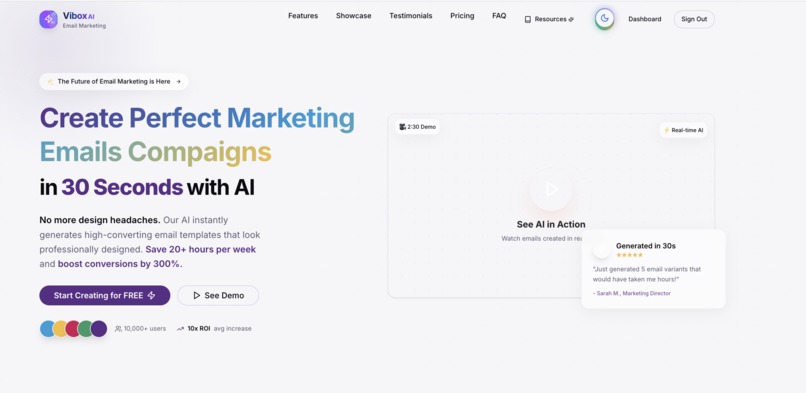
landing page
-
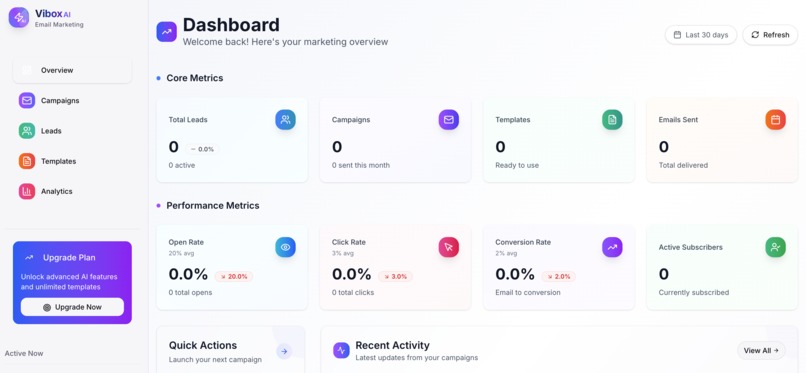
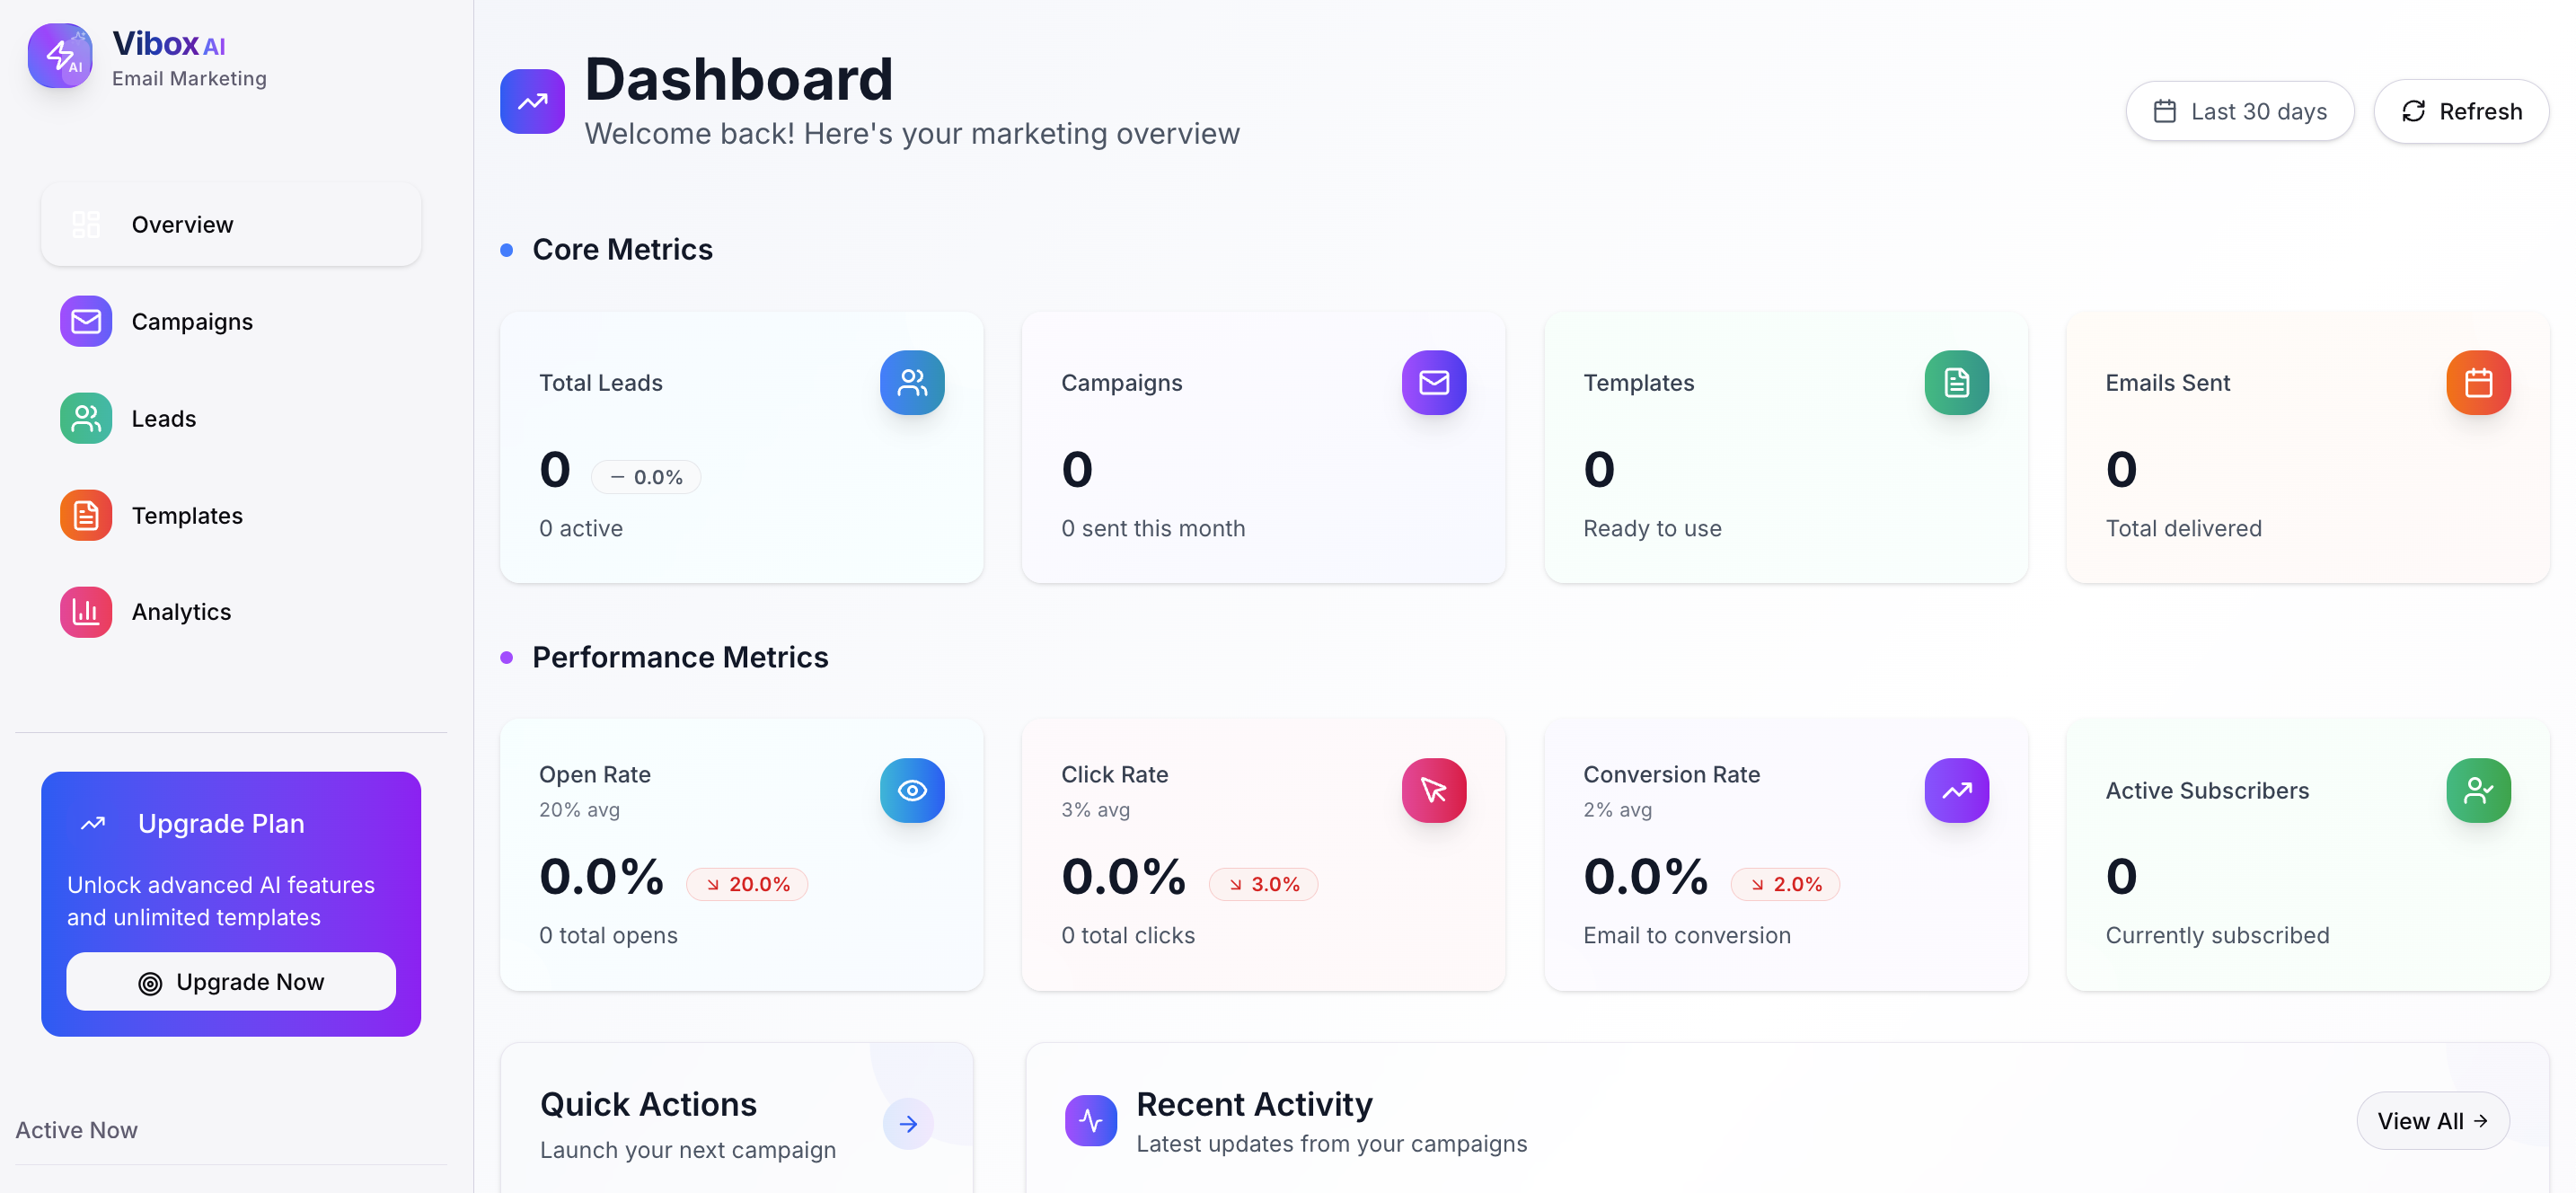
dashboard page after login
-
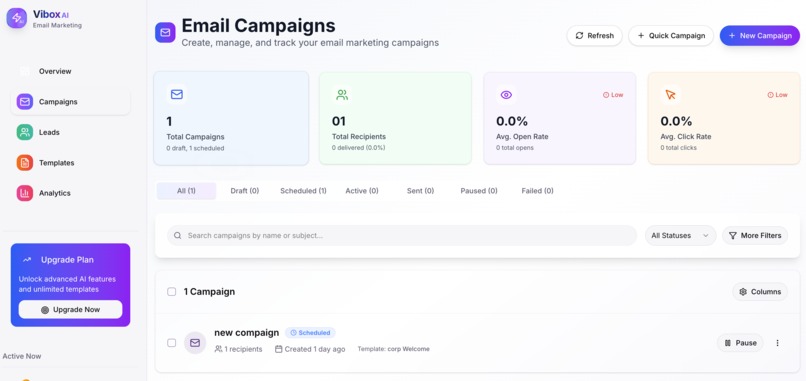
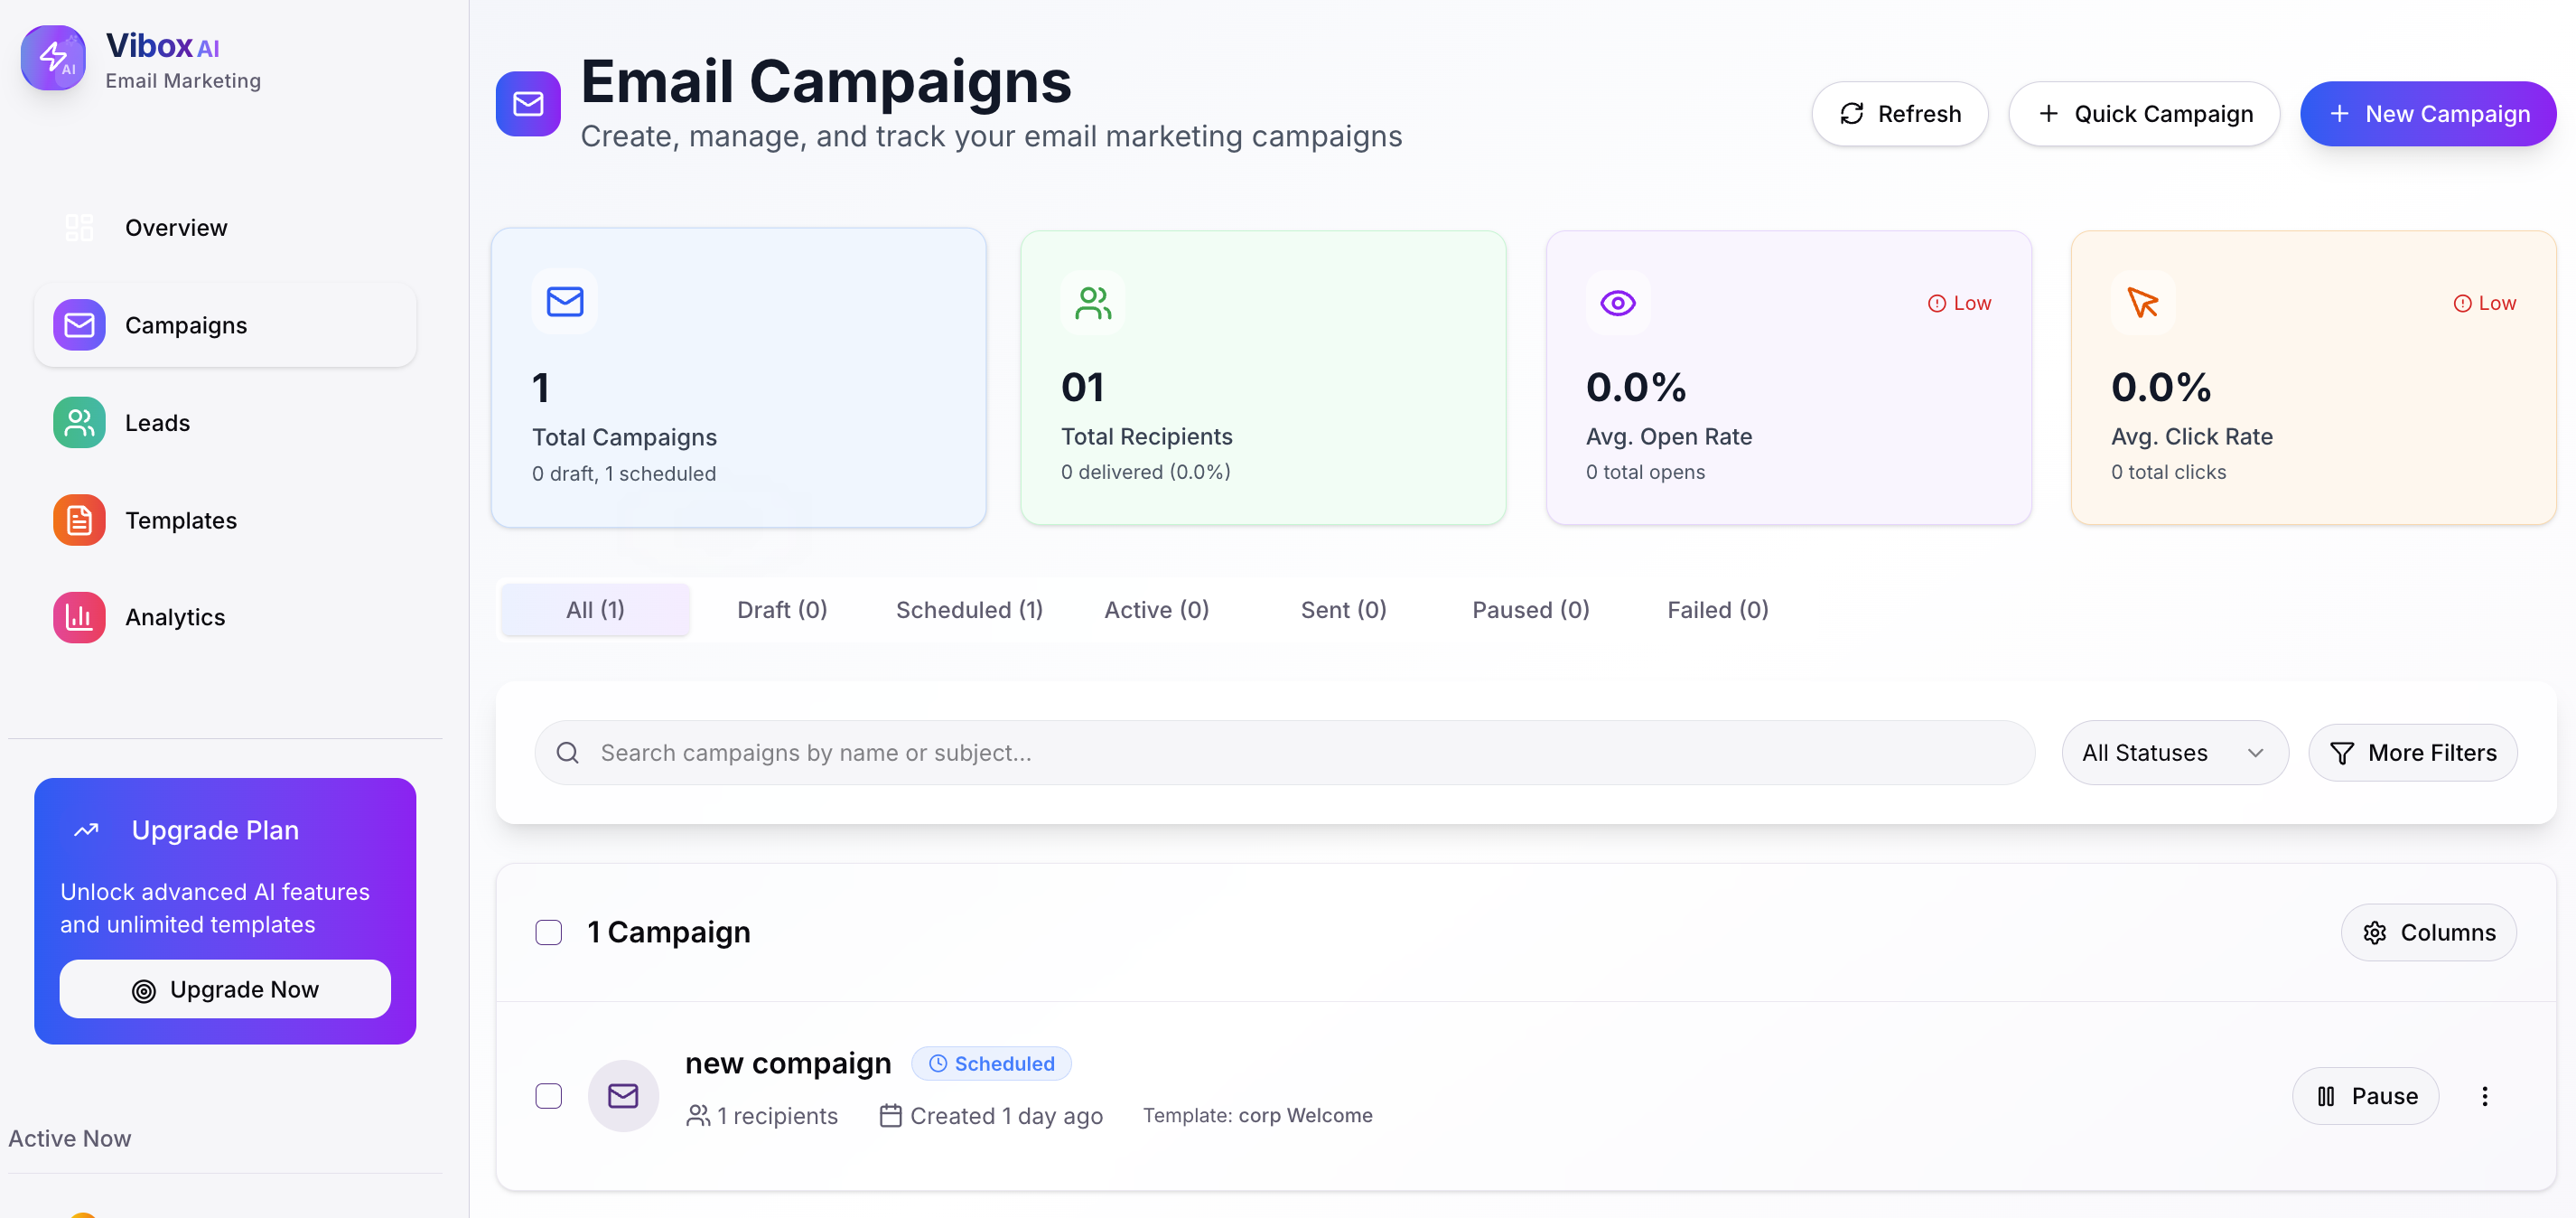
compaign images
-
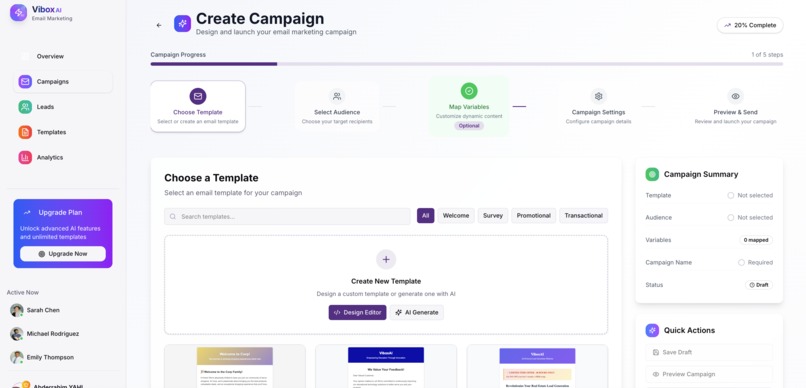
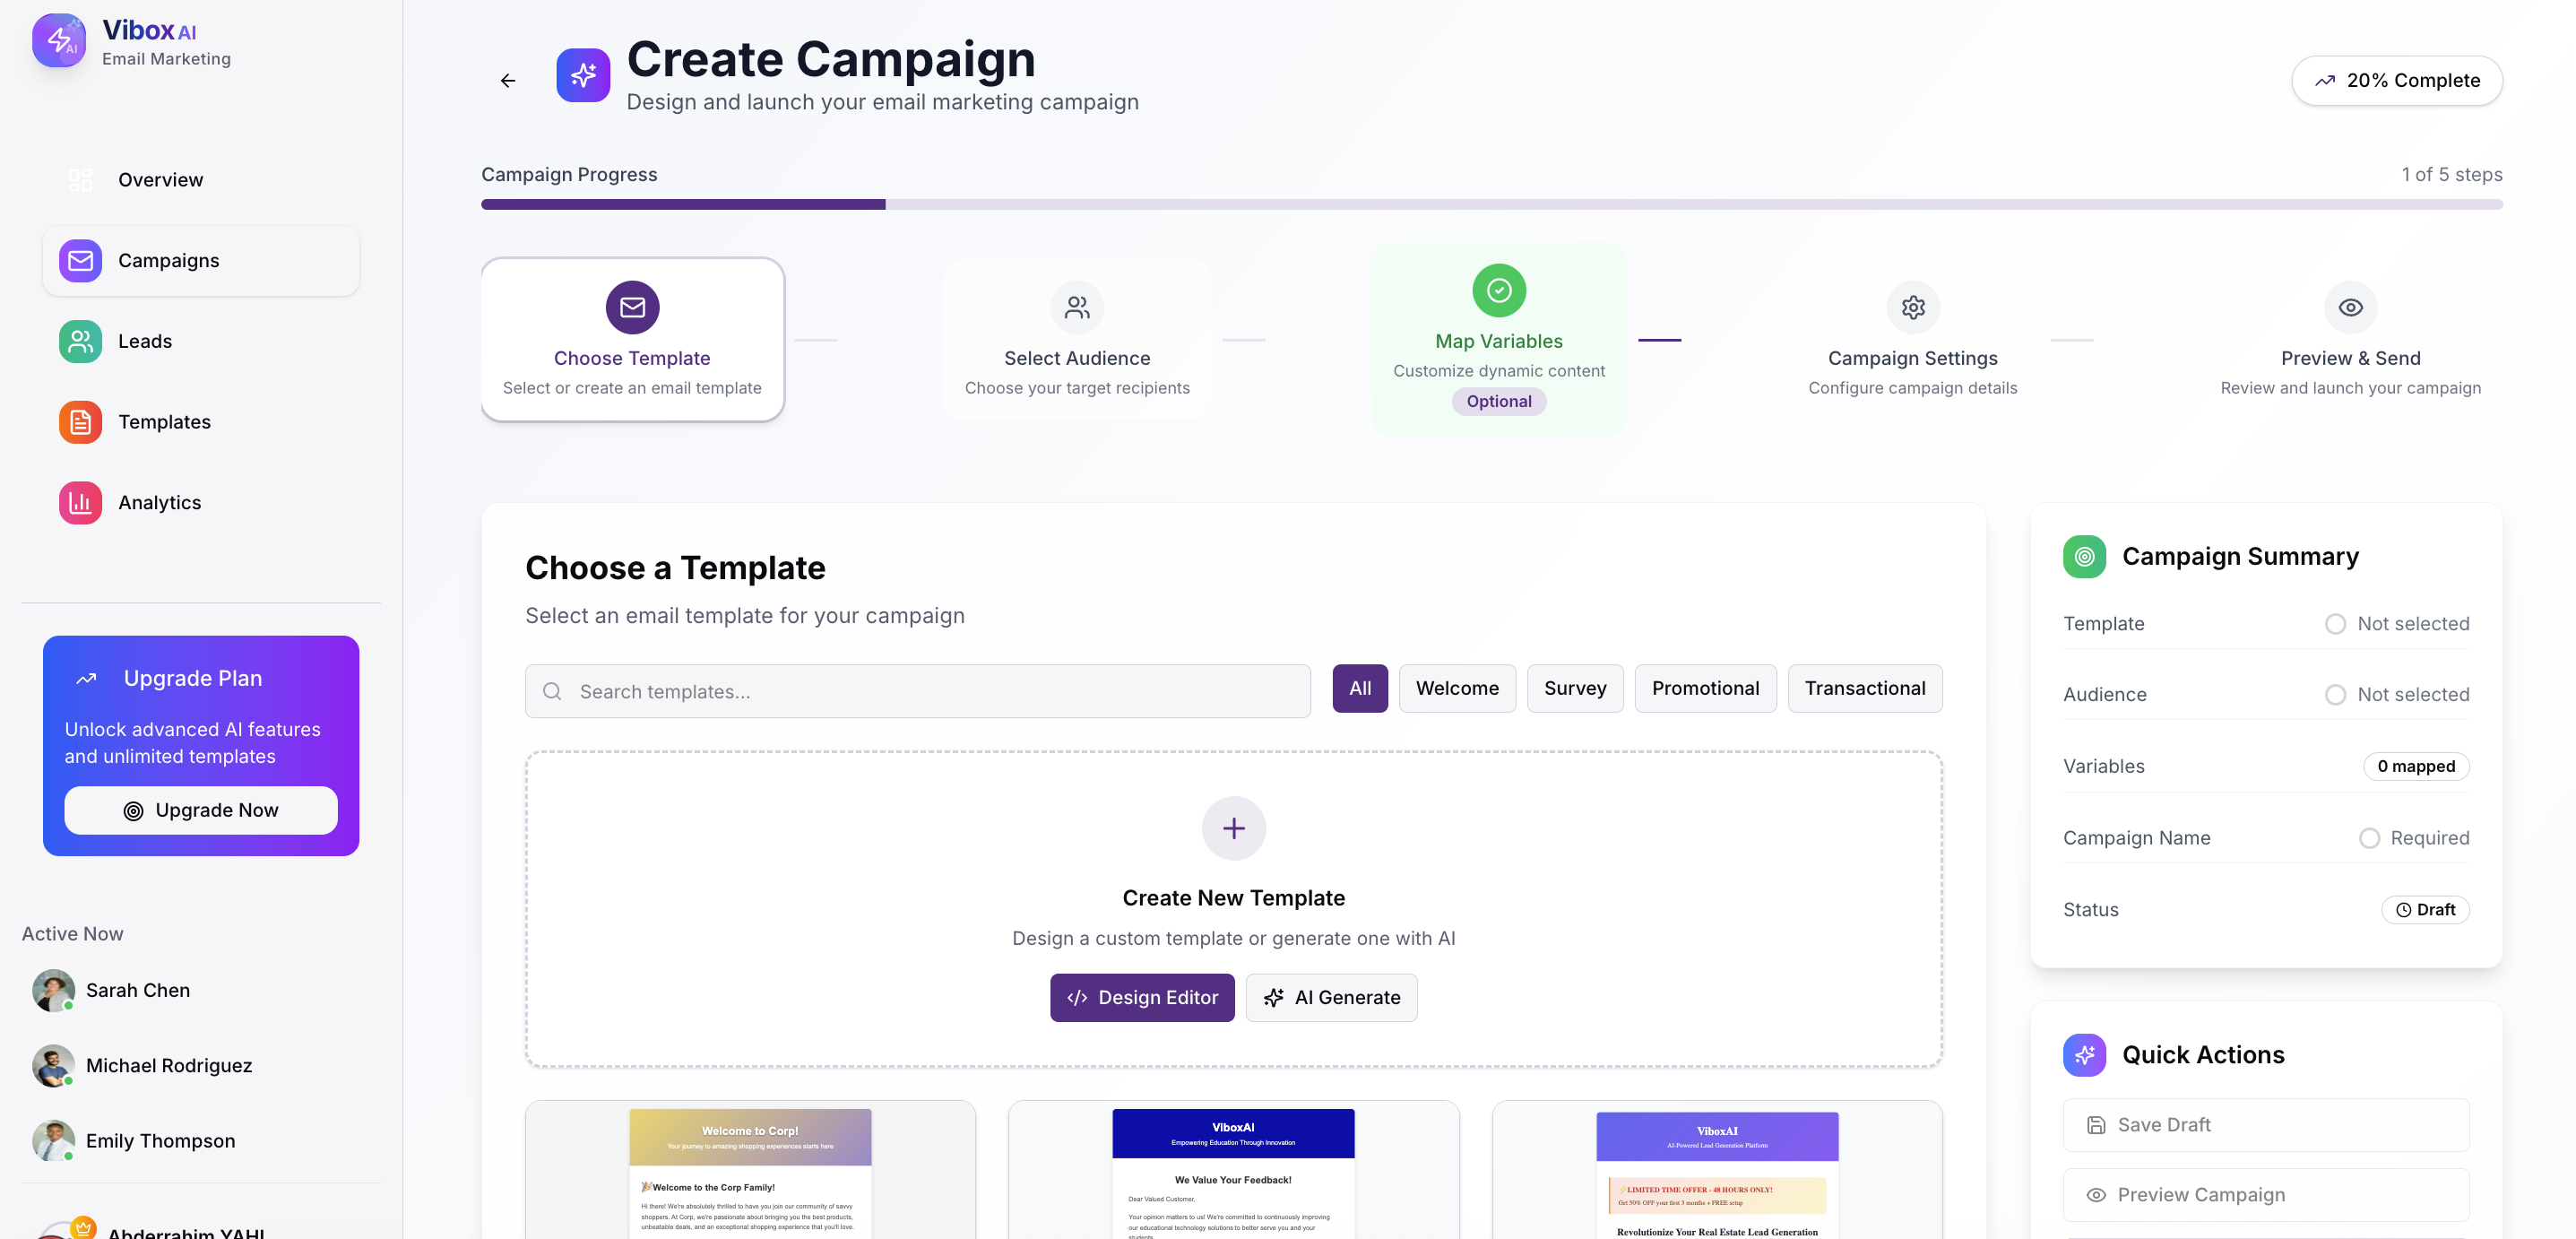
compaign creations
-
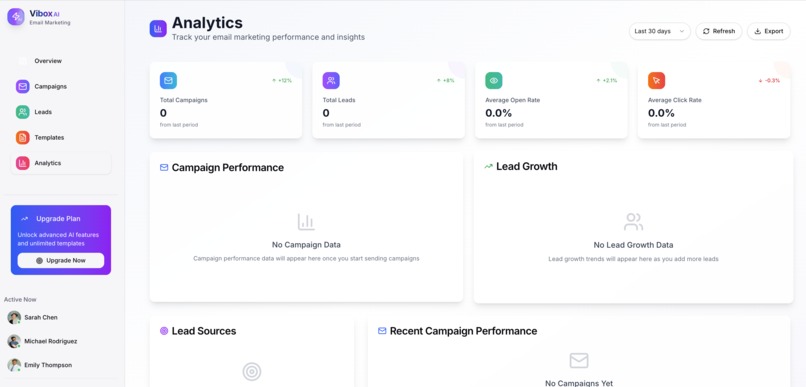
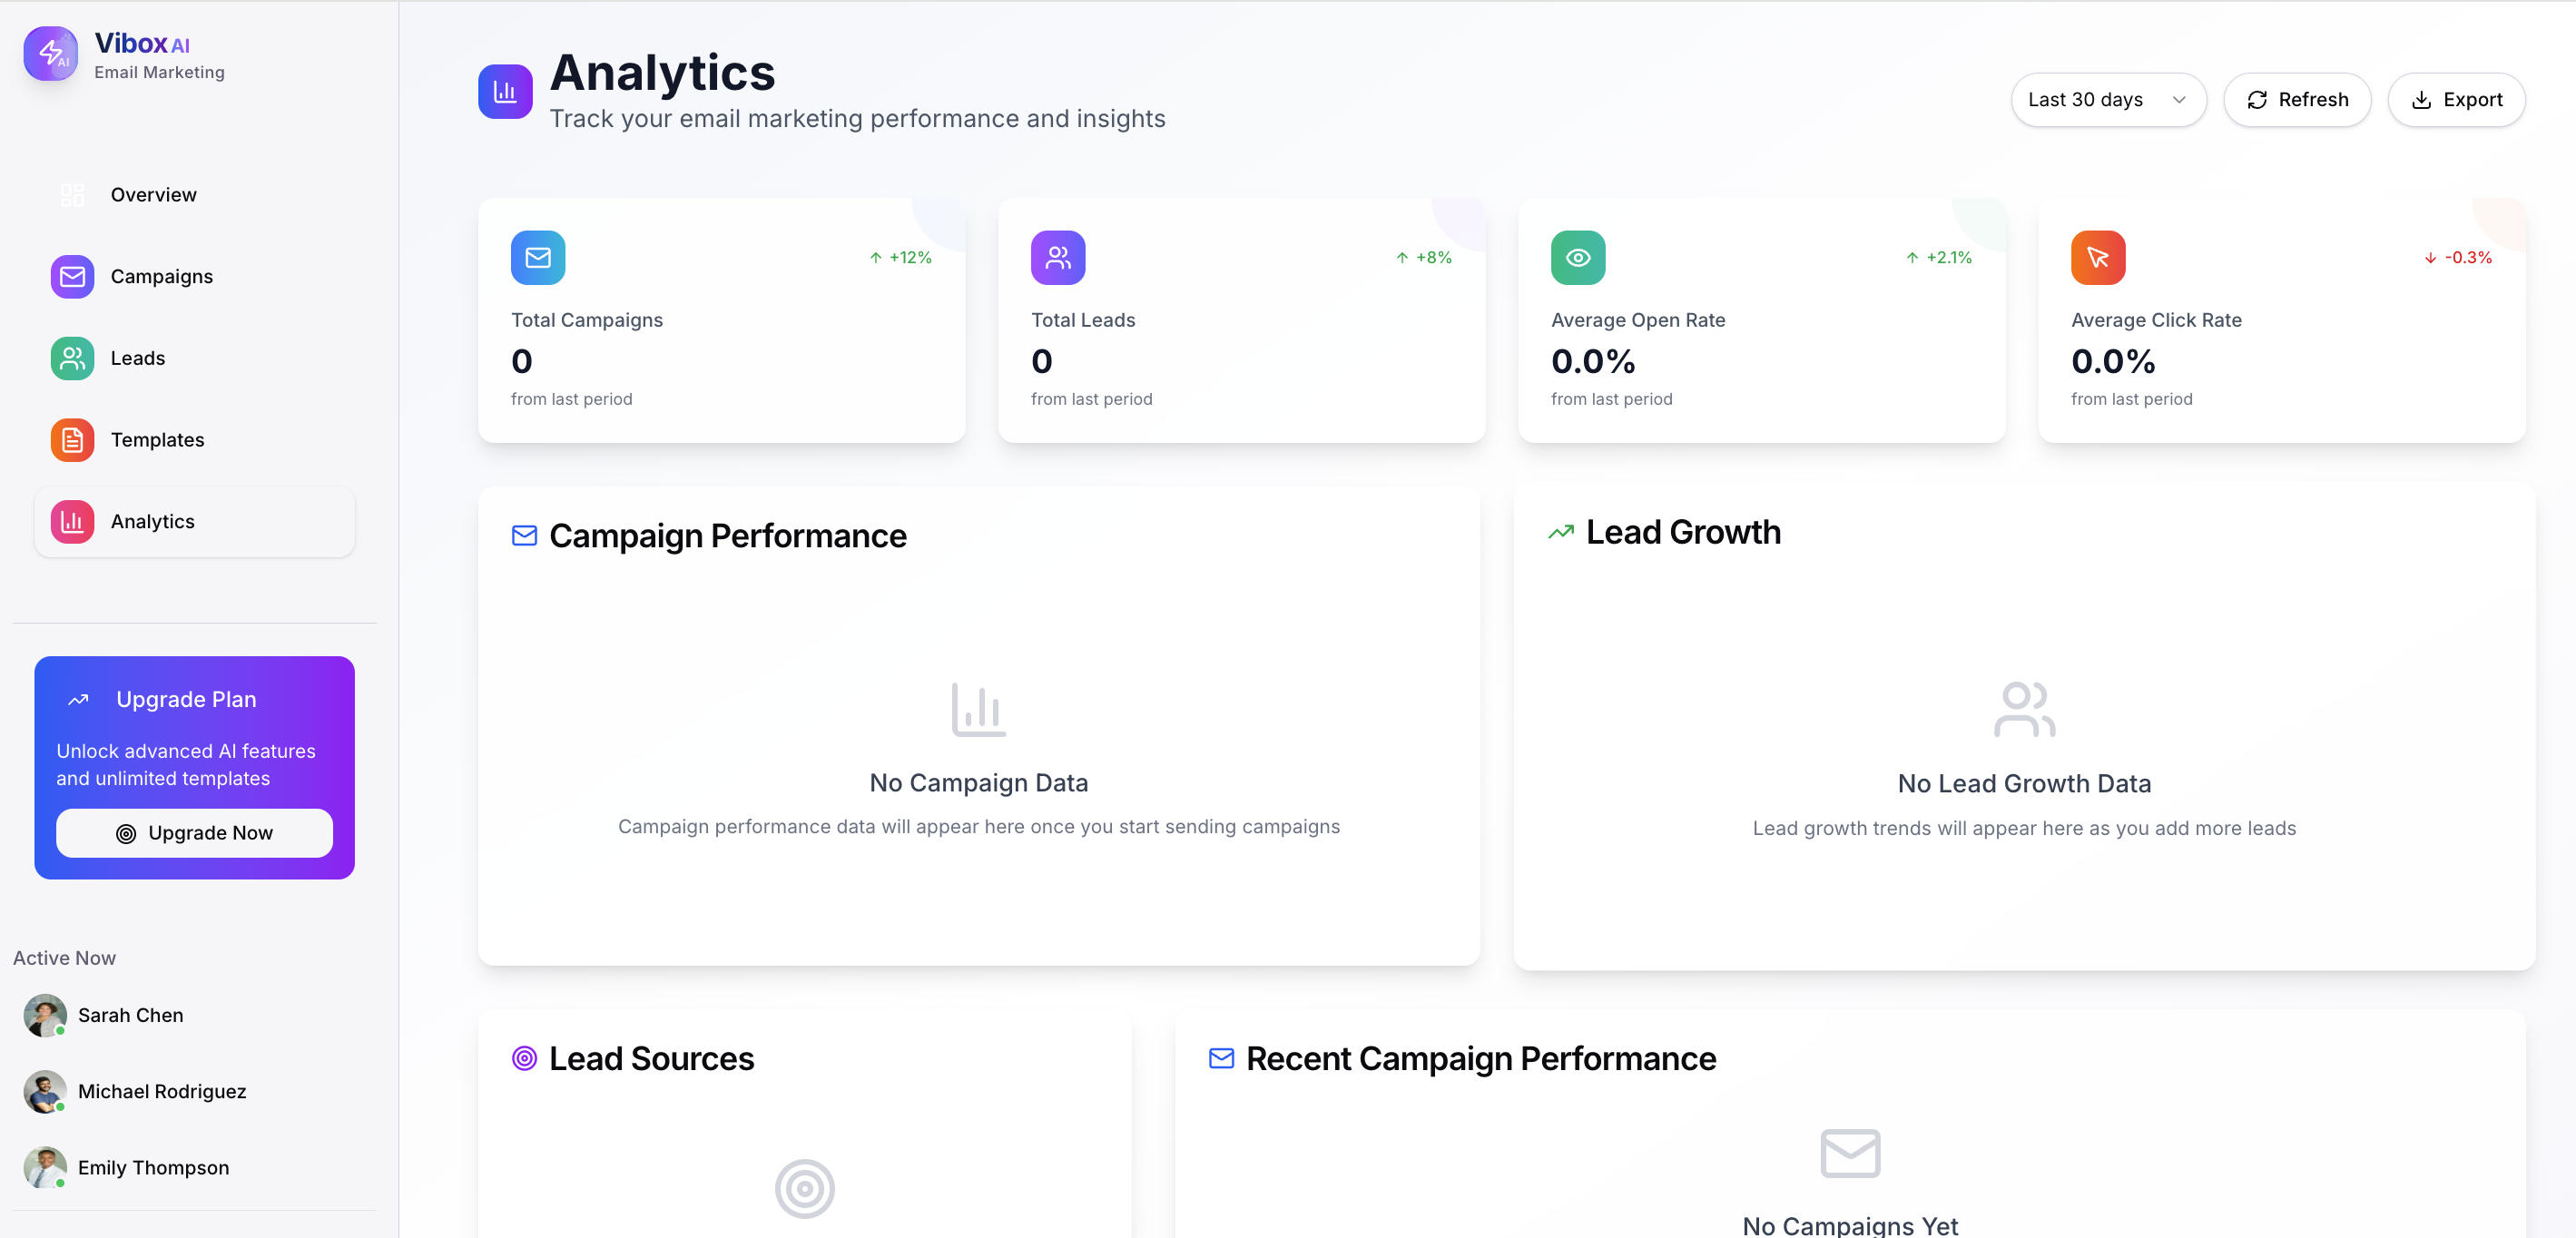
analytics
-
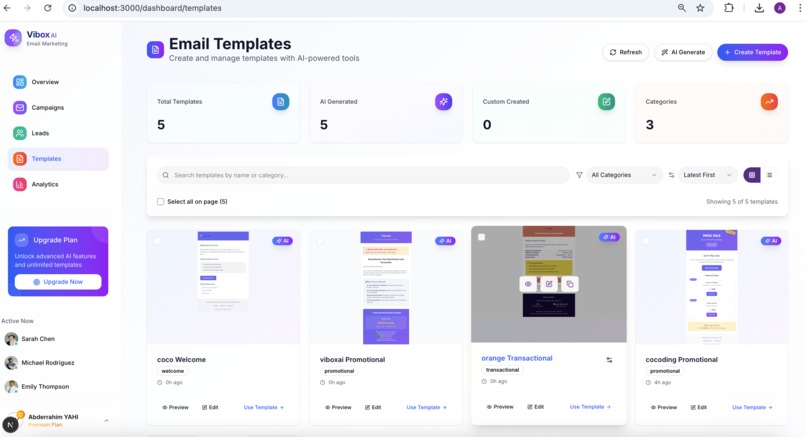
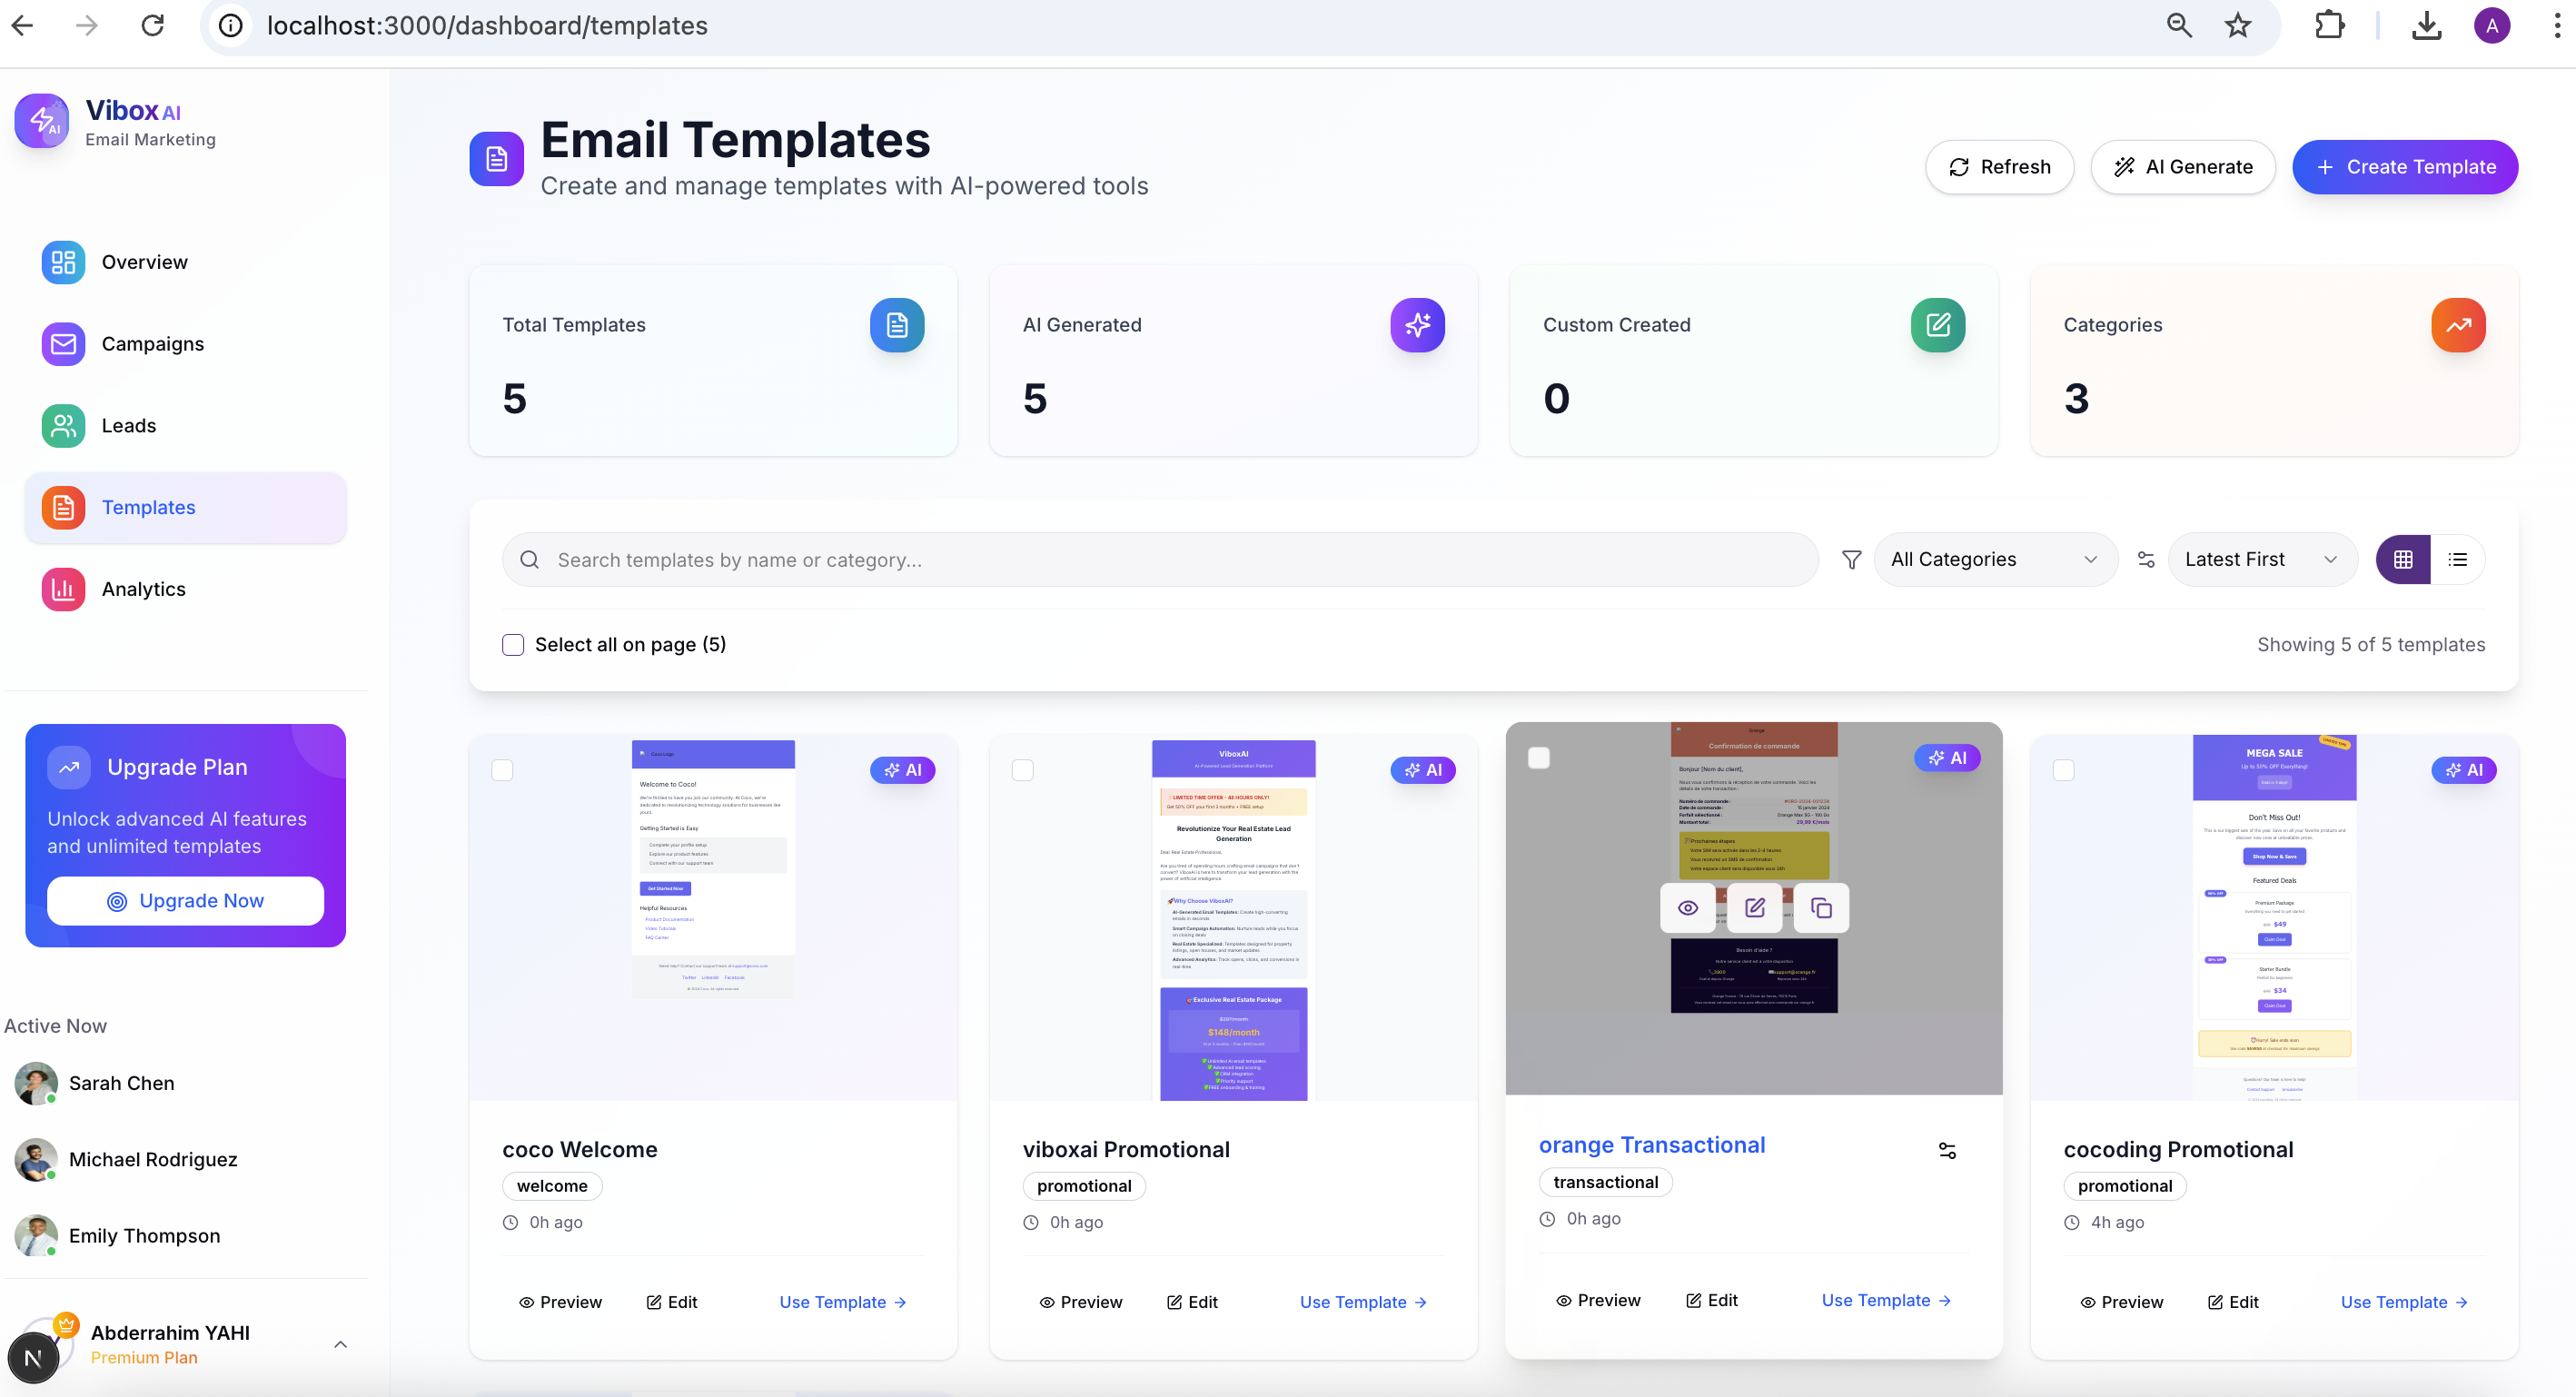
template list
-
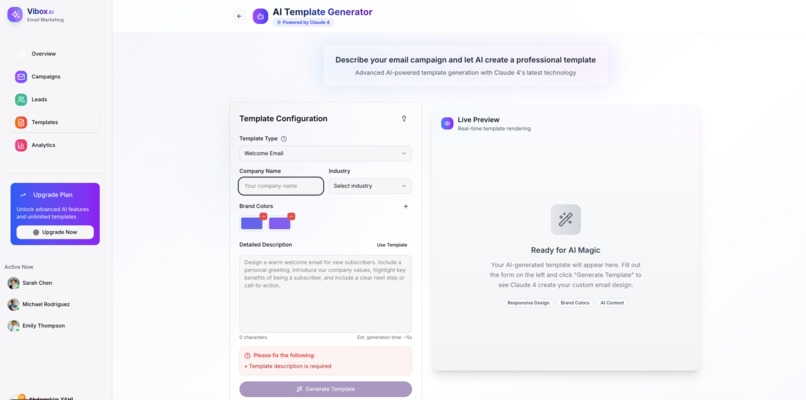
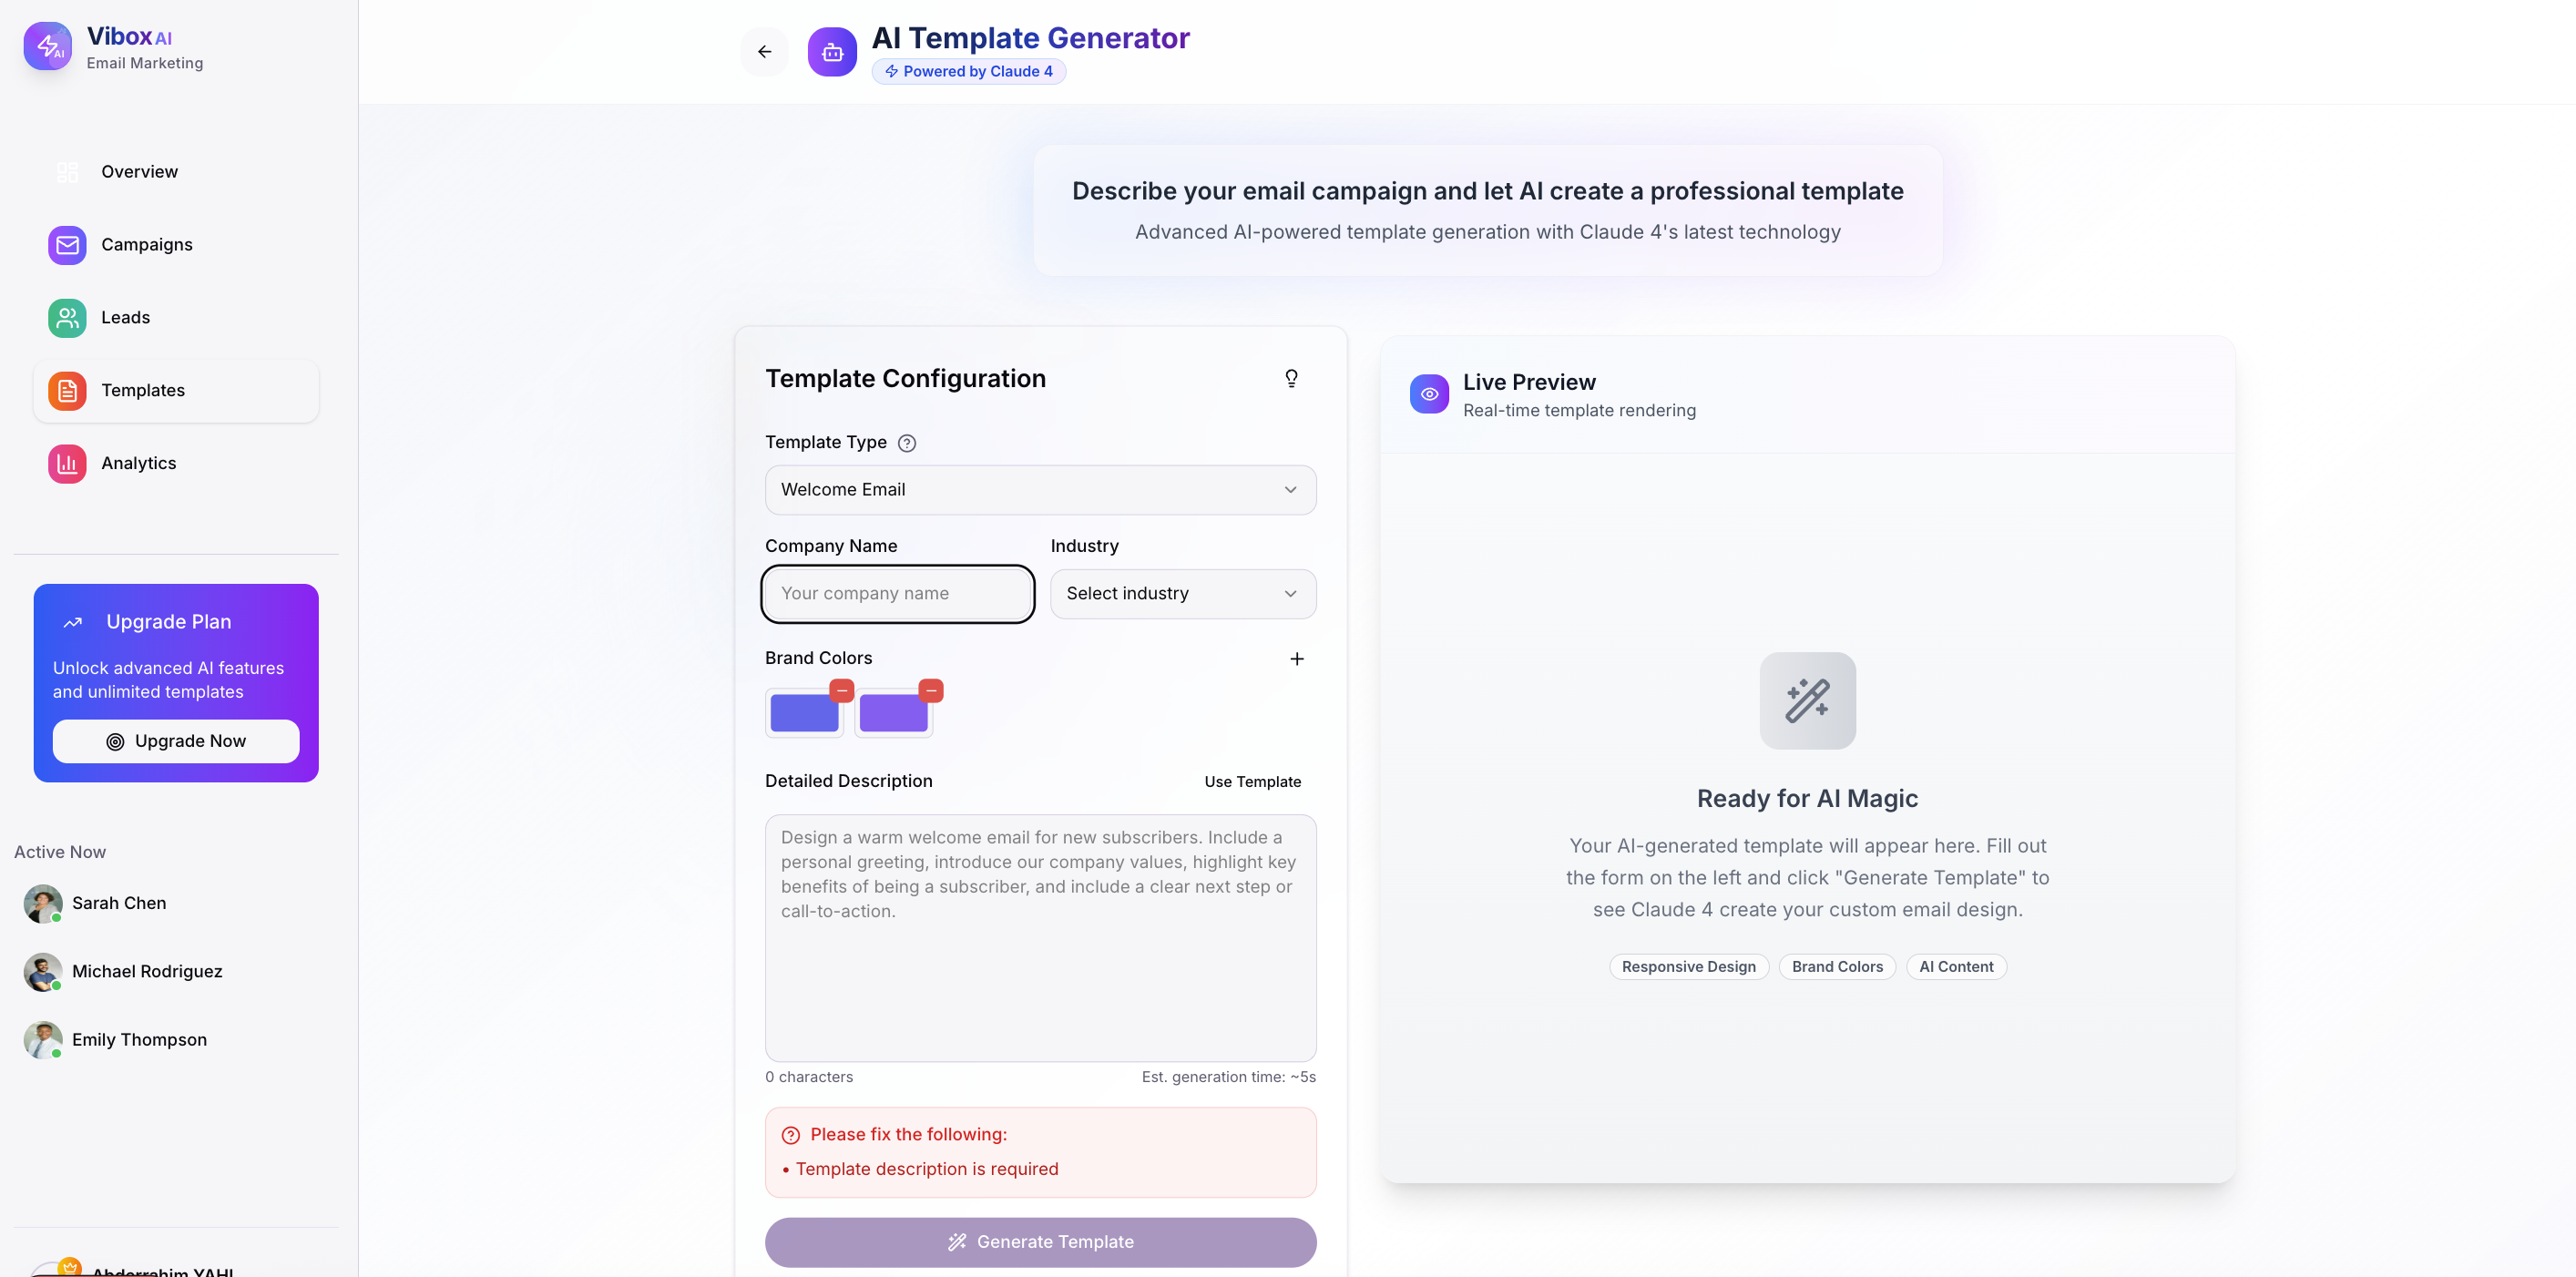
create template with AI
-
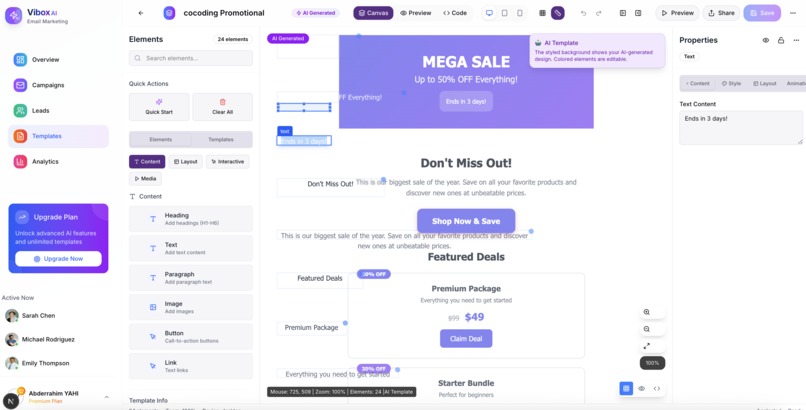
template editing
-
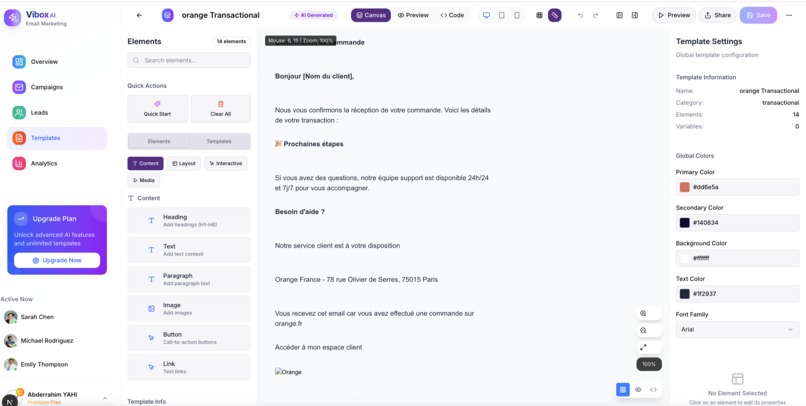
template editing
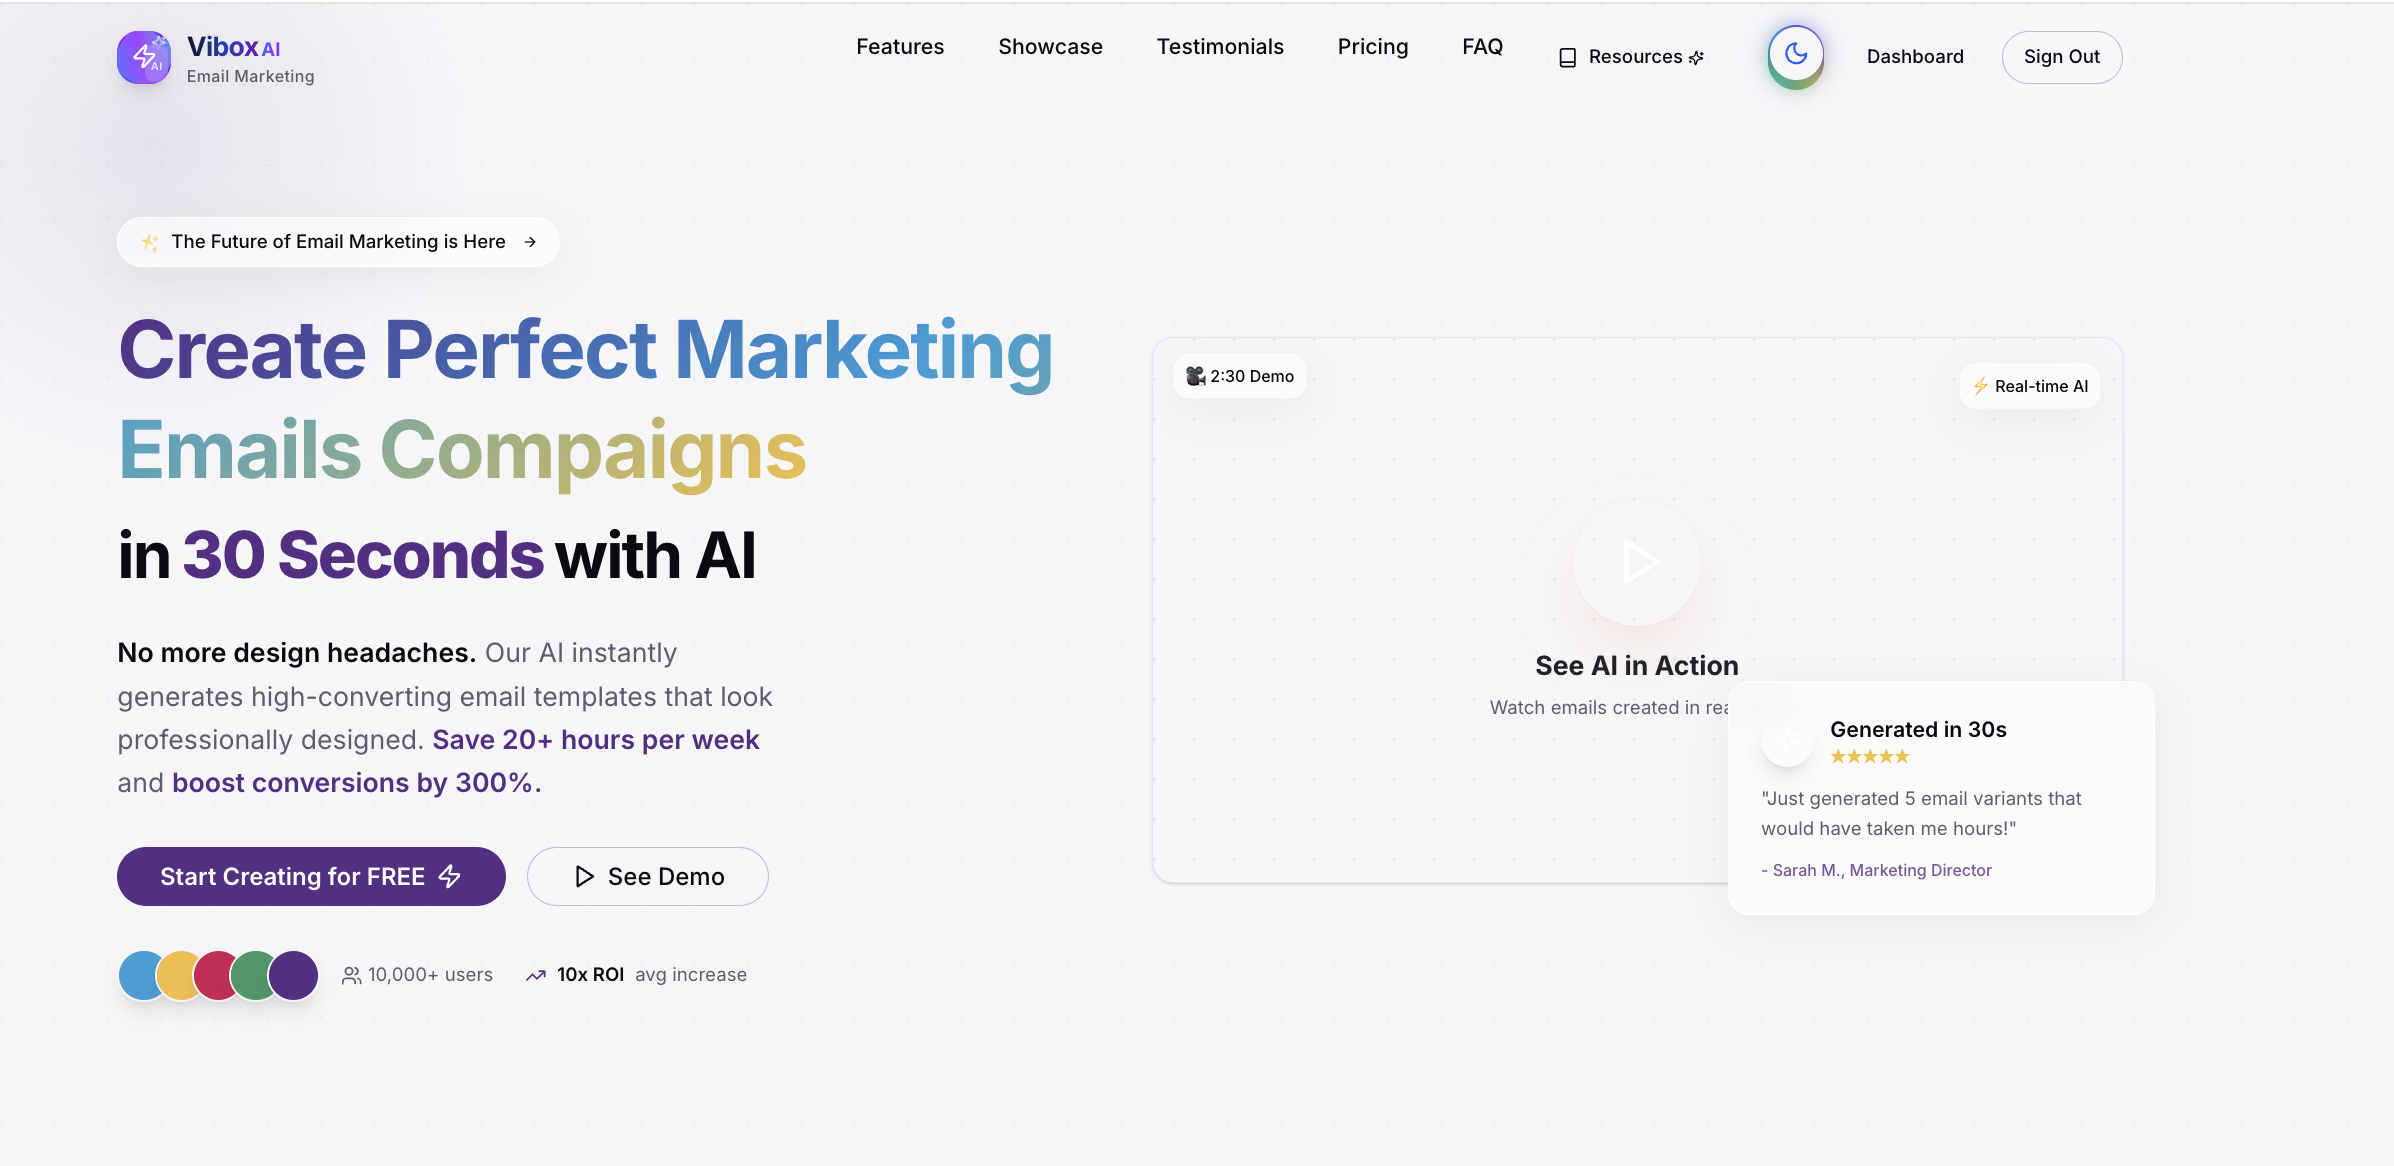


ViboxAI - AI-Powered Email Marketing Platform
ViboxAI is a cutting-edge email marketing platform that leverages artificial intelligence to help businesses create stunning, conversion-optimized email templates in seconds. This comprehensive platform streamlines the entire email marketing workflow from AI-powered template creation to advanced campaign management, lead scoring, and detailed analytics.

Features
🤖 AI Template Generation & Visual Editor
- AI Template Creation: Generate professional email templates instantly using Claude AI
- Advanced Visual Editor: Drag-and-drop email builder with real-time preview
- Template Variants: Create multiple versions of templates for A/B testing
- Brand Asset Management: Upload and organize brand assets, icons, and images
- Responsive Design: Templates automatically adapt to different screen sizes
- Code & Visual Modes: Switch between visual editing and HTML code editing
📊 Smart Campaign Management
- Campaign Wizard: Step-by-step campaign creation with audience targeting
- Advanced Scheduling: Schedule campaigns with cron-based automation
- A/B Testing: Test different subject lines, content, and send times
- Campaign Analytics: Real-time tracking of campaign performance
- Automated Workflows: Set up triggered campaigns based on user behavior
👥 Advanced Lead Management
- Lead Scoring: AI-powered lead scoring based on engagement patterns
- Segmentation: Create dynamic segments based on custom criteria
- Lead Import/Export: Bulk import leads from CSV files or other sources
- Activity Tracking: Monitor lead interactions across all touchpoints
- Custom Fields & Tags: Organize leads with custom properties
- Lead Sources: Track where leads are coming from
📈 Comprehensive Analytics
- Real-time Metrics: Track opens, clicks, bounces, and unsubscribes
- Visual Dashboards: Interactive charts and graphs for performance insights
- Campaign Comparison: Compare performance across multiple campaigns
- Email Tracking: Advanced email tracking with click and open detection
- Conversion Analytics: Track revenue and ROI from email campaigns
- Export Reports: Generate and export detailed analytics reports
🔧 Enterprise Features
- API Documentation: Complete Swagger API documentation
- Webhook Integration: Real-time webhooks for external integrations
- User Management: Role-based access control and team collaboration
- Email Preferences: Granular user notification settings
- Security: Two-factor authentication and advanced security features
- White-label: Customizable branding for agencies and resellers
Tech Stack
- Frontend: Next.js 14 (App Router), React 18, TypeScript
- Styling: Tailwind CSS, Custom CSS animations and patterns
- UI Components: shadcn/ui, Framer Motion, Lucide React icons
- State Management: Zustand for global state
- Authentication: NextAuth.js with Supabase integration
- Database: Supabase PostgreSQL with real-time subscriptions
- Email Tracking: Custom tracking pixels and link management
- AI Integration: Claude 4 API for template generation
- Payment Processing: Stripe integration
- File Storage: Supabase Storage for assets
- Deployment: Docker support with CI/CD pipeline
Getting Started
Prerequisites
- Node.js 18+ or Bun runtime
- npm or Bun package manager
- Supabase account
- Stripe account (for payments)
Installation
Clone the repository
git clone https://github.com/yourusername/viboxai.git
cd viboxai
Install dependencies (using Bun for faster installation)
bun install
# or
npm install
Set up environment variables Create a
.env.localfile in the root directory:# Supabase Configuration NEXT_PUBLIC_SUPABASE_URL=your_supabase_url NEXT_PUBLIC_SUPABASE_ANON_KEY=your_supabase_anon_key SUPABASE_SERVICE_ROLE_KEY=your_service_role_key
NextAuth Configuration
NEXTAUTH_URL=http://localhost:3000 NEXTAUTH_SECRET=your_nextauth_secret
Claude AI Configuration
CLAUDE_API_KEY=your_claude_api_key
Stripe Configuration
STRIPE_SECRET_KEY=your_stripe_secret_key NEXT_PUBLIC_STRIPE_PUBLISHABLE_KEY=your_stripe_publishable_key STRIPE_WEBHOOK_SECRET=your_stripe_webhook_secret
Email Configuration (AWS SES)
AWS_ACCESS_KEY_ID=your_aws_access_key AWS_SECRET_ACCESS_KEY=your_aws_secret_key AWS_REGION=your_aws_region
Application URLs
NEXT_PUBLIC_API_URL=http://localhost:3000 NEXT_PUBLIC_APP_URL=http://localhost:3000
4. Set up the database
```bash
# Run database migrations
bun run db:migrate
# or
npm run db:migrate
Run the development server
bun dev
# or
npm run dev
Open http://localhost:3000 in your browser
Building for Production
# Build the application
bun run build
# or
npm run build

# Start production server
bun start
# or
npm start
Docker Development
# Build and run with Docker
docker build -f Dockerfile.dev -t viboxai-dev .
docker run -p 3000:3000 viboxai-dev
Project Structure
viboxai/
├── app/                           # Next.js 14 app directory
│   ├── api/                       # API routes
│   │   ├── analytics/             # Analytics endpoints
│   │   ├── auth/                  # Authentication endpoints
│   │   ├── campaigns/             # Campaign management
│   │   ├── leads/                 # Lead management
│   │   ├── templates/             # Template operations
│   │   ├── tracking/              # Email tracking
│   │   ├── user/                  # User management
│   │   └── webhooks/              # External webhooks
│   ├── auth/                      # Authentication pages
│   ├── dashboard/                 # Main dashboard application
│   │   ├── analytics/             # Analytics dashboard
│   │   ├── campaigns/             # Campaign management UI
│   │   ├── leads/                 # Lead management interface
│   │   ├── templates/             # Template editor and management
│   │   │   └── editor/            # Advanced visual email editor
│   │   ├── overview/              # Dashboard overview
│   │   └── settings/              # User settings
│   ├── styles/                    # Custom CSS styles and animations
│   └── ...                       # Other app pages
├── components/                    # Reusable React components
│   ├── auth/                      # Authentication components
│   ├── dashboard/                 # Dashboard-specific components
│   ├── sections/                  # Landing page sections
│   └── ui/                        # UI components (shadcn/ui)
├── hooks/                         # Custom React hooks
├── lib/                           # Utility functions and services
│   ├── analytics-api.ts           # Analytics service
│   ├── auth.ts                    # Authentication utilities
│   ├── claude-api.ts              # Claude AI integration
│   ├── dashboard-api.ts           # Dashboard API client
│   ├── leads-api.ts               # Leads management API
│   ├── template-service.ts        # Template operations
│   └── utils/                     # Utility functions
├── supabase/                      # Supabase configuration
│   ├── functions/                 # Edge functions
│   └── migrations/                # Database migrations
├── scripts/                       # Database and deployment scripts
├── types/                         # TypeScript type definitions
└── manifests/                     # Kubernetes deployment manifests
Key Features Deep Dive
Visual Email Editor
The advanced visual email editor includes:
- Canvas System: Drag-and-drop interface with real-time preview
- Element Library: Pre-built components (text, images, buttons, dividers)
- Layer Management: Organize elements with a layers panel
- Properties Panel: Fine-tune styling, content, and behavior
- Code Generation: Automatic HTML generation with email client compatibility
- Template Blocks: Reusable sections for consistent design
- Responsive Preview: Test designs across different devices
Lead Scoring Algorithm
Our AI-powered lead scoring considers:
- Email engagement (opens, clicks, time spent)
- Website activity and page views
- Social media interactions
- Purchase history and behavior
- Demographic information
- Lead source quality
Campaign Automation
Advanced automation features include:
- Trigger-based Campaigns: Welcome series, abandoned cart, re-engagement
- Scheduled Sends: Optimal timing based on recipient behavior
- Drip Campaigns: Multi-step nurture sequences
- A/B Testing: Automated winner selection and deployment
- Performance Optimization: AI-powered send time optimization
Analytics & Reporting
Comprehensive analytics provide:
- Real-time Dashboards: Live campaign performance metrics
- Cohort Analysis: Track subscriber behavior over time
- Revenue Attribution: Connect email campaigns to sales
- Deliverability Monitoring: Track sender reputation and inbox placement
- Custom Reports: Build and schedule custom analytics reports
API Documentation
Full API documentation is available at /swagger when running the application. The API includes endpoints for:
- Campaign management
- Lead operations
- Template creation and management
- Analytics and reporting
- User account management
- Webhook configurations
Deployment
Production Deployment
- Environment Setup: Configure production environment variables
- Database Migration: Run production database migrations
- Build Application: Create optimized production build
- Container Deployment: Use provided Docker configuration
- Kubernetes: Deploy using provided manifests in
/manifests
CI/CD Pipeline
The project includes Jenkins pipeline configuration for:
- Automated testing
- Security scanning
- Build optimization
- Deployment automation
- Health checks
Contributing
We welcome contributions! Please follow these steps:
- Fork the repository
- Create a feature branch (
git checkout -b feature/amazing-feature) - Make your changes with proper TypeScript types
- Add tests for new functionality
- Run the test suite (
bun test) - Commit your changes (
git commit -m 'Add amazing feature') - Push to your branch (
git push origin feature/amazing-feature) - Open a Pull Request
Development Guidelines
- Follow TypeScript best practices
- Use proper component composition
- Implement proper error handling
- Add unit tests for new features
- Follow the existing code style
- Update documentation for new features
Performance
ViboxAI is optimized for performance with:
- Static Generation: Pre-built pages for fast loading
- Image Optimization: Automatic image compression and sizing
- Code Splitting: Lazy loading of components and routes
- Caching: Intelligent caching strategies
- CDN Integration: Global content delivery
- Database Optimization: Efficient queries and indexing
Security
Security features include:
- Authentication: Secure user authentication with NextAuth.js
- Authorization: Role-based access control
- Data Protection: Encrypted data storage and transmission
- Input Validation: Comprehensive input sanitization
- Rate Limiting: API rate limiting and abuse prevention
- Security Headers: Proper security headers configuration
License
This project is licensed under the MIT License - see the LICENSE file for details.
Support
For support and questions:
- 📧 Email: support@viboxai.com
- 📚 Documentation: docs.viboxai.com
- 💬 Community: community.viboxai.com
- 🐛 Bug Reports: GitHub Issues
Acknowledgments
- Next.js - React framework
- React - UI library
- Tailwind CSS - Utility-first CSS
- shadcn/ui - UI components
- Framer Motion - Animation library
- Postgres sql - Backend db
- Claude AI - AI content generation
- Zustand - State management
- NextAuth.js - Authentication
- Stripe - Payment processing
Built With
- amazon-web-services
- api
- auth
- css
- gpt-4
- next.js
- node.js
- openai
- postgresql
- react
- ses
- storage
- supabase
- tailwind
- typescript


Log in or sign up for Devpost to join the conversation.