-
-
-
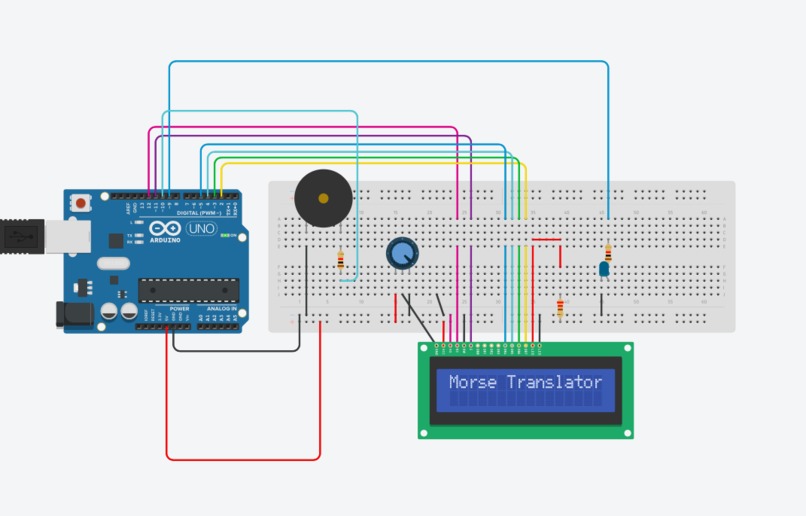
Circuit
-
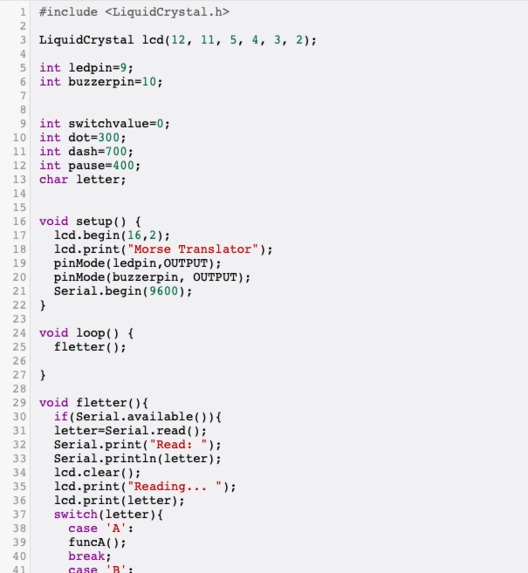
Code 1
-

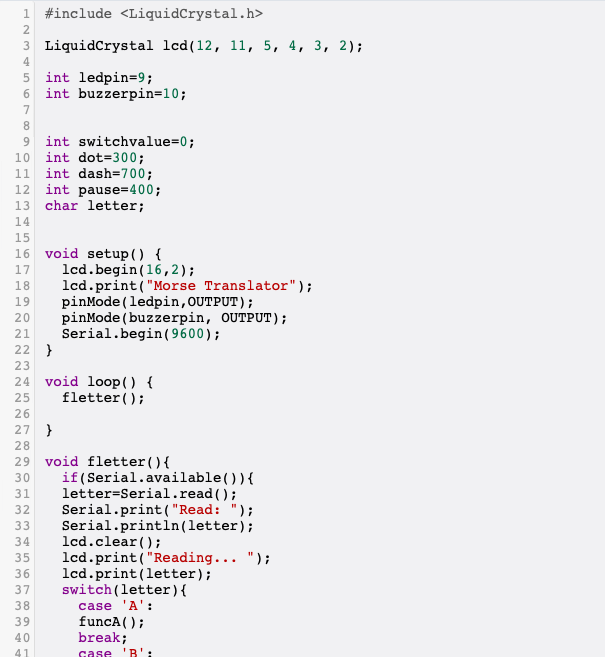
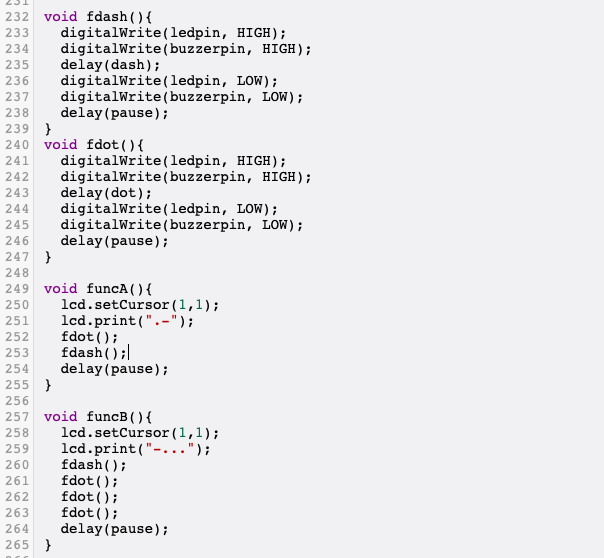
Code 2


Inspiration
Who hasn’t thought about what they would do if they become a POW? Or when you are finally abducted by the aliens and you and your buddy are trapped and gagged in their spaceship? Remember that time you were lost in a cornfield in the middle of Iowa with nothing but a 6000-lumen lantern? The answer to all these and even more problems: Morse Code! And what better way to learn it than by (once again) procrastinating your math homework with your own personal and interactive morse code translator?! Remember: you never know if you’re going to be on the wrong side of the next coup d’etat or alien invasion.
Be prepared -- learn morse code today.
What it does
It is a translator of letters/words/numbers to Morse Code. You type the character and it does three things: 1) shows each character on the LCD screen and how it is written in Morse Code, 2) the buzzer emits the character sound in Morse Code and, similarly, 3) the LED turns up showing the character in Morse Code.
How I built it
The hardware, there is a breadboard with both a buzzer and a LED that represent each letter and number in morse code through sound and light, respectively. Besides, there is an LCD screen that shows the letter/number and its corresponding code.
Regarding the code, first, we defined the pins for each of the sensors as well as the duration in milliseconds of the delay for a dot or dash (this is going to make sense later). After that, we have the initializing sequence (void setup()), where we tell the Arduino to display “Morse translator” on the screen at the beginning, and also where the ledpin and buzzerpin are defined as outputs. Afterwards, the loop function is opened. Within the loop we just have a function called fletter(). This is defined later: it reads the input of the serial monitor, and prints “Read:” and the letter/number on the monitor and “Reading…” plus the letter/number on the LCD screen. After that, it compares the input with a set of functions that serve as the “translators” from characters to morse code. Before defining each character's function, we have two other functions: one for a dot (fdot()) and one for a dash (fdash()). Each has the commands for what the led and the buzzer must do for either a “dot” or a “dash”; the only difference is the delay between having the buzzer and led high and having them low, these delay times were defined at the beginning. Finally, we have each character’s function, the “translator” part of the code. Every function defines what the LCD has to display (combination of dots and dashes) as well as the combination of fdash() and fdot() that represents that letter/number in morse code.
Challenges I ran into
It was hard due to lots of issues making all the pieces of the code work cohesively. A further hindrance was the loading of the code and the working of the web page itself; specially of the LCD because sometimes it wouldn't work.
What I learned && Accomplishments that I'm proud of
The main thing was learning to efficiently find, write, and adapt code to what we needed. A specific aspect which was very exciting in and of itself, was looking at the final result after working on it for hours.
What's next for UMorse
This device was designed for people who want to learn morse code. The only thing we would add is a button for the user to practice writing morse code.

Log in or sign up for Devpost to join the conversation.