Inspiration 3D scanning has always interested me, but most existing scanners are extremely expensive. This makes it difficult for students, hobbyists, small studios, and independent makers to experiment with 3D technology. I wanted to see whether a functional 3D laser scanner could be designed in a way that is truly low-cost, simple to build, and realistic to manufacture using basic tools.
So the main inspiration behind this project was to answer one question: Can 3D scanning be made accessible without high-end hardware and complex systems? This project is my attempt to design a scanner that is affordable, open, and easy to understand.
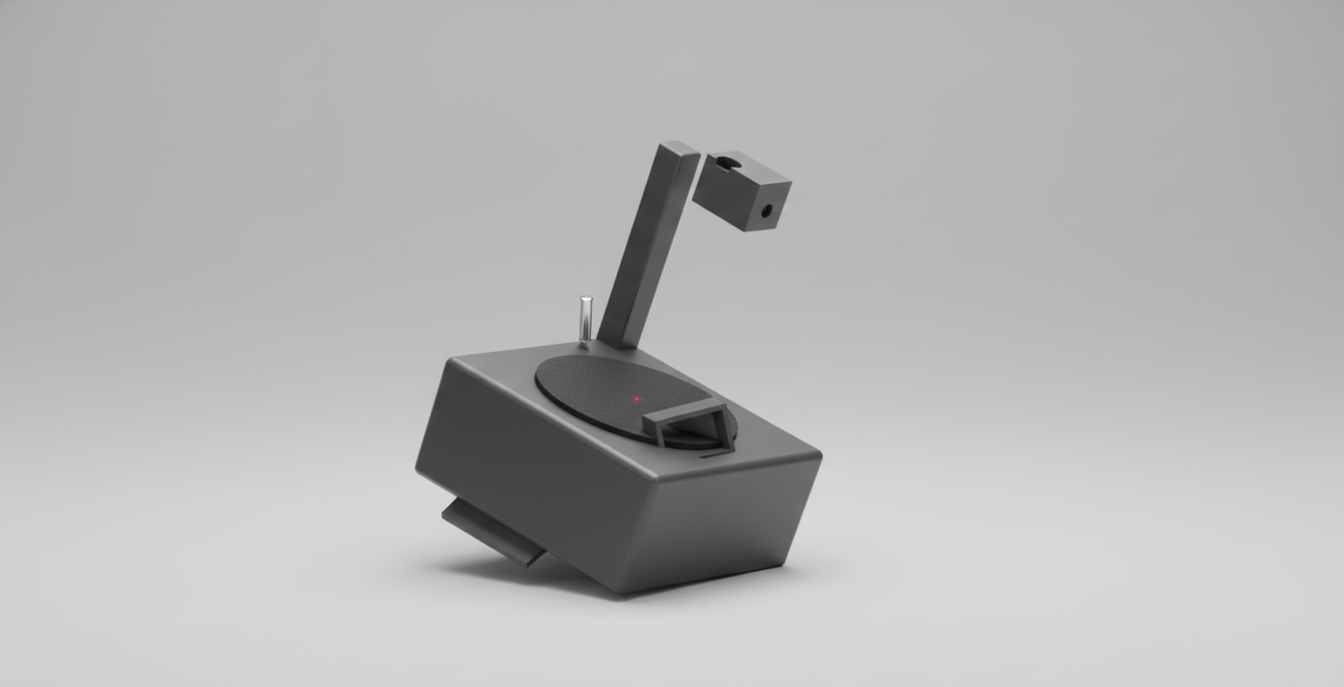
What it does The scanner works on the principle of laser triangulation. A thin laser line is projected onto an object placed on a rotating turntable. As the object rotates, the position of the laser line changes depending on the surface shape. A sensing or imaging system records this information, which can then be processed into a 3D point cloud and later converted into a standard 3D mesh format such as STL, OBJ, or PLY. In simple words, the scanner converts real physical objects into digital 3D models using low-cost hardware.
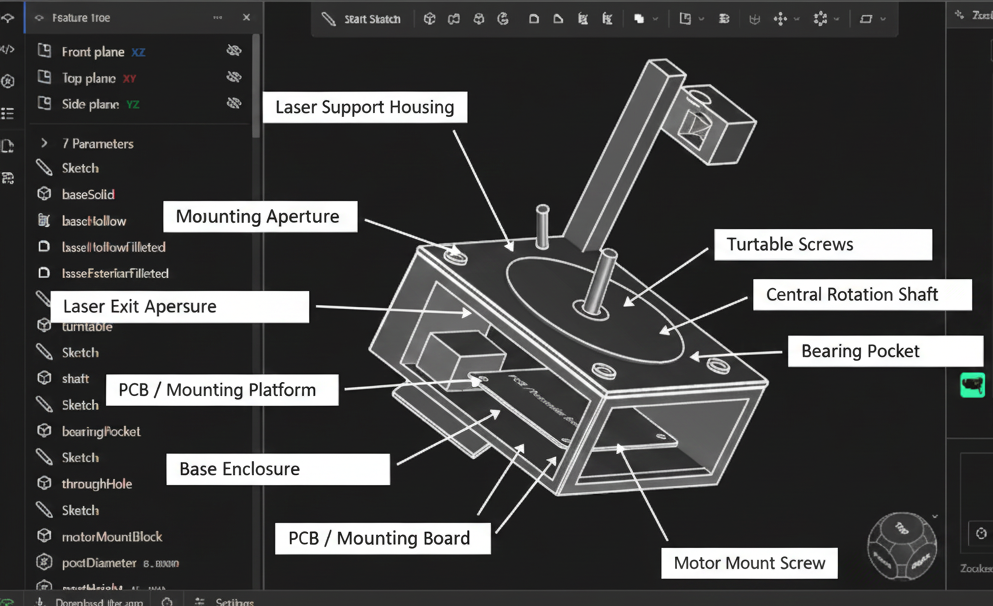
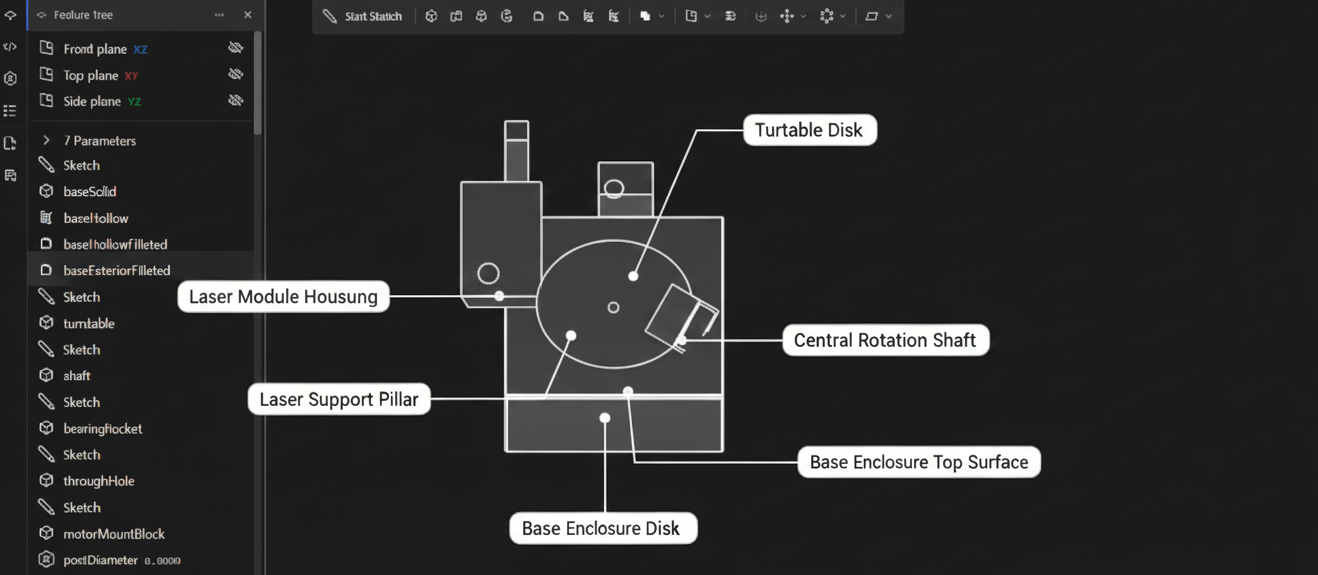
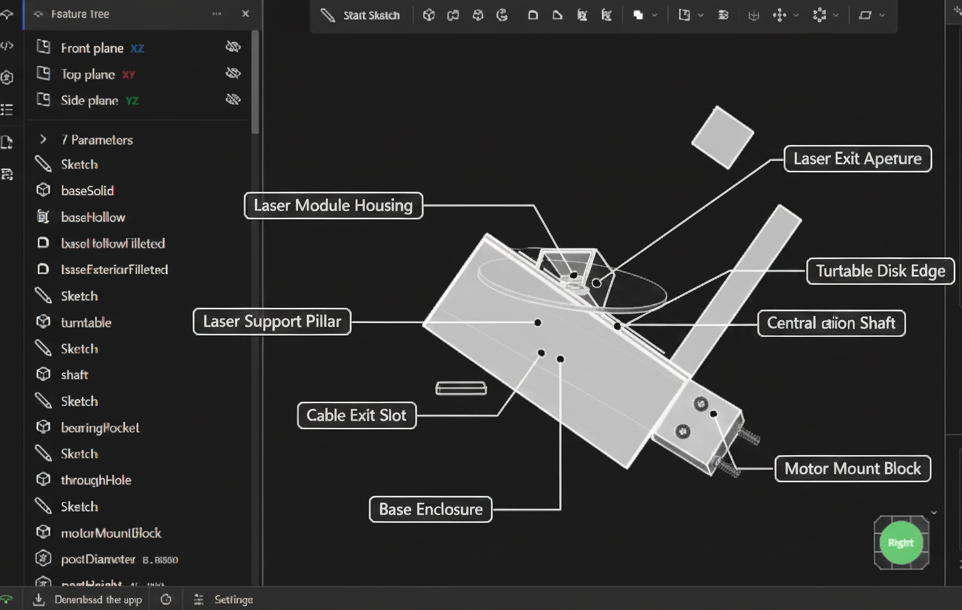
How I built it The first major step was the mechanical CAD design. I designed: the base enclosure a rotating turntable the central shaft a motor mounting block a bearing pocket an internal PCB mounting platform a laser support pillar and housing a cable exit slot The design is modular and easy to fabricate using 3D printing or basic tools. I then created: labeled CAD diagrams internal layout diagrams exploded assembly diagrams a Bill of Materials a cost breakdown
The design focuses heavily on simplicity, manufacturability, and affordability.
Challenges I ran into Some key challenges were: keeping the turntable rotation smooth and aligned designing a reliable but simple bearing pocket making sure the structure is rigid but still low-cost designing parts that are 3D-print-friendly avoiding unnecessary complexity planning calibration while keeping electronics simple Another major challenge was ensuring that the design remained realistic and not just theoretical. Every part had to make sense for real-world use.
What I learned This project helped me understand: mechanical design and tolerances cost-driven engineering decisions designing for manufacturing rather than only theory modular hardware design documenting technical work clearly how to balance cost, simplicity, and functionality It also reinforced the idea that innovation does not always need expensive tools. Expected accuracy, scan resolution, and applications The expected accuracy of this design is roughly 0.5 mm to 2 mm, depending on calibration, sensor quality, and rotation step size. The scan resolution can be improved by using smaller rotation increments and better image processing.
This level of accuracy is suitable for: education and learning hobby 3D printing product concept modeling research and student projects scanning small to medium objects It is not meant to compete with industrial scanners — it is meant to make 3D scanning accessible.
Long-term scalability and adoption Because the design uses simple, low-cost parts and 3D printed components, it can easily be reproduced, modified, and improved worldwide. As better low-cost sensors and controllers become available, they can be integrated into the same platform.
If produced in larger volumes, the cost could drop further through bulk sourcing and standardized manufacturing. This makes the design suitable for education, makerspaces, and open-source communities.
What’s next Future improvements may include: AI-based scan noise reduction improved calibration workflow higher-precision stepper control sharing the design as open-source hardware The long-term goal is to continue lowering the barrier to entry for 3D technology.
Built With
- 3d-printing
- arduino
- cad
- controller
- esp32
- hardware-prototyping
- laser-triangulation
- or
- platform)

Log in or sign up for Devpost to join the conversation.