-
-
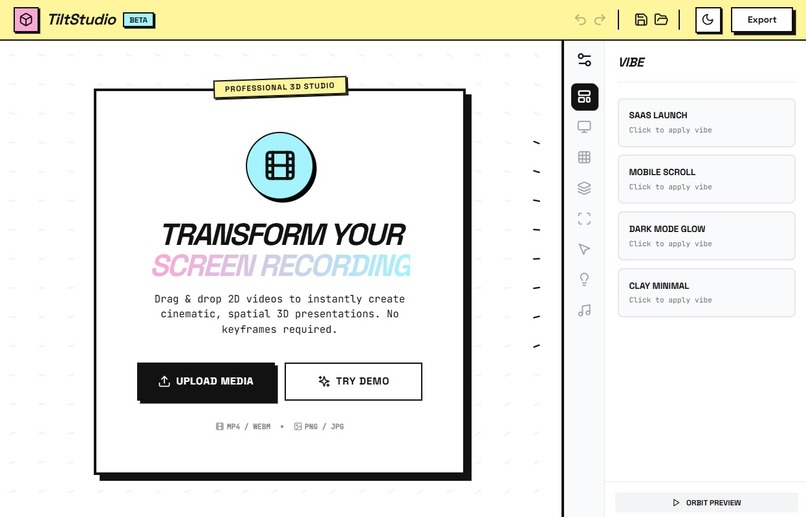
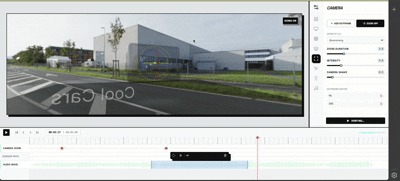
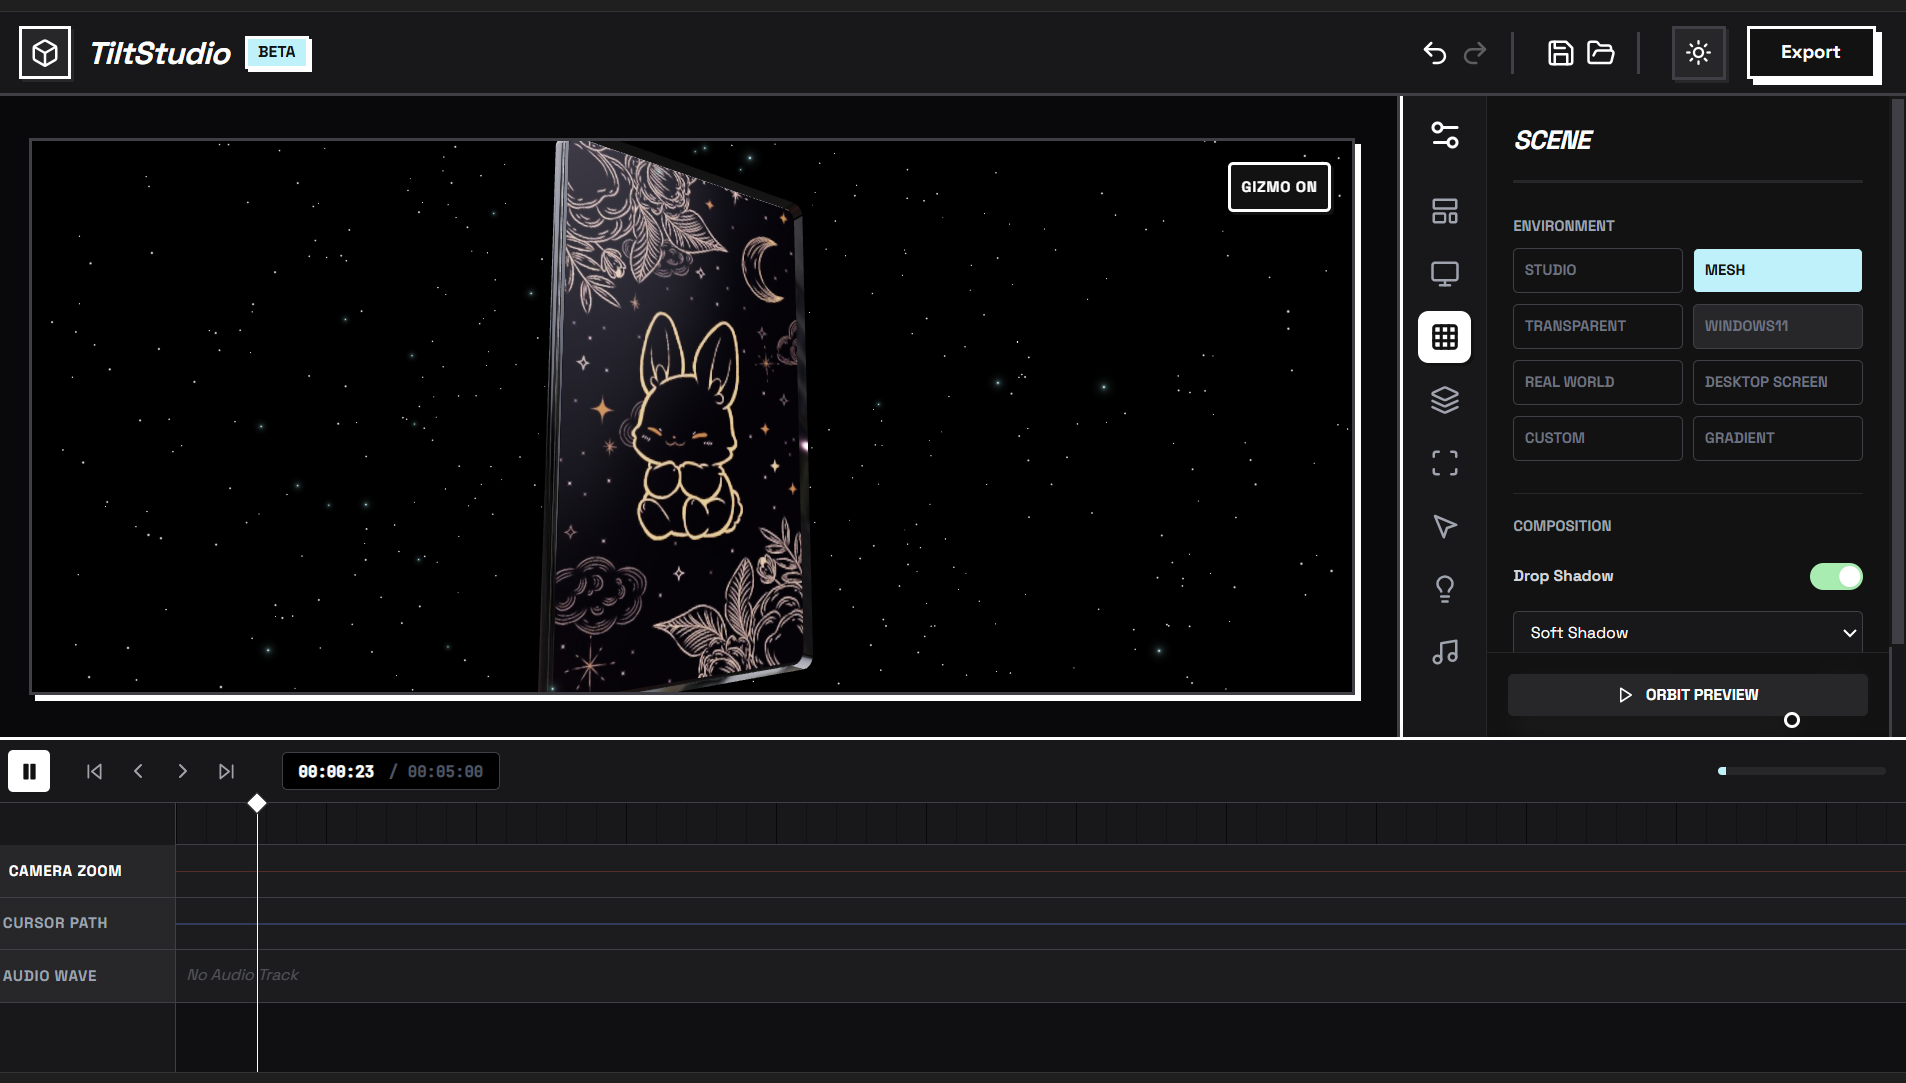
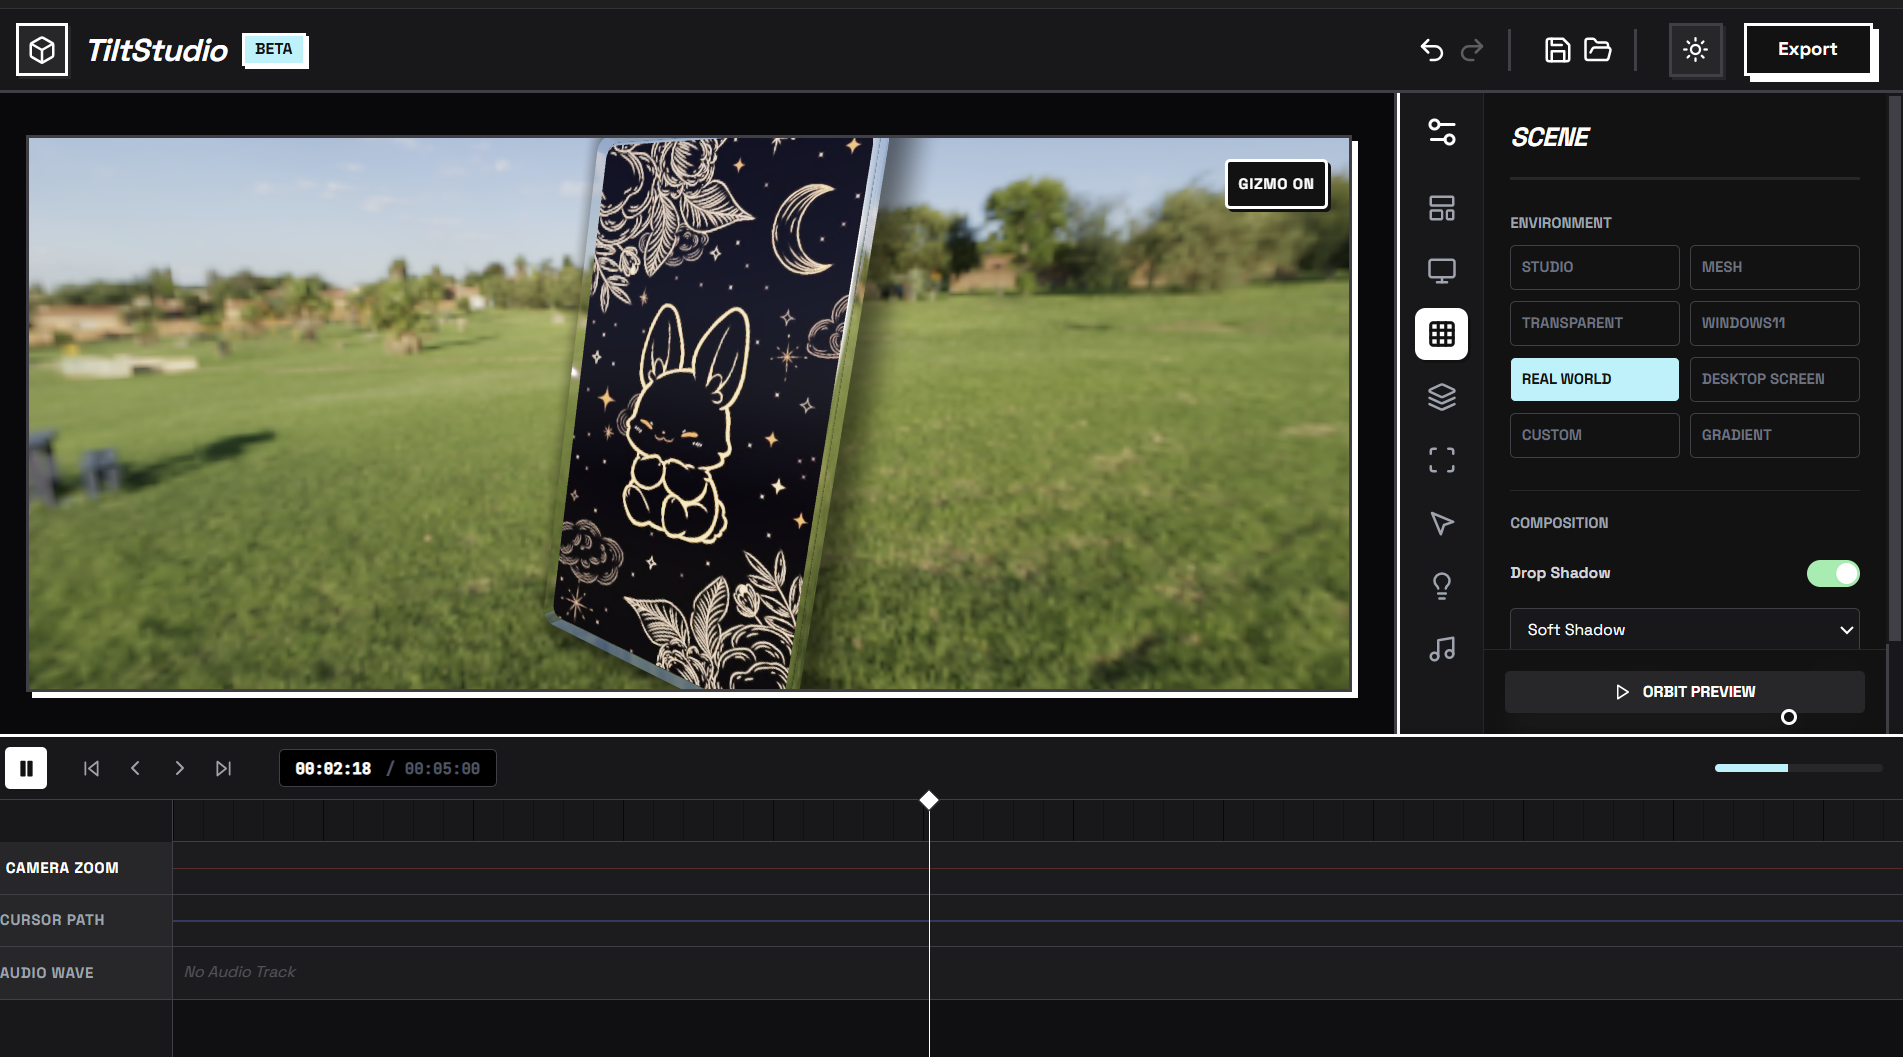
UI : Neobrutalism
-
 GIF
GIF
cool animation with full creative control
-
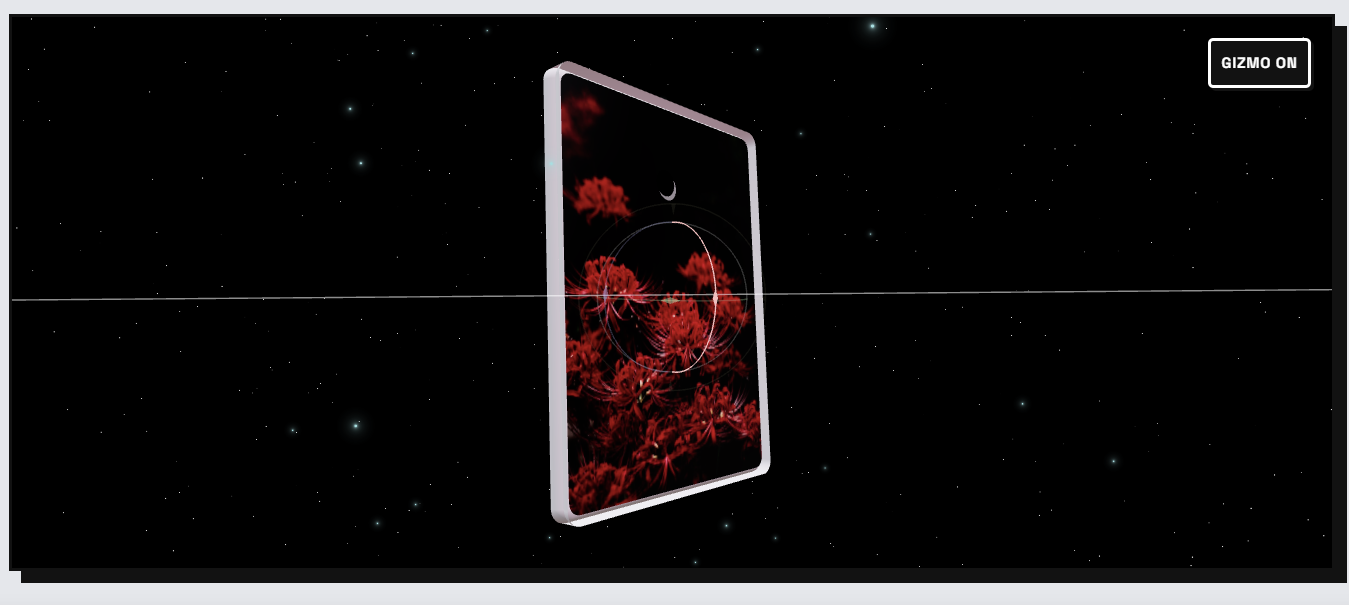
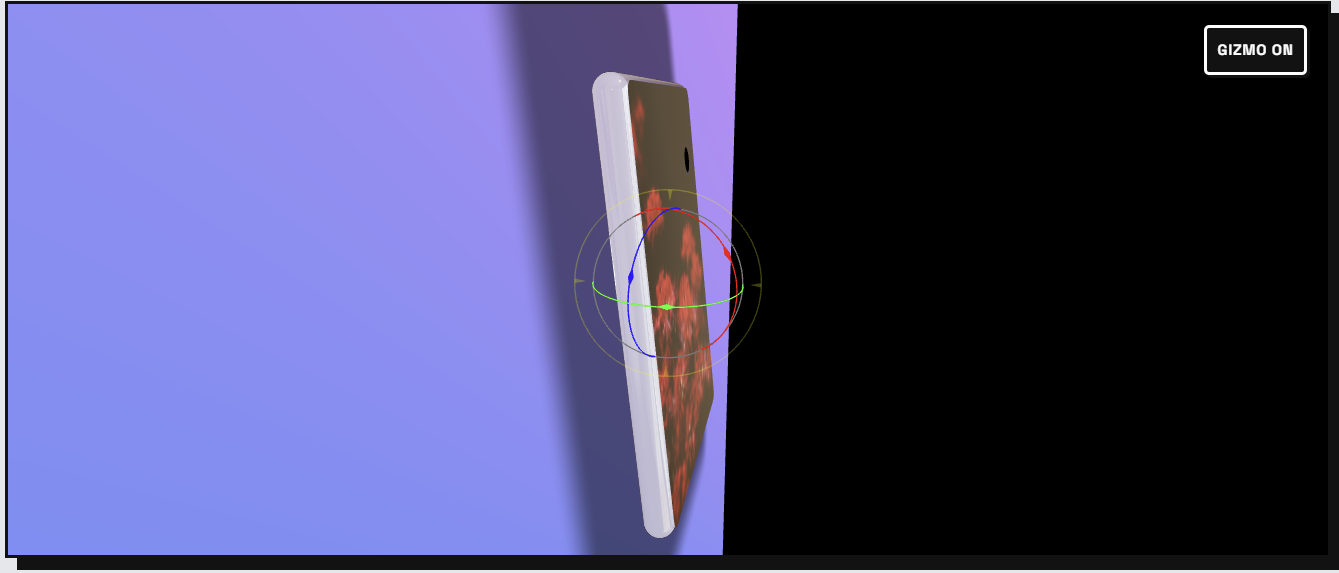
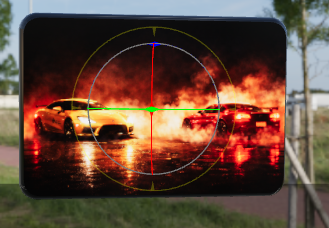
3d model control
-

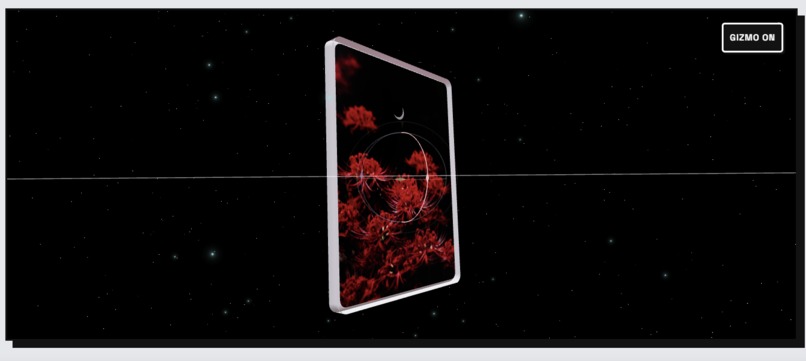
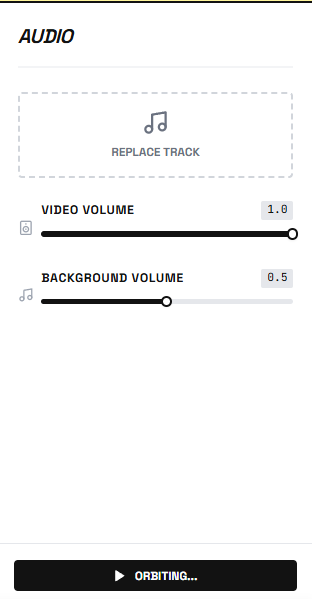
360 camera control with orbit feature
-
drop shadow
-

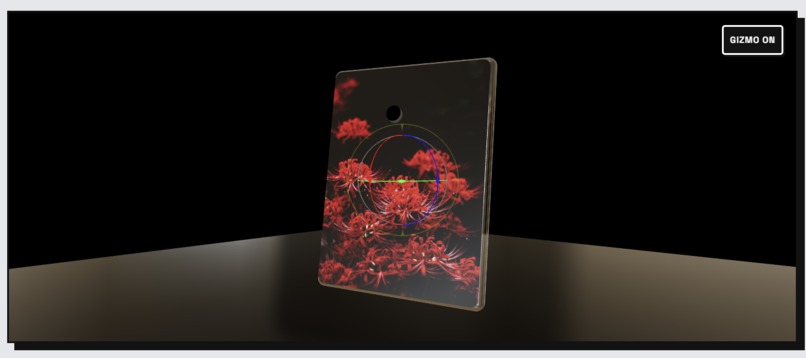
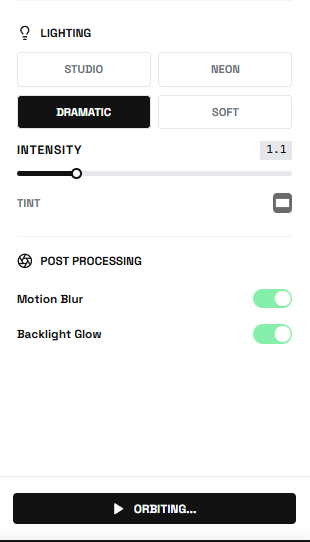
multiple lighting feature
-
 GIF
GIF
orbit feature
-
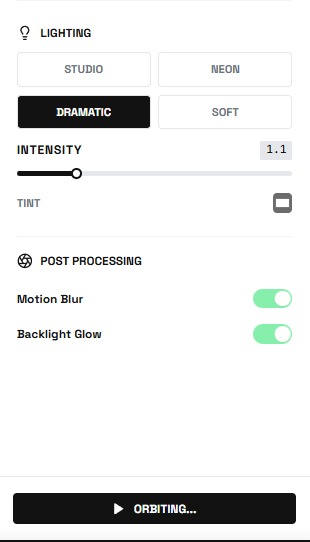
lighting options
-

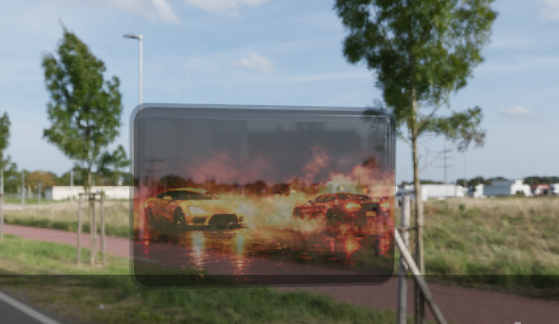
3d mockup in any environment you want
-
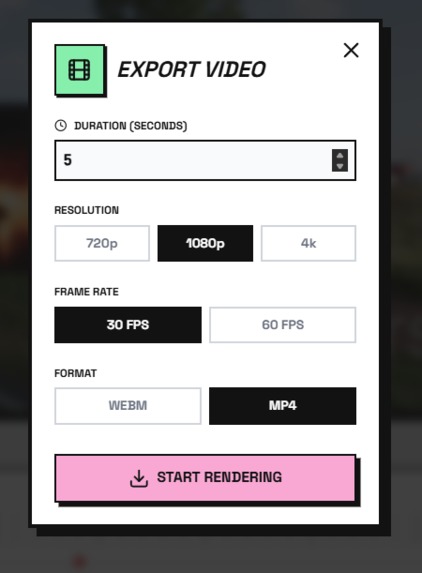
export settings
-

gimzo with turn on/off feature
-

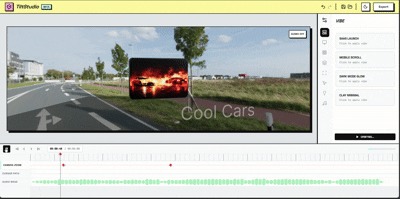
multifunction playbaack system
-

media opacity control
-
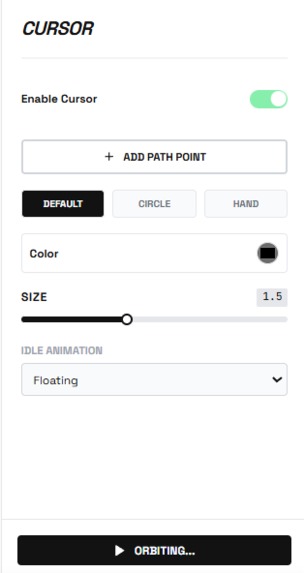
professional level customizations
-
undo + redo button with along save button
-
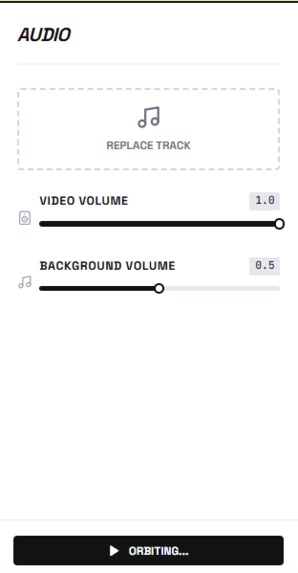
in built audio mixer and editor


TiltStudio: Democratizing Professional Video Production
The Inspiration
It started with a frustration we all shared. As developers and content creators, we constantly needed to showcase our projects - whether for portfolios, tutorials, or product demos. But every time we recorded our screens, the results looked... flat. Unprofessional. Boring.
We looked at the polished product videos from companies like Apple, Notion, and Linear - those beautiful 3D device frames with cinematic camera movements and perfect lighting. We wanted that. But the reality hit hard:
- After Effects? $500/year + 40 hours to learn
- Fiverr? $500-2000 per video + 3-day turnaround
- Online tools? Upload limits, watermarks, privacy concerns
There had to be a better way. What if we could bring that production quality directly into the browser? What if anyone could create professional videos in seconds, not hours?
That's when TiltStudio was born.
💡 What We Learned
Technical Discoveries
1. The No-Build Revelation
Early in development, we made a radical decision: no bundlers. No Webpack, no Vite, no build step at all.
Everyone said it was impossible for a complex 3D app. But we discovered that ES Modules loaded directly from CDN (esm.sh) could work beautifully:
// In index.html - that's it!
<script type="importmap">
{
  "imports": {
    "react": "https://esm.sh/react@18",
    "three": "https://esm.sh/three@0.150.1"
  }
}
</script>
The result? Instant startup. Zero configuration. Deploy by copying files. This taught us that sometimes the modern web has too much complexity - and stripping it away can be liberating.
2. WebGL is More Powerful Than We Thought
We initially worried about browser performance. Could we really do:
- Real-time 3D rendering
- Soft shadows via raymarching
- 4K video export
- Audio mixing
All client-side? The answer was a resounding yes. Modern browsers with WebGL2 and the Web Audio API are incredibly capable. We learned that the GPU in a standard laptop can rival dedicated rendering hardware from just a few years ago.
3. State Management Without a Library
Instead of reaching for Redux or Zustand, we built our own state system with a custom undo/redo stack:
interface HistoryState<T> {
  past: T[];
  present: T;
  future: T[];
}

const useHistory = <T>(initialState: T) => {
  const [state, setState] = useState<HistoryState<T>>({
    past: [],
    present: initialState,
    future: []
  });

  const set = (newState: T) => {
    setState(current => ({
      past: [...current.past, current.present],
      present: newState,
      future: []
    }));
  };

  // undo/redo logic...
};
This taught us that custom solutions can be simpler and more maintainable than bringing in heavy dependencies.
AI-Assisted Development
We heavily leveraged AI Vibe Coding tools throughout the project:
- Claude helped us architect the component structure and state management patterns
- Cursor accelerated component scaffolding and TypeScript interface generation
- AI-assisted debugging was crucial for complex WebGL shader optimization
Key Learning: AI tools aren't just code generators - they're thinking partners. When we got stuck on audio synchronization between the video element and background music, discussing the problem with Claude led us to the Web Audio API's createMediaElementSource() approach we might not have discovered otherwise.
How We Built It
Architecture Overview
┌─────────────────────────────────────────────┐
│            index.html (Entry)               │
│         (ES Module importmap)               │
└──────────────────┬──────────────────────────┘
                   │
         ┌─────────▼─────────┐
         │     App.tsx       │
         │  (State & Audio)  │
         └─────────┬─────────┘
                   │
      ┌────────────┼────────────┐
      │            │            │
┌─────▼─────┐ ┌───▼────┐ ┌────▼─────┐
│SceneCanvas│ │Sidebar │ │ Timeline │
│ (Three.js)│ │  (UI)  │ │(Sequencer)│
└─────┬─────┘ └────────┘ └──────────┘
      │
      ├─► DeviceFrame (3D Geometry)
      ├─► SmartCameraRig (Animation)
      ├─► LightingRig (PBR)
      └─► Recorder (Video Export)
Development Journey
Phase 1: Proof of Concept (Days 1-2)
We started with the core question: Can we render a video texture on a 3D plane in the browser?
Using @react-three/fiber, we got a basic scene working within hours:
function DeviceFrame({ videoUrl }: Props) {
  const texture = useVideoTexture(videoUrl);

  return (
    <mesh>
      <planeGeometry args={[16, 9]} />
      <meshStandardMaterial map={texture} />
    </mesh>
  );
}
Success! But it looked boring. We needed device frames.
Phase 2: 3D Device Models (Days 3-5)
Creating realistic iPhone and browser frames required custom geometry. We used THREE.Shape for rounded rectangles:
const createRoundedRectShape = (
  width: number,
  height: number,
  radius: number
) => {
  const shape = new THREE.Shape();
  const x = -width / 2, y = -height / 2;

  shape.moveTo(x + radius, y);
  shape.lineTo(x + width - radius, y);
  shape.quadraticCurveTo(x + width, y, x + width, y + radius);
  // ... more curves
  return shape;
};
Challenge: Extrusion for 3D depth caused z-fighting artifacts on corners. Solution: Separate front and back faces with slight offset:
$$\text{offset}z = \epsilon \cdot \text{sign}(\text{face}{\text{normal}})$$
where \( \epsilon = 0.001 \) provided enough separation without visual gap.
Phase 3: Materials System (Days 6-7)
We implemented four material types:
- Standard PBR: Realistic lighting with
MeshStandardMaterial - Clay: Diffuse-only with custom shader
- Glass: Transmission + refraction via
MeshPhysicalMaterial - Matte: Zero metalness, low roughness
The glass material was particularly tricky - we needed to balance:
$$\text{transmission} = \alpha \cdot (1 - \text{roughness})$$
where \( \alpha \) controls transparency strength.
Phase 4: Camera Animation (Days 8-10)
This was the heart of the "cinematic" feel. We built a keyframe interpolation system:
const interpolateCamera = (
  keyframes: Keyframe[],
  currentTime: number
) => {
  // Find surrounding keyframes
  const [prev, next] = findBracketingKeyframes(keyframes, currentTime);

  // Normalize time between keyframes
  const t = (currentTime - prev.timestamp) /
            (next.timestamp - prev.timestamp);

  // Apply easing function
  const easedT = easing.cubic(t);

  // Interpolate position, target, and zoom
  return {
    position: prev.position.lerp(next.position, easedT),
    target: prev.target.lerp(next.target, easedT),
    zoom: THREE.MathUtils.lerp(prev.intensity, next.intensity, easedT)
  };
};
We experimented with multiple easing functions. The cubic ease felt most "professional":
$$f(t) = t < 0.5 ? 4t^3 : 1 - (-2t + 2)^3 / 2$$
Phase 5: Video Export (Days 11-13)
This was our biggest technical challenge. Requirements:
- Capture canvas at target resolution (up to 4K)
- Mix video audio + background music
- Encode and download as MP4
The Solution: Web Audio API + Canvas Capture API
// Create audio context
const audioContext = new AudioContext();

// Video audio source
const videoSource = audioContext.createMediaElementSource(videoElement);

// Background music source
const musicSource = audioContext.createMediaElementSource(musicElement);

// Mix both sources
const destination = audioContext.createMediaStreamDestination();
videoSource.connect(destination);
musicSource.connect(destination);

// Capture canvas
const videoStream = canvas.captureStream(30); // 30 fps

// Combine video + audio
const combinedStream = new MediaStream([
  ...videoStream.getVideoTracks(),
  ...destination.stream.getAudioTracks()
]);

// Record
const recorder = new MediaRecorder(combinedStream, {
  mimeType: 'video/webm;codecs=vp9',
  videoBitsPerSecond: 10000000 // 10 Mbps for quality
});
Challenge: Audio/video sync drift over time. Solution: Lock rendering to video playback time instead of requestAnimationFrame:
videoElement.addEventListener('timeupdate', () => {
  const currentTime = videoElement.currentTime;
  renderFrame(currentTime); // Sync rendering to video
});
Phase 6: UI/UX Polish (Days 14-16)
We built a timeline with:
- Draggable playhead
- Visual keyframe markers
- Audio waveform rendering (decoded via Web Audio API) ```typescript const drawWaveform = async (audioBuffer: AudioBuffer, canvas: HTMLCanvasElement) => { const data = audioBuffer.getChannelData(0); const step = Math.ceil(data.length / canvas.width); const amp = canvas.height / 2;
const ctx = canvas.getContext('2d')!; for (let i = 0; i < canvas.width; i++) { let min = 1.0, max = -1.0; for (let j = 0; j < step; j++) { const datum = data[i * step + j]; if (datum < min) min = datum; if (datum > max) max = datum; } ctx.fillRect(i, (1 + min) * amp, 1, Math.max(1, (max - min) * amp)); } };
## 🚧 Challenges We Faced

### 1. The CORS Nightmare

**Problem:** Loading ES Modules from CDN triggered CORS errors in development.

**First Attempt:** Tried various CDN providers (unpkg, jsdelivr, skypack). All had issues with transitive dependencies.

**Solution:** Settled on esm.sh which properly handles dependency resolution and sets CORS headers. Also discovered we needed a local HTTP server - the `file://` protocol doesn't support ES Modules.

**Lesson:** Modern web features often require modern serving infrastructure.

### 2. Memory Leaks with Video Textures

**Problem:** After loading 5-6 videos, the browser would freeze. DevTools showed memory climbing to 2GB+.

**Root Cause:** WebGL textures weren't being disposed when switching videos.

**Solution:** Manual cleanup in useEffect:
```typescript
useEffect(() => {
  return () => {
    if (texture) {
      texture.dispose();
      renderer.renderLists.dispose();
      renderer.dispose();
    }
  };
}, [texture]);
Lesson: WebGL requires manual memory management - JavaScript's garbage collector doesn't automatically clean up GPU resources.
3. Safari Autoplay Policies
Problem: Safari blocked video autoplay, breaking our animation timeline.
Workaround: Required user gesture before enabling playback:
const enableAutoplay = async () => {
  try {
    await videoElement.play();
    videoElement.pause();
    setAutoplayEnabled(true);
  } catch (e) {
    // Show "Click to enable playback" button
  }
};
Lesson: Browser policies prioritize user experience over developer convenience - and rightfully so.
4. The 4K Performance Wall
Problem: Exporting at 4K (3840×2160) dropped frame rate to 5 FPS on mid-range laptops.
Investigation: Profiling showed bottleneck in shadow map rendering. At 4K, shadow maps were \( 4096^2 = 16.7M \) pixels.
Optimization: Dynamic shadow resolution based on export size:
const shadowMapSize = Math.min(
  2048,
  Math.floor(exportResolution.width / 2)
);
This reduced shadow pixels by 75% with minimal visual impact.
Lesson: Not all visual features need to scale linearly with resolution.
5. TypeScript Inference Failures
Problem: Three.js has complex type definitions. Claude helped us navigate this, but some scenarios broke:
// This failed TypeScript checks
const geometry = new THREE.ExtrudeGeometry(shape, {
  depth: extrusion,
  bevelEnabled: true
});
Solution: Explicit type annotations:
const options: THREE.ExtrudeGeometryOptions = {
  depth: extrusion,
  bevelEnabled: true,
  bevelThickness: 0.1,
  bevelSize: 0.1,
  bevelSegments: 3
};
Lesson: AI tools excel at suggesting patterns, but type safety still requires human oversight.
🎓 Key Takeaways
Technical Insights
Simplicity is a feature. Our no-build approach seemed risky but became our biggest strength.
The browser is a platform. With WebGL, Web Audio, and modern APIs, browsers can compete with native apps.
Performance matters. Real-time 3D requires constant profiling and optimization. We learned to use Chrome DevTools' Performance tab religiously.
AI pair programming works. Claude and Cursor didn't write our app - we did. But they accelerated research, caught bugs, and suggested patterns we wouldn't have considered.
Product Insights
Solve your own problems. We built this because we needed it. That authentic need drove better decisions.
Demo quality matters. A working 3D animation is worth a thousand architecture explanations.
Documentation is development. Writing our 5-page technical guide helped us clarify our own architecture.
🚀 What's Next
TiltStudio is functional, but it's just the beginning. We envision:
- AI-powered camera movements - "Make this feel more dramatic"
- Template marketplace - Community-contributed presets
- Collaborative editing - Real-time multi-user sessions
- Plugin system - Custom effects and transitions
But most importantly, we want to make professional video production accessible to everyone. Not just developers. Not just designers. Everyone.
🙏 Acknowledgments
This project wouldn't exist without:
- Three.js community - Incredible documentation and examples
- Anthropic's Claude & AI Vibe Coding tools - Our development partner
- The judges - For believing in innovative approaches to web development
Technical Specifications
Built With:
- React 18.2.0
- Three.js 0.150.1
- @react-three/fiber 8.12.0
- @react-three/drei 9.56.0
- TypeScript 5.0
- Web Audio API
- Canvas Capture API
- MediaRecorder API
Lines of Code: ~3,500
Development Time: 16 days
Coffee Consumed: Too much ☕
Team TiltStudio
Anuska Sarkar | Barnali Biswas | Suvee Sarkar
Built With
- canvas-capture-api
- css3
- es-modules
- esm.sh-cdn
- html5
- mediarecorder-api
- react-18
- react-three/drei
- react-three/fiber
- three.js
- typescript
- web-audio-api
- webgl


Log in or sign up for Devpost to join the conversation.