-
-
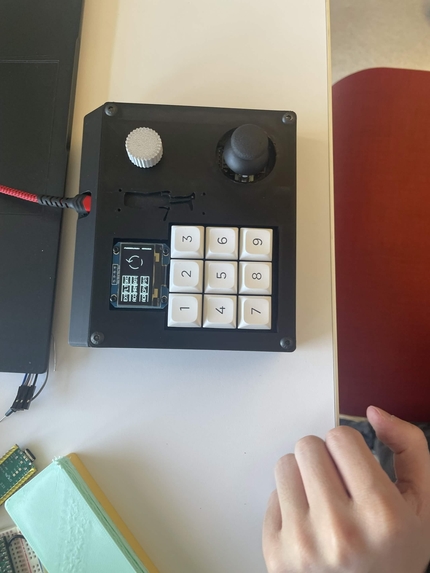
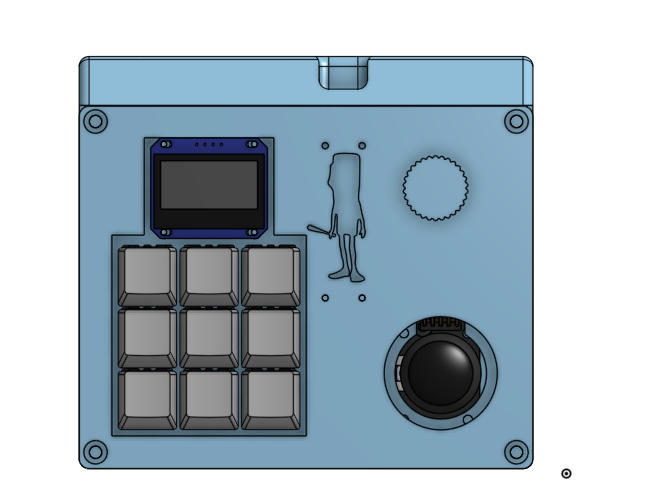
Image of the CadBuddy
-

Logo for the brand
-

Top shot
-
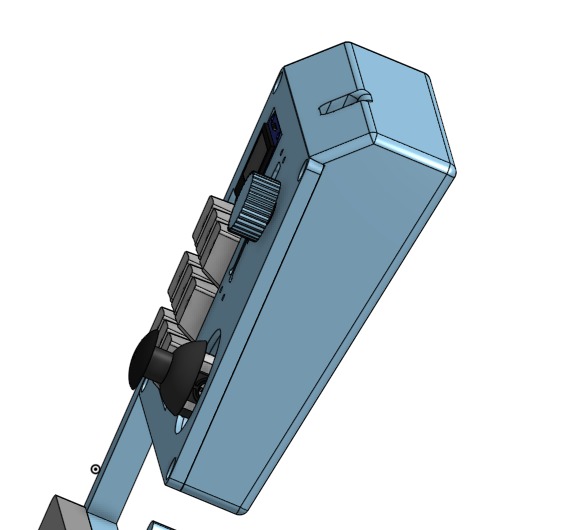
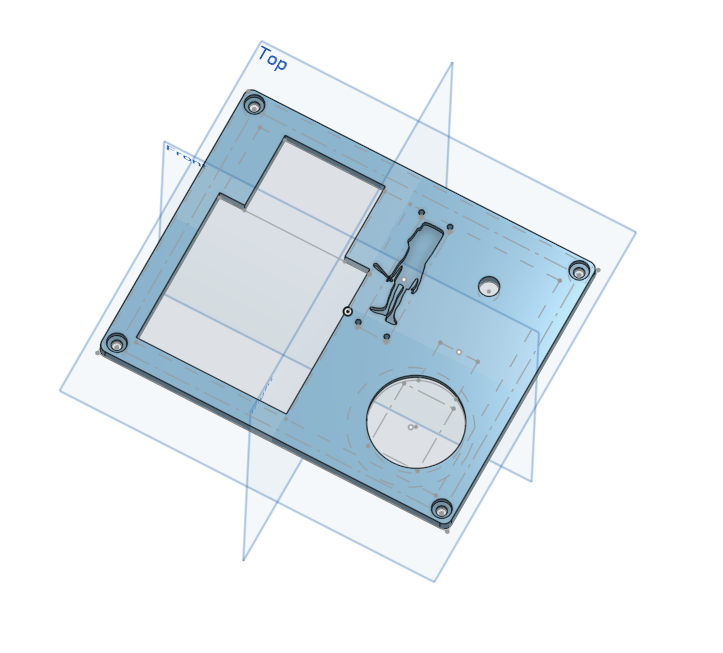
Side shot
-
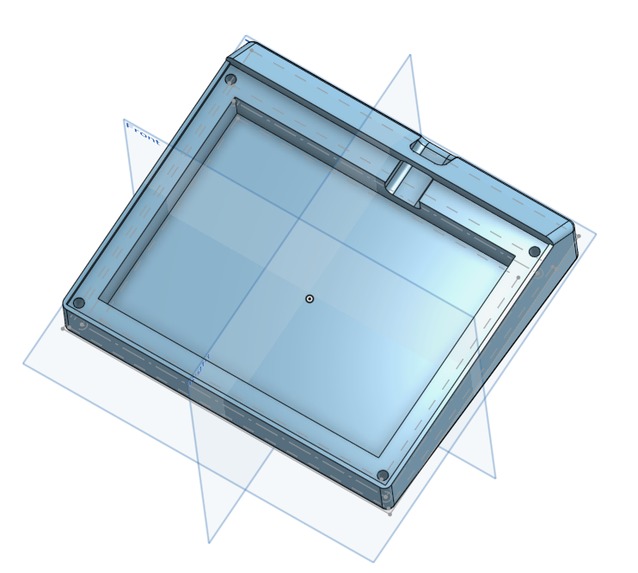
Bottom shell
-

Top shell
-
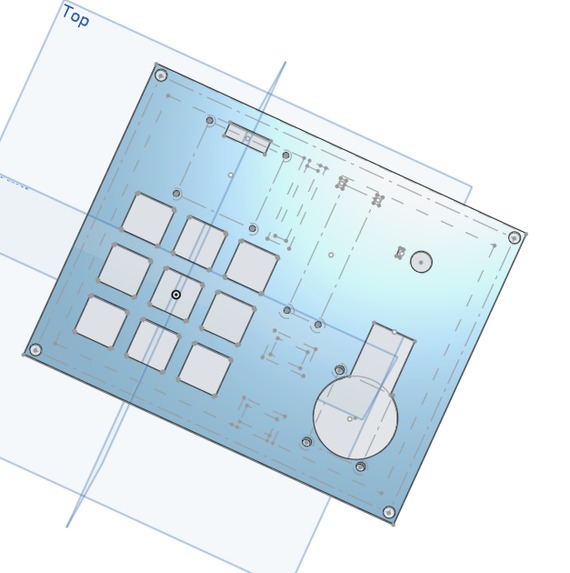
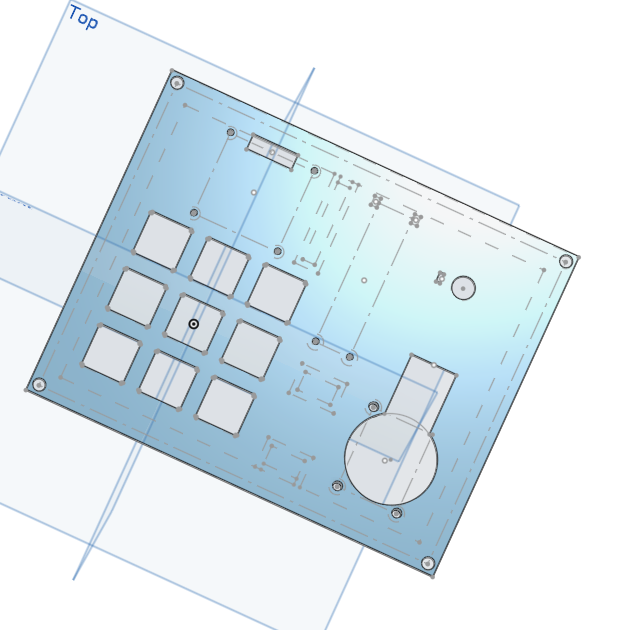
Middle plate
-

Bars in onshape


Inspiration
Working on CAD is extremely tedious without a mouse, as using a touch pad makes selecting object and panning neigh impossible. To solve this issue, while also adding a fun twist, our group created the CADBuddy which has an intuitive and easy to follow design to allow for CAD work in places where mouses would normally not function such as public transit where there is not enough mouse space
What it does
The CADBuddy has 9 customization hotkeys, each one is set to buttons used in CAD software. As of now, the CADBuddy only works for Onshape and the nine buttons do things such as creating sketches, filleting etc. The CADBuddy also has a potentiometer knob which is used to adjust the volume of the objects in the CAD. The joystick has three functions, its first function is rotating the viewing axis of the CAD, the second option is the stable rotation viewing and the third option is panning which is activated from pressing the joystick down.
How we built it
Building the CADBuddy was not easy. First, two of the members used CAD to design a shell and casing for the device. This was split into three parts, the plate, top shell and bottom shell which are sandwiched together by screws. While this was happening, the Coders on our team were creating code for the functions of each button and also creating pixel art images to be displayed on the OLED screen to signify the function of each button. Furthermore, after 3D printing the shell, the electronics of the CADBuddy had to be done. Moreover, we used keyboard switches in the buttons which had to be lubed so they sounded good. Our members soldered and connected wires with a pico board and a potentiometer to ensure that the board functioned correctly. After the soldering was done, the Code was finalized and debugged and the CADBuddy was screwed in and fully assembled after three successful test drives.
Challenges we ran into
A challenge in the beginning was trying to find the layout of the CADBuddy since we had nothing to reference the CADBuddy off of. Therefore, before the CAD work, the design team had to first draft out and position everything to ensure that the dimensions worked out and was not too bulky or big. There were also some struggles with the 3D printing of the shell. After printing the shell, some holes were missing within the shell and there were some tolerance issues which were solved by doing more CAD work and reprinting extra pieces. A challenge with the coding
Programming:
- Initially, we were using MicroPython, a library that Eric was more familiar with, to handle the Joystick and OLED Screen communication. Unfortunately, due to that library having difficulty handling USB operations, we had to move to CircuitPython, which meant rewriting code from using MicroPython libraries to CircuitPython libraries.
Learning CircuitPython required a lot of frantic googling and ChatGPT'ing, but we managed to learn the basics enough to rewrite our libraries & some code (Some was AI generated)
We faced some difficulty later on when we worked on the OLED display, as the clearing and displaying was rather difficult to work with. Specifically, managing the splash stack was very difficult.
Video & Video Editing:
Eric chose to use a software he was unfamiliar with
Accomplishments that we're proud of
In building the CADBuddy, we are proud of many things. First, we are proud that the device actually works as there are many variables which could have gone wrong and made the device not function. Furthermore, we are proud of the cooperation that we had when building the CADBuddy, we were able to work as a cohesive group and the building of the CADBuddy would not have been possible if we were not.
What we learned
Jordan: While doing CAD work, I learned about some more functions of Onshape which I used to have an easier time while CADing. Furthermore, I was taught by my groupmembers how some electronics worked such as the wiring
Jerry: While making the CADBuddy, I learned new soldering techniques. For example, when I was soldering the wires to the microcontroller pins, I accidentally connected two pins together. Because I didn't have solder wick, I learned that I could use a clump of wires to remove the solder instead. I also got lots of practice and became faster at soldering in general, too.
James: I learned how to use CircuitPython and how to program in a Raspberry Pi with Python. I learned a lot more about keyboard and how to make a custom one with a Raspberry Pi Pico. I also learned about how certain components, like a potentiometer and an OLED display.
What's next for The CADBuddy
In the future, if we decide to improve upon the CADBuddy, we will try to make the product more accessible by making an app that allows for changes to the hotkeys, letting less experienced people able to customize their CADBuddy without the chance to break something in the code. We also want to implement the CADBuddy on a platform other than Onshape, as it was configured for Onshape. Some physical changes we want to make is to make the casing metal and to add a PCB instead of connecting all the wires manually. This will allow for more longevity with the product. We also want an adjustable wrist rest to improve ergonomics. Potentially, we could add more keys.
AI Form: https://docs.google.com/document/d/1QXTqwnX0M3g_hniS8Cw_KOx7q5QdRczN-qw2x1WTULI/edit?usp=sharing
Built With
- bambustudio
- circuitpython
- davinciresolve
- onshape
- raspberry-pi-pico
- render


Log in or sign up for Devpost to join the conversation.