Inspiration
The prompt was Fly Me to the Moon, and the first thing we thought about was how you actually see the Moon's surface. At full moon it looks flat: the Sun is straight overhead and nothing casts a shadow. The craters and mountains only really show up near the terminator, the line between day and night, where sunlight comes in almost sideways and every bump throws a long shadow. That's how Galileo figured out the Moon had mountains in the first place, and he even estimated how tall they were from the length of their shadows.
Then we noticed the same thing happens on a notepad. When you write on the top page, the pen presses a groove into the page underneath. Under normal light that page looks blank, but if you light it from a low angle, the grooves throw shadows, just like craters on the terminator. So we built a terminator for paper.
What it does
You write a secret on a notepad and tear the page off. The blank-looking page underneath goes under our rig: four LEDs lying flat around the paper, and an iPhone pointing down from above.
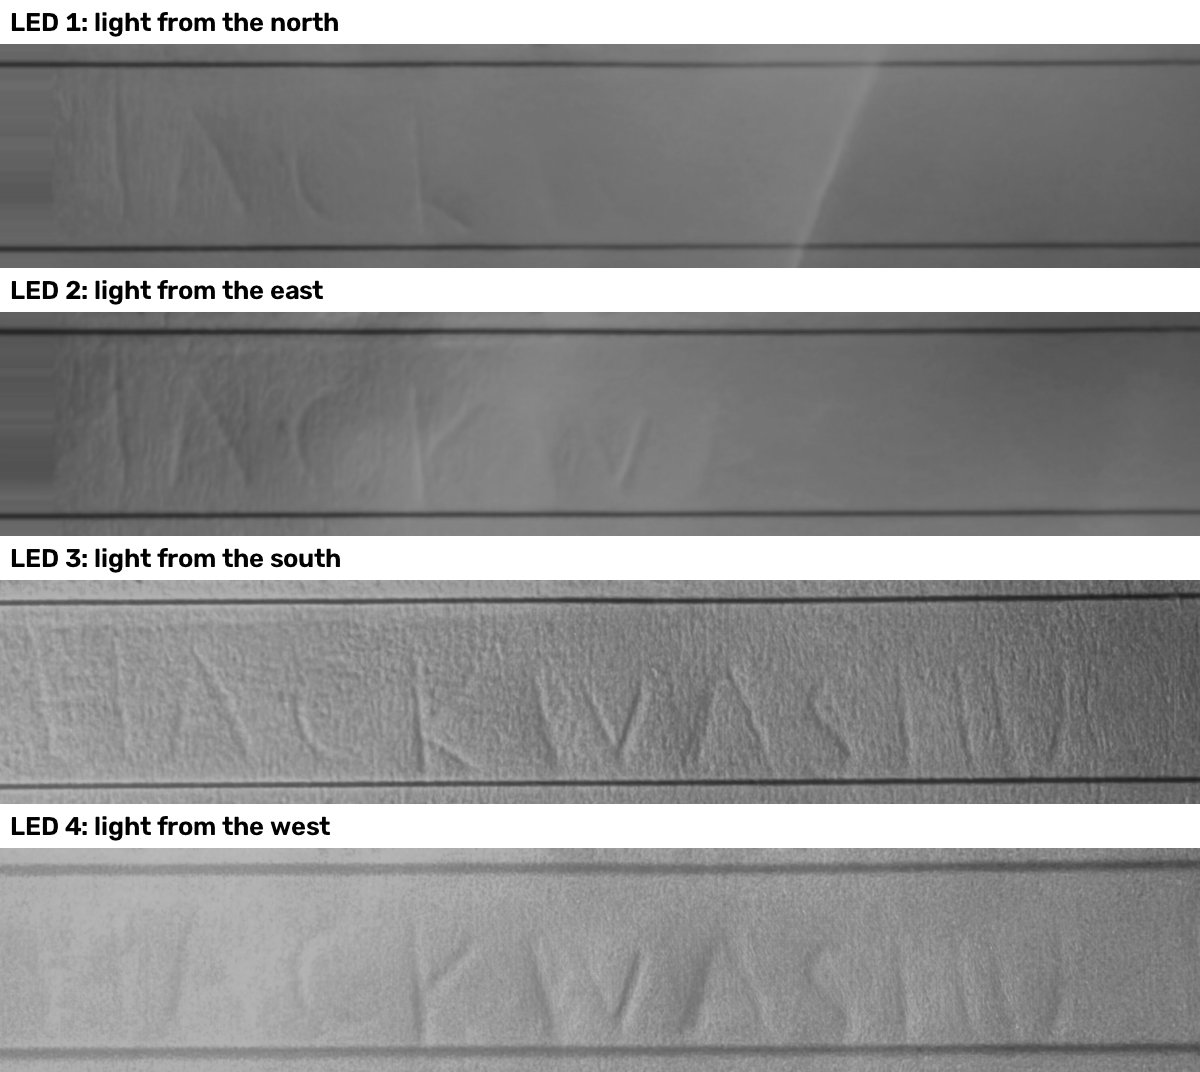
- The LEDs turn on one at a time (north, east, south, west), and the phone takes one photo per light.
- Each photo shows up in the web app as it lands, next to a Moon lit from the same side, so the Moon's phase turns as the light walks around the page.
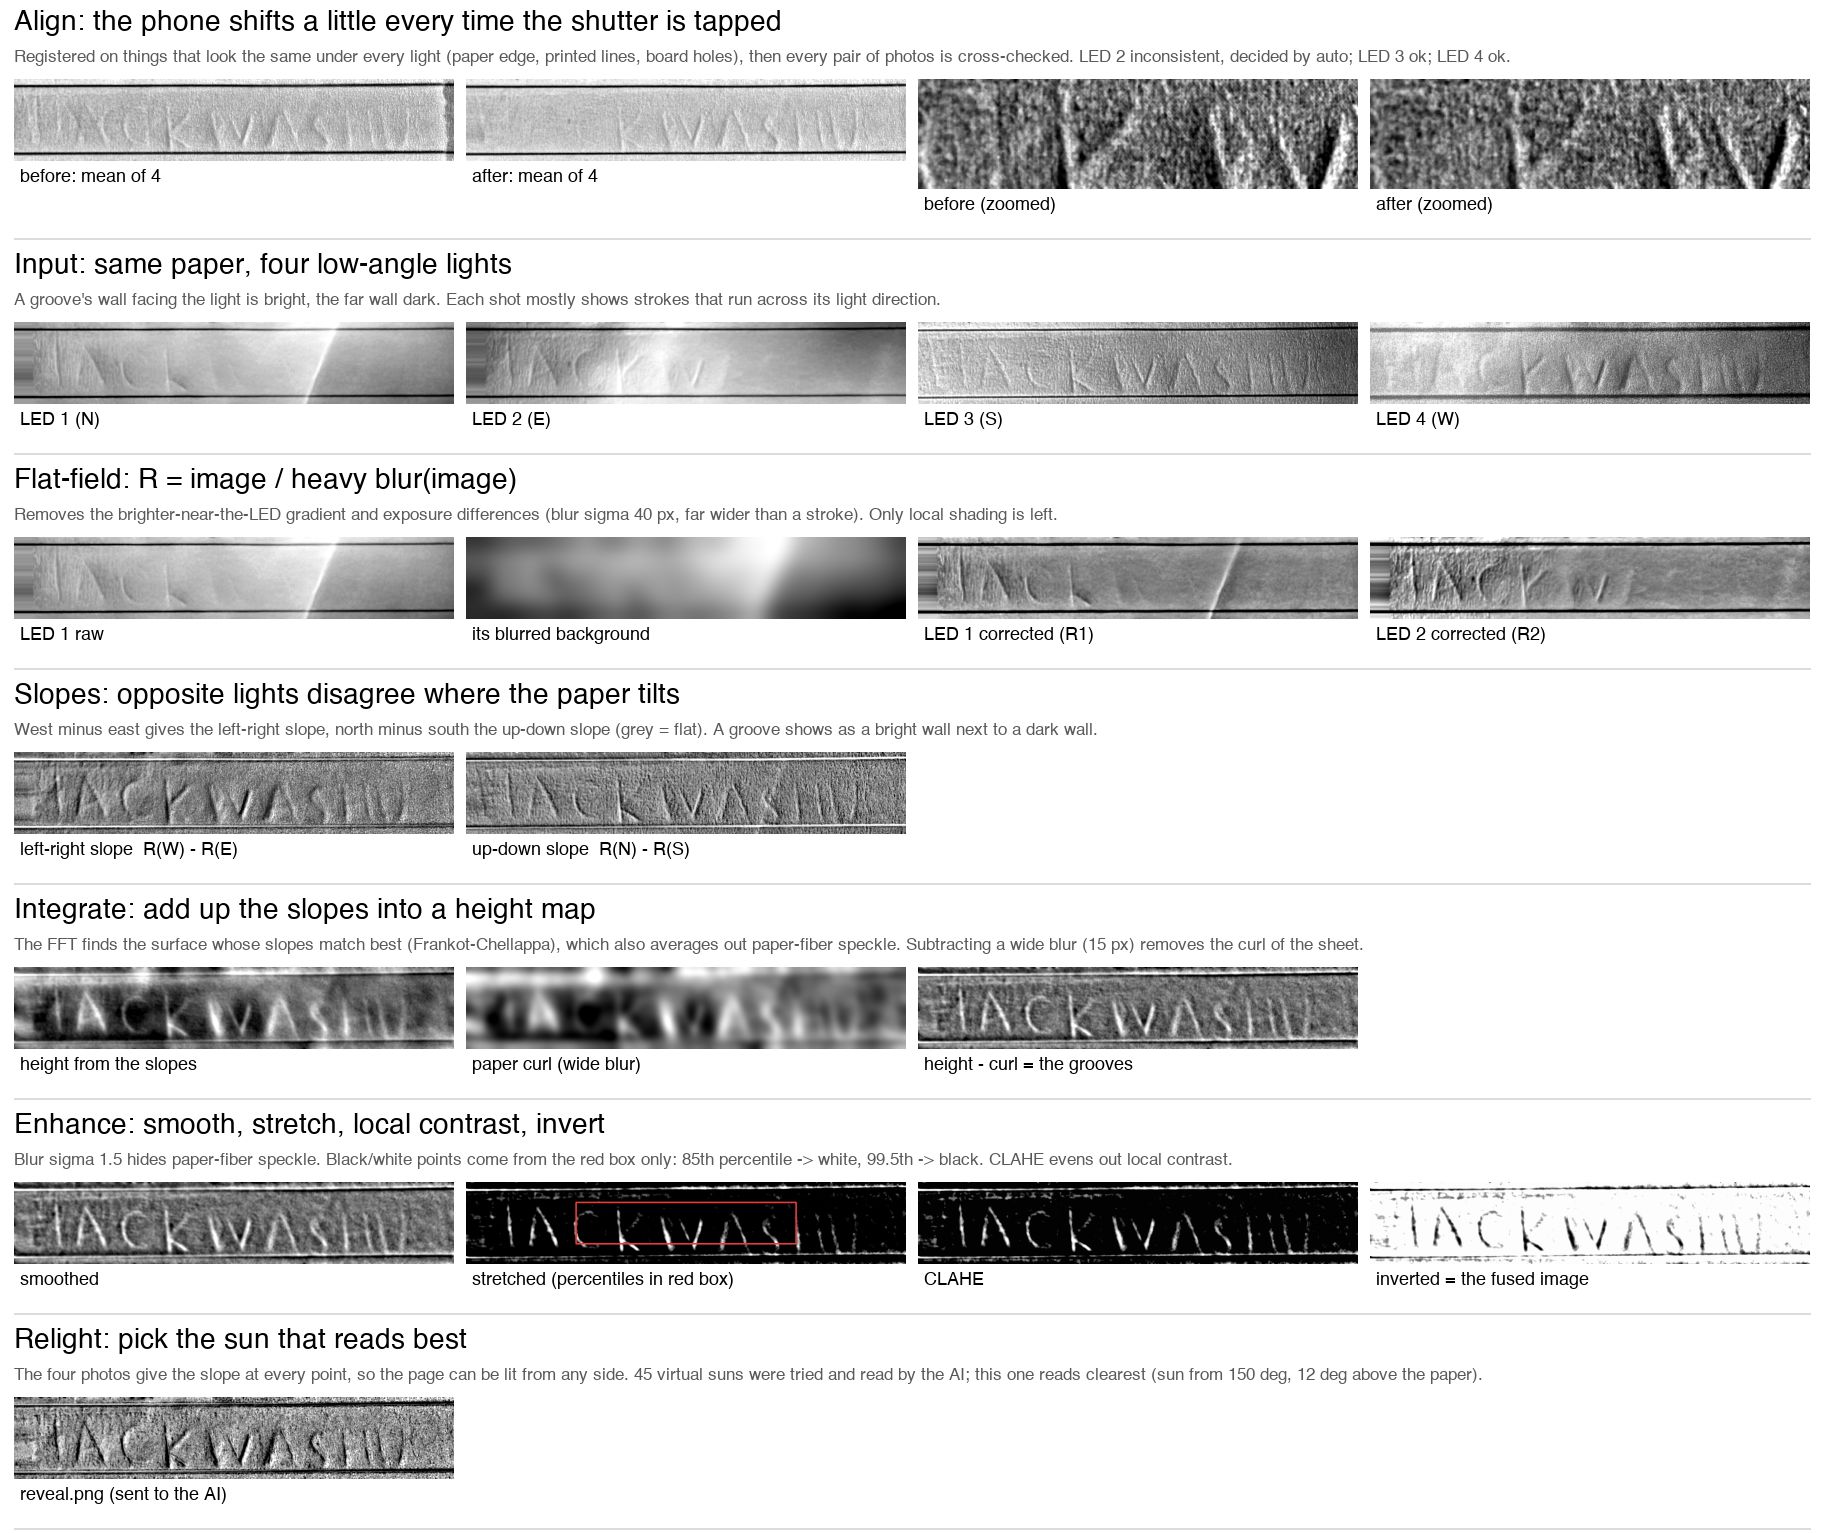
- The computer lines up the four photos, works out the shape of the paper's surface, and turns the grooves into an image of the handwriting.
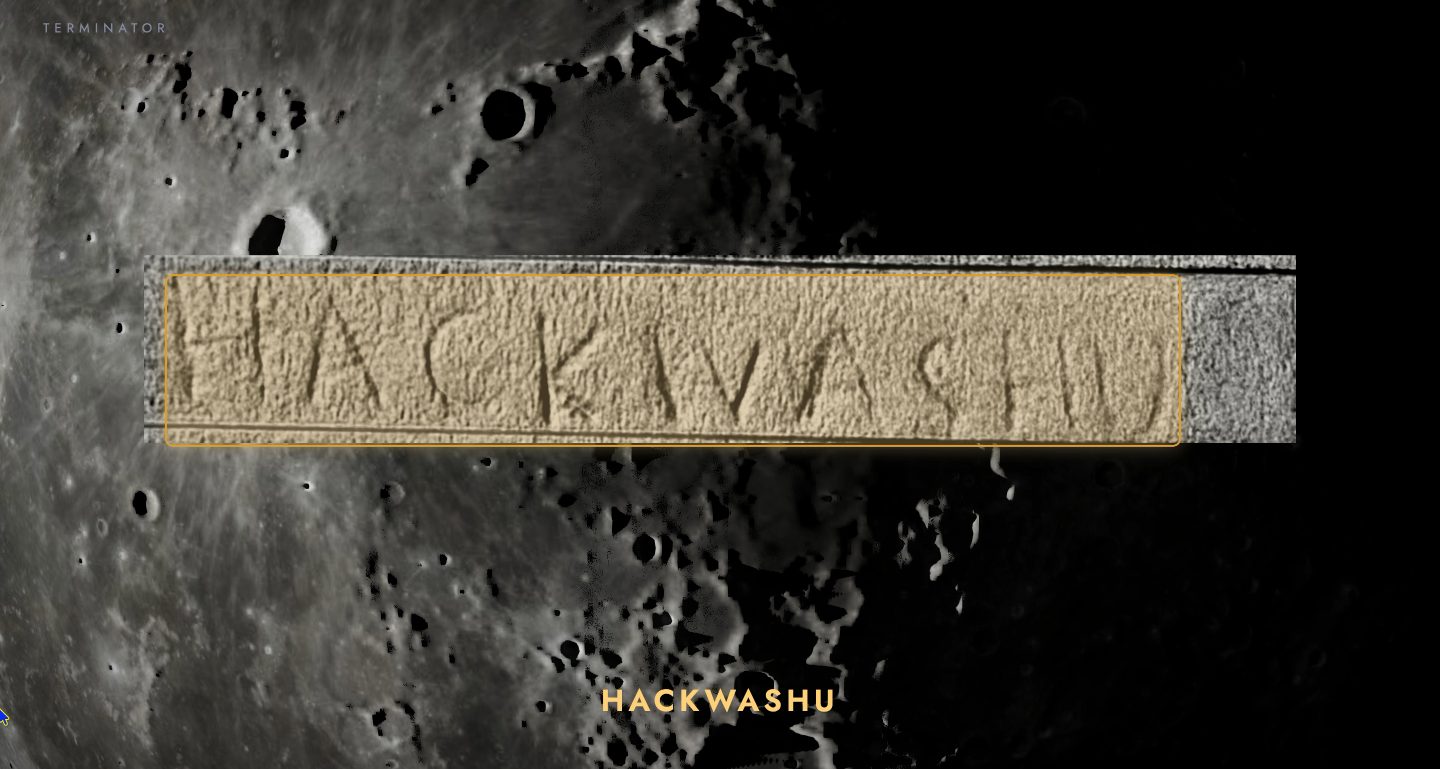
- The web app walks through every processing step. Then the camera dives down to the Moon, the recovered page lands on its surface, Google Vision reads it, and the word is boxed and spoken out loud.
- At the end you can grab the "sun" with your mouse and relight the page from any direction yourself.
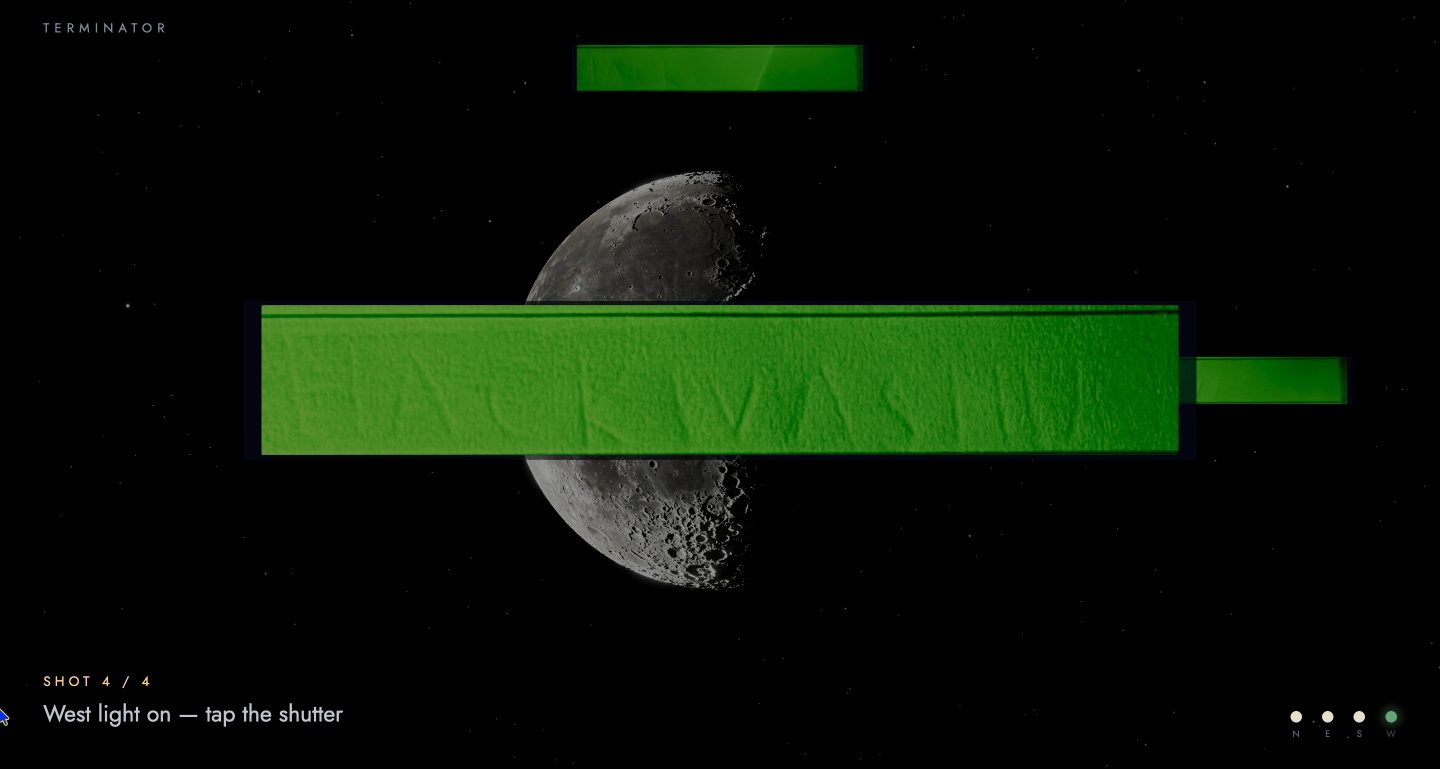
On our real test sheet, a ballpoint "HACKWASHU" on ruled notepad paper, Google Vision reads the recovered page as HACKWASHU.
How we built it
Hardware. An Arduino switches four green LEDs over serial. Green works best, since half of a phone camera's pixels are green. The LEDs lie flat on the table about 5 cm from the paper, so the light hits it at roughly 5 to 15 degrees. An iPhone is fixed above the page and shoots in the native Camera app with Night mode. Each photo is pulled straight off the phone over USB with pymobiledevice3.
Alignment. Tapping the shutter nudges the phone, so the four photos never line up exactly. We register them on the paper edge and the ruled lines (ECC, coarse to fine), and reject any fit that isn't physically plausible: too much shift, zoom or shear. Then every pair of photos is cross-checked with phase correlation. If three photos agree and one doesn't, the odd one gets moved to match.
Recovering the surface (photometric stereo). First we divide each photo \( I_k \) by a heavily blurred copy of itself. That removes the LED falloff and any exposure change between shots, leaving only local shading:
$$ R_k = \frac{I_k}{G_{\sigma} * I_k}, \qquad \sigma = 40 \text{ px} $$
A groove's wall facing the light is bright and the far wall is dark, so the difference between opposite lights gives the slope of the paper at every point:
$$ g_x = R_W - R_E, \qquad g_y = R_N - R_S $$
We integrate the slopes into a height map with the Frankot–Chellappa method, which solves it in one step in the Fourier domain:
$$ \hat{z}(u, v) = \frac{-\,i\,u\,\hat{g}_x(u, v) \;-\; i\,v\,\hat{g}_y(u, v)}{u^2 + v^2} $$
Subtracting a blurred copy of the height map, \( z - G_{15} * z \), removes the curl of the sheet and leaves just the grooves.
Relighting. Once we know the slope everywhere, we can render the page under a virtual sun at any azimuth \( \phi \) and elevation \( \theta \), with \( \rho \) the paper's brightness:
$$ I(\phi, \theta) = \rho \cdot \operatorname{clip}!\left(1 + \frac{g_x \cos\phi + g_y \sin\phi}{\tan\theta},\; 0.04,\; 2.5\right) $$
We render about 45 sun positions, send each one to Google Vision, and keep the one whose reading agrees best with the others. It's a vote among the top reads, so one lucky misread can't win. That becomes the final image.
The web app. Vite, TypeScript and three.js. It watches the scan folder the Python side writes, and a small state machine runs the show: live capture with NASA Moon imagery and a real star catalog, step-by-step pages of the processing, the dive to the Moon, the reading, and a draggable sun that uses the same lighting formula as the Python relighting. Sound is generated locally with Tone.js, and the reading is spoken with the browser's built-in speech. The only thing that needs the internet is the Google Vision call.
Challenges we ran into
- Where the light sits matters more than how bright it is. Our first rig had the LEDs standing upright on a breadboard. It lit the page from above and washed the grooves out completely, whether the LEDs were bright or dim. Laying them flat on the table fixed it right away.
- Continuity Camera wasn't good enough. Using the iPhone as a webcam was easy, but it has no Night mode and it's blurry up close. We switched to the native Camera app and pulled the photos over USB instead.
- Ruled paper fools image alignment. On lined paper, the alignment could slide a photo 1,375 pixels along the lines and still report a great match. We added a plausibility check and a cross-check between all four photos. On one scan that caught a photo that was 124 px off, and the reading went from "WAS" to "WASHU".
- The phone kept changing its mind. Under the dimmer LEDs, the iPhone quietly switches to a different sensor mode (higher ISO, more digital zoom), so those shots come out blurrier and shifted by about 96 px. We only found it by reading the photos' EXIF data. Now the app warns about it, and locking exposure and focus before the first shot avoids it. The phone also flipped its EXIF orientation mid-scan while pointing face down, so we ignore that tag now.
- One combined image wasn't readable enough. Our first fused image only read as "ACKWASH". Letting the AI pick the sun angle got "HACKWASH" out of the same scan, and the full "HACKWASHU" on later ones.
Accomplishments that we're proud of
- It works on a real notepad page with an ordinary ballpoint pen: a page that looks blank to the eye comes out as readable handwriting.
- We wrote the photometric stereo pipeline ourselves, from flat-fielding to Fourier integration, and it runs in well under a minute on a laptop.
- The "hold the sun" relighting in the browser uses the same model as the Python side, so what you drag around on screen is the real recovered surface, not a visual effect.
- Everything runs locally except the one AI call, and the app shows every step instead of hiding it.
What we learned
- Grazing light is incredibly sensitive. A groove you can't see or feel shows up clearly at a 10 degree angle.
- Real hardware is where the bugs are. EXIF orientation, a phone silently switching camera modes, a cable in the frame flipping a sign in our math: none of these showed up on our synthetic test data.
- Checking measurements against each other (four photos, 45 sun angles) was far more reliable than trusting any single one.
What's next for Terminator
- A 3D view of the recovered surface (we already compute the height map).
- A small enclosure and a camera we can trigger ourselves, so a scan is one button press instead of four taps.
- Other surfaces with faint relief: embossed paper, worn coins, erased pencil.


Log in or sign up for Devpost to join the conversation.