-
-
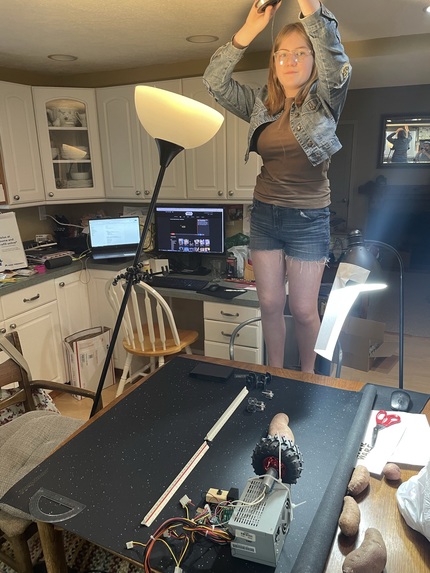
The set up for the star wars shrinking scene in the stop motion video
-
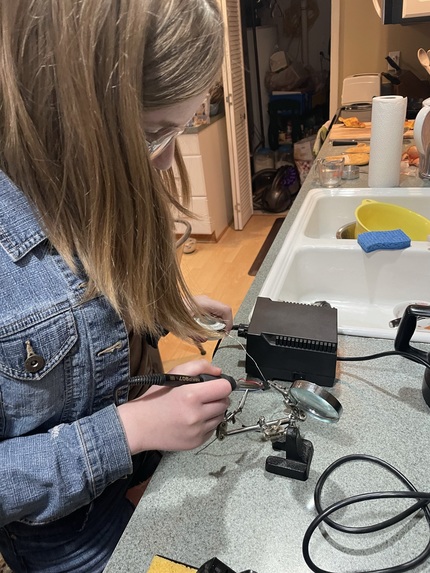
Sodldering the new button on after breaking the old ones wire.


Inspiration
I like doing stop motion videos but it can be frustrating to have to move everything for each frame. It can be difficult to move it so that it looks smooth. I was inspired to create a droid to help me overcome this problem by doing it for me.
What it does
The Stop Motion Droid moves various objects just a little bit every time you click a button to help create a very smooth stop motion movie.
How we built it
I found an old DC motor and motor driver that I wanted to use to move things for my stop motion videos. My plan was to use an Arduino to control this, but the DC motor needs 6V and more amps that I can directly get from the Arduino board. So I took a computer power supply out of an old computer in my garage. After unscrewing it from the case, I tried plugging it in but I didn't get any voltage from the leads. After watching a few YouTube videos, I found out that you have to put a jumper so that the power supply thinks it's connected to a computer. One wire later, and I had a functioning power supply for the motor.
After looking at the specs for the motor driver, I hooked it up to the Arduino through five different wires (board voltage, ground, PWM, INA, and INB). I also added a switch to the arduino so I could press the button while filming to get it to move. I copied and changed a couple of sample Arduino scripts and eventually got everything working.
Here are the major parts I used: Switch Wheel Motor driver (VNH5019) DC gear-motor (6V 99:1 metal gearbox, 25mm diameter) Computer power supply
Challenges we ran into
I came across a variety of challenges while working on this project.
It is really hard to get the spinning motor to do what we want it to do. It was difficult to figure out how to attach the jumper for the power supply. I bumped it a few times causing the jumper to fall out, and it took a minute to figure out why the motor didn't move. A few pieces of duct tape fixed that problem. It is difficult to remember to plug in the computer. I had to move the Stop Motion Droid around a few times while filming. I was using the connection to my laptop to power it and sometimes forgot to re-plug it in. Having a dedicated power supply for the arduino would help. This could probably be done through the computer power supply too. The motor suddenly stopped working after the motor touched the metal on the power supply. It caused a little spark and I put a piece of plastic around the motor to avoid that. It required restarting everything. A wire connecting the button snapped off while I was filming. I was forced to solder a few wires to a new button. The motor suddenly stopped working when the motor driver touched the metal power supply. I put duct tape around the motor driver to avoid this.
Accomplishments that we're proud of
The Stop Motion Droid actually worked!
What we learned
Insulating plastic enclosures are important, and not just decorative. It also takes work to set up a scene to use the Stop Motion Droid. It's not automatically something that saves time.
What's next for Stop Motion Droid
The DC motor and motor driver need to have an enclosure. I will design one using TinkerCAD and then 3D print it. This will avoid having any shorts when the droid is in use.

Log in or sign up for Devpost to join the conversation.