-
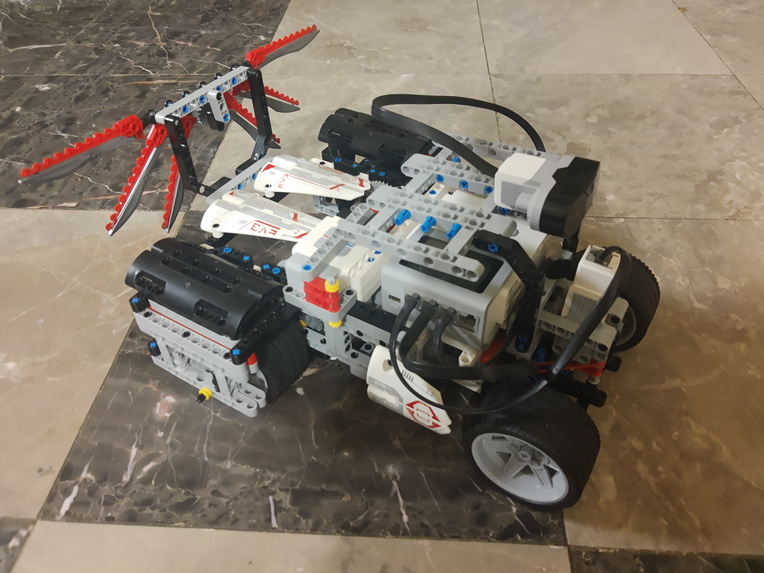
Rover (without Raspberry Pi and sensors)
-
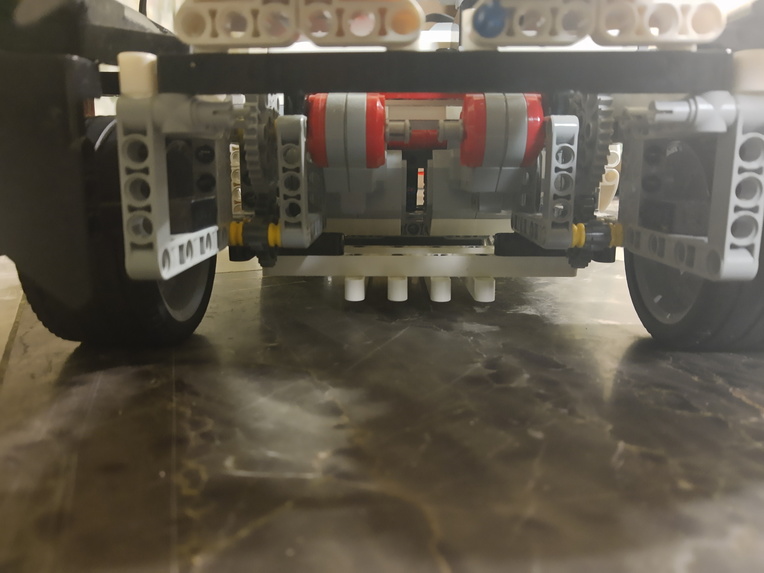
Two Large Servo motors with Optimized Gear Ratio
-
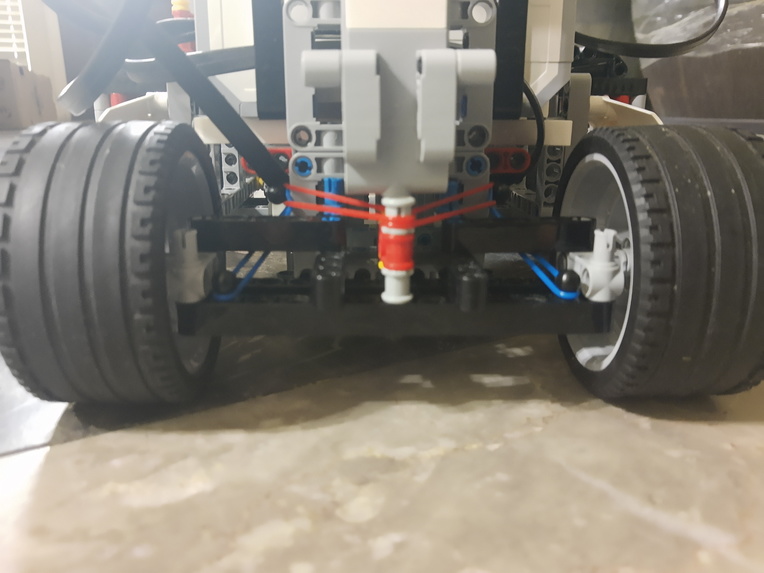
Steering Wheel Mechanism with Rubber Bands for Extra Stability
-
Ultrasonic Sensor (backup for autonomous driving purposes)
-

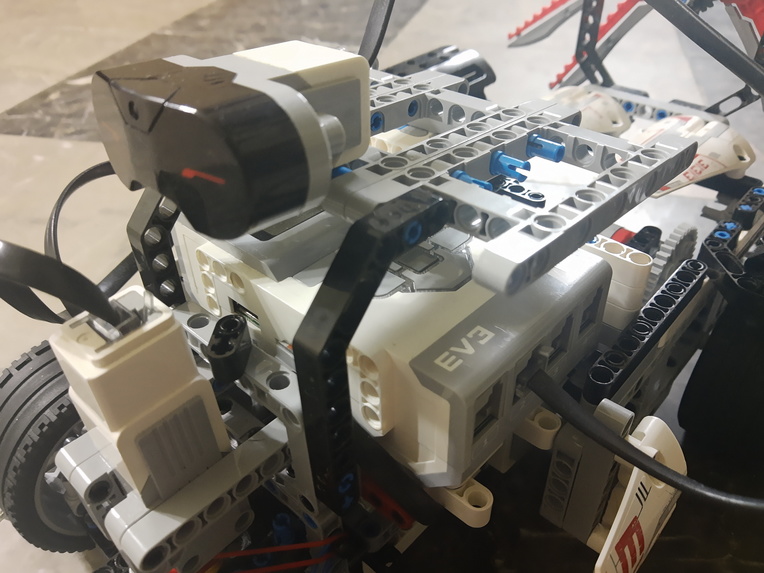
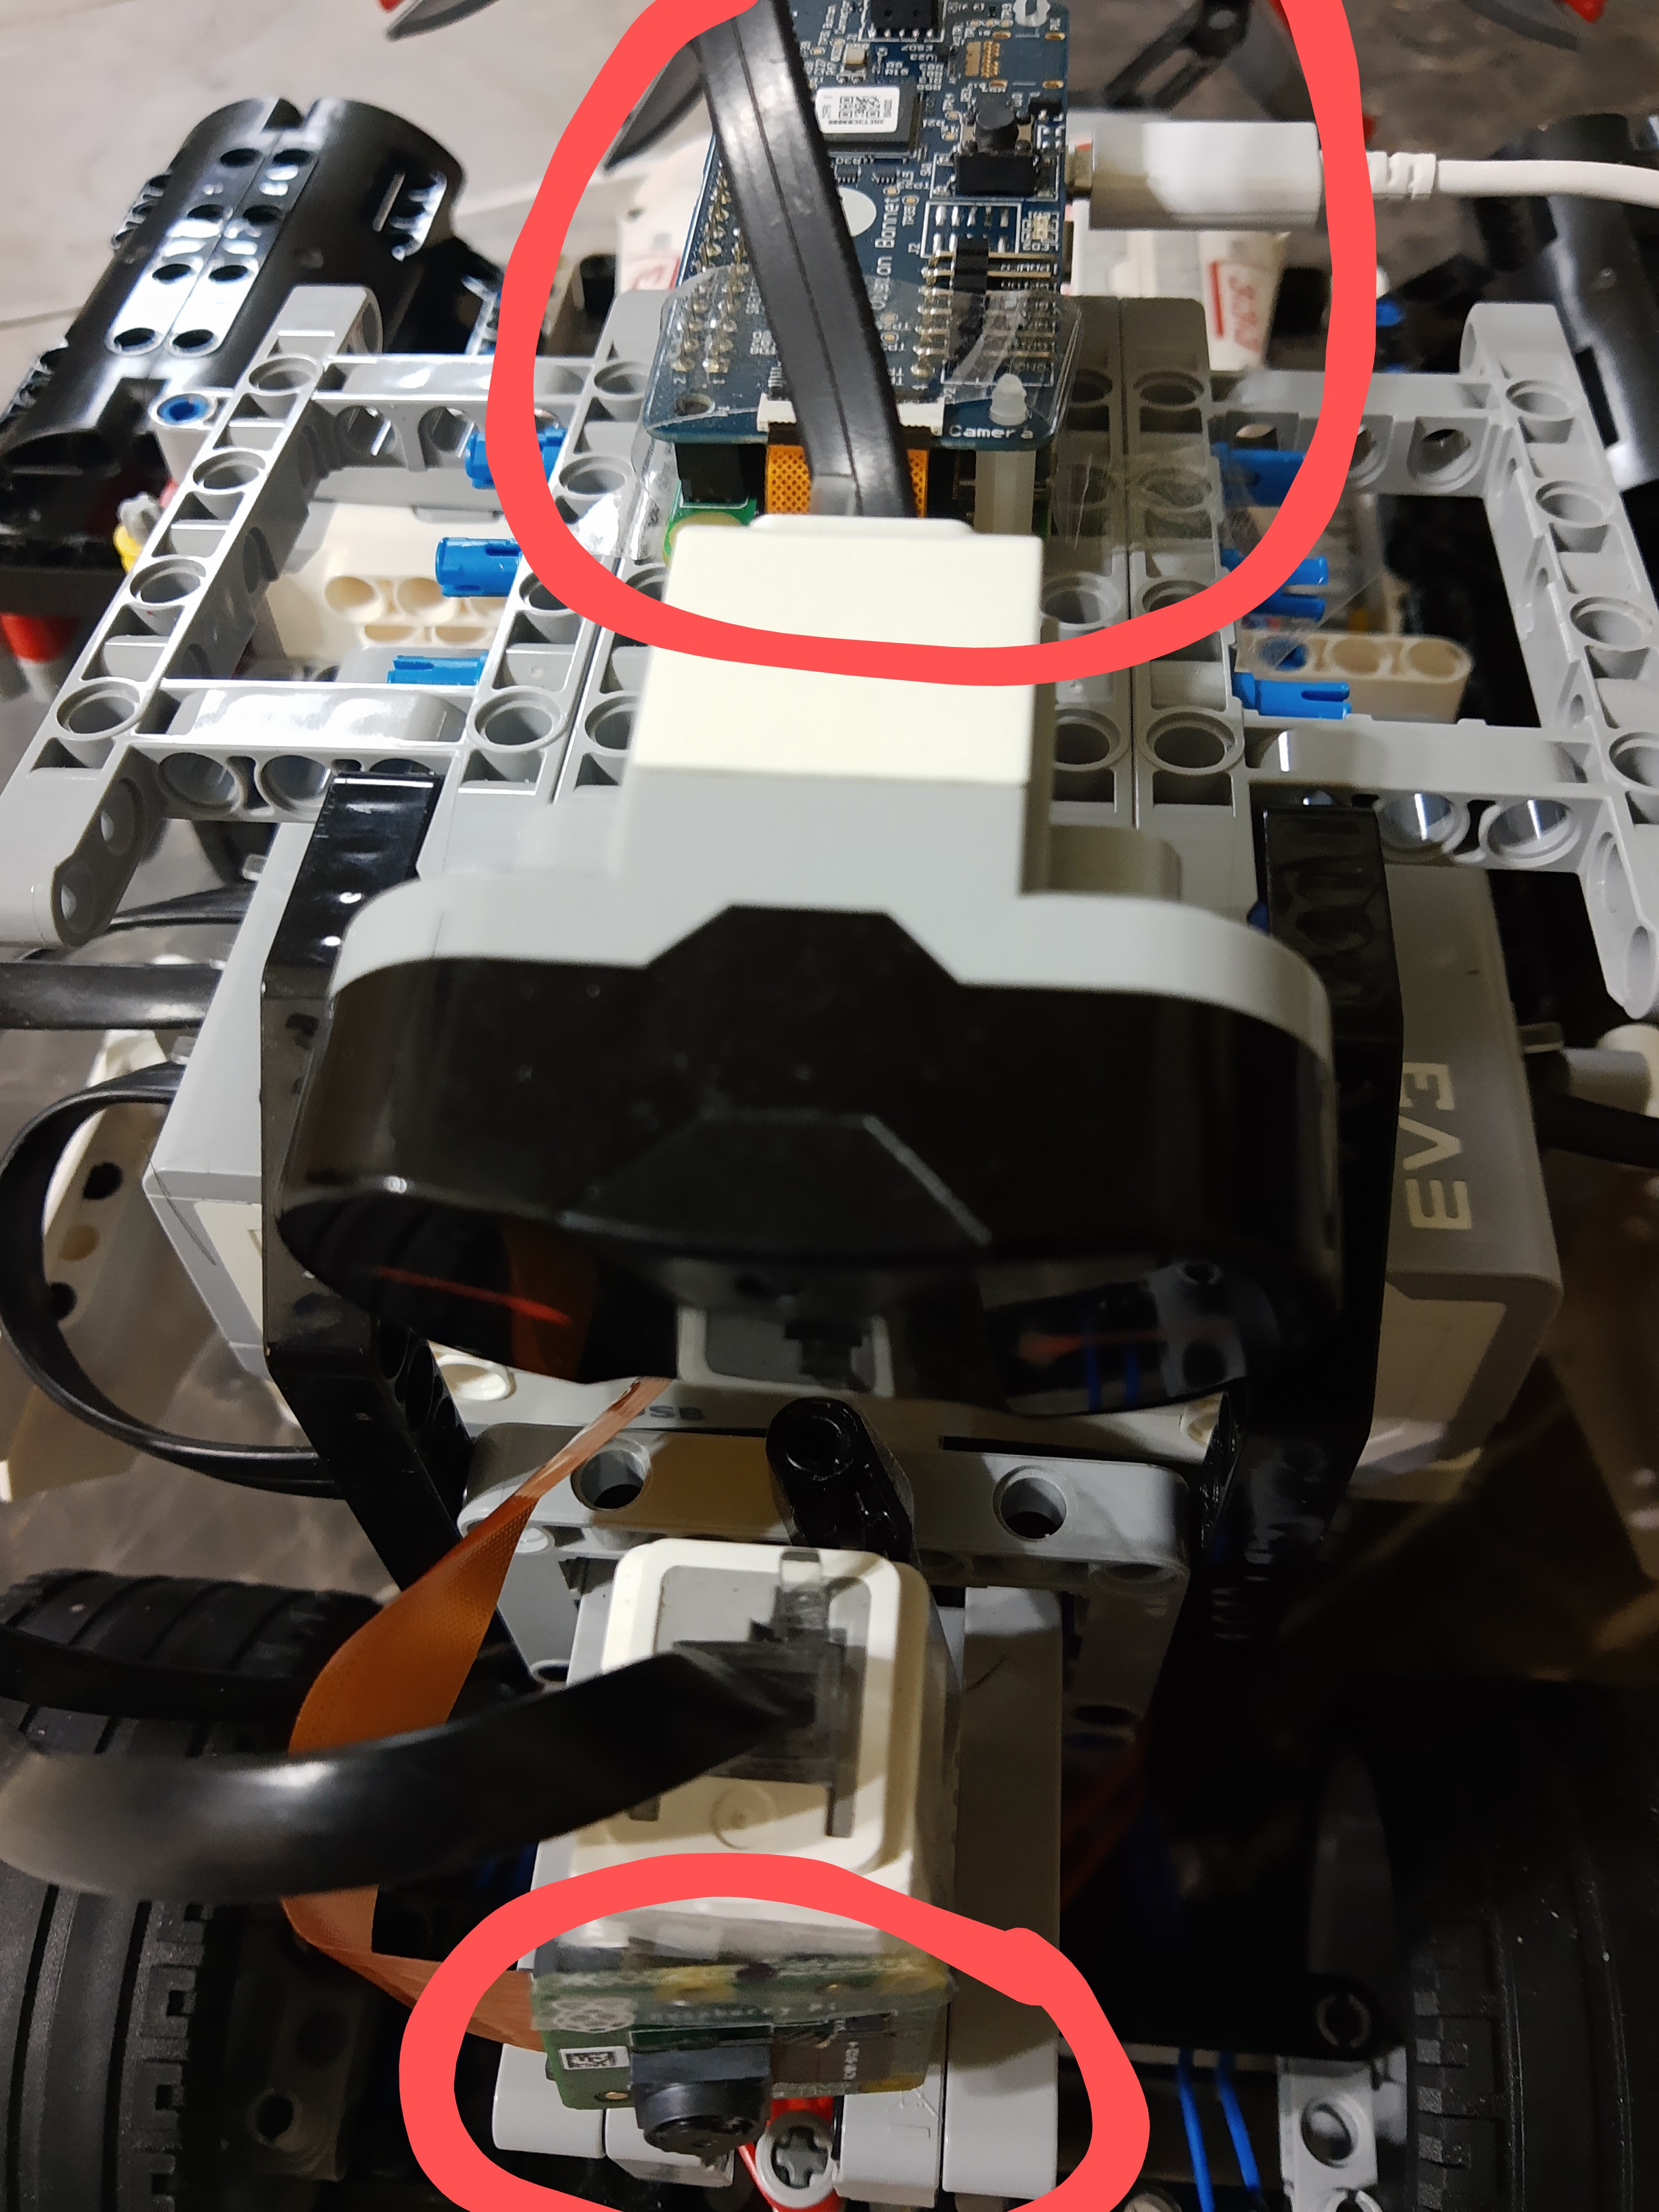
Raspberry Pi and Camera Module Connected to Rover
-
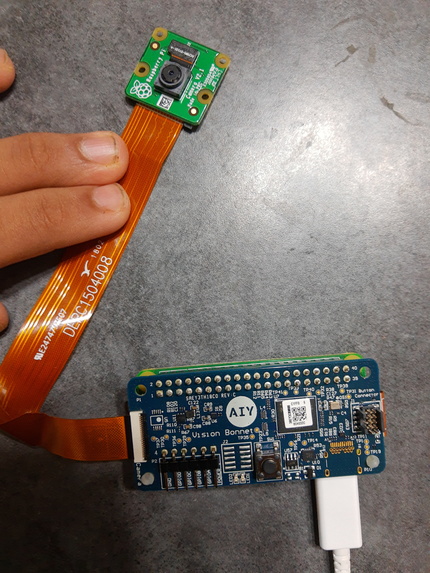
Raspberry Pi and Camera Module
-

Machine Learning Model Detecting Obstacles and Placing Bounding Boxes Over Them
-

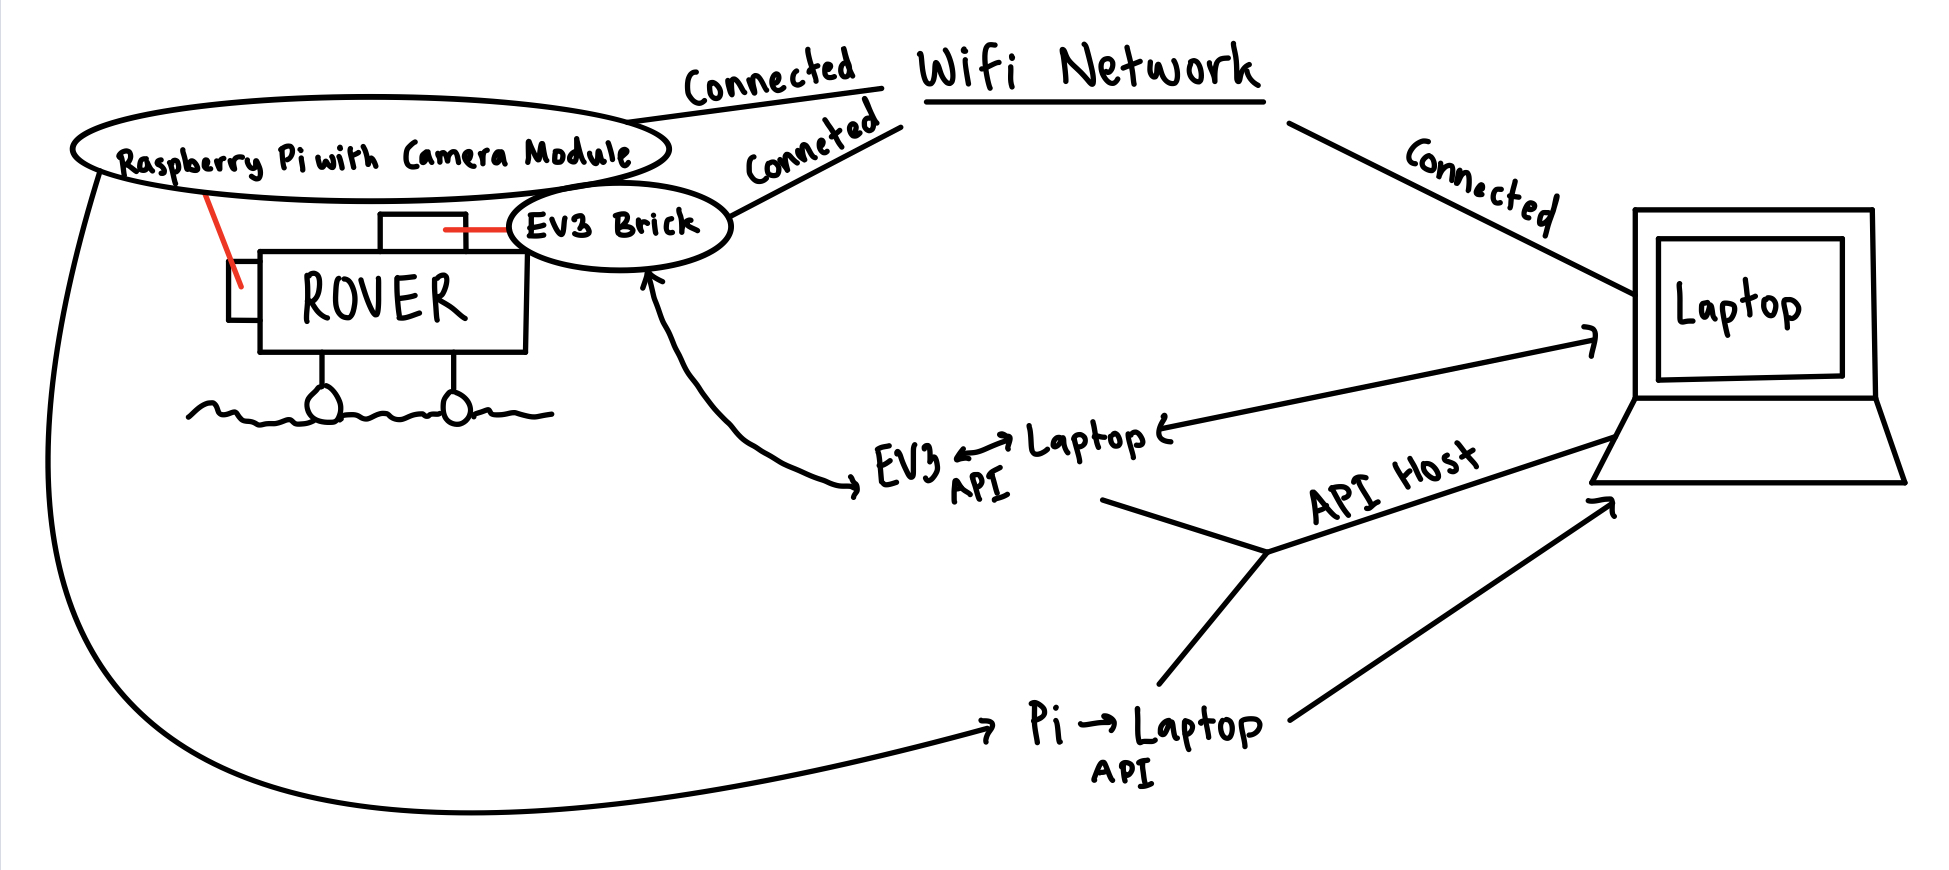
My Amazing Drawing Showing How Everything is Connected
-
Some Code Snippets


Inspiration
I wanted to address the challenge of "Space" that HackBI gave in a meaningful way. Ever since I was young, I have always been fascinated by space rovers. I was amazed how they can be used to help explore different planets in our universe to help us learn what is needed to sustain life.
What it does
The rover I created is can be used to collect data, autonomously drive, upload results for us to view, and explore the final frontier!!!
How I built it
There were many steps required to build my rover and seamlessly connect everything together. First, I started off with building my rover.
To build my rover, I used a Lego Mindstorms EV3 set, along with its extension set. I used two large servo motors (each motor moving one of the back wheels), one medium servo motor (to control the steering mechanism), and an ultrasonic sensor (as a backup to the object detection machine learning model used for autonomously driving the rover). Everything was connected to the EV3 brick, which provided power to the motors and sensors and also told the motors and sensors what to do.
Some important key points about how the rover was built: As seen in the attached pictures, a gear ratio was added to the large servo motors to increase the speed of the rover. Additionally, support beams were added to either side of the back driving wheels to keep them stable. Finally, rubber bands were added to the steering mechanism to keep the steering wheels from unintentionally moving.
Overall, the rover is extremely sturdy and fast - it also looks kind of cool :). A video is attached of the robot just normally driving.
The next step was to use a Raspberry Pi with a Raspberry Pi camera module for taking pictures of the robot's surroundings. I used a Raspberry PI Zero W, along with a Google AIY board and a Raspberry Pi Camera V2.1 for my project. As this was my first time using a Raspberry Pi, I felt very intimated but eventually learned how to use it. First, I flashed the Raspbian OS to a microSD card, adding SSH and auto connecting wifi capabilities, and plugged it into the Raspberry Pi. Then, I booted it up and set up the Pi to allow it to use the camera. After that, I wrote a Python code to take pictures and save them to the local Pi storage, and I was done! It was a lot easier than I initially expected. I finally added it to the rover, as seen in the attached images.
Now that the rover can take images, it is time to use a machine learning model to identify obstacles in the pictures that the Pi camera takes in order to provide details to the EV3 brick with instructions on which motors to move, with what speed, in what direction, etc. The output from the model was used to make the rover autonomous. In order to detect objects in images, I used a ResNet50 model from ImageAI. Once the model was saved, I created a code to take input images, process them through the model, and then produce output images that had bounding boxes over all obstacles detected. The model was highly accurate in detecting objects and obstacles, as seen in the image attached. Using the size of the window, I was able to calculate the relative height and width of the object and translated the parameters into directions for the EV3 brick to help the rover avoid the obstacles successfully.
I wanted to start adding sensors to the rover, which would be able to collect data, but unfortunately, I ran out of time. However, this is something that I will definitely implement in the future.
The final step for this rover was, you guessed it, bringing everything together. I have everything working correctly separately, but none of it matters if each step can't communicate with each other to create a successful product. I chose to create a Rest API for this. Through an API, I was able to communicate between my Raspberry Pi (which takes the images), my laptop (which ran the model), and my EV3 brick (which controlled the motors and sensors on the rover). Note: Attached is an image showing a diagram of everything I am about to explain.
To create a successful communicating rover, I set up two local Rest APIs using Python Flask. One of these APIs was used to post images from the Raspberry Pi (which has a wifi module) and get them using the laptop. The other API was used to post commands and get them using the EV3 brick (which had access to wifi using Bluetooth tethering). First, the Raspberry Pi camera takes a picture. This picture is sent back to the Raspberry Pi Zero and uploaded to the first Rest API using a post command. When the API receives this command, the computer (which is on the receiving end) uses the get method to take this image and store it on the local drive. This image is automatically run through the machine learning model to detect obstacles and their relative size, and from this information, commands are written in a way that the EV3 brick can understand and use. The commands are posted to the second Rest API. After each command is posted, the EV3 brick can use the get method to call and use these commands. Once these commands have been loaded on the EV3 brick, they are used to control the motors and move the rover in a way to avoid obstacles. Additionally, the EV3 brick posts data from the ultrasonic sensor to the second API, which the computer can use to make further logical decisions in the case if the model was to fail. This ultrasonic sensor can sense how close an object right in front of it is, so if it senses that an object is pretty close, the rover will immediately break and back up in the direction it came from.
WOW! It all worked :)
Challenges I ran into
The main challenge I ran into was getting the Pi camera and Rest APIs to work. I was completely new to both of these things, and it was challenging to use them both for something complex. Thankfully, you guys had some wonderful mentors (THANK YOU Patrick Riley and Peter Murphy) that helped me with building the Rest API!
Accomplishments that I am proud of
Honestly, I am proud of everything :) . I was really surprised that in the end, everything worked!!!
What I learned
I learned how to work with Raspberry Pi and Rest APIs.
What's next for Space Rover using EV3, Raspberry PI, and Rest APIs
The next things that I want to do with this project are to first add suspension to the rover (enabling smoother rides), and second, adding the various sensors to measure important data (like temperature, light intensity, humidity, amount of particulate matter, etc). I would probably use Arduino (something I have experience in) to accomplish this.
Built With
- camera
- ev3
- flask
- machine-learning
- python
- raspberry-pi
- restapi


Log in or sign up for Devpost to join the conversation.