-
-
Body
-
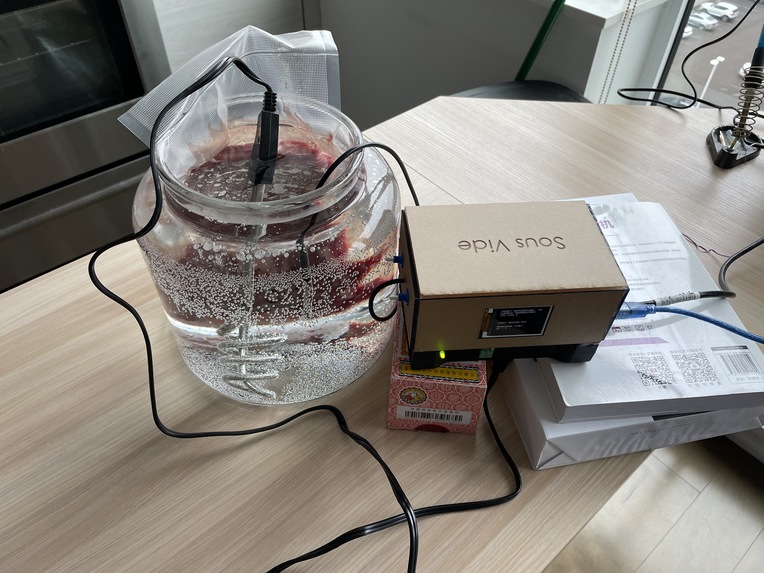
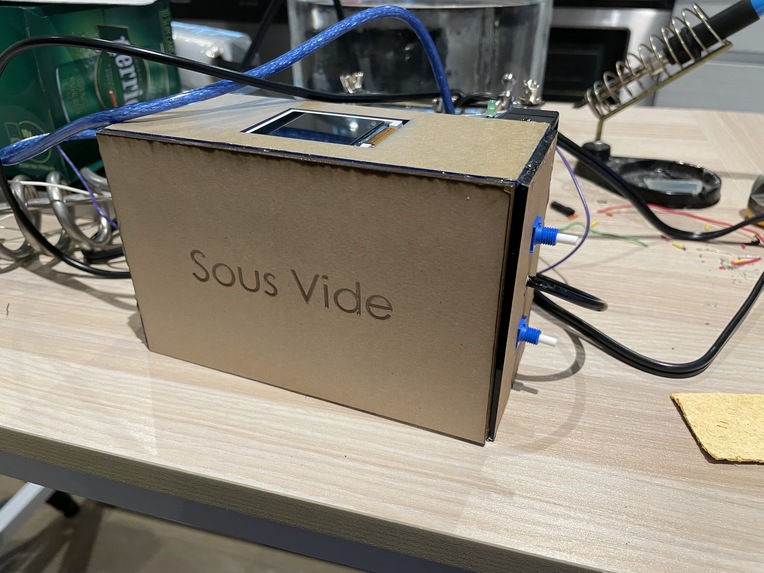
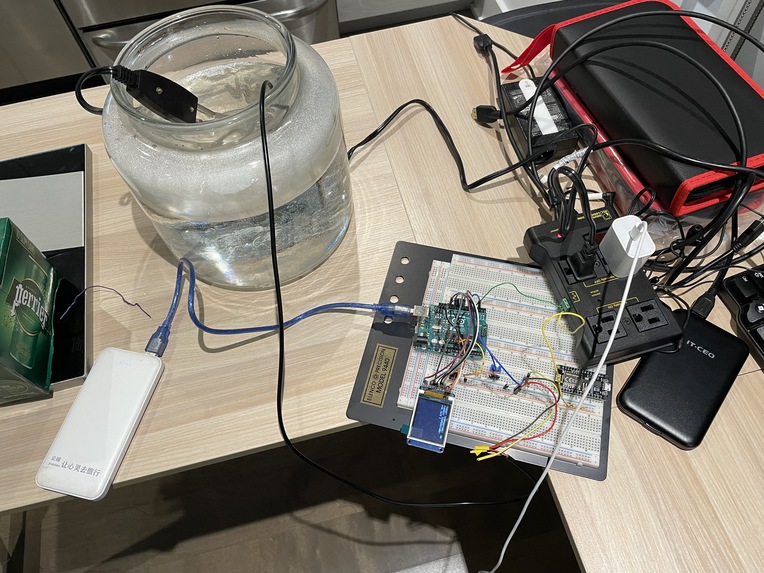
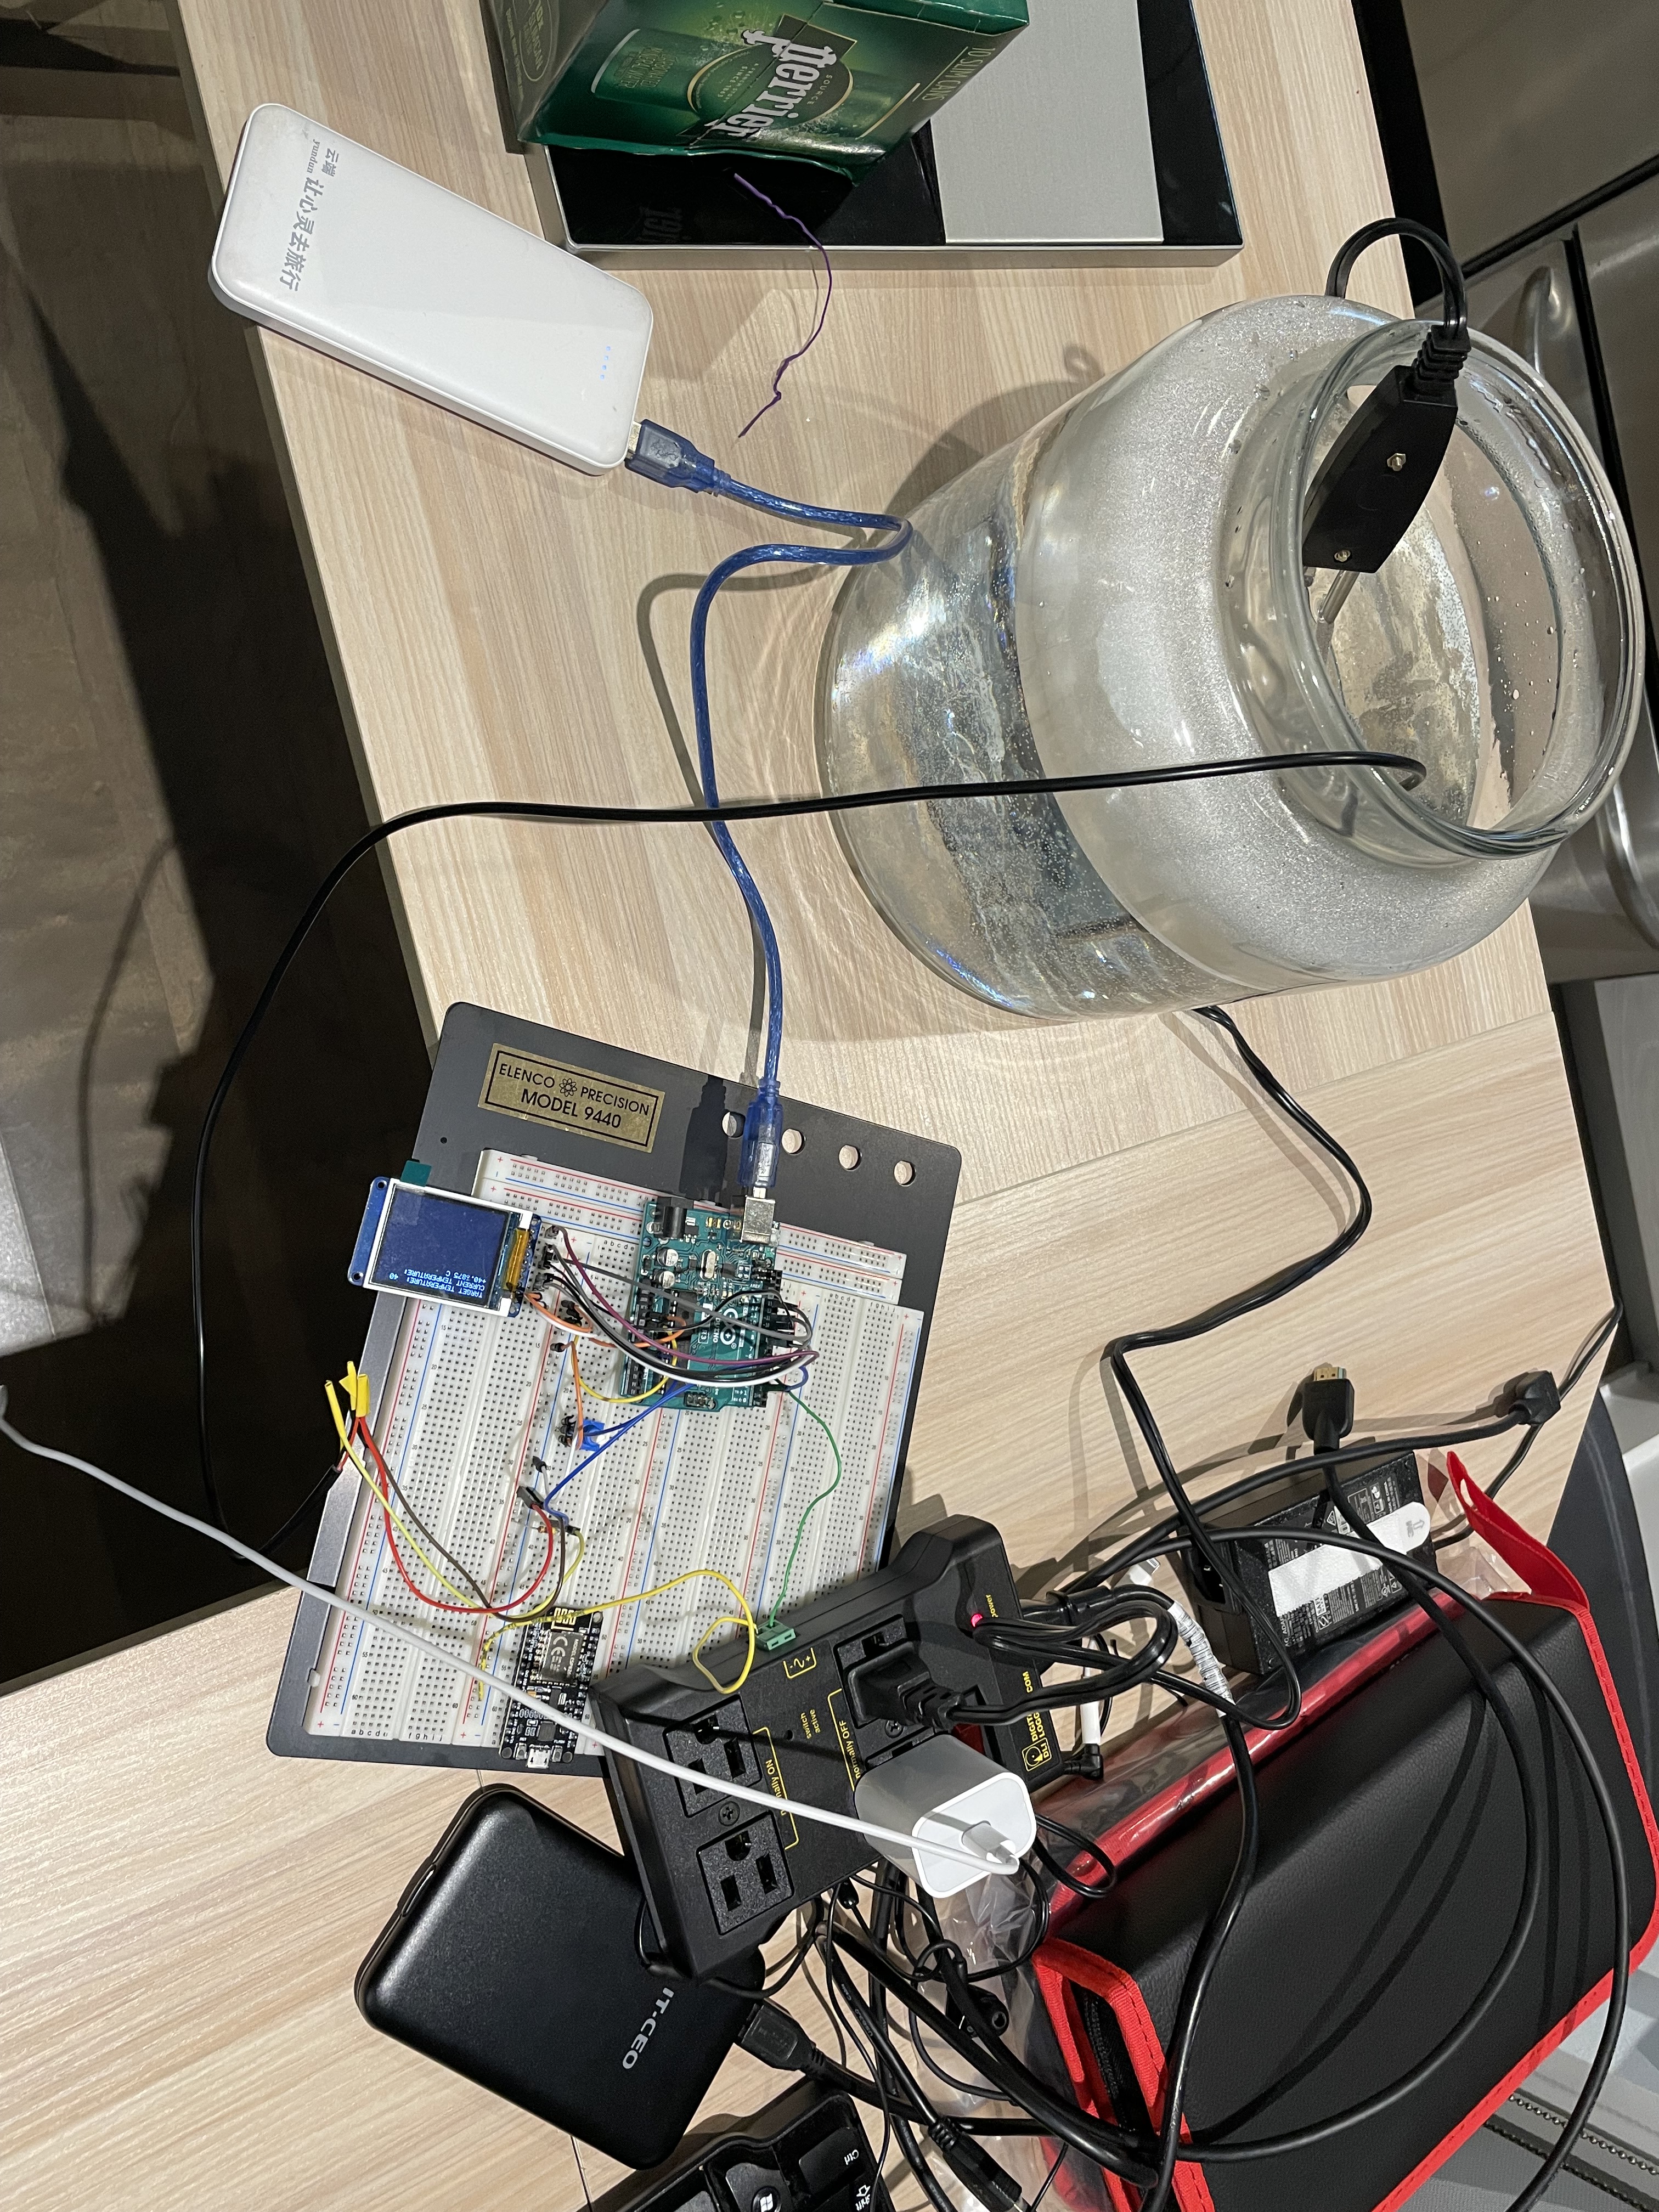
Cooking setup
-
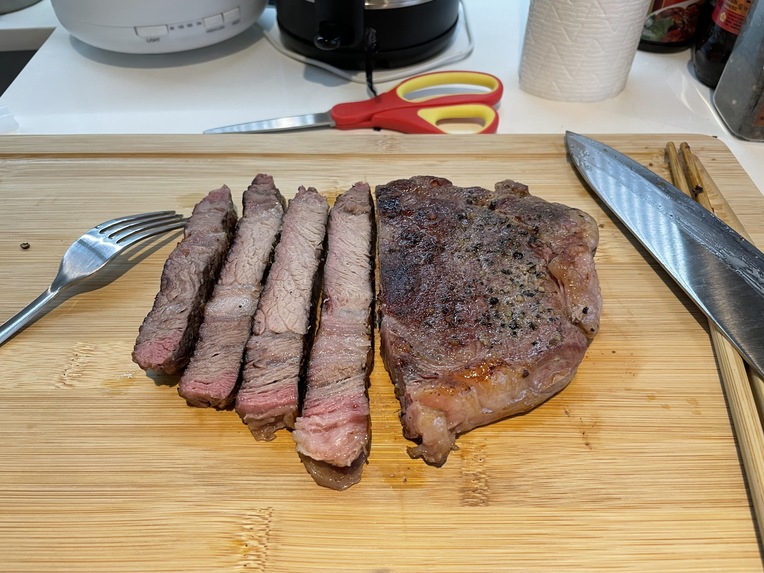
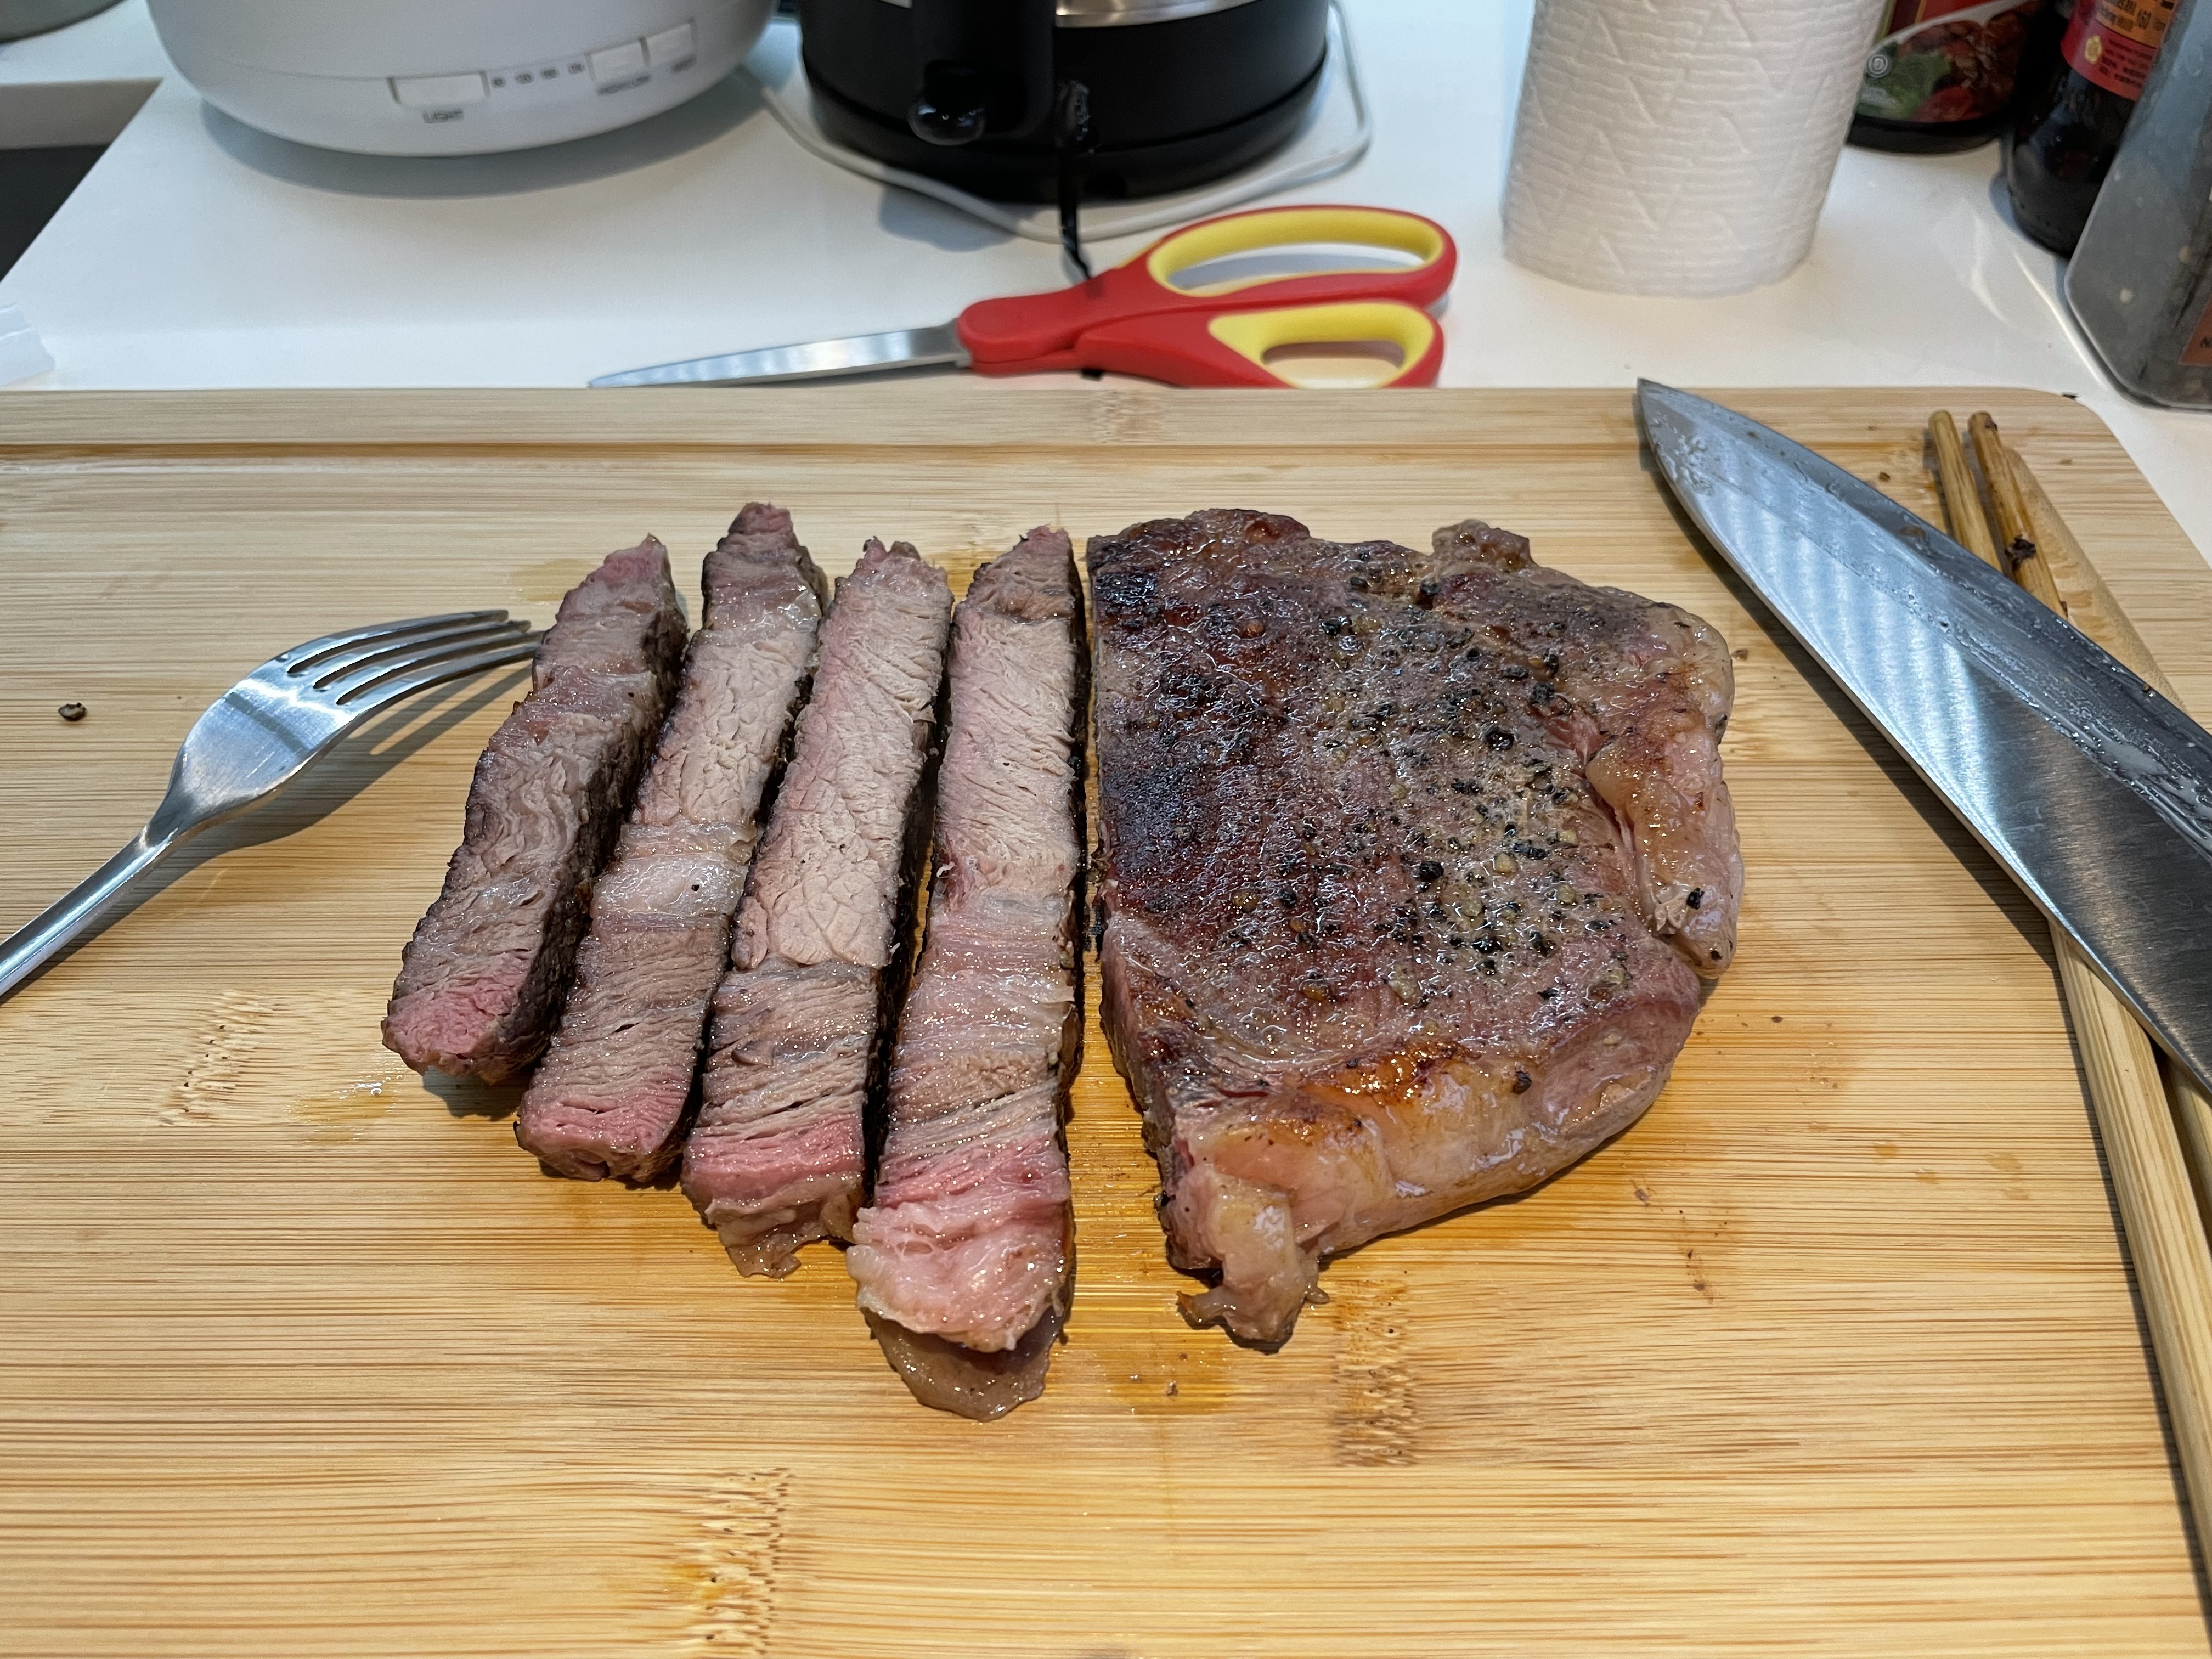
Food demo
-
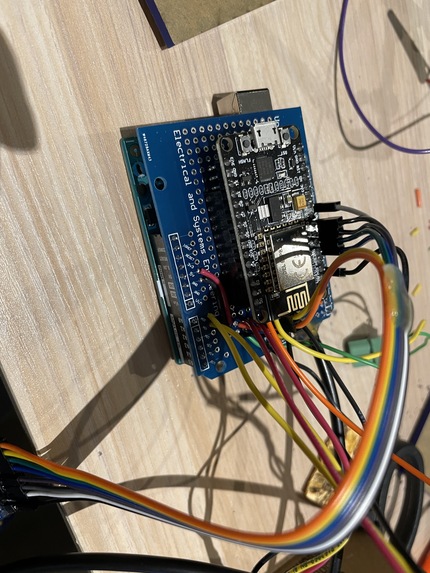
Soldering Process
-
Milestone demo


Overview
The goal of our final project is to build a sous vide. Sous vide, also known as low temperature long time cooking, is a method of cooking in which food is placed in a plastic pouch or a glass jar and cooked in a water bath for longer than usual cooking time at a regulated temperature (usually about 65 °C). Our design makes use of a heat stick and a temperature sensor that constantly monitors the water temperature. We are using Arduino Uno to control the heat stick to maintain water at target temperature, which set by user. Once the target temperature is reached, the Arduino will turn off the heat stick, and when current temperature drops below target temperature, the heat stick will be turned on again. We set our device to have an operation range of 20 to 80 °C, and it turns out that it could control the temperature with in ±1 °C of error, which beat our expectation of ±5 °C of error.
Inspiration
We want to build a sous vide by ourselves because we found that the prices of the sous vides available in the market are as high as hundreds of dollars. If we can build the device with the same function using low-price components, our design will be a competitive substitute for the sous vides in the market.
What it does
How we built it
The core functionality of the sous vide is measuring water temperature and heat it. So I divided this project to two parts: sensors and actuators;
For the sensor part, namely, water temperature sensor, I selected the DS18B20 (see reference 1) because it is widely used in Arduino DIYs and has a water proof version which fits right into my scenario. Besides that, my sous vide will have two potentiometers for user input of target temperature and operation time duration.
For actuator part, the largest challenge comes from how to heat the water. My solution to this problem is using the heat stick. I got one from amazon for 15 dollars (see reference 2), and it claims to have 1000W heat power in 110V AC input. But the next question comes: how do I turn on and turn off an AC device with Arduino digital output? My original thought is using two high voltage rating MOSFETs back to back to conduct AC current, but after researching a bit online, I figured that relay would be a much better solution. After consulting with Kim, I got an IoT relay (see reference 3) from Detkin lab repository, which it has an integrated a relay into a wiring board, and it saved my time trying to figure out how to solder a relay inside a wiring board safely. Besides that, I decided to reuse the TFT LCD screen I got for my lab4 on my sous vide to display target temperature, current temperature and remaining time.
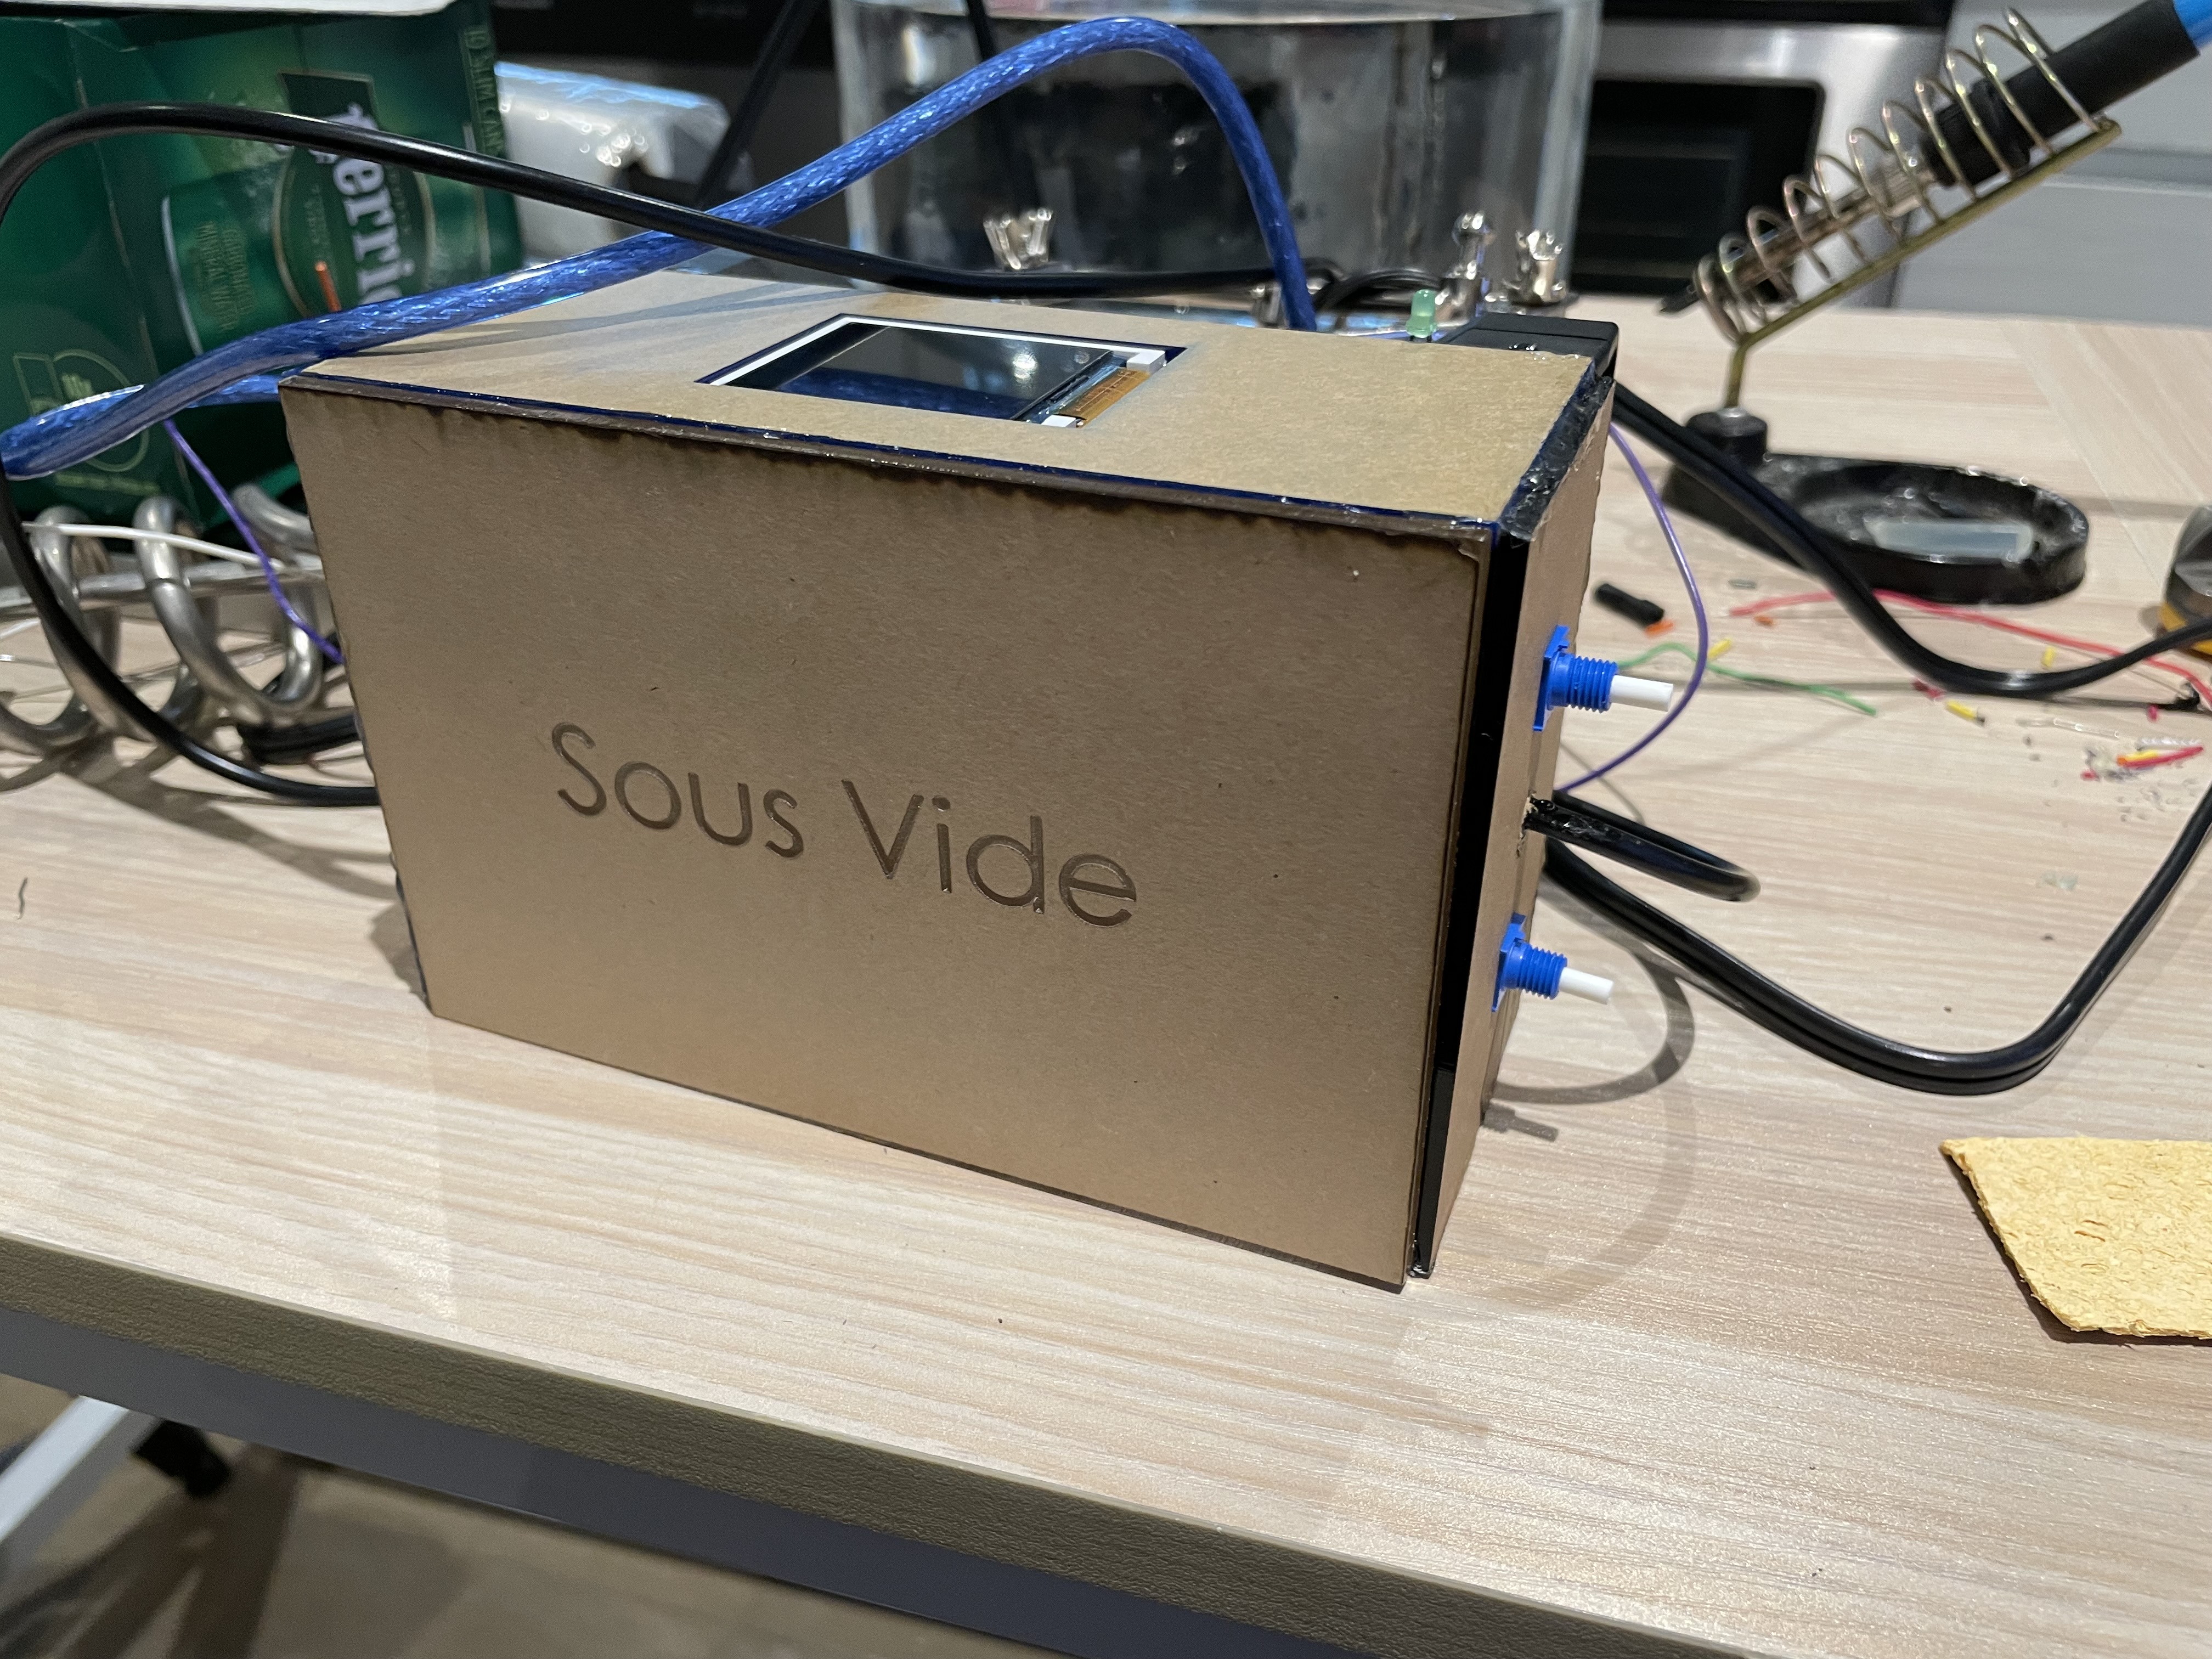
Lastly, I would like to make my sous vide go beyond a final project, that it should have a compact outlook and high reliability. Therefore, making a case for it become necessary. My final decision is to use laser cut Acrylics and hot glue gun to make a case because comparing with 3D printing, laser cutting has advantage of material strength, and also easier to make 2D design.
Challenges we ran into
Figuring out how to interfacing with the temperature sensor is a challenge that I thought it is easy but actually it turns out not at all. All available libraries for DS18B20 sensor online is Arduino code based which we are not allowed to use. Therefore, I read through the datasheet, and some tutorials of it to learn how to interface with its 1 wire bus design.
Accomplishments that we're proud of
I am proud of this device as a product that I could use in my life, rather than barely a course work. I am confident to introduce it to my friends and family and inviting them to use it to make a dish in Christmas party.
What we learned
In this project I have practiced almost every facets that I have learned over the semester in ESE519. For programming with Arduino, I have covered topics including timer, interrupts, ADC, serial and wireless communication. I also experienced to design this thing as a product that I want to sell to someone, and think about what are the functions people need to use and how can I make these functions reliable and easy to use.
What's next for Sous Vide
This will not be the end. The sous vide still have some drawbacks that need to be improved. First of all, the power management. Now I use wall plug to power the heat stick and an USB power bank for the Arduino. It is definitely a redundancy. Secondly, although the IoT relay did a great job of working and testing in this project, it would not be a good idea to use it if I am aiming at building a commercial product. I would turn my head back to AC relays for smaller size, so that I would be able to reduce the overall size of the device. Besides that, I want to integrate the device onto the heat stick to make the entire product into one piece, like a real sous vide does.

Log in or sign up for Devpost to join the conversation.