Inspiration
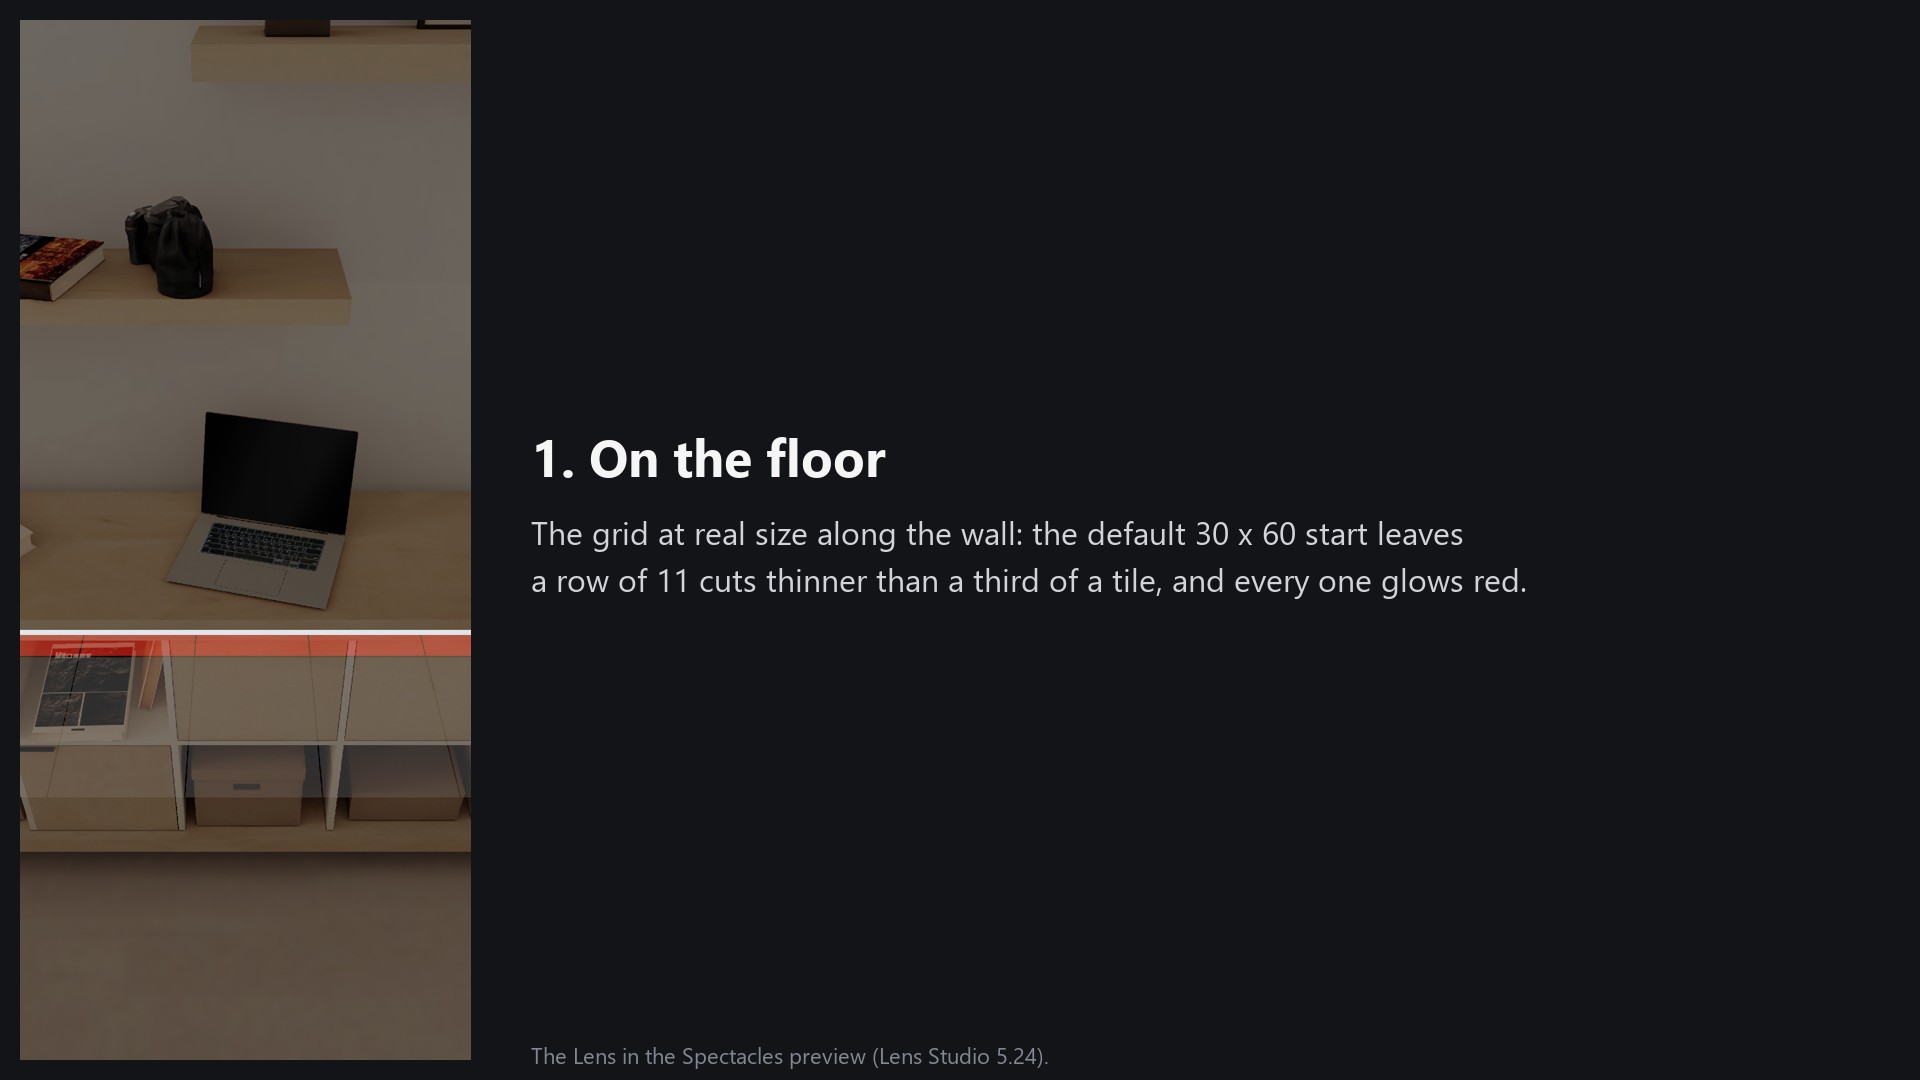
Anyone who has tiled a floor knows the moment: the last row along the wall needs a strip two centimetres wide. It is fragile, hard to cut, and it looks wrong. Tilers avoid it by choosing where to start the first row, usually with a tape measure and some arithmetic on cardboard. Planning apps can draw the layout, but on a phone you then have to map the diagram back onto the room. Glasses can draw the cuts where they will actually be.
What it does
You stand in the room. A full-size tile grid lies on the floor at true scale. Every cut thinner than a third of a tile glows red along the walls and the door threshold.
- Pick a tile size (30x30, 30x60, 60x60 cm) and a pattern (straight, 1/2 brick, 1/3 offset) on a small SPECS UI Kit panel. The grid redraws at real size.
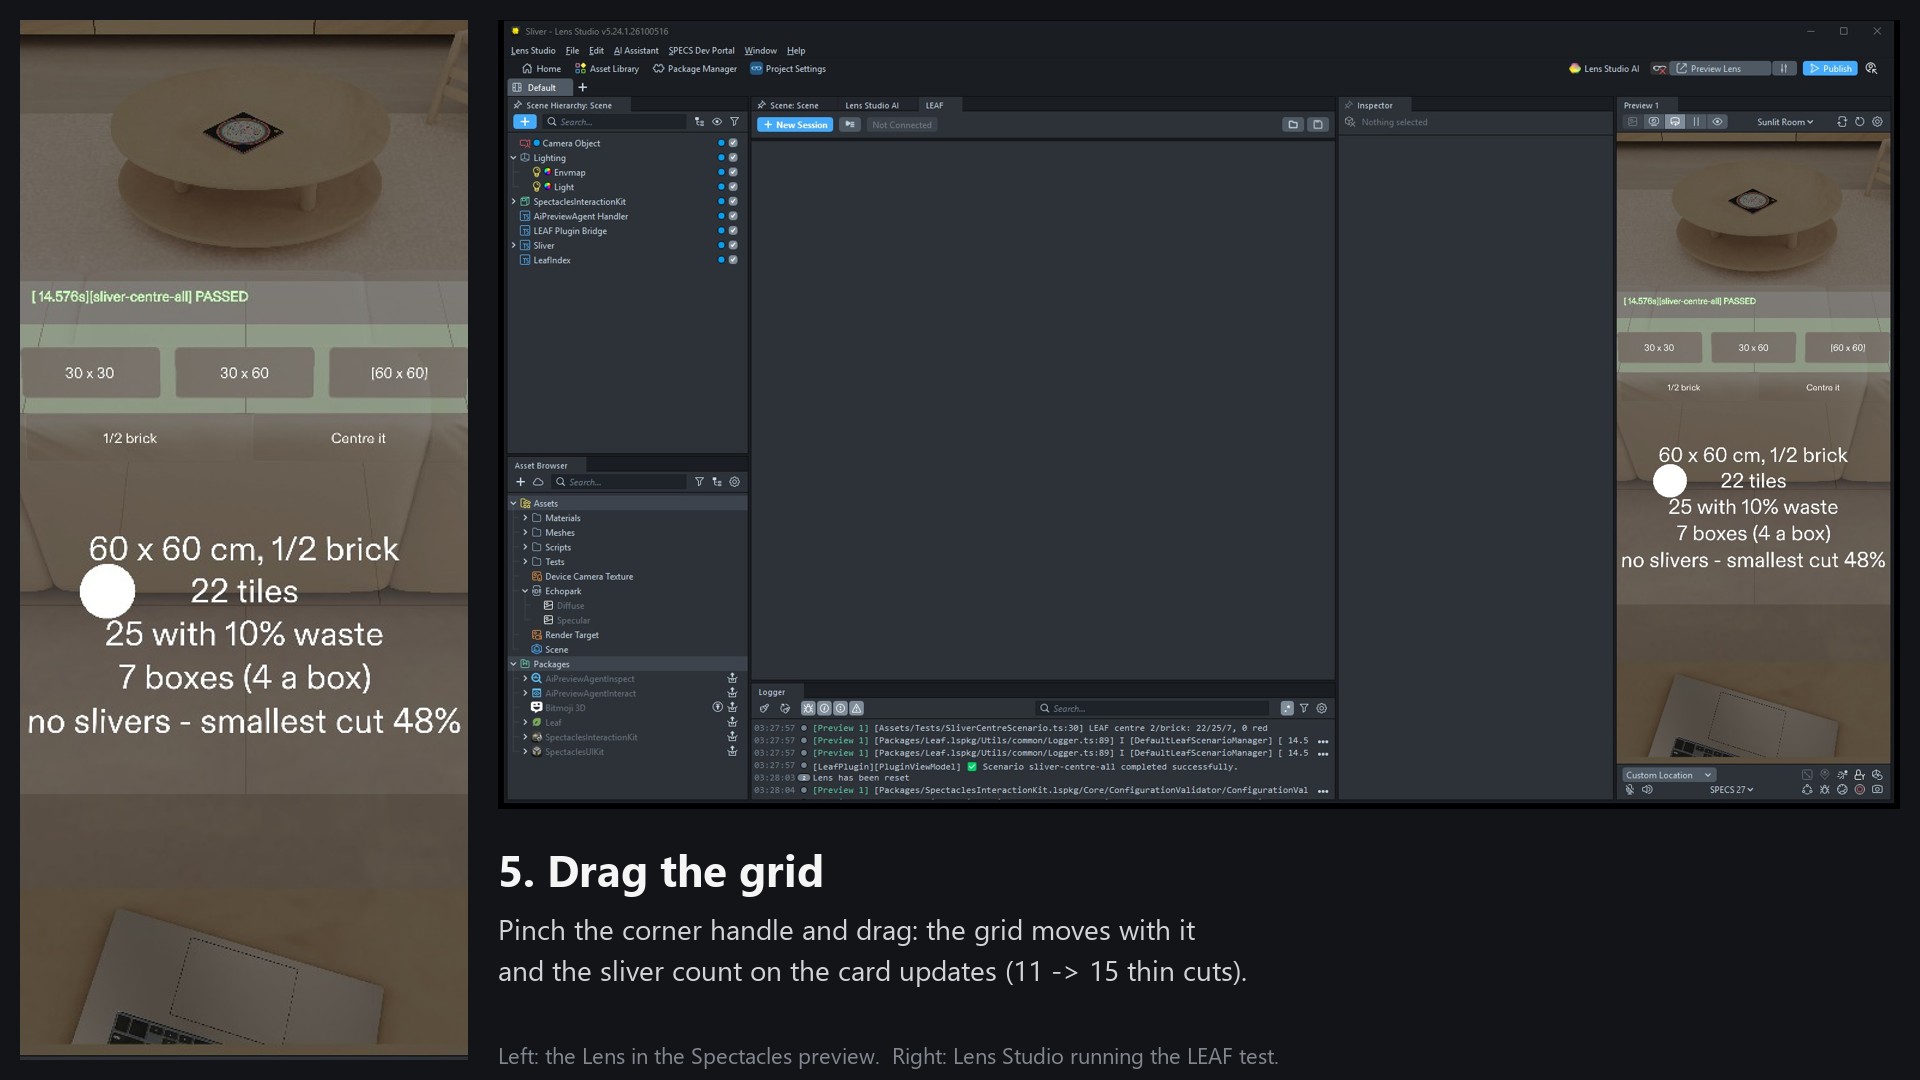
- Pinch the white handle at the grid's corner and drag. The red slivers move and shrink.
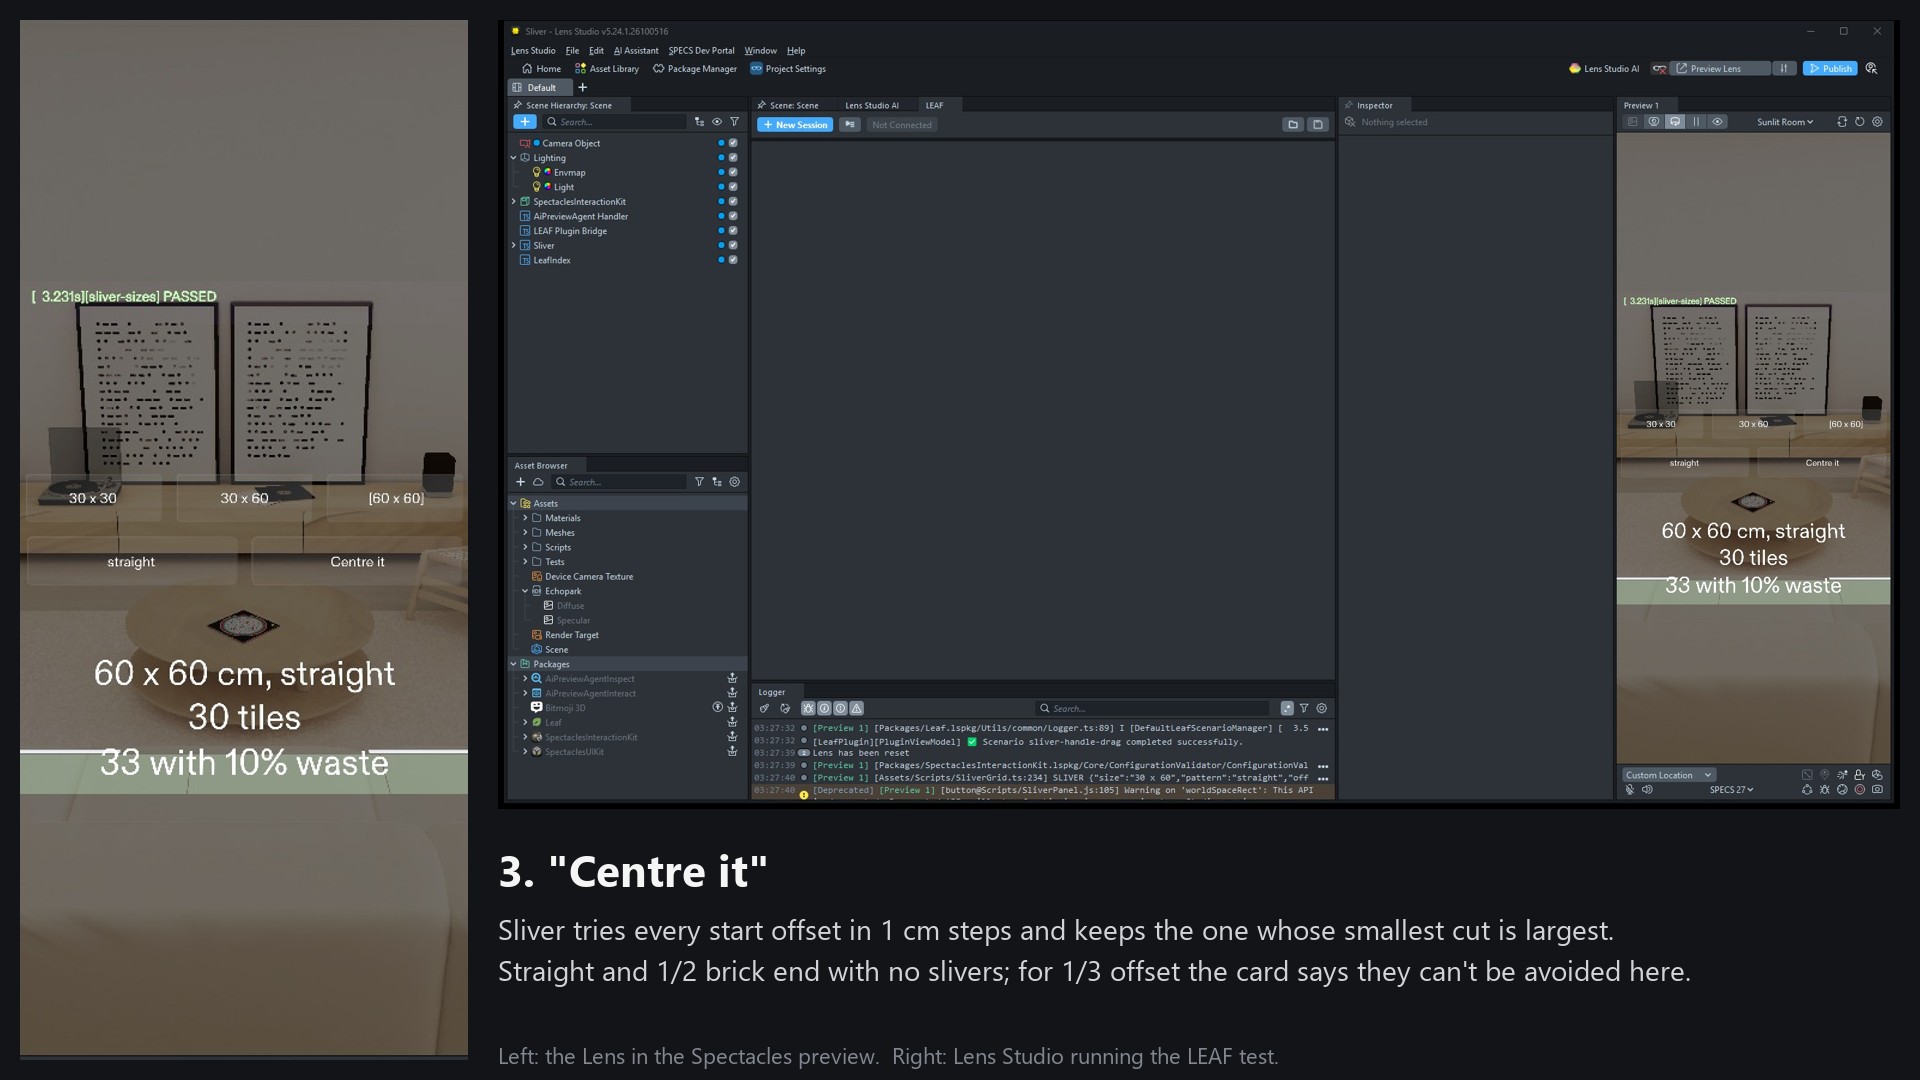
- Pinch "Centre it". Sliver tries every start offset in 1 cm steps and keeps the one whose smallest cut is largest. For straight and brick layouts the red disappears. For 1/3 offset it cannot in this room, and the card says so - which is worth knowing before the tiles are bought.
- A card under the panel reads what to buy: tiles, tiles with 10% waste, and boxes (30x60 straight, centred: 40 / 44 / 6 boxes).
- The panel and card follow you lazily. They hold still while you look at them and only move when they drift more than 25 degrees off your view or you walk 30 cm.
The preview has no real floor, so the room is a labelled stand-in: a 300 x 240 cm virtual floor with walls and a door gap. On device the grid would sit on the world-mesh floor plane.
How we built it
- Plan. The challenge's skill pack (
plan-lens) produceddevpost/design-brief.md: one spatial moment, why glasses, where things live, done criteria, risks, build notes for CLAD. The brief carries a measured table of expected card values for all 9 size x pattern rows, computed bylens-core/layout.js- the layout math written first as plain JS with unit tests, so the Lens and the brief share one source of truth. - Convert. Through the Lens Studio MCP server we followed CLAD's SPECS project-init steps: target platform Spectacles, Device Tracking World camera, SIK 2.0, SPECS UI Kit 2.0 and LEAF from the Asset Library, the SPECS preview.
- Build.
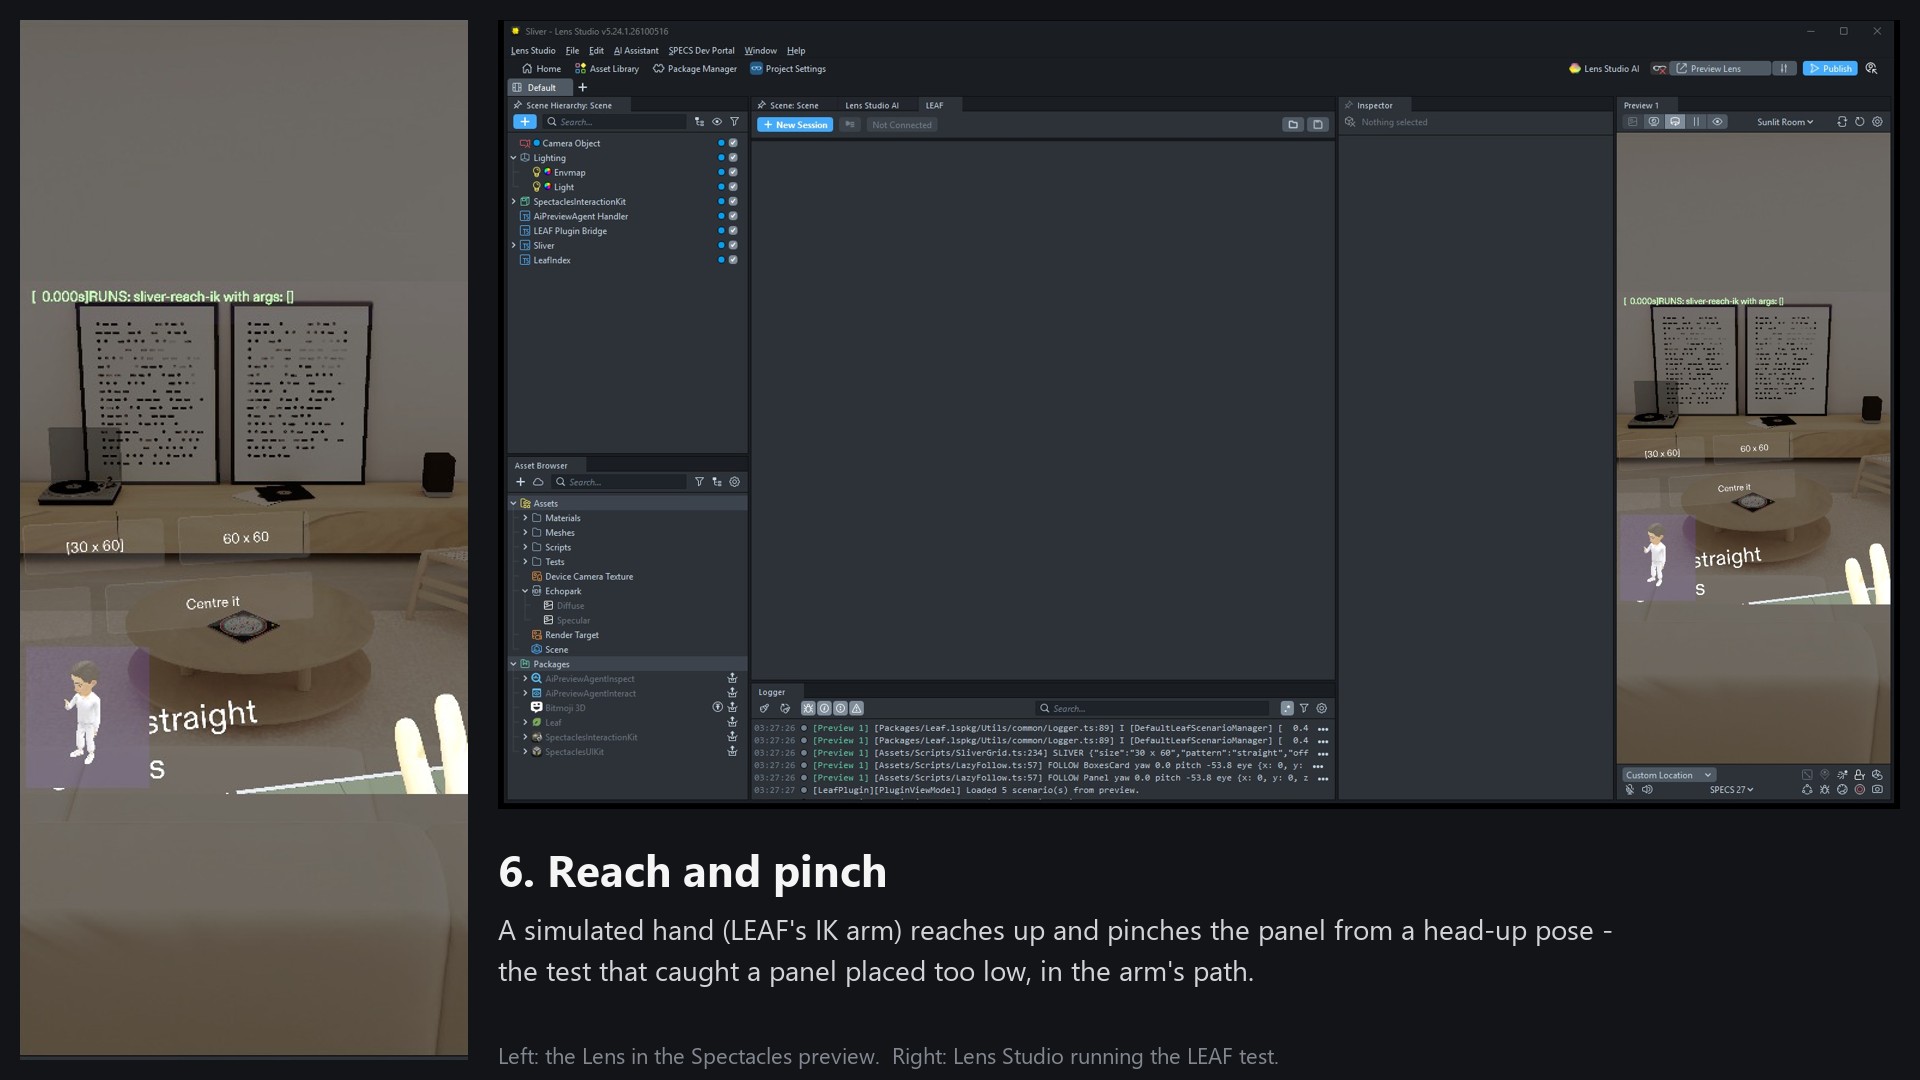
SliverGrid.tsports the layout math verbatim and builds four mesh layers (whole tiles, cuts, slivers, walls) with MeshBuilder;SliverPanel.tscreates the UI Kit buttons at runtime; the handle gets a collider plus SIK InteractableManipulation;LazyFollow.tskeeps the panel in view. The scene is assembled by editor scripts run through the MCP (ExecuteEditorCode), so it can be rebuilt from scratch. - Test. One LEAF scenario per done criterion, run in the preview through the MCP: sizes at true scale, handle drag changes the red pattern, "Centre it" matches all 9 rows of the brief's table, panel and card in view, and LEAF's IK avatar reaching out to press the buttons.
Challenges we ran into
- The IK arm found bugs the pinch tests missed. Our first panel sat 45 cm ahead and 45 cm below the eye. Mouse-pinch tests passed, but LEAF's IK avatar, aiming at a size button, pressed "Pattern" instead: the near row was in the arm's path. Moving the panel to the brief's own spot (80 cm ahead, 17 degrees down) fixed it.
- A panel that runs away when you look at it. The first lazy follow re-faced the eye every frame, so turning your head toward a button moved the button. It now re-anchors only past a 25 degree dead angle or a 30 cm walk, and faces the anchored eye.
- Looking at the floor is out of arm's reach. From the floor-looking pose the panel is beyond wrist reach, so the IK takes the far-field ray. We kept the comfortable 80 cm spot: reach is certified head-up (5/5 LEAF pass), and far-field pinch covers the floor pose.
- The numbers had to match. The first build laid 30x60 tiles sideways and searched 0.5 cm steps, so 30x60 at 1/3 offset centred to 51 tiles and 6 red cuts where the brief said 42 and 2. LEAF's table test caught it.
Accomplishments that we're proud of
- Five LEAF scenarios pass, and the "Centre it" test checks all 9 rows of a table written before the Lens existed.
- The 1/3 offset result: Sliver tells you a layout cannot avoid slivers in your room, instead of pretending it can.
- The whole scene is rebuilt by scripts through the MCP; nothing depends on hand-placed objects.
What we learned
- Test with the body, not only the mouse: the IK reach test was the one that found placement bugs.
- Real scale is the point and also the constraint. A 3 x 2.4 m floor never fits a 37 x 32 degree view, so the card and panel have to stay with you while the grid stays on the floor.
What's next
- Use the SPECS world mesh for the real floor plane and wall lines instead of the stand-in room.
- Irregular and L-shaped rooms, diagonal layouts, offcut reuse.
- Wall tiles: the same sliver problem, standing up.
AI tools used
Designed and built with Claude Code (Anthropic) as the coding agent. The plan-lens interview
was answered by the agent from its own plan; Claude wrote the layout math, the Lens scripts, the
editor build scripts and the LEAF tests, and drove Lens Studio through its MCP server. All code
was written during the submission period. The demo video has no narration: captions carry it,
and every shot is real footage of the Lens in the Lens Studio 5.24 Spectacles preview.
Built With
- claude-code
- javascript
- leaf
- lens-studio
- mcp
- spectacles
- spectacles-interaction-kit
- spectacles-ui-kit
- typescript
