-
-

Jira CFG
-

Jenkins
-

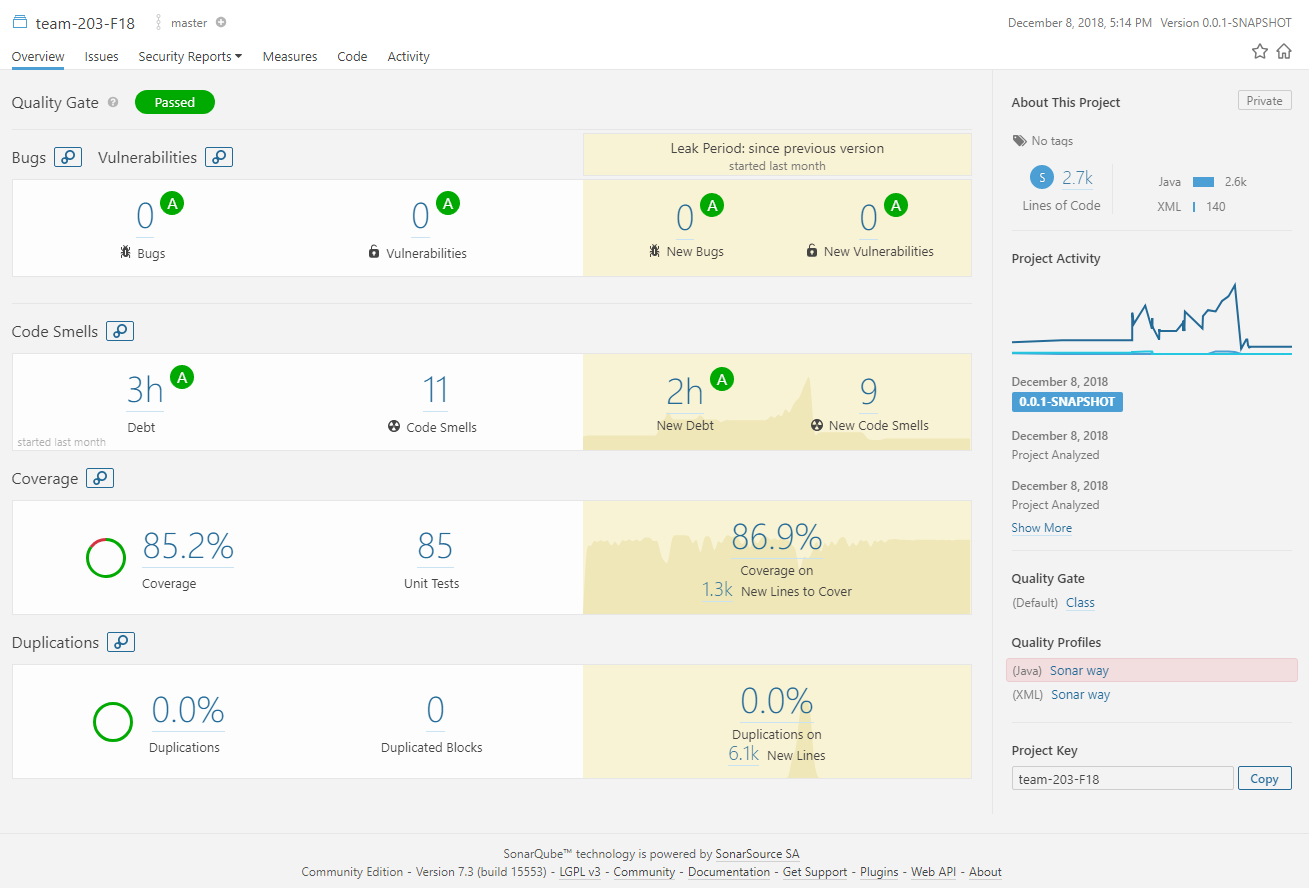
SonarQube
-

Slack Git Integration
-

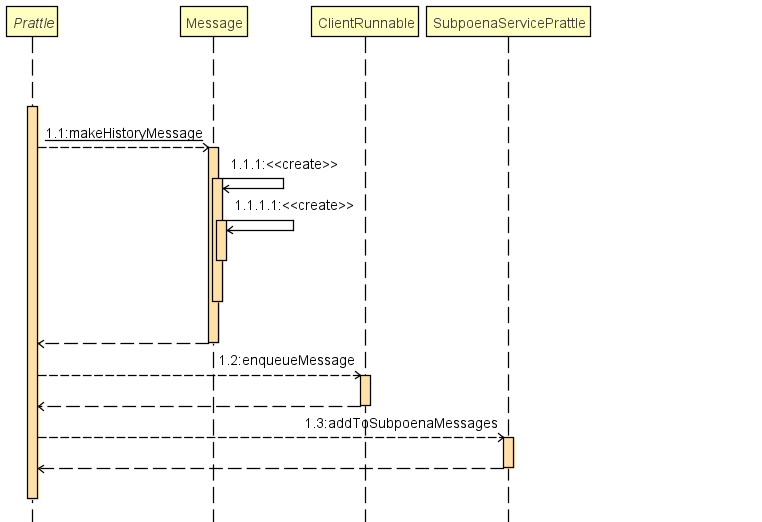
Subpoena
-

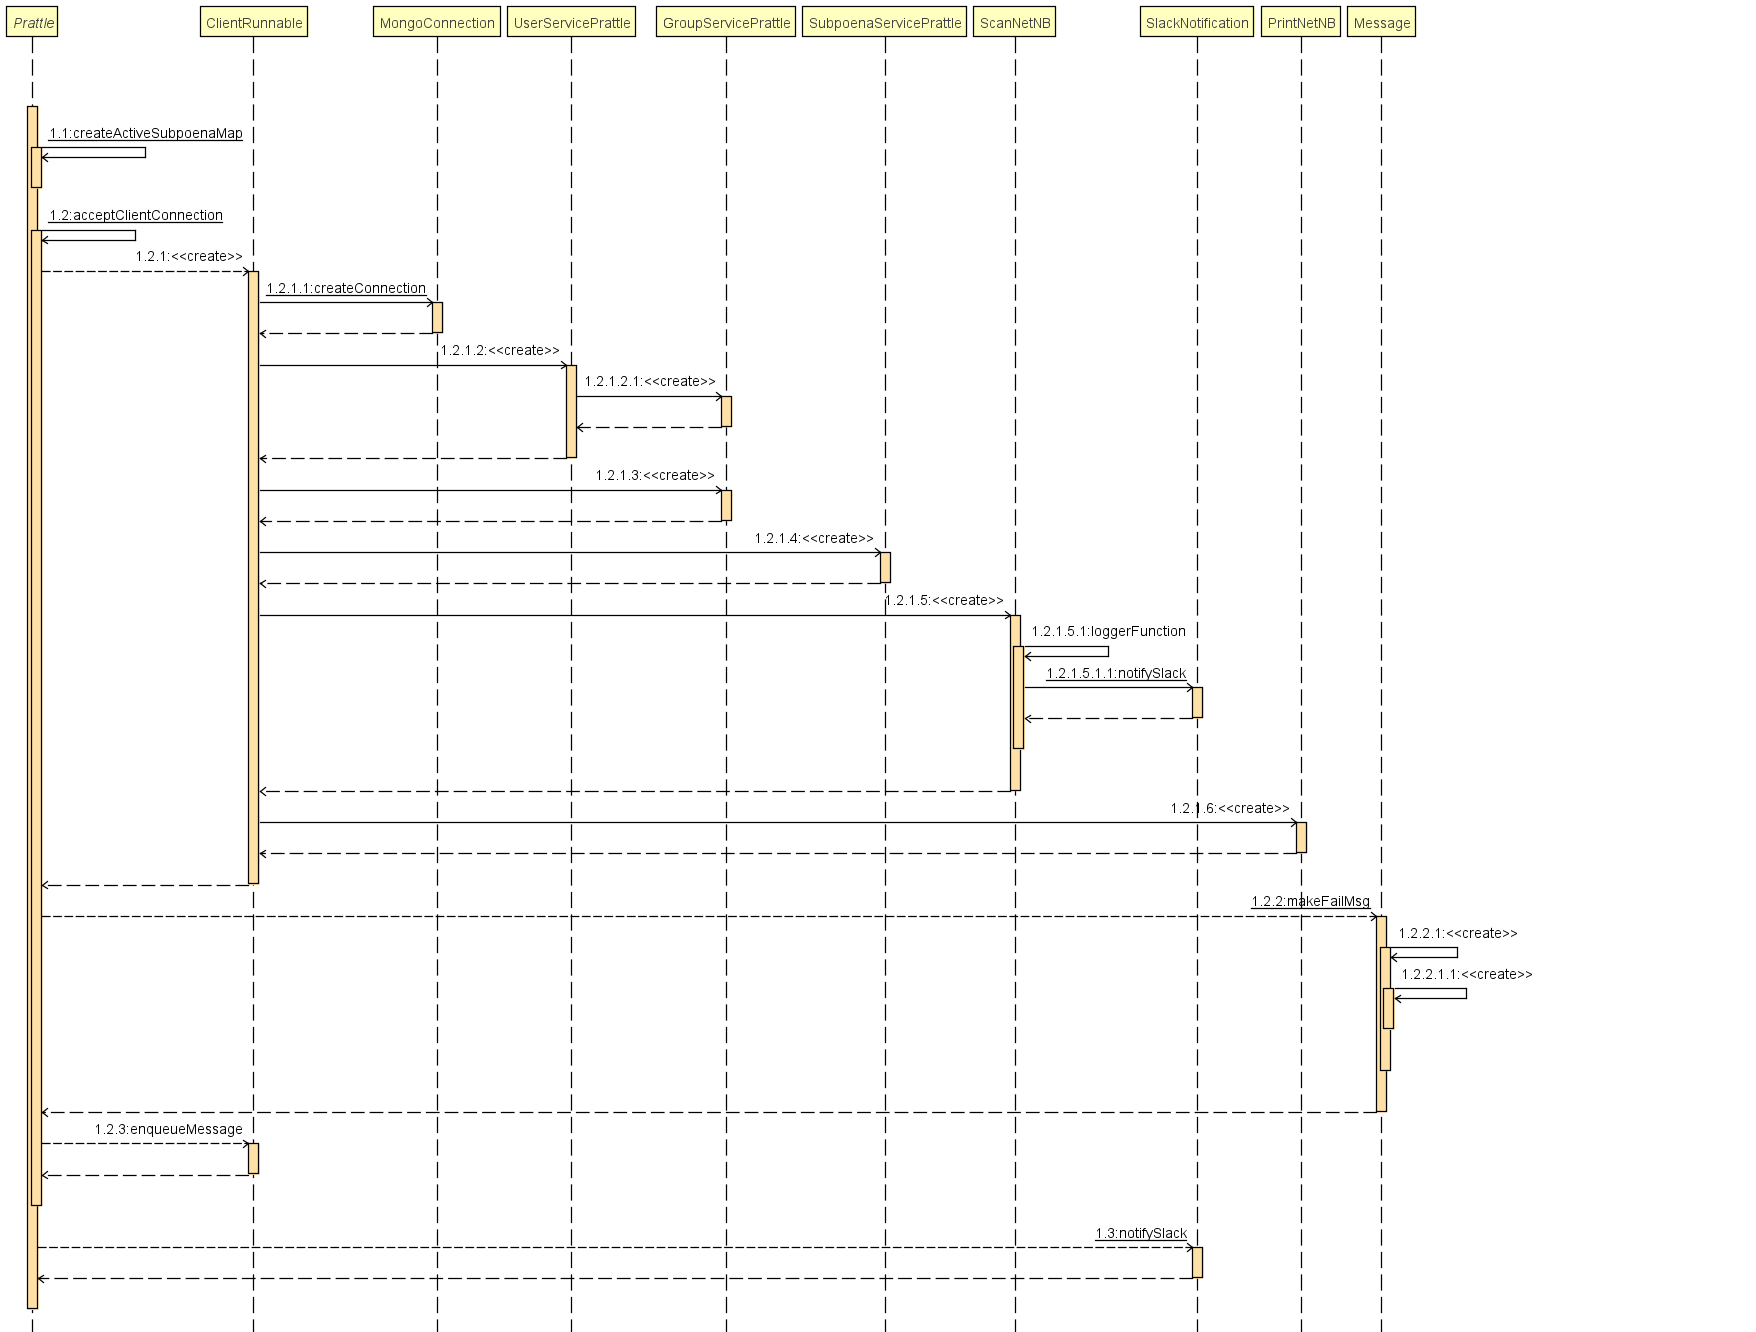
Server UML
-

Slick Bot
-

Broadcast Subpoena


Team-203-F18
Team repo for Team 203 - Fall 2018
Members
- Akshay Sadarangani
- Chetan Mahale
- Nipun Midha
- Peter Mascarenhas
Live AWS System
Link
ec2-35-166-190-64.us-west-2.compute.amazonaws.com
Port
4545
Usage
From the Chatter root folder (where the pom.xml is located), run the following maven command:
mvn exec:java -Dexec.mainClass=edu.northeastern.ccs.im.chatter.CommandLineMain -Dexec.args="ec2-35-166-190-64.us-west-2.compute.amazonaws.com 4545"
Testing
After running the command and entering a username, send one of the reserved messages such as Hello message to get a response back from the server
YouTube Videos
Relevant Files
All relevant files can be found under the Final Presentation folder
Sample Commands
Private Message
Send a 1:1 PM to anyone using their username
PRIVATE <username> <message>
Group Message
Send group messages to all members of a group that you belong to or own:
GROUP <group name> <message>
Queue unread messages:
Messages will now be queued as unread messages if a user is offline. When this user logs in he/she will see his unread messages on the UI under the Unread Messages tab
TEST scenario: Login as a user. Send private message to an offline user.
Login as offline user. View unread messages.
Same applies to Group messaging
Recall messages
Every time a message is sent, a success message is delivered along with the message ID. The user may use this ID to recall the message sent.
Only the message’s sender may recall the message.
If the user is offline and hasn’t received the message the message is deleted.
If the user is online then the message is edited to Recalled
Use the following command to test
RECALL <ID> “user” <recepient> //To recall user messages
RECALL <ID> “group” <recepient group> //To recall group messages
Note after successful recall the message is removed. You can check this by logging in as the user and seeing his history messages.
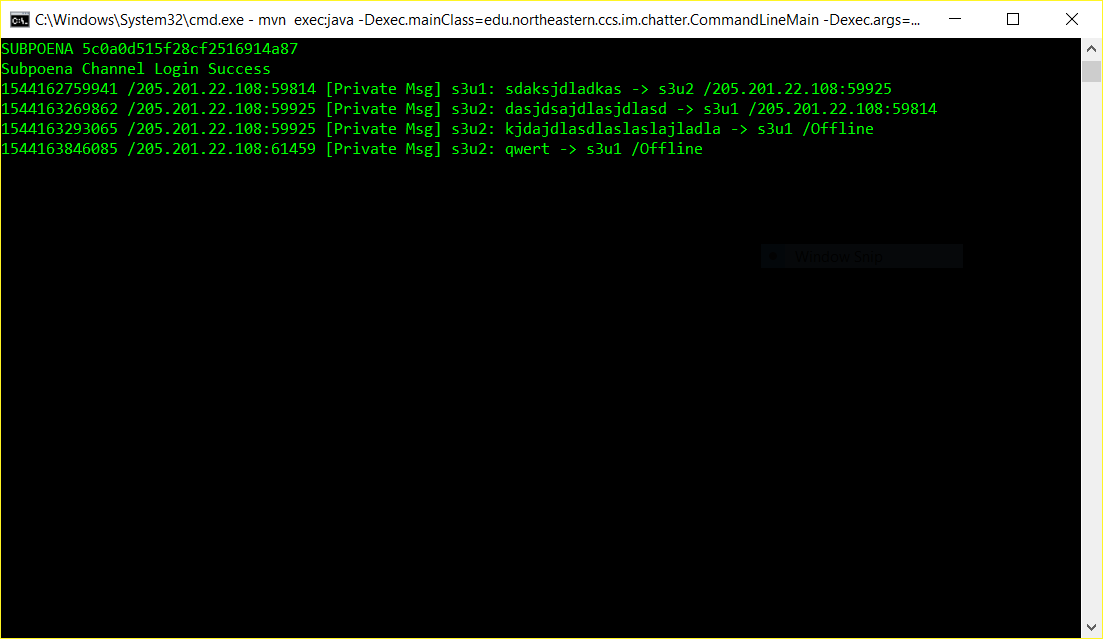
CALEA compliance.
You will notice that all messages are wrapped with leading sender IP and trailing recipient IP
This is for CALEA compliance and only visible either directly in the database or by fedaral agencies as in the case of subpoenas.
Note: Broadcast messages will always show associated IPs.
Parental Control
This feature can be turned on/off for a user. If this feature is turned on and the user receives a vulgar message the message is edited to remove vulgar language. The vulgar word is appended with **** irrespective of the length of the word.
To turn parental control on, run the command
PARENTAL_CONTROL <on/off>
This also happens without delay.
Searching of Messages.
This can be done by the command
SEARCH <“sender/receiver”> <name> // SEARCH where (“sender”/ “receiver”) is <name>
This will list all the messages where sender/receiver is <name>
This can be also be done for Subpoena messages.
JMeter has been tested for MongoDB and we got stuck with thoroughly testing chatter.jar. We managed to get some stats but they are not accurate. It was really hard to send command line messages to Jmeter but this was tested for MongDB( our backend)
Subpoena
There are 3 types of subpoena.
- All communication of one user
- Between two users
- A group
Subpoena can be created with the following command
SUBPOENA_USER <firstUsername> <secondUsername> <from_date> <to_date> //Date should be of format mm-dd-yyyy
SUBPOENA_USER <firstUsername> all <from_date> <to_date> //"all" is to get all communication of single user
SUBPOENA_GROUP <group name> <from_date> <to_date>
This can be done only in the admin flow. Login as admin using credentials admin/test
An ID is returned when the subpoena is created. Agency can log in using this ID with the following command
SUBPOENA <ID>
Agency is allowed only to login, view messages, search messages and quit.
On logging in, you can see messages arriving in real time and also the history of all communication within the time period. Searching of messages can be done too. See searching of Messages tab.
Environment
Logging can be dynamically turned to different levels namely “ALL”(default) , “DEBUG”,”FATAL”,”WARN”, “INFO”, "ERROR" Logging can only be changed by admin Login as admin using credentials admin/test
LOGGER <on/off>
PS: The logging hierarchy ALL > DEBUG > INFO > WARN > ERROR > FATAL > OFF
More Commands
Use the HELP command to see a complete list of all commands with their appropriate syntax

Log in or sign up for Devpost to join the conversation.