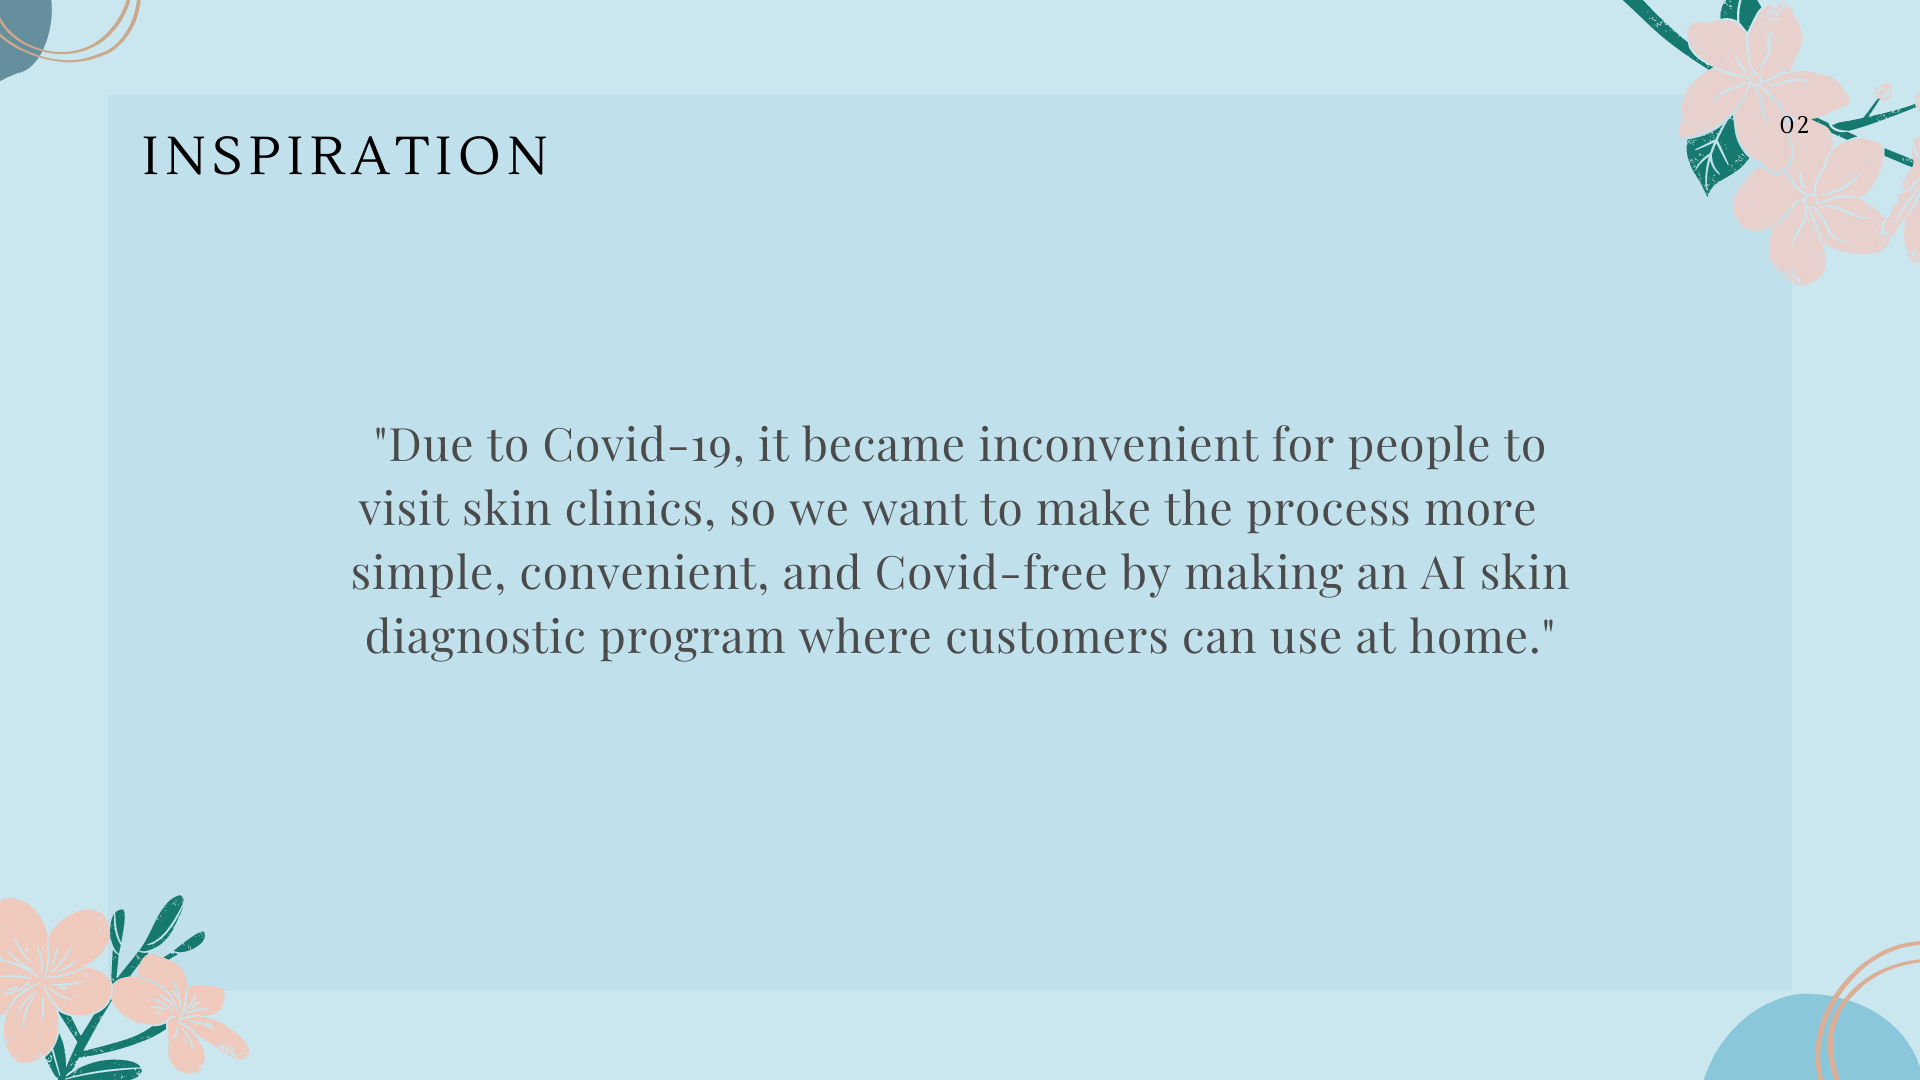


Inspiration
Due to Covid-19, it became inconvenient for people to visit skin clinics, so we want to make the process more simple, convenient, and Covid-free by making an AI skin diagnostic program where customers can use at home.
Problem Statement
People found it inconvenient to attend skin clinics because of Covid-19. Furthermore, some people are unwilling to pay for clinic visits.
What It Does
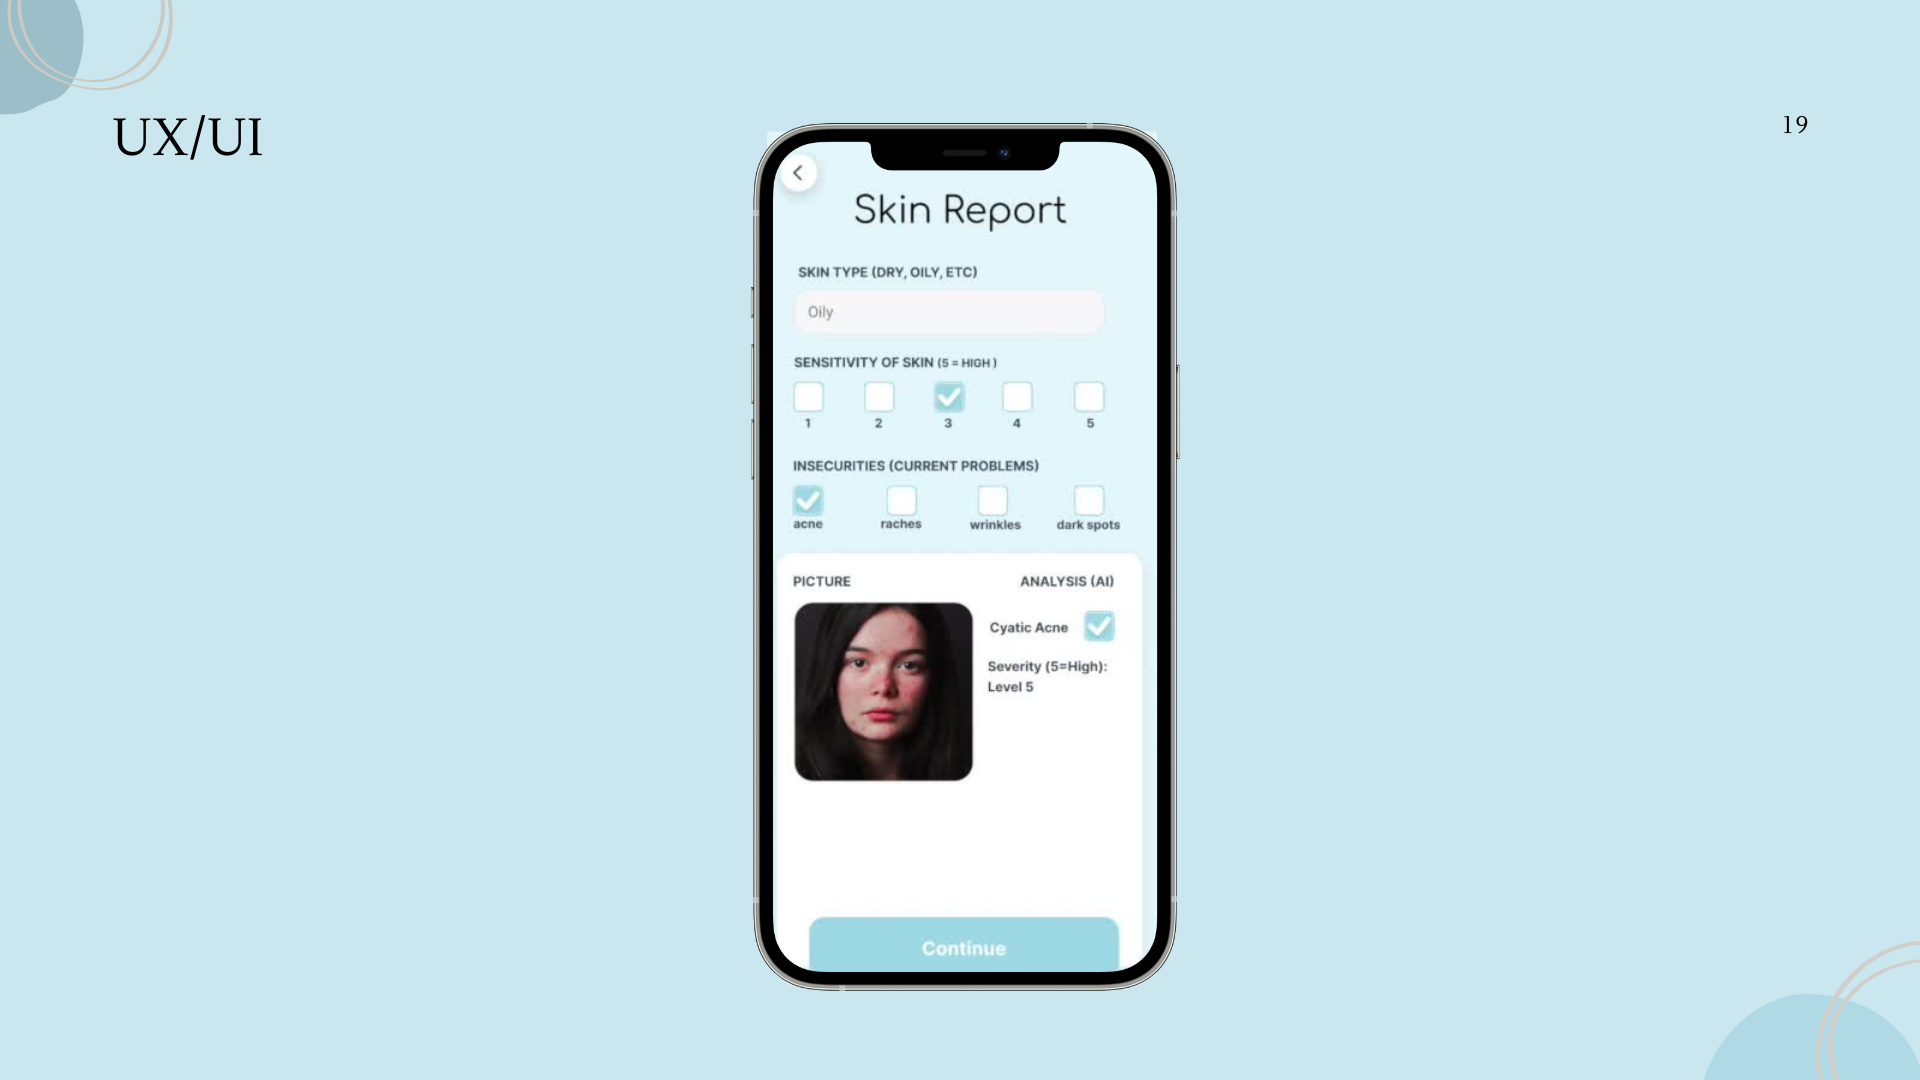
The AI operated program analyses a particular individual's face to see whether they have problems with their skin or not. If they do, the program will specifically point it out, and suggest different skincare products/ services that best match their current skin problems.
How We Built It
*For a better understanding of this section, please visit our presentation, video, and live demo.
** System Architecture, Data Collection and Data Pipeline, Model Architecture (CNN): please refer to images in our presentation for more accuracy.
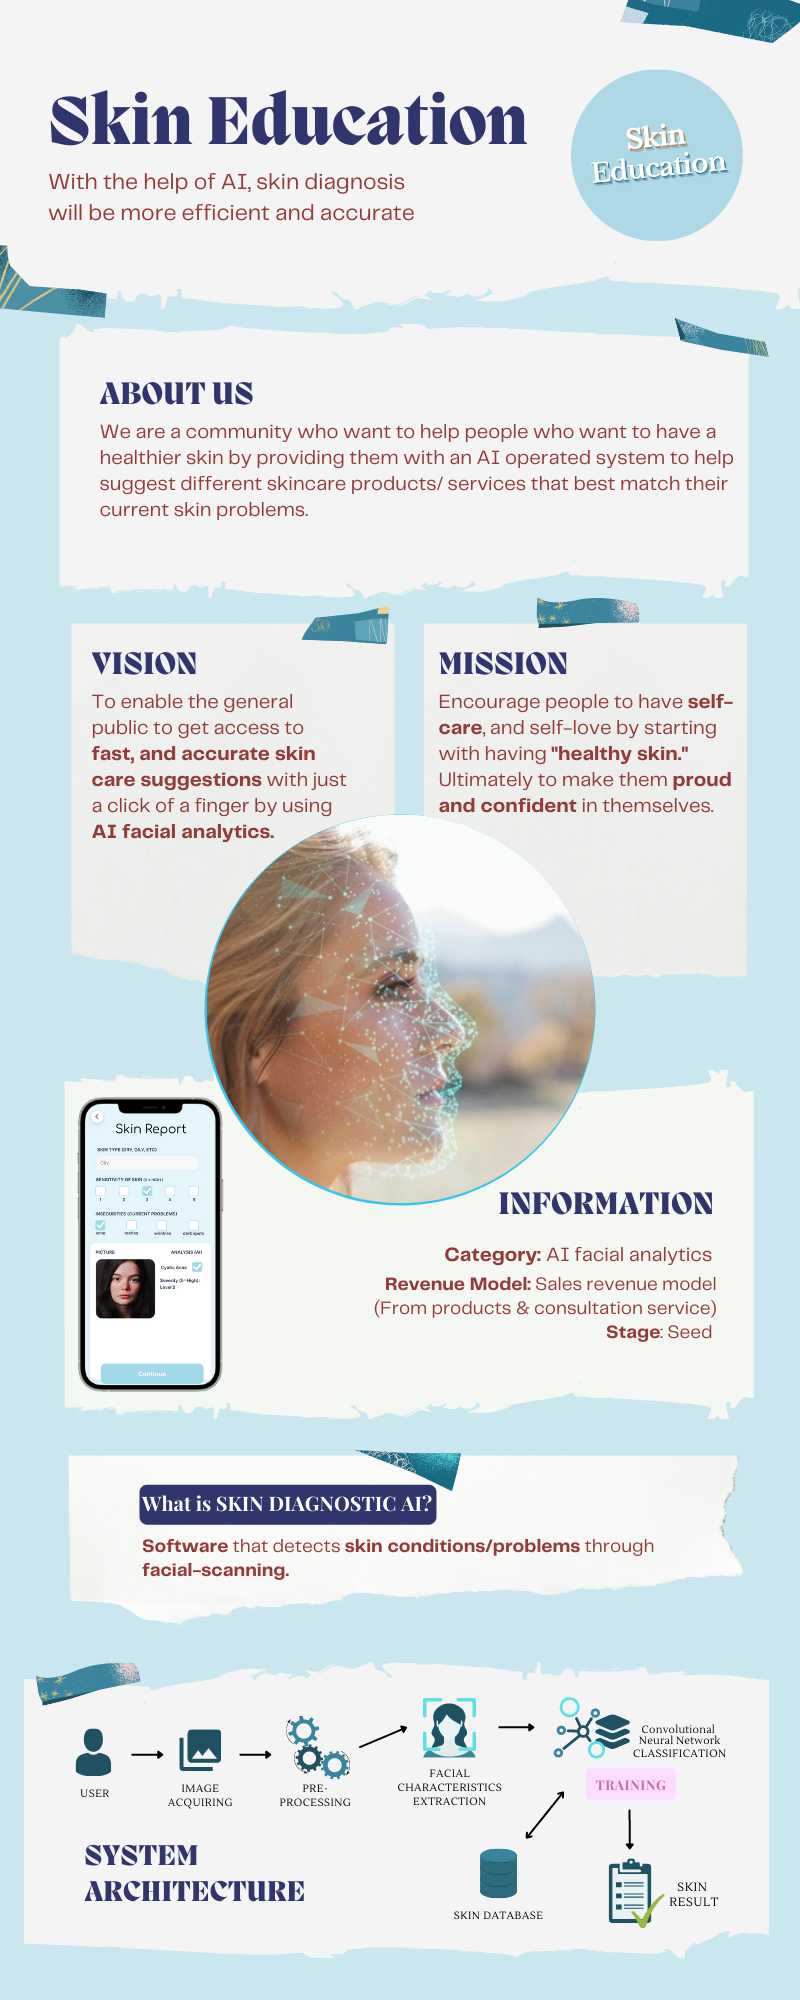
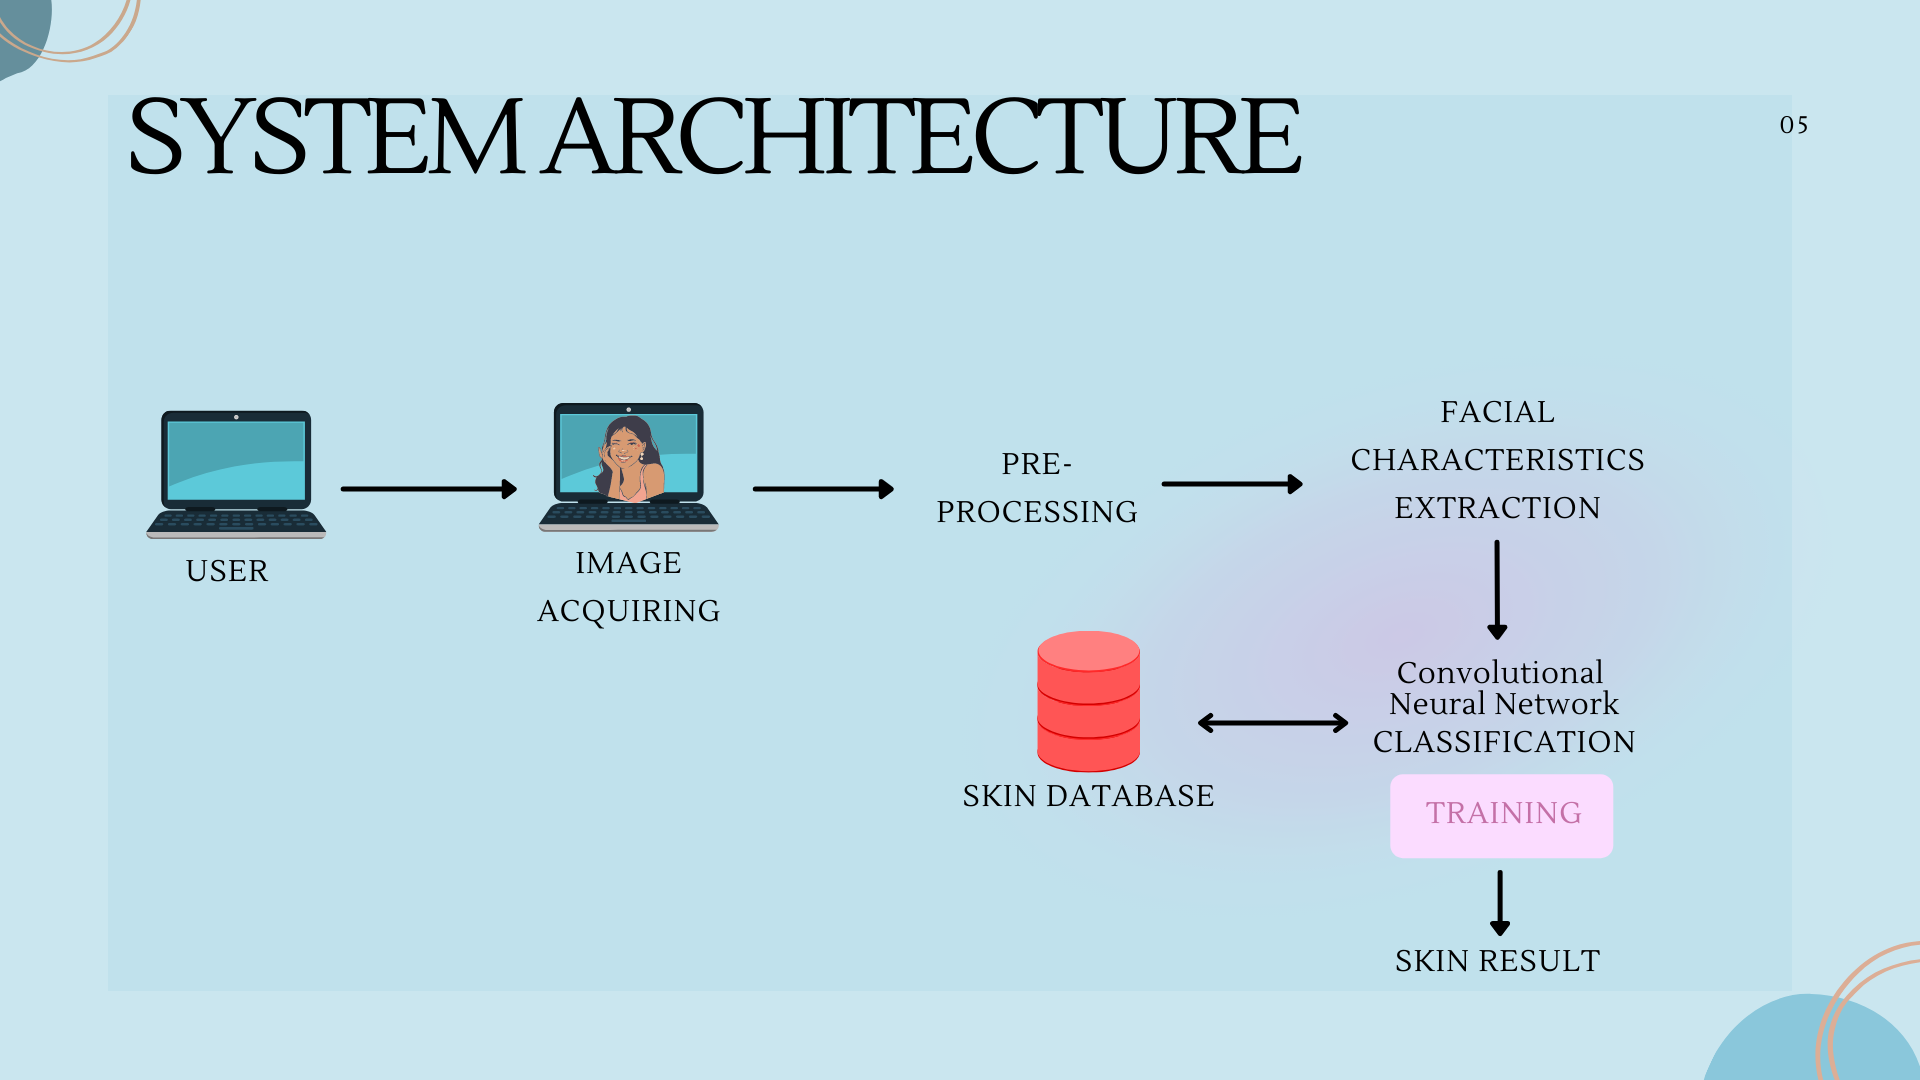
System Architecture:
User → Image Acquiring → Pre-processing → Facial Characteristics Extraction → Convolutional Neural Network CLASSIFICATION Training → Skin Database → Skin Result
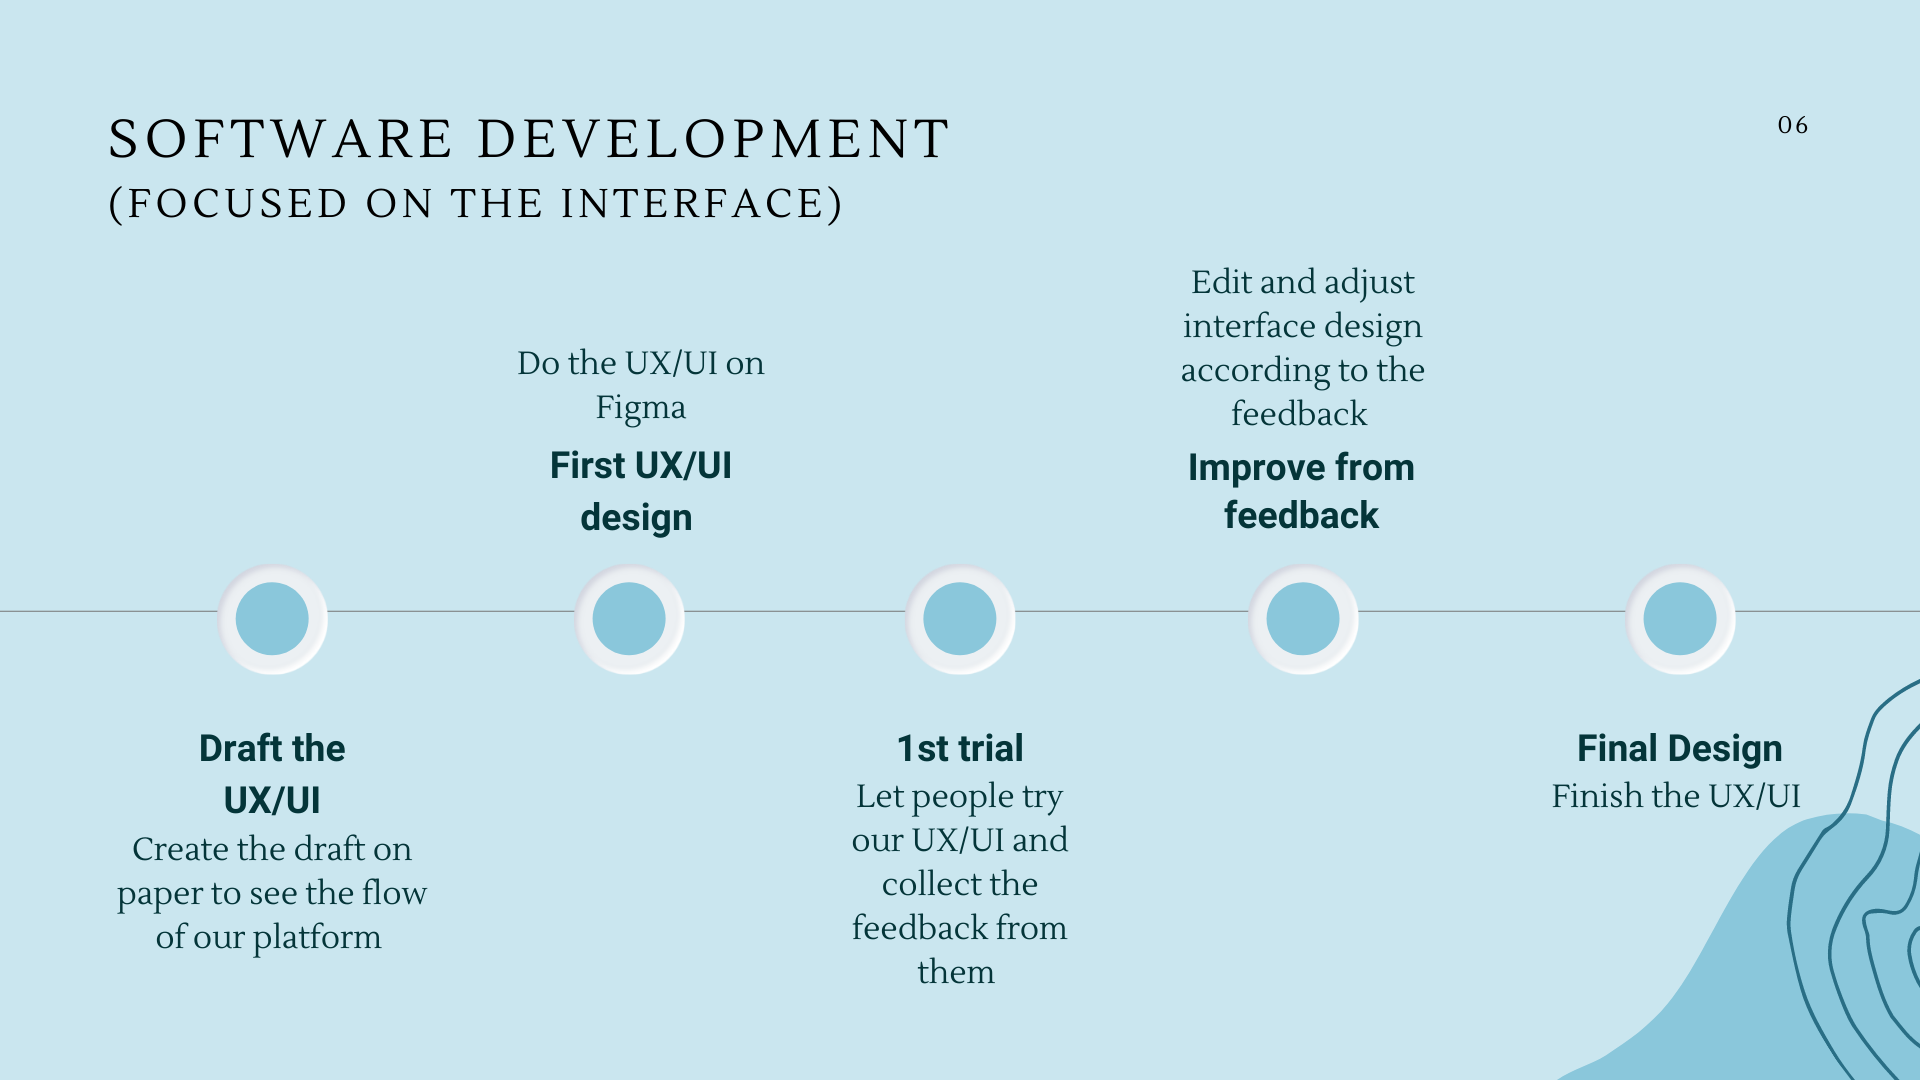
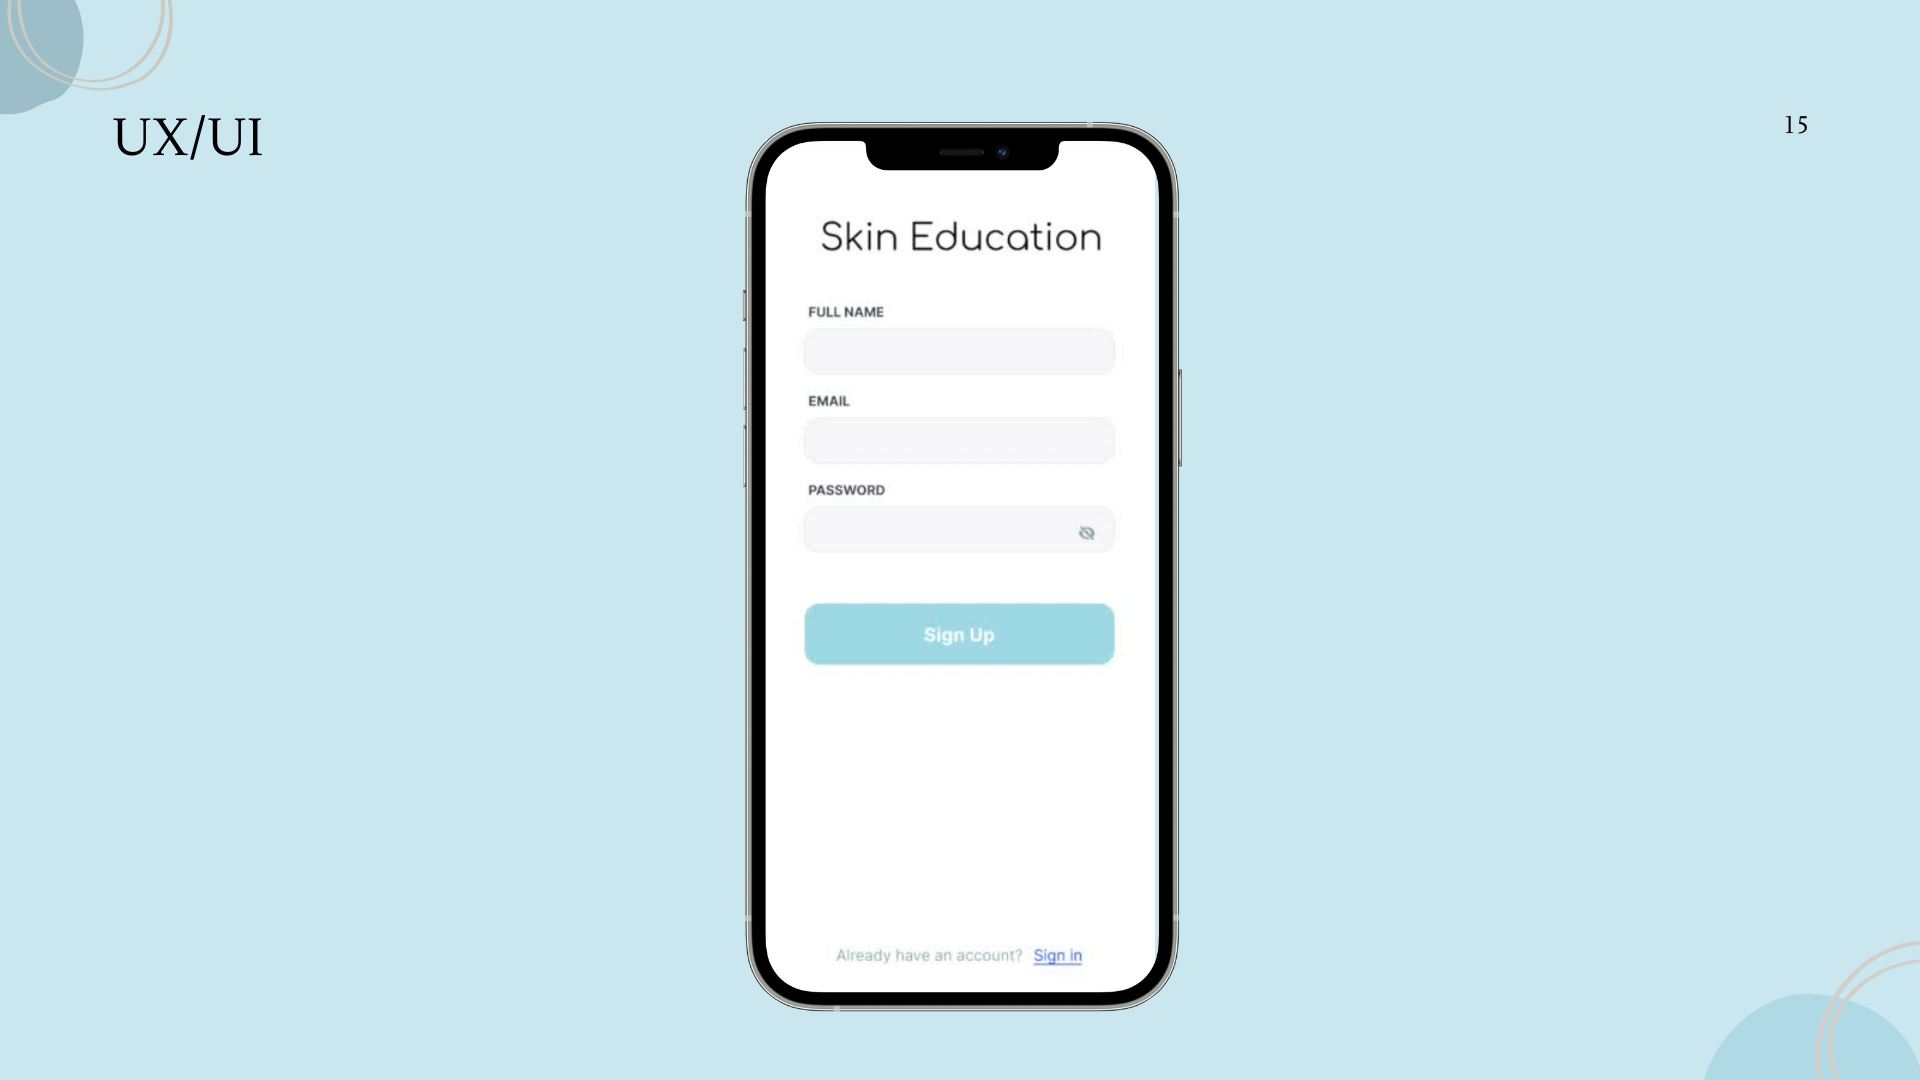
Software Development
- Draft the UX/UI : Create the draft on paper to see the flow of our platform
- First UX/UI Design : Do the UX/UI on Figma
- 1st Trial: Let people try our UX/UI and collect the feedback from them
- Improve from feedback: Edit and adjust interface design according to the feedback
- Final Design: Finish the UX/UI
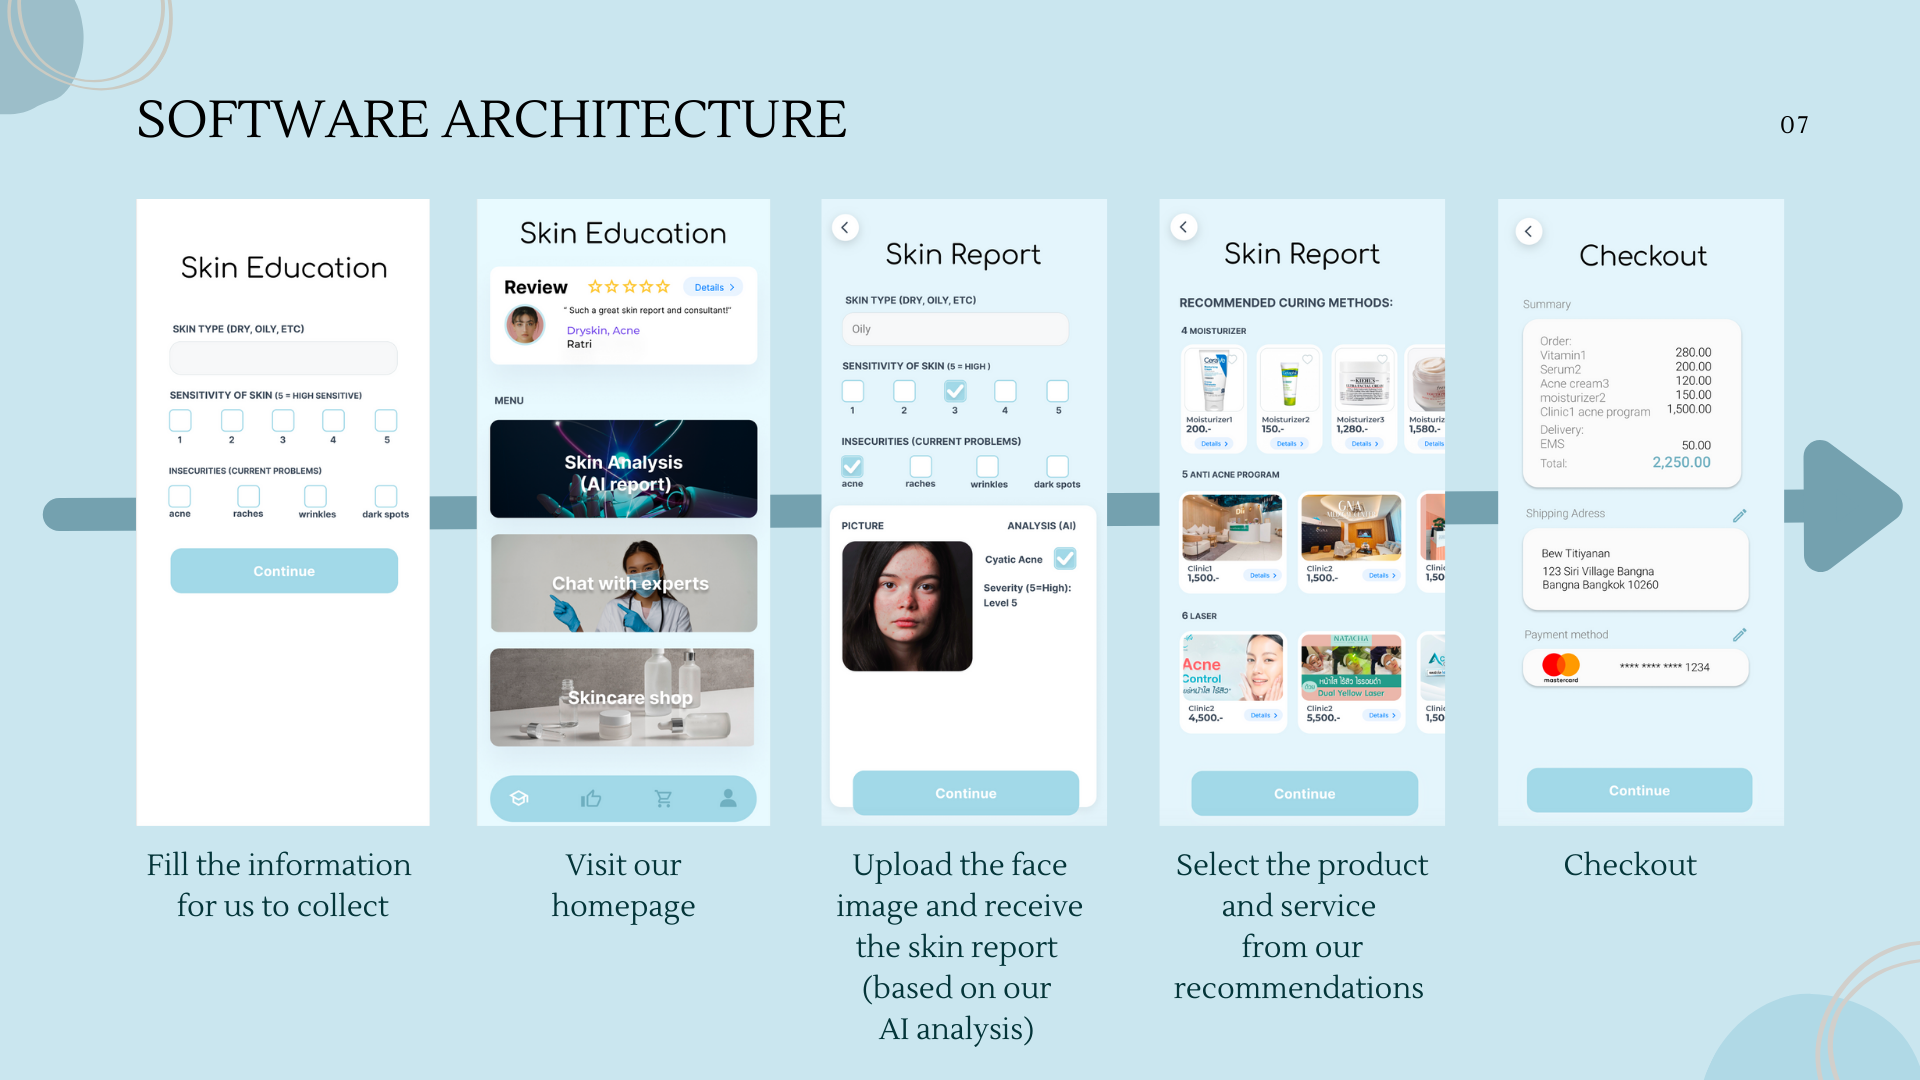
Software Architecture
There are 3 services including skin analysis using AI, chat with experts, and skincare shop.
- Skin analysis using AI Fill the information for us to collect → Visit our homepage → Select Skin analysis using AI → Upload the face image and receive the skin report(based on our AI analysis) → Select the product and service from our recommendations → Checkout
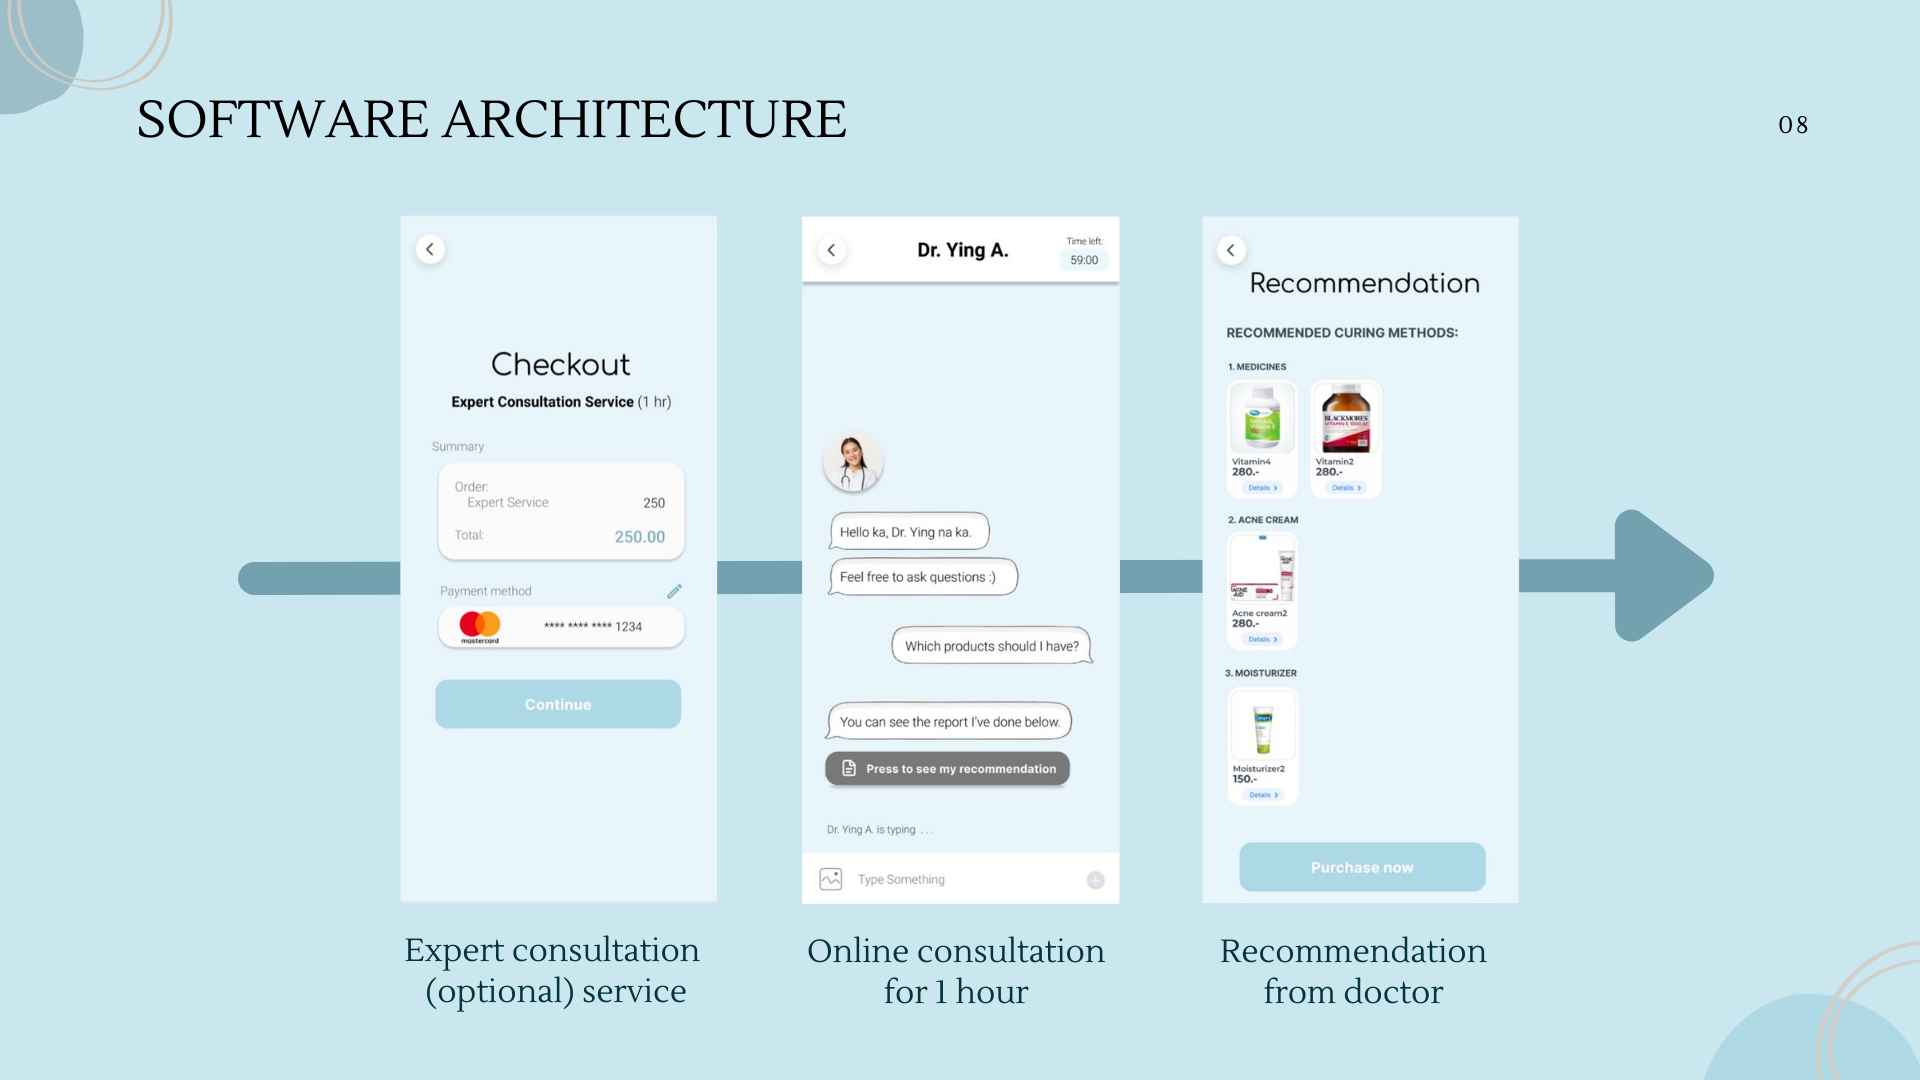
- Chat with experts Visit our homepage → Select Skin analysis using AI → Chat with experts →
- If already did the skin analysis → Pay for the chat service → online consultation for 1 hour → receive the recommendations from doctor
- If not already did the skin analysis → Upload the face image and receive the skin report(based on our AI analysis) → Pay for the chat service → online consultation for 1 hour → receive the recommendations from doctor
- Skincare shop
Visit our homepage → Select Skincare shop →
- If already did the skin analysis → Select the product and service from our recommendations → Checkout
- If not already did the skin analysis → Upload the face image and receive the skin report(based on our AI analysis) → Select the product and service from our recommendations → Checkout
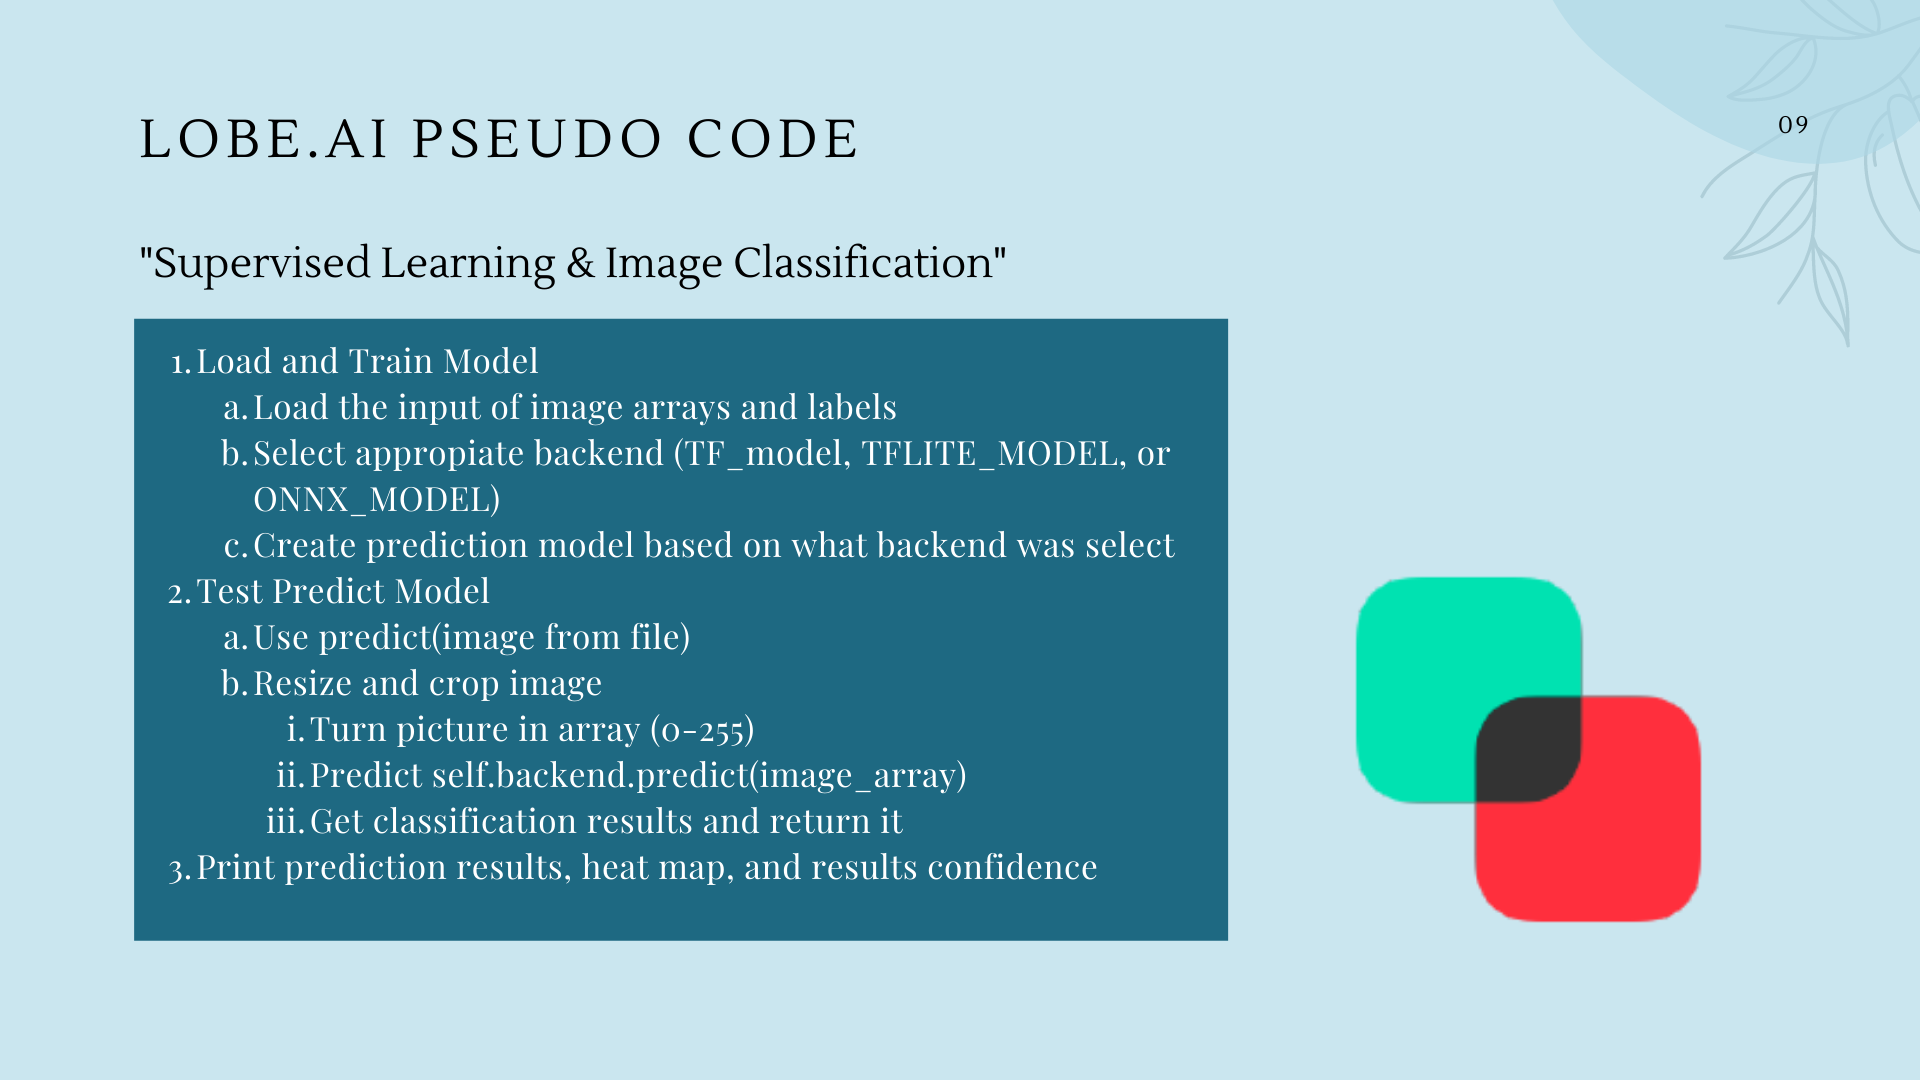
Lobe.AI Pseudo Code
Reinforcement Learning & Image Classification
- Take the images and label them to create a machine learning dataset
- Data will automatically train itself and create a model
- Test the model and gave feedback on its results
- Load image_model a. Load signature i. input image array/signature ii. Select appropiate backend (TF_model, TFLITE_MODEL, or ONNX_MODEL) iii. Create prediction model based on what backend was select
- Predict from file model.predict_from_file a. Use predict(image from file) i. Resize and crop image ii. Turn picture in array (0-255) iii. Predict self.backend.predict(image_array) iv. Get classification results and return it
- print(result.prediction)
- Print how confident the model is on the prediction
- Visualized heatmap to see where model look to make prediction
How does it know which image they use to classify The image process develops a common statistical characteristic of each class from the image data training set, then the image is classified by pixels and see which class does each pixel fit in.
Data Collection and Data Pipeline:
Google Images & Facial Scanning → Skin Data , Convolutional Neural Network CLASSIFICATION
Model Architecture (CNN):
Input → Hidden Layers(Convolution + Relu , Pooling) → Classification(Flatten, Fully Connected, Softmax)
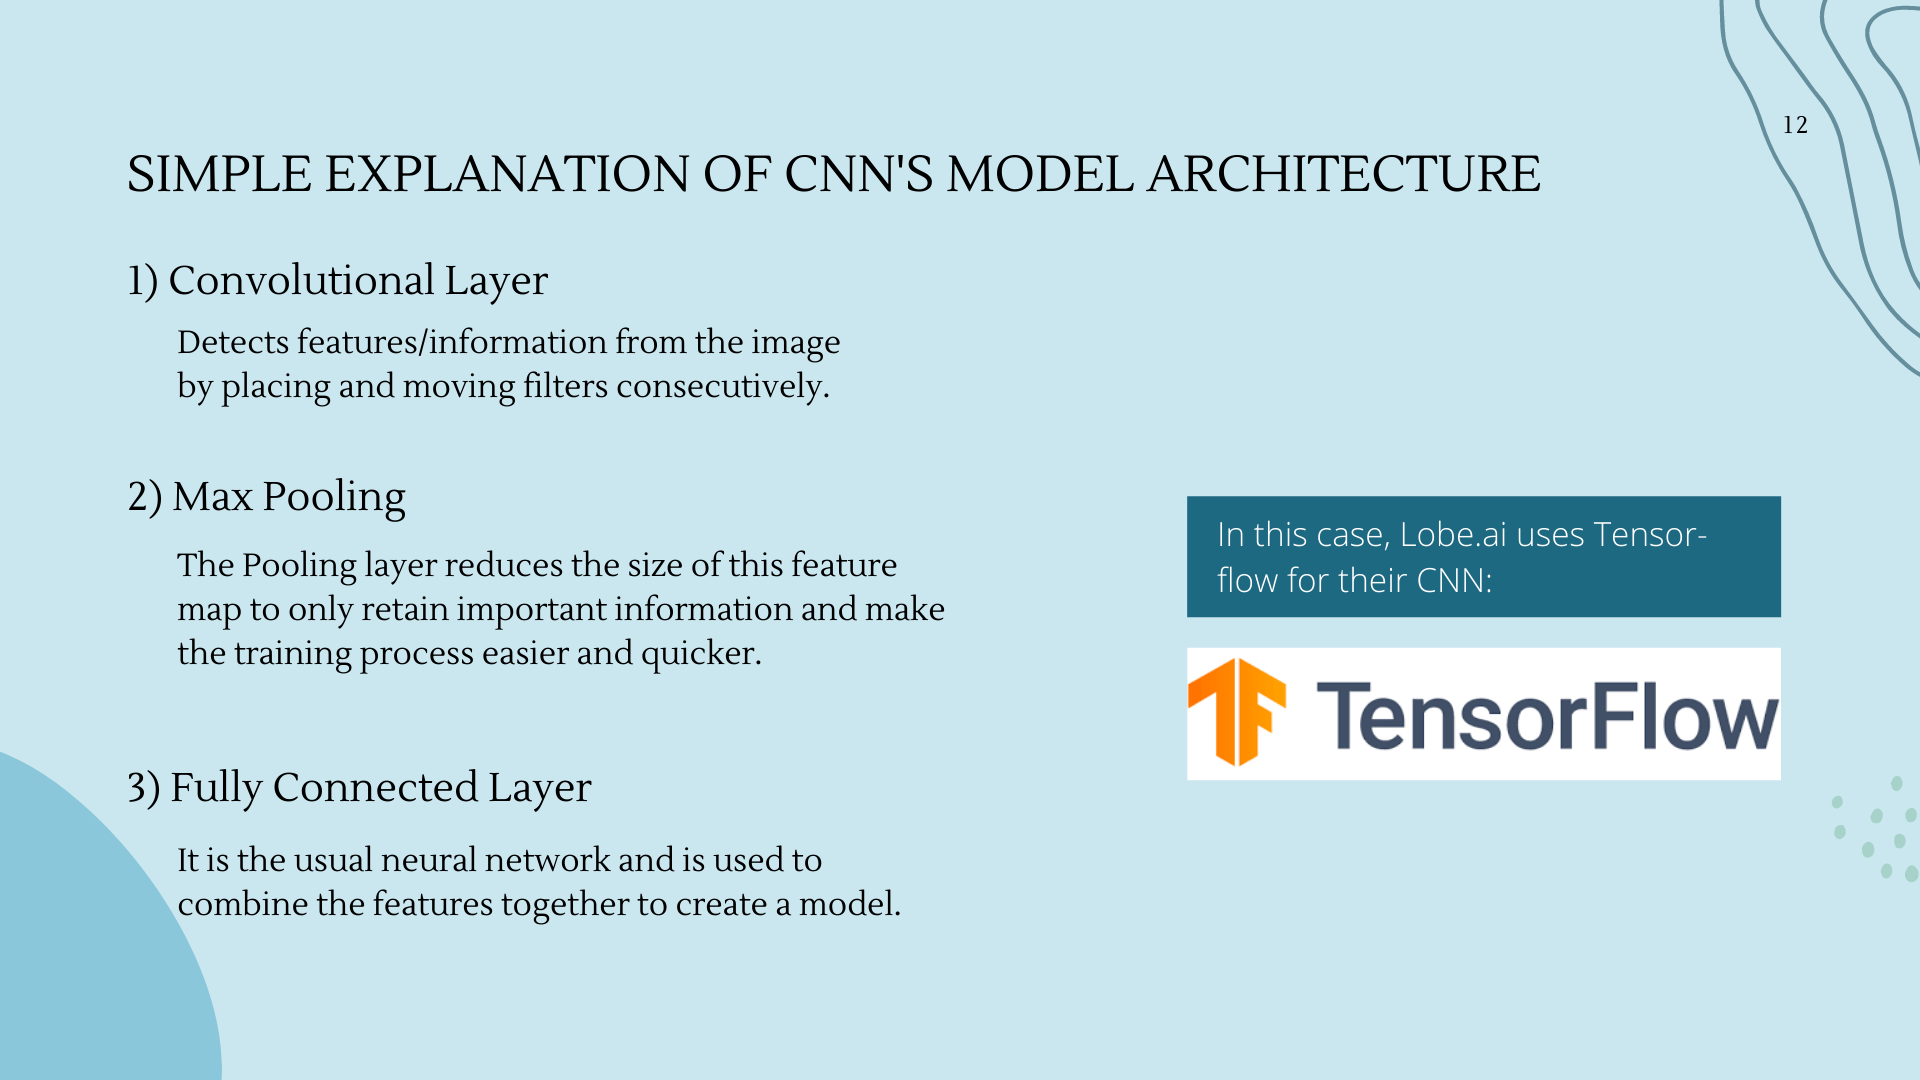
Simple Explanation of CNN’s Model Architecture:
- Convolutional Layer: Detects features/information from the image by placing and moving filters consecutively
- Max Pooling: The pooling layer reduces the size of this feature map to only retain important information and make the training process easier and quicker.
- Fully Connected Layer: It is the usual neural network.
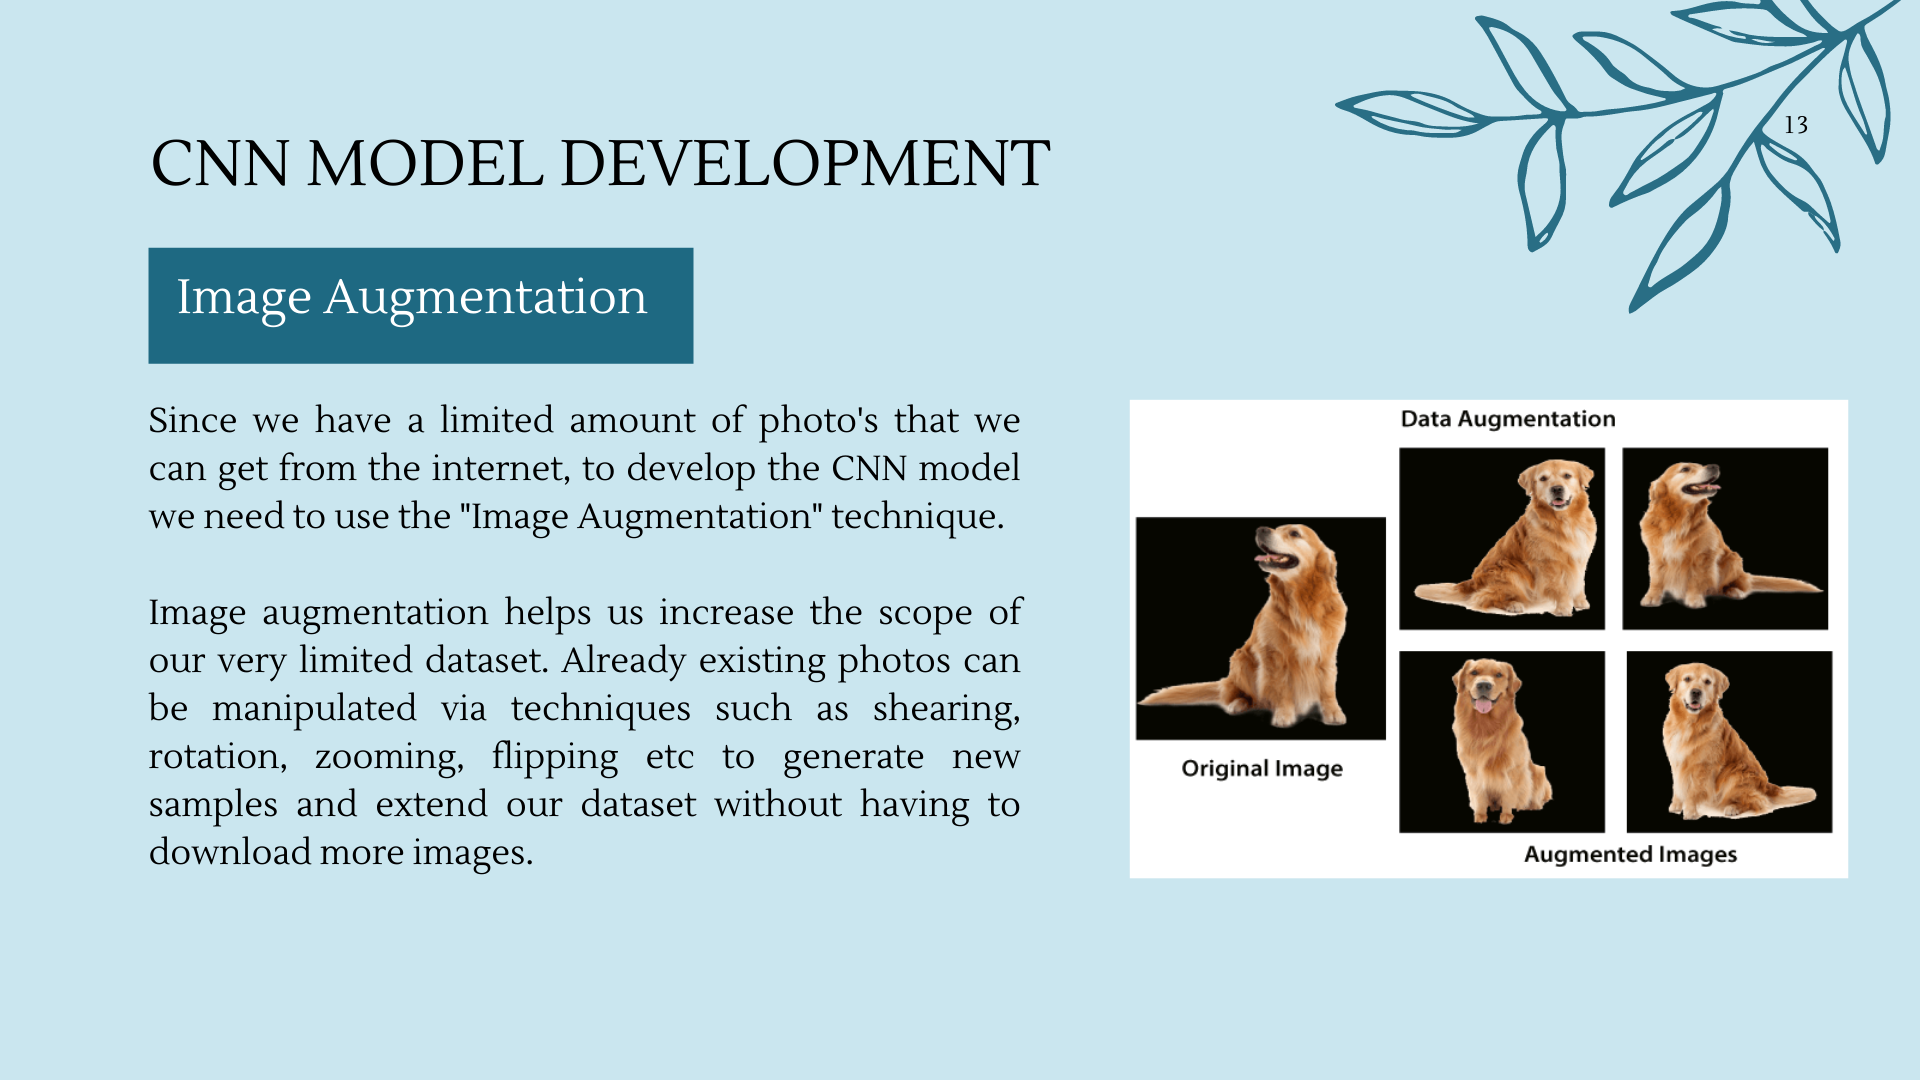
CNN Model Development:
“Image Augmentation”
Since we have a limited amount of photo's that we can get from the internet, to develop the CNN model we need to use the "Image Augmentation" technique.
Image augmentation helps us increase the scope of our very limited dataset. Already existing photos can be manipulated via techniques such as shearing, rotation, zooming, flipping etc to generate new samples and extend our dataset without having to download more images.
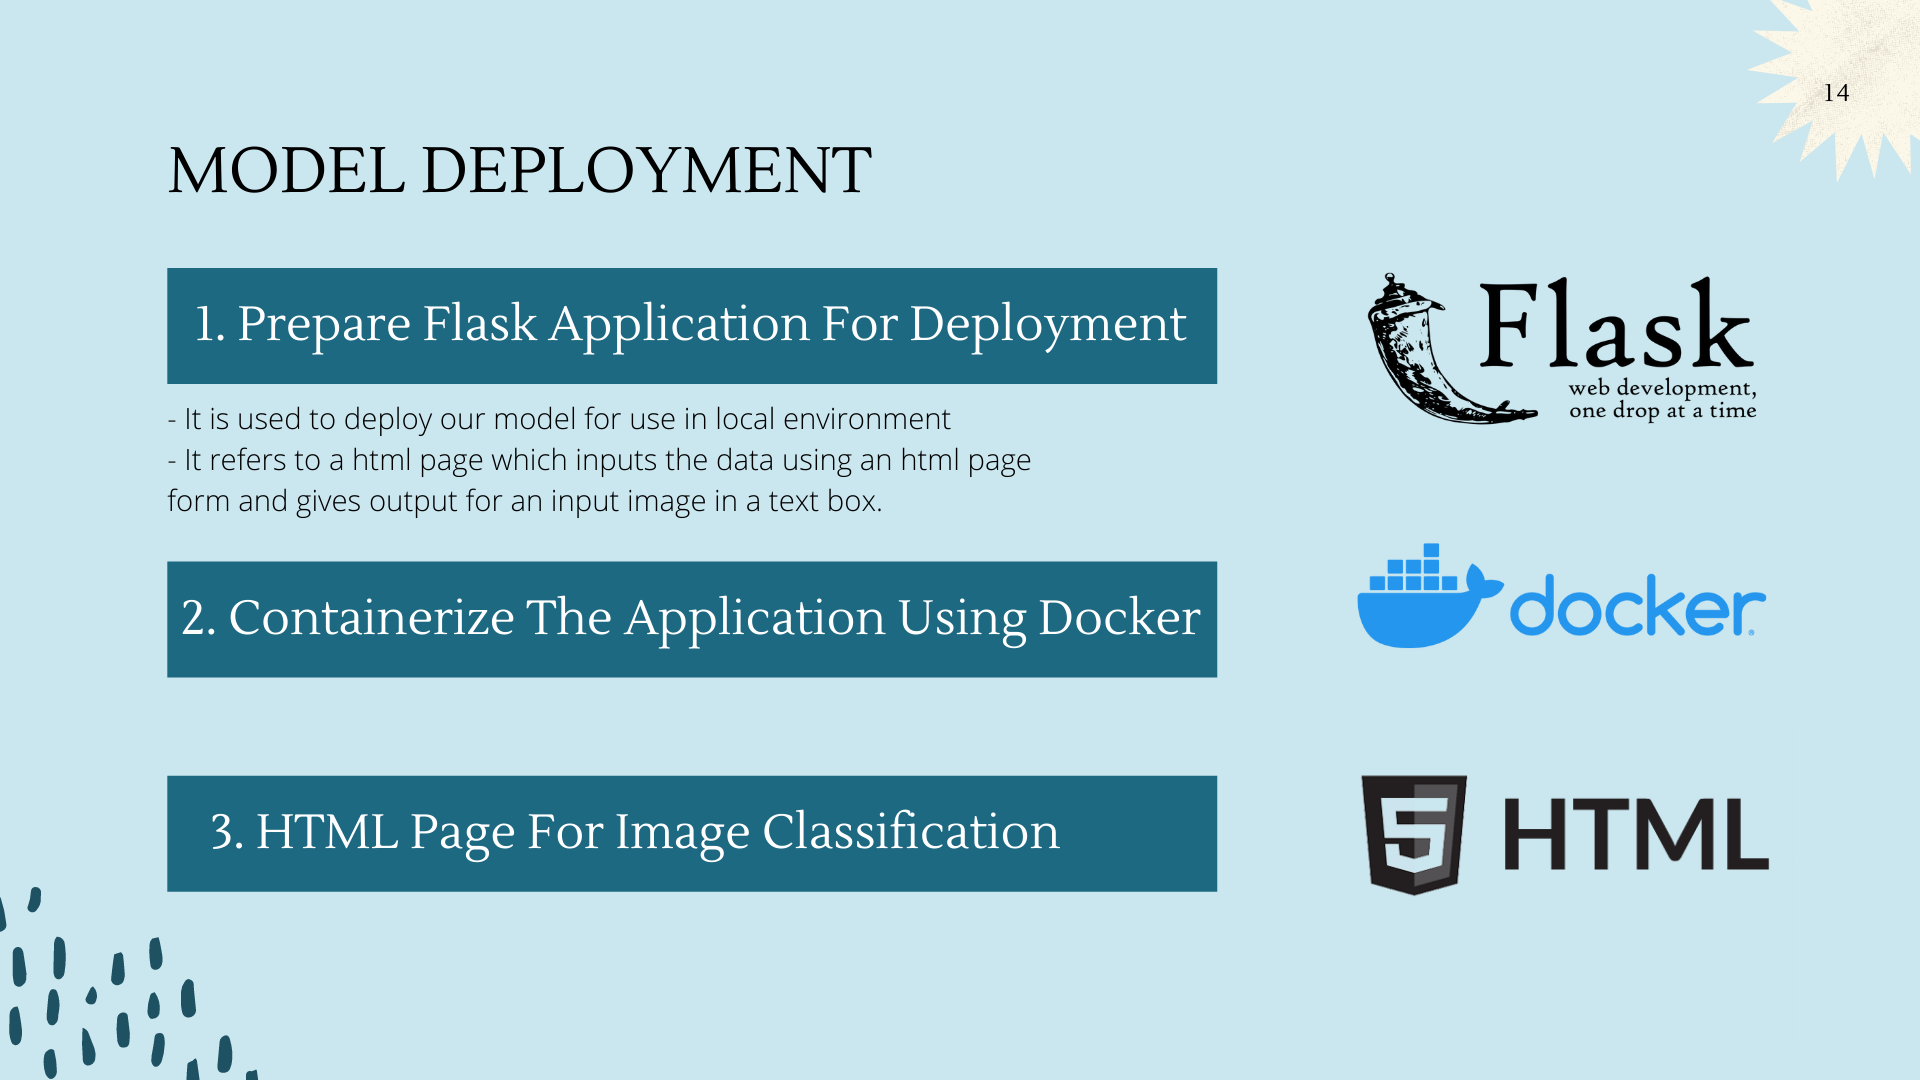
Model Deployment
- Prepare Flask Application For Deployment
- It is used to deploy our model for use in local environment
- It refers to a html page which inputs the data using an html page form and gives output for an input image in a text box.
- Containerize The Application Using Docker
- HTML Page For Image Classification
Accuracy of AI System = Around 95%
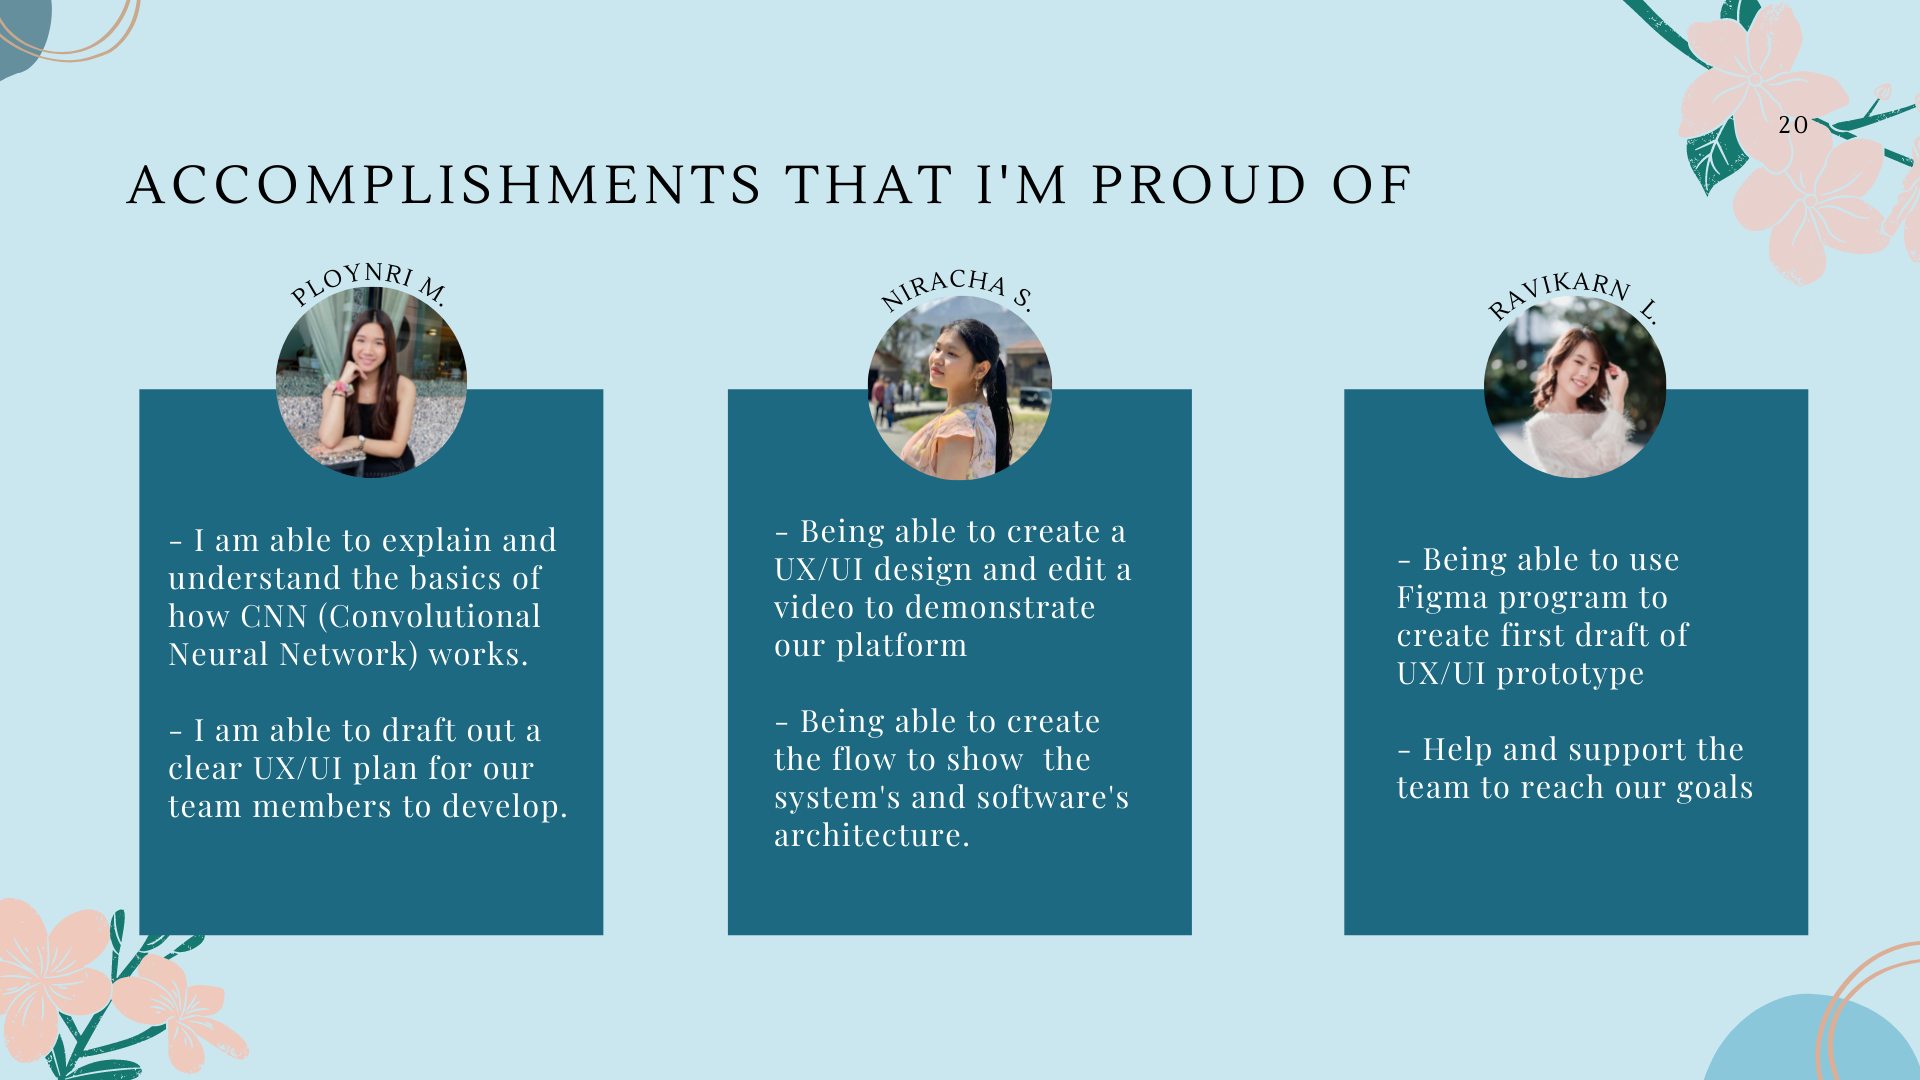
Accomplishments That I’m Proud Of (Individual)
Ploynri M.
- I am able to explain and understand the basics of how CNN (Convolutional Neural Network) works.
- I am able to draft out a clear UX/UI plan for our team members to develop
Niracha S.
- Being able to create a UX/UI design and edit a video to demonstrate our platform
- Being able to create the flow to show the system’s and software’s architecture.
Ravikarn L.
- Being able to use Figma program to create first draft of UX/UI prototype
- Help and support the team to reach our goals
Ponthakorn M.
- Having the experience to work on an image classification machine learning model with lobe.ai
- Being able to work on an AI project with this group of people
Pannathorn H.
- Having the experience to work on an image classification machine learning model with lobe.ai
- Being able to work on an AI project with this group of teammates
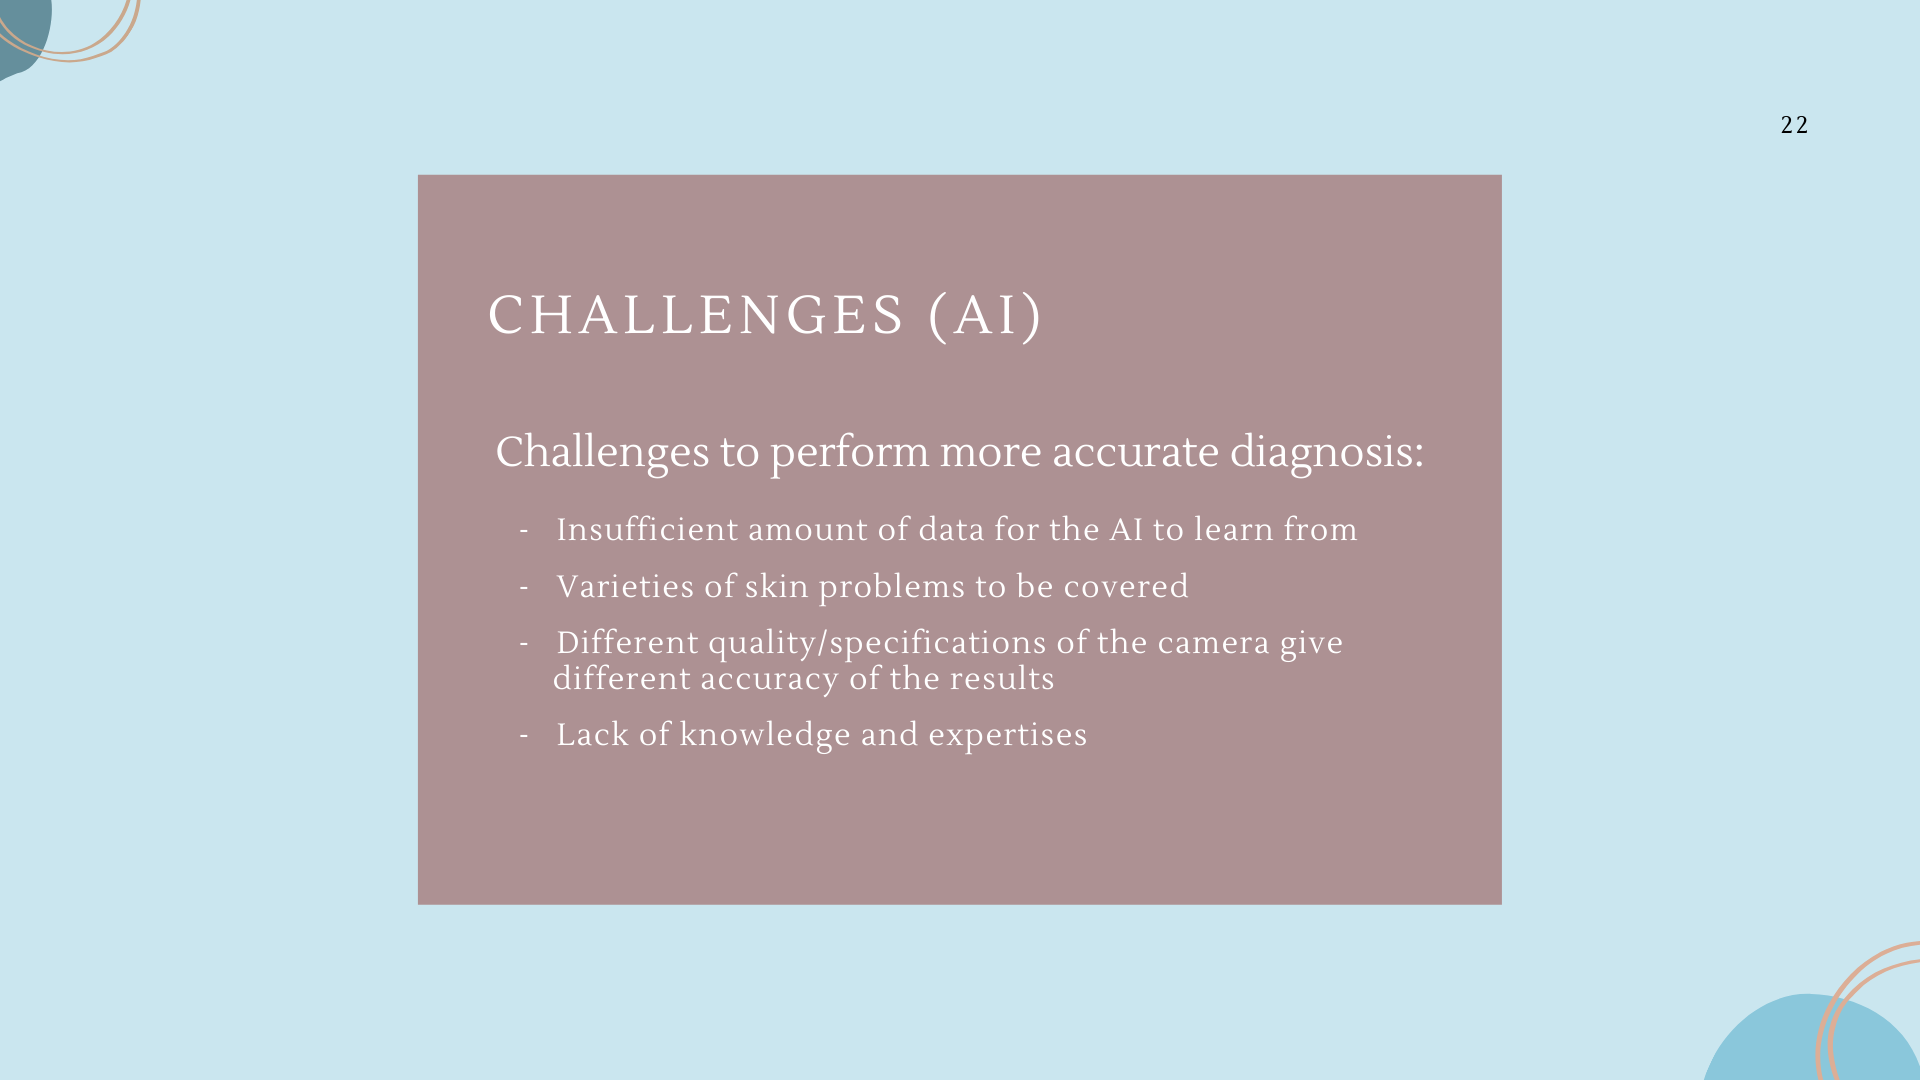
Challenges AI
- Challenges to perform more accurate diagnosis
- Insufficient amount of data for the AI to learn from
- Varieties of skin problems to be covered
- Different quality/specifications of the camera give different accuracy of the results
- Lack of knowledge and expertises
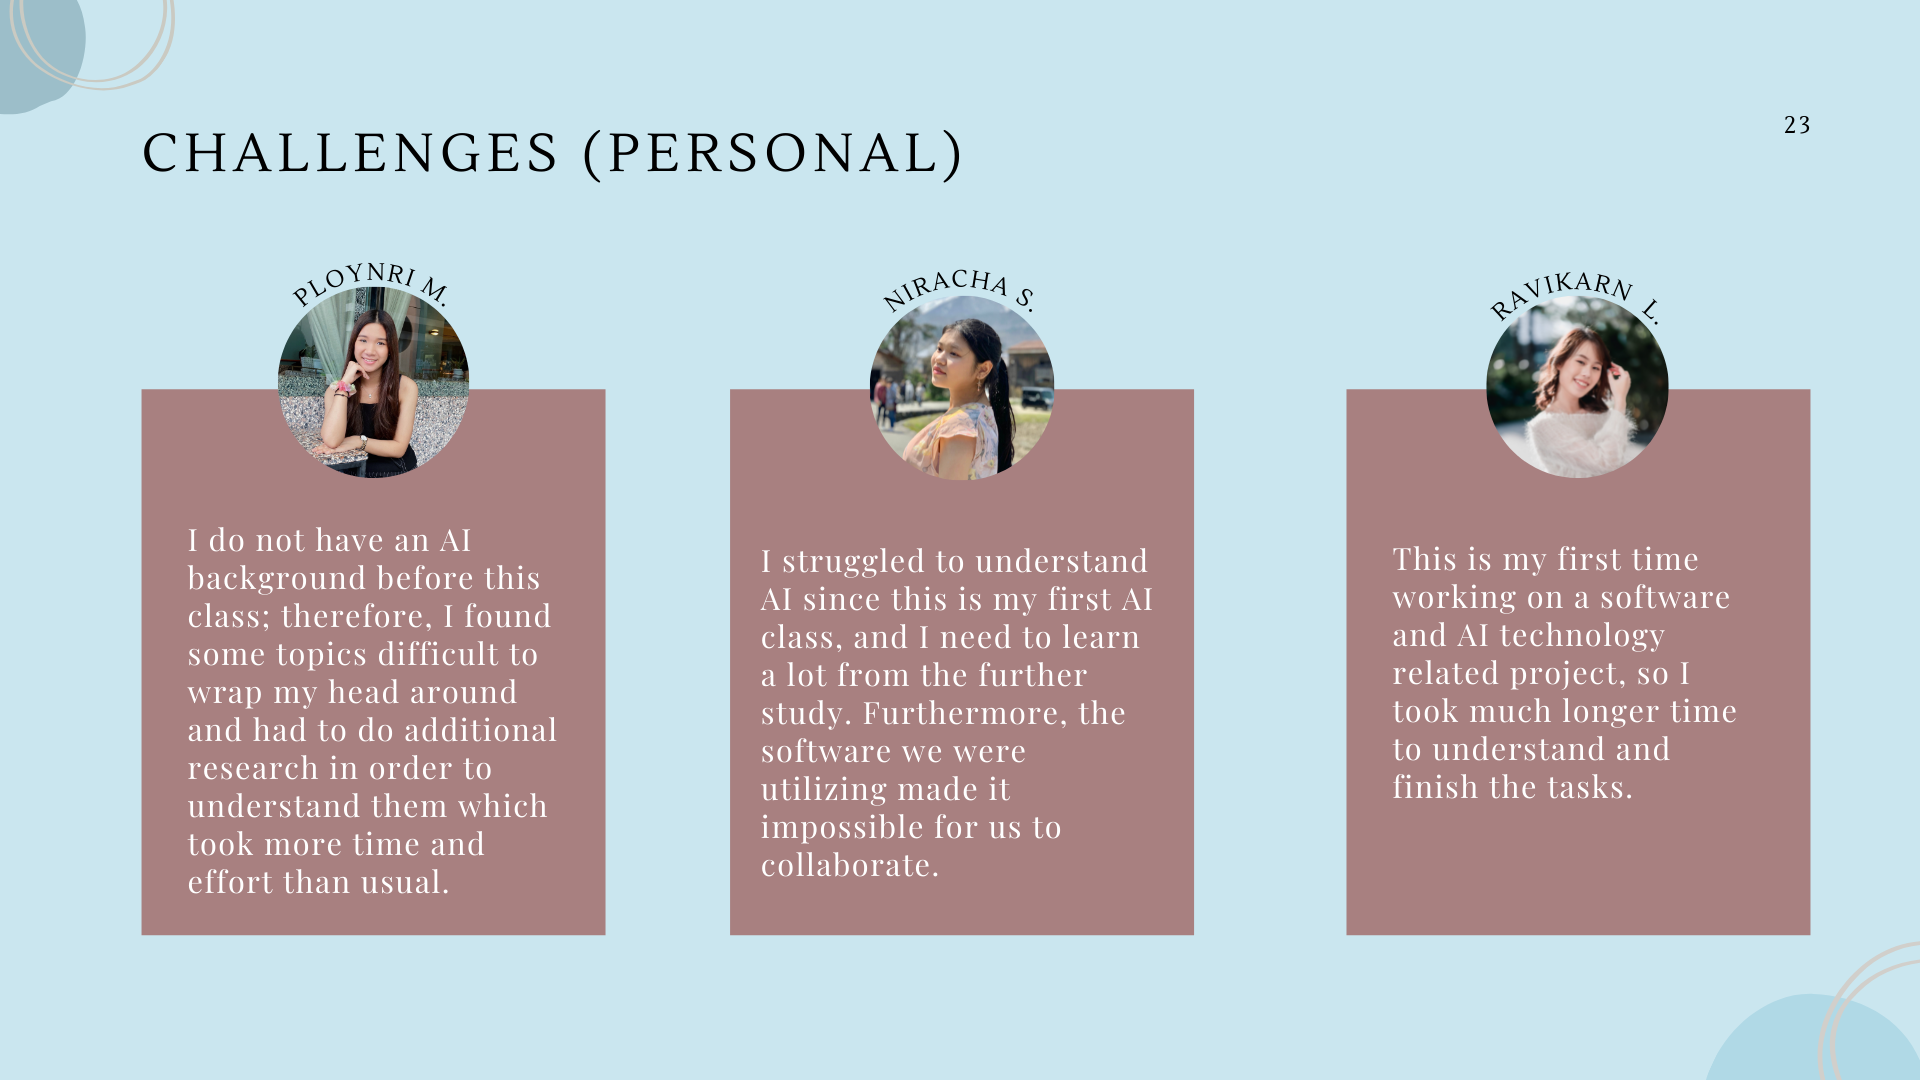
Challenges (Individual)
Ploynri M.
- I do not have an AI background before this class; therefore, I found some topics difficult to wrap my head around and had to do additional research in order to understand them which took more time and effort than usual.
Niracha S.
- I struggled to understand AI since this is my first AI class, and I need to learn a lot from the further study. Furthermore, the software we were utilizing made it impossible for us to collaborate.
Ravikarn L.
- This is my first time working on a software and AI technology related project, so I took much longer time to understand and finish the tasks.
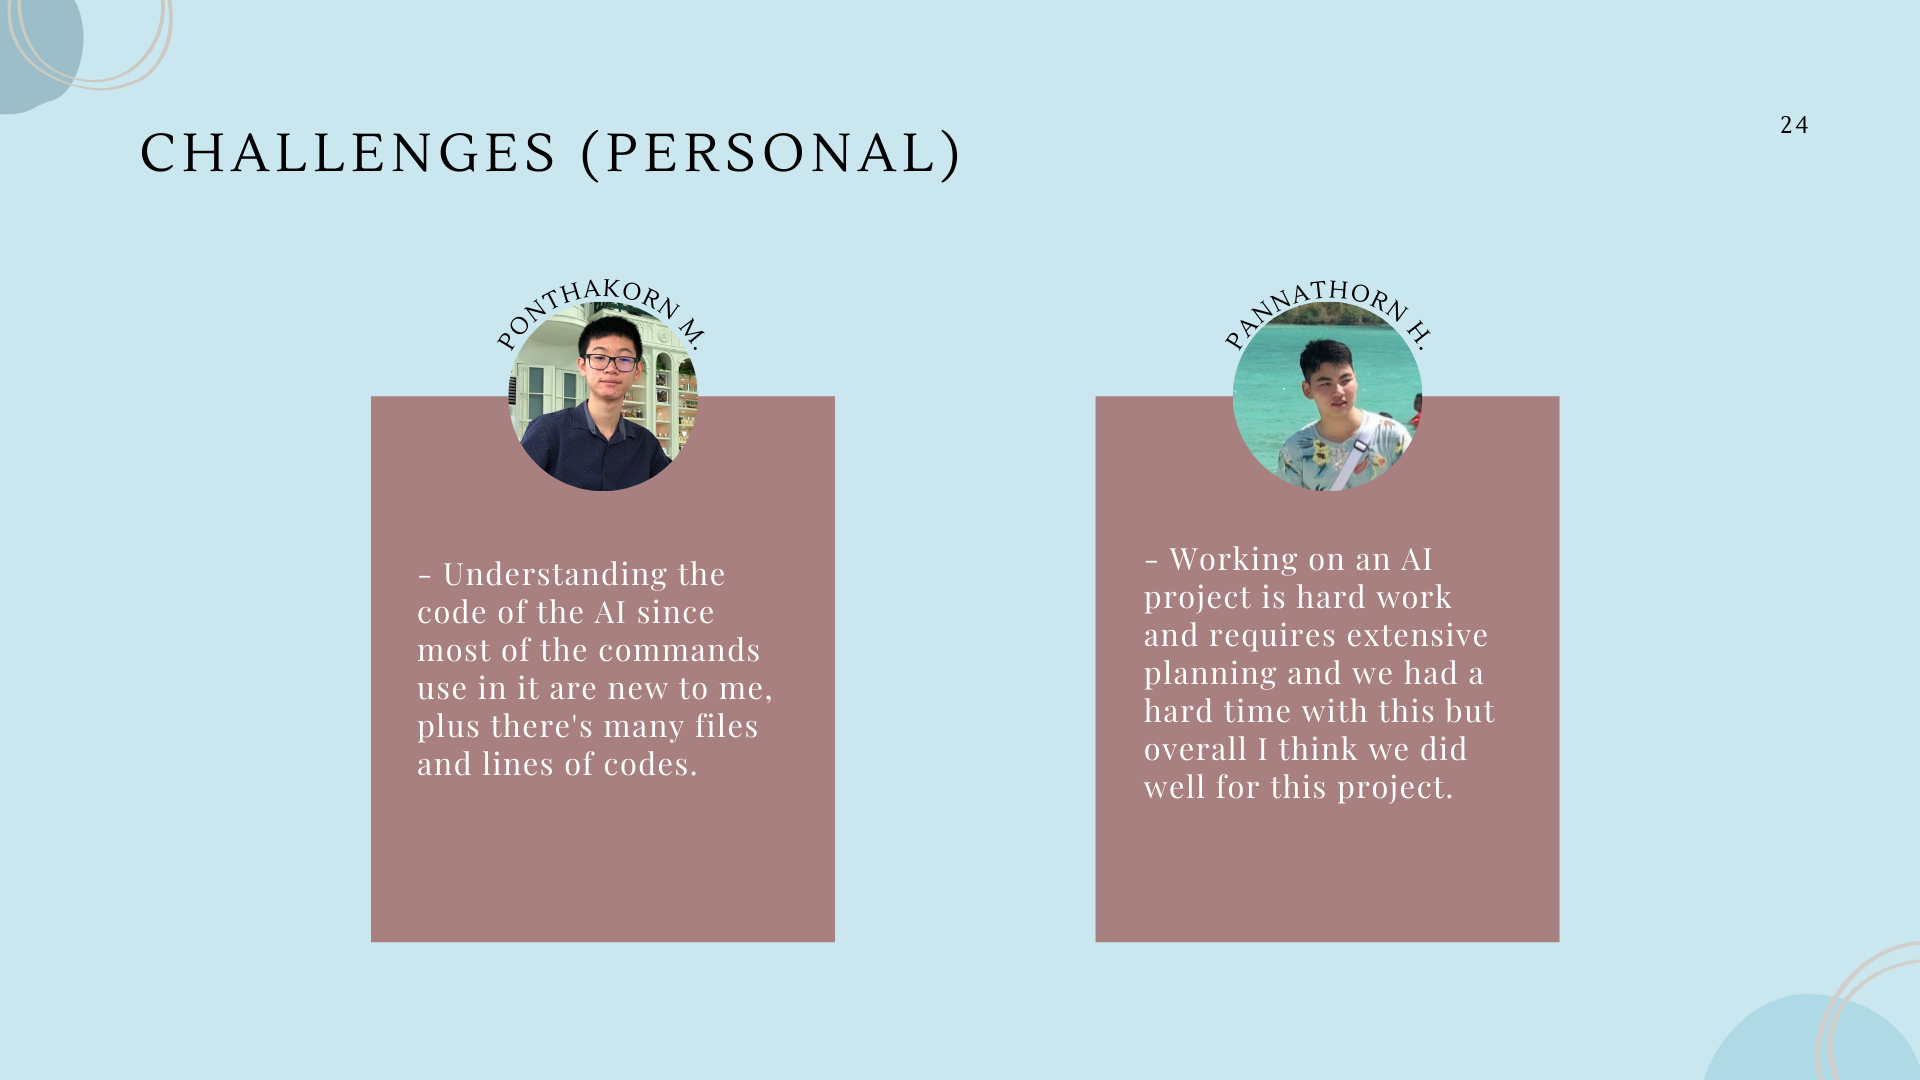
Ponthakorn M.
- Understanding the code of the AI since most of the commands use in it are new to me, plus there's many files and lines of codes.
Pannathorn H.
- Working on an AI project is hard work and requires extensive planning and we had a hard time with this but overall I think we did well for this project.
What I Learned (Individual)
Ploynri Muncharntip
- I learned the processes of how to do image classification, and what type of techniques it uses to make it happen. For example, in this case, we used the CNN. Moreover, I also learnt how to communicate clearly with my team mates to make it easier to collaborate.
Niracha Seripattanapol
- I learned to understand the software and system architecture, as well as an understanding of AI, which help us in completing this project. I learned more on how to create UX/UI on Figma, for example, the button and the prototype. I also learned to collaborate with team more efficiently
Ravikarn Limprasertsiri
- I learned how to apply AI to our usual team project using available programs. Moreover, I had improved my skills to create UX/UI design on Figma for the first time.
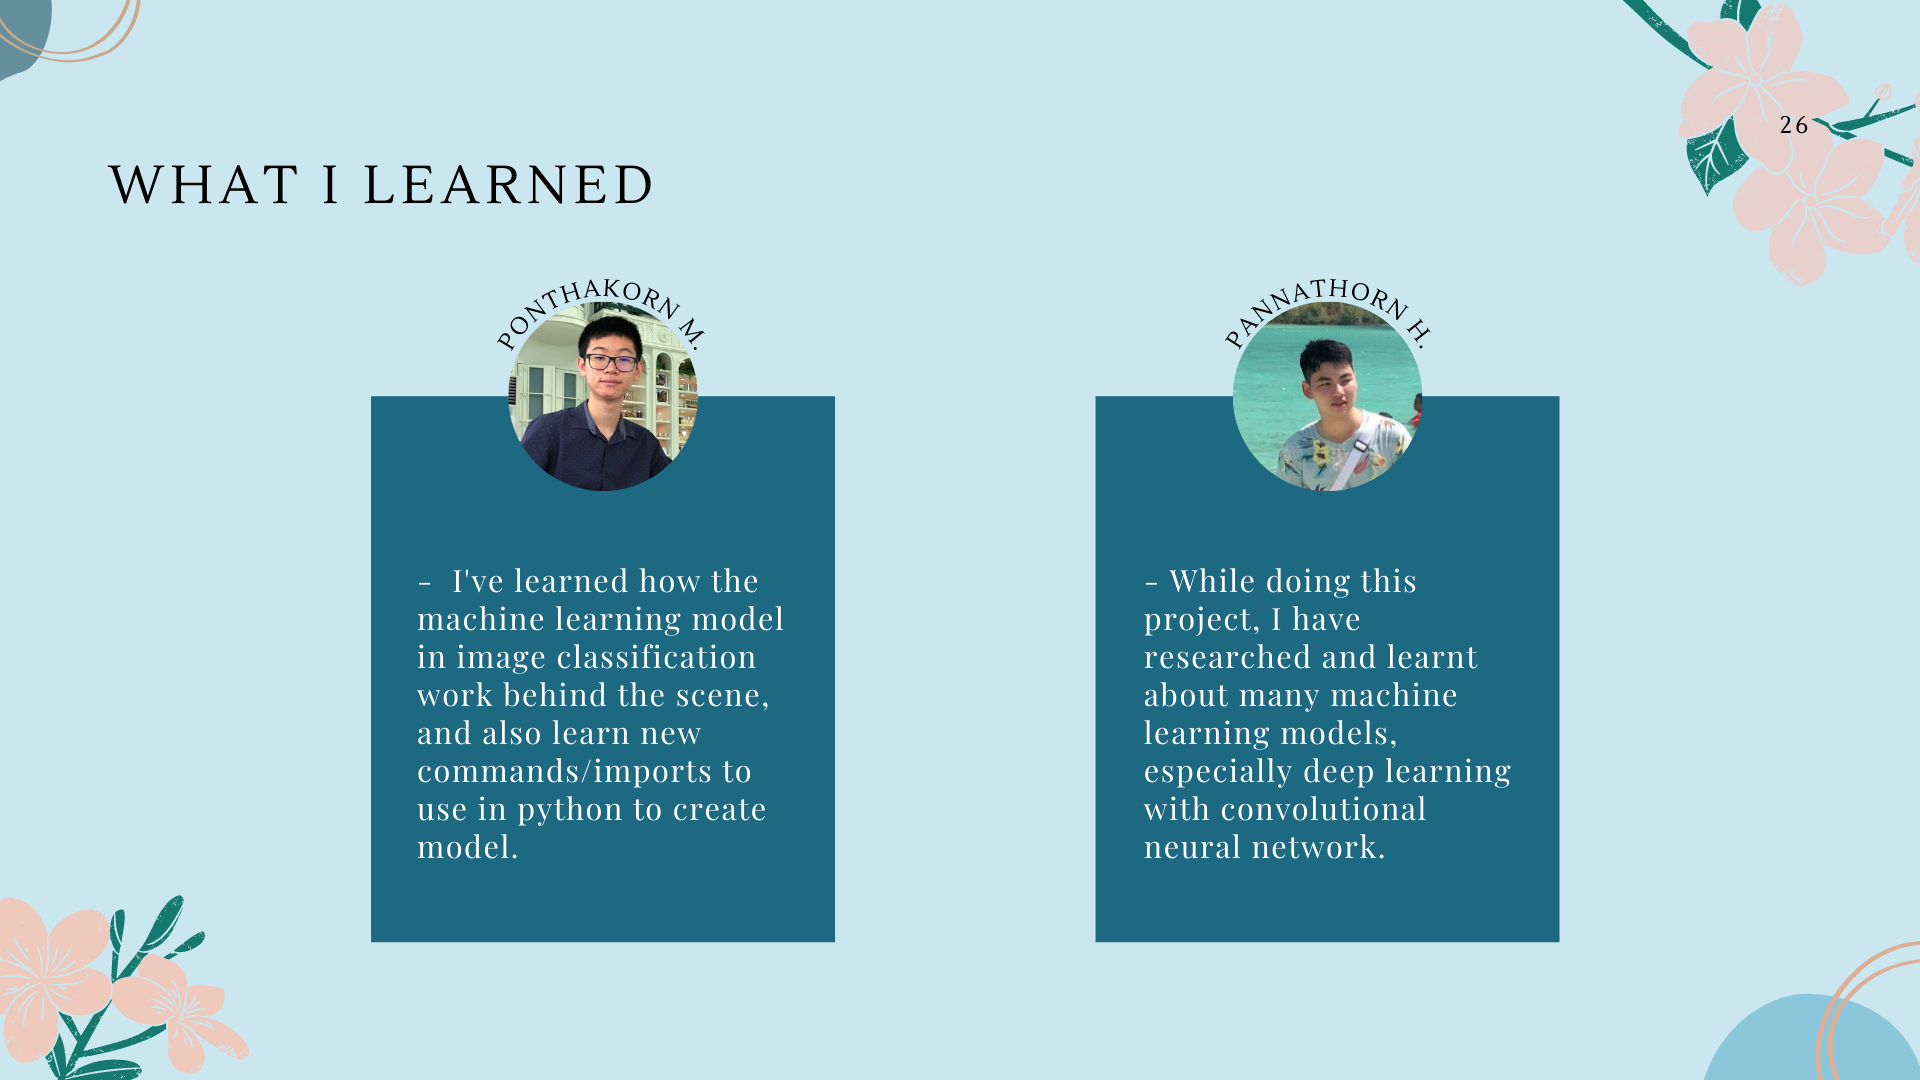
Pontakorn Methavichit
- I've learned how the machine learning model in image classification work behind the scene, and also learn new commands/imports to use in python to create model.
Pannathorn Hanmatheekuna
- While doing this project, I have researched and learnt about many machine learning models, especially deep learning with convolutional neural network.
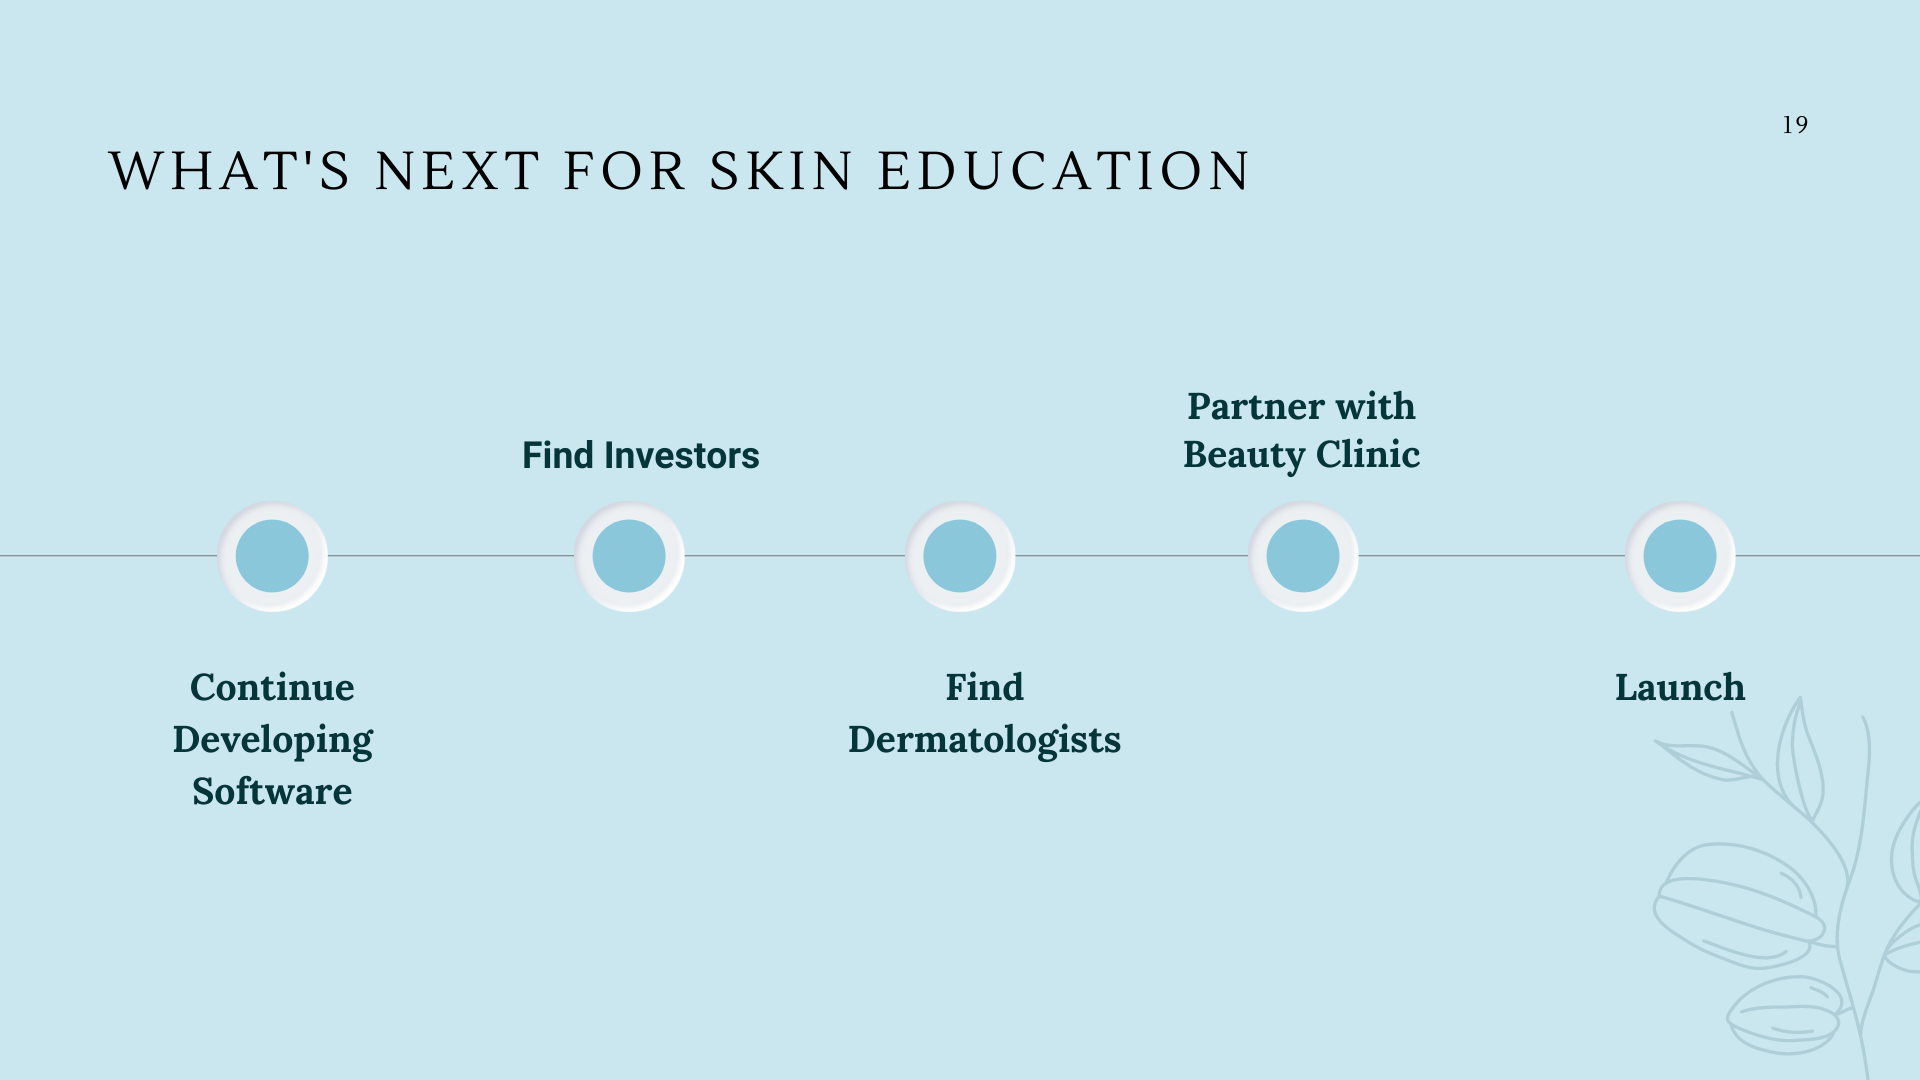
What's Next for Skin Education
- Continue developing Software
- Finding Investors
- Find Dermatologists
- Partner with Beauty Clinic
- Launch!
Team Member and Work Plan
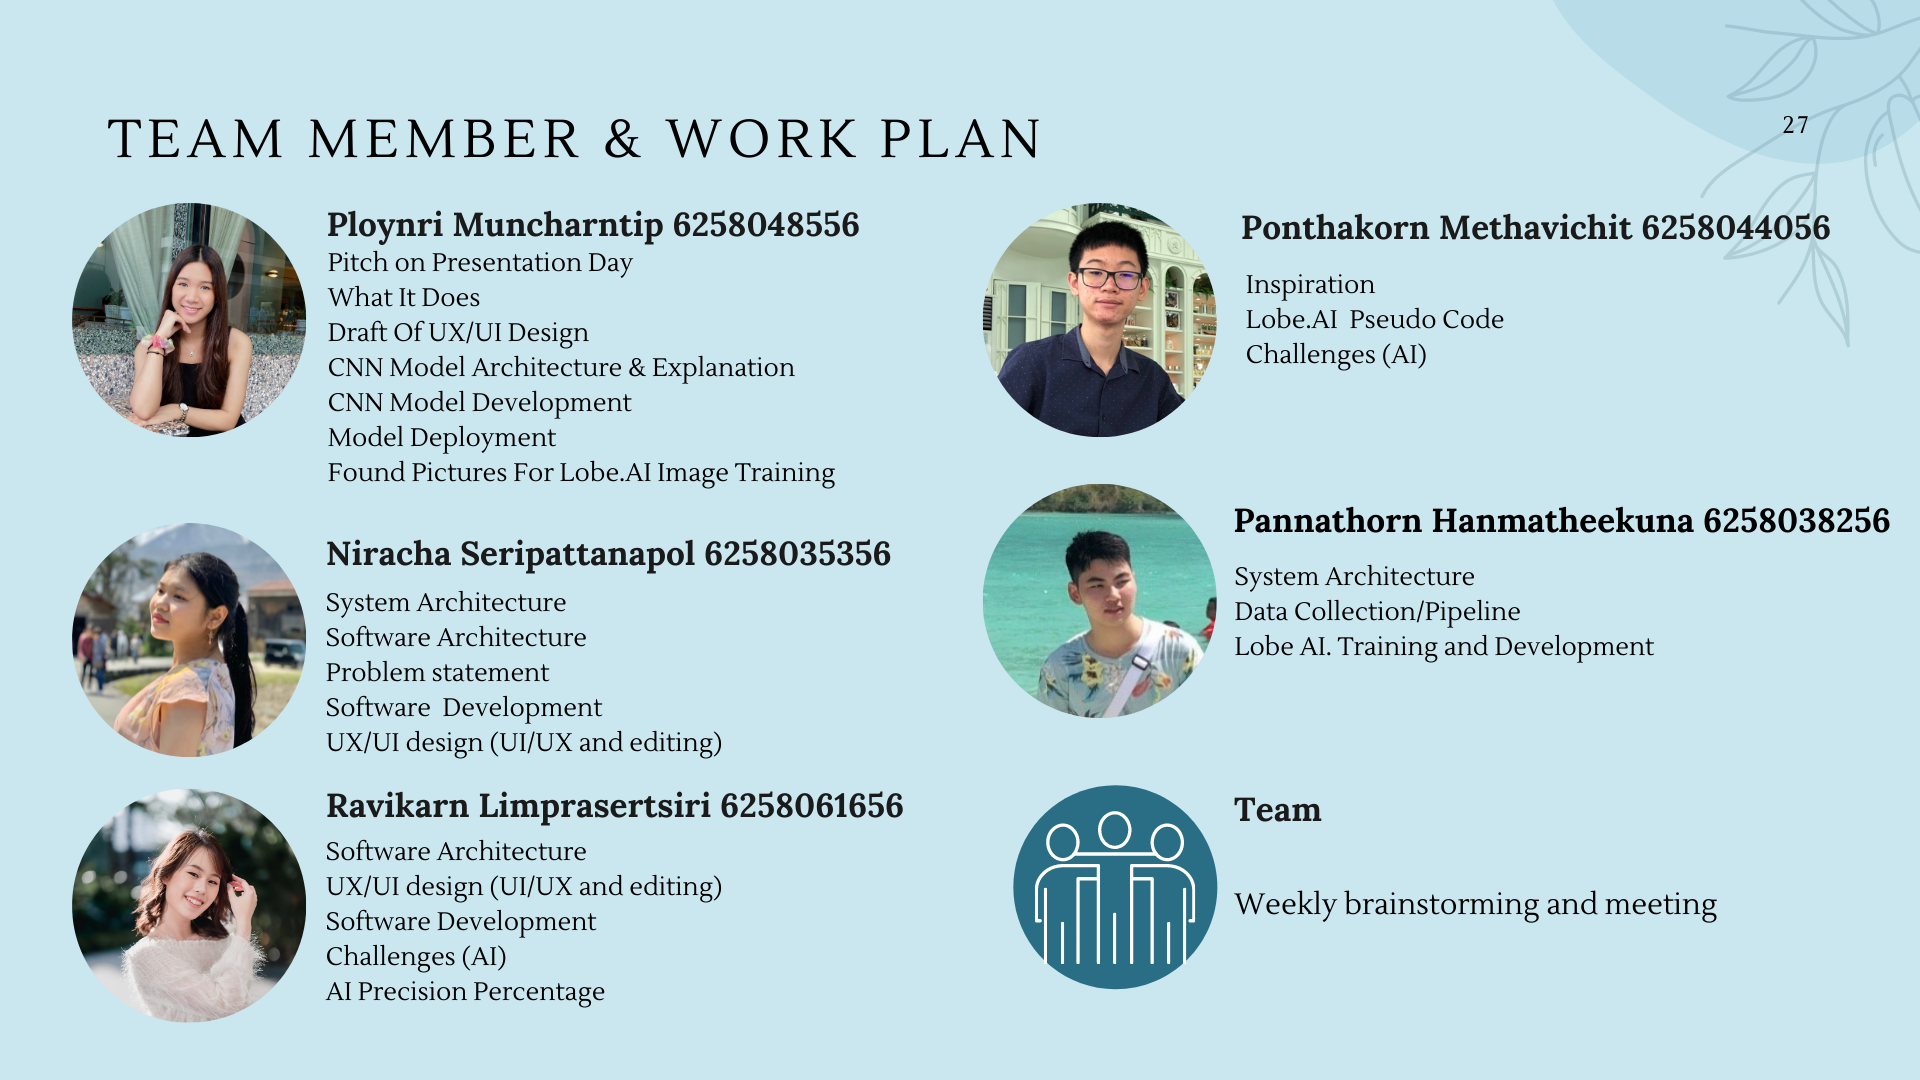
Ploynri Muncharntip 6258048556
- Pitch on Presentation Day
- Draft Of UX/UI Design
- What It Does
- CNN Model Architecture & Explanation
- CNN Model Development
- Model Deployment
- Found Pictures For Lobe.AI Image Training
Niracha Seripattanapol 6258035356
- System/Software Architecture
- Problem statement
- Software Development
- UX/UI design (UI/UX and editing)
Ravikarn Limprasertsiri 6258061656
- Software Architecture
- UX/UI design (UI/UX and editing)
- Software Development
- AI Challenges
Ponthakorn Methavichit 6258044056
- Inspiration
- Lobe.AI Pseudo Code
- Challenges (AI)
Pannathorn Hanmatheekuna 6258038256
- System Architecture
- Data Collection/Pipeline
- Lobe AI. Training and Development
Team
- Weekly brainstorming and meeting
References
Prabhu. (2019, November 21). Understanding of convolutional neural network (CNN) - deep learning. Medium. Retrieved December 1, 2021, from https://medium.com/@RaghavPrabhu/understanding-of-convolutional-neural-network-cnn-deep-learning-99760835f148.
Lobe. (2020, September). Lobe-python. Retrieved November 20, 2021, from https://github.com/lobe
Lobe. (2016, April). Lobe. Retrieved November 20, 2021, from https://www.lobe.ai/
Figma. (2016, September 27) Figma. Retrieved December 2, 2021, from https://www.figma.com/?fuid=
Tran, Hai & Le, Triet & Le, Thai & Nguyen, Thuy. (2016). Burn Image Classification Using One-Class Support Vector Machine. 233-242. 10.1007/978-3-319-29236-6_23.
Science, O. D. S. C.- O. D. (2019, July 29). Image augmentation for Convolutional Neural Networks. Medium. Retrieved December 3, 2021, from https://medium.com/@ODSC/image-augmentation-for-convolutional-neural-networks-18319e1291c.
Thailand Skin Care Products Market Size, Share & Analysis, 2021-2027. (n.d.). Retrieved from https://www.alliedmarketresearch.com/thailand-skin-care-products-market-A06653#:~:text=The Thailand skin care products,7.6% from 2021 to 2027.
Appendix
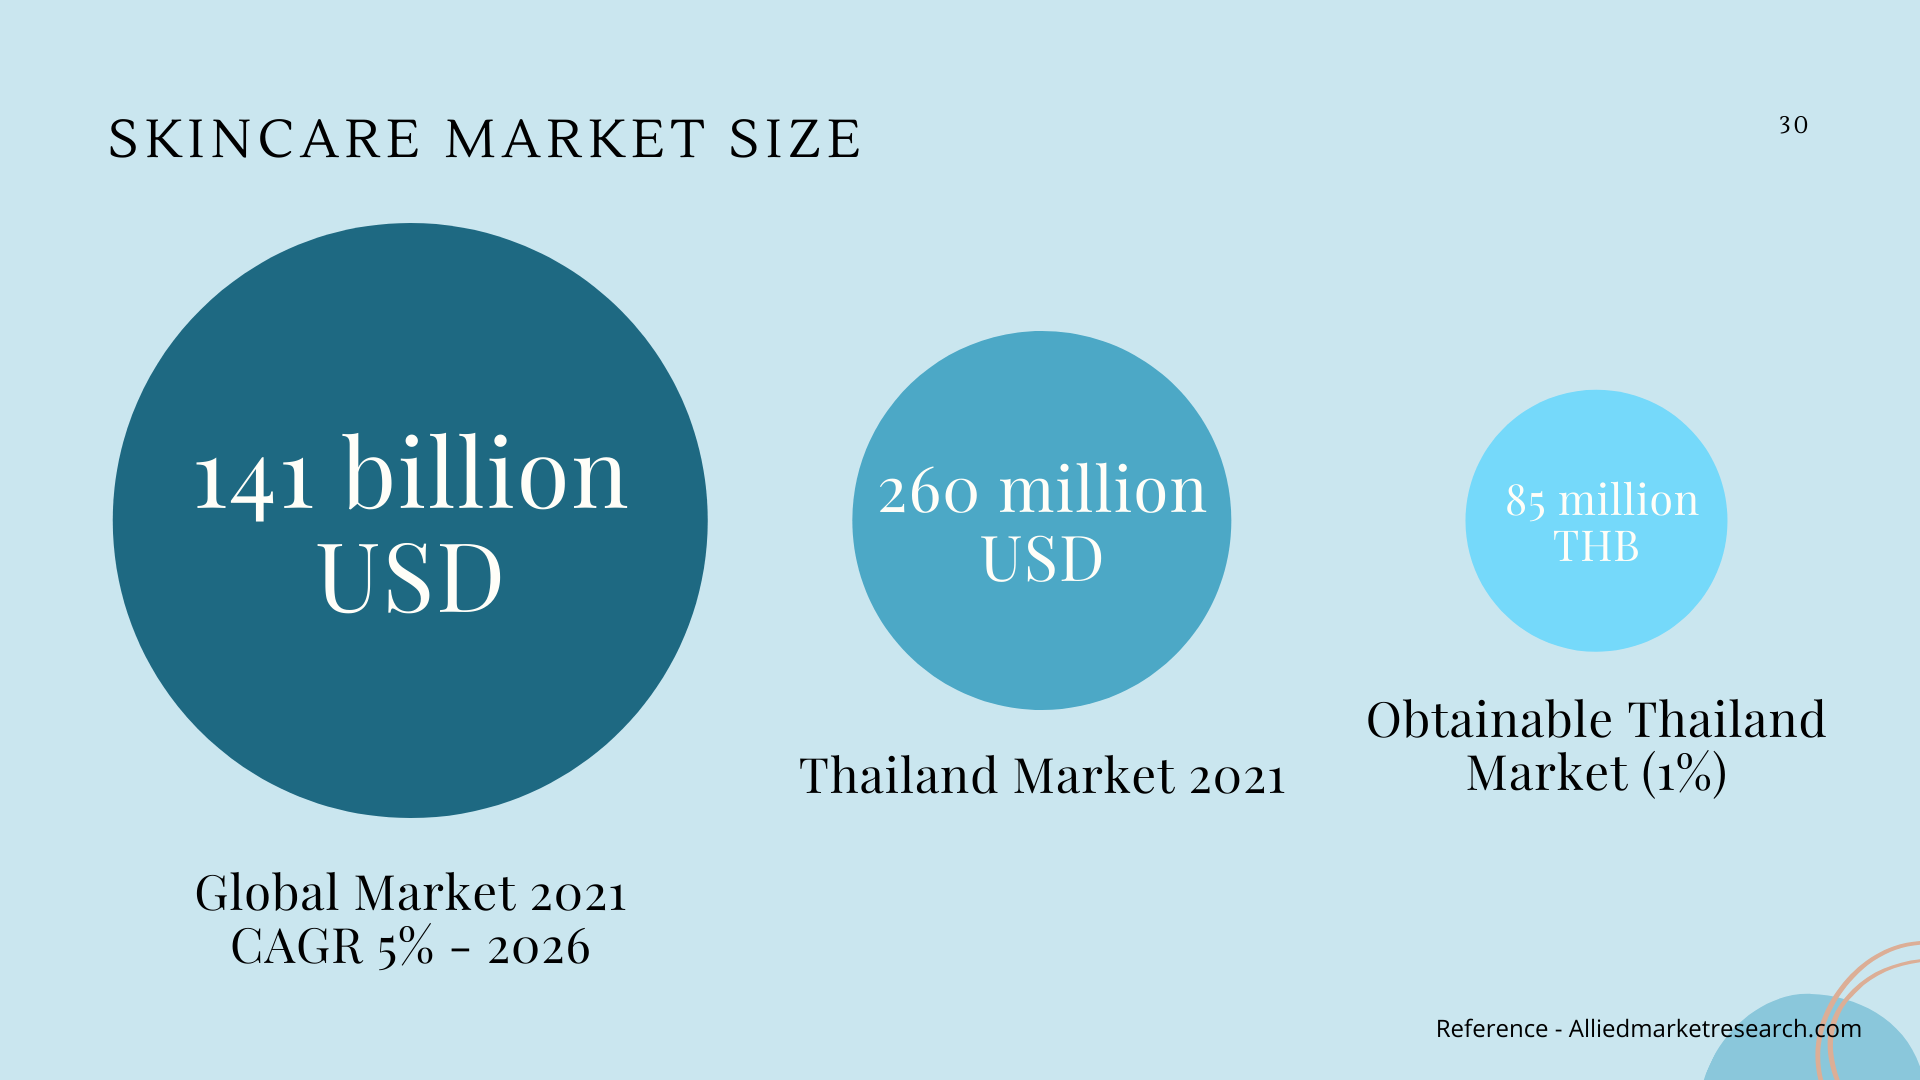
Skincare Market Size
- Global Market 2021 CAGR 5% - 2026 = 141 billion USD
- Thailand Market 2021 = 260 Million USD
- Obtainable Thailand Market (1%) = 85 million THB
Skincare Target Market Population (Pyramid Top to Bottom)
- Age 15-24 years old = 4,151,876
- Total female population in Thailand = 35,711,735
- Total female population in Asia = 3,904,727,342
Questions That Were Asked During Our Pitch
Challenges that we faced in Lobe.ai
Can only do image classification (identify one problem), but cannot do image detection (identify many problems of the face), so in order to solve this problem we will ask customers to take only the part of their face where they have skin problems or concerns. For example, if they have acne on their chin, they will have to only take the picture of this area. If they also have other parts of their face where they have acne, they can always submit a new photo to get new skin diagnostic results. However, in the future if we want to enable the "image detection" feature, we will have to write our own code in addition to the one from Lobe.ai, or we can use the software called "Azure" which was recommended by Ajarn Woradom during his lecture.
Inconvenient and hard to collaborate because it only allows one person to develop and train the model. This may cause some human error if we were to upload many pictures because no one else could help check.
There is a limited amount of photo's we could find from Google; therefore, it is hard to get 99% or even 100% accuracy.
How did you implement Lobe.ai
- Lobe.ai is generally an easy application to use. The following are the steps used to train our model on Lobe.ai.
- First, we download facial images of 7 different skin types that we would use to train and test our model. In our case we downloaded about 250 images, in which we would split into training and testing set of ratio 80/20. So we have 200 images for training and 50 images for testing.
- Next, we import our training set images (200 images) into our Lobe.ai model to let it train. The Lobe.ai trains the model by itself which is very convenient.
- Finally, after the model is trained, we could test our model with our testing set of images in the Lobe.ai application. In our case, our model test is very accurate, getting an efficacy of 95% accuracy.
Have you implemented the Lobe.ai into your UX/UI, and how would you do it?
Currently we have not yet implemented the AI model into our UX/UI, but it is in our plan. How we could do this is to use Flask to deploy our model, Docker to containerize the application, and HTML for display the image classification results. *More details of this are included in our slide *
Skin Education lobe.ai code (Exported from lobe.ai) Link for code: https://drive.google.com/drive/folders/1z3utu2DbYg7i7SSnDIxNZ63EDYhss5kn?usp=sharing
Built With
- convolutional
- network
- neural

Log in or sign up for Devpost to join the conversation.