-

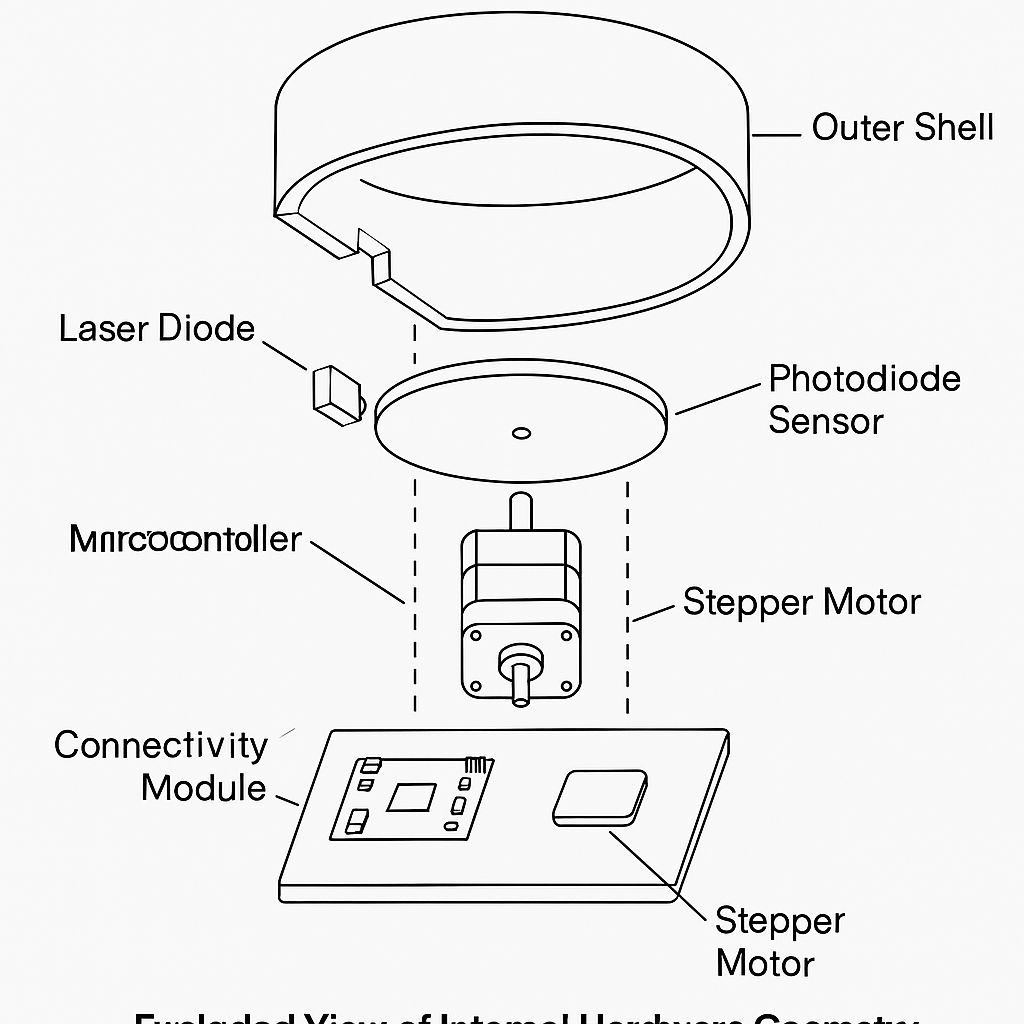
This is an exploded view diagram of the internal hardware geometry for ScanLite 3D, a low-cost 3D scanning device
-
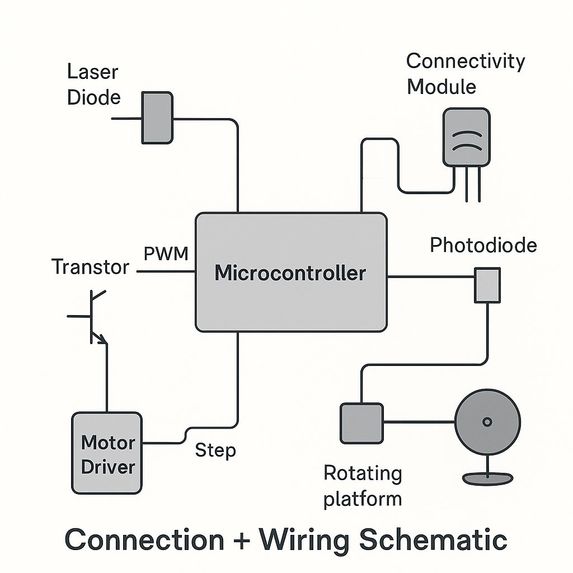
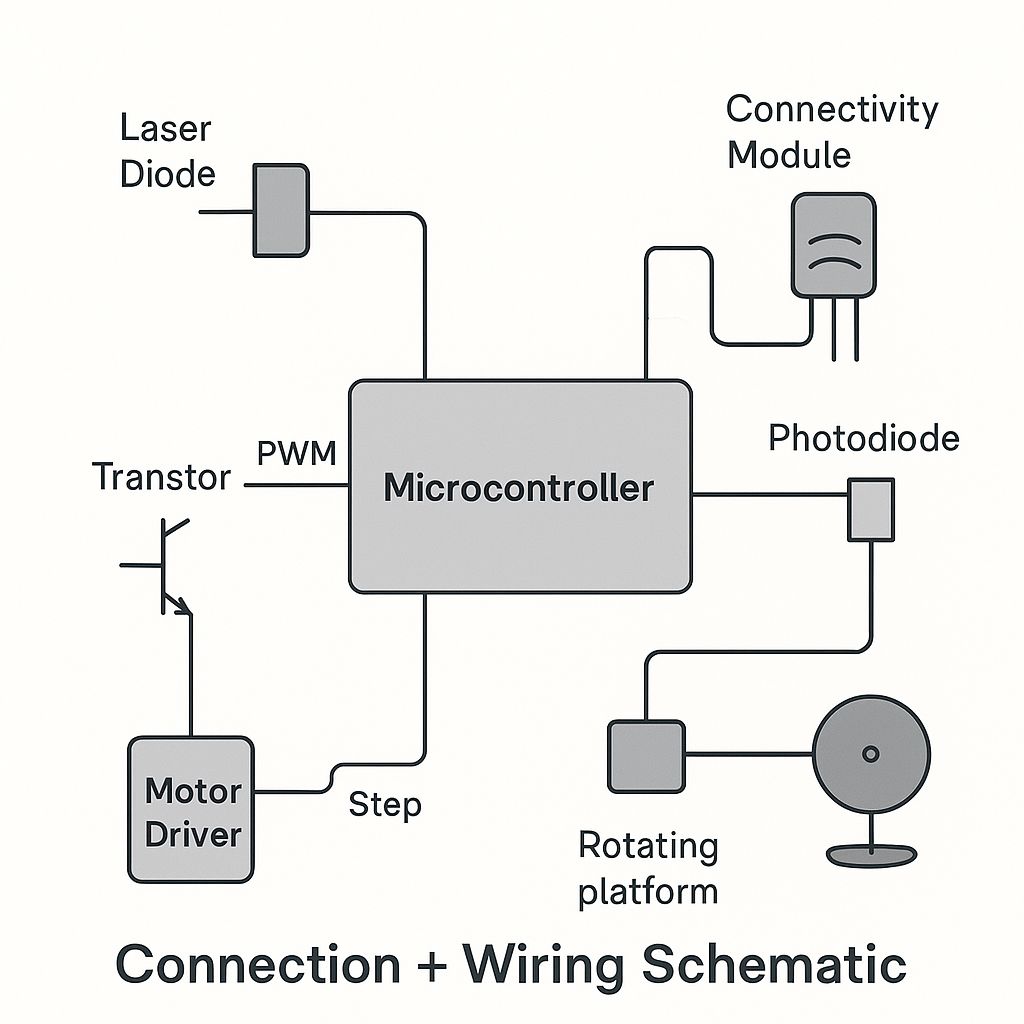
The diagram illustrates the electrical connections and signal pathways between the core components of the 3D laser scanner system
-
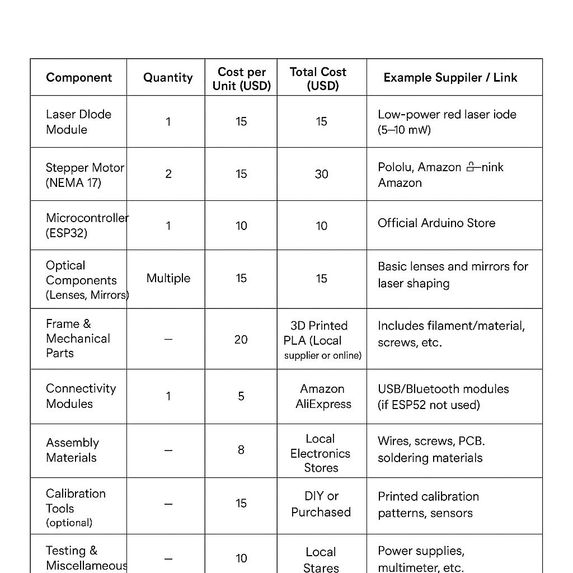
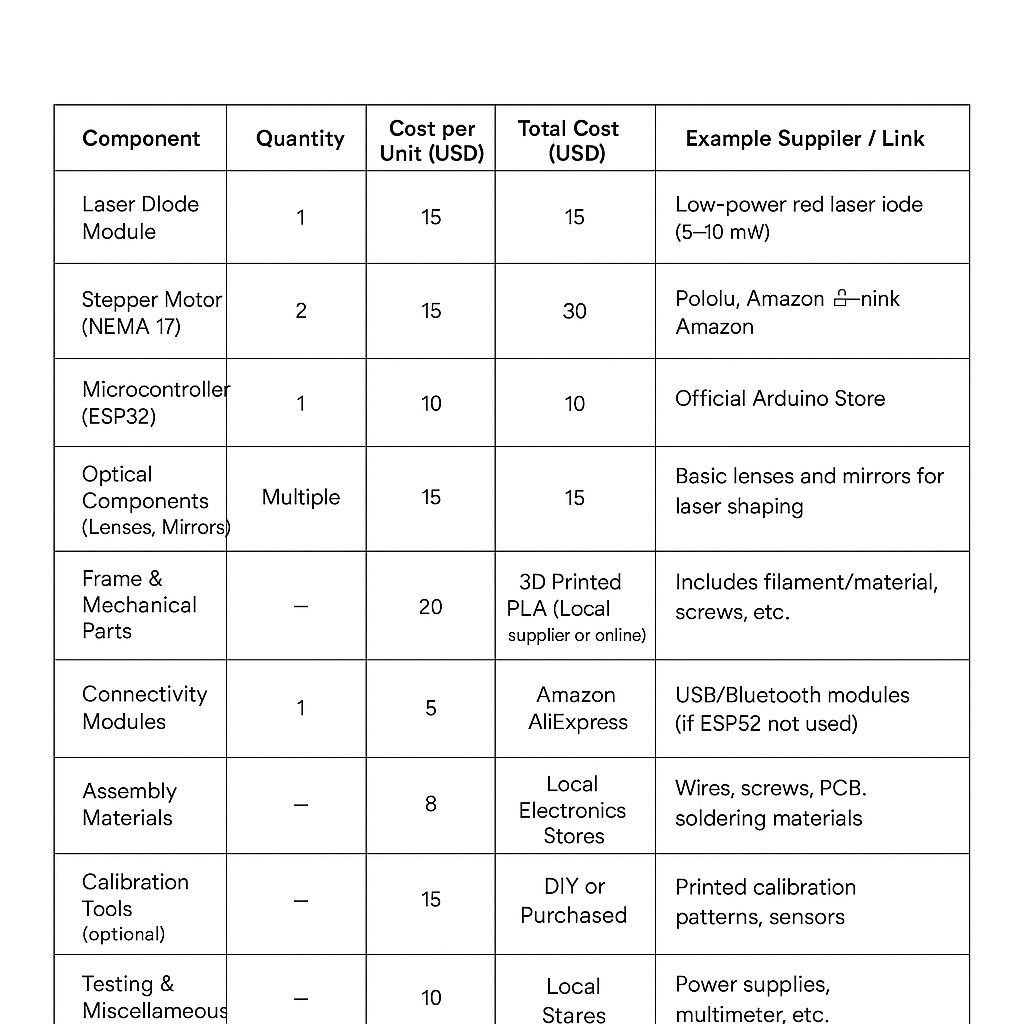
A detailed cost breakdown & parts sourcing section covering Bill of Materials and pricing tiers for my 3D laser scanner project
ScanLite 3D - Affordable 3D Scanning for All
Inspiration The inspiration behind ScanLite 3D came from the need to democratize access to 3D scanning technology. Traditional 3D scanners are often expensive and complex, limiting their availability to professionals and large companies. We wanted to create an affordable, easy-to-use device that anyone—from hobbyists to small businesses—could use to capture accurate 3D models of real-world objects. Our goal was to empower creativity and innovation by making 3D scanning accessible to all.
What it does ScanLite 3D uses a laser diode and photodiode sensor mounted on a rotating platform to capture detailed surface profiles of an object. By combining precise motor control with light detection, it generates accurate 3D point clouds of scanned items. These point clouds can then be processed to create detailed digital models for use in design, manufacturing, education, or virtual environments.
How we built it We built ScanLite 3D using affordable off-the-shelf components, including an Arduino microcontroller, stepper motor, laser diode, photodiode sensor, and a custom 3D-printed frame to hold everything in place. The system is controlled by firmware that synchronizes the laser scanning with the platform rotation, collecting data points in real time. Connectivity options like USB and Bluetooth allow users to easily transfer scan data to their computers or mobile devices for processing.
Challenges we ran into Calibration precision: Ensuring the laser and sensor alignment was accurate enough for consistent scans required multiple iterations and careful adjustment.
- Motor synchronization: Achieving smooth rotation with precise step control was critical to avoid distortion in scanned data.
- Data noise: Filtering out ambient light interference and sensor noise was a challenge, requiring tuning of sensor sensitivity and signal processing algorithms.
- Cost constraints: Balancing component quality with affordability forced us to carefully select parts that offer the best value without compromising performance.
Accomplishments that we're proud of
- Successfully creating a fully functional low-cost 3D scanner prototype.
- Developing an intuitive calibration process to improve scan accuracy.
- Designing and 3D printing a custom frame that holds components securely and enables easy assembly.
- Integrating wireless connectivity for easy data transfer.
- Capturing detailed and reliable 3D scans of various small objects.
What we learned
- The importance of mechanical precision in scanning systems to minimize errors.
- How to implement real-time control and data acquisition using microcontrollers.
- Techniques to reduce sensor noise and improve signal quality.
- The challenges and trade-offs involved in designing low-cost hardware with reliable performance.
- Collaborative problem-solving in hardware and software development.
What's next for ScanLite 3D - Affordable 3D scanning for All
Moving forward, we plan to enhance ScanLite 3D by:
- Improving scan resolution and speed.
- Adding support for larger objects with an adjustable platform.
- Developing user-friendly software for 3D model visualization and editing.
- Expanding connectivity options, including cloud integration for remote access.
- Exploring applications in education, small-scale manufacturing, and art.


Log in or sign up for Devpost to join the conversation.