-
-
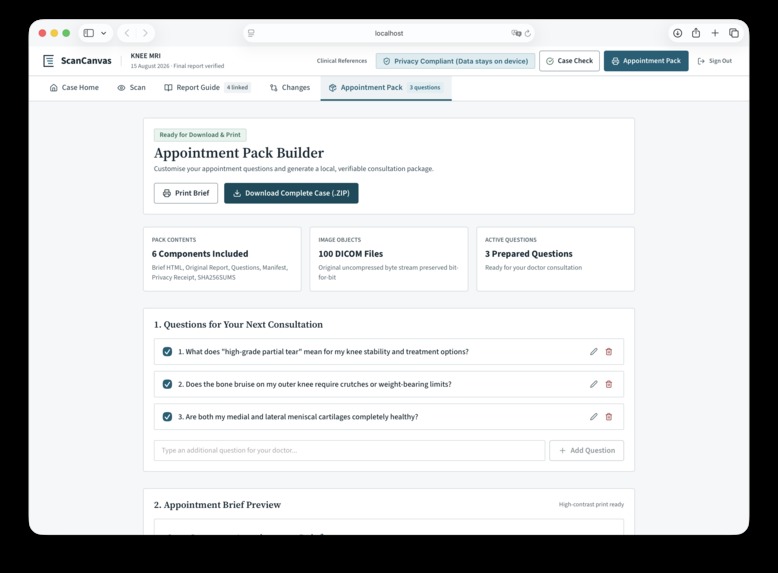
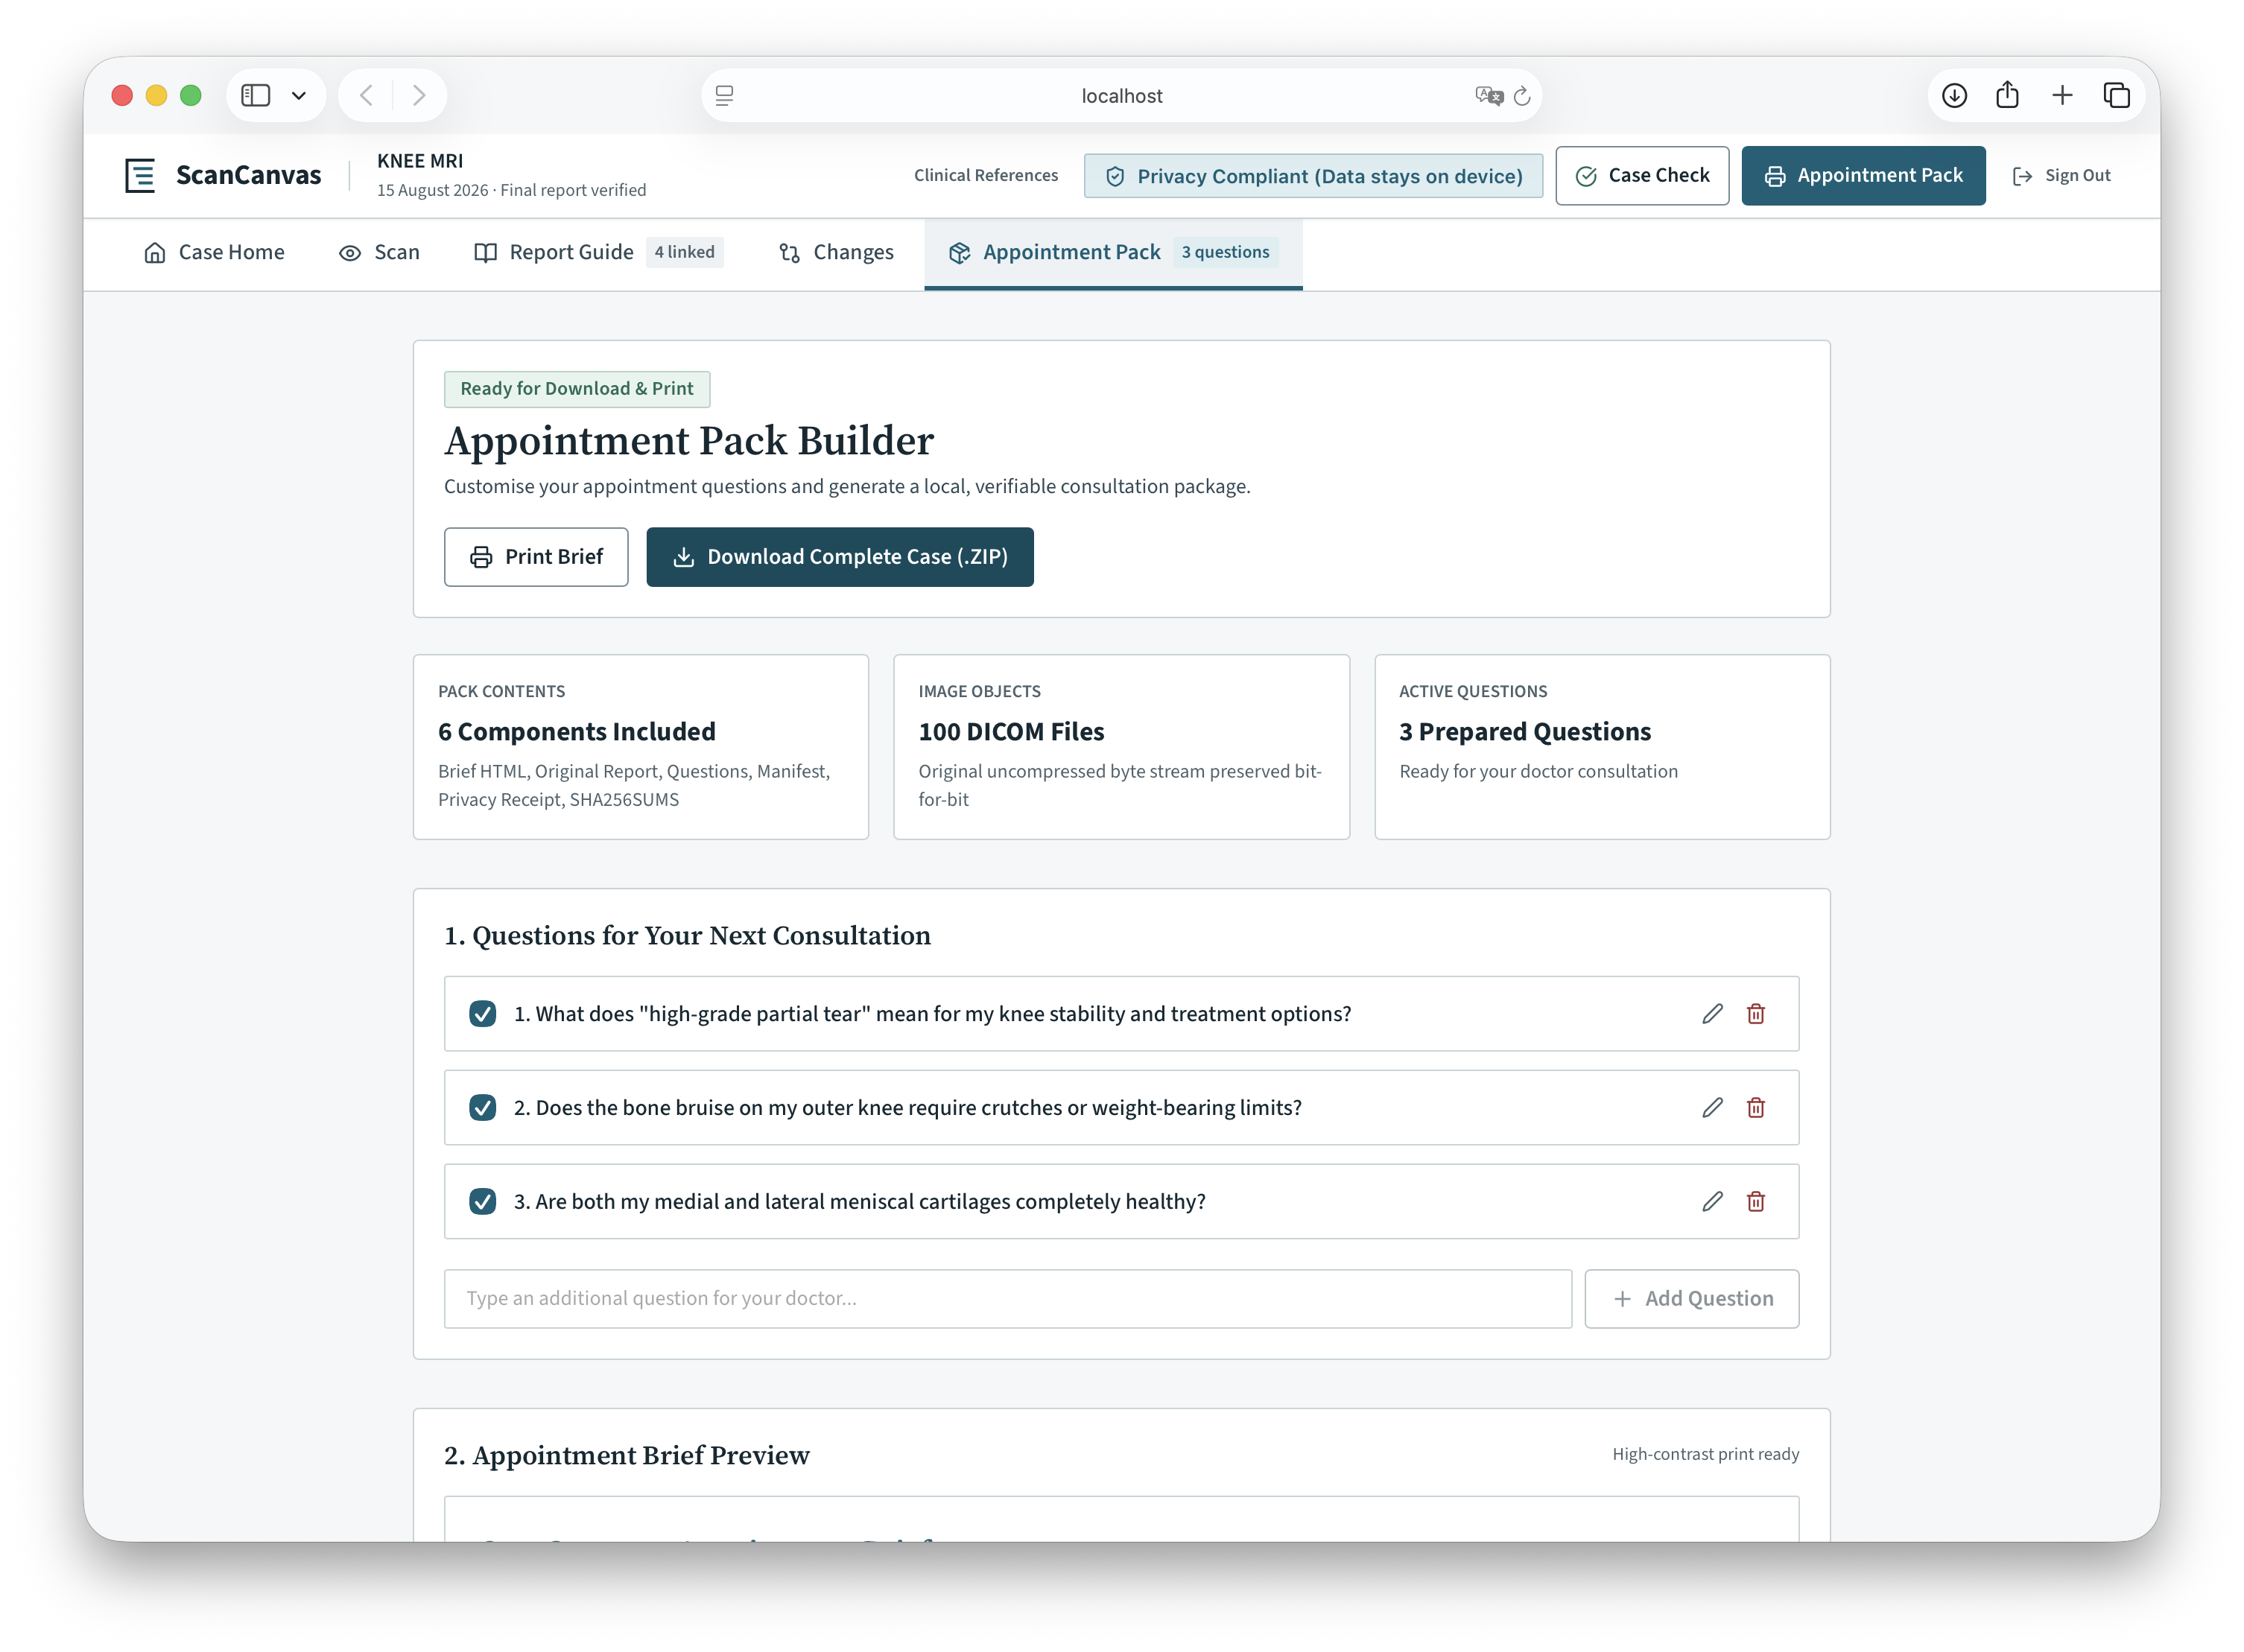
Appointment Pack Builder: Choose and edit questions, preview a print-ready brief and download a verifiable Appointment Pack with records
-
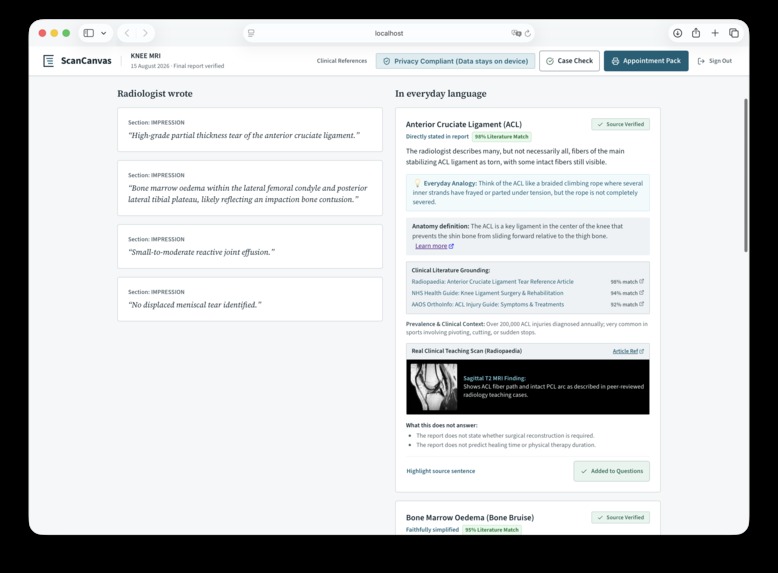
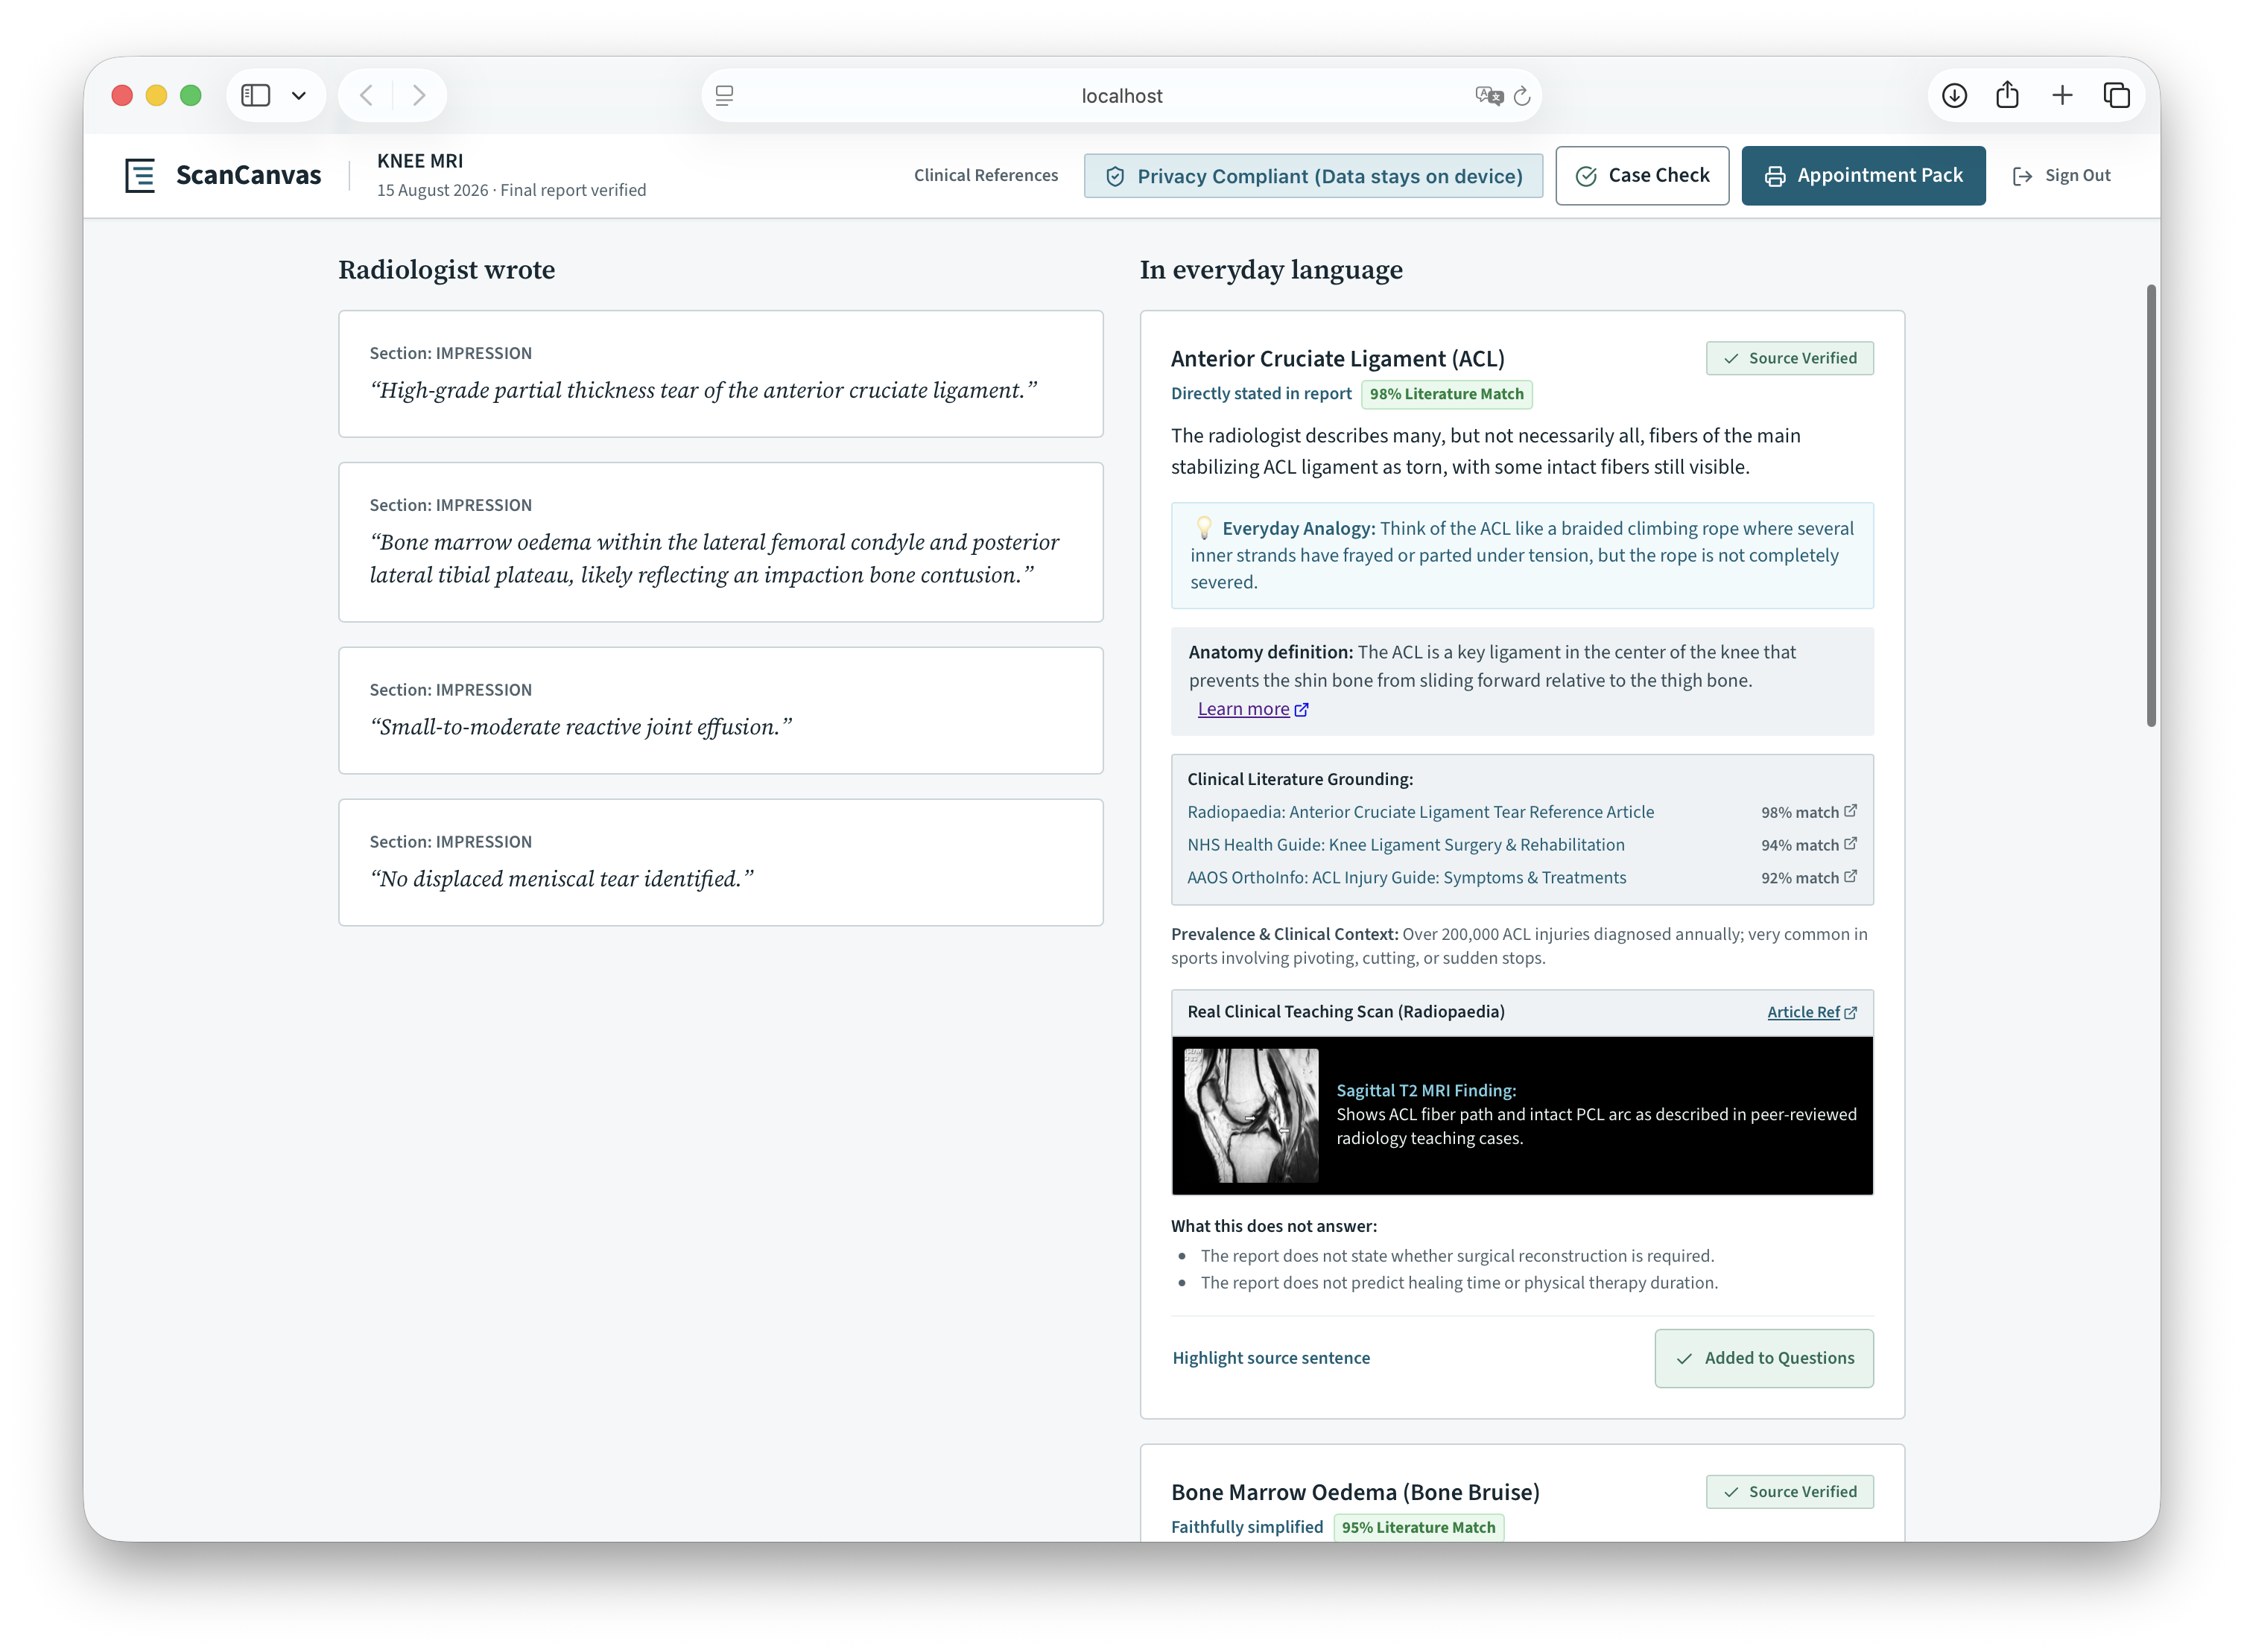
Report Guide: See the radiologist’s exact wording beside plain-language explanations, source evidence and questions to take to appointment
-
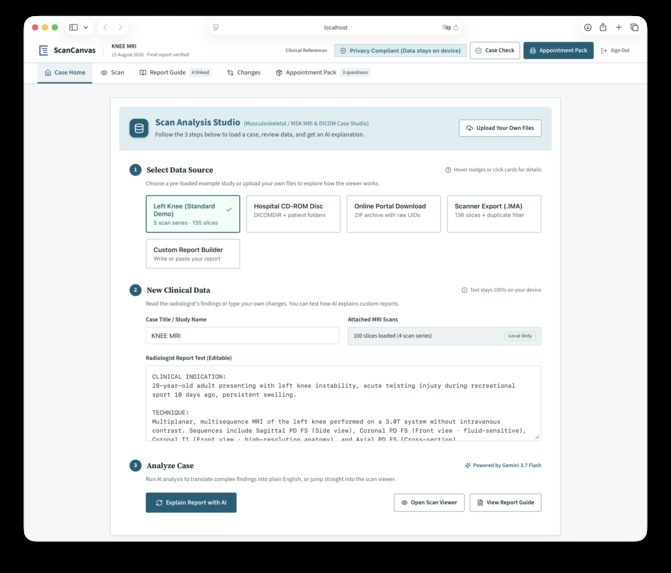
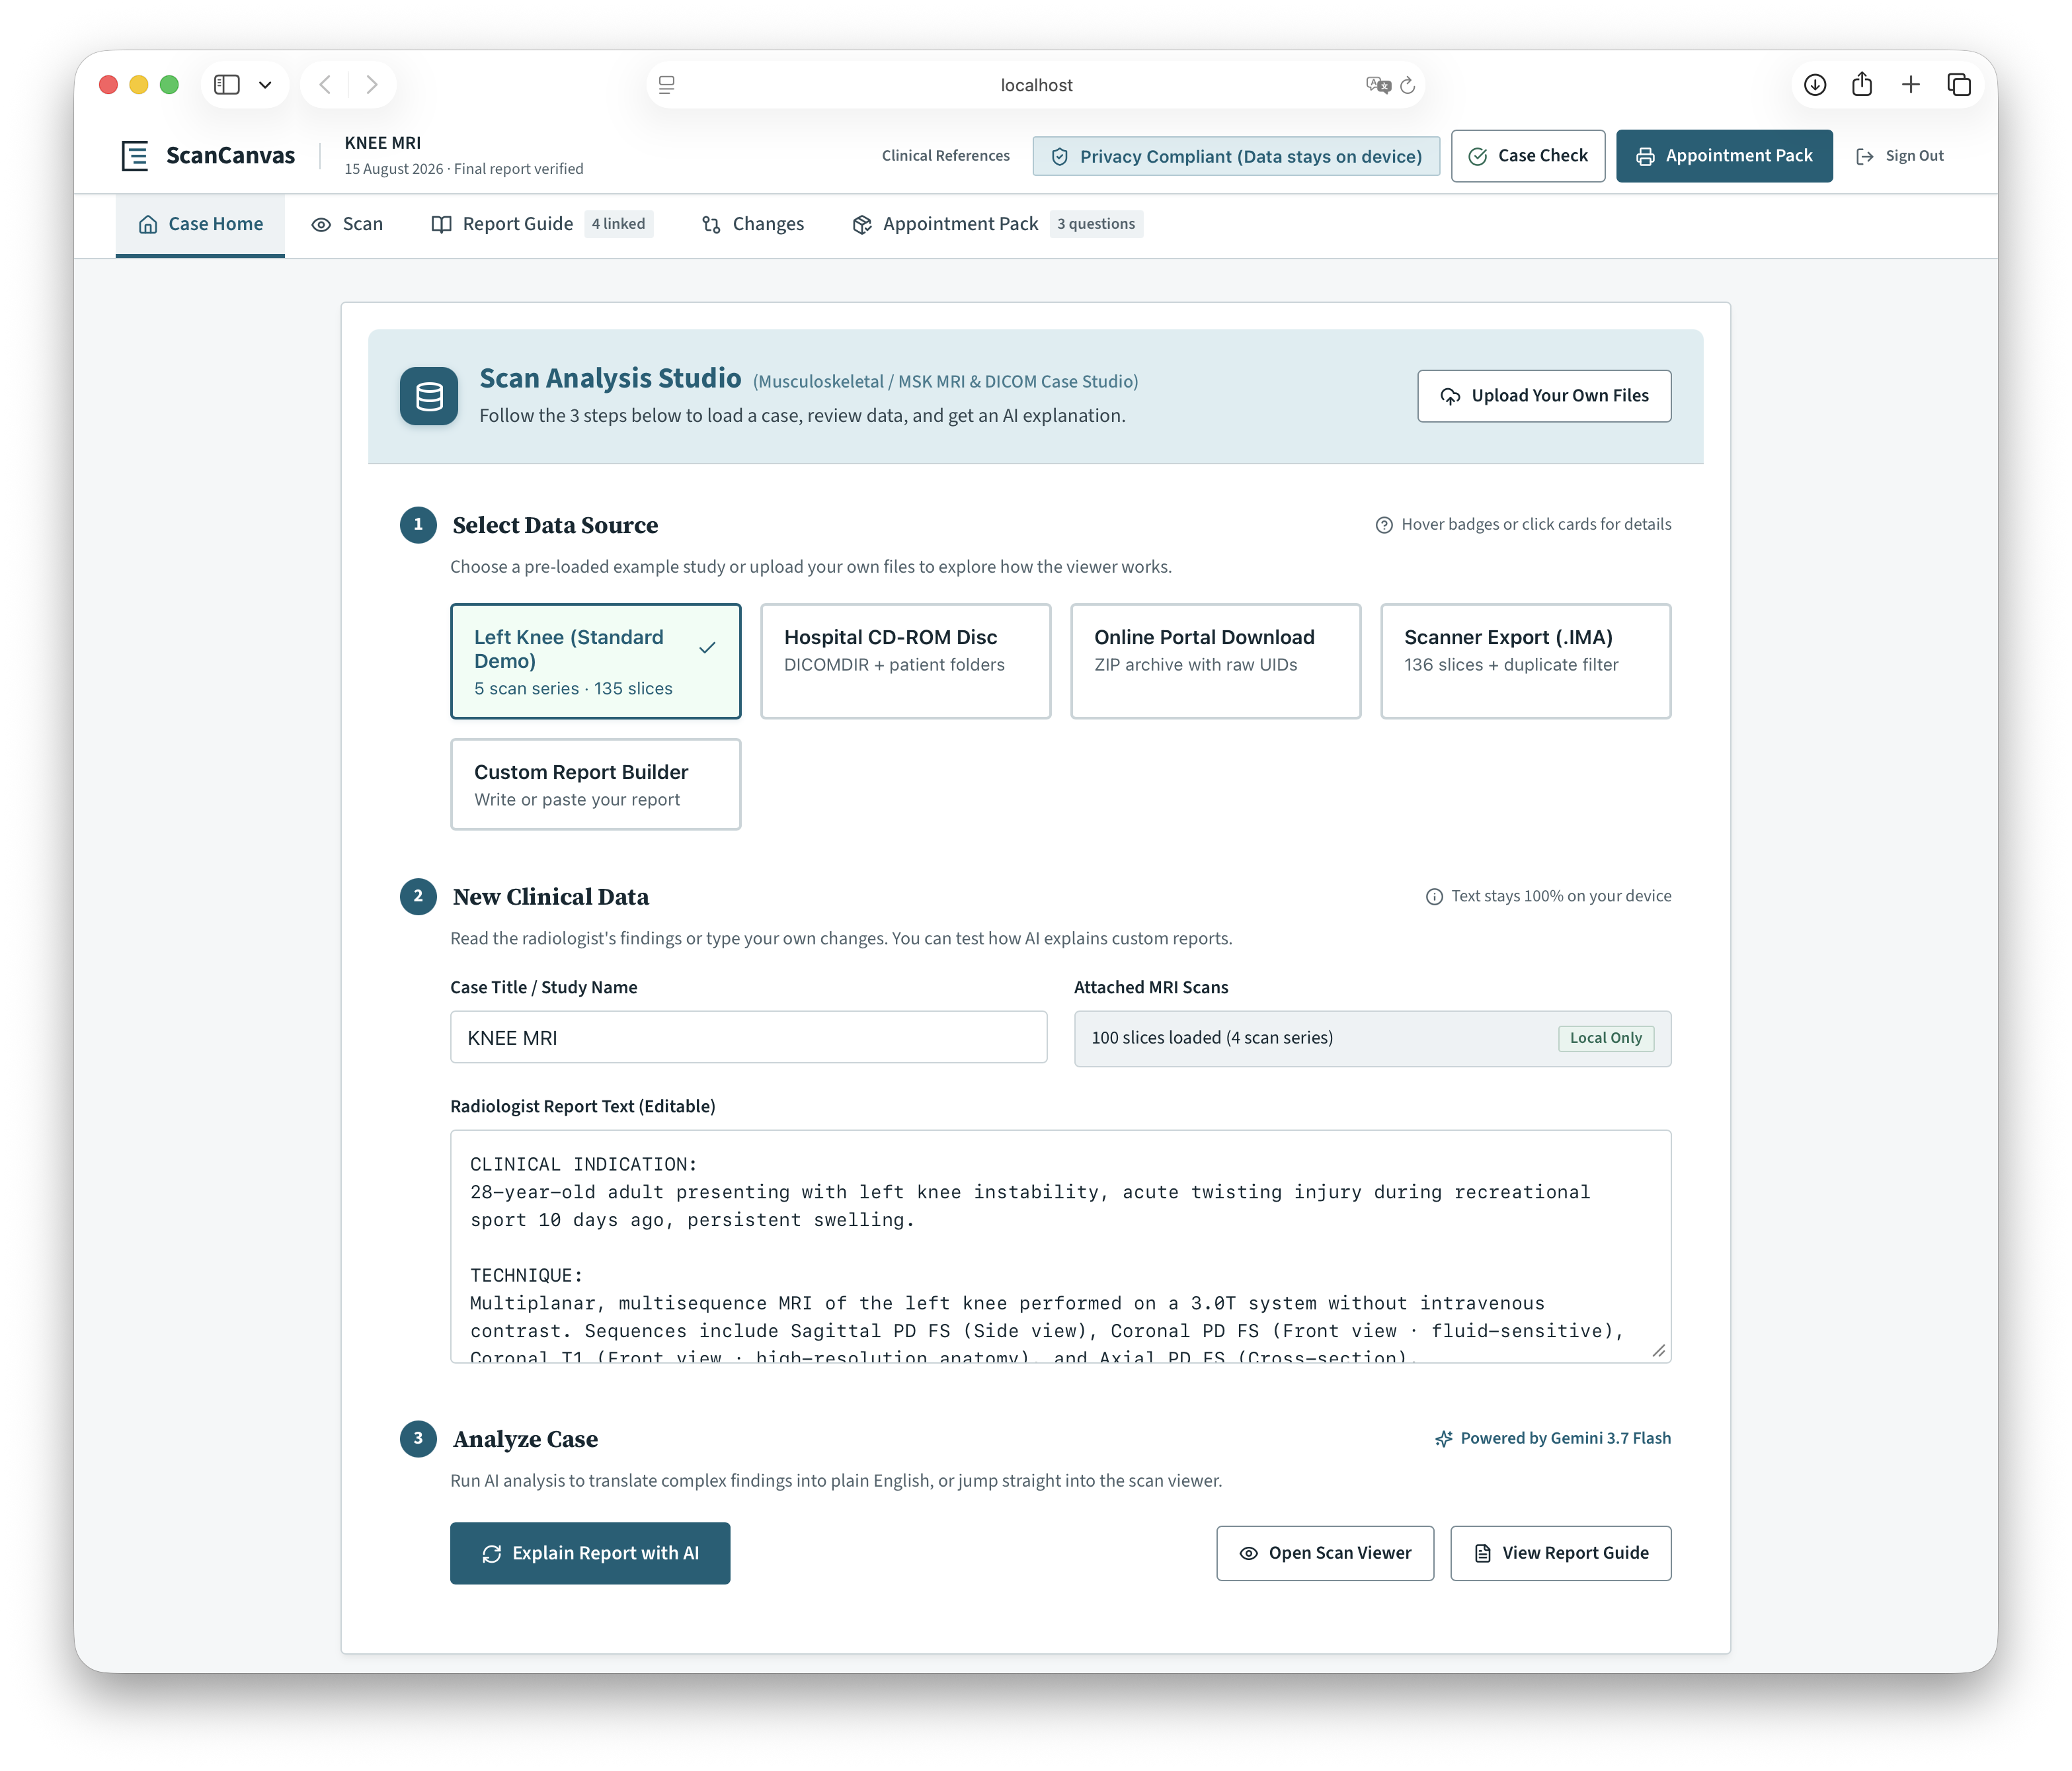
Case Home Page: Your case at a glance: scan readiness, report status, privacy controls and the next useful action
-
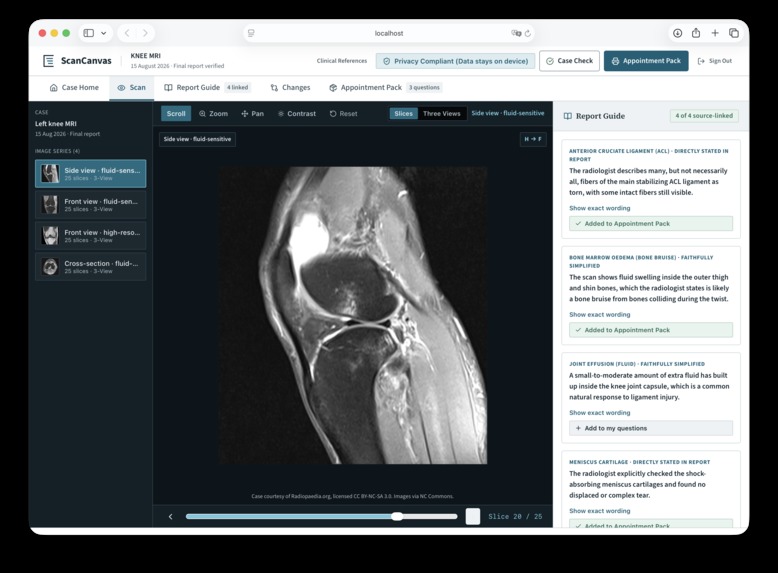
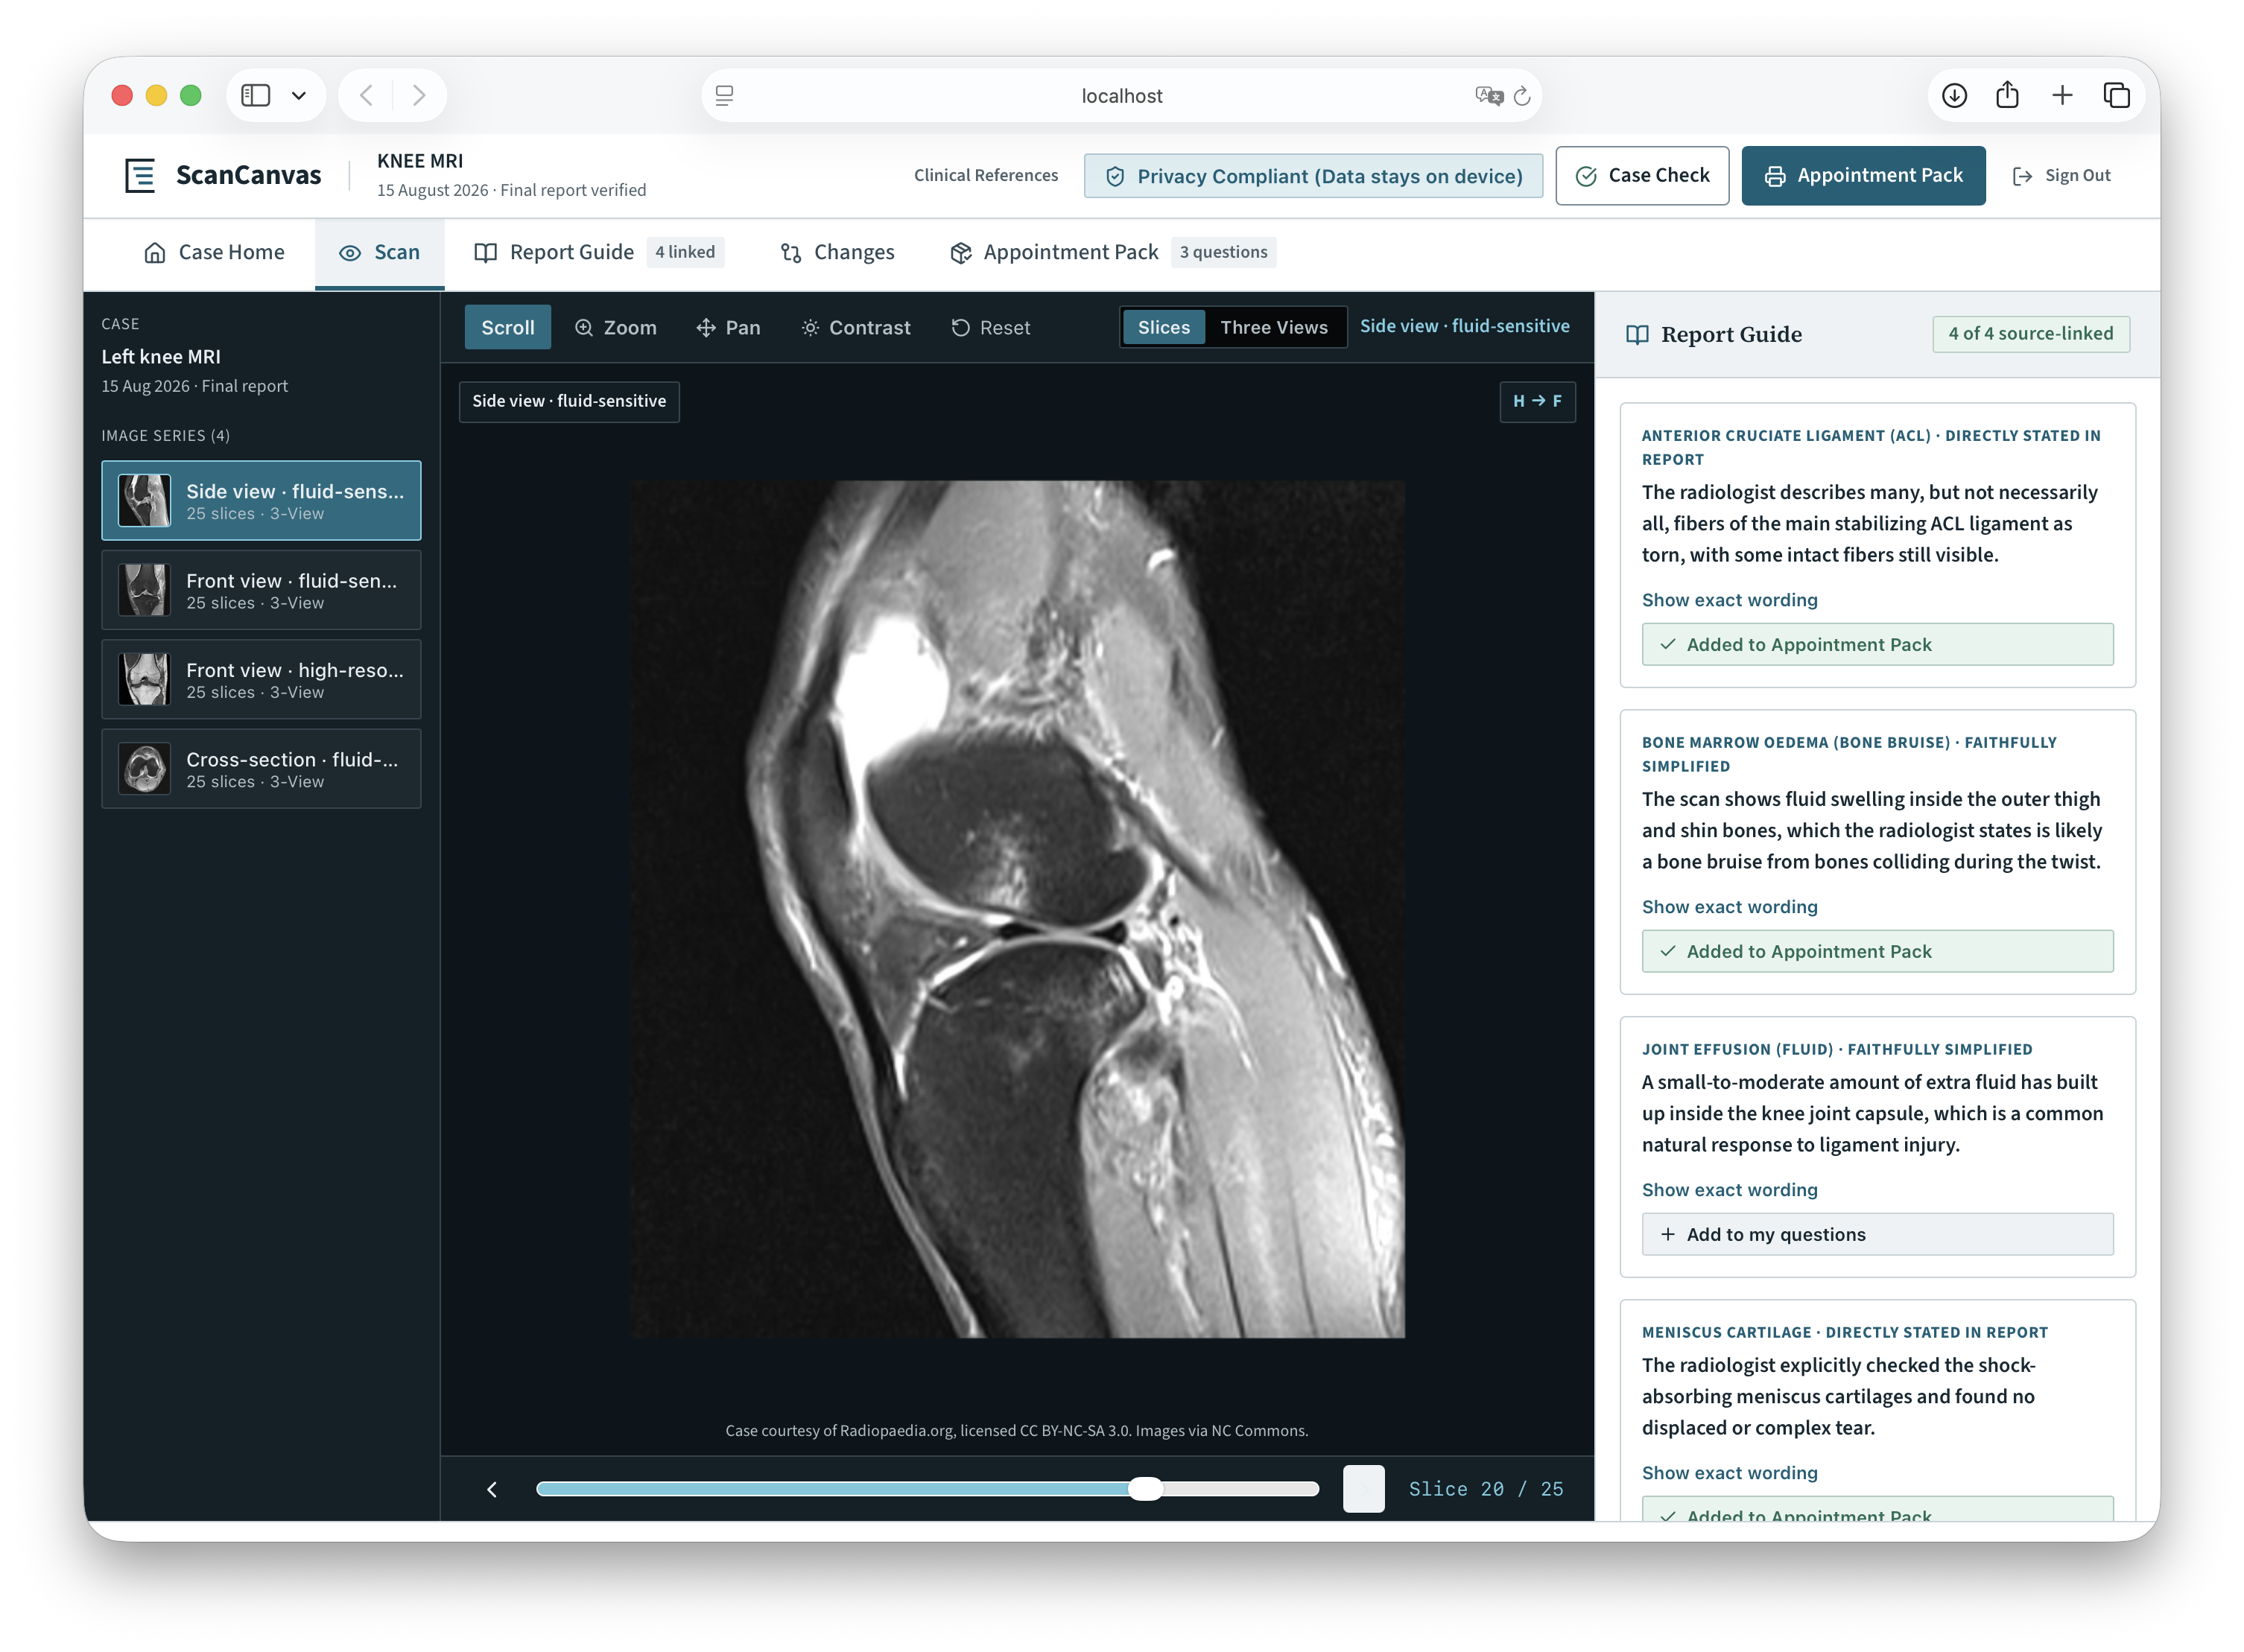
Scan Page: Explore MRI series locally with slice navigation, zoom, pan and contrast tools.
-
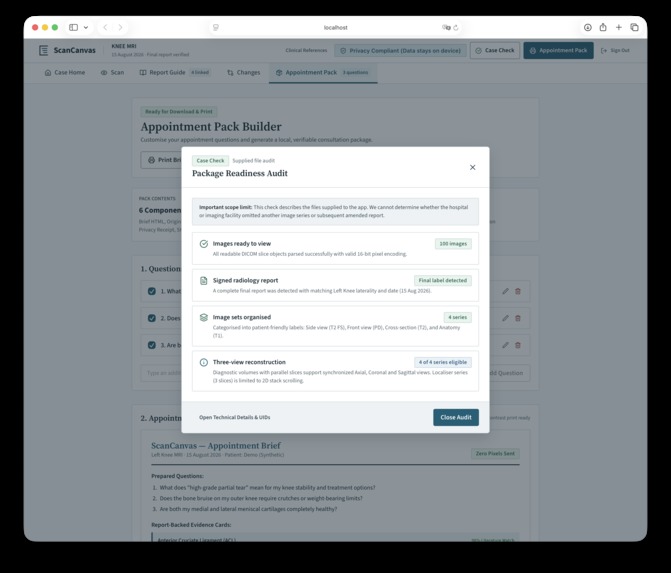
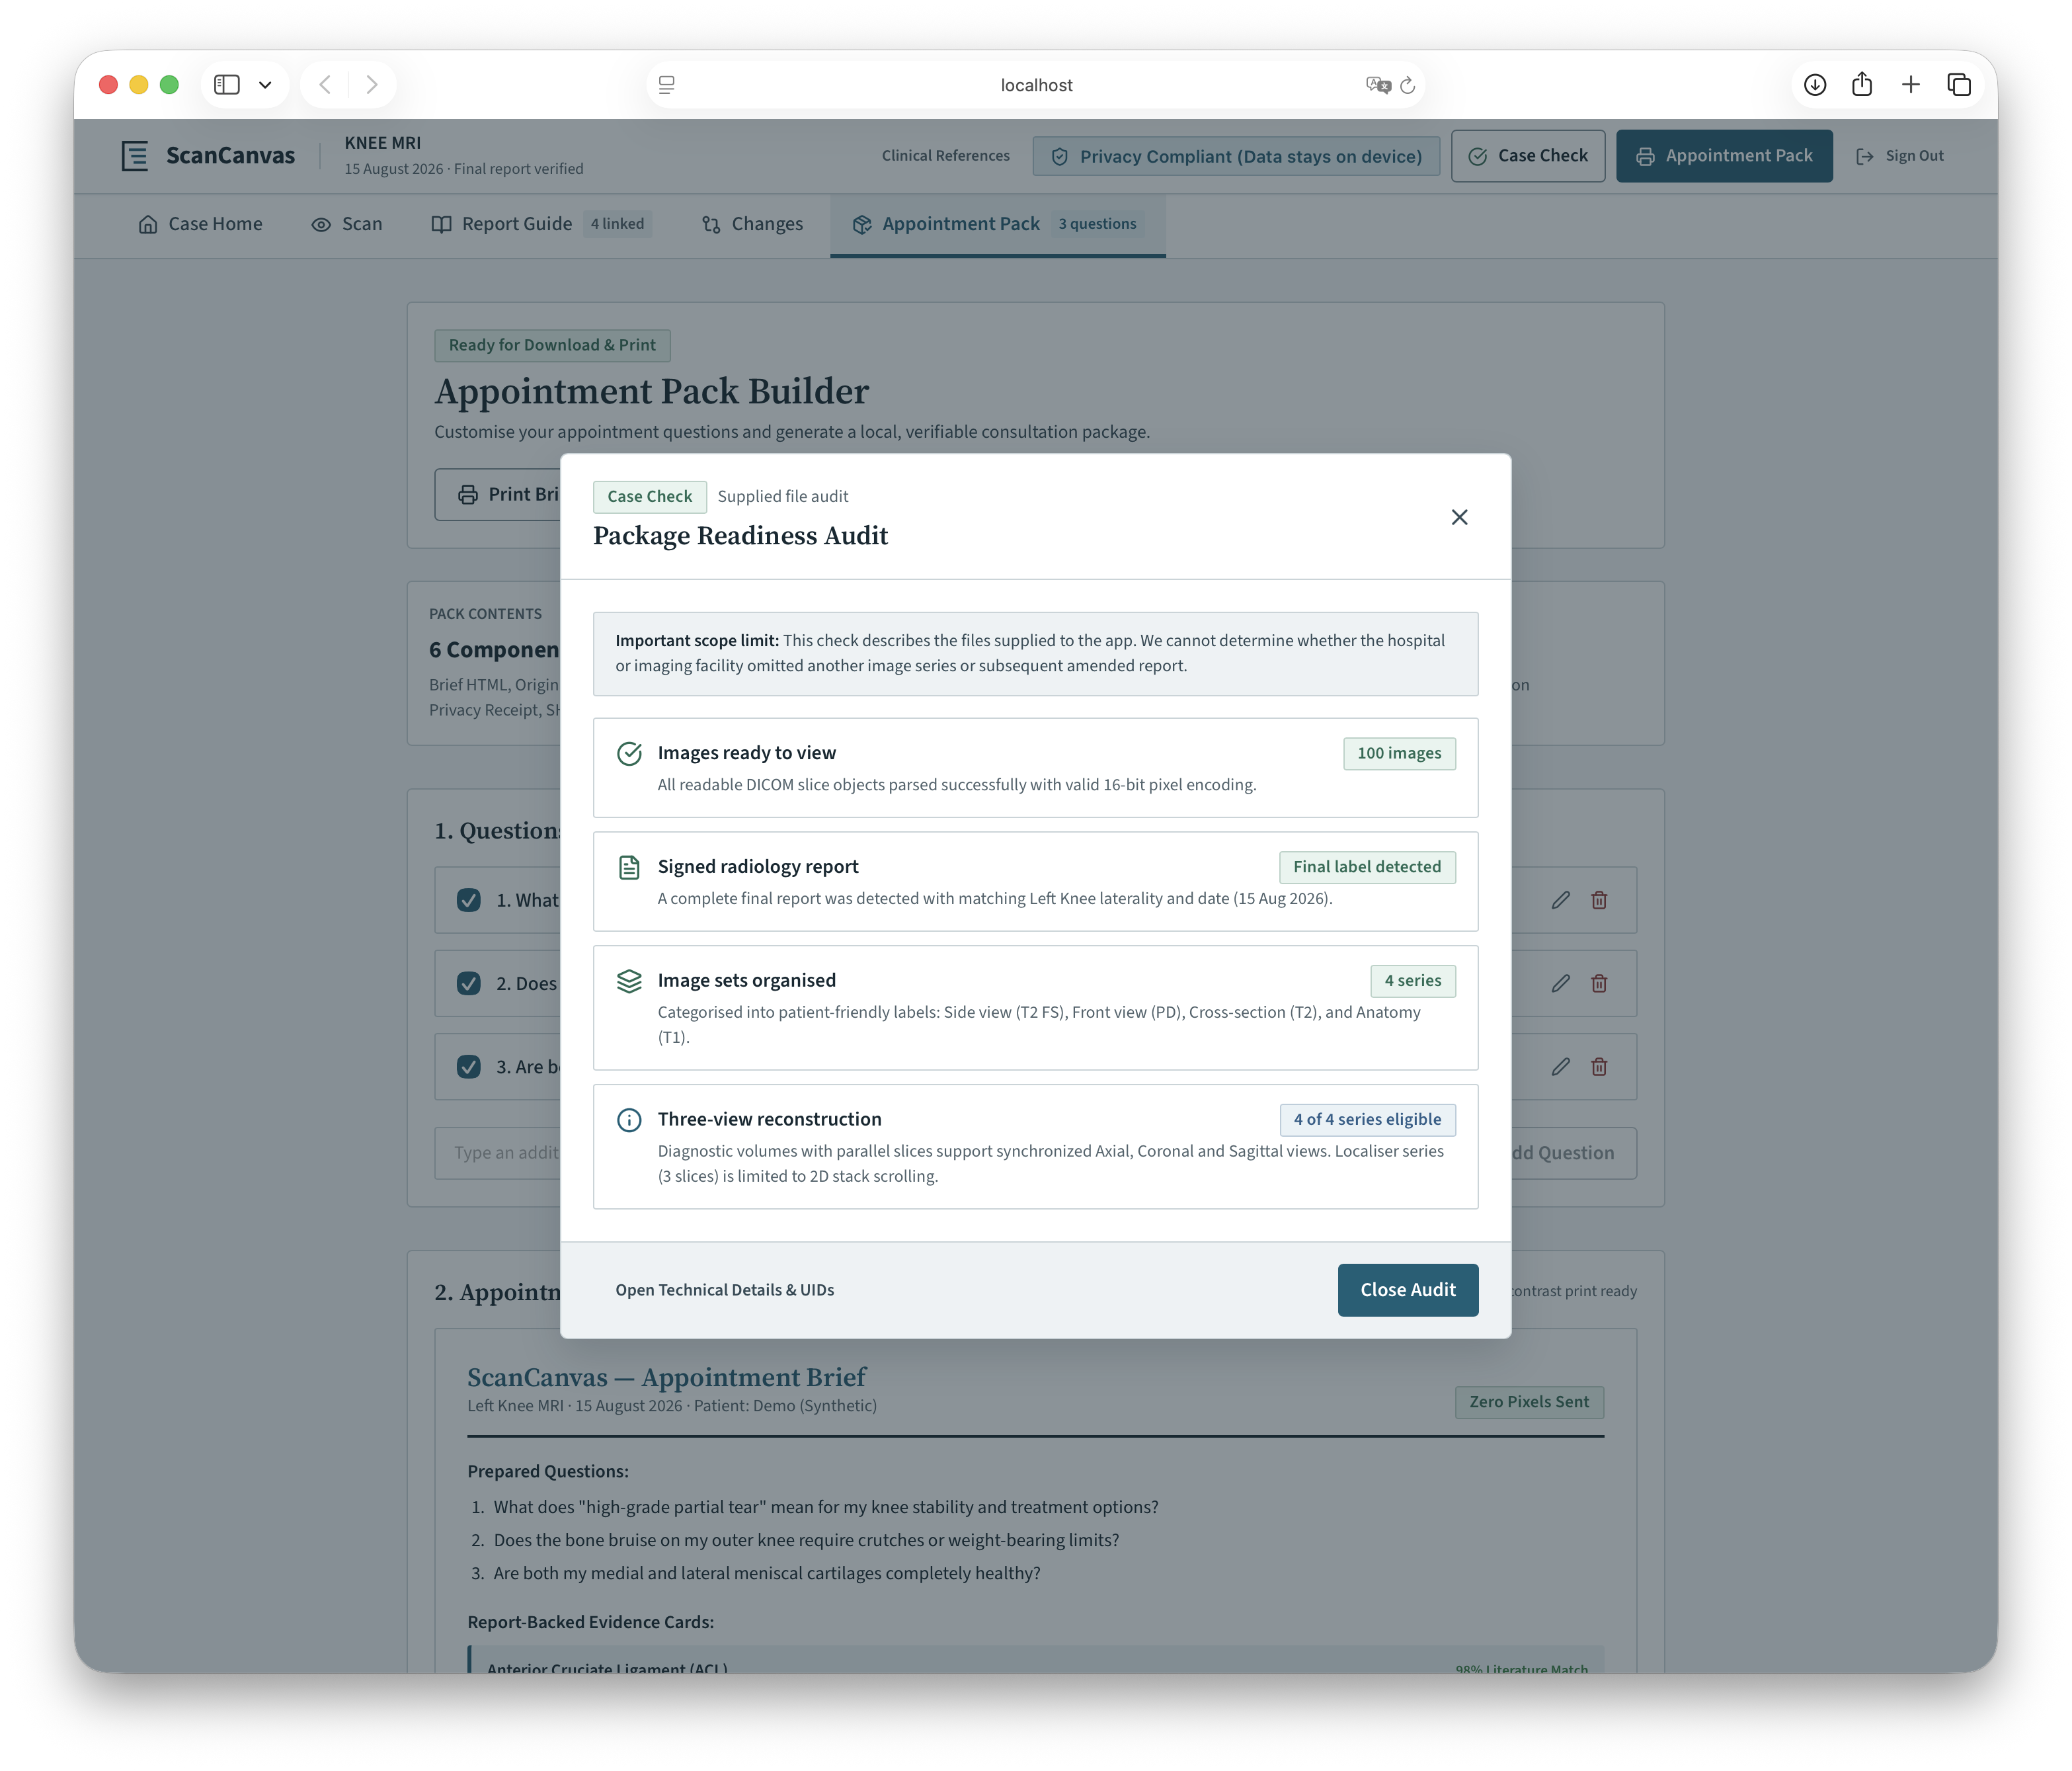
Review what arrived: readable images, signed-report status, organised series, three-view eligibility and any files needing attention
Inspiration
My father is a radiologist, so I have had a chance to see the systems radiologists use every day. PACS platforms and medical image viewers are incredibly powerful, but they are designed for trained professionals. For an ordinary person, they can feel almost impossible to navigate.
I experienced this myself with my own radiology records. An MRI might arrive on a CD, inside a ZIP file, or as hundreds of unfamiliar DICOM files that a normal image viewer cannot open. Even when the written report is included, it is full of terminology that is difficult to understand without medical knowledge. I was fortunate because I could ask my father to open the images and explain the report in simple language. Most people do not have a radiologist in the family. They may receive their results and then spend days or weeks waiting for another appointment, unsure what the report means or what questions they should ask.
My own experience with knee injuries also influenced the project. Knee problems often involve more than one scan over time, which makes it even harder to keep track of different files, reports and changes. That became the starting point for ScanCanvas.
What it does
ScanCanvas helps people open, organise and understand their MRI records in one place. A user can add an MRI folder, CD export, ZIP file or collection of DICOM images. ScanCanvas checks the files locally, groups them into recognisable image series and makes them available through an interactive viewer.
The signed radiology report is then explained in everyday language. Each explanation remains connected to the exact wording in the original report, so users can see where the information came from rather than being asked to trust a generated summary.
If someone has reports from different dates, ScanCanvas can also organise them into a timeline and describe what was mentioned in each report. It does this conservatively. If two statements cannot be compared safely, the application says so instead of guessing.
Finally, users can collect questions and create an Appointment Pack containing their report, plain-language explanations, selected questions and scan information. The goal is not to replace a radiologist or doctor. It is to help people understand what their report says, stay organised and arrive at their next appointment better prepared.
How we built it
We built ScanCanvas using Google Antigravity, which helped us turn the initial idea, product plan and interface designs into a working full-stack application. The frontend uses Next.js, React and TypeScript, and the application is containerised with Docker and deployed on Google Cloud Run.
Although ScanCanvas runs on Google Cloud, we deliberately separated the application into two processing lanes. The MRI lane stays inside the user’s browser. DICOM files are inspected, grouped into image series and opened in the viewer locally. File hashing and compatibility checks also happen on the device, so MRI pixel data is never sent to a generative model.
The cloud lane begins only after the user reviews and approves the exact radiology report text that will be processed. That text is sent to our Cloud Run API, while Firestore stores the job state, workflow checkpoints and provenance records. A private Cloud Run worker coordinates the report-processing stages and sends approved text to Gemini through Vertex AI.
Gemini 3.7 Flash handles most of the workflow. We selected it because it is fast and well suited to structured extraction, plain-language rewriting and generating consistent JSON responses. For selected extended-research tasks that require more detailed context and reasoning, we route the request to Gemini 3.1 Pro. These research results remain separate from patient-specific statements, which must always be grounded in the signed radiology report.
We use Google ADK to coordinate the agent workflow. The agent identifies relevant report statements, creates everyday-language explanations, preserves uncertainty words and prepares possible questions for the next appointment. It can also compare two reports conservatively and return a safe refusal when the wording cannot be compared reliably.
Model output is never shown directly to the user. A deterministic verification layer checks that every explanation has an exact supporting sentence in the original report. It also blocks unsupported diagnoses, disease probabilities, urgency claims and treatment recommendations. If an output fails these checks, it is rejected rather than displayed.
Once the result has been verified, it is stored in Firestore and returned to the application. The browser then combines it with the locally processed scan information, selected questions, file manifest, SHA-256 integrity hashes and privacy receipt to create the final Appointment Pack.
MRI files → processed locally in the browser → organised into image series → opened in the ScanCanvas viewer → MRI pixels remain on the device
User-approved report text → Cloud Run API → Firestore job and provenance record → Google ADK workflow on Cloud Run → Gemini 3.7 Flash on Vertex AI → Gemini 3.1 Pro for selected extended research → deterministic evidence and safety verification → verified result stored in Firestore → returned to the browser → Appointment Pack created
Cloud Run hosts and scales the application services, Vertex AI provides controlled access to the Gemini models, and Firestore maintains durable workflow state. Google Cloud service identities and Secret Manager keep credentials out of the browser, while Cloud Logging records technical events without storing MRI pixels or report contents.
This architecture allows ScanCanvas to benefit from Google Cloud and Gemini while maintaining a clear privacy boundary: the scan stays with the user, and only explicitly approved report text enters the cloud workflow.
Challenges we ran into
One of the biggest challenges was working with DICOM. A single MRI can contain hundreds of files, multiple image series, duplicate images, unusual file names and unsupported formats. We needed the application to handle those situations without crashing or pretending that every file was usable.
Another challenge was finding the right boundary for AI. It would have been easy to build a chatbot that sounded confident, but that would not necessarily make the product safe or trustworthy. ScanCanvas does not diagnose MRI images, calculate disease probabilities or recommend treatment. It explains the signed radiology report and keeps the original wording visible.
Privacy was equally important. Medical images can contain sensitive information, so we designed the main workflow around local image processing. The application clearly shows what stayed on the device and what report text was approved for processing.
We also had to make a highly technical process feel approachable without hiding important limitations. Sometimes the safest and most useful result is “this cannot be compared reliably” or “this file could not be opened.” Designing those honest states became an important part of the project.
Accomplishments that we're proud of
We are proud that ScanCanvas goes beyond being another medical image viewer. It can take an unfamiliar collection of MRI files, organise the image series, open the scan, explain the signed report with exact source links and produce a practical Appointment Pack.
We are especially proud of the privacy-first workflow. MRI pixel data remains on the user’s device, while only explicitly approved report text is used for the explanation process.
We also built the system to show uncertainty and refuse unsupported comparisons. In a medical context, saying “I cannot verify this” is more valuable than producing a confident-looking answer. Most importantly, the project remains focused on a real human problem: helping someone move from confusion to a more informed conversation with their clinician.
What we learned
The biggest lesson was that access to medical records does not automatically make those records usable. Giving someone hundreds of files is not the same as helping them understand what they received.
We also learned that plain language alone is not enough. People need to know where an explanation came from, which is why the connection to the original report became central to ScanCanvas.
Another lesson was that safety does not have to make a product less useful. Clear boundaries, visible sources and honest refusals can actually make the experience more trustworthy.
Finally, we learned how wide this problem is. Radiology is a strong starting point, but many medical systems are built primarily for professionals. Patients are often expected to navigate the same information without the same training or tools.
What's next for ScanCanvas: MRI Records Made Understandable
The next step is to test ScanCanvas with more people and learn which parts of the experience are most useful before, during and after an appointment.
I would like to support more MRI body areas, improve report import from PDFs and photographs, strengthen accessibility and make it easier to review records on mobile devices. We also want to explore secure sharing and better handoff between patients and clinicians.
In the longer term, the same approach could be extended beyond MRI to other radiology records and technical medical documents. ScanCanvas started with a personal experience, but the problem is shared by many people. The aim is simple: nobody should receive their medical records and be left sitting in the dark because the files are impossible to open and the language is impossible to understand.
App Access
You can test the app yourself by using this link . You need to use "demo" as the password in order to log in.
Built With
- antigravity
- cloud
- dcmjs
- dicom
- gemini
- html5
- javascript
- jszip
- next.js
- react
- typescript
- vertex

Log in or sign up for Devpost to join the conversation.