Inspiration
With three engineering majors on our team, between all of us, we've had many hours of breadboarding under our belts. One electrical engineering lab class in particular generally requires students to use hundreds of through-hole resistors over the course of the semester and, while one day looking at the messy bag of almost indistinguishable resistors that I'd accumulated, I decided that instead of manually sorting them using an ohmmeter or their visual color codes, it might be useful to build a resistor-sorting machine. Because sorting resistors is a tedious process, makerspaces on campus generally see a lot of waste of resistors, contributing to the 62 million tons of e-waste a year. This could be easily avoided with an automatic resistor sorter.
What it does
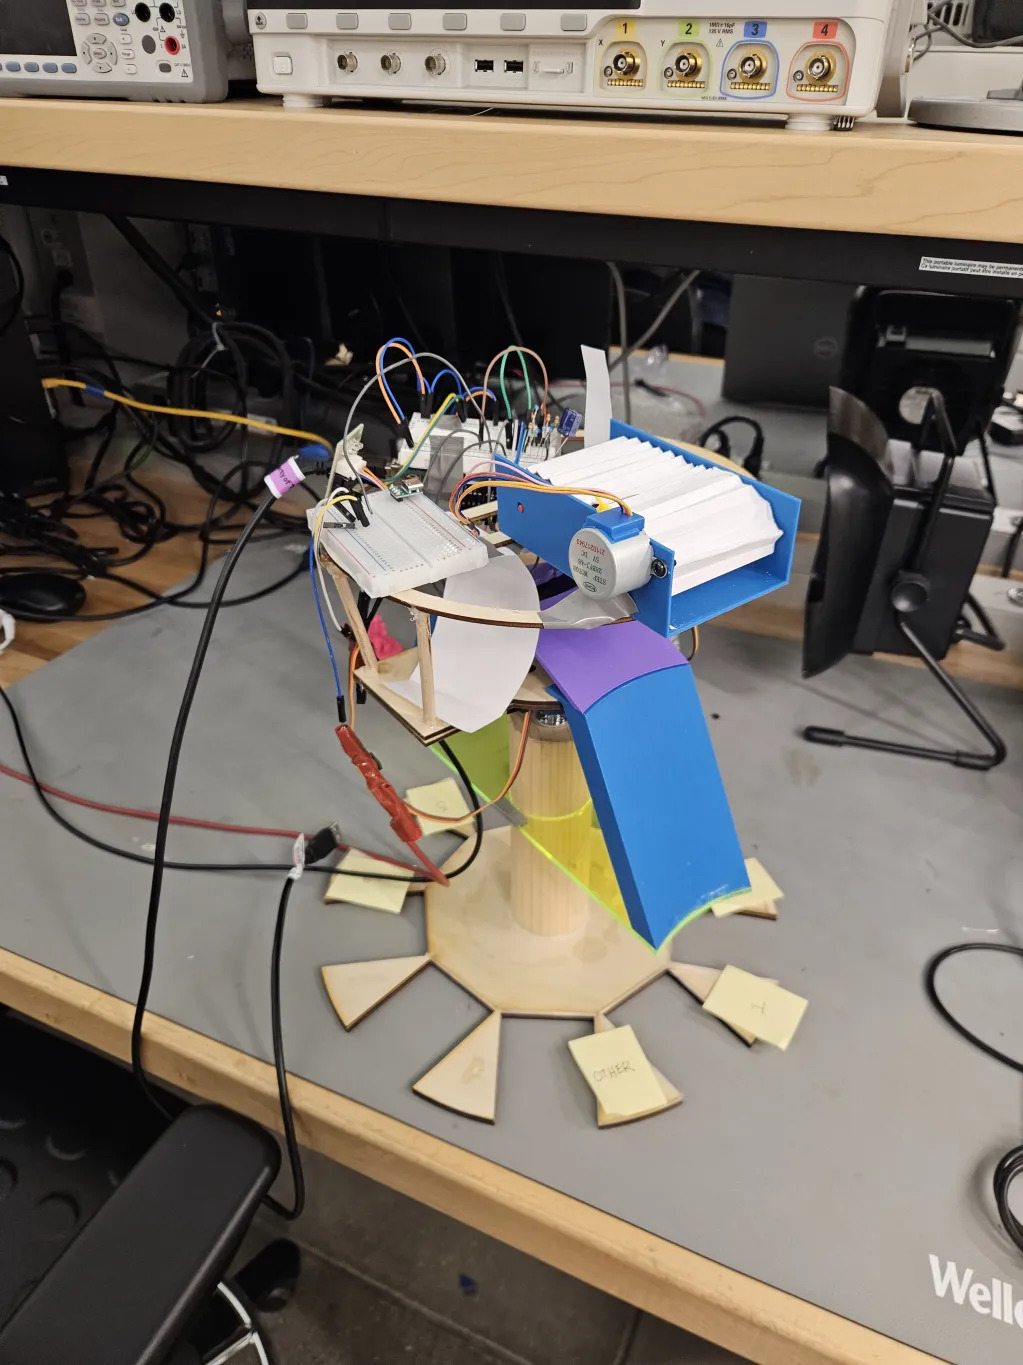
Instead of manually placing resistors one at a time between clamps of an ohmmeter or RLC meter, with this machine, several used resistors can be placed on a conveyor belt mechanism to be automatically sorted. The conveyor belt will direct resistors between a pair of two contacts so that its resistance value (between 0Ω and 1MΩ) can be measured.
A user can place resistor boxes into slots of the machine and, using our custom GUI, can specify the resistance value corresponding to each box. After resistance is determined, the machine will direct the resistor to the box of the correct value.
How we built it
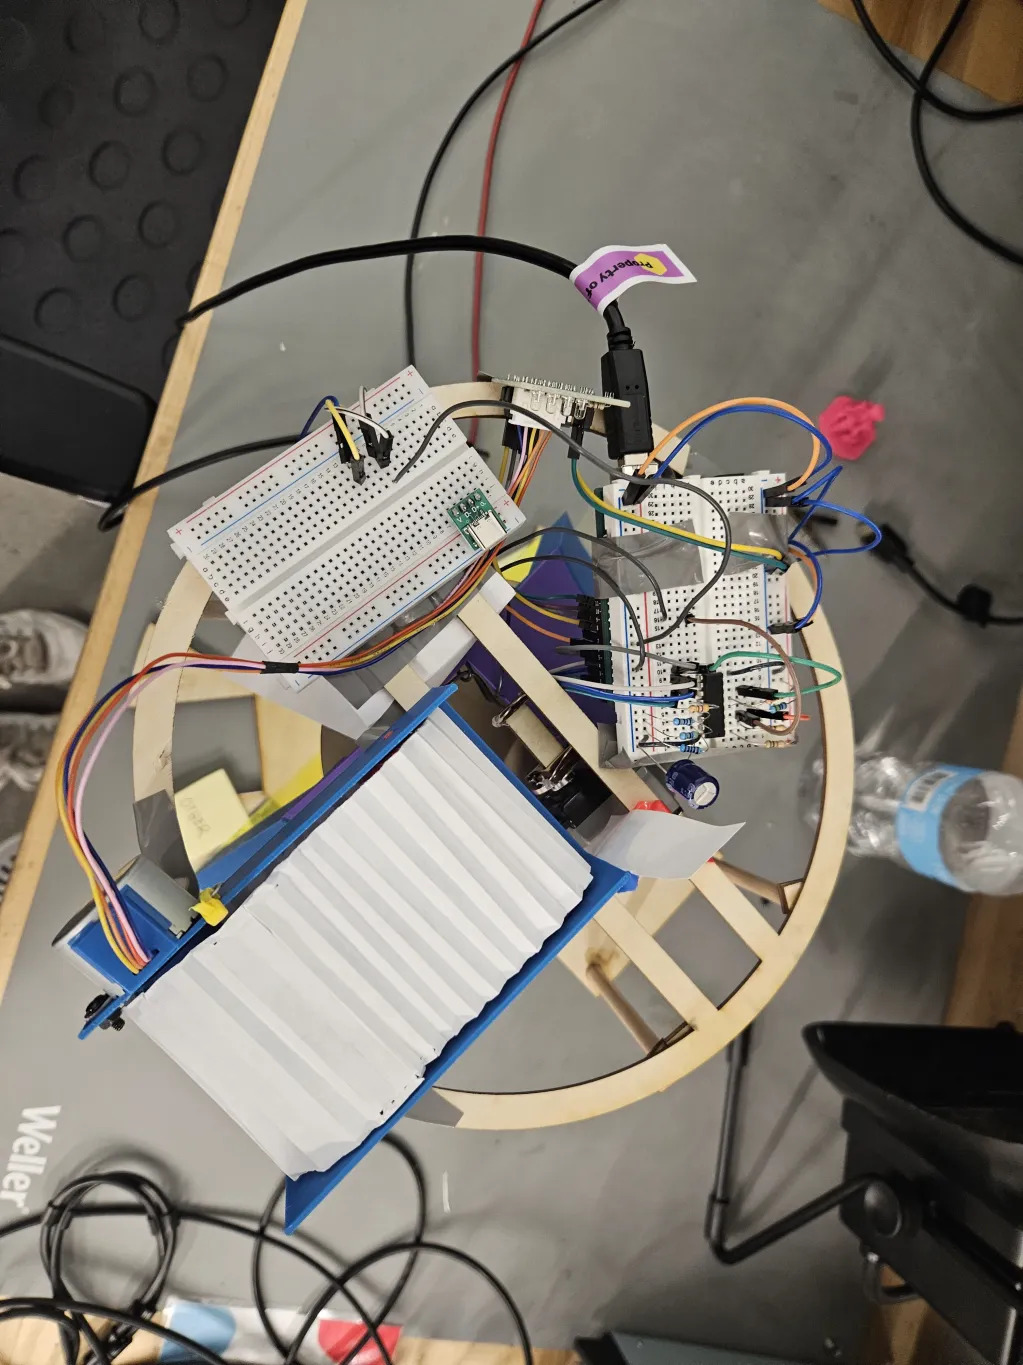
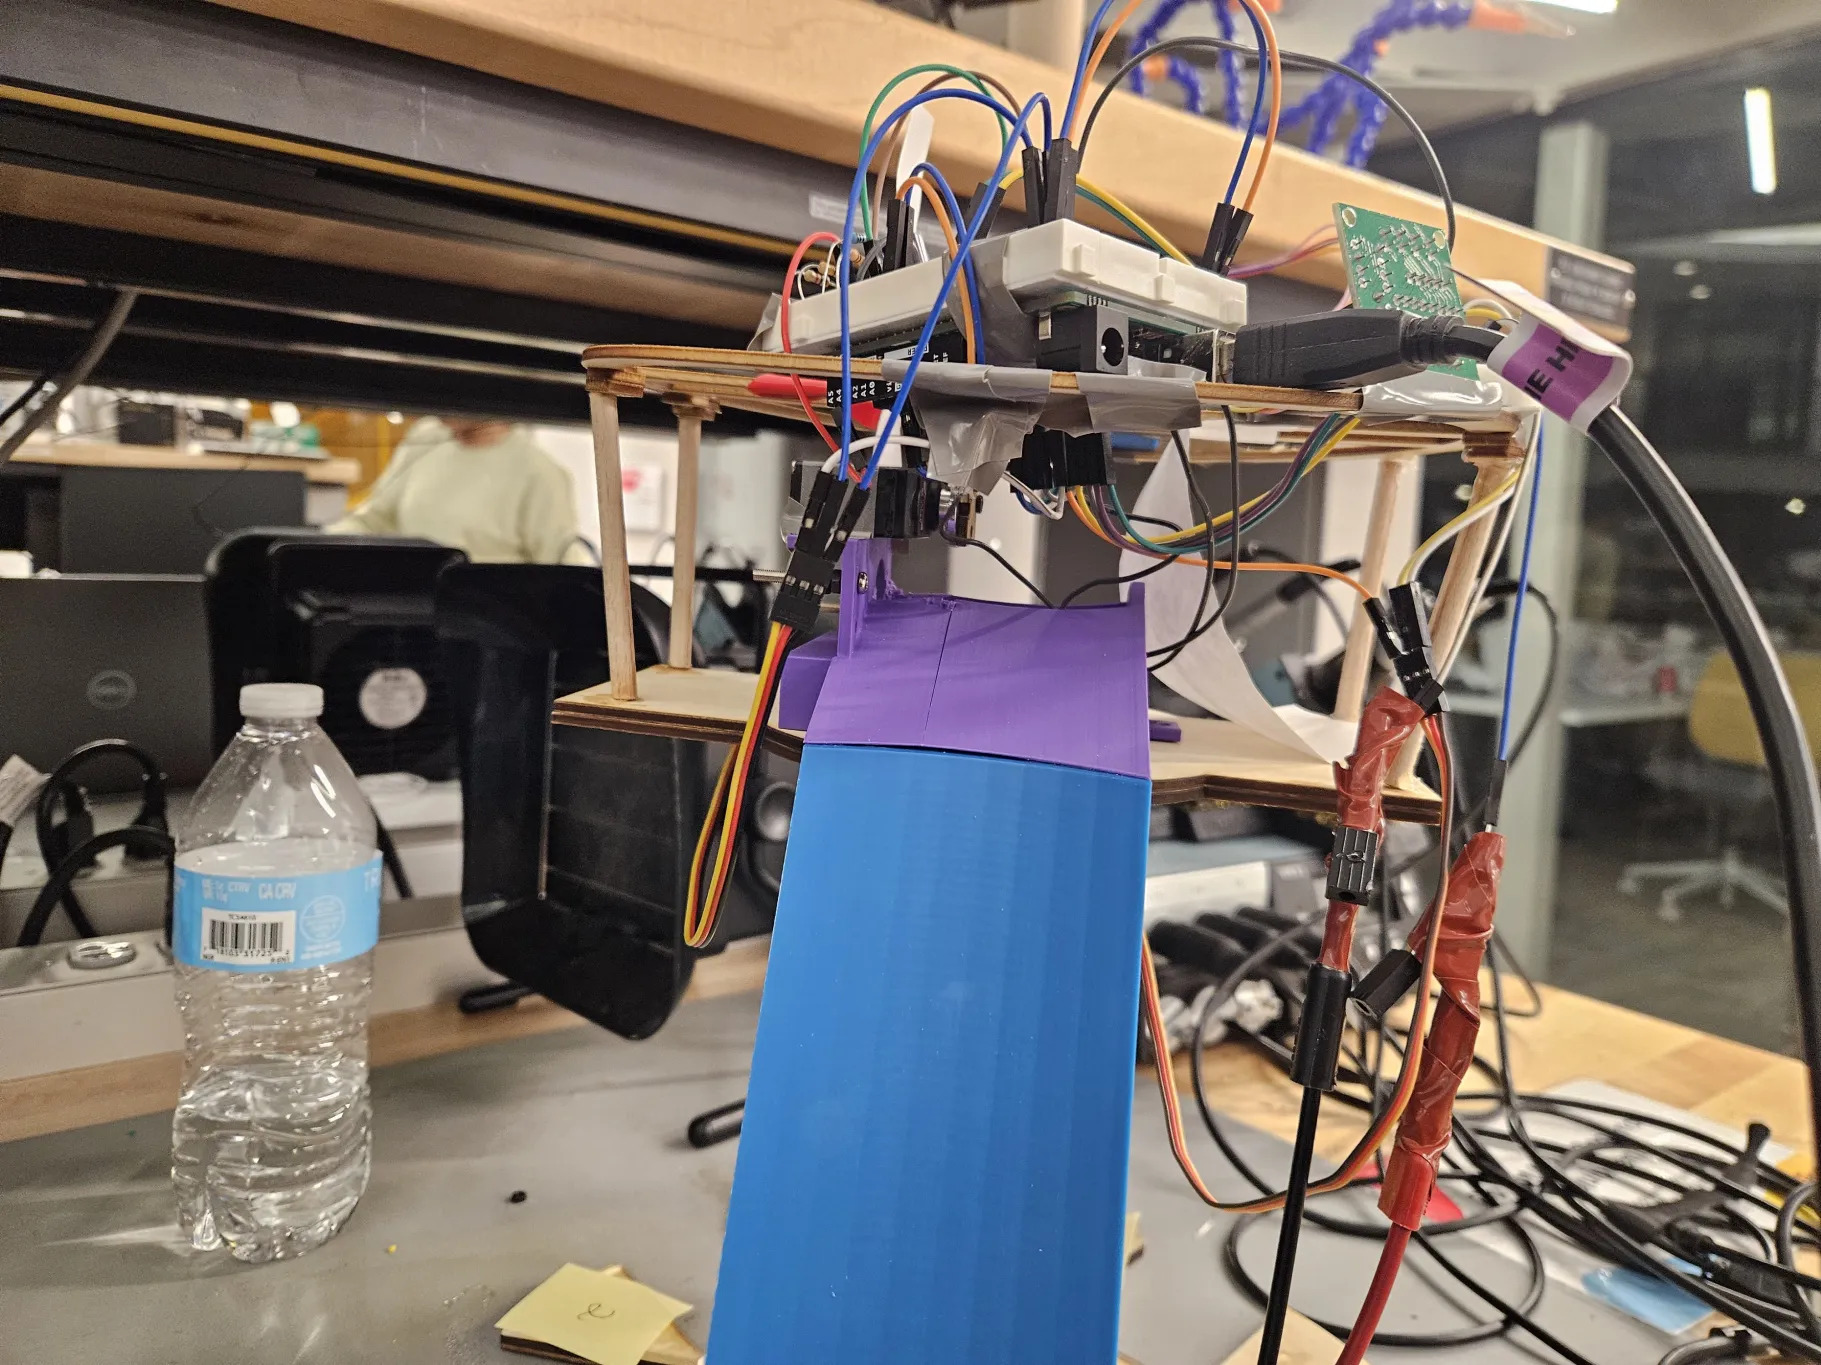
We sketched out most of the mechanical components of our design in Onshape and used 3D printers/laser cutters to manufacture them. For example, we designed a base that resistor boxes could slot into, a paper conveyor belt, and several supporting parts to house an Arduino, breadboards, and several motors.
An integral part of the design was the ohmmeter circuitry. The circuit was made on a breadboard and used an 8-to-1 channel multiplexer and Arduino to switch between 8 different voltage divider circuits, thereby attaining a reasonable estimate of the resistance of an unknown resistor.
As for the GUI and serial communication between the computer and the Arduino, two Python libraries were of great use. To build an interface and use several components in unison, we used PyGame. State handling was of great importance here in obtaining user customizations and storing them. Then, to send a signal to start its process to the Arduino, we used pySerial. The Arduino can read this serial buffer and then kickstart everything, with Python listening for any messages sent about a resistance value that’s detected. Once Python receives this number, depending on the user’s input for what resistance the boxes correspond to, it sends back a box index to the Arduino via serial. From there, the Arduino instructs a servo to turn to the right box and tip the holder that the resistor is on to drop the resistor into the correct box.
Challenges we ran into
Initially, the ohmmeter circuit was quite imprecise in calculating resistance. This was most probably due to high tolerance reference resistors (+-5%) and effects of loading from the microcontroller and surrounding components. To increase accuracy, correction factors were added into the C++ code, determined from the percent error of measured values for resistors of various magnitudes.
Another major setback occurred during the hardware debugging process, during which -12V was accidentally supplied to 5V servo motors, which rendered them unusable. The Arduino also seemed to be affected and had to be replaced. We then tried supplying 5V power from the Arduino to the motors, but the Arduino couldn’t handle this load, so we had to add another breadboard with a separate power source to our design.
Accomplishments that we're proud of
We’re proud of the fact that we were able to build a working prototype of this automatic resistor sorter in such a limited amount of time, as this was a pretty ambitious project to tackle and involved equal levels of circuit design, GUI design, mechanical design, and firmware. We bounced back from unexpected issues and made a product that can be further refined for actual implementation in our makerspaces.
What we learned
We learned more about how to (reliably) operate DC motors, how to rapidly design and fabricate mechanical components, how to use serial communication to send information between a user interface and microcontroller, and further developed our C++ programming skills while writing the ohmmeter and general control code.
What's next for Resistor Sorting Robot
We want to improve the conveyor belt to more accurately drop resistors onto the sensor, and the overall system can be expanded to include more slots for more resistor options. Additionally, we would also like to move away from having a power supply and instead use a battery pack to power our servos.
As for the software side, we want to introduce mirroring into the GUI, which will show where the system’s current position is, and potentially an animation to show a resistor being put into the box. In addition, we wanted to originally use a Raspberry Pi as the onboard PC, but had some issues with the display and then a limited supply of alternates at the HIVE. So, we had to use one of our laptops, but of course it’s more realistic to have a controller that can operate on its own and potentially transmit information back. Finally, we had some issues with sending a JSON file of the current resistor bucket values due to memory limits of the Arduino, so that could be something we could explore as an alternative to the Arduino having to communicate to the computer, obtain the box index, and then come back.
As a trial run, the first task of the Automatic Resistor Sorter will be to sort and recycle the hundreds of used resistors currently sadly residing at the bottom of my lab bag. After that, we plan to pitch the design to the Sustainability Committee of the ECE makerspace on campus to mitigate waste of prototyping resistors used there.

Log in or sign up for Devpost to join the conversation.