Inspiration: Busy college students may feel too tired to get up and turn their light on or off with a switch which can lead to oversleeping. Our project makes this easier by automatically having the lights turn on and off by themselves depending on the designated light threshold. The project also alerts students to wake up so that they won’t miss class.
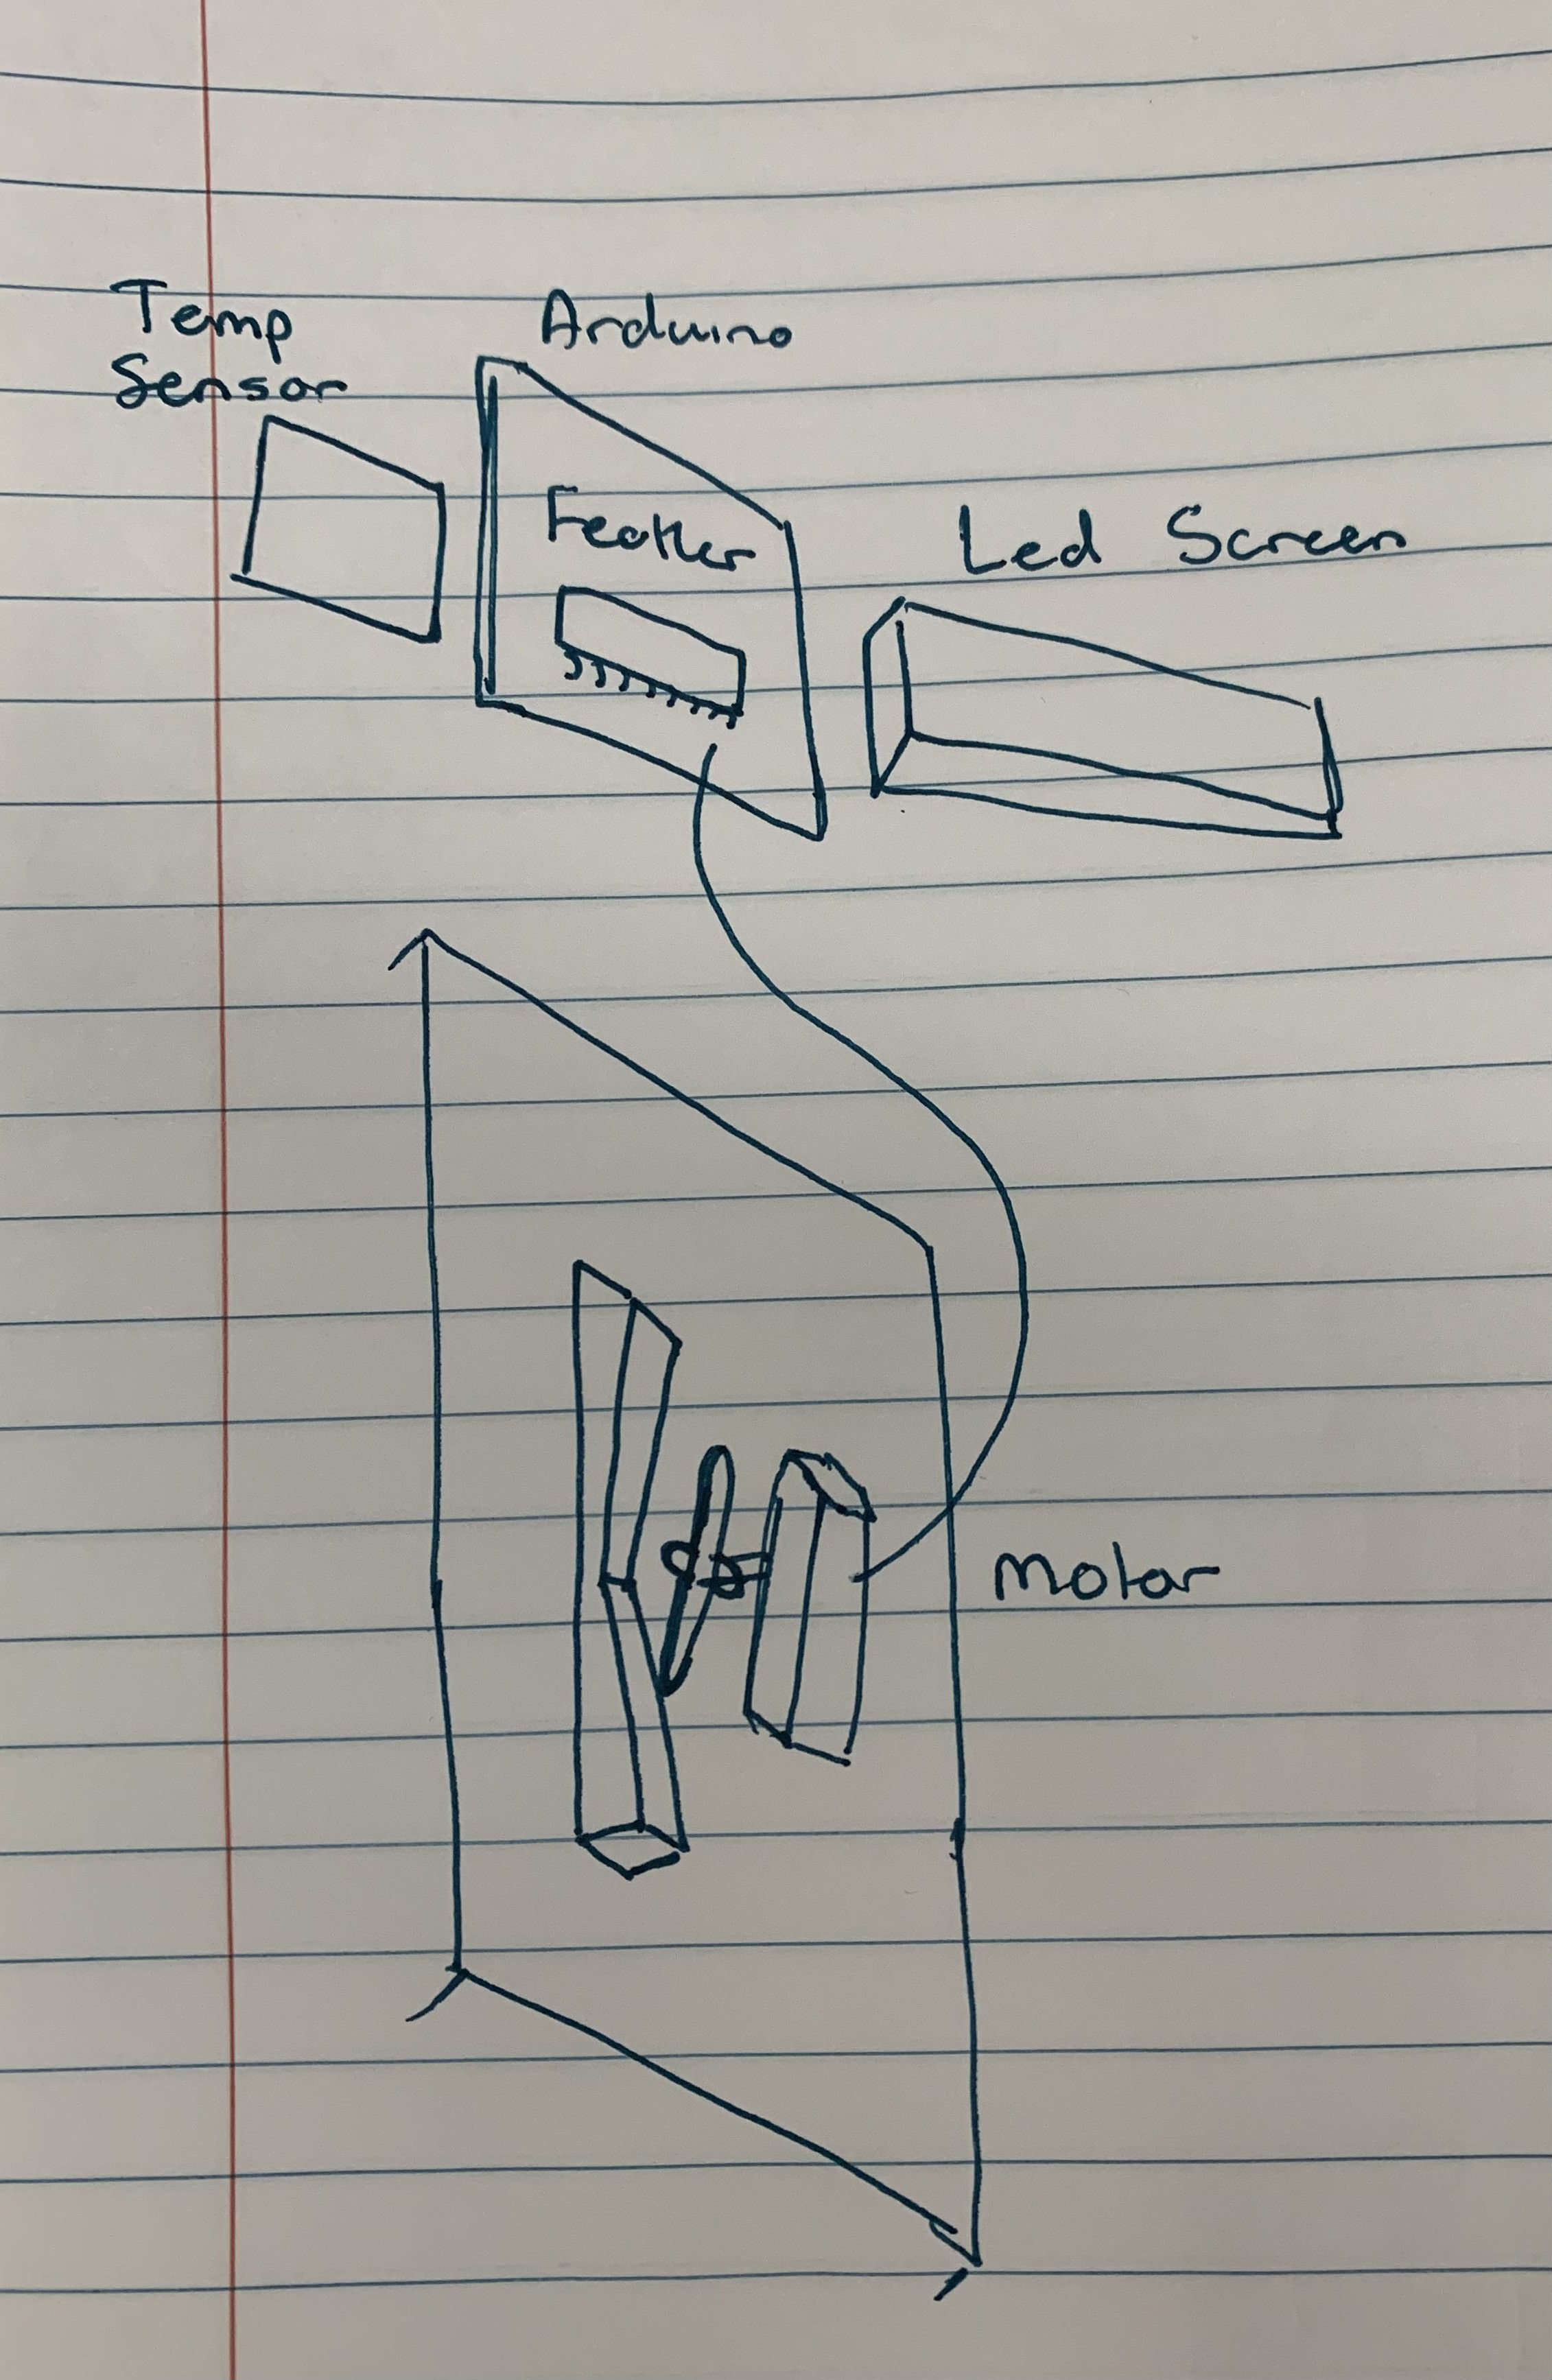
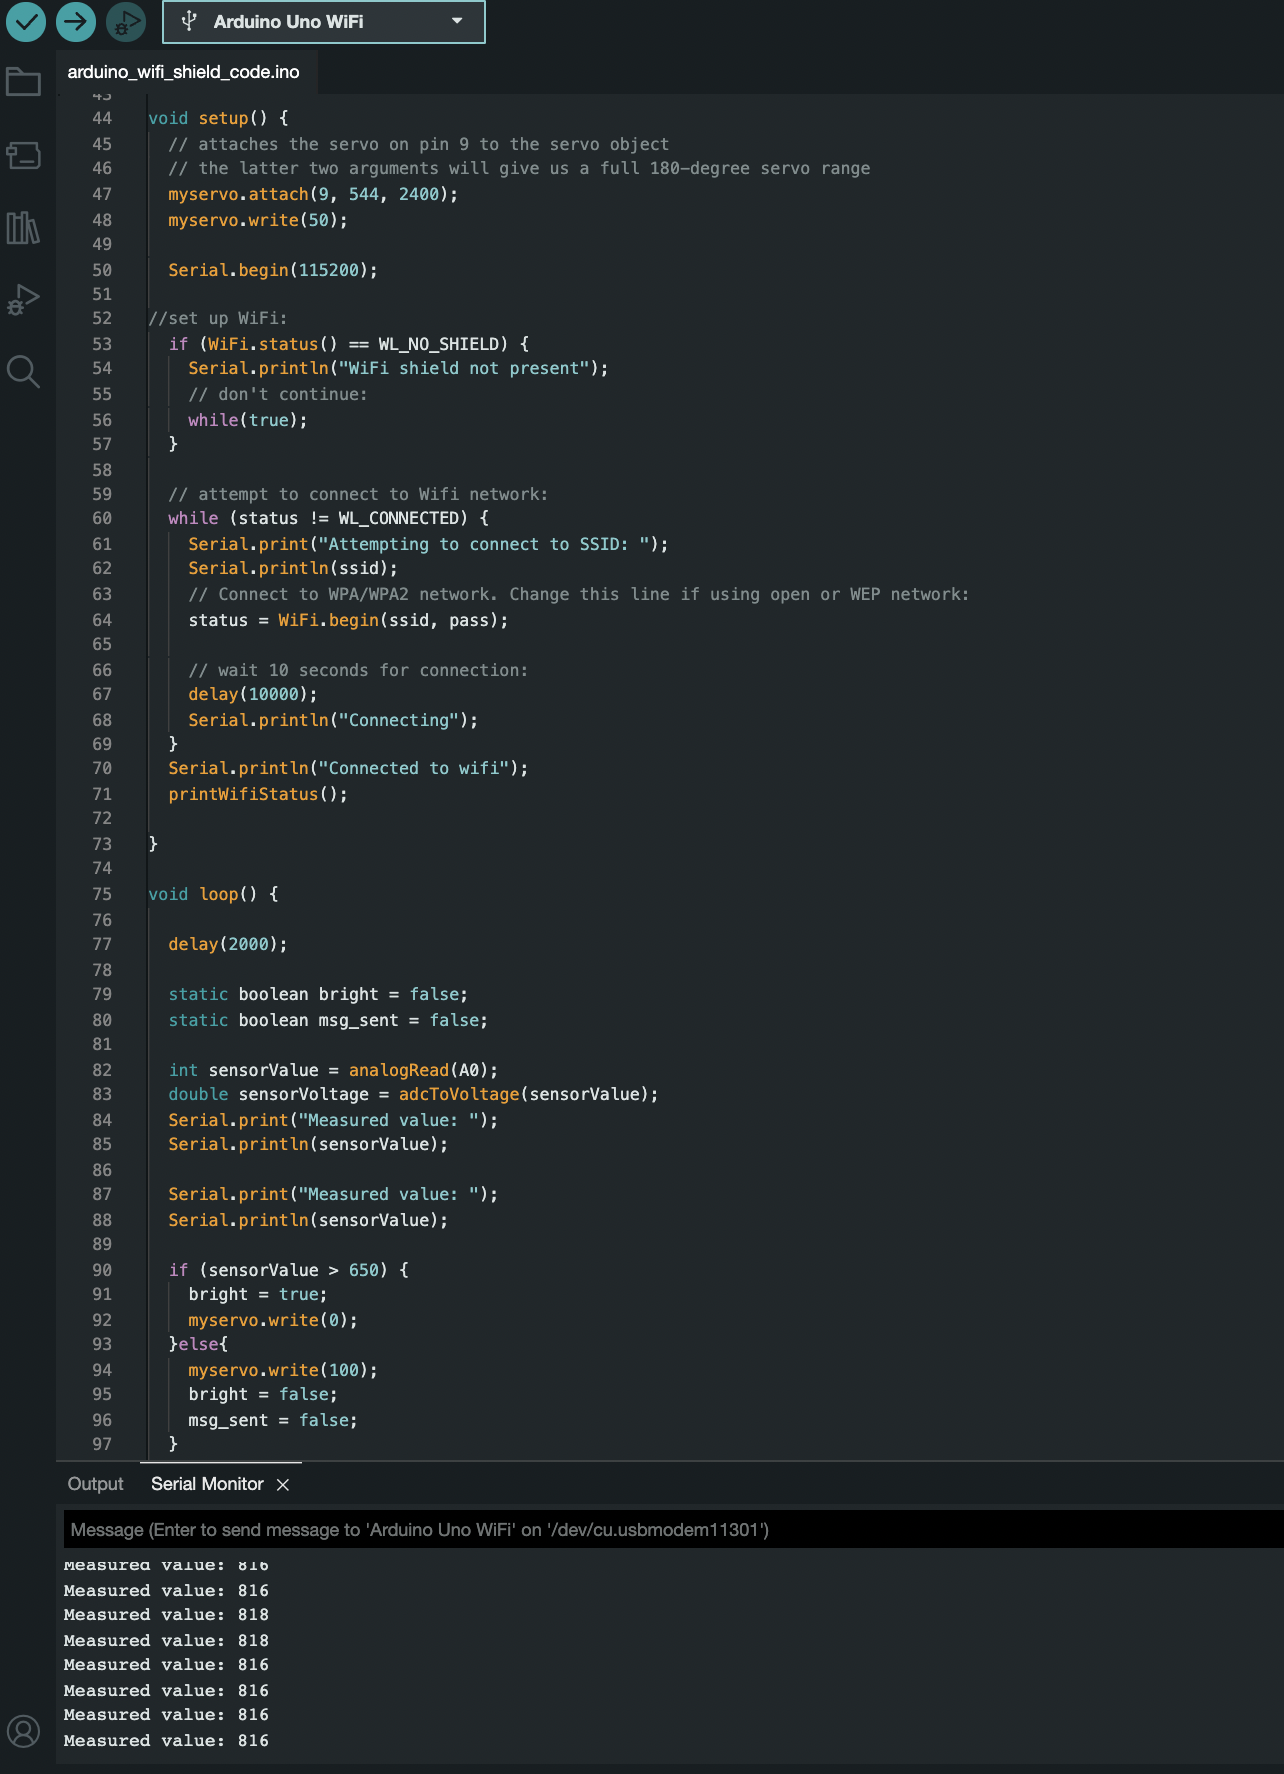
What it does: The LED is operated by a light switch, which is flipped using a servo motor. A photoresistor also measures the current brightness of the room. When the value measured by the photoresistor passes threshold of above 650, the servo will automatically actuate, causing the light switch to flip and the LED to change its state from on to off/off to on. When this threshold is met, a message is also sent using IoT (Thingspeak and Twilio) to the user’s phone, alerting them to wake up.
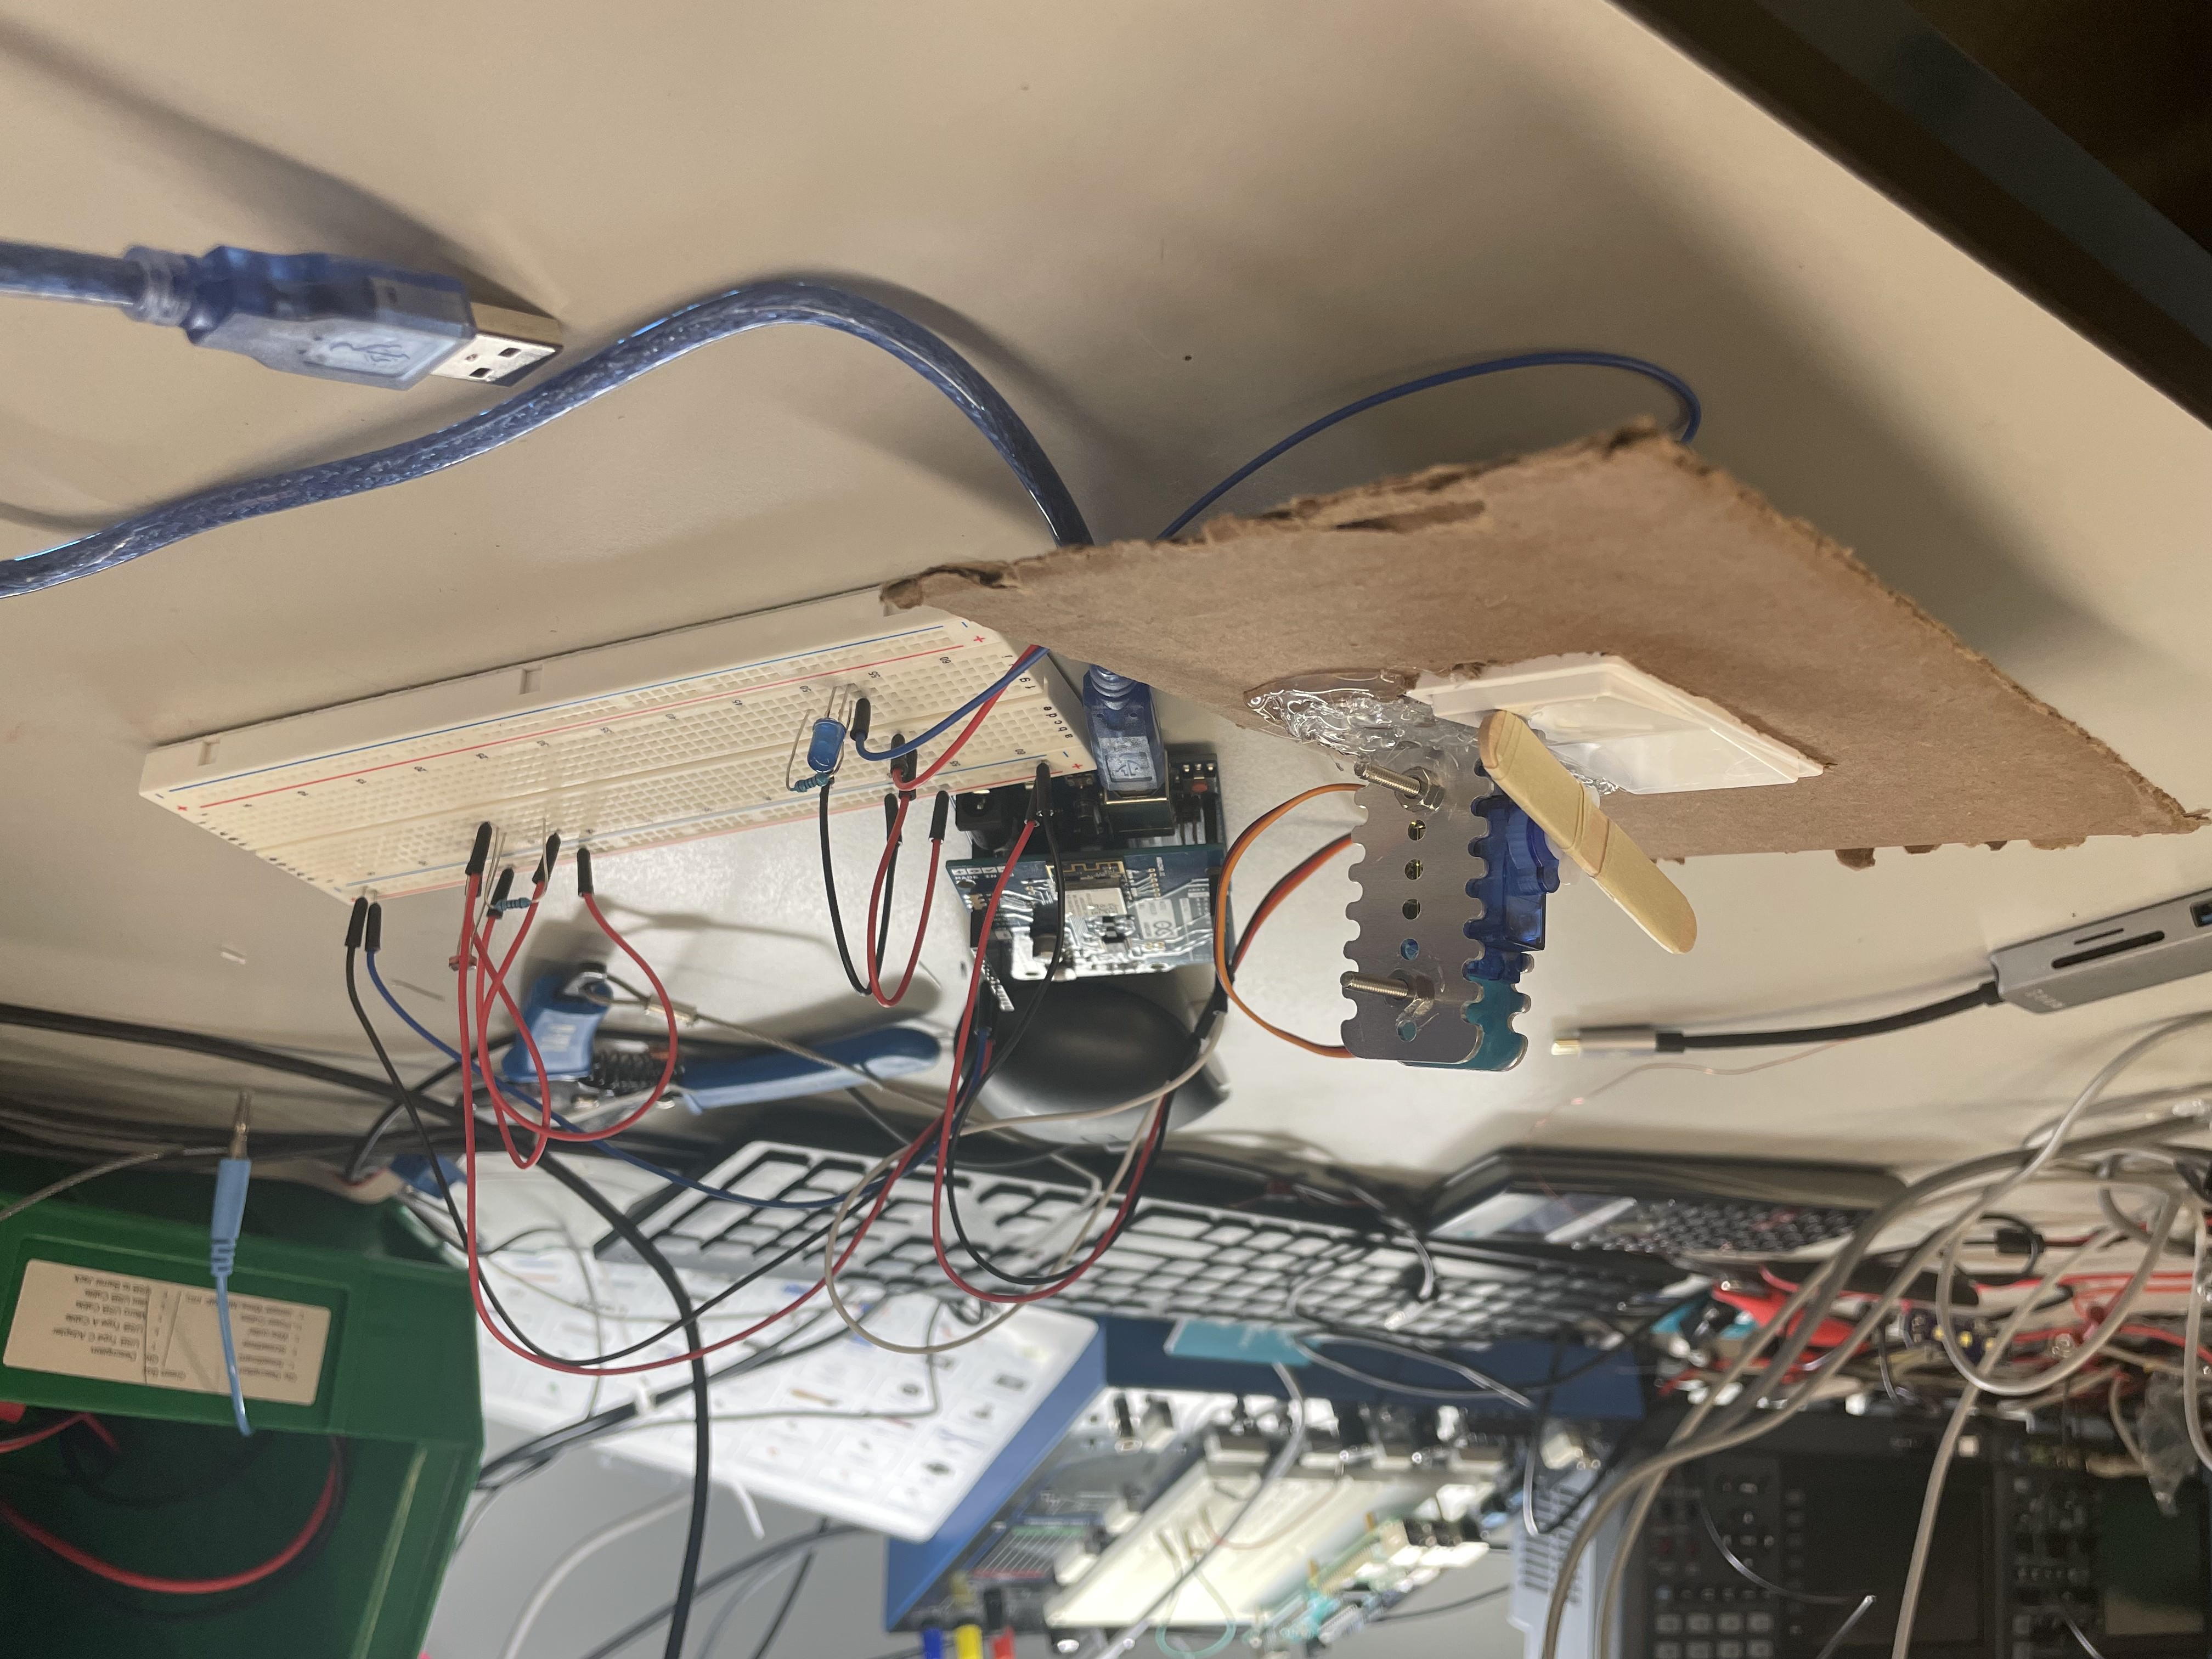
How we built it: Materials used: Arduino Uno, breadboard, jumper wires, photoresistor, resistors, servo motor, LED, light switch, Arduino Wifi shield 101
Design Process and Iterations: We originally wanted to attach the device to any light switch using suction cups to make the project more versatile. However, we were unsure how we would generalize the design to the wide variety of light switches we might come across. We eventually settled on a single pole rocker switch because we figured it would be a relatively easy starting switch that we could later generalize.
The first iteration just involved getting the motor and photoresistor working separately. Once we were confident that both components worked, we put them together and wrote the code to integrate the two parts. The code went through many iterations as we found that we had difficulties getting the motor to push the switch hard enough to activate it. We eventually found that no delay made the motor move fast enough to activate the switch.
Using the chosen light switch we created our final design using cardboard as a simulated wall and attached the motor using clamps.
Challenges we ran into: One issue we initially encountered was how we were going to use the servo motor to move the light switch. We decided it would be best to mount the motor to a piece of cardboard next to the light switch, so that the motor would be able to push down and move the switch. However, the switch was too heavy for the motor to move it. After many different variations, a wooden stick was added to the motor, allowing enough force to be applied to move the switch.
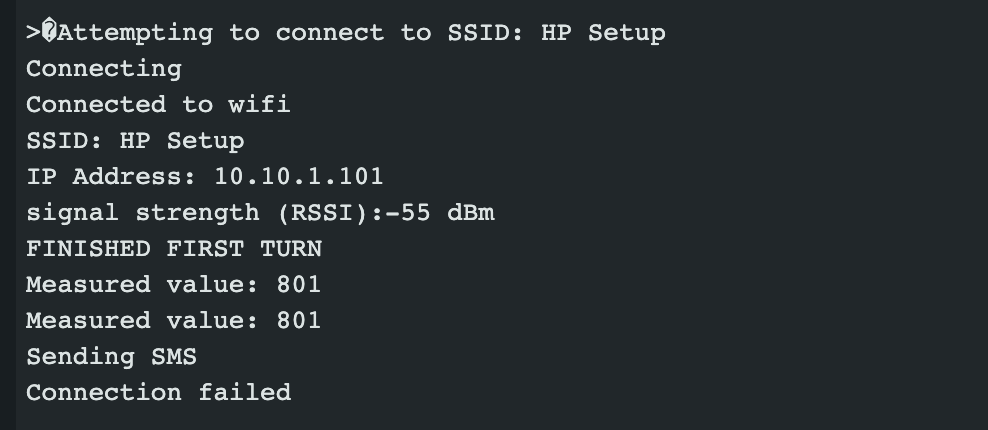
We spent a great deal of time trying to figure out how to use the IoT component. After discovering that Blynk was not compatible with our laptops, and trying out many different types of wifi shields, we settled on trying to use Twilio and Thingspeak. Despite our best efforts and many conversations with the TAs, Detkin staff, and other teams, we were not able to successfully send text messages because a TCP connection could not be made to the remote host, a problem that was out of our control. However, we were still able to successfully connect the wifi shield to the hotspot. We hope that future projects will be able to overcome this problem.
Accomplishments that we're proud of: We are proud of successfully using the photoresistor and servo motor in conjunction. The motor will move depending on the value measured by the photoresistor, so it was really interesting to learn how to use them together. We are also proud of being able to code a lot of the project ourselves. Lastly, we are happy to have figured out how to have the motor actually move the switch, which was a problem that we were initially uncertain about.
What we learned: We learned how to use a wifi shield and more about how IoT works. Although we weren’t able to send text messages, we nevertheless successfully used the hotspot, which both of us had not been able to accomplish during the IoT lab. We also learned how to use the photoresistor to send signals to the motor to control its movement. Finally, we learned how to use a component outside of the Arduino (the light switch) in conjunction with the LED.
What's next for Automatic Light Switch: We currently use the LED from the Arduino kit. In the future, we could scale the project and use a larger light bulb instead in a real-life setting. Another idea is to have the light set based on time rather than brightness of the room. For example, we could have the light turn on automatically in the evening and possibly sync with the user’s alarms. Since our light switch is meant to send texts to the user when it turns on, we considered also adding a text to describe the weather for the day, so that the user would be informed once they wake up. Lastly, we hope the project can be used for more general purposes – the motor could be used to turn on different types of switches, not just for lights.

Log in or sign up for Devpost to join the conversation.