-
-

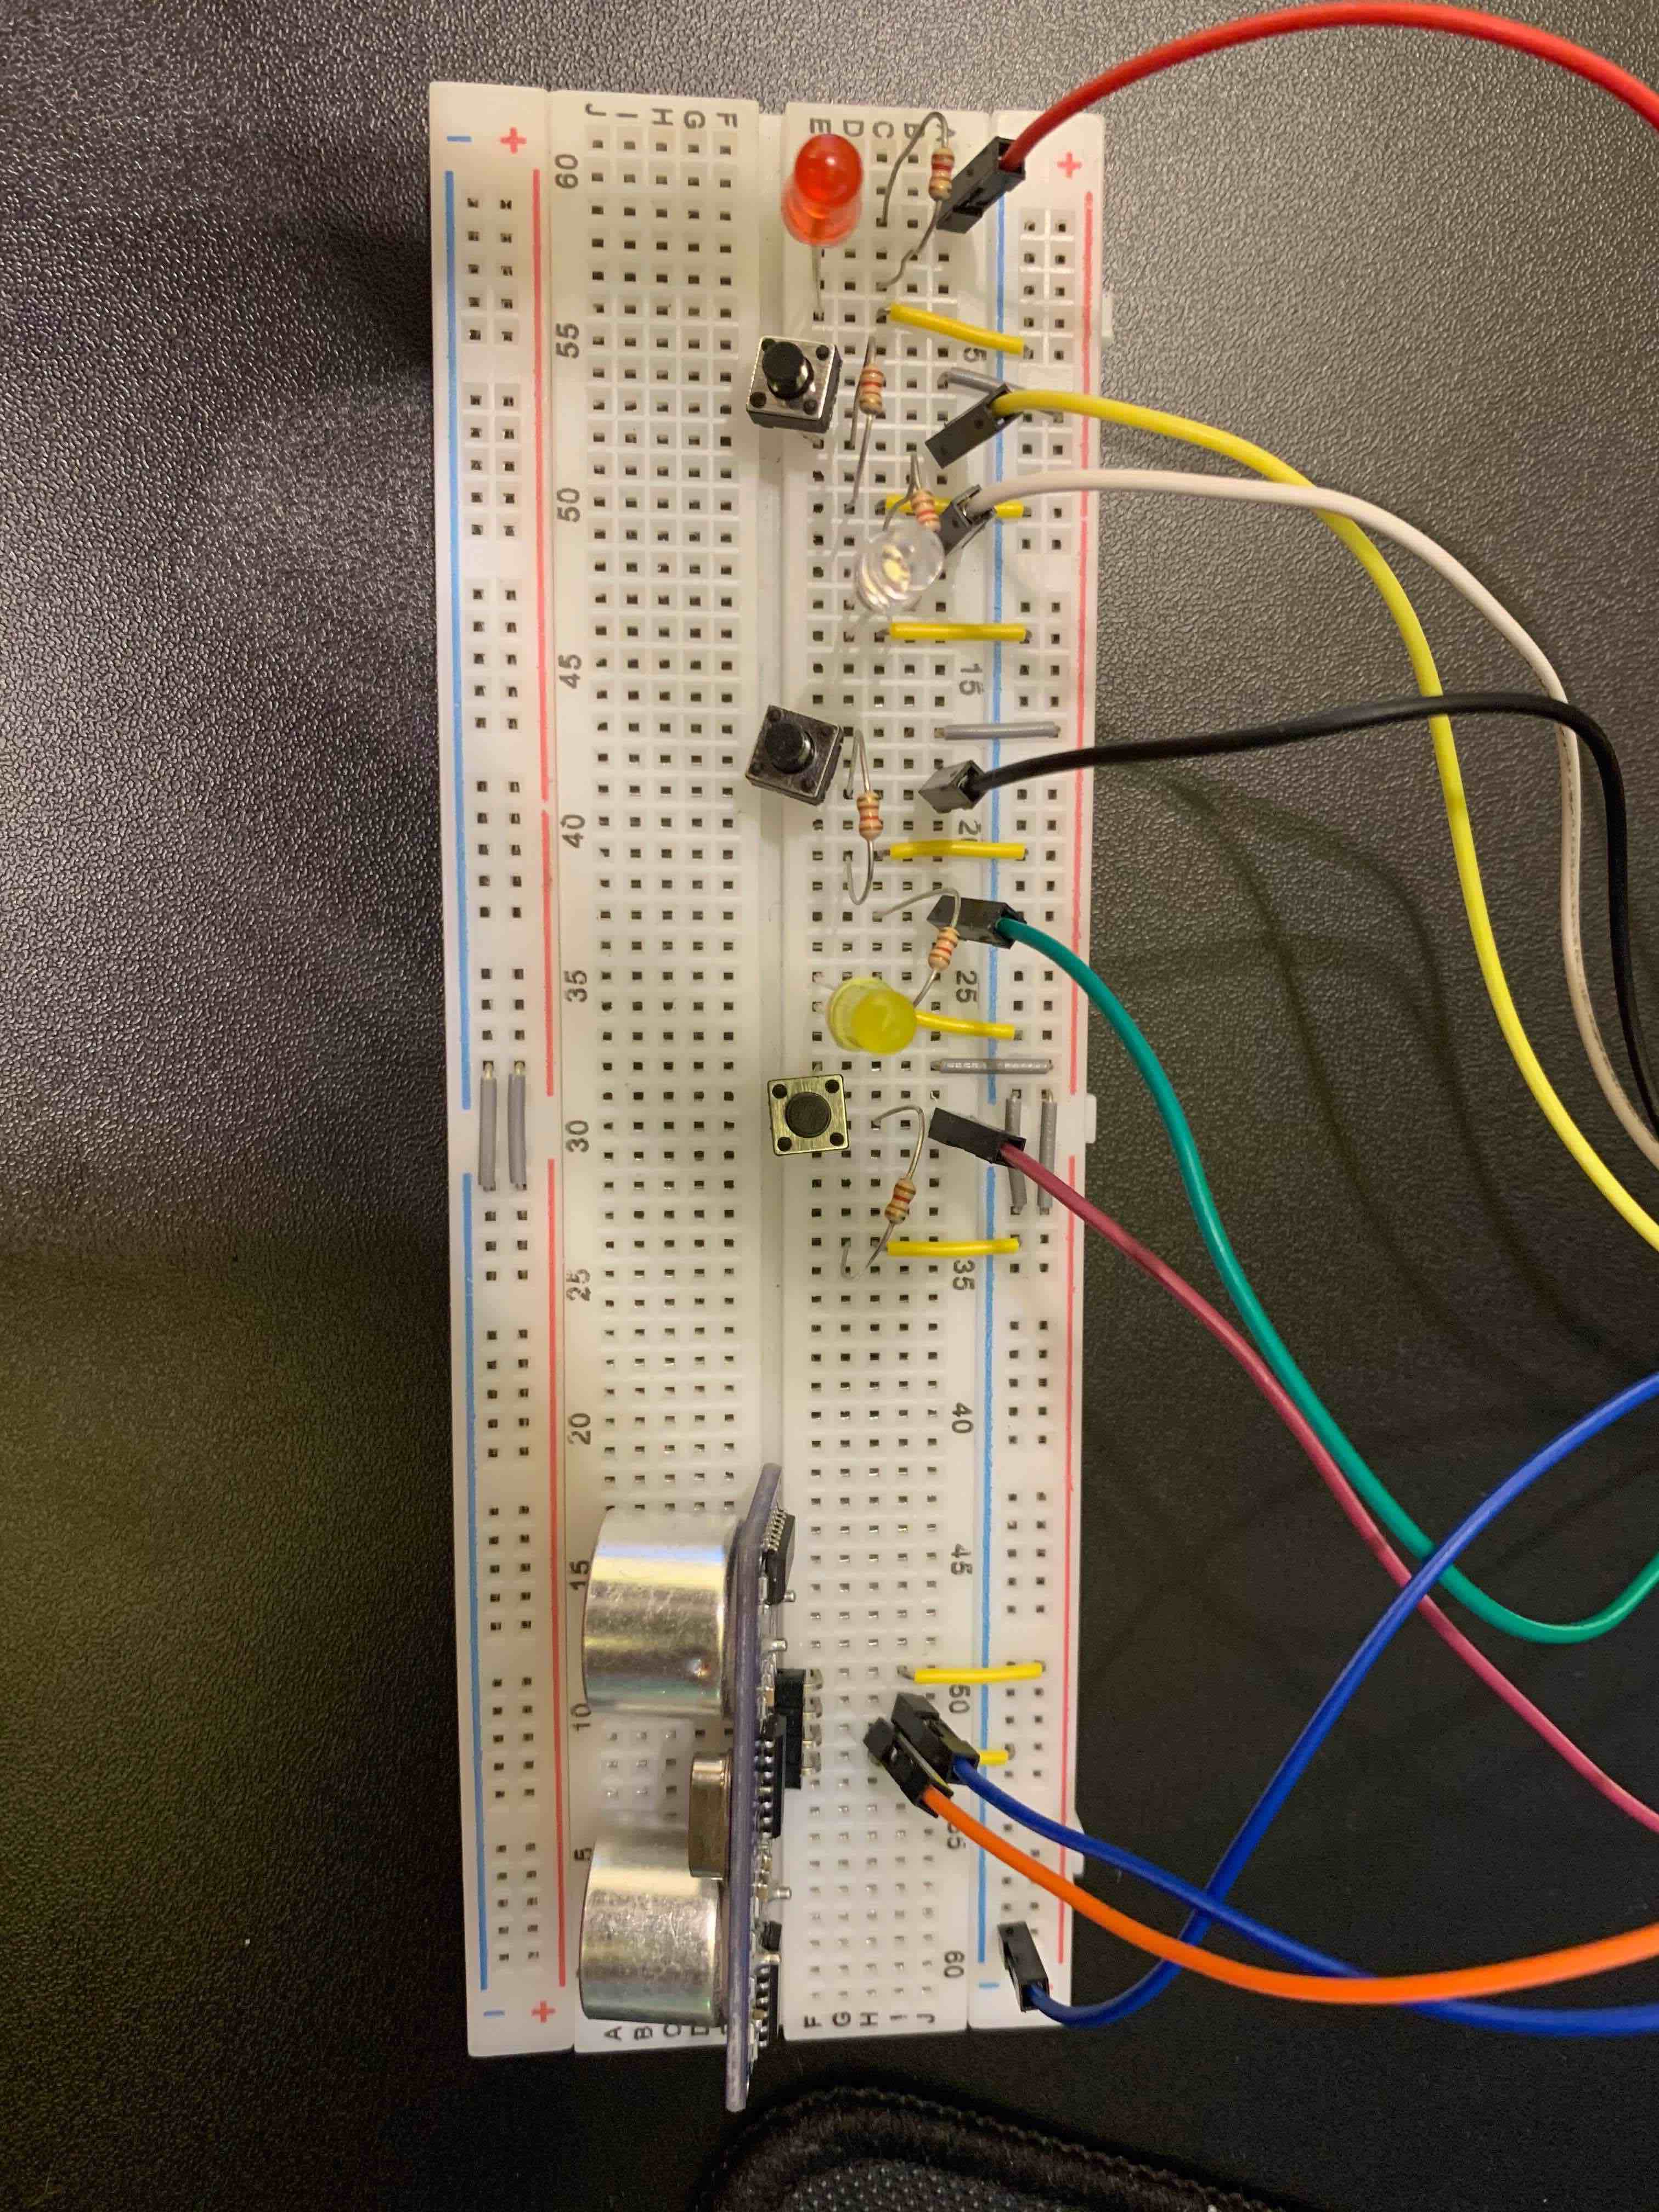
Bread board overview (circuit w/ 3 LEDs, 3 switches and a PING sensor)
-
Prototype to big idea conversion
-
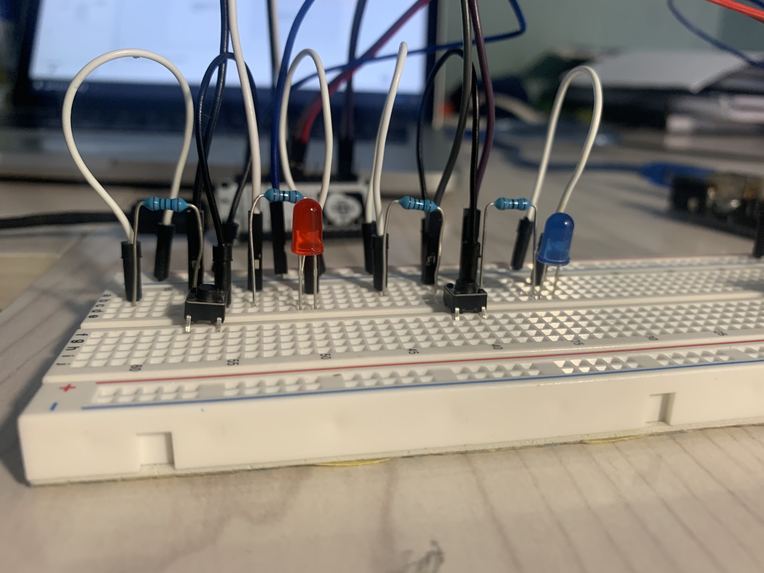
LED circuit close up
-

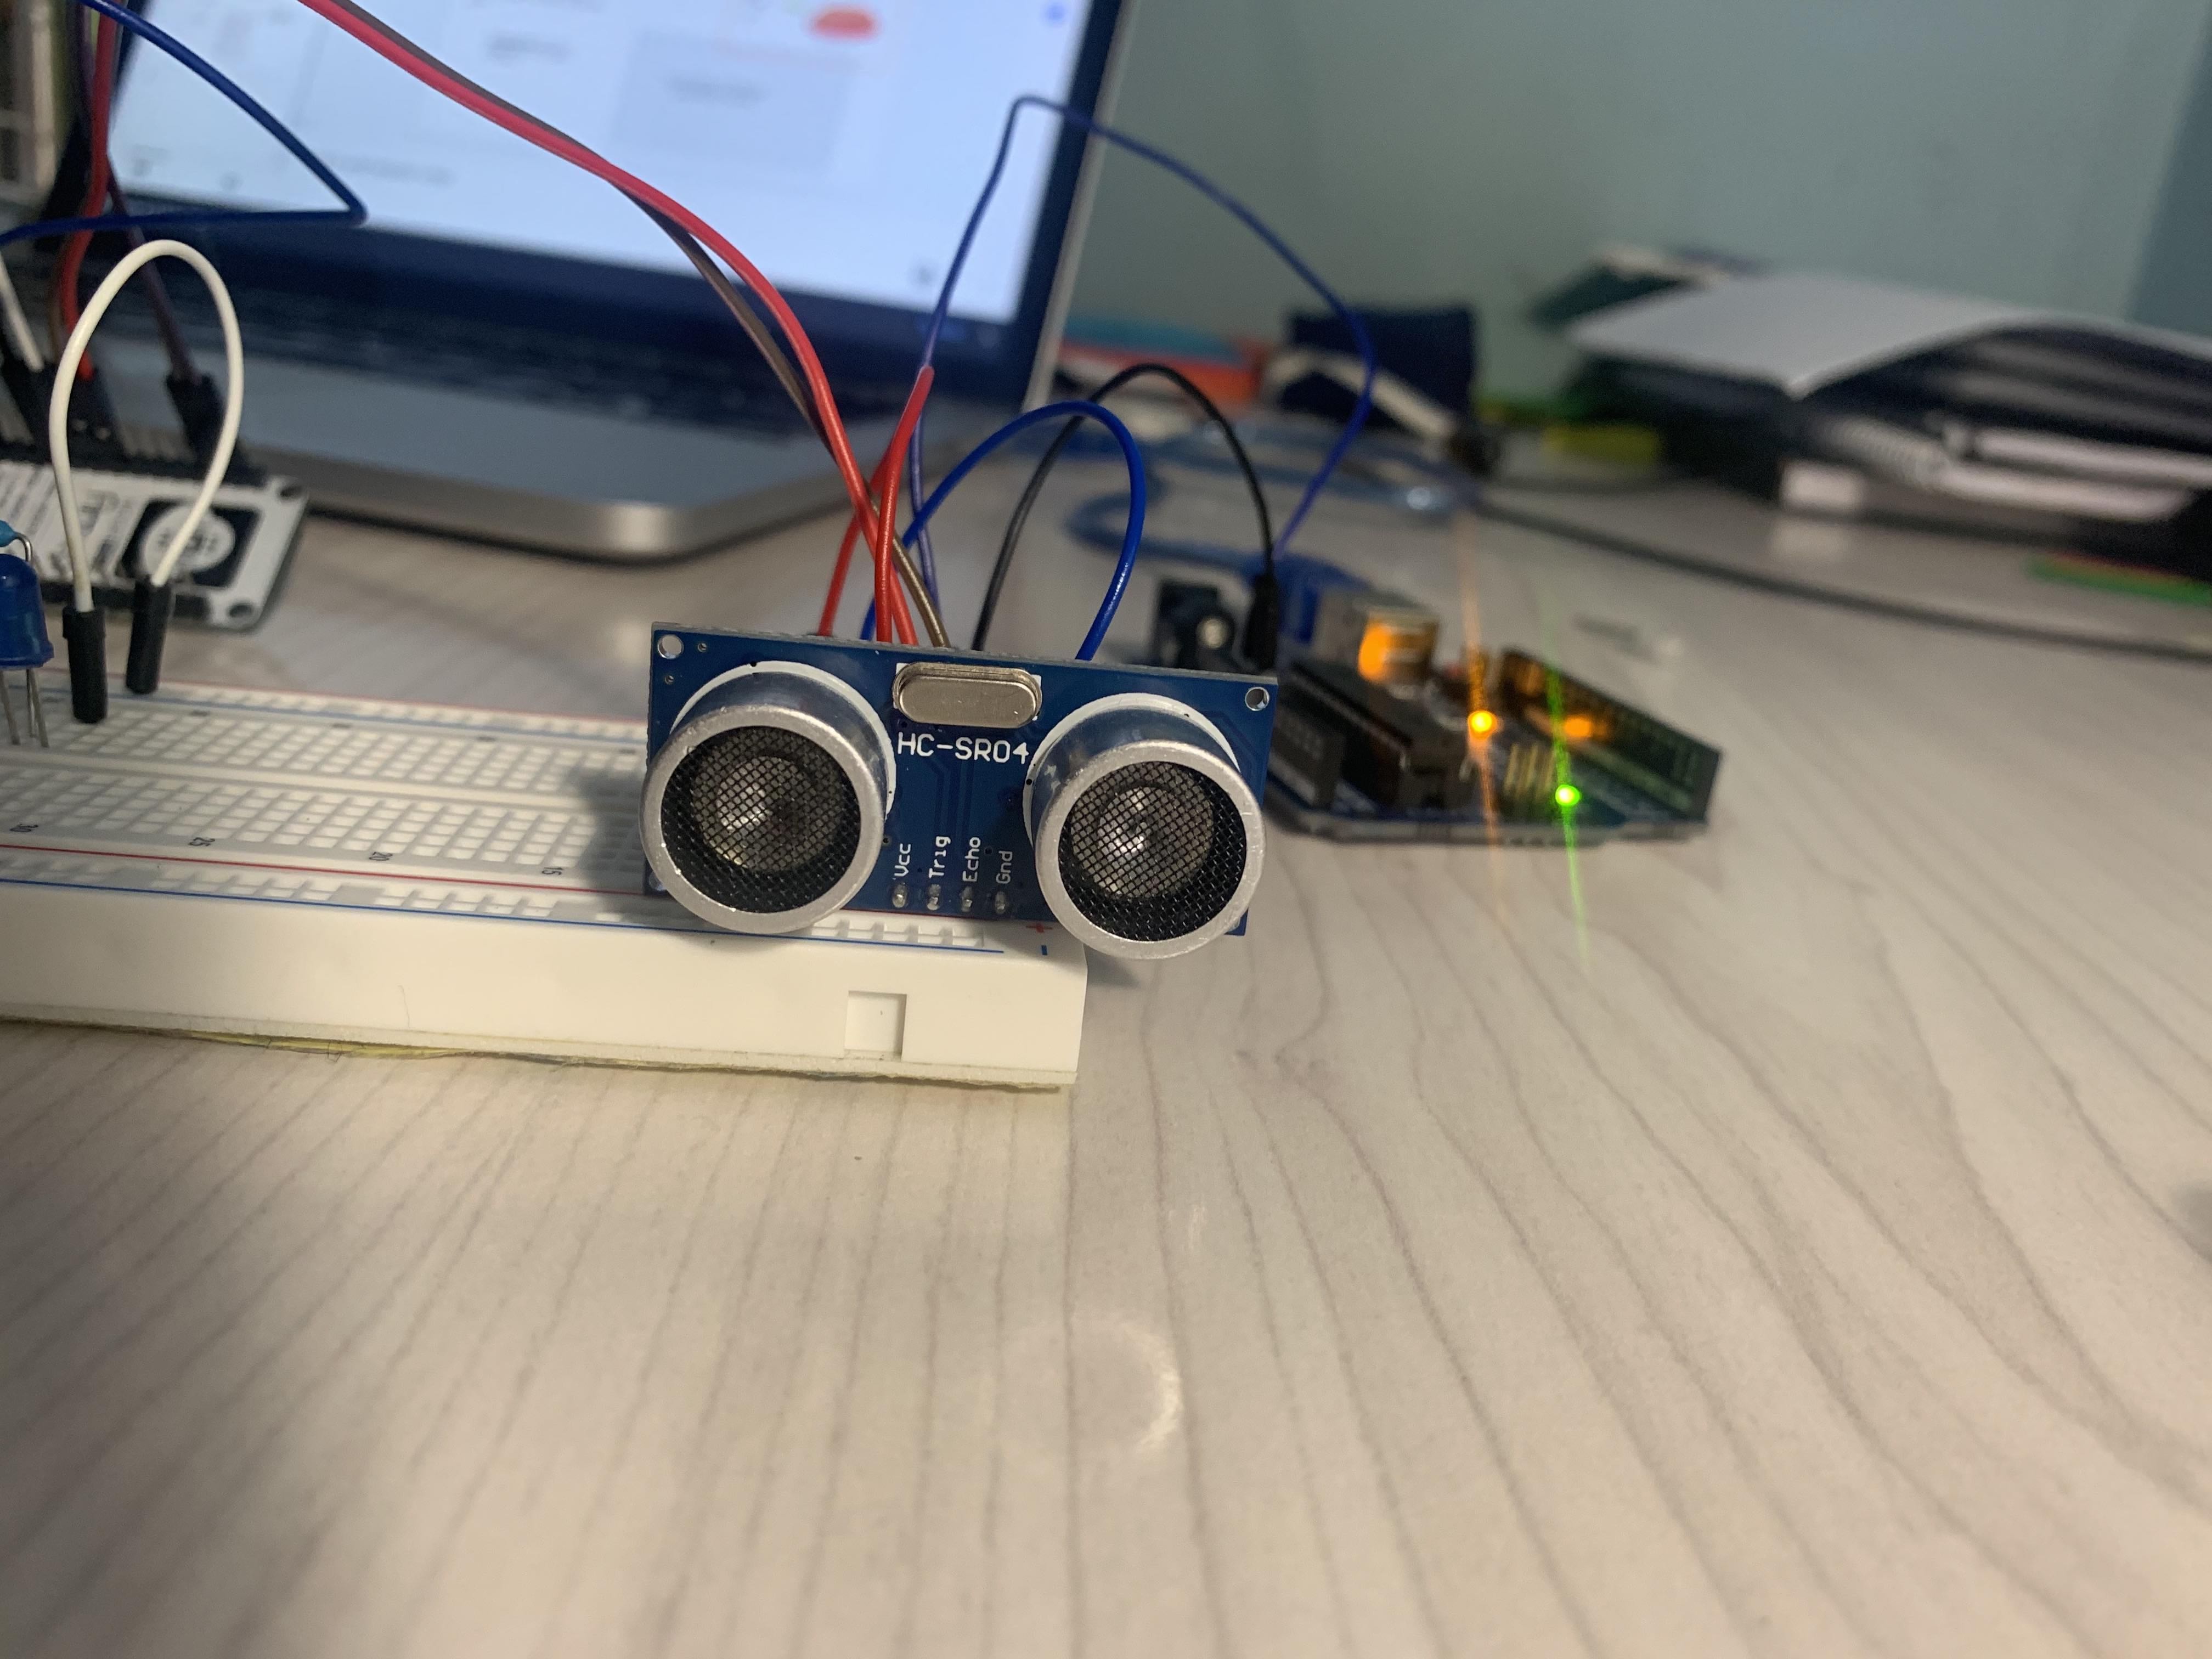
PING Sensor close up
-
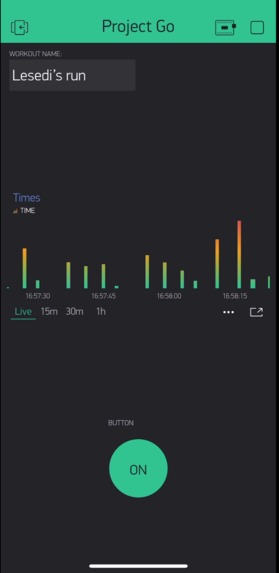
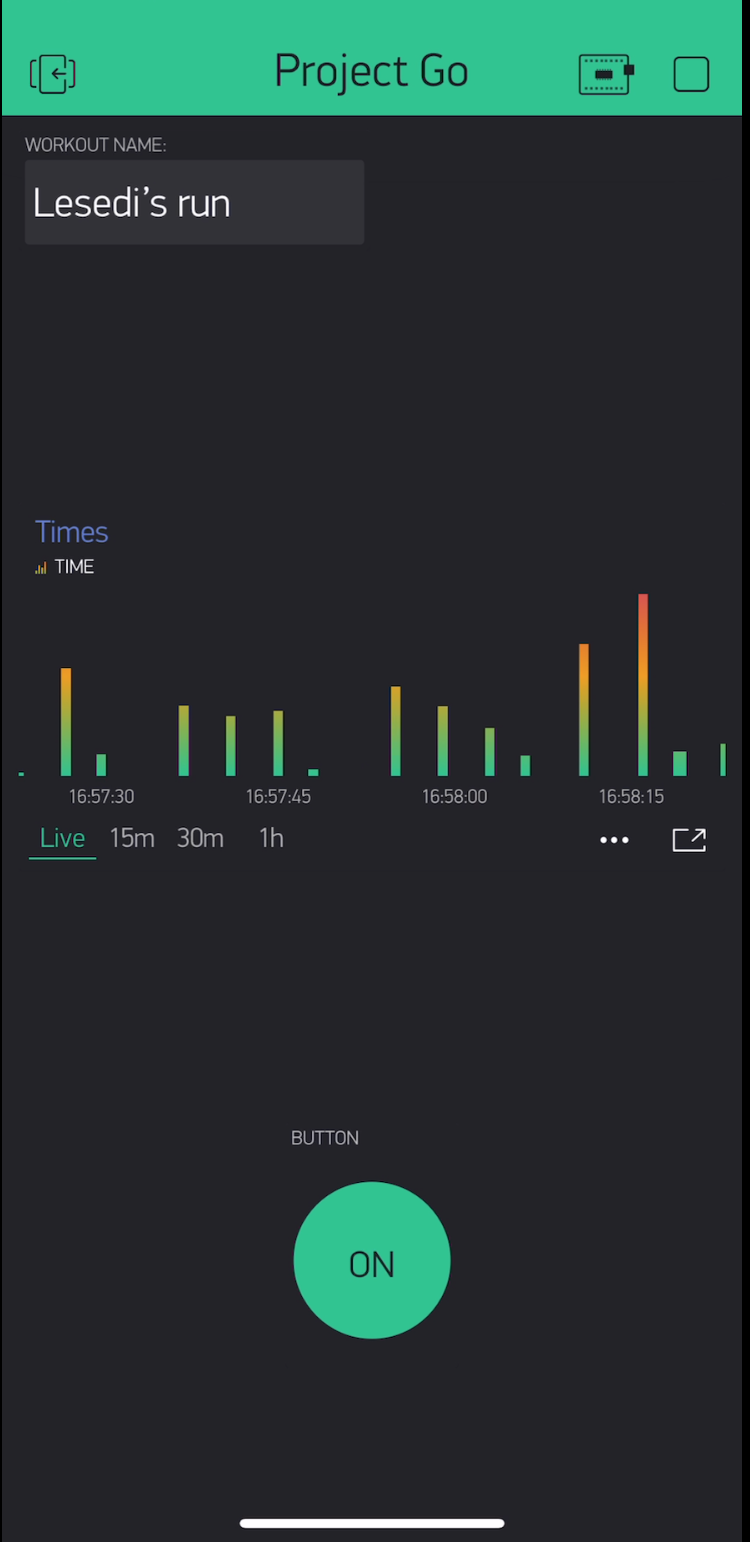
Blynk screenshot displaying times between runs.
-
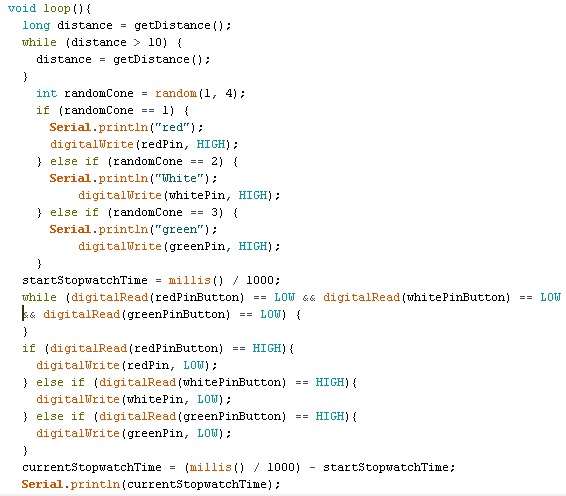
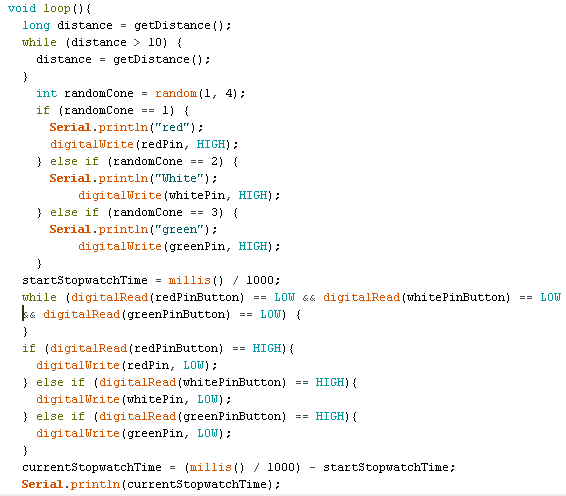
code used for the Arduino Uno board


Inspiration
What it does
The project prototypes smart cones which athletes can use to track their reaction times and speed performance. Individual cones light up, signalling that the athlete must-go-to it. Once the athlete presses the cone, another cone lights up. The time between cone presses is recorded and used to measure performance.
How we built it
The prototype uses three LEDs, three pushbuttons, a PING sensor, a NodeMCU and an Arduino. Each LED and pushbutton combo models and a cone that athlete can touch. We modelled the home cone using an ultrasonic PING sensor.
The circuit was built and tested additively, each unit borrowed in-class concepts. We worked simultaneously with an Arduino and Node MCU code. This allowed us to test the functionality of the code for the hardware using the Arduino--which was more reliable. We then used the Node MCU to test the software and IoT functionality.
My partner and I had initially worked on different codes. This allowed us to explore various ways to execute our project. We then tested each other's codes and combined the two. As the circuitry is composed of elements from our labs, we found that it was simple to design the circuit.
Challenges I ran into
Problems We Faced: Lesedi: Generally, the Node MCU got overwhelmed when more than 2 LEDs were connected and thus seised to function properly. This was a problem we discovered later on. For this reason, it was difficult to debug the circuit and the code. This was how we came up with the idea to work with Arduino and Node MCU code in tandem.
Problem 1: For Roger, his Node MCU didn’t work well with the 3 LEDs connected to it. It just printed out weird characters on the serial monitor when testing his setup. Solution: So he tried to build the circuit from the beginning and tested it after each step and he found that his Node MCU wasn’t functioning properly if he had more than 1 LED connected to it (even if he didn’t mention the second LED in the uploaded code) So he did the same setup with only one LED;
Problem Part 2: However, his program couldn’t return time’s more than 2 seconds. If he doesn’t press the push button after 2 seconds from moving his hand close to the ping sensor and lighting up the LED, a while loop would break and the main loop starts from the beginning. We didn’t know the reason and the TA’s advice was to build the circuit with the Arduino board and just sent the times with the Node MCU to the Blynk app. unfortunately, the board wasn’t working well (it couldn’t print “hello” at the start of the function) So He just built the whole setup using the Arduino board and it worked!
Accomplishments that I'm proud of
That we managed to complete the project with all the equipment that wasn't working well.
Despite the Node NCU setback, we managed to get our project to work. This allowed us to record a functioning project and give our presentation.
(Lesedi: I like the logo I came up with.)
What I learned
constructing something from scratch! using python! continually debugging till the project works.
I was a really fulling experience to construct our project from the ideation phase to the prototype phase. Throughout we learned methods of hardware and software debugging, how to code using C++, and how to adapt to design challenges.
What's next for Project Go
As this was just a prototype, the next step is to create a model that resembles the final product:
Each LED and pushbutton should be a pad that lights up and turns off when the athlete touches it. Also, the PING sensor should be a cone. Moreover, each pad(that contains the LED and push-button) should be connected to the boards wirelessly!

Log in or sign up for Devpost to join the conversation.