-
-
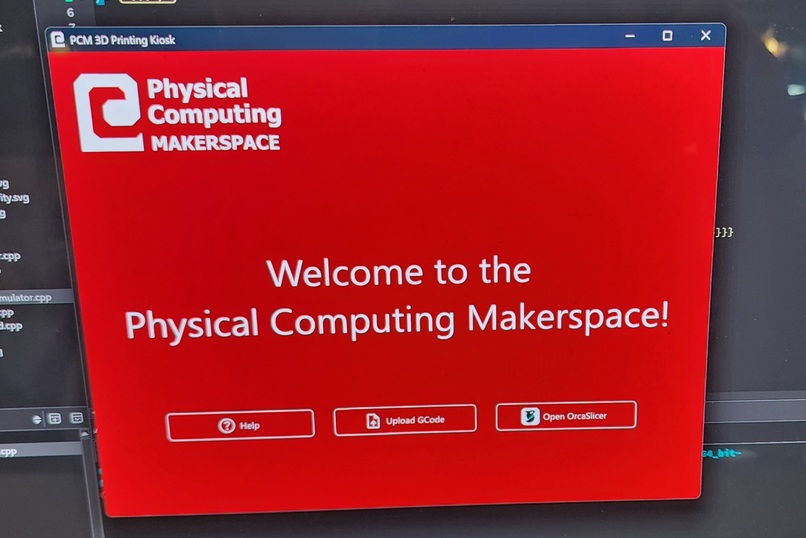
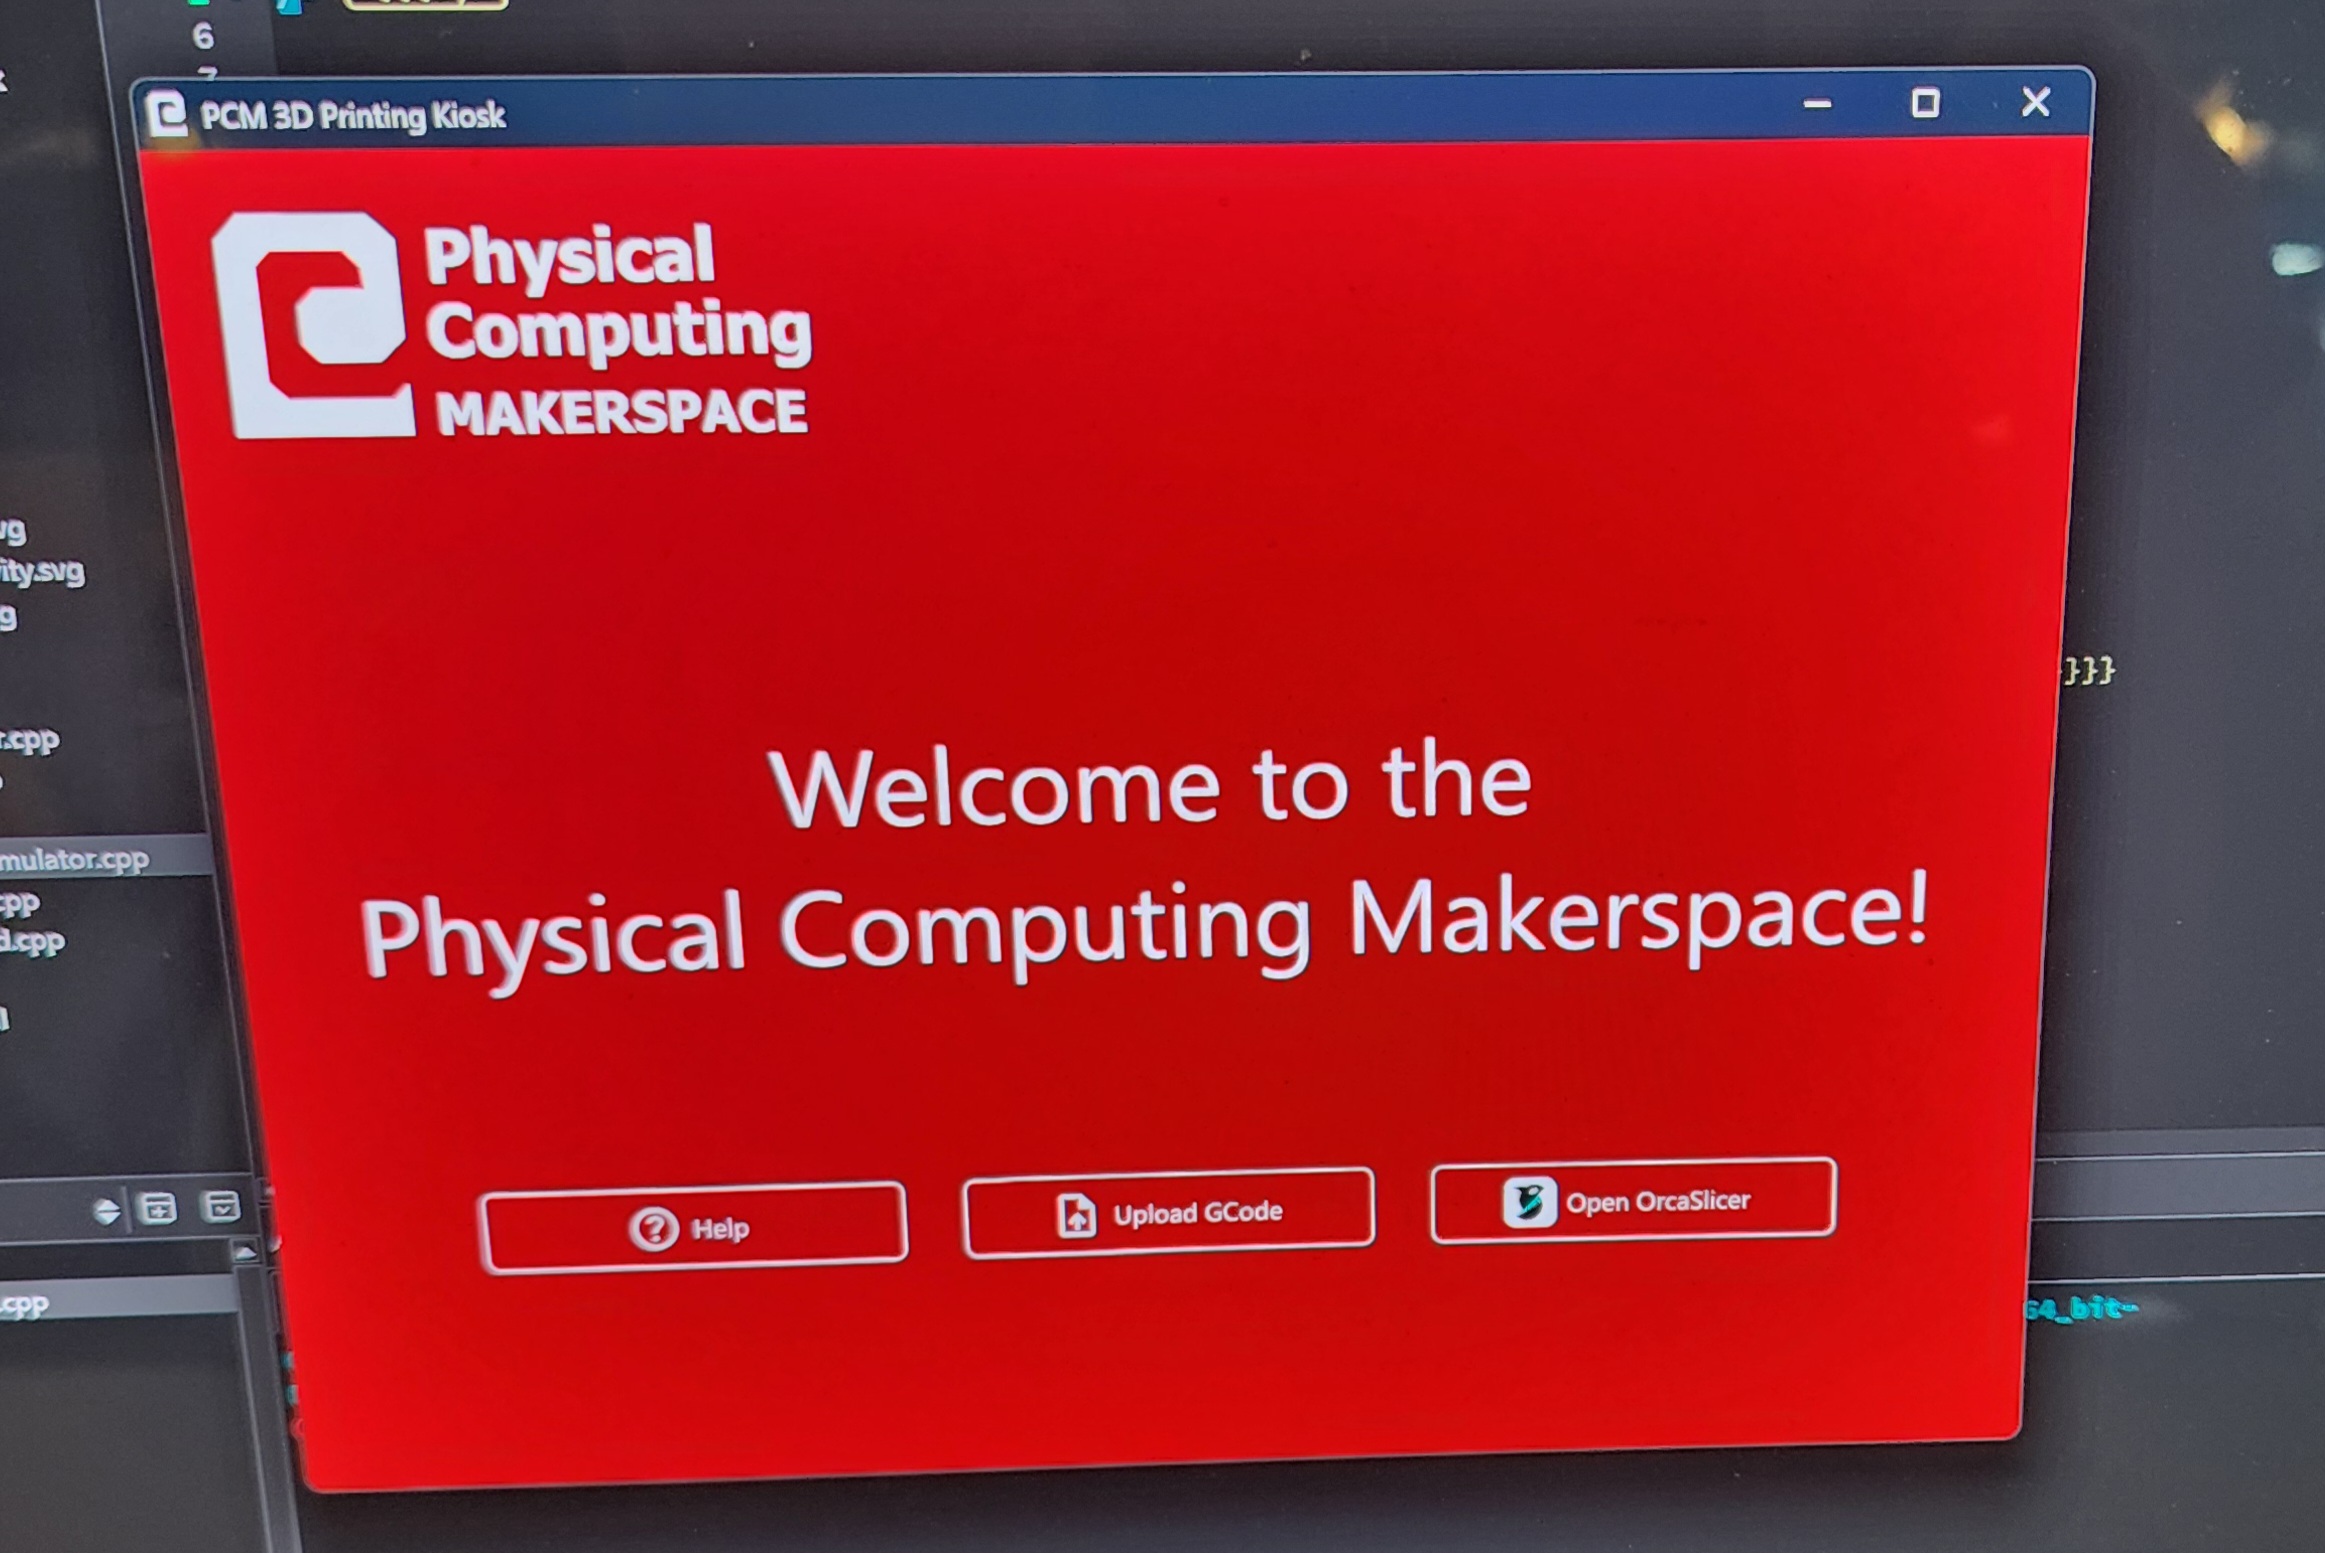
Kiosk Idle Screen
-
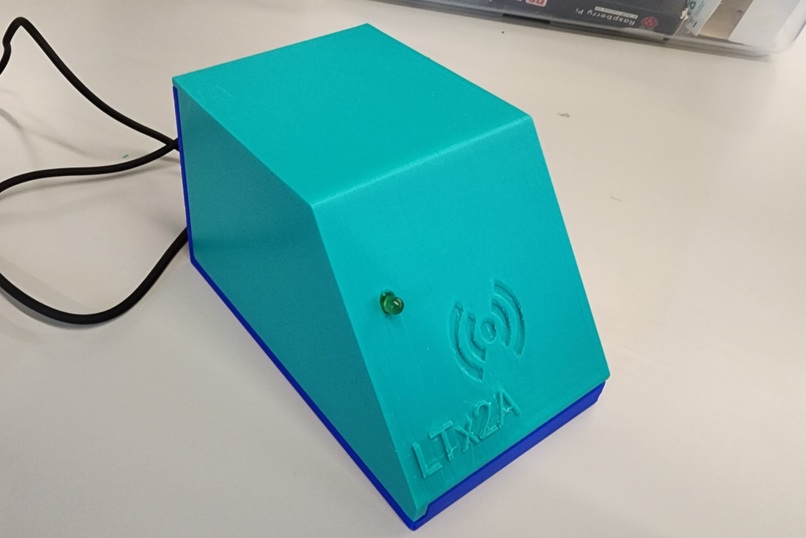
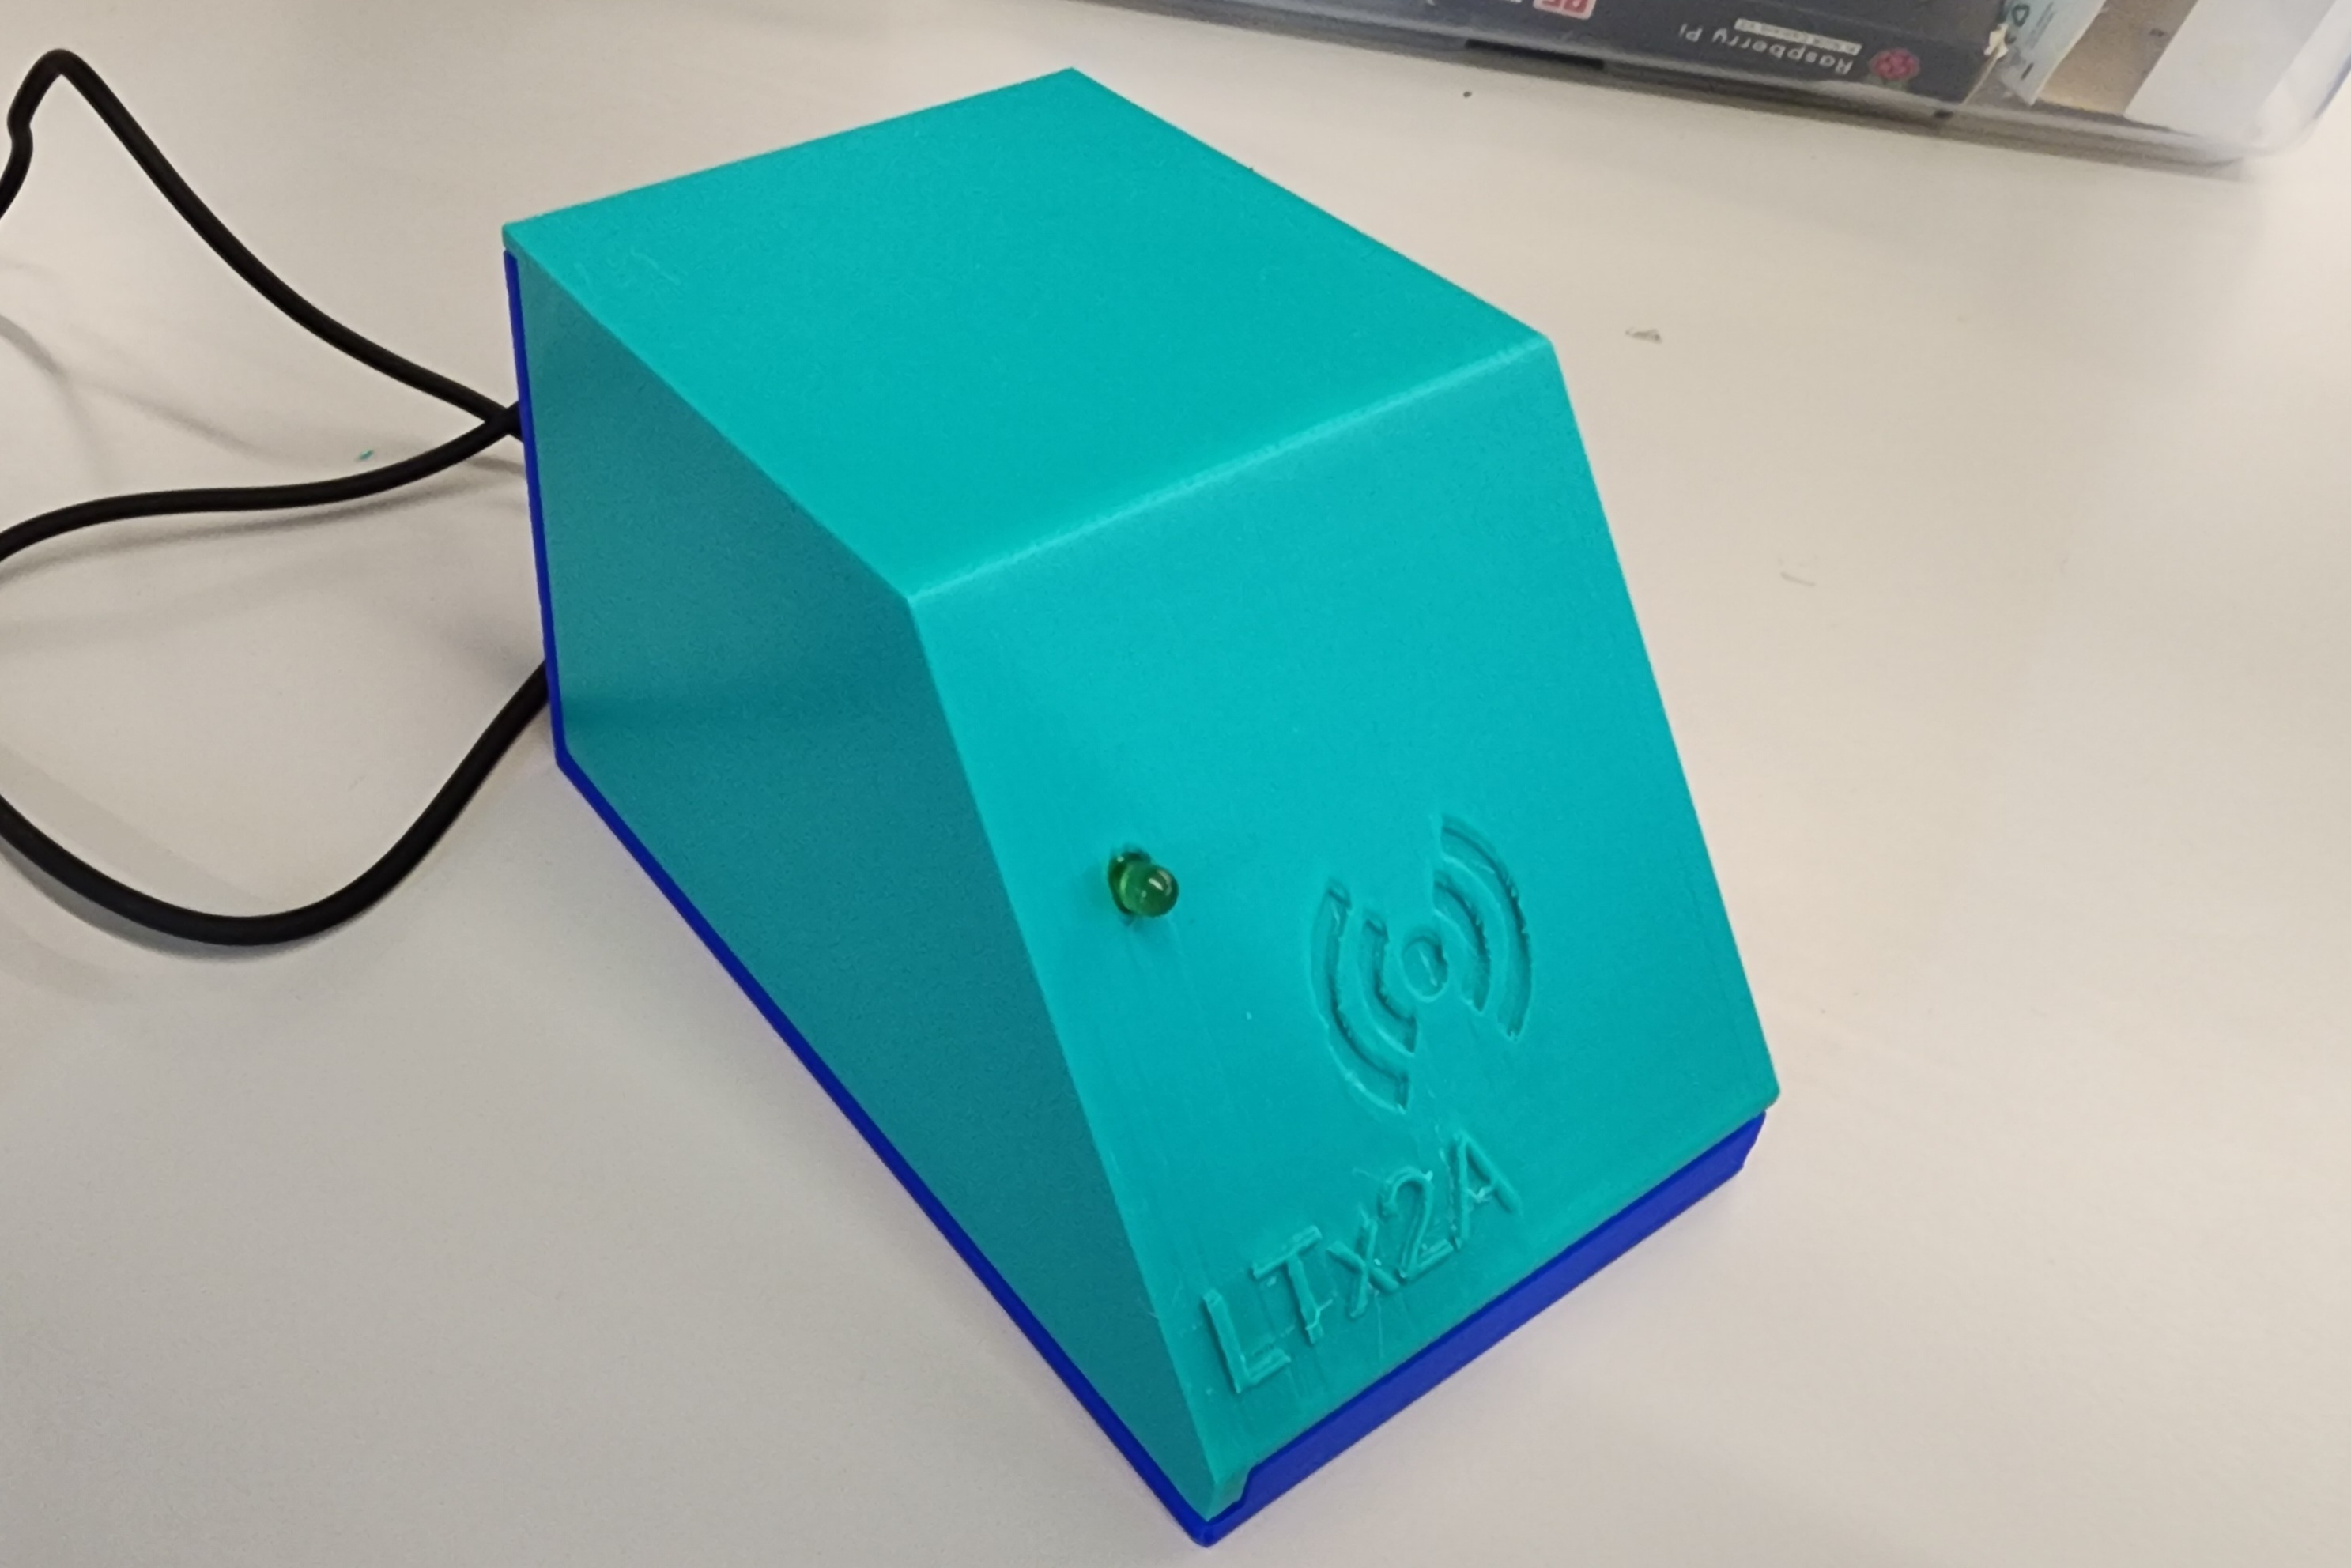
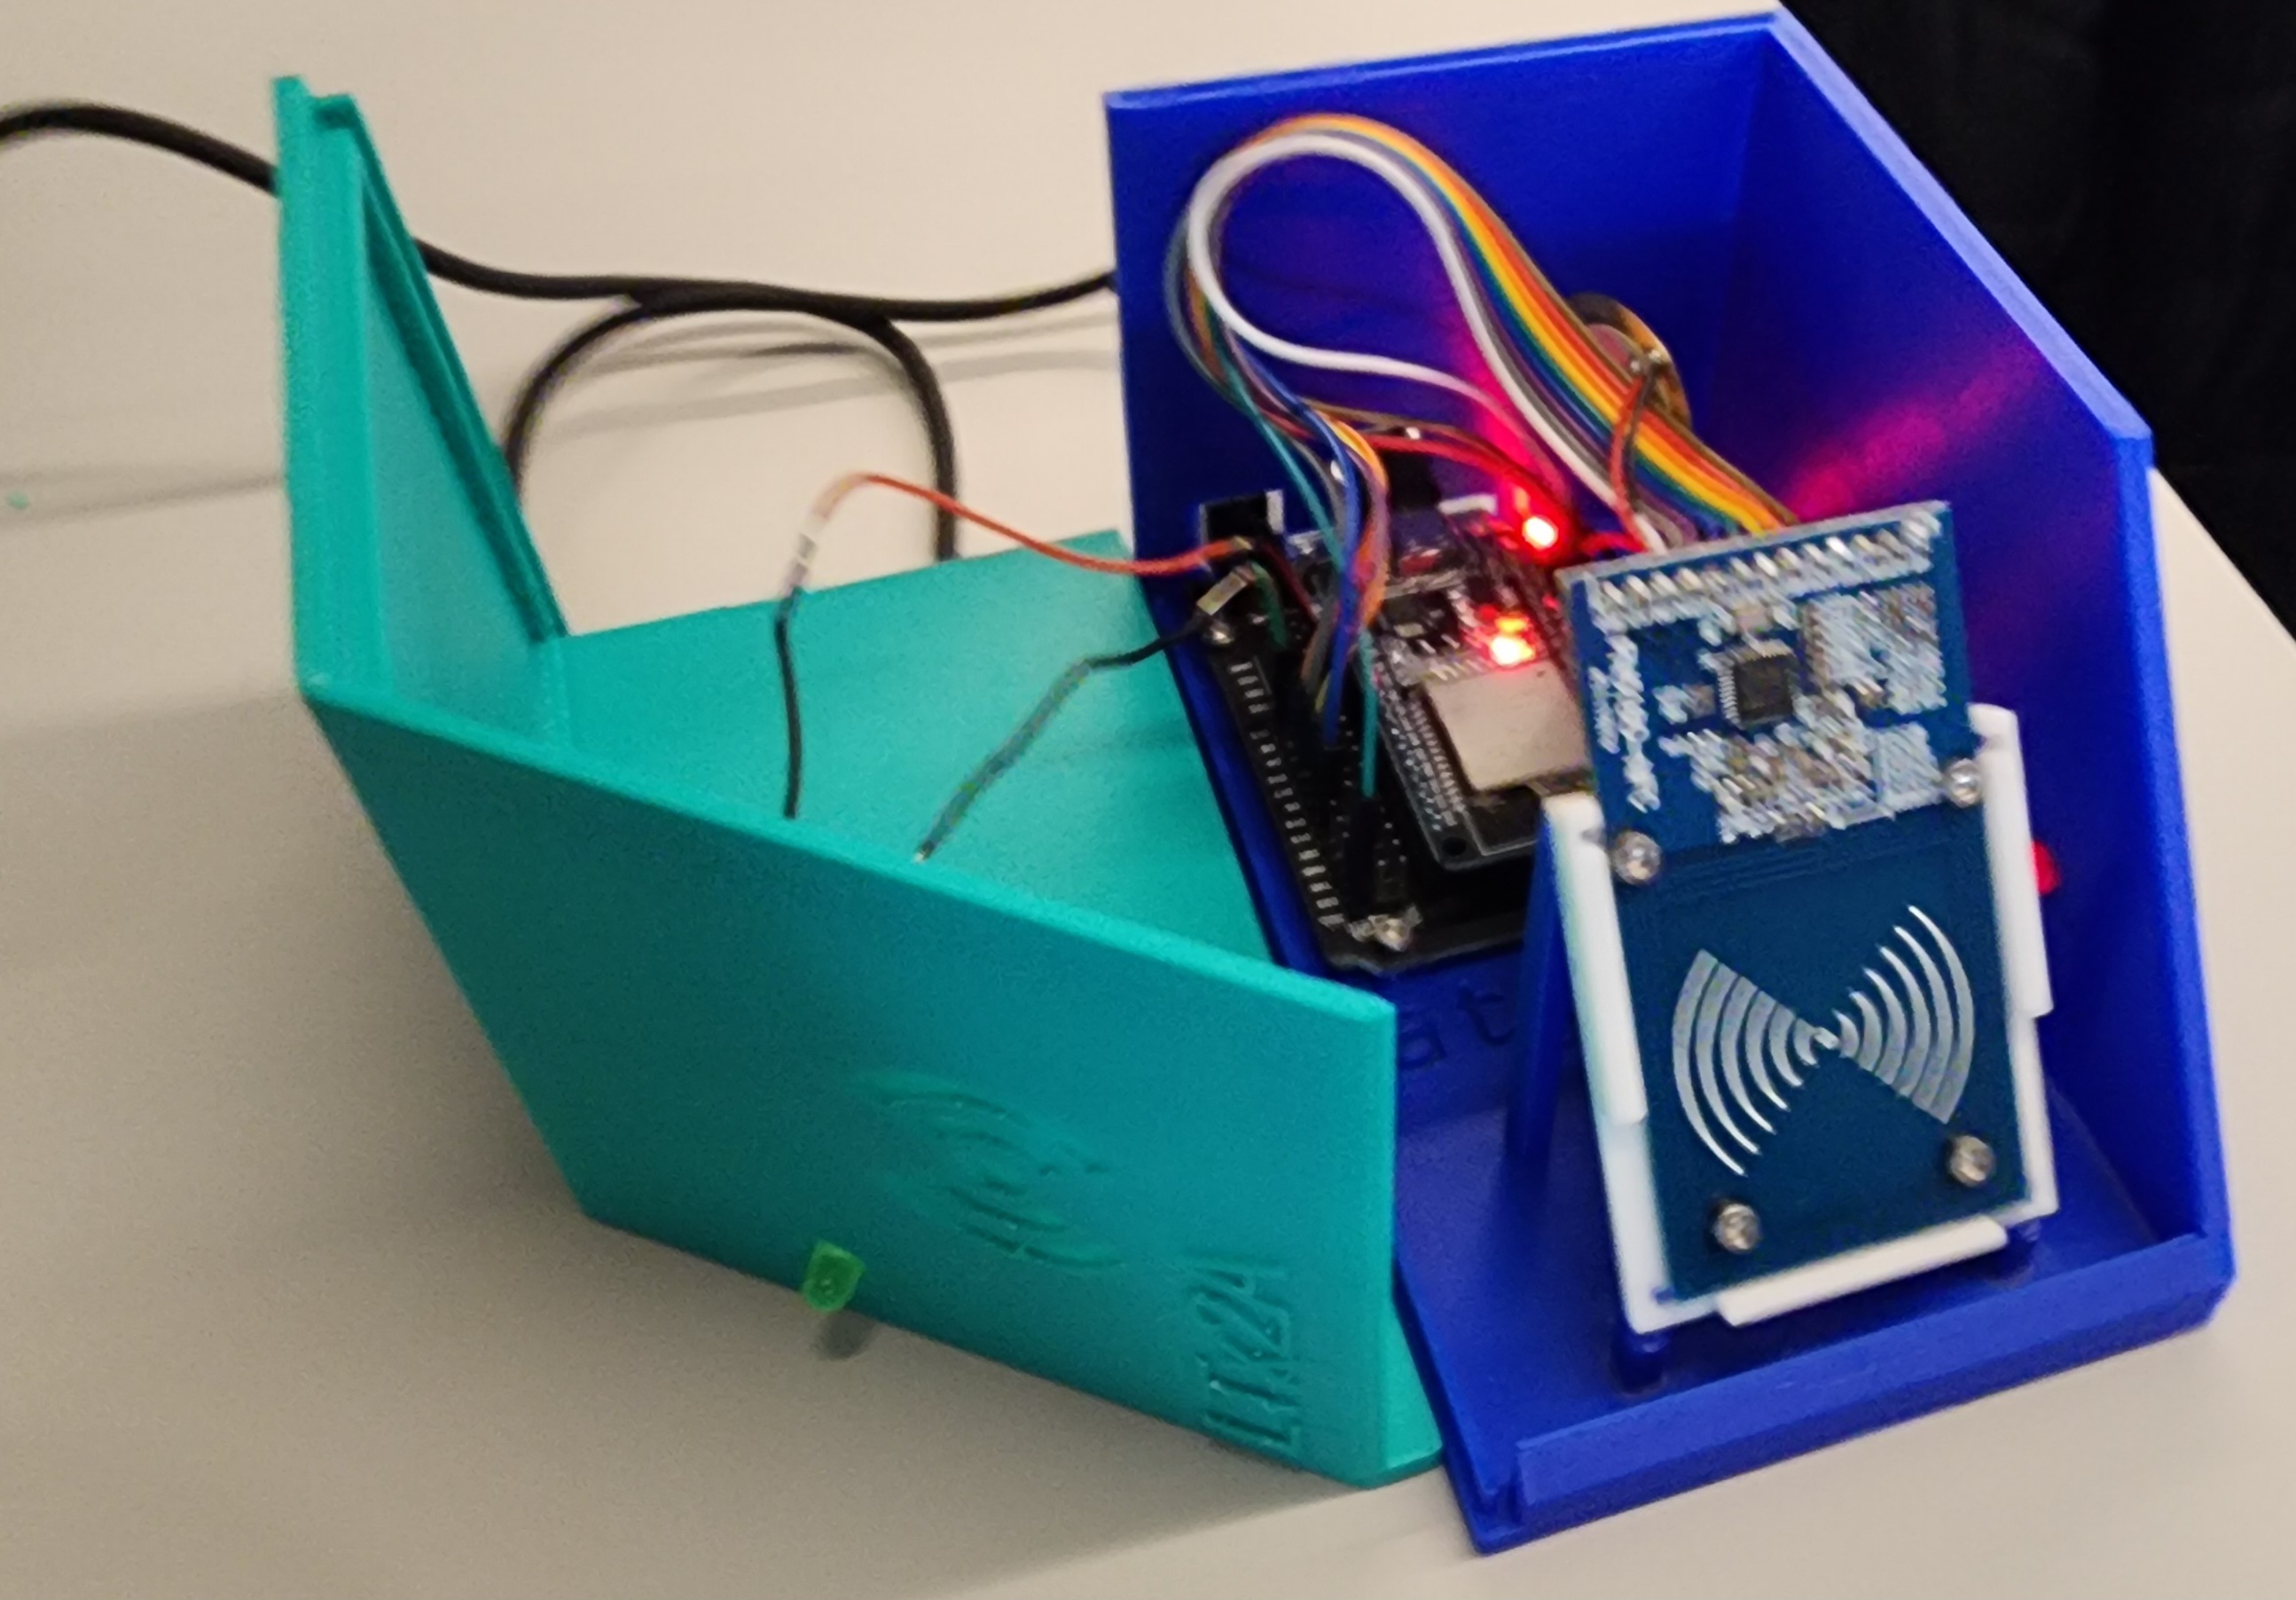
RFID Reader Front
-
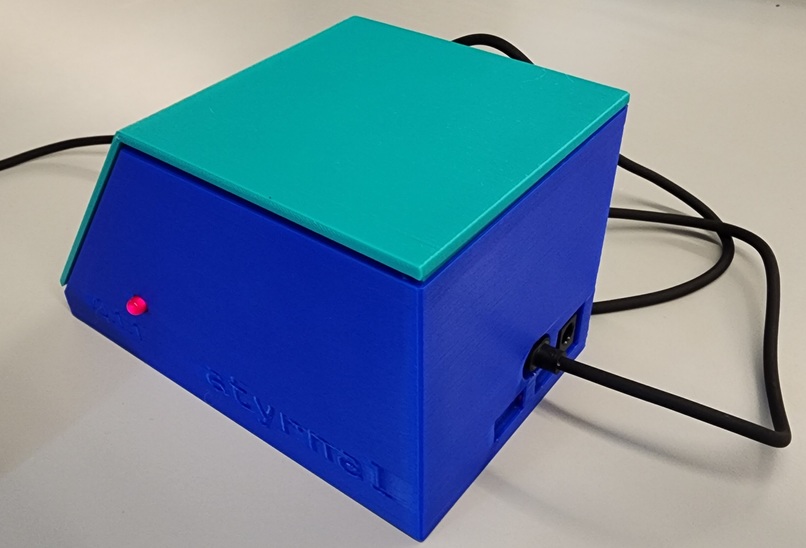
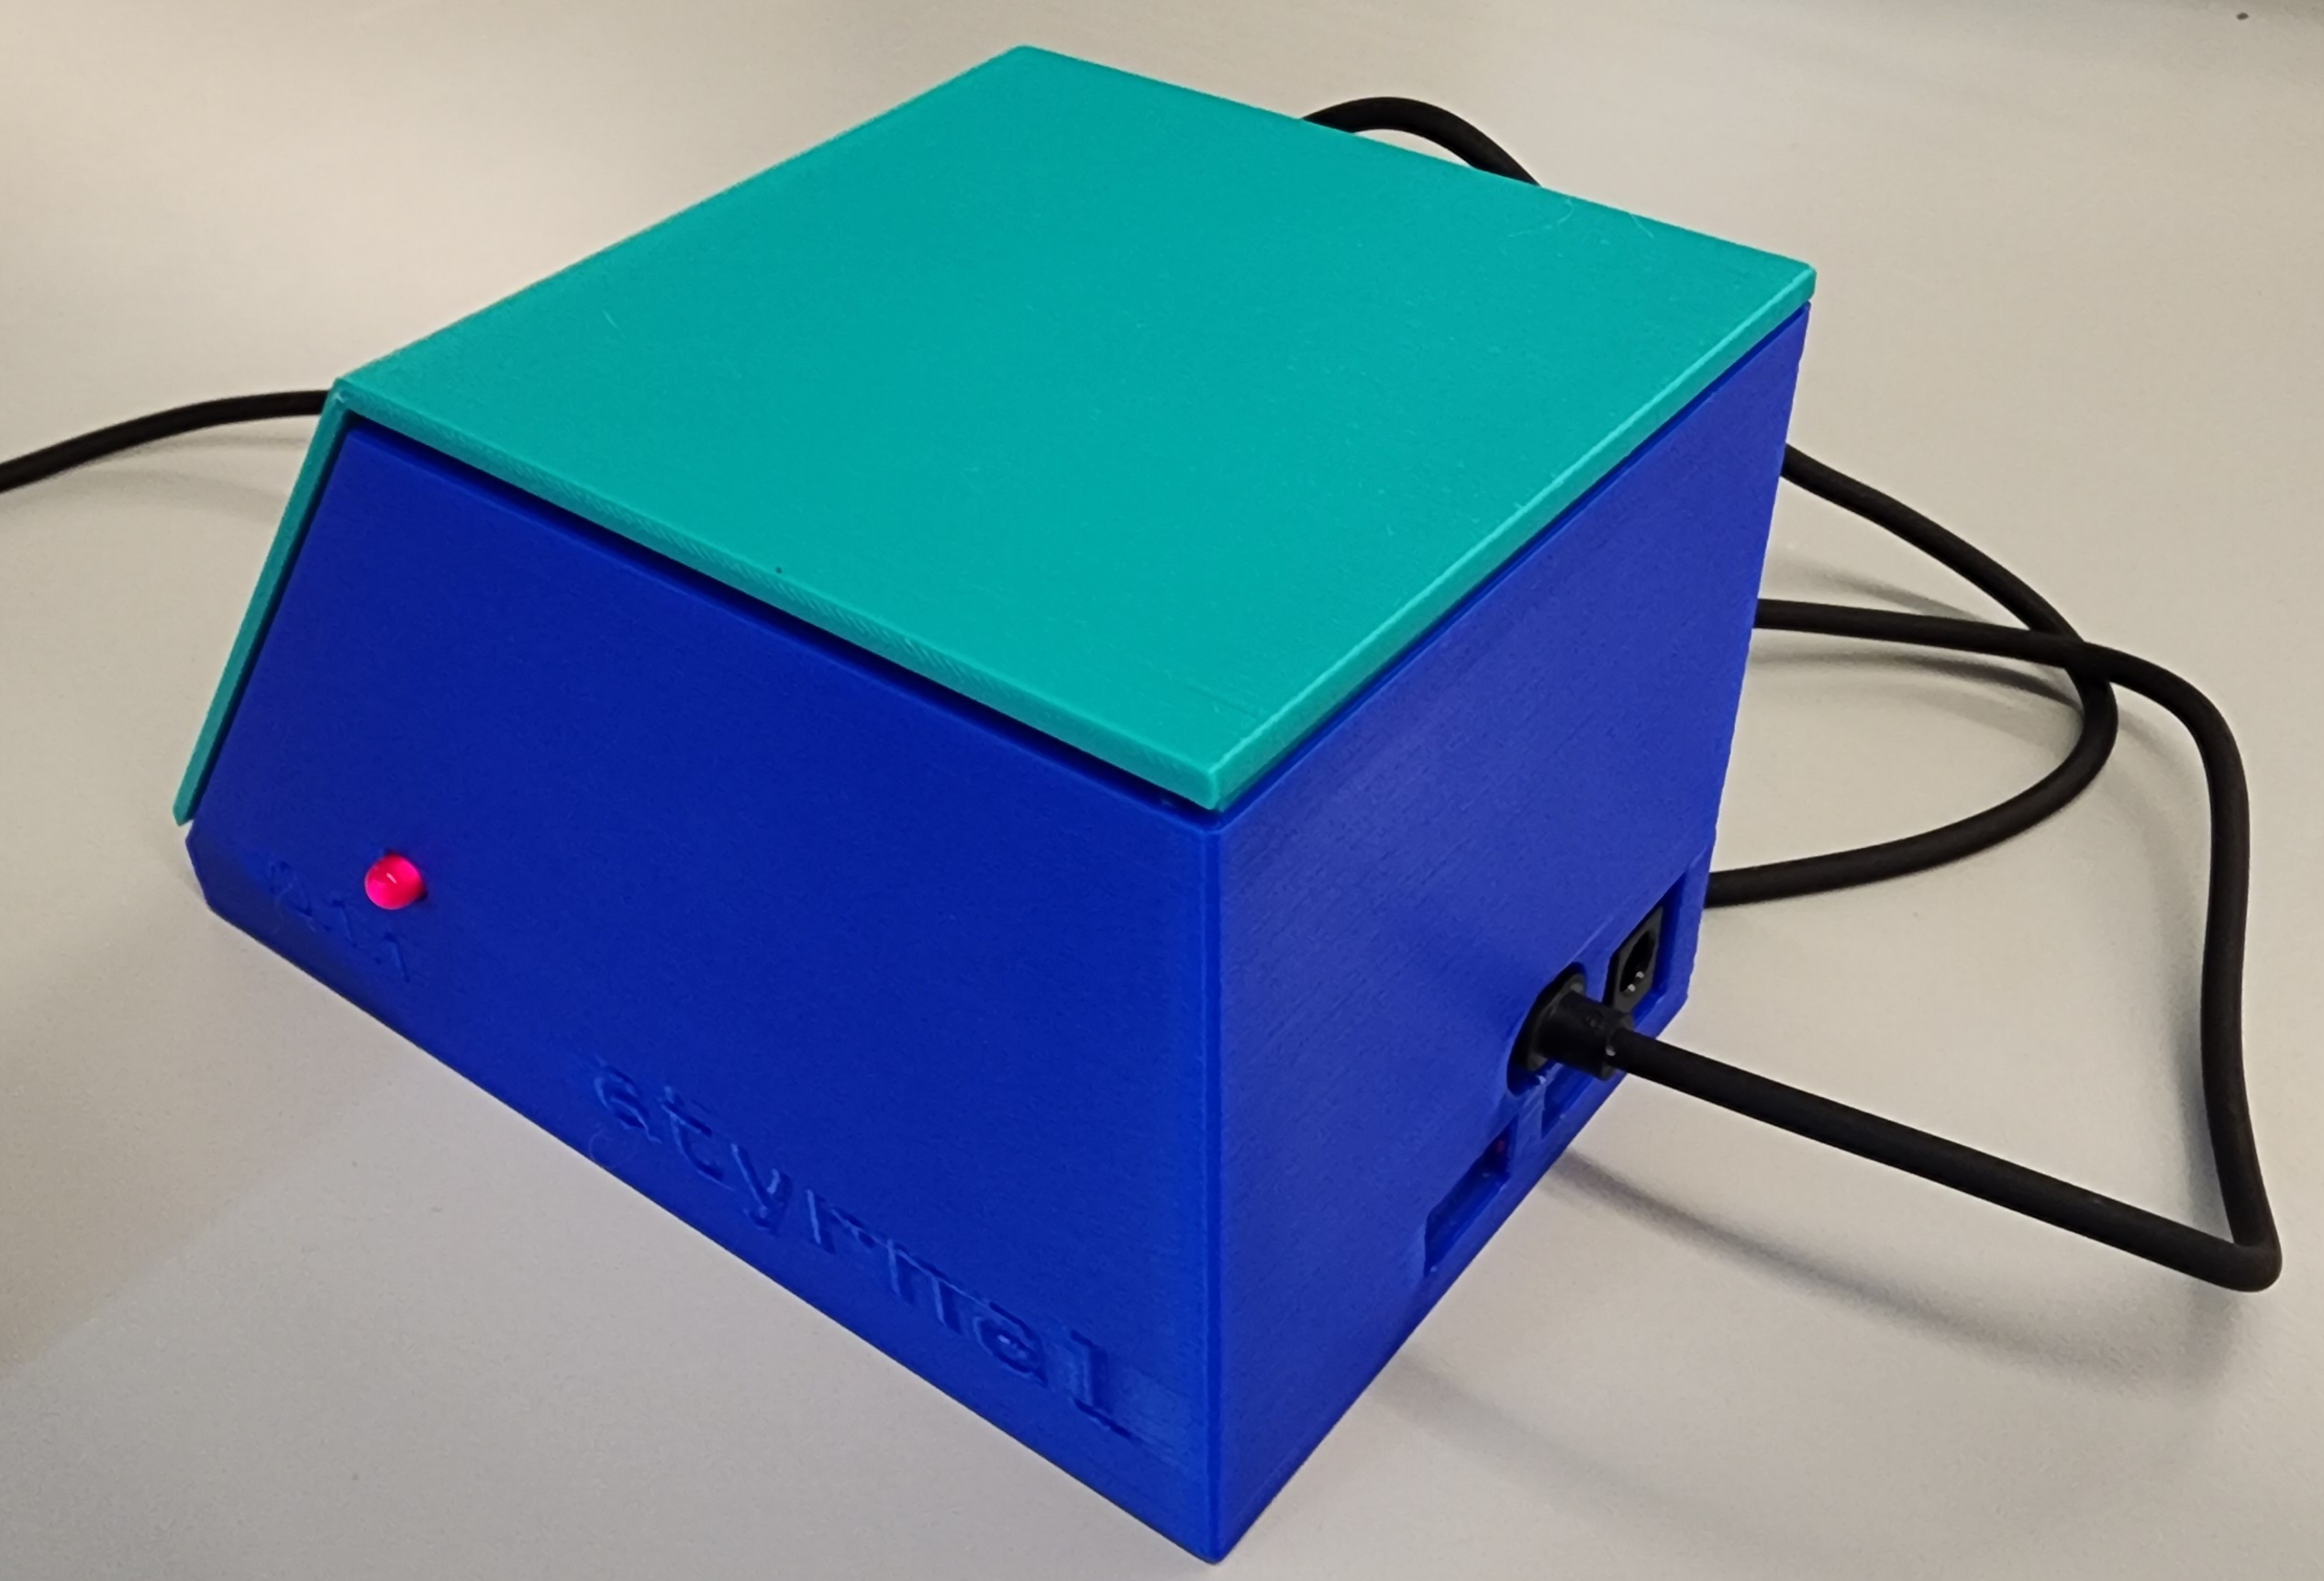
RFID Reader Back
-
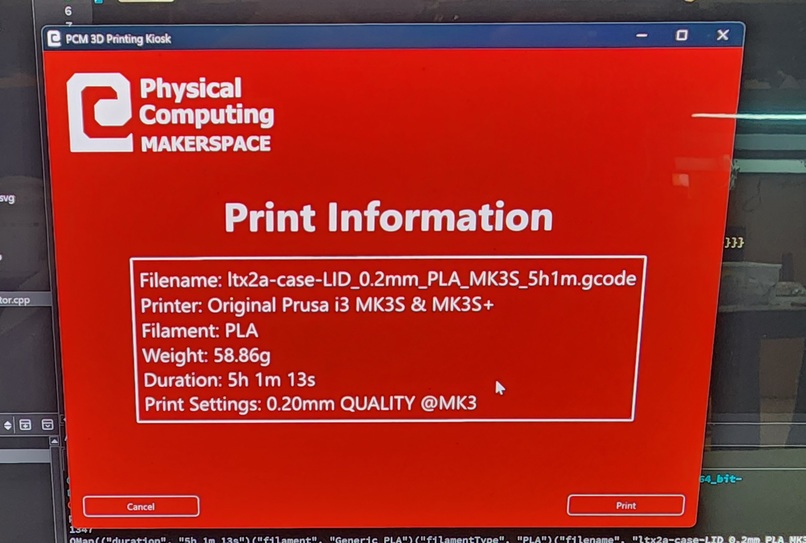
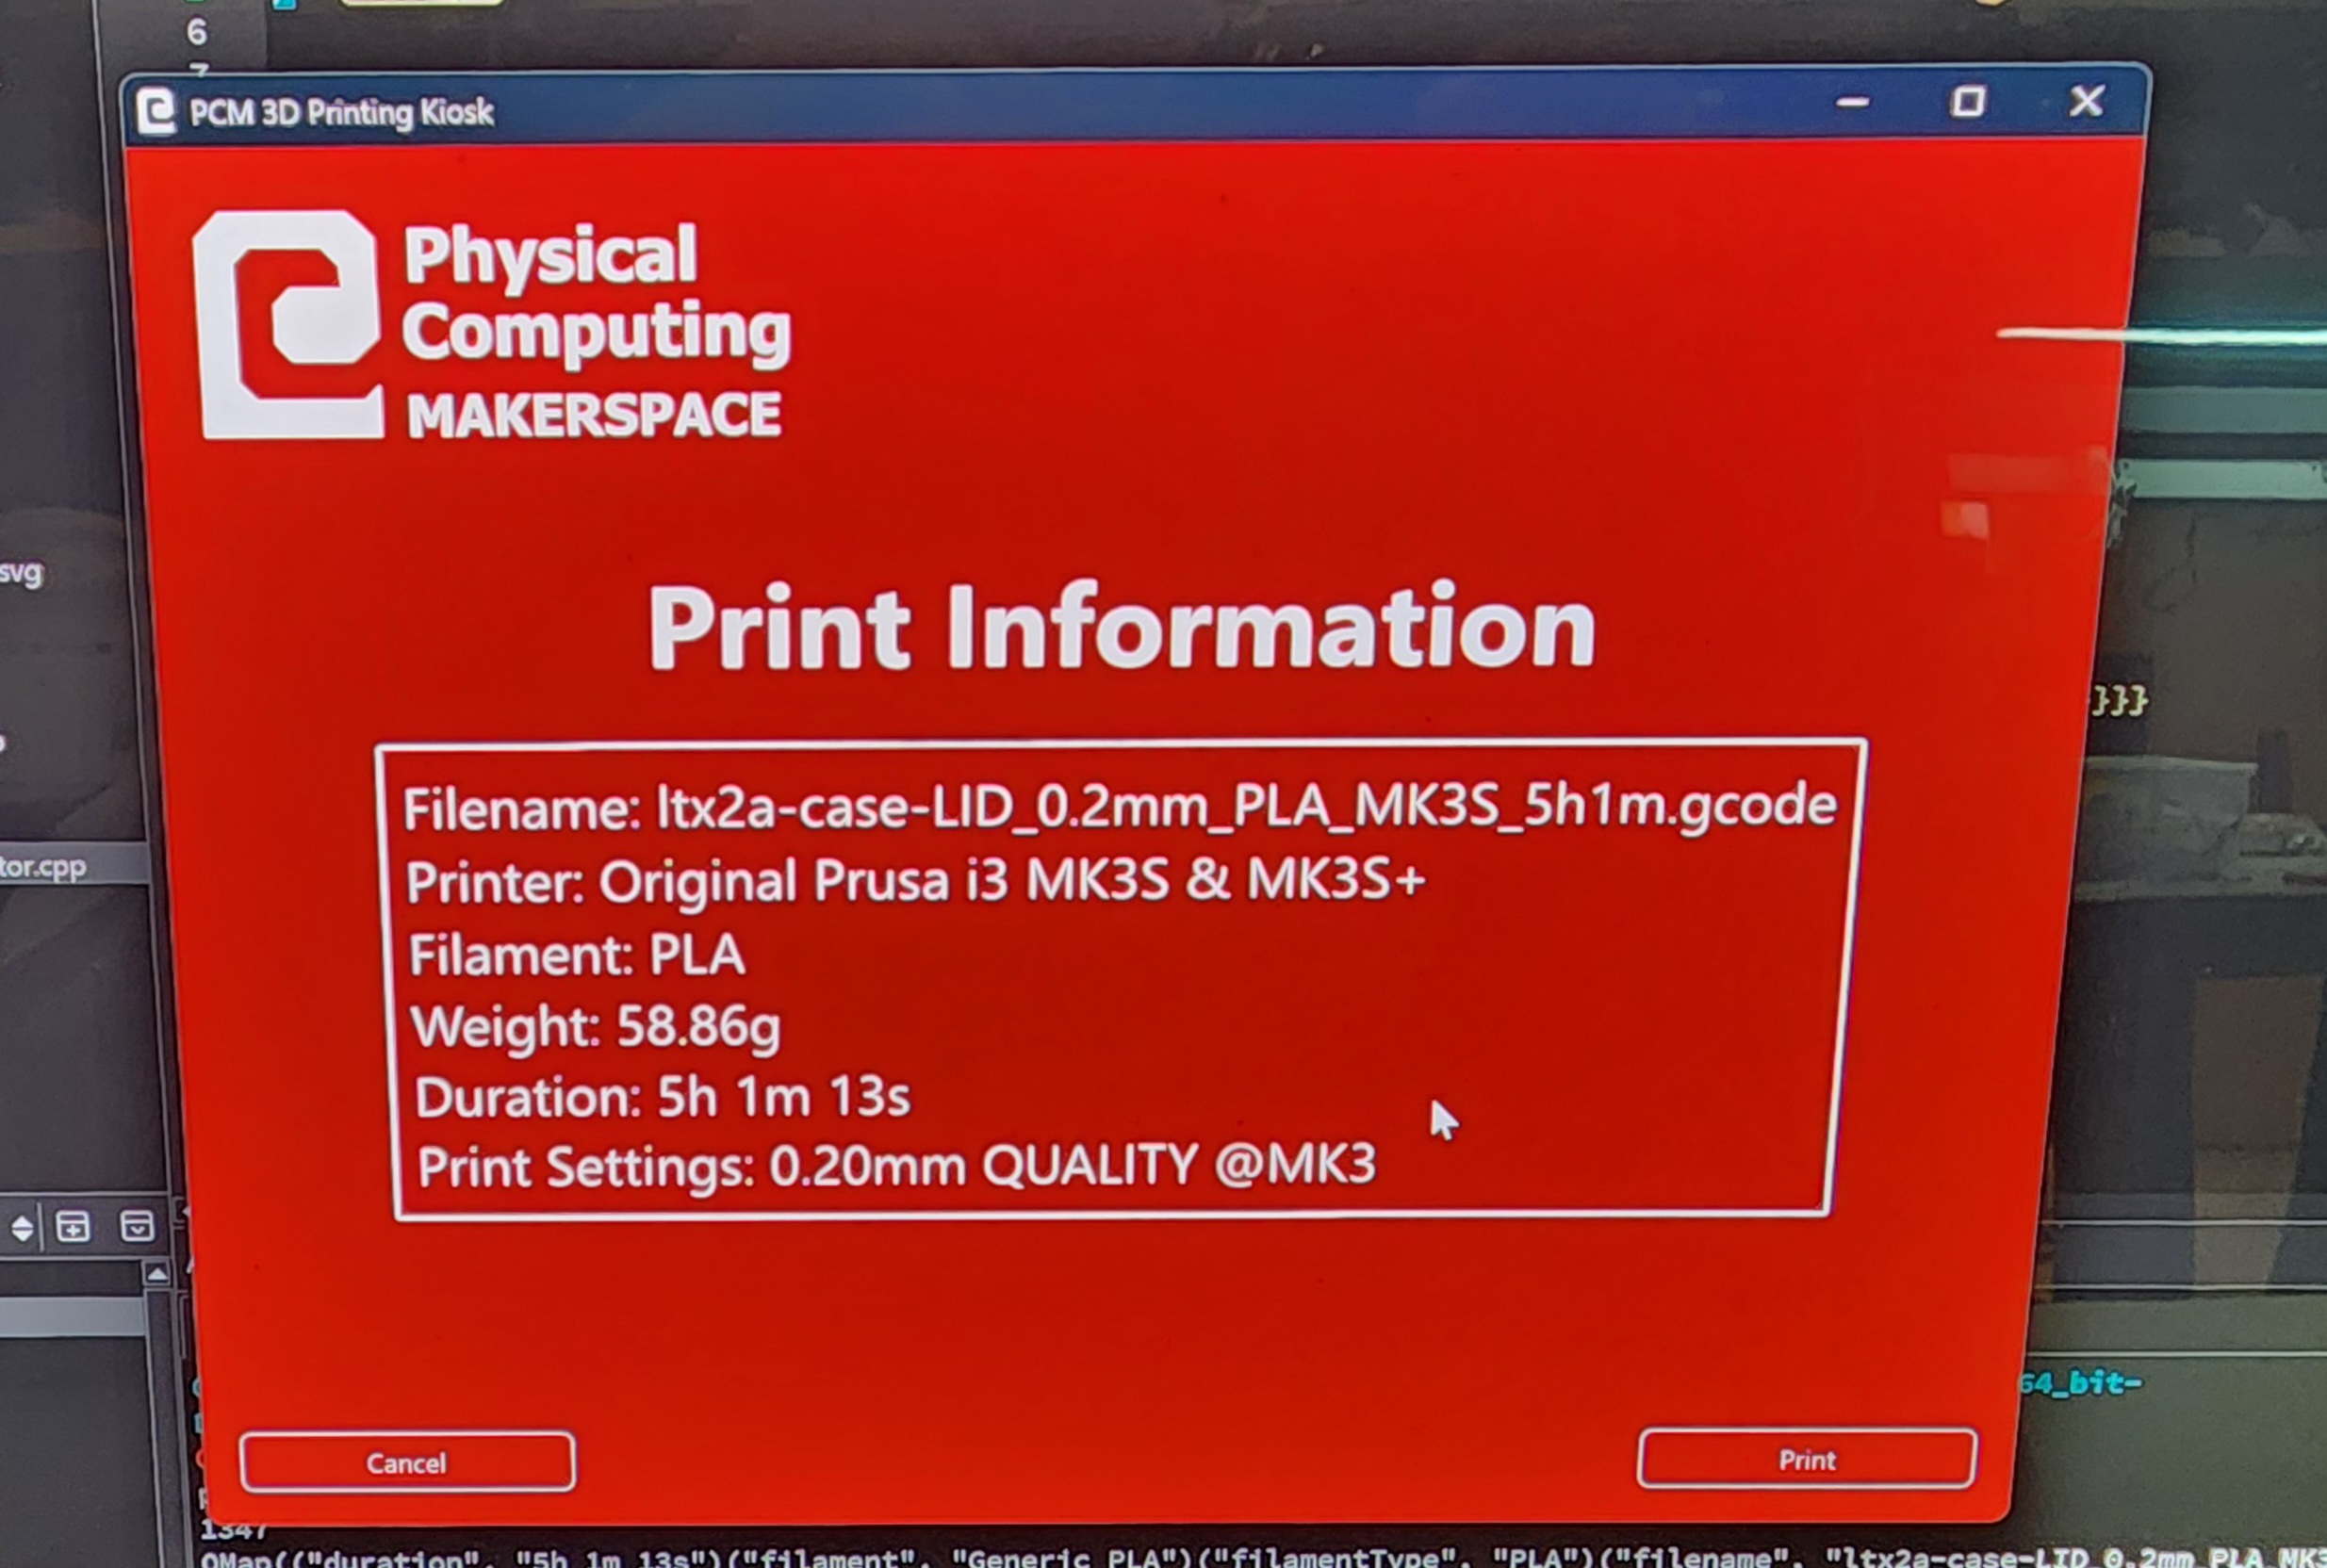
Kiosk Print Info Screen
-
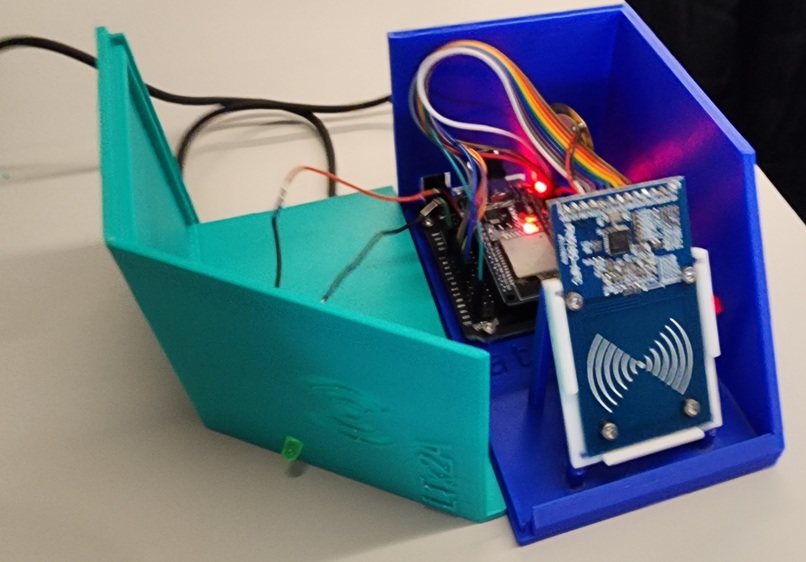
RFID Reader Internals
-
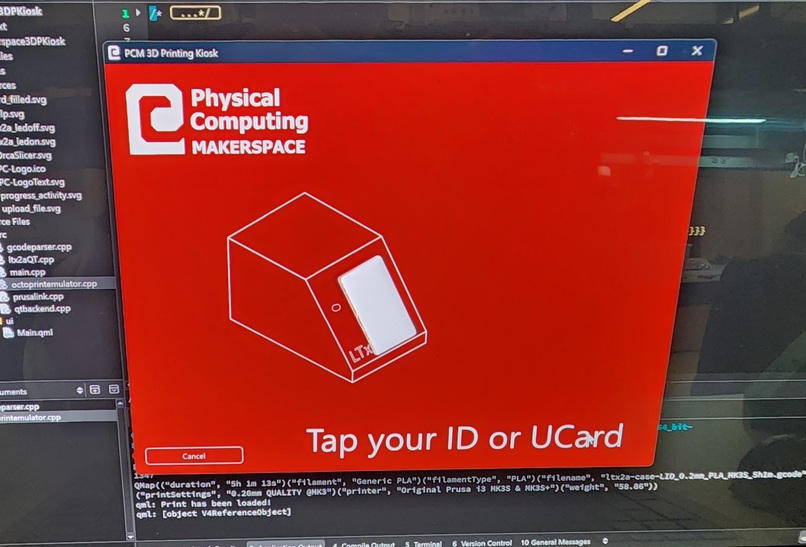
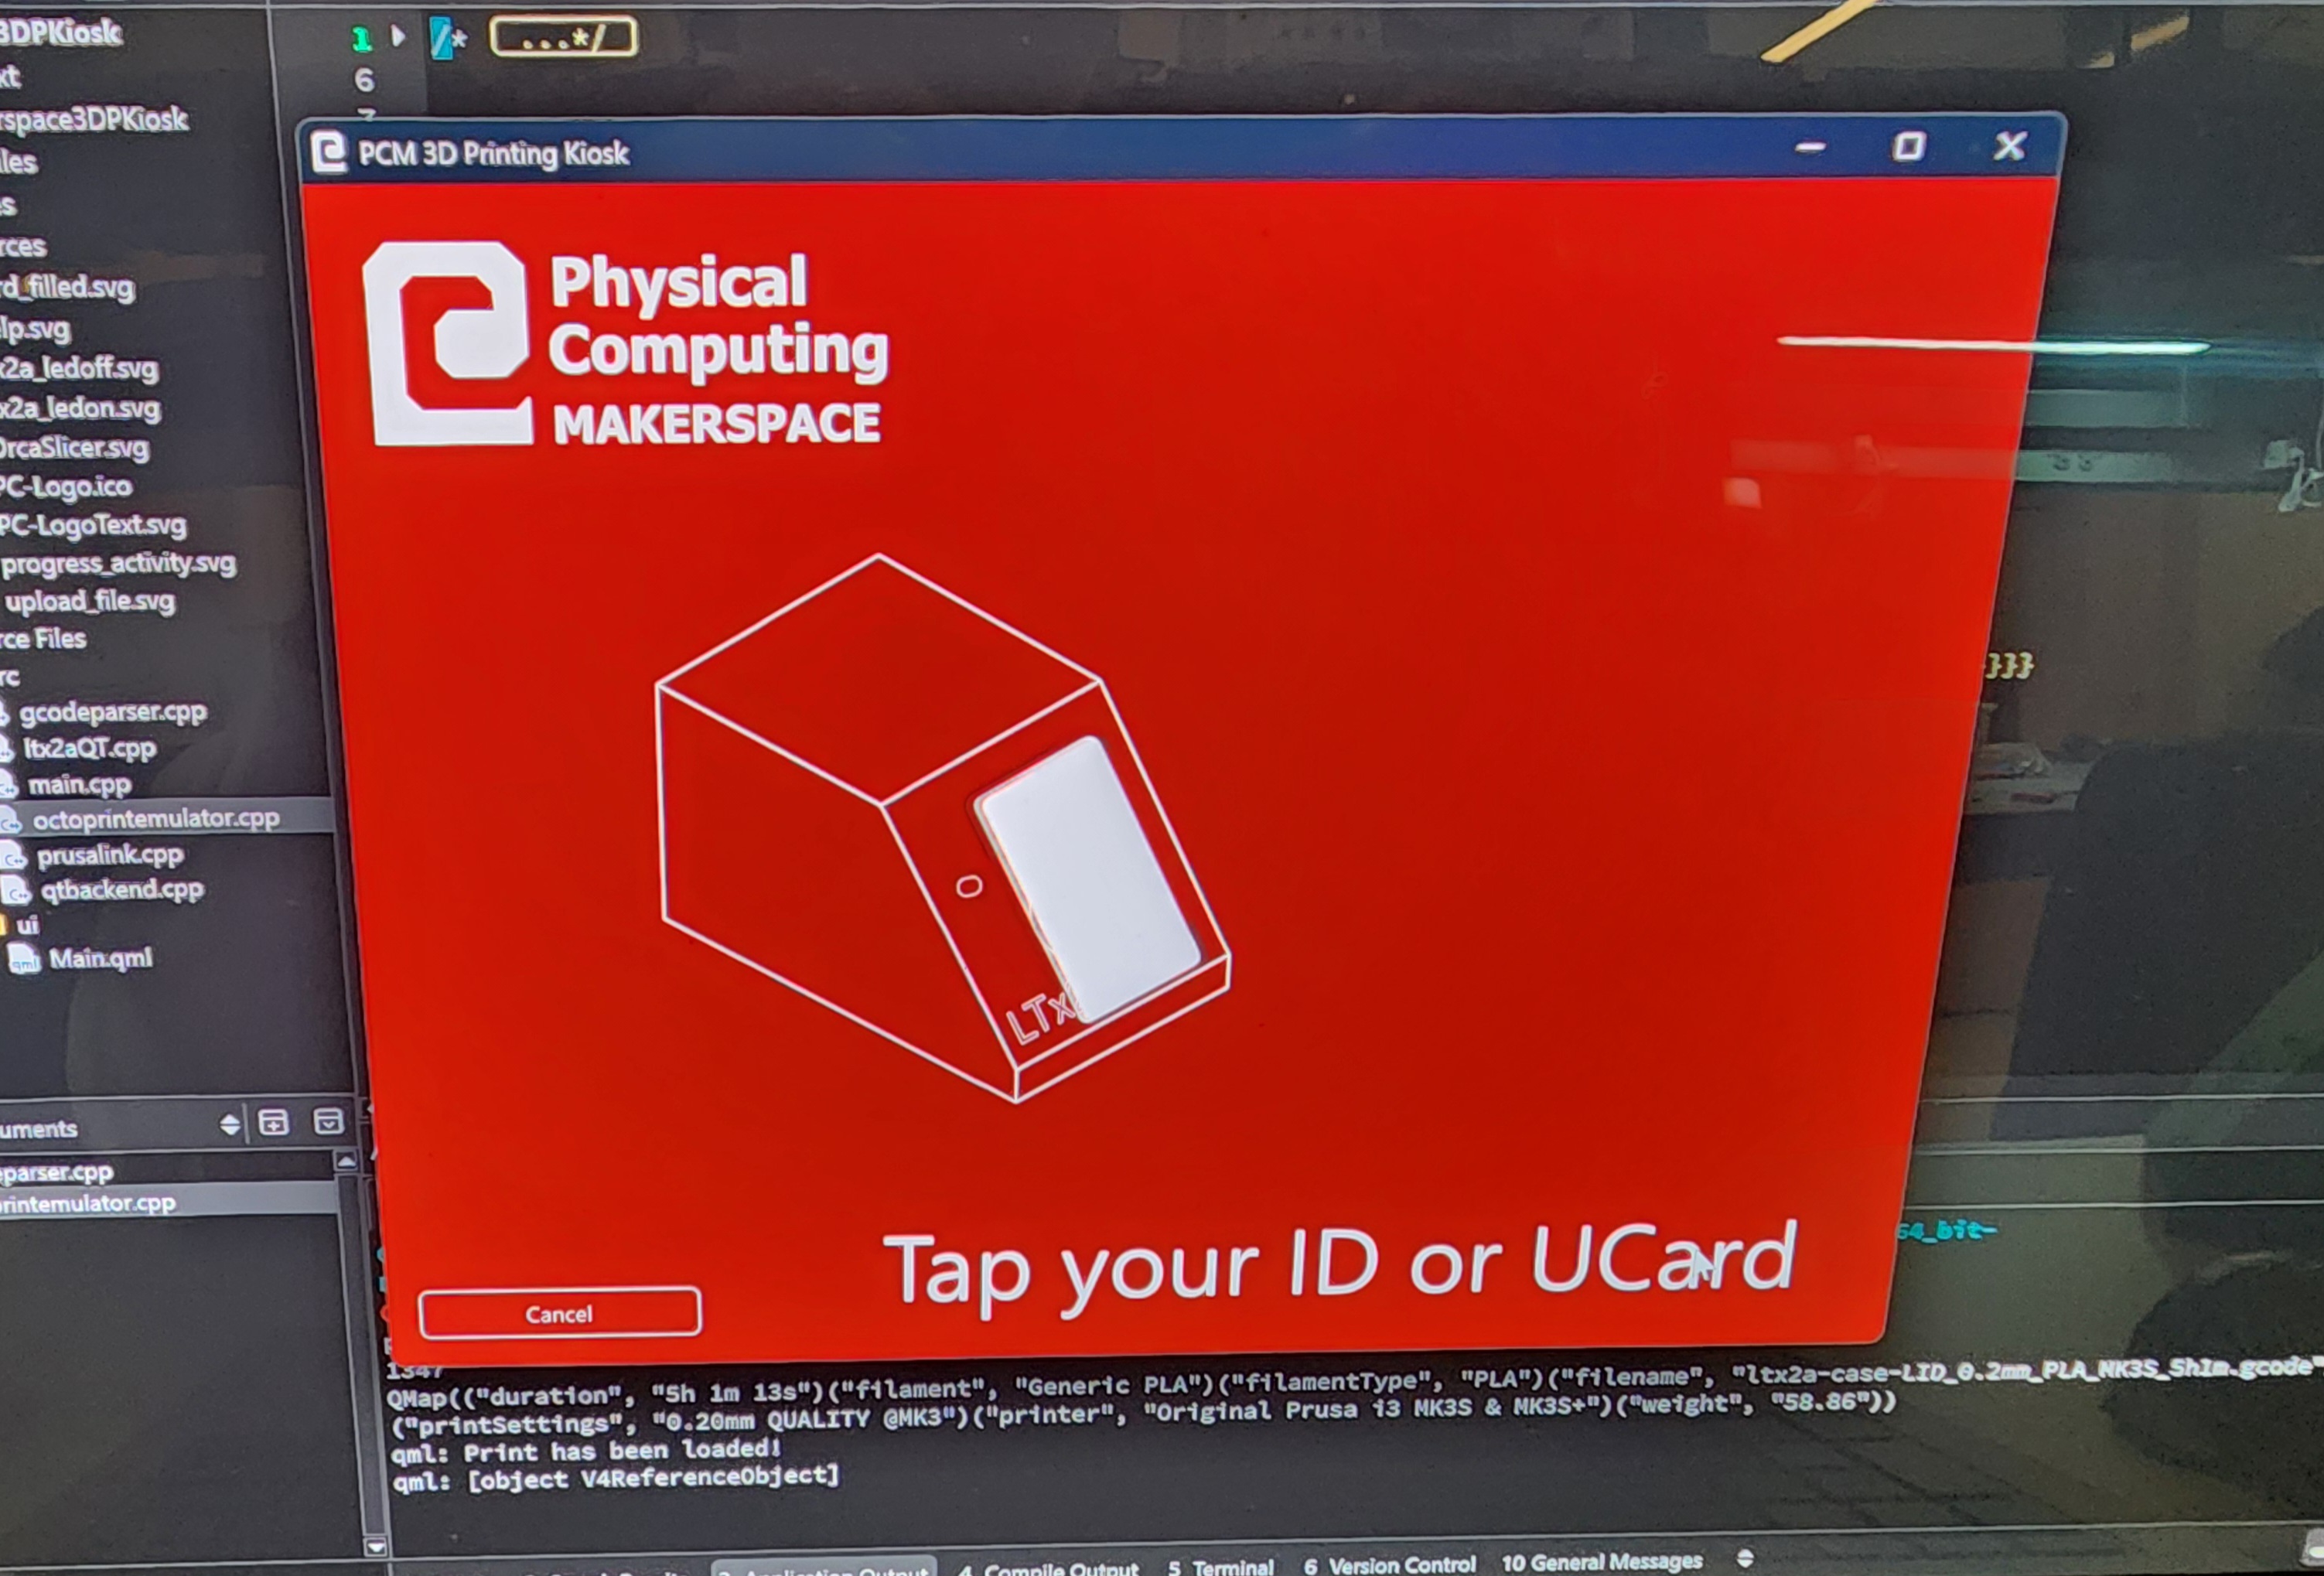
Kiosk Card Scan Animation
-
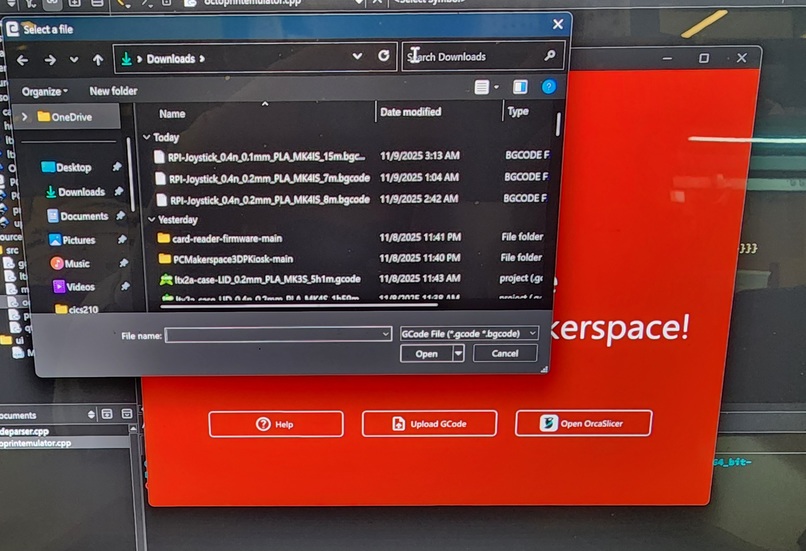
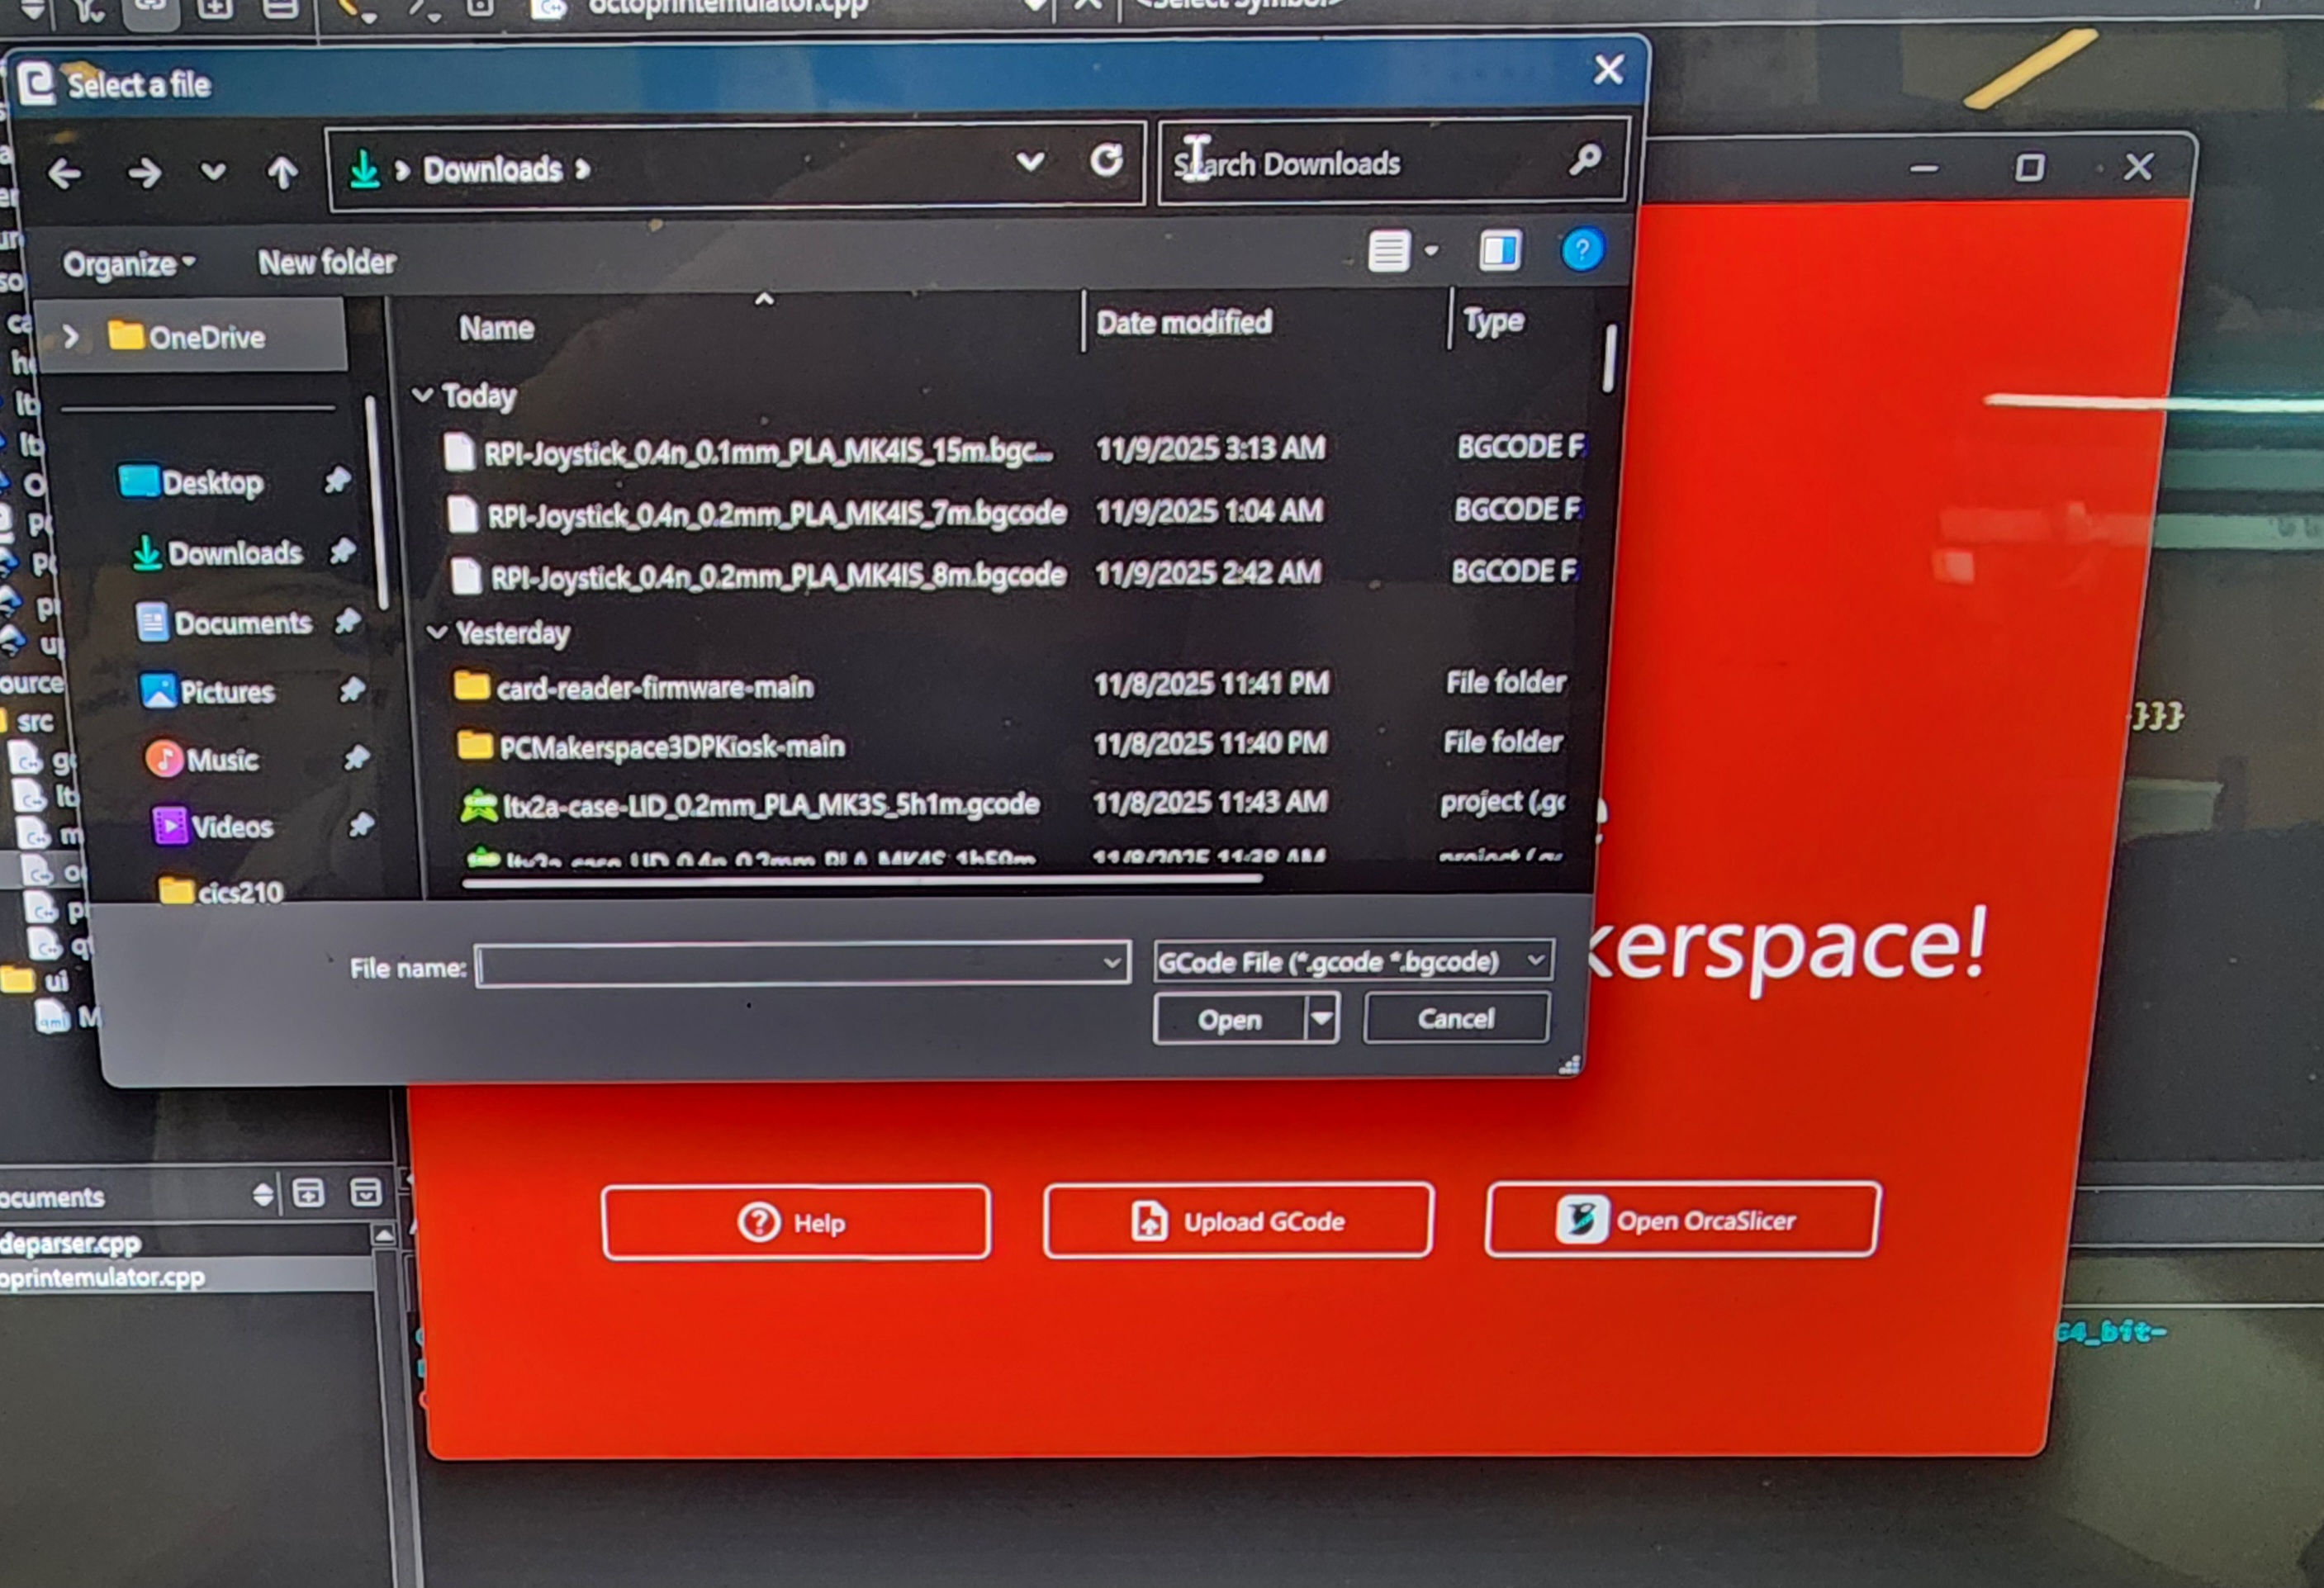
Kiosk File Upload Dialog
-
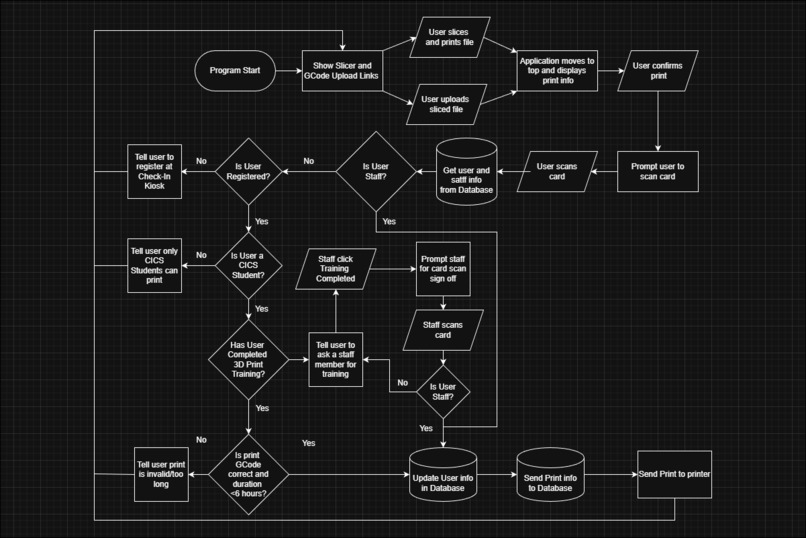
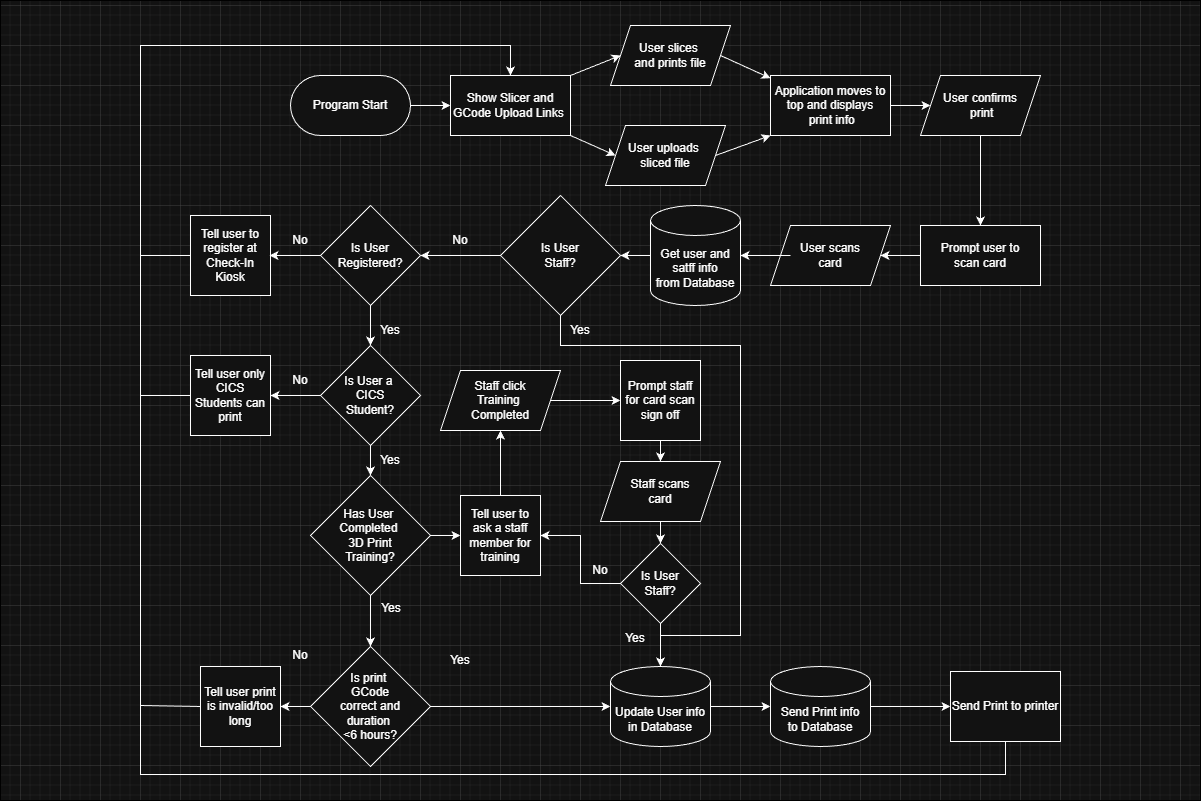
Kiosk App Flowchart
Inspiration
Ever since I started working at the Physical Computing (CICS) Makerspace a few weeks ago, there have been several issues with the way 3D printing has been handled. There were a few rules in place, but they were mostly ignored, as our system consisted of having people slice their own prints onto a USB Drive / SD card and run them directly from the printer. There were several problems with this system: people could start prints longer than 6 hours (our maximum), they could use more than two printers at once, there was no verification that they were a CICS Student or that they had completed our 3D Printing training, and they didn't need to interact with staff at all to start their prints, meaning if a print failed, we had no record of who it belonged to or what the print details were.
I'm a big fan of projects that solve real world problems, so I set out to make a comprehensive solution that would tackle all these issues in a convenient, elegant, and user-friendly manner.
What it does
The system is comprised of three main subsystems: the custom RFID Card reader, for scanning IDs/UCards and generating unique identifiers, the Kiosk desktop app, for handling interaction with the user, and the systems which bridge the desktop app and the RFID Reader / 3D Printers.

The Kiosk app remains constantly running on the kiosk computer, waiting for someone to upload a 3D Model to it. It offers options to either upload a sliced model (GCode file) directly, or allows the user to slice their model on the kiosk, and it integrates directly with the slicer, so once the model is "printed" from the slicer, it will be immediately uploaded to the kiosk app without any further input from the user. It then displays information about the print: duration, weight, printer model, filament type, etc., and once the user is ready to print, it prompts them to scan their ID/UCard. Once the card ID is received from the RFID reader over Serial, the app retrieves the user's information from the database, and makes sure they are authorized to print and that their print is valid, offering clear and specific feedback otherwise. Assuming those checks pass, the print is then immediately sent to the 3D Printer over LAN and started, through custom code interfacing with the printer's REST api. It then updates the database, storing statistics such as how many prints the user has started, how much filament they have used in total, and how many hours they've printed for in total. It also stores information about the print itself in a separate database table, especially useful in cases where a print fails. The database system is designed to integrate with the already existing Physical Computing Makerspace (PCM), so in the future it will be able to pull user information from the registration submitted there.
The RFID reader itself is running on an ESP32 Microcontroller, using LEDs and a Piezo element (Buzzer) to provide simple analog feedback to the user. It waits for a card to be detected by the RFID module (wired over SPI), then generates a unique ID number for the card and sends it to the custom library of the kiosk app to be parsed and used by the application. This is tricky because all the data on a UCard is encrypted, but we are still able to get a unique 8-Byte id from this encrypted data that is constant across all RFID scanners.
How I built it
I started by building the RFID reader, soldering the headers for the PN5180 RFID module, the wires and resistors for the LEDs and Piezo element, and wiring everything together. Then I designed a custom case in Fusion to be 3D Printed to contain all the internals of the RFID reader and create one cohesive unit, measuring all the necessary holes and dimensions that would allow everything to fit and be attached securely (mostly with nuts and M2.5 screws). From there, it was a matter of writing C++ firmware for the Esp32. I was able to find an Arduino library for the PN5180, (after trying two versions that did not work), but there was still significant code to write to handle generating a unique ID and timing it all, as well as a custom library for the piezo element managing frequency through PWM.
After getting the RFID Reader working and it's case finally printed and fitting, I turned my attention to the software that the user would interact with. I made a desktop application using the Qt Quick framework in C++, creating a frontend in QML. I also wrote a mini C++ library to handle reading, parsing, and reacting to the Serial data being sent by the RFID reader, and integrate that into the program. I also made classes to handle connecting and uploading files to the 3D Printer, integrating with OrcaSlicer by mimicking the OctoPrint API, and to parse print information from the GCode Files generated by the printer, and then I linked all of those together with the Gui and state machine to create the final application.
Challenges I ran into
Oh boy, there were at lot.
- The first RFID module I used, I accidentally shorted two of the pins together when soldering headers, and had to start over.
- Initially I couldn't get the RFID Module to detect any type of card whatsoever (even the cards that came with it), eventually I was able to change the RFID Standard the module was using from IEEE 14443 to IEEE 15693, and eventually iClass, and read the cards.
- I couldn't get any data from the UCards (because they were encrypted), and had to find a workaround to get a unique identifier without proprietary software.
- I had to reprint and redesign the case because the 3D Prints were not precise enough and the tolerances needed to be adjusted.
- A lot of bugs with the RFID firmware and the library that interfaces with it.
- A lot of file handling issues when trying to parse GCode files without reading in every line (GCode files can be quite large).
- Trouble making the GCode parser compatible with different file formats, printer models, and slicers.
- Reverse engineering the API enpoints called by OrcaSlicer when submitting a print, in order to get it to send prints to my program.
- A ton of rebuilds to make tiny tweaks to the user interface.
- Getting the 3D Printer's api to work properly and with my program.
- Trying to make my program handle interfacing with three different systems (RFID reader, slicer, 3d printer) which were not all that easy to integrate with an external program.
- Making a user interface that was pretty and easily understandable, and programming the flow / state machine without breaking everything.
- Had to switch database software because Qt didn't have any good MySQL drivers
- MSVC toolchain issues :(
- Does sleep deprivation count?
Accomplishments that I'm proud of
-Learned a lot more about Qt and RFID Cards than I ever thought I would -Made something that will prove useful to many people, and will (hopefully) continue to be used long after this hackathon
- Managed to create a simple workflow directly from slicer to printer without user hassle
- Had fun with other hackers and helping out people!
- Completed my first hackathon!!
What I learned
- Qt is a very fun framework to work with
- Parametric CAD (Fusion)
- How slicers and GCode work
- Various information about RFID and PWM on the esp32
- How hackathons work
What's next for PCM 3D Printing Kiosk
I plan to continue actively developing it to a point where it can reliably meet all of our 3D printing needs at the PCM. Some future features are:
- Connection to multiple printers simultaneously
- Webserver for uploading files to the kiosk over LAN (completely eliminating the need for USB Drives)
- Integration with the existing PCM database (and moving to a different database software)
- Printer status monitoring
- Print job / queue system (like UPrint for the ink printers on campus)
- Code refactoring to make it a little more readable and optimized (this current version is a hack, after all)
Built With
- 3dprinting
- arduino
- c++
- esp32
- platformio
- qt


Log in or sign up for Devpost to join the conversation.