Problem Statement
Based on the project's goals and features, the problem statement it aims to solve can be articulated as follows:
Contributing to open-source software presents a significant challenge for many developers, regardless of their experience level. The primary obstacles create a high barrier to entry, discouraging potential contributors and slowing down the onboarding process for those who persist.
These challenges include:
Codebase Complexity: Large, mature open-source projects often have complex architectures and extensive codebases that are difficult for newcomers to navigate and understand. Developers can spend a great deal of time simply trying to comprehend the existing code before they can make any meaningful contributions.
Difficulty in Finding Suitable Tasks: Identifying an appropriate first task is a common hurdle. While many projects use labels like "good first issue," finding one that matches a developer's specific skills and is still available can be a time-consuming and frustrating process.
Lack of a Clear Implementation Path: Once a developer selects an issue, there is often no clear roadmap for how to approach the solution. They must independently figure out which files to modify, what the implementation logic should be, and how to test their changes, which can be an intimidating task in an unfamiliar project.
This combination of factors leads to a steep learning curve that can deter new talent from joining the open-source community and can slow down even experienced developers who are new to a specific project. Existing tools often focus on code editing or version control but lack an integrated, intelligent system to guide a developer through the entire contribution lifecycle—from initial understanding to final implementation planning.
Therefore, the core problem is the lack of a streamlined, intelligent, and supportive onboarding process that helps developers overcome the initial hurdles of contributing to open-source projects, thereby making the ecosystem more accessible and efficient for everyone.
SOLUTION
Open-Source Code Navigator 🚀
An intelligent tool designed to help developers navigate, understand, and contribute to open-source projects. Powered by local language models via Ollama, this application provides AI-driven analysis, issue finding, and guided contributions to streamline the open-source onboarding process.
Table of Contents
Key Features
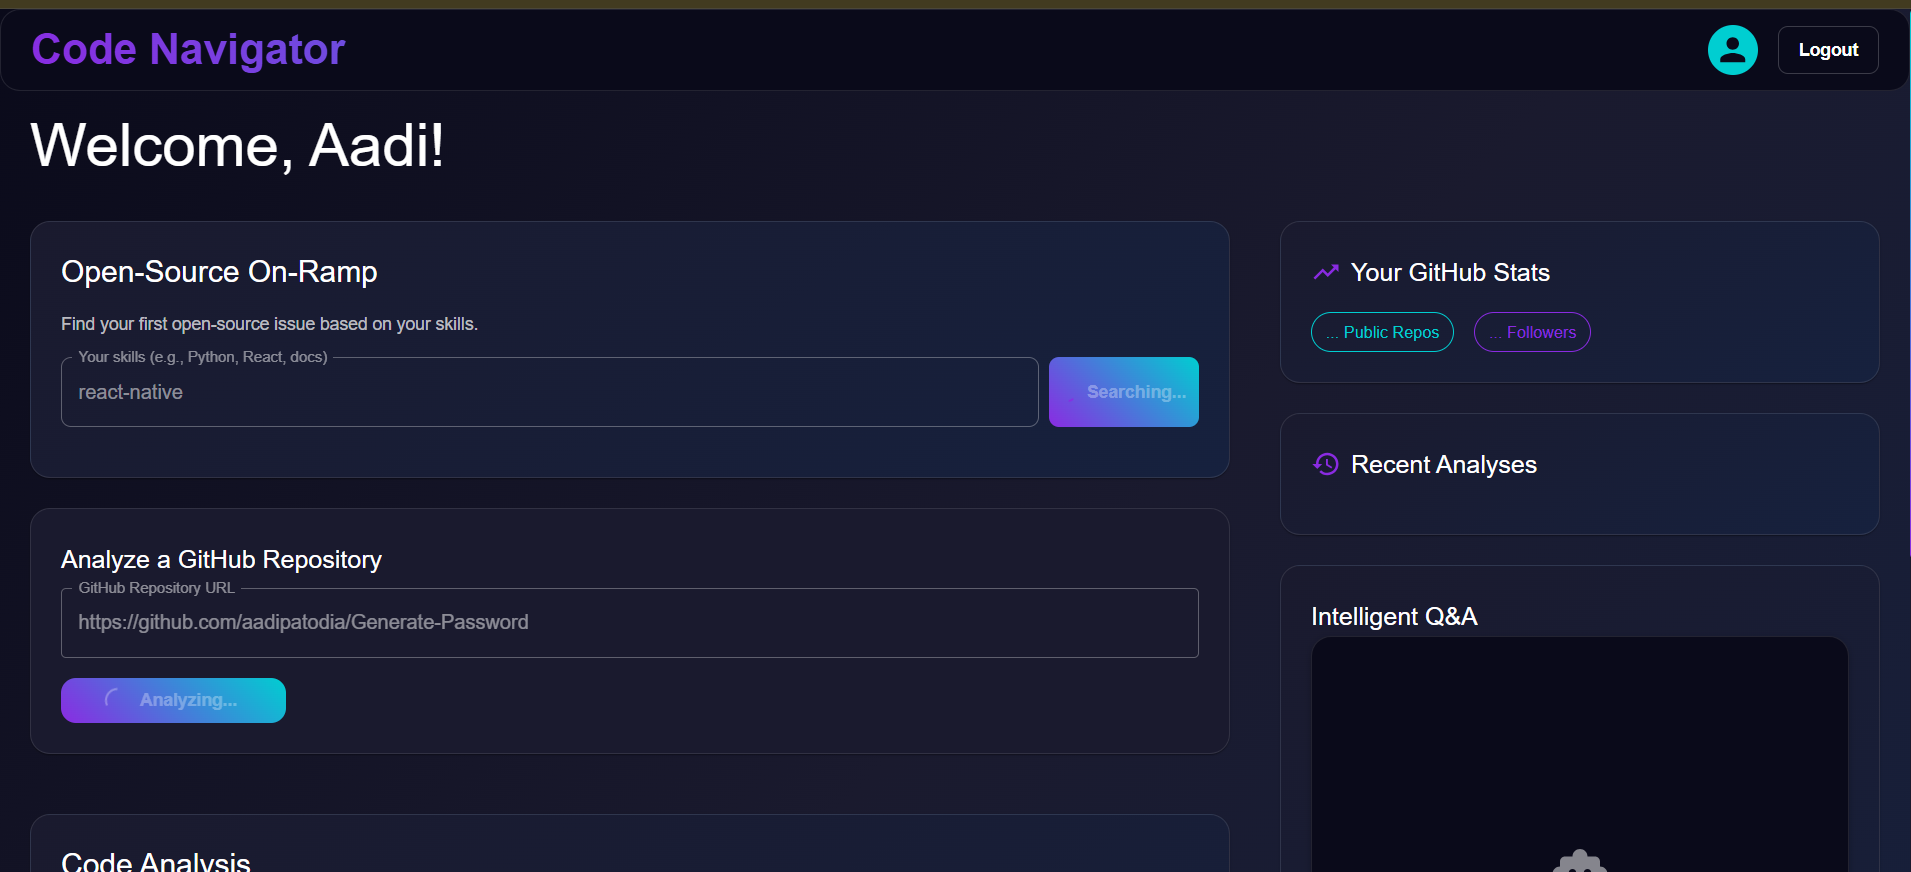
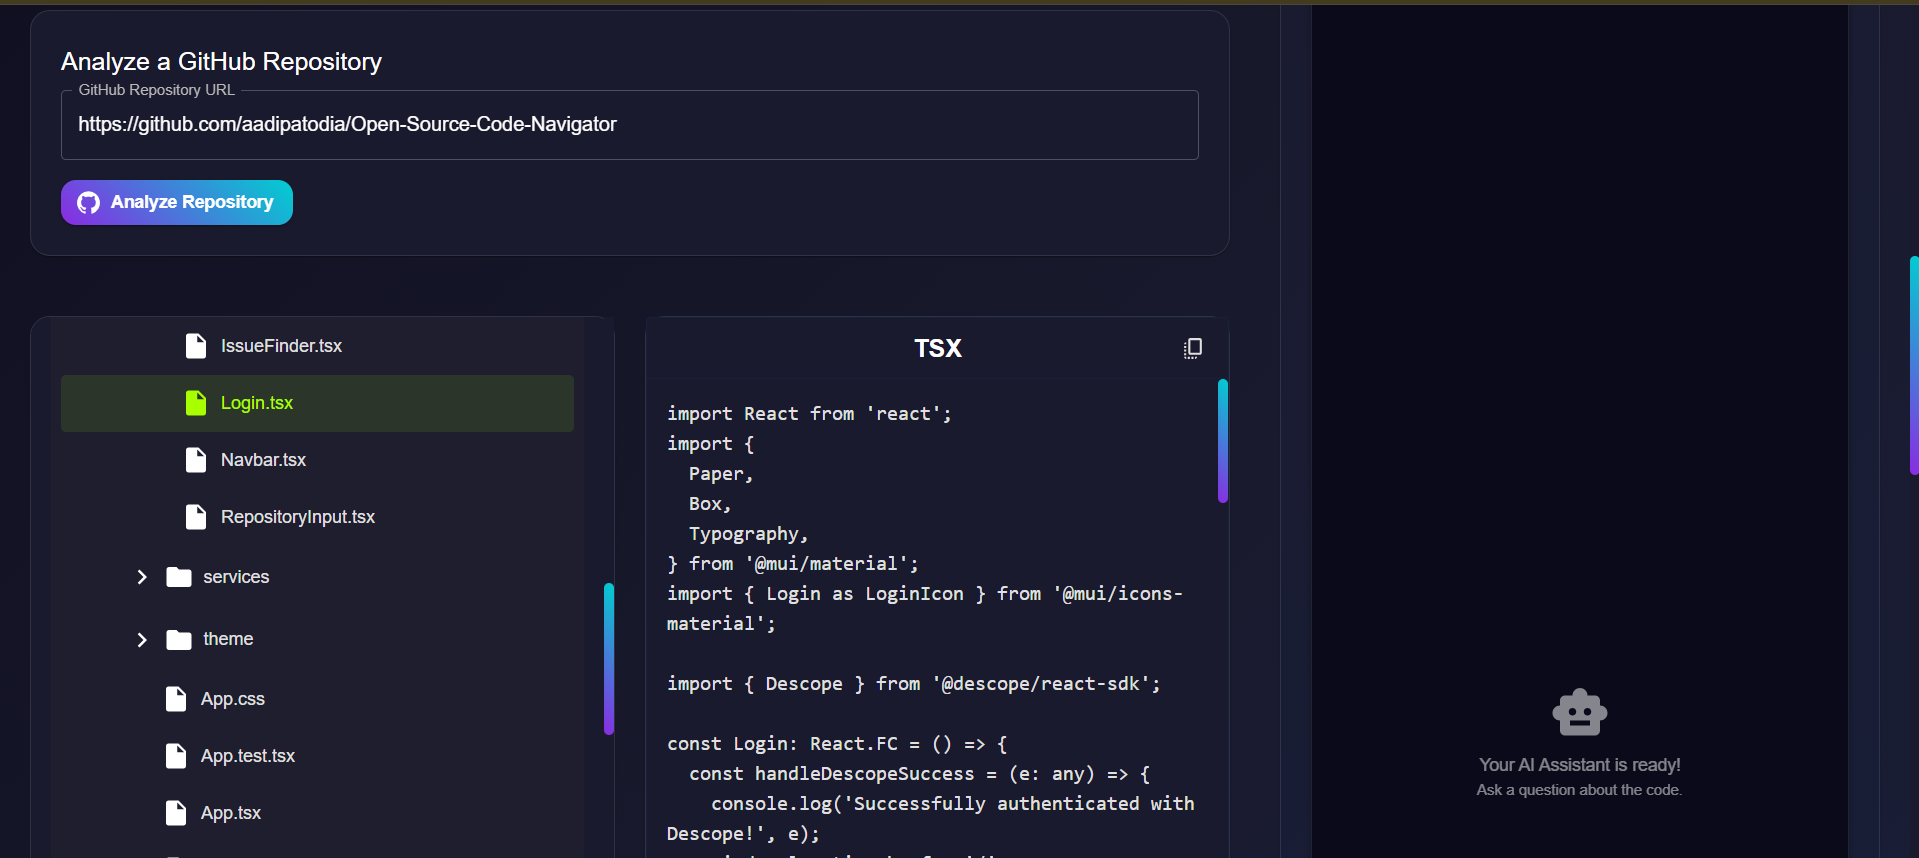
GitHub Repository Analysis: Provide any public GitHub repository URL to instantly clone it and generate a complete, interactive file tree. This allows you to browse the entire codebase structure directly in the application.
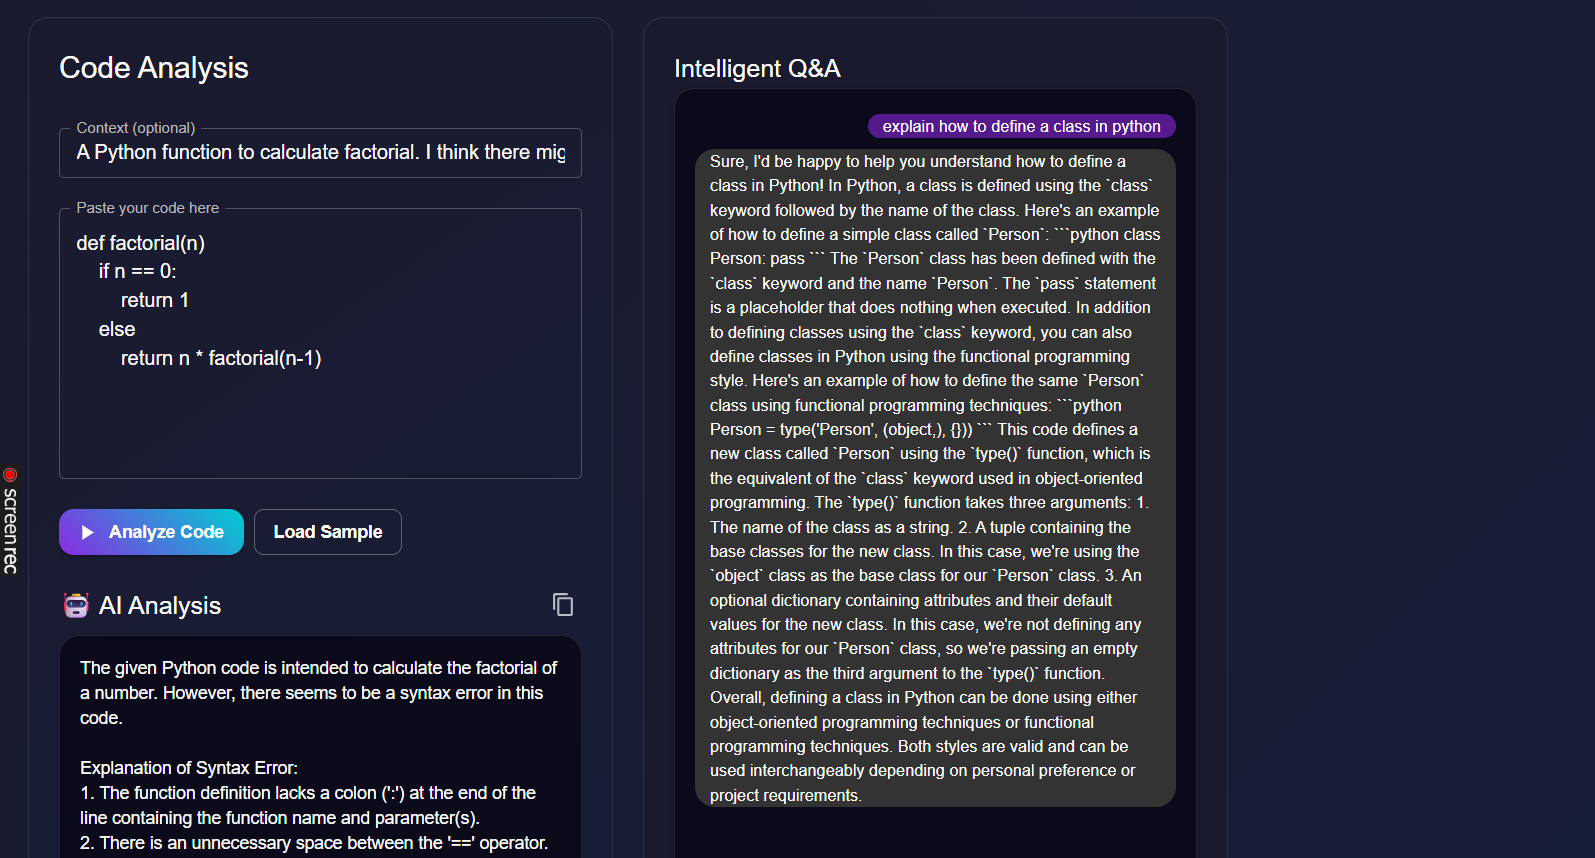
AI-Powered Code Explanation: Select any file from the repository's file tree to receive a detailed, AI-generated explanation of its purpose, logic, and structure.
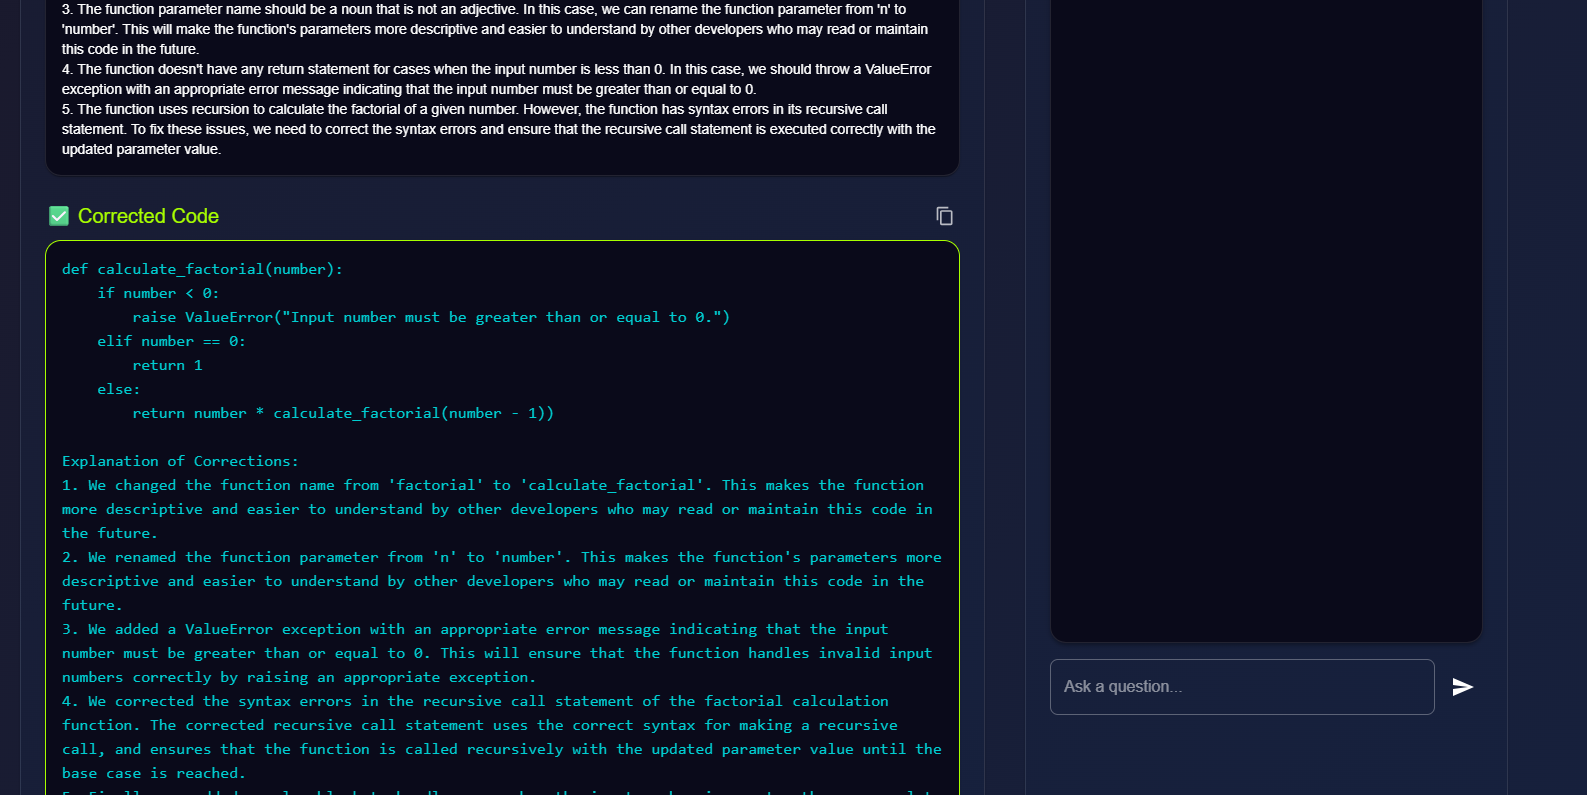
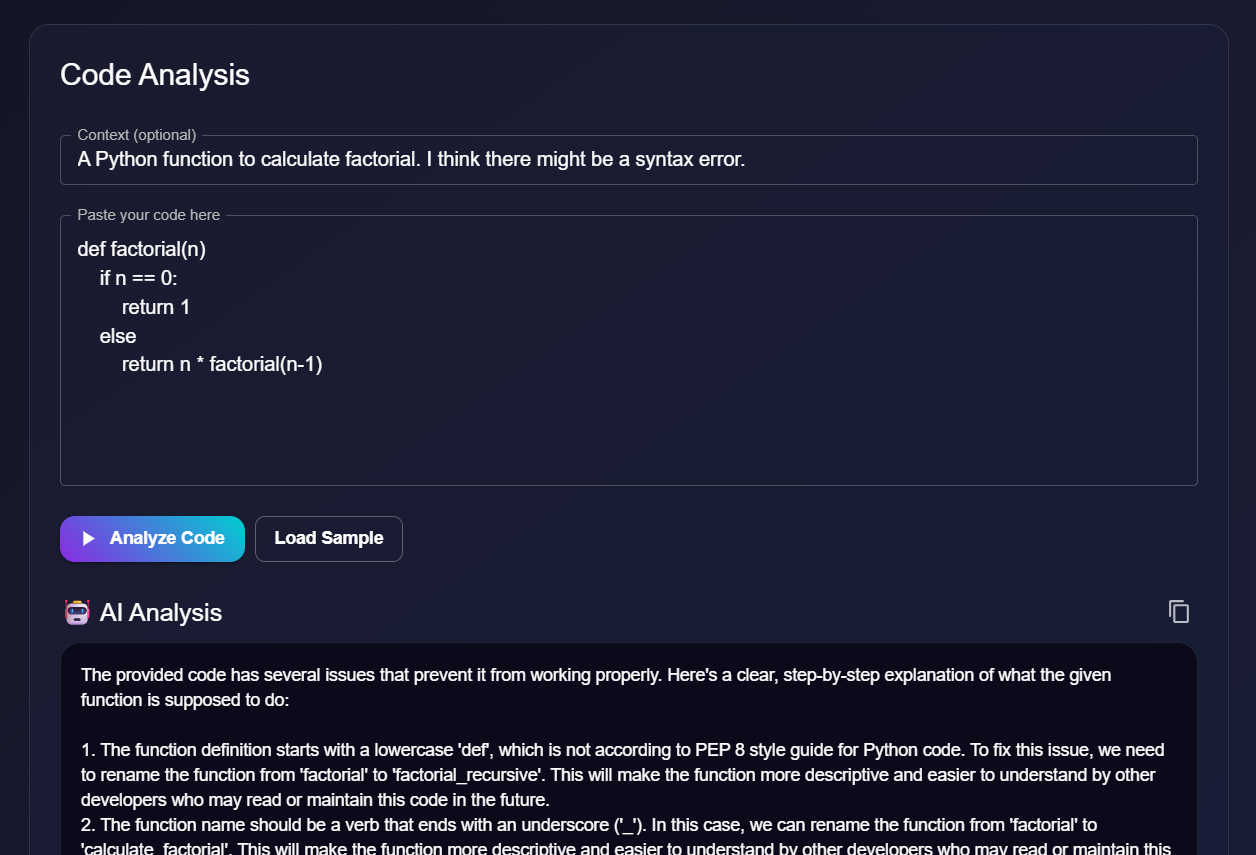
Error Detection & Correction: The code analysis tool can also identify syntax and logical errors in any code snippet you provide, explain what is wrong, and suggest a corrected version of the code.
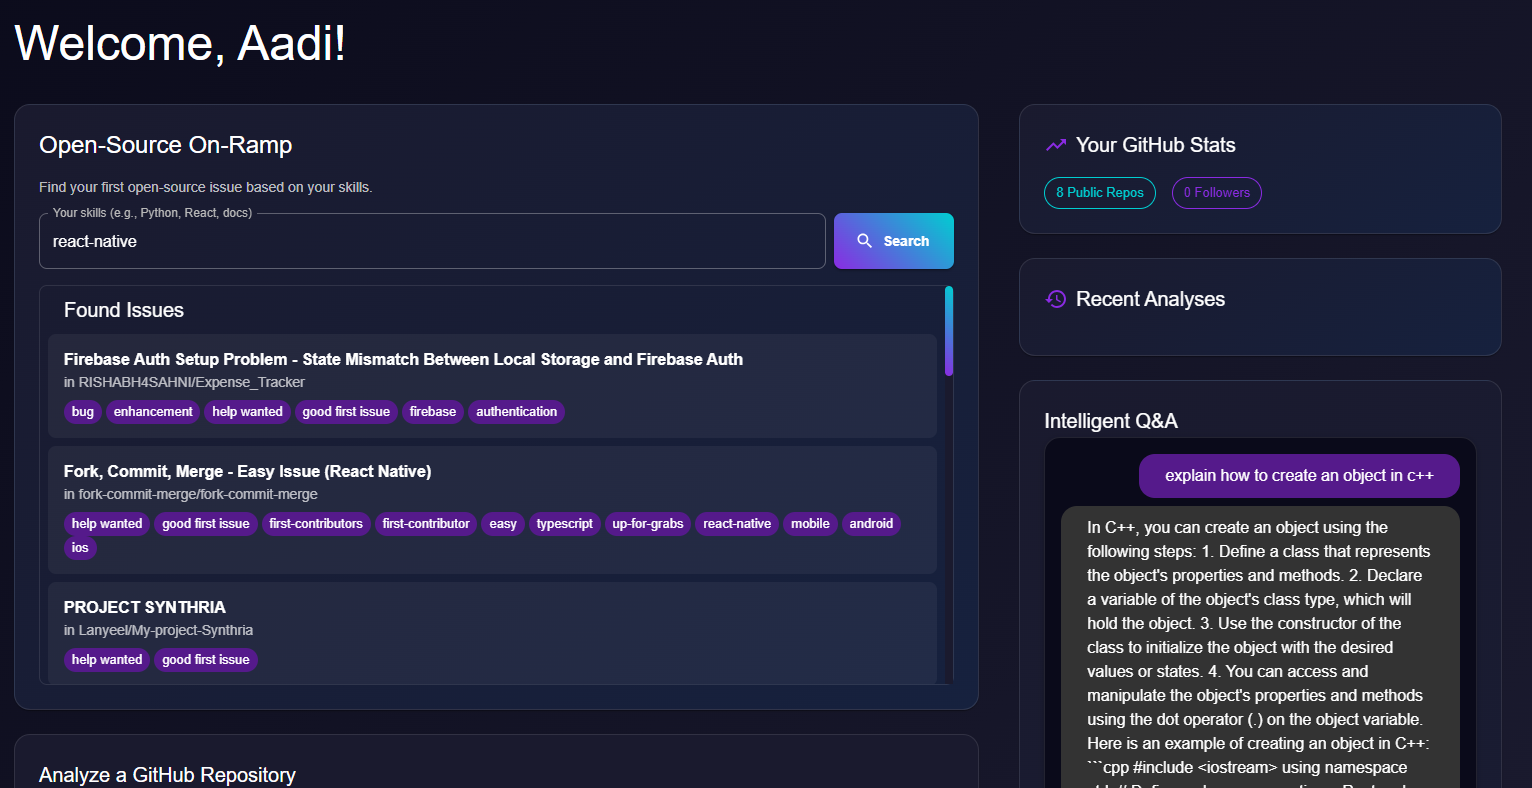
Intelligent Issue Finder: Discover beginner-friendly open-source contributions. The tool specifically searches GitHub for issues labeled as
"good first issue"based on the skills you provide (e.g., "Python, React, docs").AI-Guided Contributions: After selecting an issue, the application generates a personalized, step-by-step plan to help you solve it. This guide provides actionable instructions and points to relevant files in the codebase.
Interactive AI Chat: Engage in a conversation with an AI assistant that has context on your selected files. Ask specific questions about the code, clarify concepts, or brainstorm solutions.
Secure User Authentication: All user sessions are securely managed through Descope, integrating with GitHub for a seamless and safe login experience.
Private & Local AI: All AI capabilities are powered by a locally running language model via Ollama, ensuring your code and data remain private and secure on your own machine.
Tech Stack
This project integrates several key technologies to deliver its features. Here’s a breakdown of what each component does:
FastAPI (Backend)
The backend is built with FastAPI, a modern, high-performance Python web framework. It serves as the core of the application, handling all business logic and data processing.
API Endpoints:
It exposes a RESTful API that the frontend consumes to perform actions like analyzing repositories, finding GitHub issues, and fetching file content.Authentication Hub:
It validates user session tokens received from the frontend against Descope to secure its endpoints.Orchestrator:
It communicates with the MCP Server to get AI-generated content and with the GitHub API to fetch repository and issue data.
React (Frontend)
The user interface is a single-page application (SPA) built with React and TypeScript.
User Interaction:
It provides all the interactive components, including the repository input field, the file explorer, the issue finder, and the AI chat window.State Management:
It manages the application's state, such as the currently analyzed repository, the selected file, and conversation history.API Client:
It makes authenticated requests to the FastAPI backend to trigger analysis and retrieve data.
Ollama
Ollama is the engine that runs the large language model (stable-code) locally on your machine.
Local AI:
It allows the application to perform all AI tasks (code explanation, error correction, contribution guides) without relying on third-party cloud APIs, ensuring user privacy and reducing costs.Model Serving:
It exposes an API that the MCP Client connects to, making the powerful stable-code model available to the rest of the application.
MCP Client for Ollama
This is a crucial intermediary service that acts as a specialized API server and proxy.
API Gateway for AI:
It sits between our FastAPI backend and the Ollama model. The backend sends requests to the MCP server, which then communicates with Ollama.Enables Functionality:
It provides the necessary server infrastructure (localhost:8080) that the main backend application connects to for all its AI-related tasks. It must be running for any AI features to work.
Descope
Descope is the identity and authentication provider for the application.
User Management:
It handles the entire user lifecycle, including sign-up and login, through a customizable, pre-built flow.Secure Sessions:
After a user authenticates (e.g., via GitHub), Descope generates a secure JSON Web Token (JWT) that is used to authorize API requests between the frontend and backend.Social Logins:
It simplifies the integration of third-party logins like GitHub, securely handling the OAuth 2.0 flow and providing the necessary access tokens.
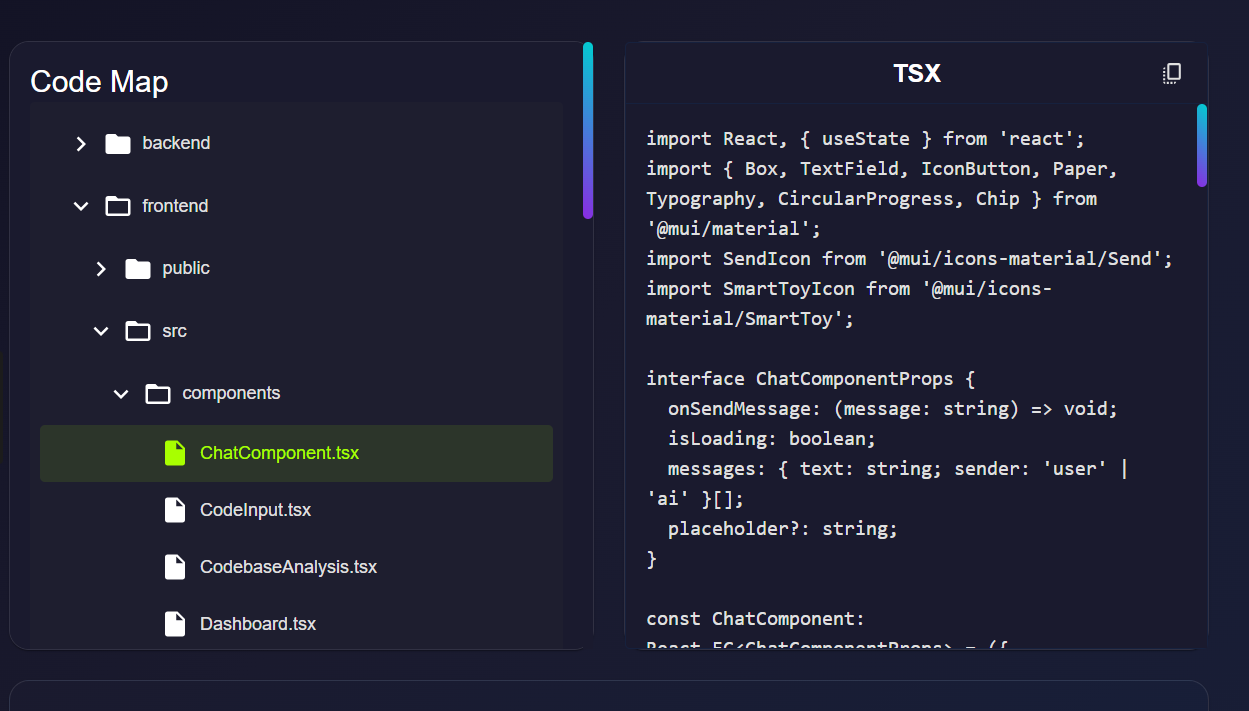
Project Structure
The project is organized into two main directories: backend and frontend.
CODE-NAVIGATOR/
├── backend/
│ ├── .venv/ # Python virtual environment
│ ├── mcp-client-for-ollama/ # MCP client integration
│ ├── .env # Backend environment variables
│ ├── main.py # FastAPI application entry point
│ ├── mcp_config.json # MCP server configuration
│ └── requirements.txt # Python dependencies
│
└── frontend/
├── public/ # Static assets
├── src/
│ ├── components/ # React components
│ ├── services/ # API / utility services
│ └── App.tsx # Main React application component
├── .env # Frontend environment variables
└── package.json # Node.js dependencies
Setup and Installation
Prerequisites
Make sure you have the following installed on your system:
Ollama Setup
This project uses a local LLM hosted by Ollama to power its AI features.
- Install Ollama: Follow the instructions on the Ollama website to download and install it for your operating system.
- Pull the Model: The application is configured to use the
stable-codemodel. Open your terminal and run the following command to download it:bash ollama pull stable-code - Ensure the Ollama application is running in the background before starting the application's servers.
Backend Setup
- Clone the repository:
bash git clone [https://github.com/aadipatodia/Hackathon_Project_OPOR.git] cd Hackathon_Project_OPOR/backend - Create and activate a virtual environment:
- Windows (PowerShell):
powershell python -m venv .venv .\.venv\Scripts\Activate - macOS / Linux (bash):
bash
python3 -m venv .venv
source .venv/bin/activate
- Windows (PowerShell):
- Install Python dependencies:
bash pip install -r requirements.txt - Create the environment file:
Create a file named
.envinside thebackenddirectory and add the following variables.env DESCOPE_PROJECT_ID="YOUR_DESCOPE_PROJECT_ID" GITHUB_PAT="YOUR_GITHUB_PERSONAL_ACCESS_TOKEN"DESCOPE_PROJECT_ID: Your project ID from the Descope console.GITHUB_PAT: A GitHub Personal Access Token (classic) withrepoandread:userscopes.
Frontend Setup
- Navigate to the frontend directory:
bash cd frontend - Install npm dependencies:
bash npm install - Create the environment file:
Create a file named
.envinside thefrontenddirectory and add your Descope Project ID.env REACT_APP_DESCOPE_PROJECT_ID="YOUR_DESCOPE_PROJECT_ID"
Running the Application
To run the application, you need to have three separate terminals open and running concurrently. All commands should be run from the backend directory.
Terminal 1: Start the MCP Server
This server acts as a proxy to the Ollama model.
- Windows (PowerShell) / macOS / Linux (bash): ```powershell # Navigate to the backend directory cd path/to/Hackathon_Project_OPOR/backend
# Activate virtual environment Windows: ..venv\Scripts\Activate macOS/Linux: source .venv/bin/activate
# Start the server python -m mcp_client_for_ollama --servers-json mcp_config.json --model stable-code
## Terminal 2: Start the FastAPI Backend
This is the main API server for the application.

### Windows (PowerShell)
```powershell
# Navigate to the backend directory
cd path/to/Hackathon_Project_OPOR/backend

# Activate virtual environment
.\.venv\Scripts\Activate

# Start the server
python main.py
macOS / Linux (bash)
# Navigate to the backend directory
cd path/to/Hackathon_Project_OPOR/backend

# Activate virtual environment
source .venv/bin/activate

# Start the server
python3 main.py
Terminal 3: Start the React Frontend
This serves the user interface.
Windows (PowerShell) / macOS / Linux (bash)
# Navigate to the frontend directory
cd path/to/Hackathon_Project_OPOR/frontend

# Start the development server
npm start
🌐 Access the App
Once all three servers are running, open your browser and go to:
The Code Navigator AI Assistant is more than just a tool; it's a comprehensive platform that empowers developers to confidently navigate and contribute to the open-source community. By leveraging the power of AI and secure authentication, it removes the barriers to entry and fosters a more inclusive and collaborative environment for developers of all skill levels. This project not only meets the requirements of the hackathon but also provides a valuable and practical solution to a real-world problem faced by the developer community.

Log in or sign up for Devpost to join the conversation.