-
-
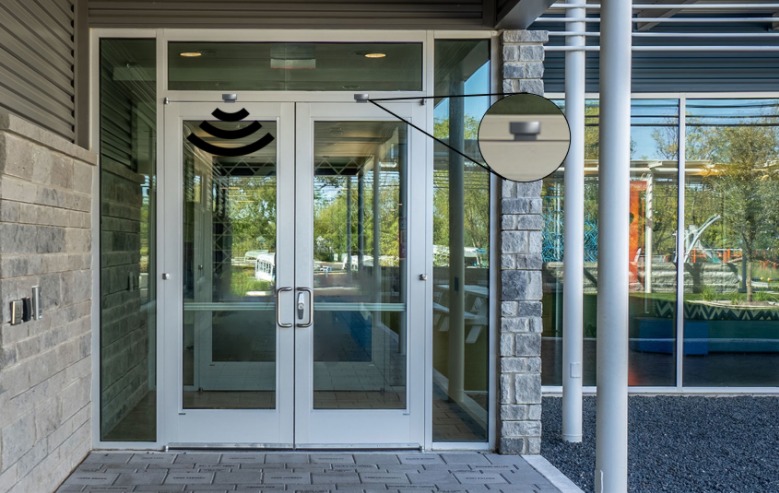
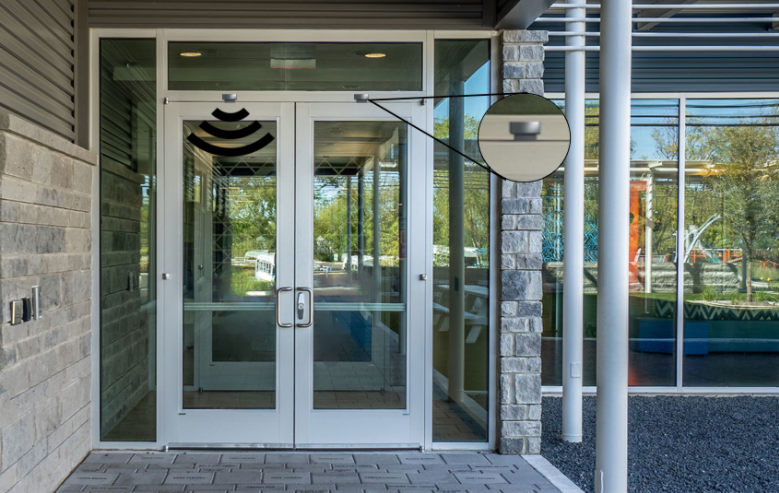
View of how our tech seamlessly integrates with a storefront
-
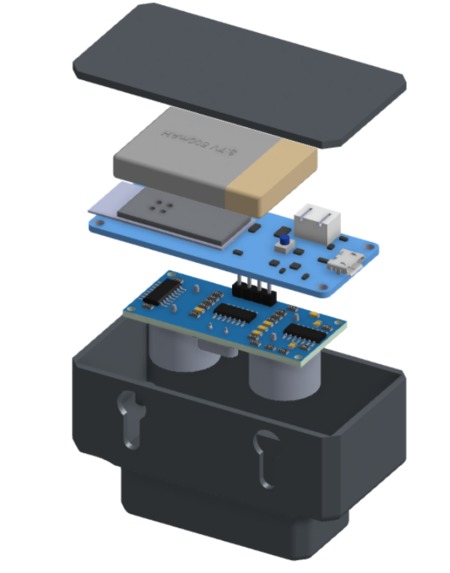
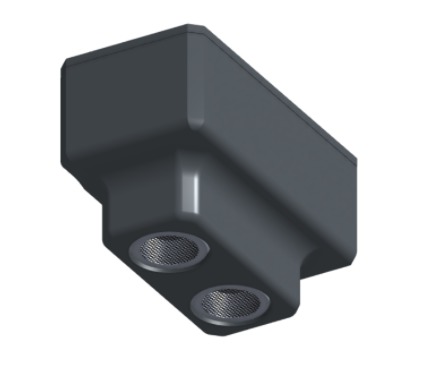
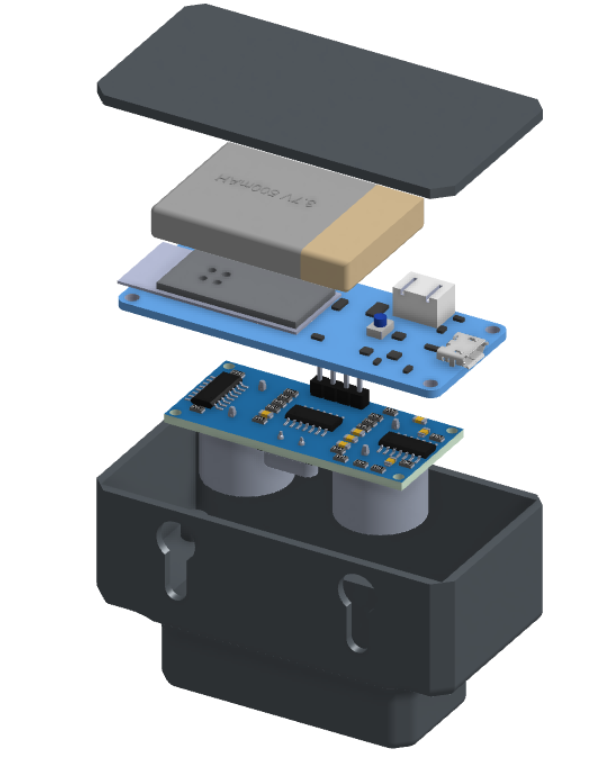
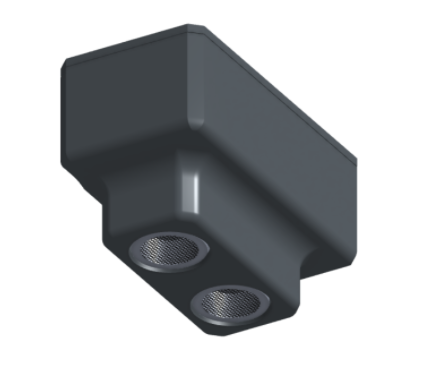
Exploded view of hardware: Arduino MKR 1010, optional battery, ultrasonic sensor, and enclosure
-
-
-
-
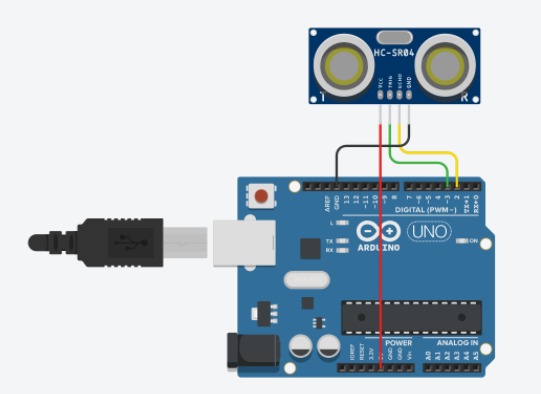
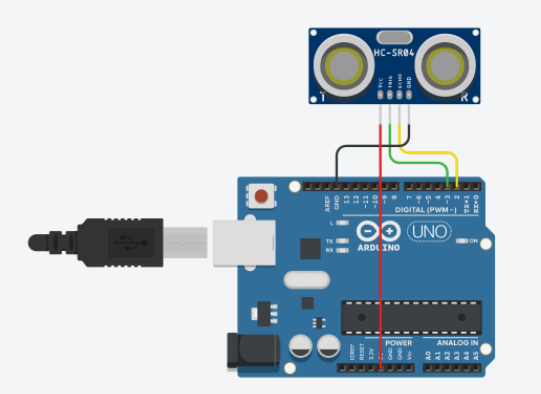
TinkerCAD circuits schematic where we tested the code
-
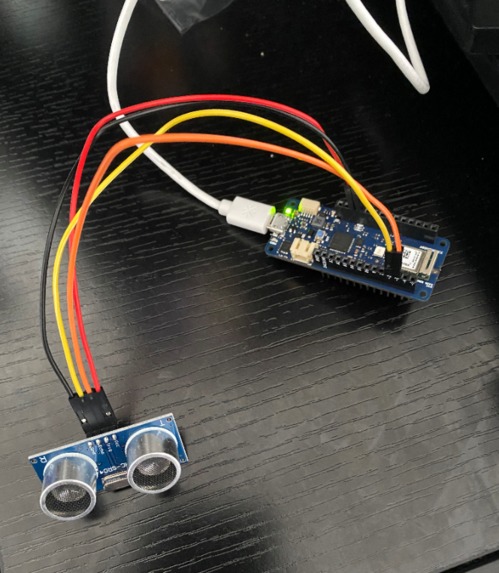
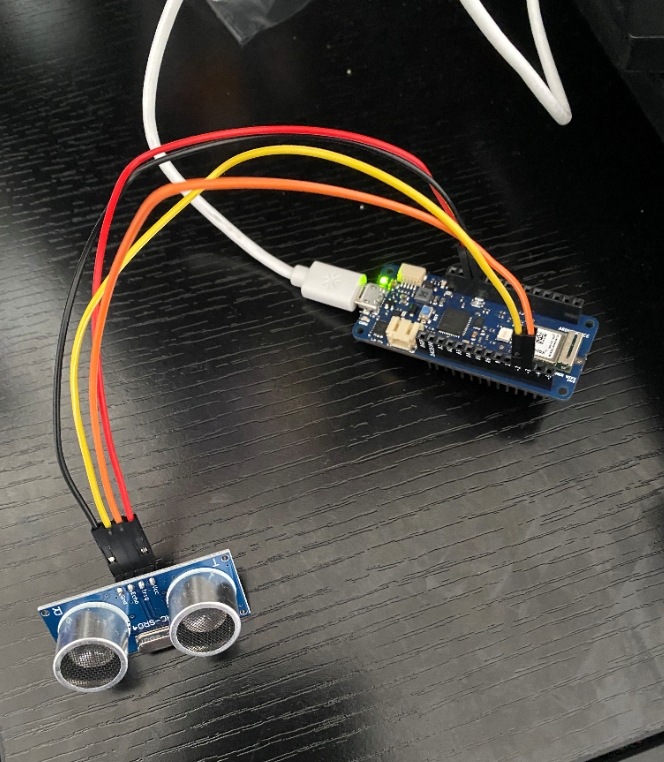
irl circuit
-
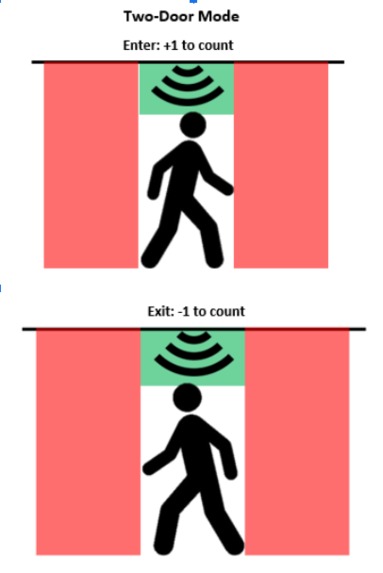
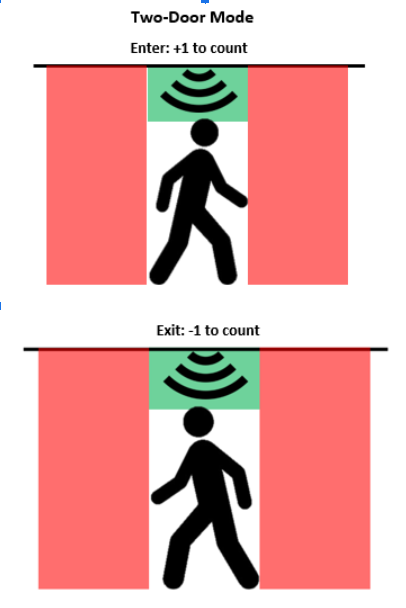
2 door method
-
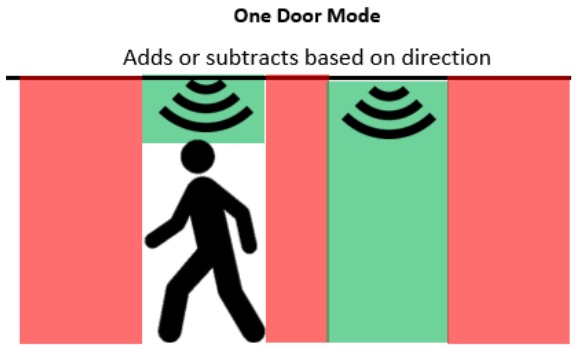
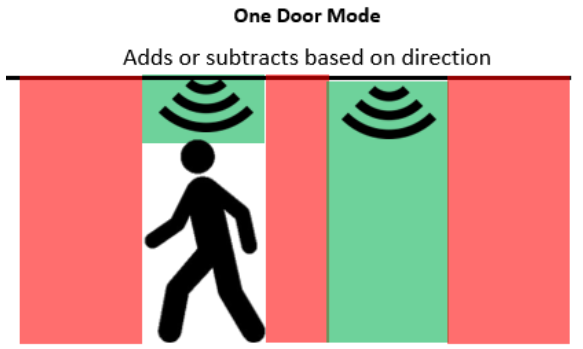
one door method
In the age of building capacity limits and social distancing, knowing how many people are entering and exiting a store is essential to businesses. Currently, businesses have an employee stand at the entrance and manually count the number of people entering and leaving the business. Once capacity has been reached, the employee creates a line outside of the business for people wanting to enter. This can be a tiresome process for the employee and the customers who also may have to deal with unfavorable weather conditions being outside of the business. Our goal was to remove this pain point and streamline this capacity tracking and queue process to create convenience for businesses and their customers.
[Go to the bottom to get a quick TLDR of the technical terms]
Inspiration
With the onset of the pandemic, many businesses and other inside space have been closely regulating their capacities. With this project, we hoped to create something that would aid in automating the process of keeping track of how many people are occupying indoor spaces.
What it does
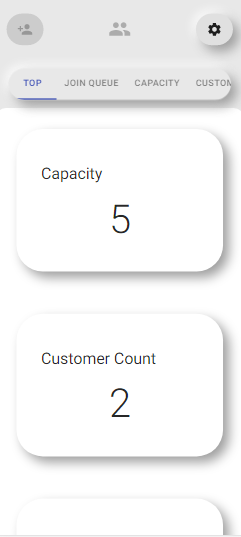
There are 2 parts to Numa. The first part is the customer counter. This is an IoT device consisting of an ultrasonic sensor connected to an Arduino MKR 1010. This device is placed at the entrance and exit of the business. The ultrasonic sensor detects if a person is passing by the doorway. When this happens, the Arduino makes an HTTP request to our Web App notifying it if a person has left or entered the business. Customer count is then increased or decreased accordingly.
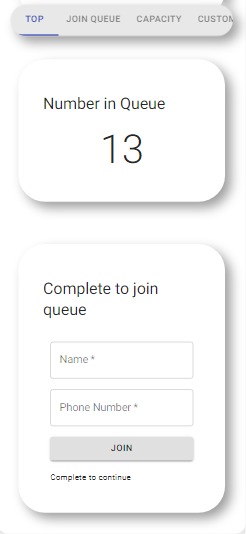
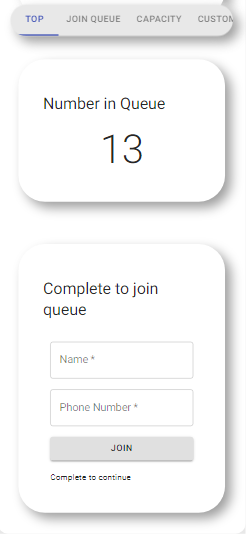
The second part is the queue system. Customers can check our web app to see if there’s a wait time for entering the store. If there is, they can add themselves to our queue. They are then sent a unique identifier (either a QR code) to verify themselves at the door when it’s their turn to come in. Customers also have the ability to remove themselves from the queue if they no longer can come to the business.
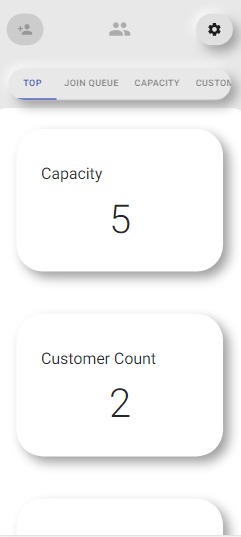
Customers can see metrics on average wait time, the capacity of the store, the number of people currently in the store, the current queue size, and additional data trends as well. Ideally, there would be a custom view for this and also an admin view to see data metrics, change settings on capacity, and other things.
How we built it
Since we are all remote, most of our hardware prototyping was performed in simulation. We used the TinkerCAD circuits platform to simulate the Arduino code that detected when a person passes through the door. This code was sent to our team lead, Larry, who added the code to connect the Arduino to the internet. Ideally, we would be able to POST to a database with the Arduino so we could then get the necessary information using the frontend. These metrics would be passed in as state to our React app which could then be passed to different functional components. Some of the main components that were used for the user interface were the app bar, the scrollable navigation tab, the container for all of the metrics, and the form. The creation of these components was significantly aided by Material-UI which allowed us to modify and integrate pre-made components into our application.
Challenges we ran into
A major challenge was figuring out the algorithm to detect a person’s presence. It seemed like there were so many ways to do it, each with different pros and cons. We decided to go with the simplest option, albeit the most flawed, to save time and show our proof of concept.
Another challenge was connecting the Arduino to the remote web server. Arduino has a new Cloud platform that allows devices and data to be controlled remotely. The initial plan was to have the Arduino send data to the cloud platform and have our web server access that data from the Cloud’s REST API. While the Arduino would connect to the Wifi, there were errors connecting to the Arduino Cloud we were unable to solve. The Arduino MKR 1010 also has the ability to run its own web server and connect to a remote web server. However, there were challenges connecting to localhost when trying to test this because the Arduino and Laptop were using the same IP address. We would’ve had to deploy our site fully to be able to test if the Arduino could connect to our web server.
A major frontend challenge was figuring out the capabilities and limitations of Material-UI. Under other circumstances, React class components and React functional components could have been used interchangeably, but some of the components from Material-UI required hooks to customize them which can only be done using React functional components. While the design of the UI stayed fairly consistent throughout the development of the client-side, the codebase had to be much more flexible to accommodate the demands of Material-UI.
What we learned
The basics of IoT integration with Arduino
What's next for Numa
- Alexa integration
- Focusing on small business owners and maybe even universities
- Enable owners to look at trends over time
- Enable users to look at the projected busyness of a location based on previous data
Team Leader Slack Link - Larry Rentz: swamphacks-vii.slack.com/team/U01LQFS37ED
Technical Terms Explanation
Ultrasonic Sensor - An ultrasonic sensor sends a sound wave towards an object and records the time it takes for the wave to be received by the sensor. Plugging this time into a pre-derived formula will determine the rough distance of objects in front of it.
Arduino - An Arduino is a type of microcontroller, which is a circuit that we can program to do a specific task. A microcontroller is similar to a computer, but the main difference is that it can only run one program, not multiple.
Web Server - A computer/group of computers that a website or software can run on. The software can make requests to the server to send, receive, or store information.
Built With
- arduino-mkr-1010-wifi
- express.js
- hc-sr04-ultrasonic-sensor
- mongodb
- node.js
- onshape
- react.js
- tinkercad-circuits


Log in or sign up for Devpost to join the conversation.