-
-
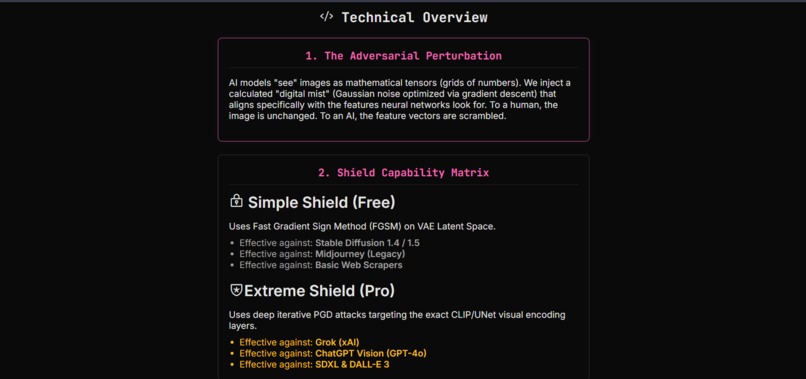
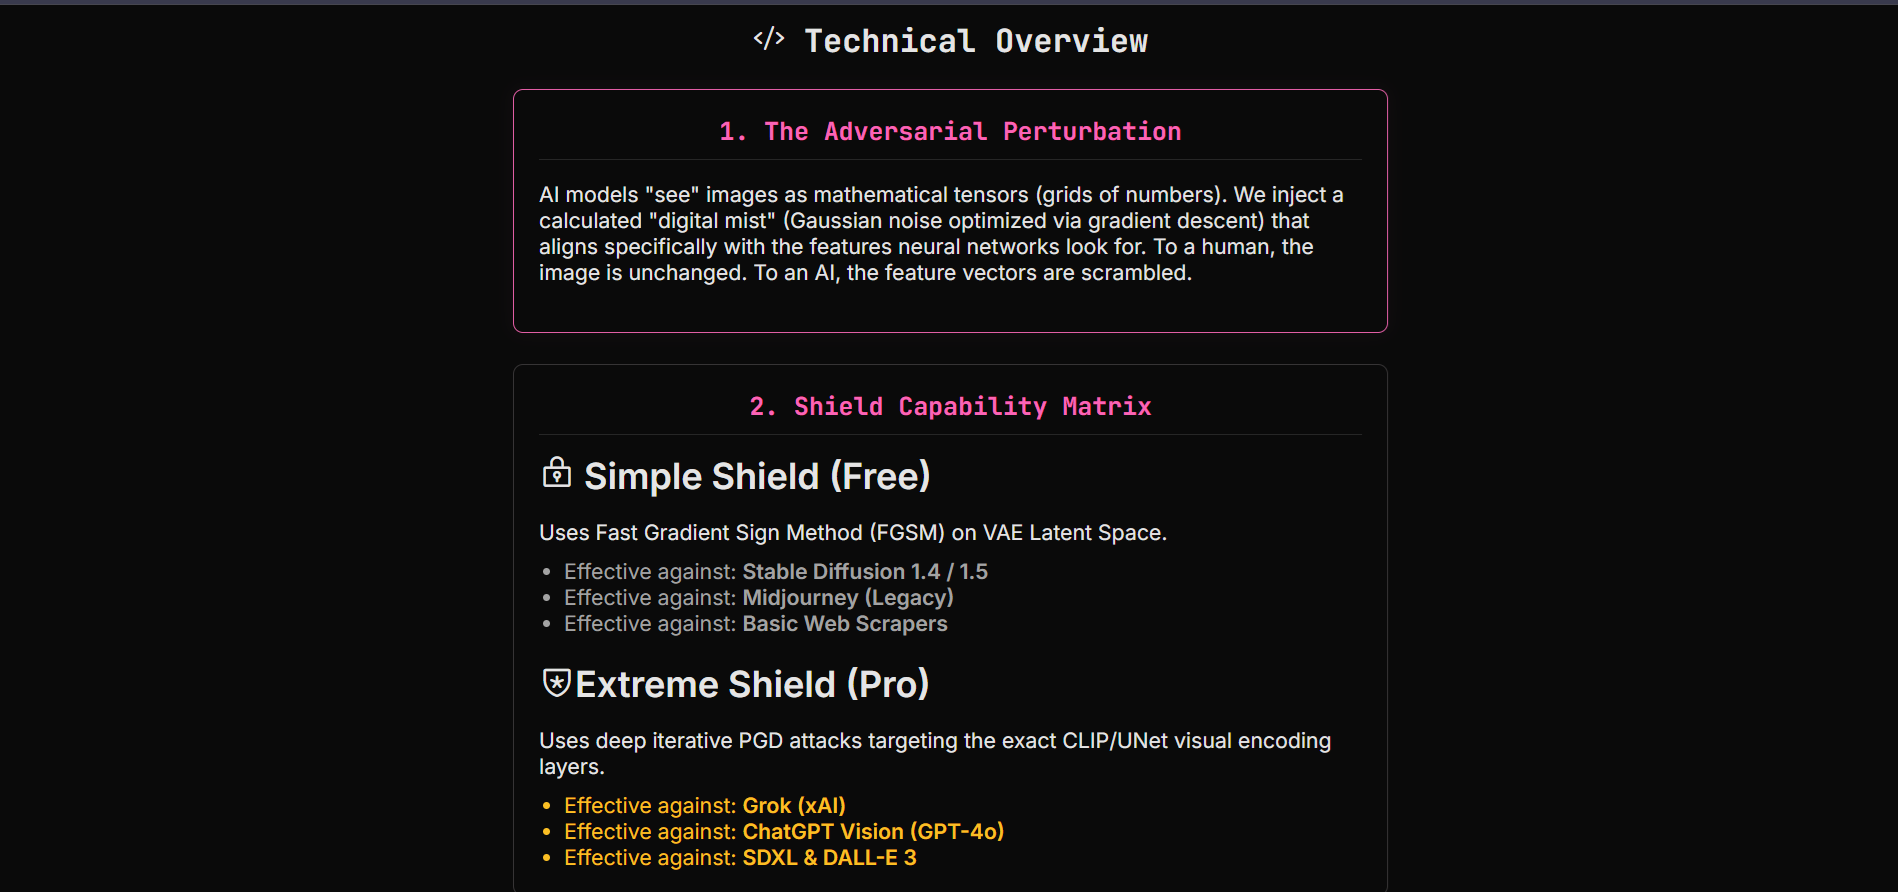
This is the How it works Page of our web APP.
-
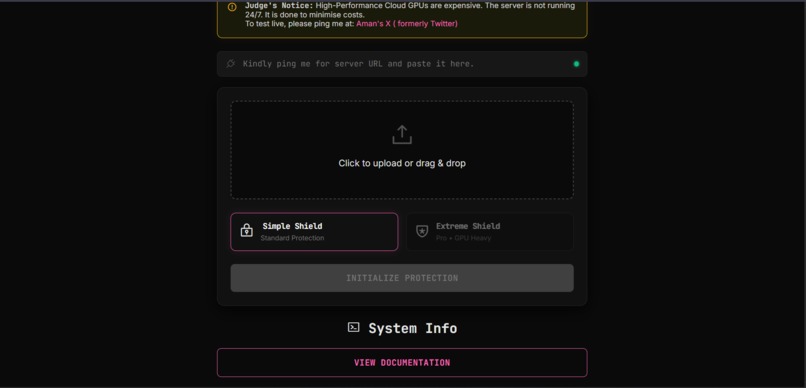
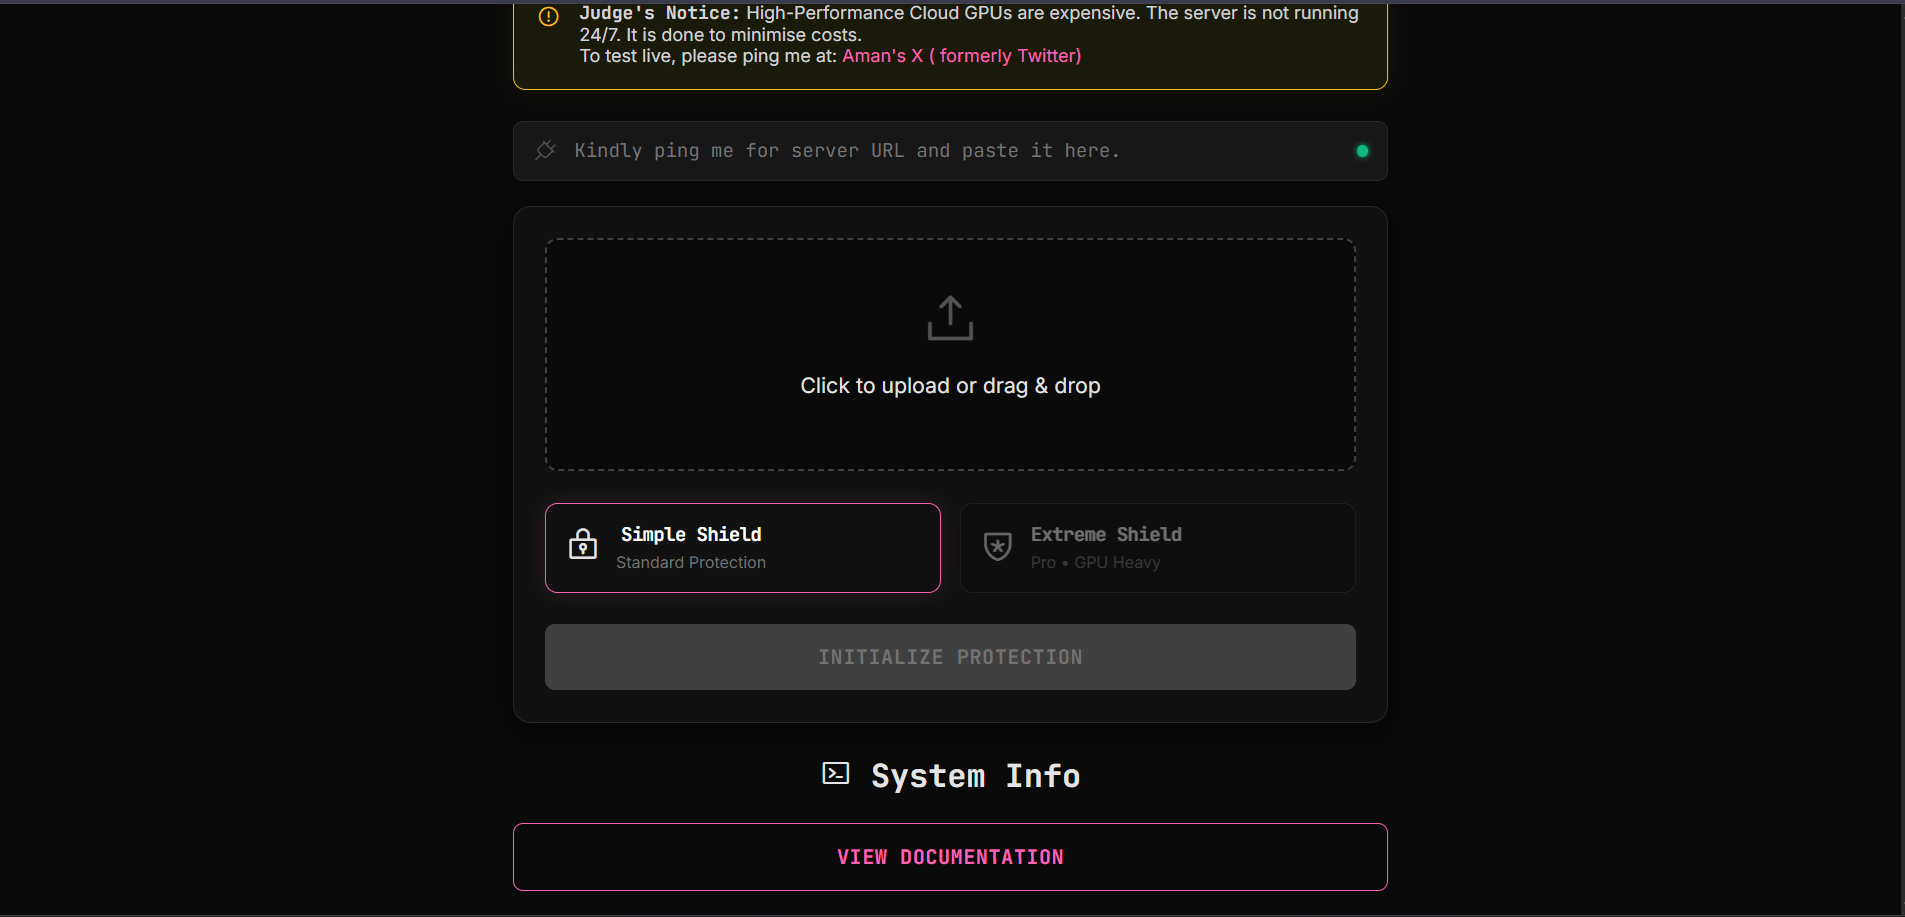
This is the main Terminal interface where users will upload their images.
-
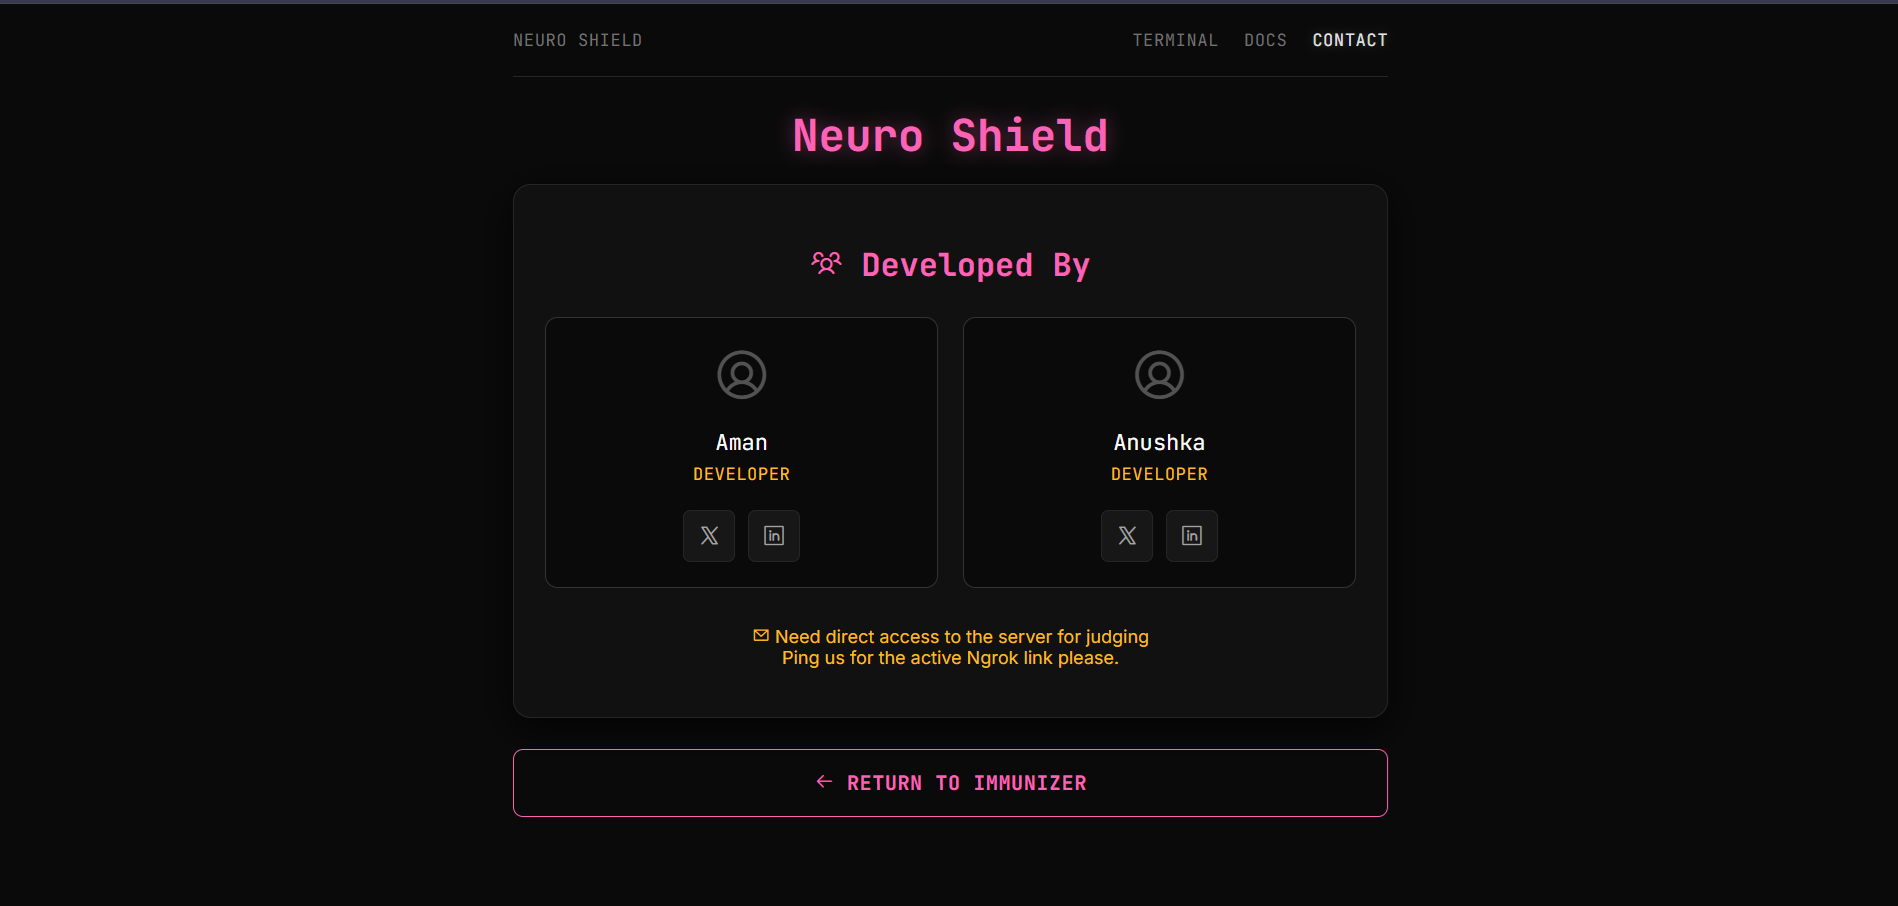
This is the contact Page
Inspiration
We are living in an era where our digital photos can be stolen and manipulated without consent. A recent BBC report highlighted a terrifying trend: students and everyday individuals are increasingly becoming victims of non-consensual deepfake pornography. This isn't just a celebrity issue anymore; it's a societal crisis.
While legislation moves slowly, technology moves fast. We were inspired by MIT's PhotoGuard, a research project that introduced the concept of using "adversarial perturbations" to disrupt AI models. We wanted to take that research out of the lab and build a practical, accessible web tool that empowers anyone to protect their photos before uploading them online.
What it does
Neuro Shield is a web-based privacy tool that "immunizes" images against generative AI.
- Invisible Cloaking: Users upload a photo, and our engine applies a calculated layer of adversarial noise. To the human eye, the image looks unchanged. To an AI, the image content becomes unrecognizable.
- Dual-Tier Protection:
- Simple Shield: A lightweight defense against basic scraping.
- Extreme Shield (Pro): A heavy-duty, iterative gradient attack designed to break advanced Diffusion models. ** So when an AI model tries to modify the image , either the model fails to do so or the edited image looks awfully fake.**
Real-Time Verification: Unlike other tools, we don't just ask you to trust us. We include a built-in "Attack Simulation". Users can instantly challenge a Stable Diffusion model to edit their protected image, proving the shield's effectiveness in real-time.
How we built it
We built Neuro Shield using a client-server architecture powered by Google Colab to leverage free GPU compute.
- Backend: We used Python and FastAPI to build the REST API. We utilized
pyngrokto tunnel the localhost server from Colab to the public web. - AI Engine: We utilized Hugging Face Diffusers and PyTorch.
- For the Simple Shield, we target the VAE (Variational Autoencoder) latent space.
- For the Extreme Shield, we perform Projected Gradient Descent (PGD) directly against the Stable Diffusion Inpainting UNet.
For the *Deplyment * here is the google Colab link link
Frontend: We built a custom HTML/CSS interface with a cyberpunk aesthetic to emphasize privacy and security, using vanilla JavaScript for asynchronous API communication.
How we leveraged Gemini 3 for this project :
We leveraged Gemini 3's specific "Deep Think" and "Vibe Coding" capabilities to move from a rough concept to a polished, deployment-ready prototype in record time.
1. "Deep Think" for Adversarial Logic
Feature Used: Gemini 3 Deep Think (Reasoning Mode). How it helped: When we needed to define the "Core Algorithm" for invisible perturbations, Gemini 3 didn't just guess; it used its "Deep Think" capabilities to reason through complex mathematical concepts. This allowed us to formulate a theoretical approach for adversarial noise that is robust against diffusion models but invisible to the human eye, solving a problem that typically requires PhD-level research.
2. "Vibe Coding" for Instant UI Creation
Feature Used: Zero-Shot "Vibe Coding" & Multimodal Generation. How it helped: We provided a high-level "vibe" (cyber-security, dark mode, terminal aesthetics), and Gemini 3 instantly generated the complete HTML/CSS structure. The model's "Vibe Coding" ability allowed it to intuitively understand the aesthetic requirements generating the neon pink accents, "void black" backgrounds, and JetBrains Mono typography without needing iterative design cycles.
3. Full-Stack Context Awareness (1M+ Token Window)
Feature Used: 1 Million Token Context Window. How it helped: When we uploaded the full index.html and style.css files, Gemini 3 ingested the entire codebase into its context window without truncation. This enabled it to spot the specific conflict causing the image sizing issue (the missing max-height on the result image) and the unstyled verification input immediately, rather than asking for code snippets piecemeal.
4. Agentic Workflow Planning
Feature Used: Agentic Capabilities & Multi-Step Planning. How it helped: Instead of just writing code, Gemini 3 acted as a "Principal AI Engineer," breaking the project down into 7 distinct phases (Theory, Algorithm, Web Arch, etc.). This reflects Gemini 3's "Agentic" design, which is optimized to plan and execute long-horizon tasks rather than just answering simple queries.
5. Multimodal Quality Assurance
Feature Used: Native Multimodal Understanding. How it helped: Because Gemini 3 is natively multimodal (understanding code, text, and images simultaneously), it could conceptually "see" how the CSS max-width properties would render on a screen. It anticipated the mobile responsiveness issues in the verification-group and proactively suggested flex-wrap fixes to ensure the "Attack" button didn't break the layout on smaller devices.
Challenges we ran into
- The "Channel Mismatch" Nightmare: When building the Verification feature, we tried to reuse the same model we used for protection. However, the Inpainting model expects 9 input channels (image + mask + masked_image), while standard image-generation tasks only provide 4. This caused
RuntimeErrorcrashes. We solved this by implementing a Hybrid Architecture that loads a standard UNet specifically for verification while keeping the Inpainting UNet for protection. - GPU Memory (VRAM) Constraints: Running two distinct Diffusion pipelines + a VAE on a single free-tier NVIDIA T4 (16GB VRAM) led to immediate Out-Of-Memory crashes. We had to optimize aggressively by using
torch.float16, manual garbage collection (gc.collect()), and a Shared Memory Strategy where both pipelines share the same Text Encoder and VAE components, saving ~3GB of VRAM.
Accomplishments that we're proud of
- Zero-Cost Infrastructure: We successfully deployed a production-grade AI application with zero hosting costs by leveraging Google Colab and Ngrok.
- The "Hybrid" Memory Architecture: Solving the VRAM bottleneck allowed us to offer both heavy-duty protection and real-time verification in the same session, which is technically difficult on limited hardware.
- Visual Proof: Seeing the "Verification" result for the first time—where the AI tried to edit a face and produced gray static instead—was a huge moment of validation.
What we learned
We learned that AI models see the world very differently than humans. We dove deep into the math of Adversarial Machine Learning. Specifically, we learned how to maximize the loss function with respect to the input pixels rather than the model weights :
We gained a practical understanding of how Latent Diffusion Models extract features and how fragile that extraction process really is when introduced to specific patterns of Gaussian noise.
What's next for Neuro Shield
- Scalable Cloud Deployment: Moving from Google Colab to a dedicated GPU cluster (AWS SageMaker or RunPod) to remove the session timeout restrictions.
- Multi-User Queueing: Implementing Redis/Celery to handle thousands of concurrent users without blocking the GPU.
- Browser-Side Inference: Exploring WebGPU to run the "Simple Shield" directly in the user's browser, enhancing privacy by ensuring the original photo never leaves their device.

Log in or sign up for Devpost to join the conversation.