-
-
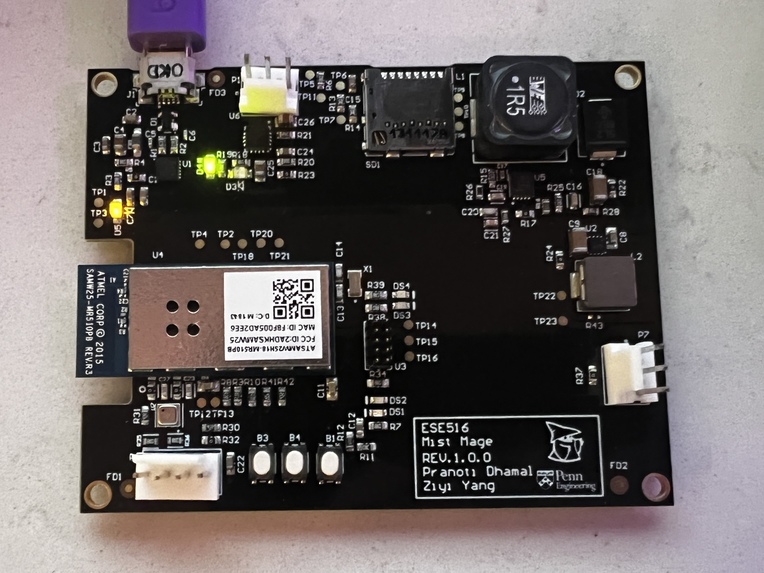
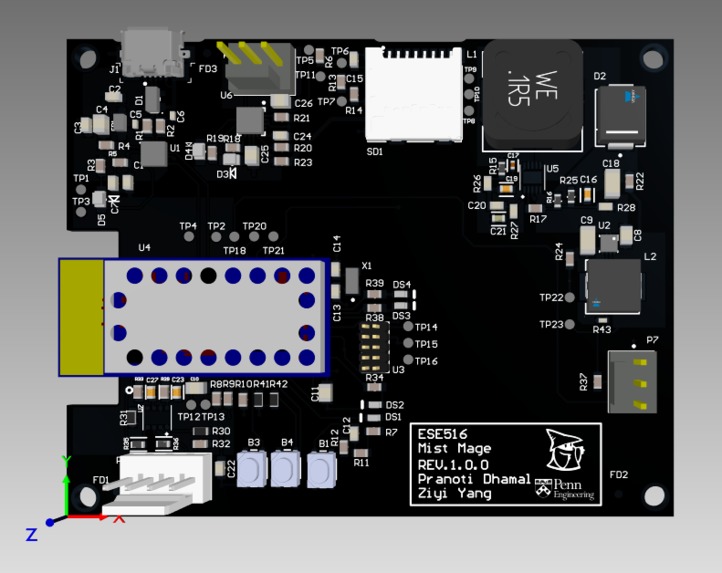
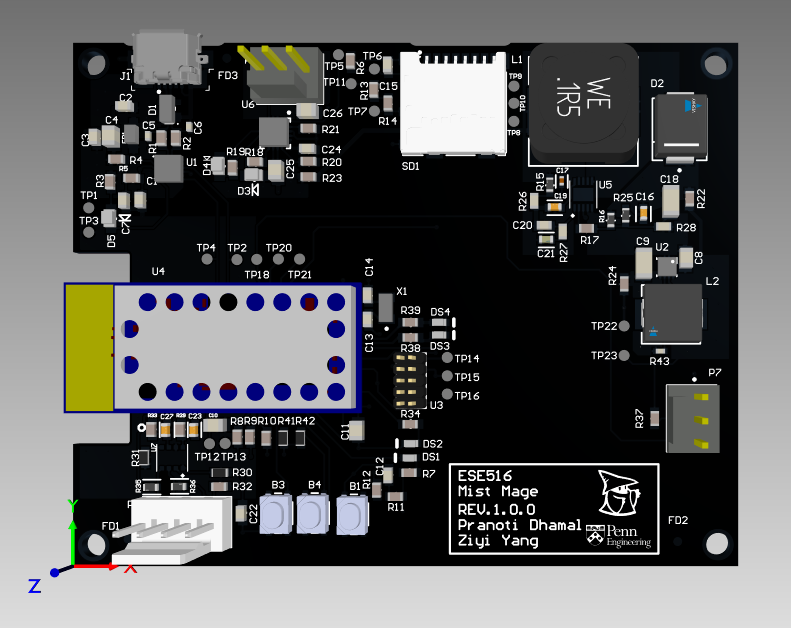
PCBA
-

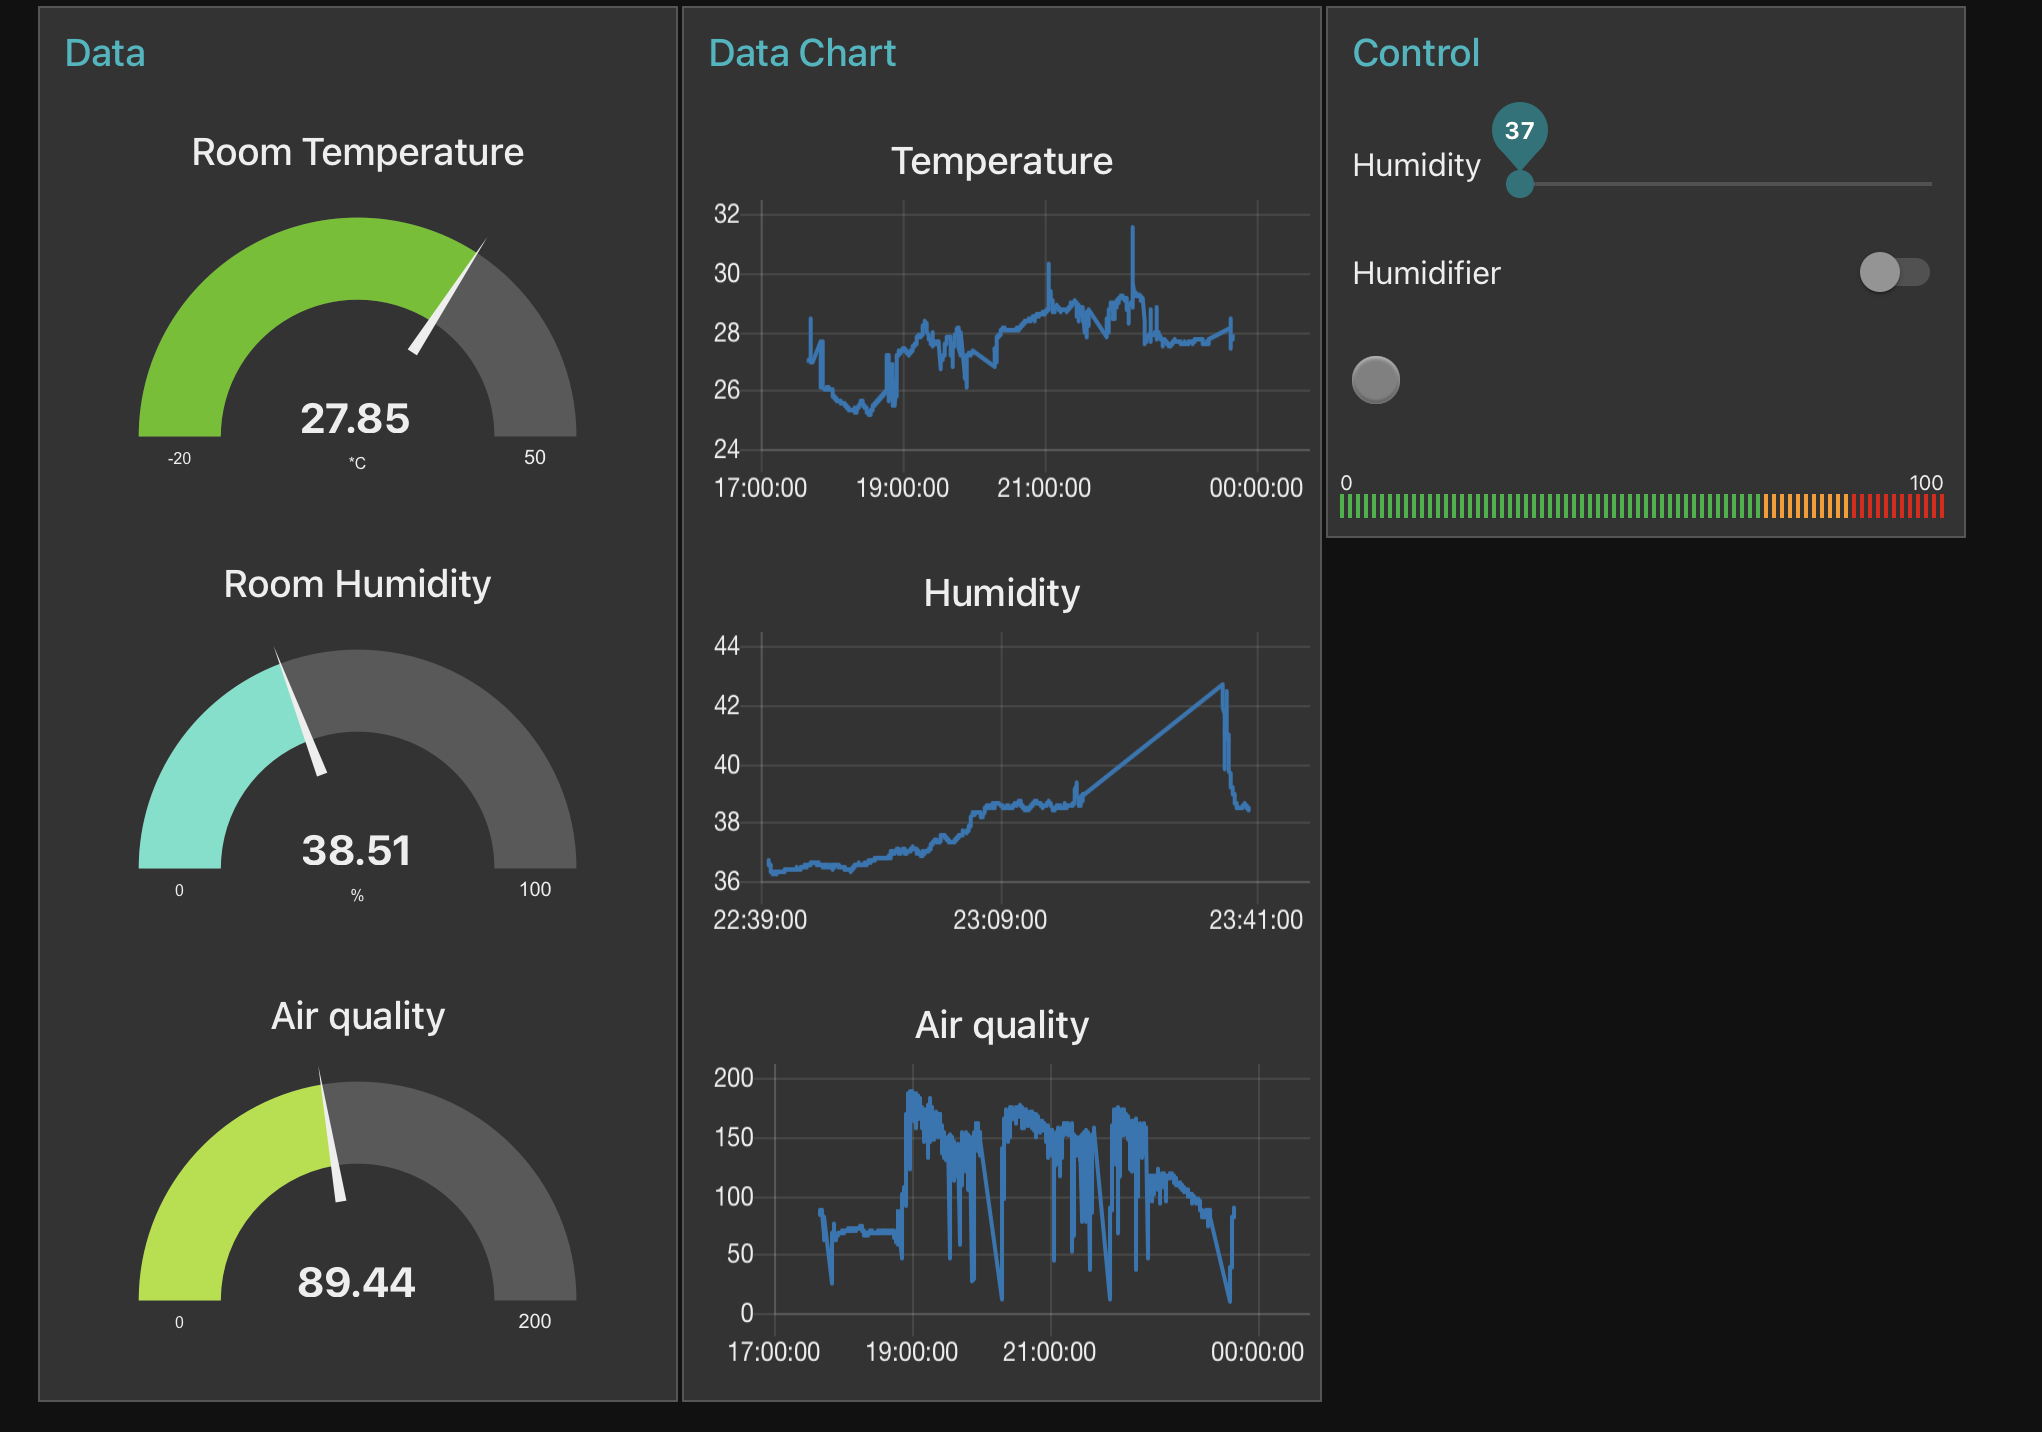
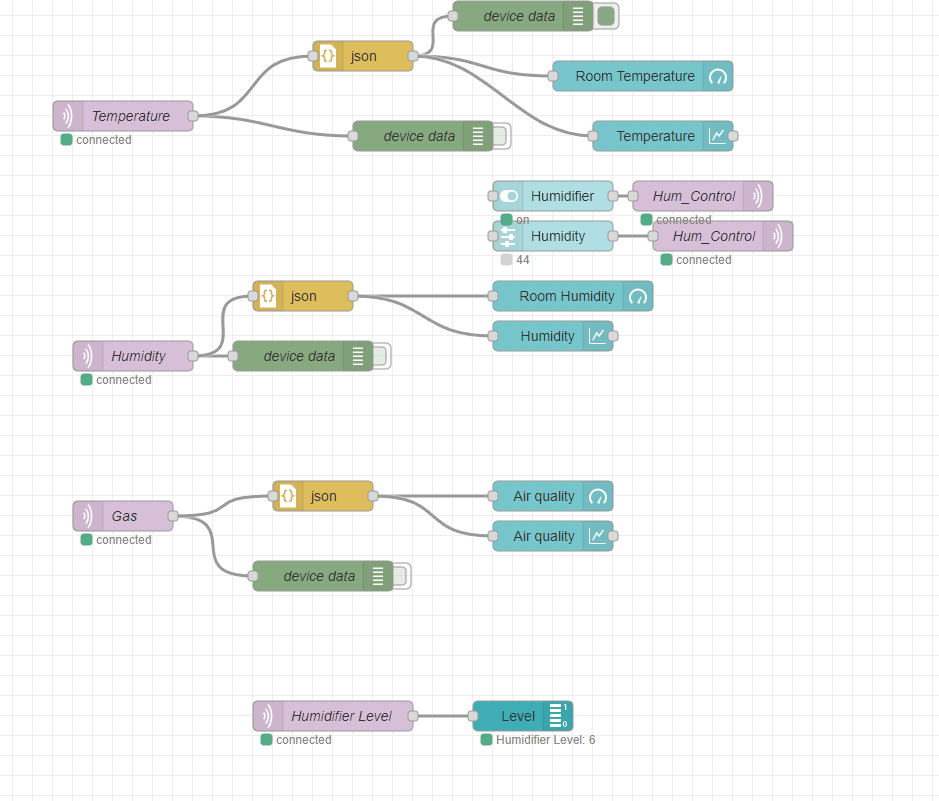
NodeRed Dashboard
-
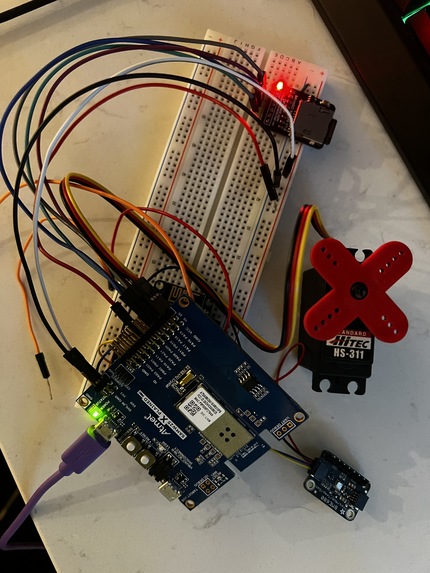
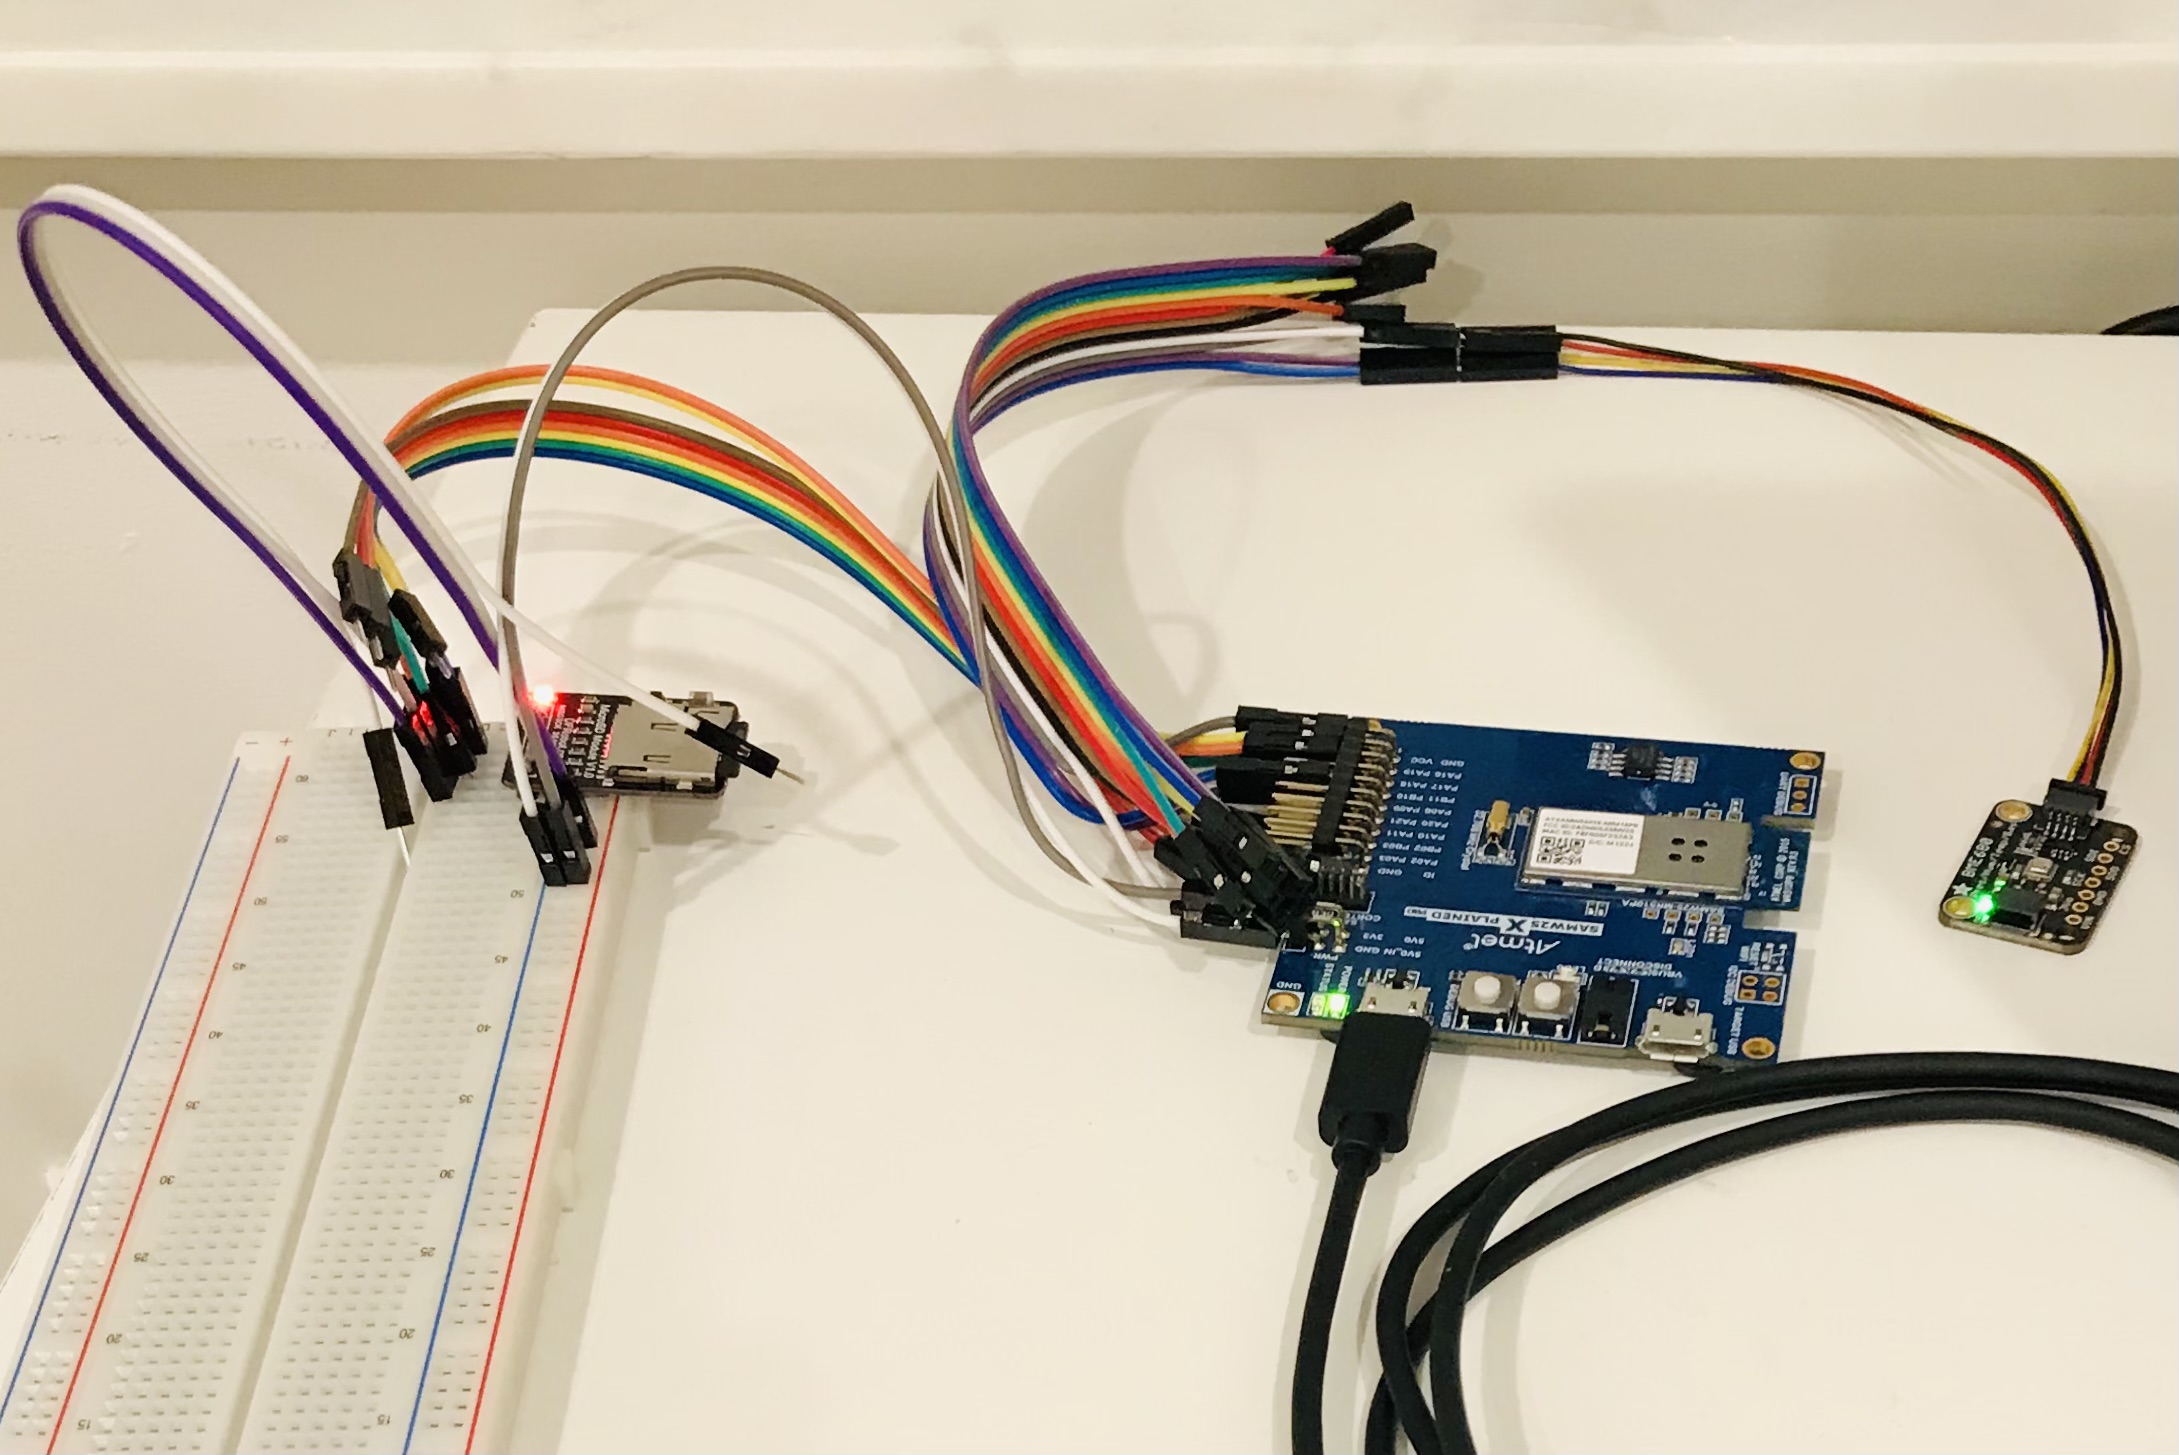
Final Set up
-
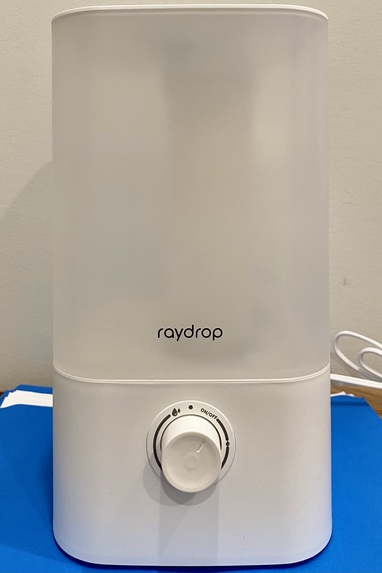
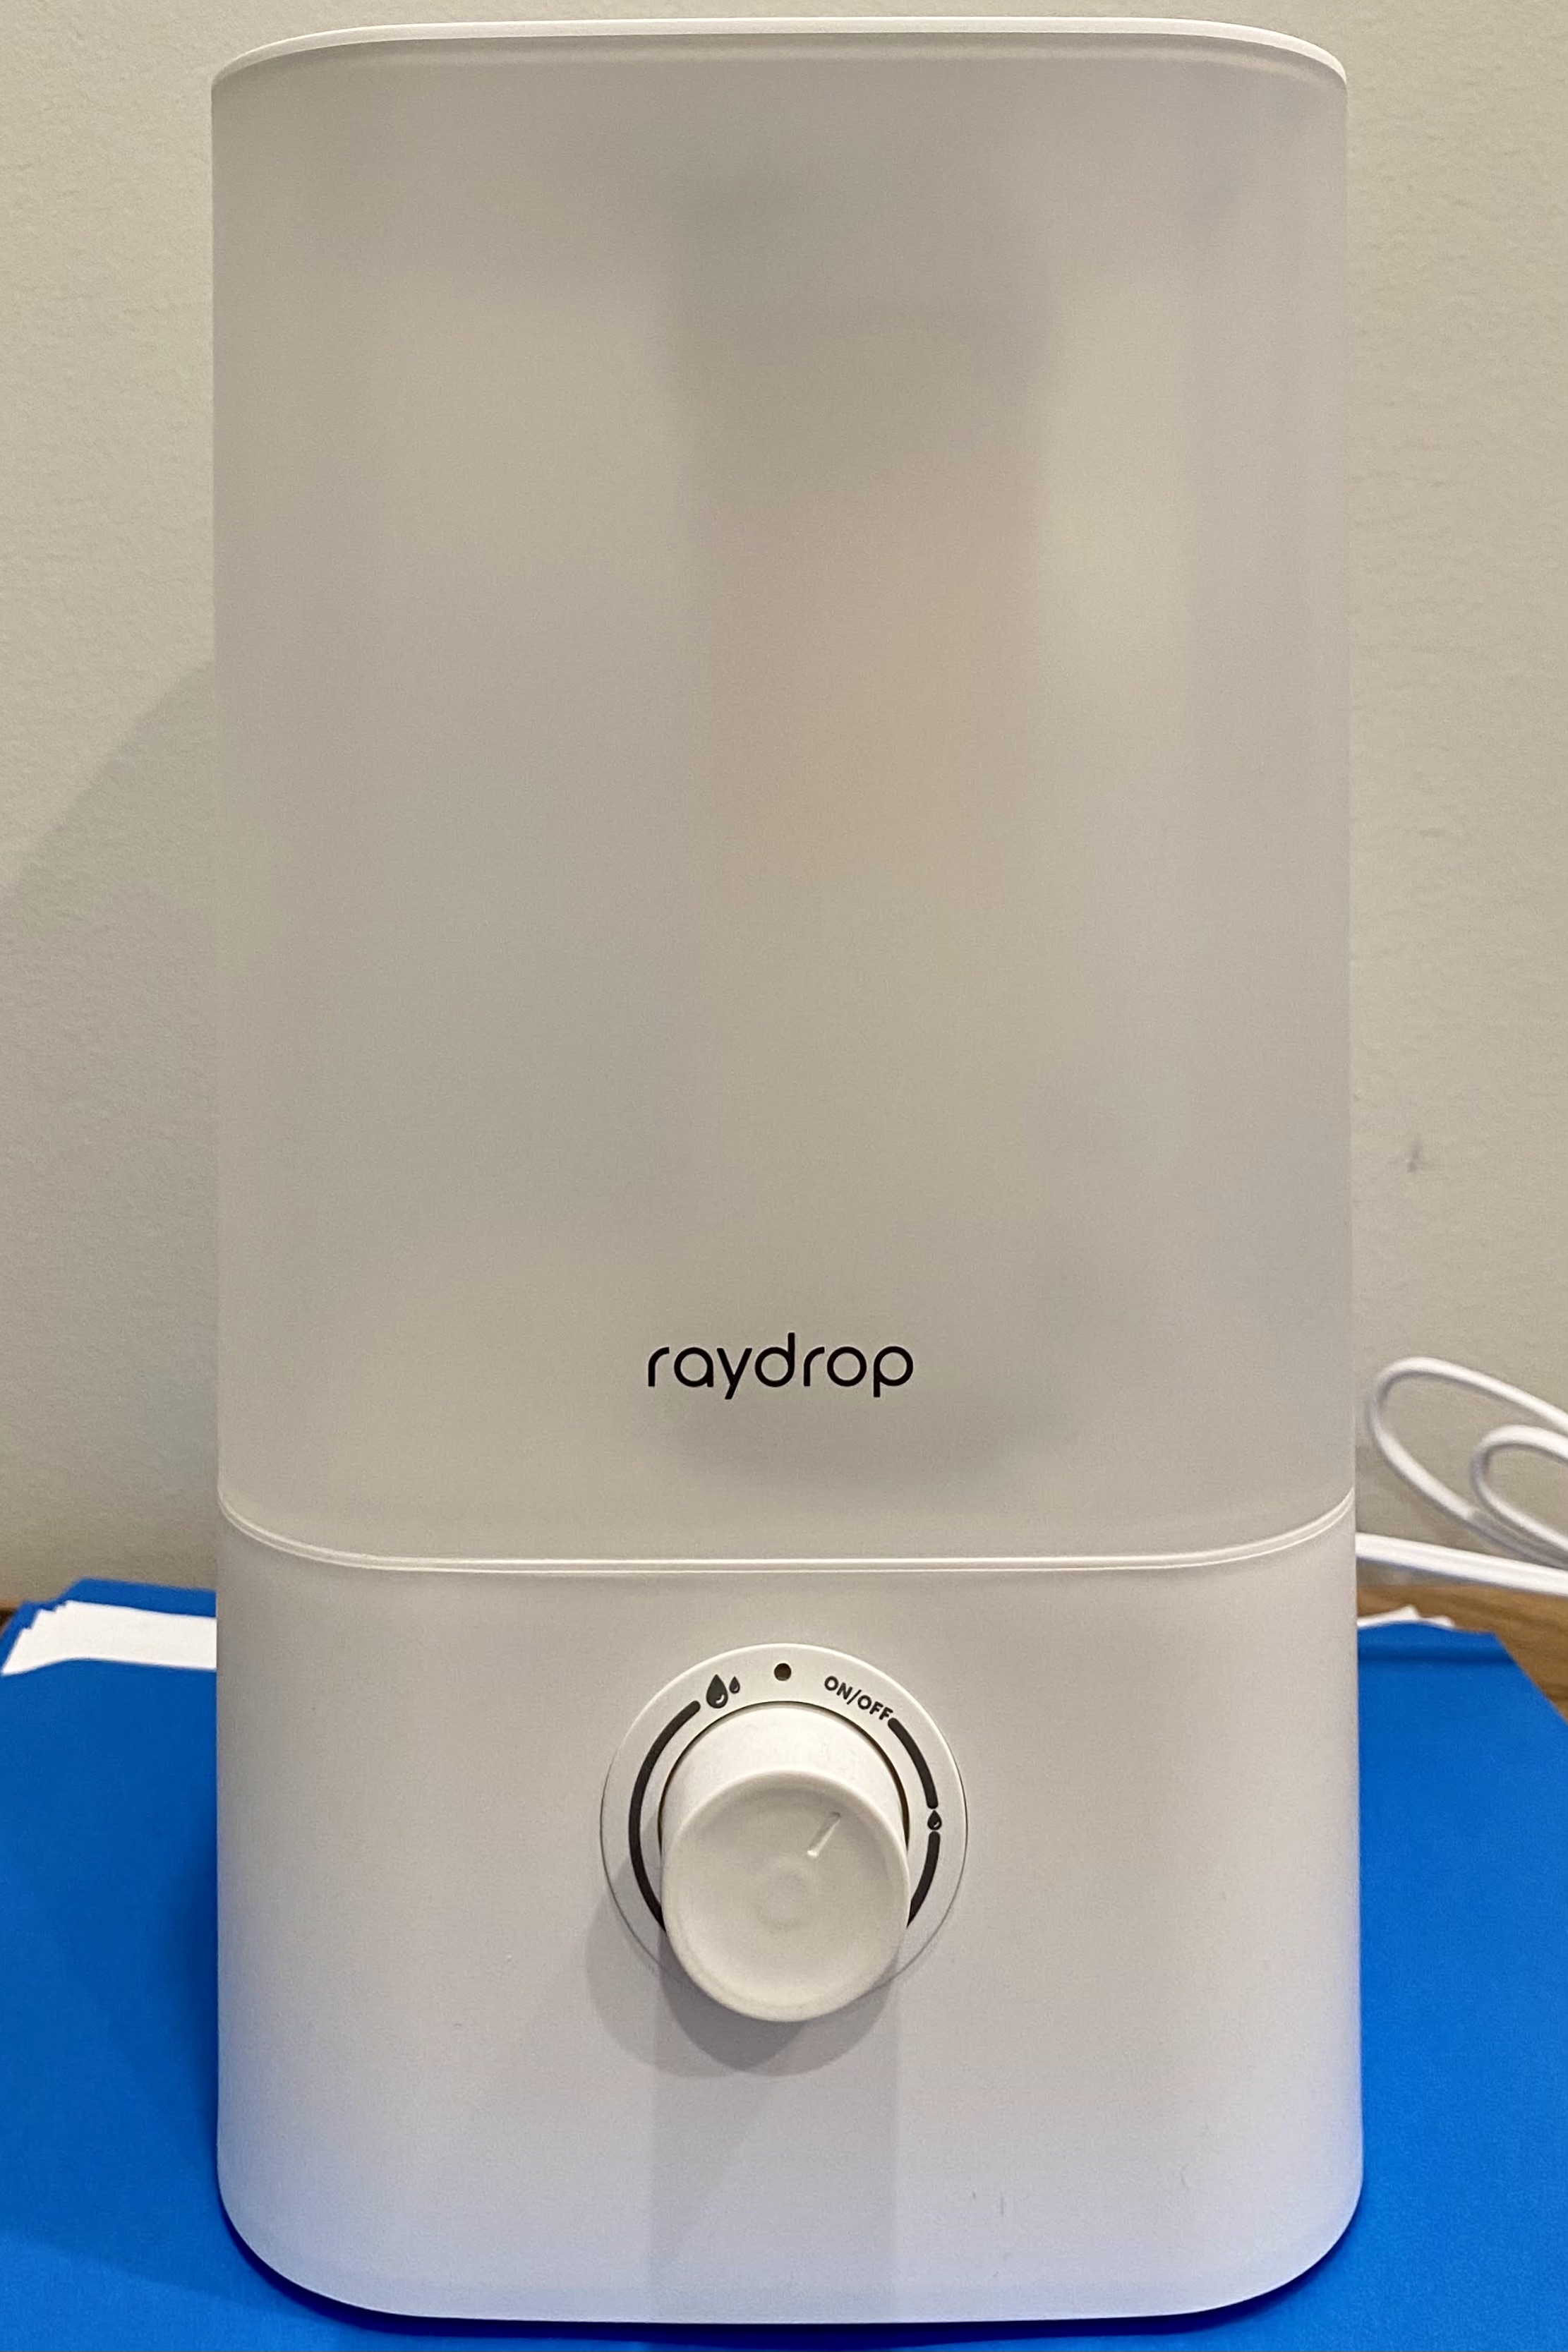
Humidifier
-
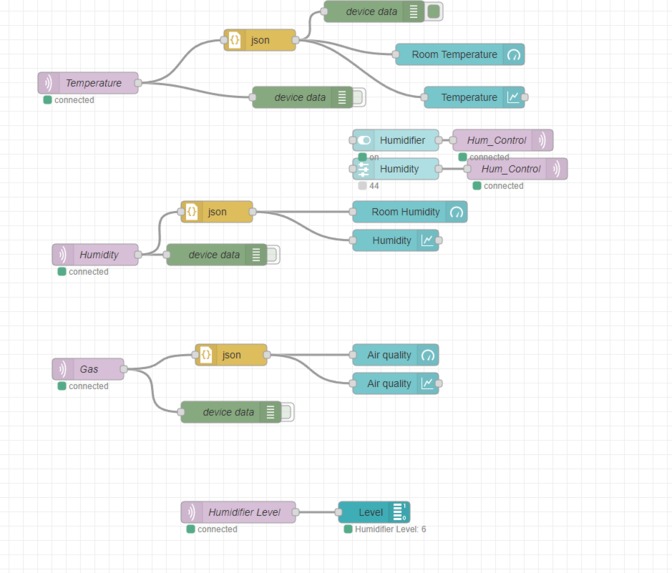
Web Application Back End on NodeRed
-

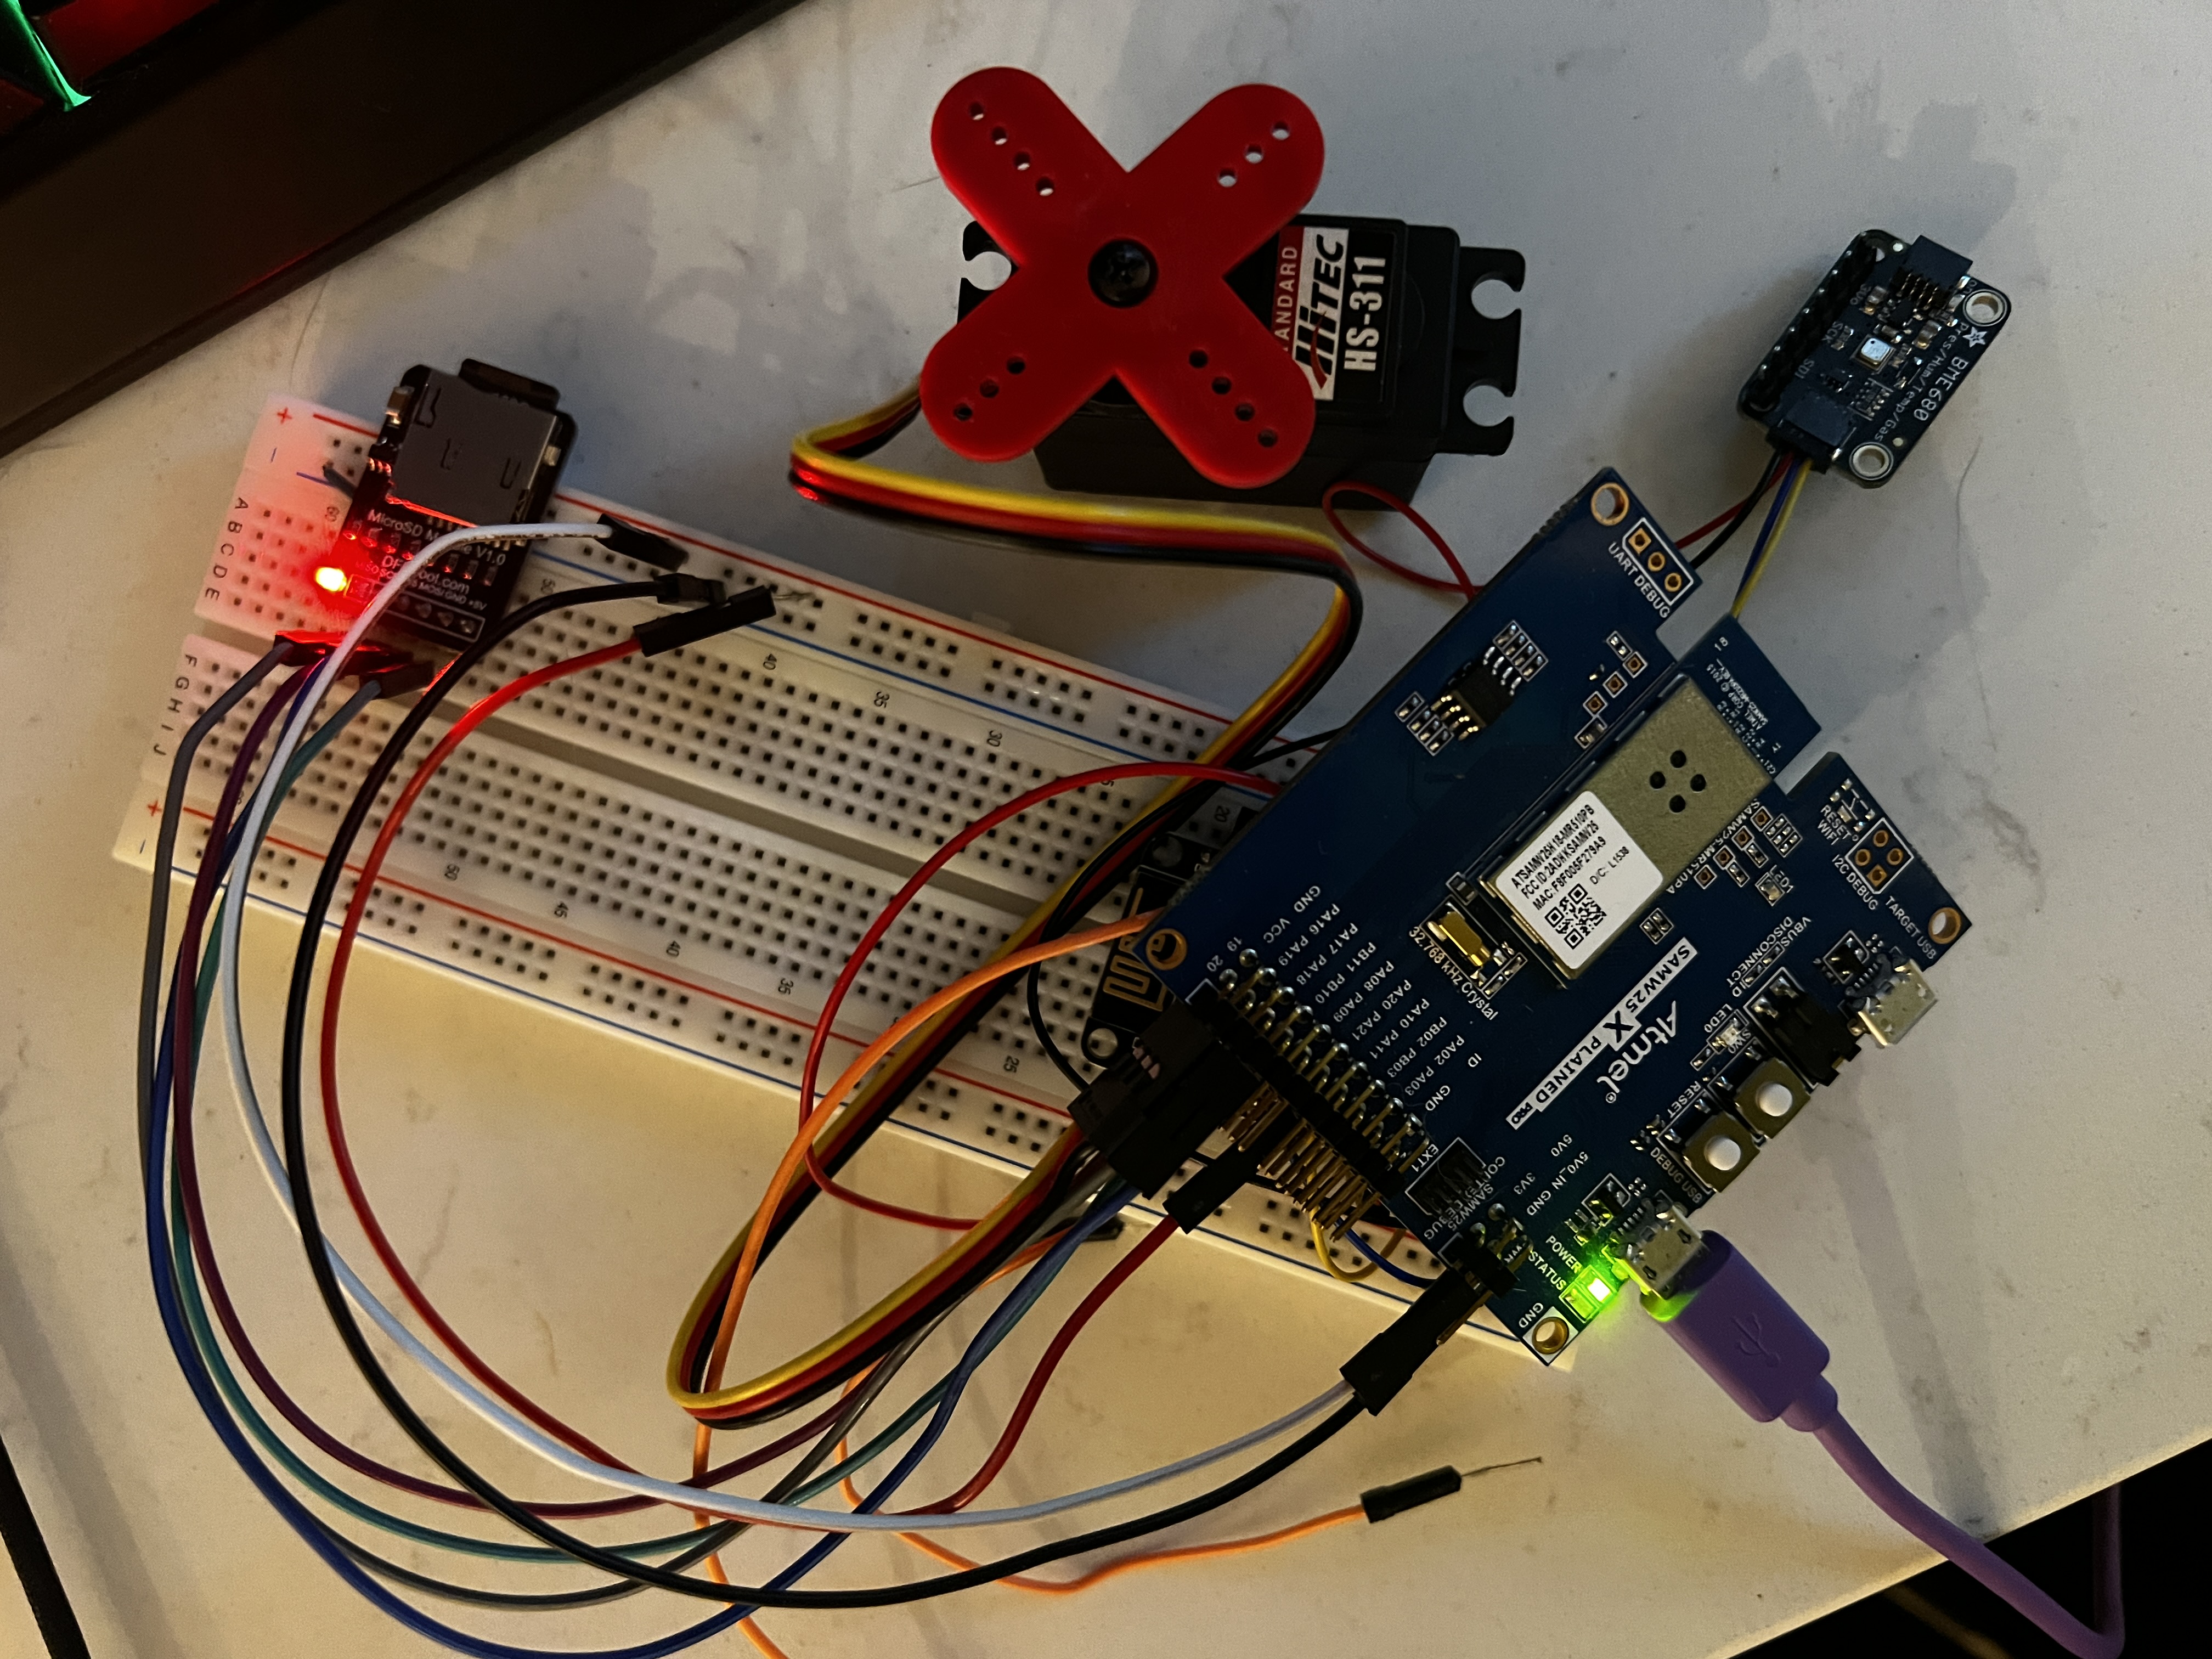
Development Board Assembly
-
PCB 3D Model Top
-

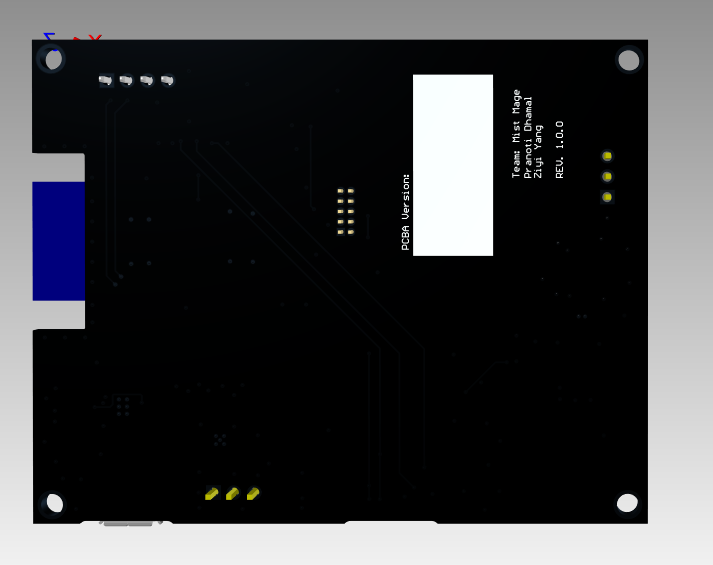
PCB 3D Model Bottom
-

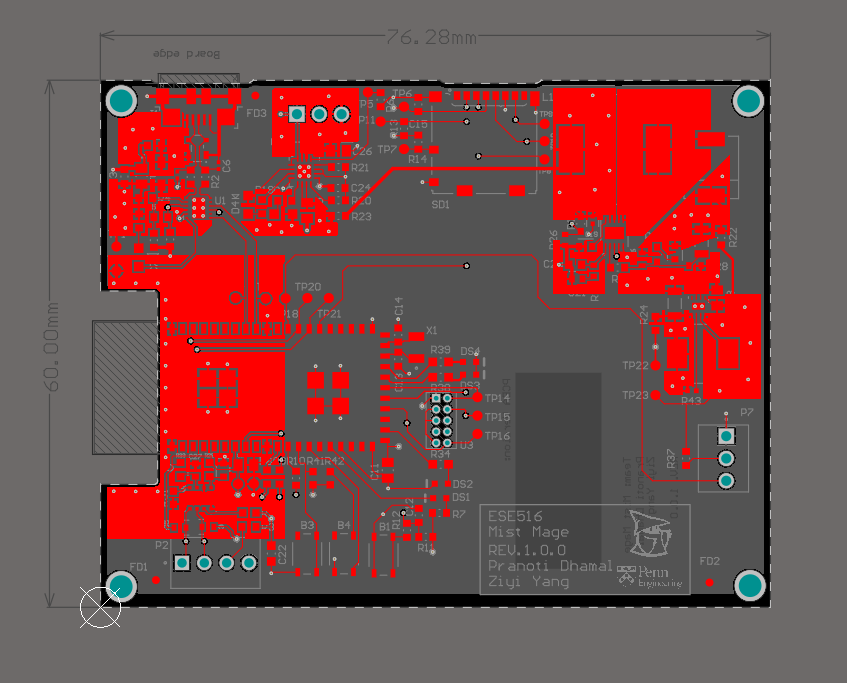
PCB Top Layer
-
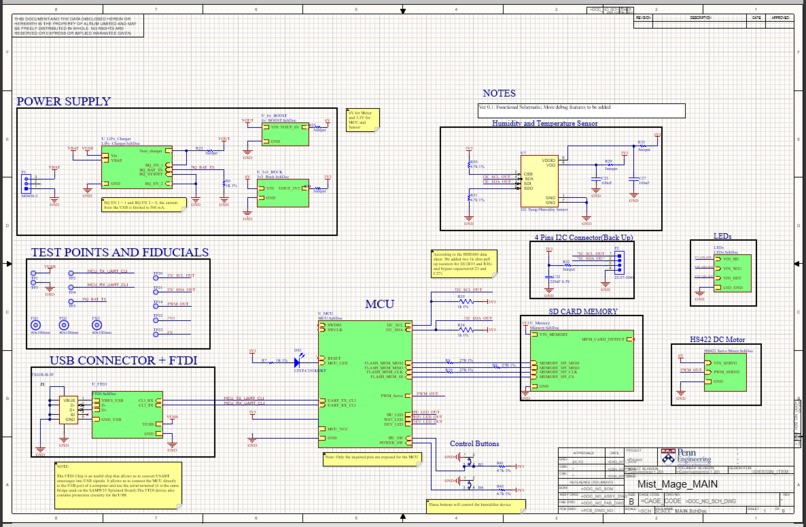
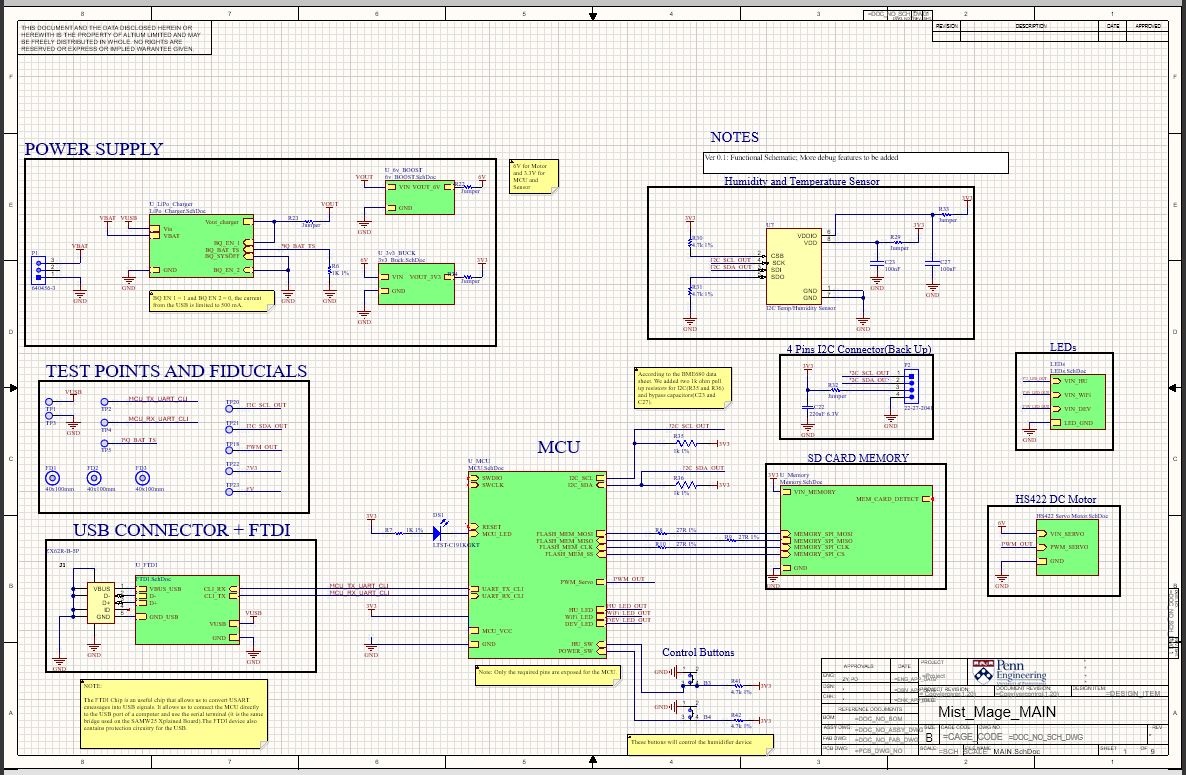
Schematic

Inspiration
During the winters, as we turn on the room heater at night, the indoor air gets increasingly dry while we’re asleep. And waking up to such drier air means waking up to a bloody nose with an itchy throat. Often, it’s difficult to keep a track of the indoor air humidity and even more difficult to maintain the desired humidity level. Even excess humidity can have negative effects on our bodies. This inspired us to develop a device that can sense the humidity level and accordingly control the humidifier such that the indoor humidity level is maintained at some desired level.
What it does
The Mist Mage device lifts off the burden of manually controlling the indoor humidity level. It provides an online web application user interface to monitor the humidity level and the humidifier’s control settings. It also allows the user to control the humidifier using the web application. The humidity, temperature, and air quality is sensed using a sensor and the humidifier's knob is controlled by controlling the servo motor attached to it.
How we built it
- From Idea to High-Level Block Diagram: We started by analyzing the major blocks of the system, from sensors to web application, and how everything will fit together. We identified specific components like the BME680 sensor, a servo motor and the SAMW25 MCU module.
- From Block Diagram to Schematic: The next step was to finalize the circuit diagram for the entire project. This involved identifying the different interfaces of the MCU like I2C, SPI, etc, and how we'll use the SERCOMs to connect different modules. Also designing the power supply to support different voltage levels of the system was a critical aspect of this phase.
- From Schematic to PCB Design and Manufacturing: When we had all the components and connections finalized, we started to design the PCB. It was an iterative process which has been the most interesting part of this project. After a lot of reviews, we generated BOM and Gerber files which we then sent out to the PCB manufacturers.
- Moving on to the Firmware: While the PCBs were getting manufactured, we ordered some development boards to utilize this time to develop firmware so that once we get the assembled PCB, we will have the code ready to get it working. We developed generic I2C drivers and also a bootloader with OTAFU support. We also developed an understanding of the FreeRTOS and how the code should be partitioned at the thread level for the RTOS.
- Connecting to the Internet: We chose the simple MQTT protocol to support the exchange of data between the device and the web application. We developed a NodeRed application using the simple graphical interface and simulated the MQTT messages that we expect from the device.
- Putting Everything Together: Then we moved onto developing some API functions specific to the BME680 sensor and the servo motor using the development boards. We added support for publishing and subscribing to our MQTT topics to establish a connection with the web application.
- And Finally: After all the prototyping work, we wanted to bring up the PCBAs that we received. But as we're cursed with the pandemic, our PCB order was not completed on time and we didn't get a chance to bring up our manufactured PCBs.
Challenges we ran into
- Ordering PCBs: I think the biggest challenge that we faced was finalizing the components for BOM for ordering the PCBs. The components were going out of stock from the market every day and we were forced to find substitutes for those components.
- Finding/Developing a custom part: To control the humidifier's knob, we were looking for a gripper type of a part that we can connect to the servo motor. As we didn't find it in the market, we decided to 3D print it. But unfortunately, we were not able to develop a working 3D printed part.
- Collaborating on the PCB project: It was difficult to distribute work between the team members and stitch everything together for the PCB project.
What we learned with the prototype
Working with the prototype gave us a lot of opportunities to fail and learn from our mistakes. Since we were working with the development boards, we had the flexibility to redesign. Just knowing that was a great confidence booster. Prototyping has taught us that it's best to get our feet wet as early as possible. Getting the many basic building blocks ready and then integrating everything should be the first step. After this, we have the opportunity to refine things, add complex logic, and add more features. We also learned that it's critical to be adept with the development tools like Altium, Microchip Studio, Logic Analyzer, etc. While the learning curve is steep in the beginning, it pays off in future projects!
What we learned
We realized that designing in a modular way is critical to project development. It eases collaboration and allows us to refine things without breaking everything that works. We also learned to think forward and have contingency plans. The hardware development domain is volatile and situations change overnight. And last but not the least, the documentation is what keeps everything alive. All the TODOs, the comments in code, and review comments help us progress in the project development cycle. And after the project development, it helps us to leverage our learnings and accelerate the next project development.
What's next for Mist Mage
We need to bring up the PCBs and procure/3D print the missing part to complete the project. And we would like to analyze the data from the sensor and the data fetched from the weather forecasts locally on the device using a simple machine learning TinyML model of the MCU. This will help in better automation and also efficient power use.

Log in or sign up for Devpost to join the conversation.