-
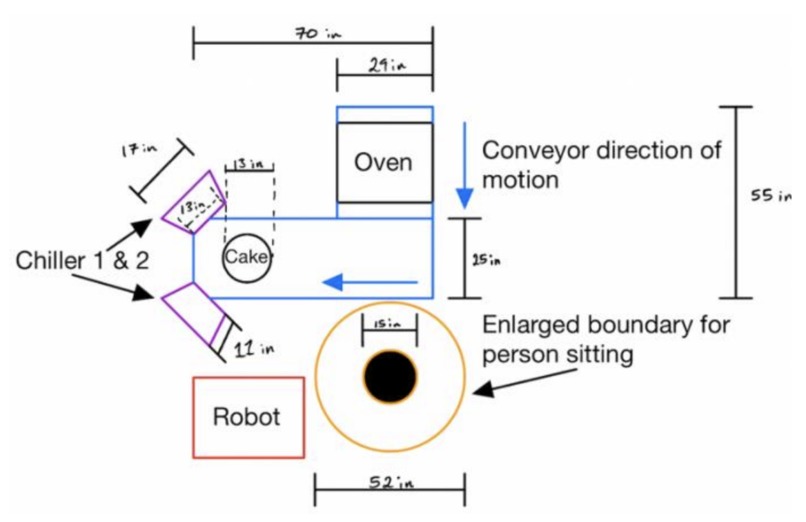
Environment Description: Top View of Robotic Manipulator Workspace
-
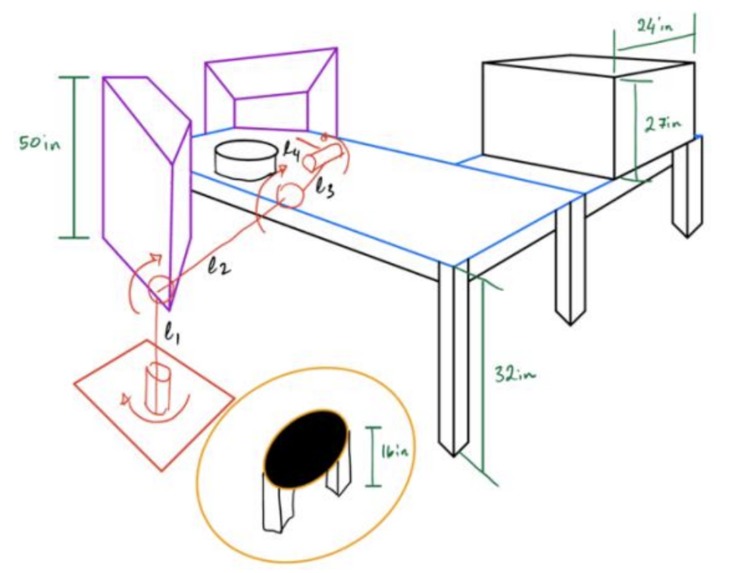
Environment Description: 3D view of Robotic Manipulator Workspace
-
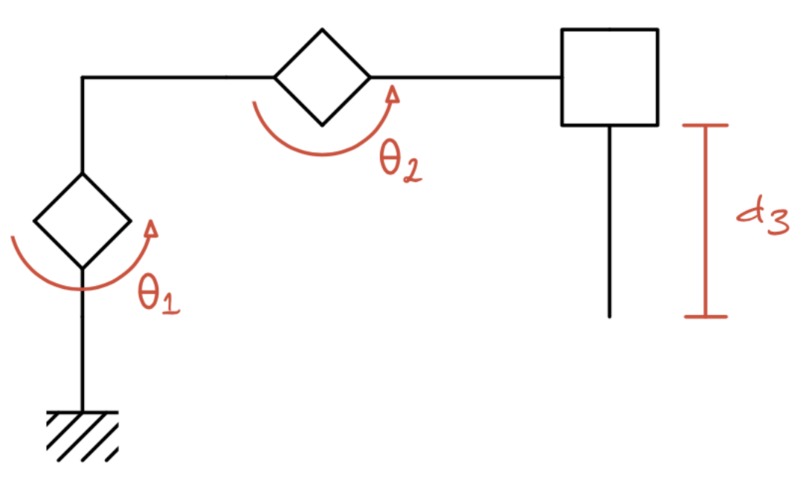
SCARA Manipulator configuration
-
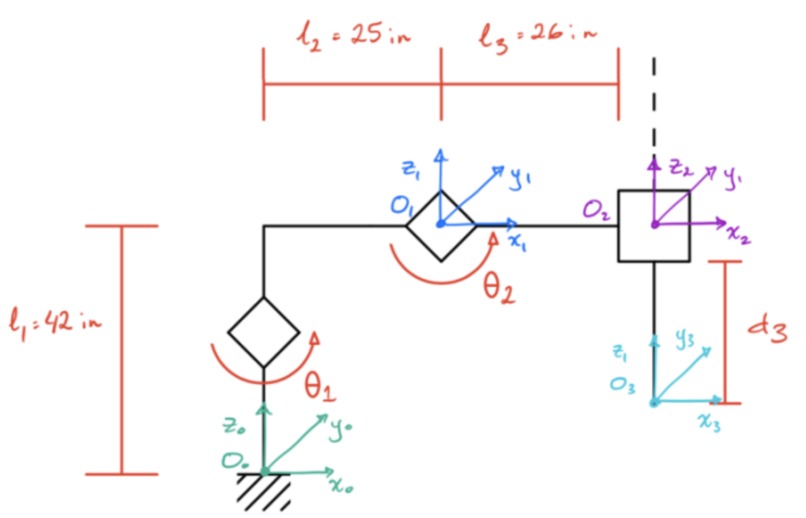
Forward Kinematics of Robotic Manipulator
-
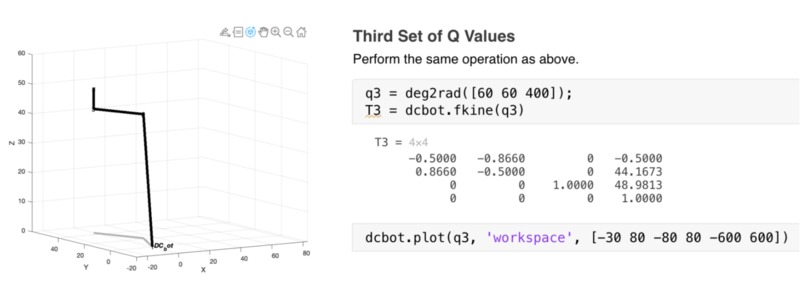
Position validation and testing of the Robotic Manipulator using Matlab
-
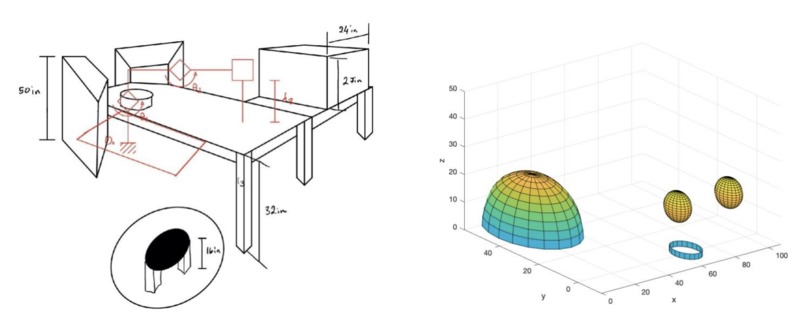
The workspace was simulated in Matlab, simplifying objects such as tables into spheres or domes for smoother implementation
-
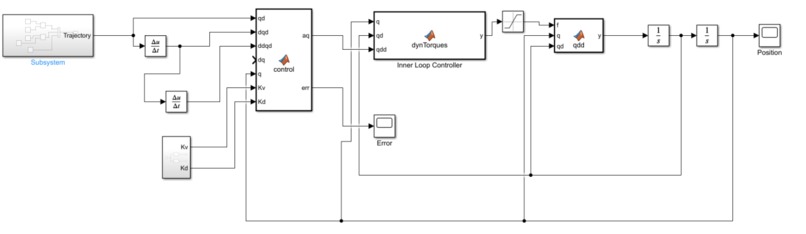
Implementation of State-Space Inverse Dynamics Controller for DC-Bot (robotic manipulator)


Inspiration
Undertaken during the final year of my undergraduate degree in Mechatronic Systems Engineering, this project revolved around crafting an application for a robotic manipulator. The inspiration for DC-Bot comes from the challenges humans face when tasked with creating repeatable patterns on cakes. While baking a cake is an elementary process requiring a modicum of technique, its decoration is where the baker is really put to the test. It truly requires a high level of skill and finesse, here the experienced rise and others fall; this separates the good from the great. This process also requires, pattern repetition, even distribution and equidistant frosting piping. This is a towering task for humans to complete efficiently and consistently.
What it does
Using a serial link robotic manipulator for this application would remove these challenges. A robot can create programmed patterns repeatedly and perfectly each time, regardless of the complexity. The dispensing process can also be controlled very precisely, this would effectively eliminate any challenges present with even distribution and equidistant frosting piping. Thus, the use of a decorate cake robot (DC-Bot) would be highly beneficial. Lastly, For the purpose of this project, certain variables were kept constant to minimize the level of complexity. The variables in question are only related to the dispensing liquid (frosting), temperature, flowability, viscosity and consistency.
How I built it
I took on this project in four main steps, each one building on the last. These steps were: Step 1, where I learned about Robotics and Rigid Motions; Step 2, which covered Forward and Inverse Kinematics, along with Velocity Kinematics using the Jacobian method; Step 3, focusing on Path and Trajectory Planning; and Step 4, where I explored Dynamics and Control.
You can dive into the details of each step by checking out the "Try it out" link, which will take you to a Google Drive folder. All the nitty-gritty work involving math and calculations was done using Matlab, ensuring accuracy and a solid project journey.
Challenges I ran into
As I approached the final stage of the project, I encountered some hurdles. Step #4, focusing on the dynamics and control of the robotic manipulator, turned out to be more challenging than I had expected. While I successfully implemented the controller using Matlab Simulink, I faced difficulties during the program's final compilation. Unfortunately, a significant portion of time was spent troubleshooting the control system, resulting in an incomplete implementation.
Accomplishments that I'm proud of
I take pride in the entirety of this project, as each distinct step served to enhance and reinforce my comprehension of robotic manipulators. It highlighted how math and linear algebra are crucial for creating robots with wide-ranging movement abilities.
What's next for Mechatronics Design: DC-Bot (Robotic Manipulator)
The project wraps up here, but it would be fascinating to see my code in action through a real robotic manipulator.
Built With
- matlab
- simulink
- solidworks

Log in or sign up for Devpost to join the conversation.