Inspiration to build this project
Building a light tracking robot can be a rewarding and educational experience.
What it does
A light tracking project, specifically a light-tracking system, is designed to detect the direction of a light source or the maximum light intensity and orient a sensor or a device in that direction.
How we built it
Building a light tracking system requires a combination of electronics, sensors, and programming. Below are the general steps to build a basic light tracking system:
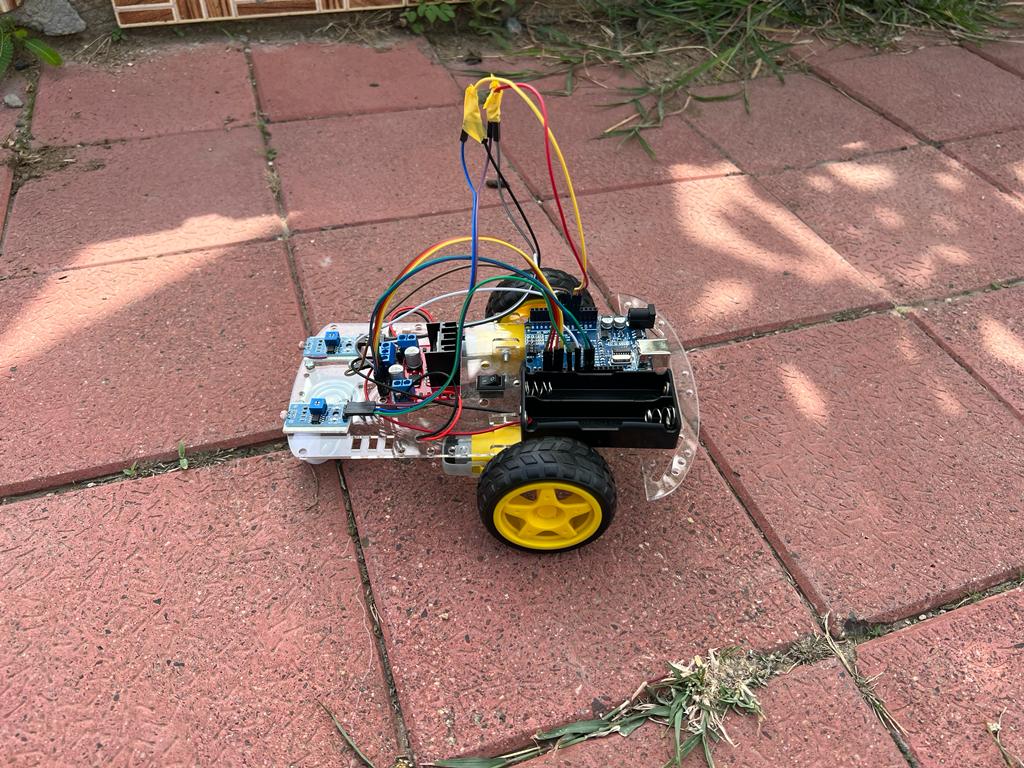
Components Needed:
Light-sensitive sensor (e.g., Light Dependent Resistor - LDR) Microcontroller (e.g., Arduino or Raspberry Pi) Servo motors or stepper motors Mounting mechanism for the sensor and motors Power supply (e.g., batteries or power adapter) Breadboard and jumper wires Light source (e.g., a flashlight or LED) Steps to Build a Light Tracking System:
Sensor Setup:
Connect the LDR to the microcontroller. Typically, I need to create a voltage divider circuit with a resistor to measure the varying resistance of the LDR based on light intensity. Motor Control Setup:
Connect the servo or stepper motors to the microcontroller. Ensure that the motors can move horizontally and vertically to track light effectively. Code Development:
Write the code to read the sensor's data and control the motors accordingly. The algorithm should make the system move the motors in the direction of maximum light intensity detected by the sensor. Calibration:
Calibrate your system to determine the starting position. This may involve moving the sensor/motors to a predefined initial position before tracking begins. Tracking Logic:
Implement the tracking logic, which can be based on the following principles: Move in the direction of the greatest increase in light intensity. Adjust the angle of the motors based on the difference between the current sensor reading and the desired value. Testing and Debugging:
Test the system by placing a light source at different positions and observing if the tracking mechanism correctly follows the light. Power Supply and Mounting:
Provide a stable power supply for your system. Mount the sensor and motors securely on a stable platform to ensure accurate tracking.
If applicable, design a user interface to control and monitor the tracking system.
Lastly, we made sure to refer to the datasheets and documentation of the components you're using and consult relevant online resources and tutorials for guidance on specific hardware and software configurations.
Challenges we ran into
Here are some common challenges we faced and potential solutions:
Sensor Accuracy: Light-dependent resistors (LDRs) and other light sensors may have variations in sensitivity. Calibrating and normalizing the sensor readings can help mitigate this issue.
Noise and Interference: Ambient light, reflections, and electronic noise can affect sensor accuracy. Shielding the sensor and using signal filtering techniques can help reduce noise.
Power Supply: Choosing the right power supply is crucial. Insufficient power can lead to erratic motor movements or sensor instability. Ensure that your power supply meets the requirements of both the microcontroller and motors.
Mechanical Issues: Mounting the motors and the sensor securely while allowing for smooth movement can be challenging. Carefully design and assemble the mechanical components to minimize friction and backlash.
Code Complexity: Developing the tracking algorithm can be complex, especially if you want precise tracking. Break down the problem into smaller steps, and use modular coding practices for easier debugging and maintenance.
Calibration: Accurate calibration of the sensor and motors is crucial for precise tracking. Calibrating your system to account for variations in sensor readings and mechanical inaccuracies is essential.
Feedback Control: Implementing a feedback control system can be challenging but significantly improves tracking accuracy. Incorporating feedback from sensors or encoders on the motors can help fine-tune the tracking mechanism.
Testing Environment: Testing a light tracking system may require controlled lighting conditions. Creating a controlled environment for testing can be time-consuming and may require blackout curtains or shields to eliminate interference from external light sources.
Data Processing: Real-time data processing and motor control can strain the microcontroller's capabilities. Choose a microcontroller with sufficient processing power and memory for your application.
User Interface: If you plan to add a user interface or remote control, designing a user-friendly interface can be a challenge, especially if you're not experienced in user interface design.
Cost and Budget: Sourcing quality components within a limited budget can be a challenge. Carefully plan your project budget and explore cost-effective component options.
Safety Precautions: Depending on the size and power of your project, consider safety measures, especially if you are working with high-voltage components or heavy mechanical parts. Follow safety guidelines and practices.
Documentation and Troubleshooting: Keeping comprehensive project documentation can be time-consuming but is crucial for troubleshooting issues that may arise during the development and later maintenance of your system.
Accomplishments that I am proud of
I am proud that I have not given up!
What I learned
kudos to my learning! it was such a great learning through this project.
Built With
- arduino
- c/c++

Log in or sign up for Devpost to join the conversation.