


Inspiration
- A week or two ago we came across a video of someone using nitinol, a shape memory alloy of nickel and titanium, in the form of a spring to lift a weight; when a current was passed through the coil, it contracted and lifted a fairly heavy weight.
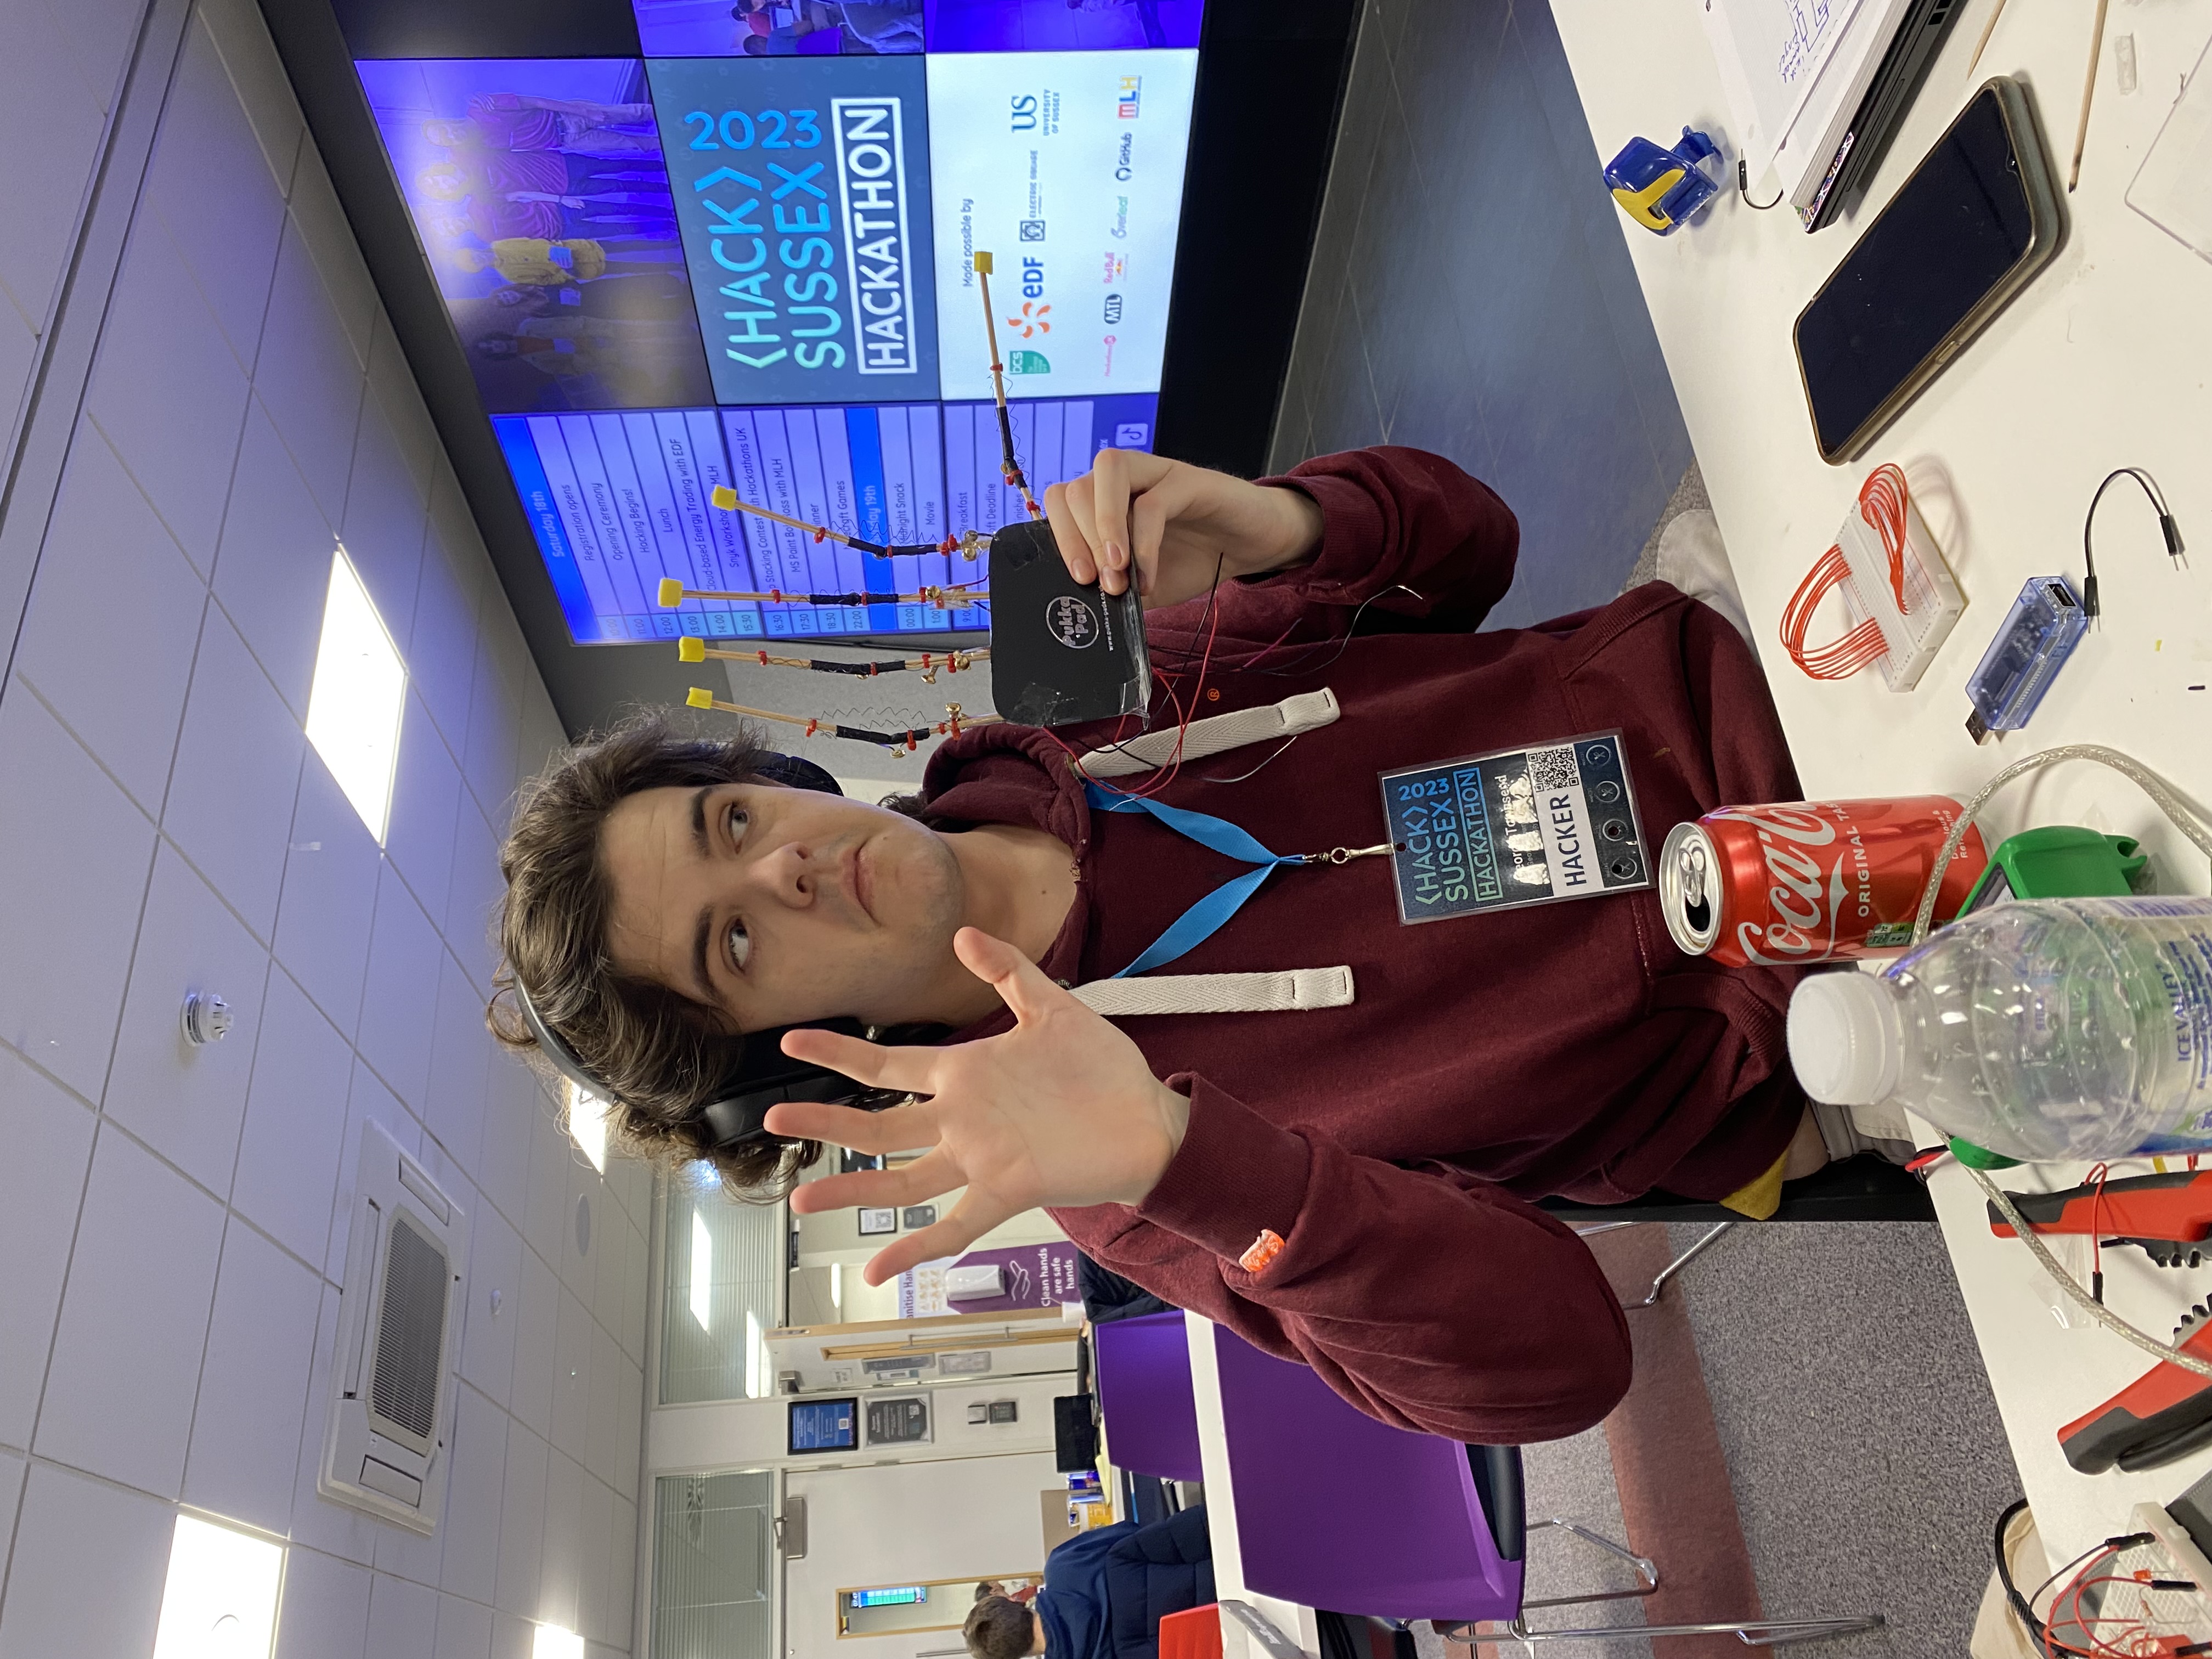
- This is really cool! We realized we could use this to do something much more complex, and we immediately settled on the idea of a robotic hand, as there were a lot of parallels between these springs and artificial muscles, so having a biomechanical component would be really interesting.
- We were also inspired by the mechanical string and straw hand, and were initially planning on using a design much more similar to it.
Iterative design process
Nitinol Spring
- Initially we didn't plan on using a spring at all, and instead just use the wire by itself straightened out - however, this proved to be far too weak, and the mechanical advantage of using a spring provided much more force.
- Our first few attempts to temper a spring were fairly successful, if a little crude - we wrapped it tightly around a small wooden dowel, and heated it over a lighter, then poured water over it. While this did technically work, it wasn't a very tightly wound wire by the end, and it was unnecessarily dangerous and slow.
- After many iterations and trying out different ideas, by the end we had settled on wrapping the wire around a steel strip and blasting it with a heat gun at 500 degrees, then dunking it in cold water, and repeating several times - this led to a much more effective spring which provided a much greater force.
Finger and hinge
- v1.0: We started out with two wooden dowels attached with a piece of heat-shrink tubing. This was flexible enough, but had a few issues. It would bend laterally just as easily as longitudinally, so the springs would bend the finger any way they felt like it. Also, the heat-shrink didn't supply enough restoring force to return the finger to resting position.
- v1.1: To amend some of these problems, we attached two elastic bands to the joint, one on either side. This helped with the restoring force and the directionality of the joint, but we found that the dowels rubbed against each other and broke the tubing after some time.
- v2.0: The next version of our design moved the two dowels apart to reduce friction, and also doubled them up for increased rigidity. We swapped the two elastic bands out for one band on the top of the joint and a piece of zip-tie glued underneath to limit lateral movement. This was close to working, but the zip-tie gave too much resistance to contraction.
- 3.0: Our final design took version 2.0 further by pre-stretching the elastic band to calibrate the tension properly. We covered the elastic band with a second piece of heat-shrink tubing, which gave sufficient restriction to lateral movement while not affecting longitudinal movement. This was helped further by doubling back on the springs, so that one half of the tension pulled on either side of the joint. We also gave the joint "brass knuckles" made of split-pins to restrict and calibrate the most-relaxed-position. Finally, we attached rubber pads to the end of each finger, to increase grabbing force.
Control Circuit
- Fingers require 1.5A at 5VDC.
- Microcontroller cannot supply anywhere near this current from its GPIO.
- We have relays but they require 12V.
- We have transistors but they cannot pass through the total current required.
- Our solution, after much trouble, was to trigger resistors from the MCU, which in turn switch relays to control fingers.
Control Software
Our control software pipeline is as follows:
- Python AI software detects which fingers are raised or lowered, from the webcam image.
- It opens up a UART connection (over USB) which sends a message to the MCU, whenever the finger status has changed.
- When the MCU receives this message, it sets its GPIO outputs that are connected to the NPN transistor bases, which in turn power the relays, which in turn power on through the finger coils.
- The MCU also, based on this message, sets the status of the LED matrix to show the status of the current finger (kid named finger)


Log in or sign up for Devpost to join the conversation.