Inspiration
Building this demo started from curiosity about how real‑world biometric systems like Aadhaar and campus access control work, especially iris recognition, which is both highly accurate and privacy‑sensitive. The idea was to create a simple, safe sandbox that shows the full flow—camera access, capture, and a fake “match” to student details—without touching any real biometric database.
What it does
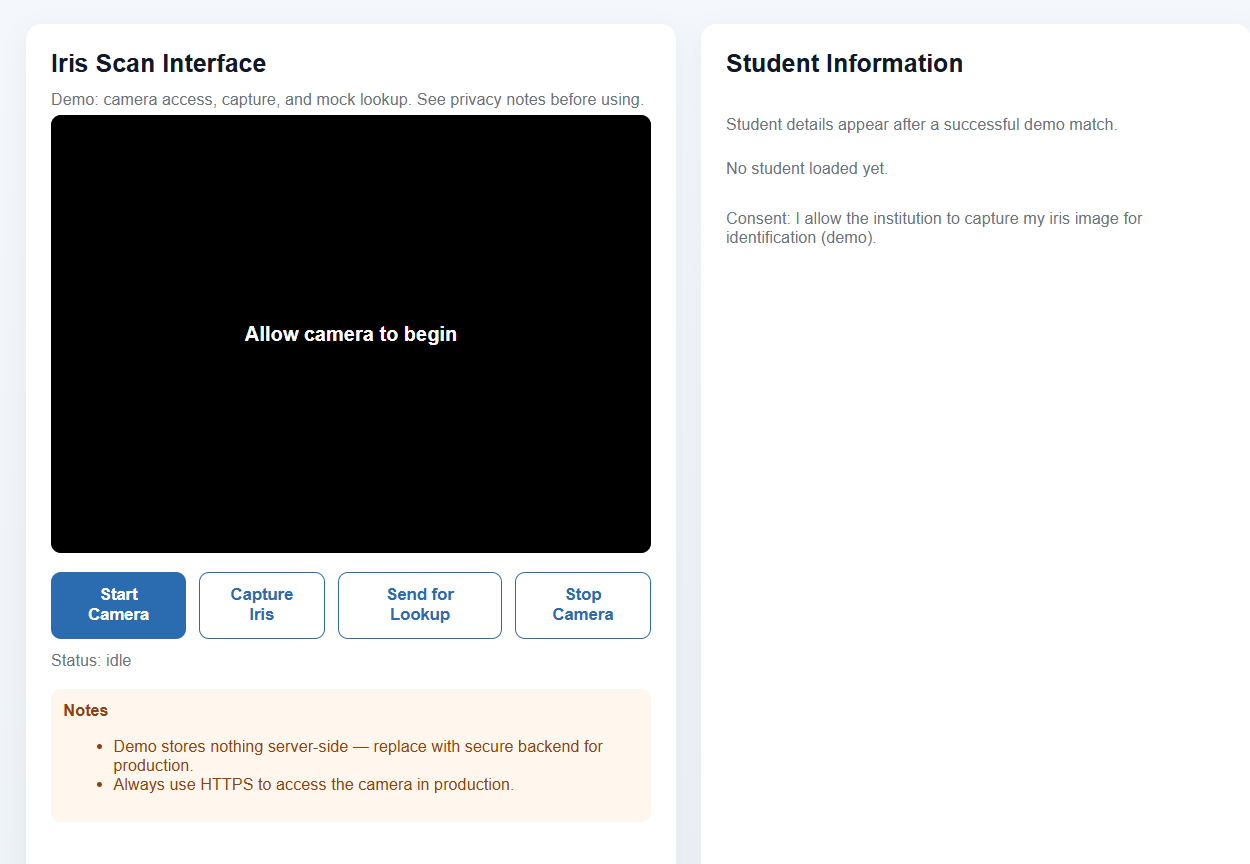
Core behavior It requests access to the device camera and lets the user start and stop the camera stream from the page. When the user clicks “Capture Iris,” it grabs a frame from the live video to represent an iris image. On “Send for Lookup,” it performs a mock lookup: if the demo considers it a successful match, the Student Information section is populated with example student details. Privacy and consent The page explicitly states that the demo stores nothing server‑side and should be replaced with a secure backend in a real system. It reminds users that production use must happen over HTTPS for safe camera access and secure transmission. It includes a consent line where the user allows the institution to capture the iris image for identification in this demo context.
How we built it
The interface centers on a minimal control panel with buttons to start/stop the camera, capture the iris frame, and send it for a mock lookup, with a live “Status: idle / processing / matched” indicator. After a simulated successful match, a student information section updates from “No student loaded yet” to show demo student details, mimicking what a real system would do when an iris is identified. Technically, the front end can be implemented with: Browser camera APIs (for example, navigator.mediaDevices.getUserMedia) to stream video and grab a frame to a canvas. A mock lookup function that uses a placeholder rule (like hashing image metadata or just a fixed demo ID) to decide which student record to display, instead of any true biometric matching. A simple state machine for UI states: idle → camera on → captured → lookup in progress → result shown.
Challenges we ran into
Browser permissions and reliability Different browsers and devices behave differently with camera access, which required handling permission denials, unsupported environments, and clear fallbacks in the UI. Privacy and ethics Deciding how to design a demo that feels realistic but does not store or misuse biometric data was non‑trivial; the solution was to keep all matching local or simulated and provide explicit notes about storage and security. User trust and communication Writing concise notes and consent text so students understand that this is a demo, what is being captured, and that the server does not store anything was an important design task, not just a technical one. Overall, this project turned iris scanning from an abstract biometric concept into a concrete, end‑to‑end experience, while keeping security, privacy, and user consent at the center of the design.
Accomplishments that we're proud of
Technical accomplishments Built a full front‑to‑back flow: camera access, iris capture, and a mock lookup that ends in displaying student details, giving a realistic feel of an actual biometric system. Kept the demo lightweight and browser‑based, so it runs without installing native apps while still using live camera input. Privacy and UX accomplishments Designed the demo so that no biometric data is stored server‑side, which is a strong privacy‑first choice for a student project. Clearly communicated consent, usage, and security expectations (including recommending HTTPS and secure backends for real deployments), which builds user trust around such a sensitive technology.
What we learned
Working on this clarified how many moving parts are needed even before any “real” iris recognition model appears: Permissions and UX: Getting users to grant camera access and clearly telling them what is happening matters as much as any model accuracy. Security and privacy by design: The demo explicitly states that nothing is stored server‑side and recommends replacing it with a secure backend for production, plus always using HTTPS to access the camera. Separation of concerns: It is natural to separate the capture UI, the network or mock lookup layer, and the final student‑info rendering logic. This also highlighted how iris biometrics fit into broader AI/ML workflows: image acquisition, preprocessing, feature extraction, and matching can later be swapped in behind the same UI.
What's next for IrisGuard
Technical accomplishments Built a full front‑to‑back flow: camera access, iris capture, and a mock lookup that ends in displaying student details, giving a realistic feel of an actual biometric system. Kept the demo lightweight and browser‑based, so it runs without installing native apps while still using live camera input. Privacy and UX accomplishments Designed the demo so that no biometric data is stored server‑side, which is a strong privacy‑first choice for a student project. Clearly communicated consent, usage, and security expectations (including recommending HTTPS and secure backends for real deployments), which builds user trust around such a sensitive technology.

Log in or sign up for Devpost to join the conversation.