-
-
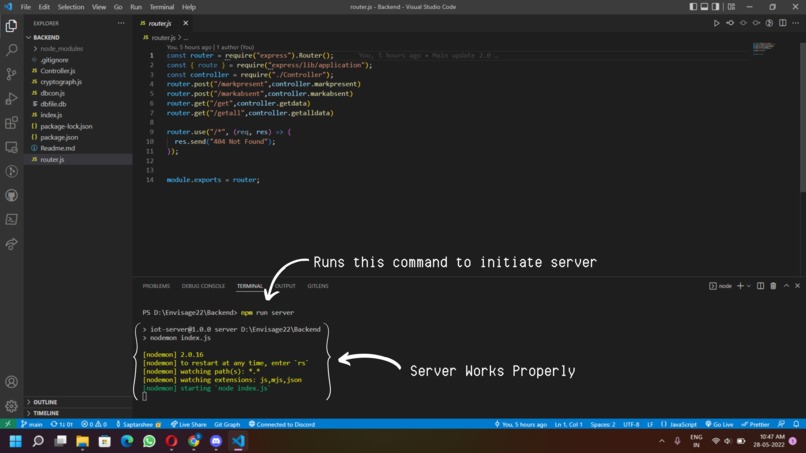
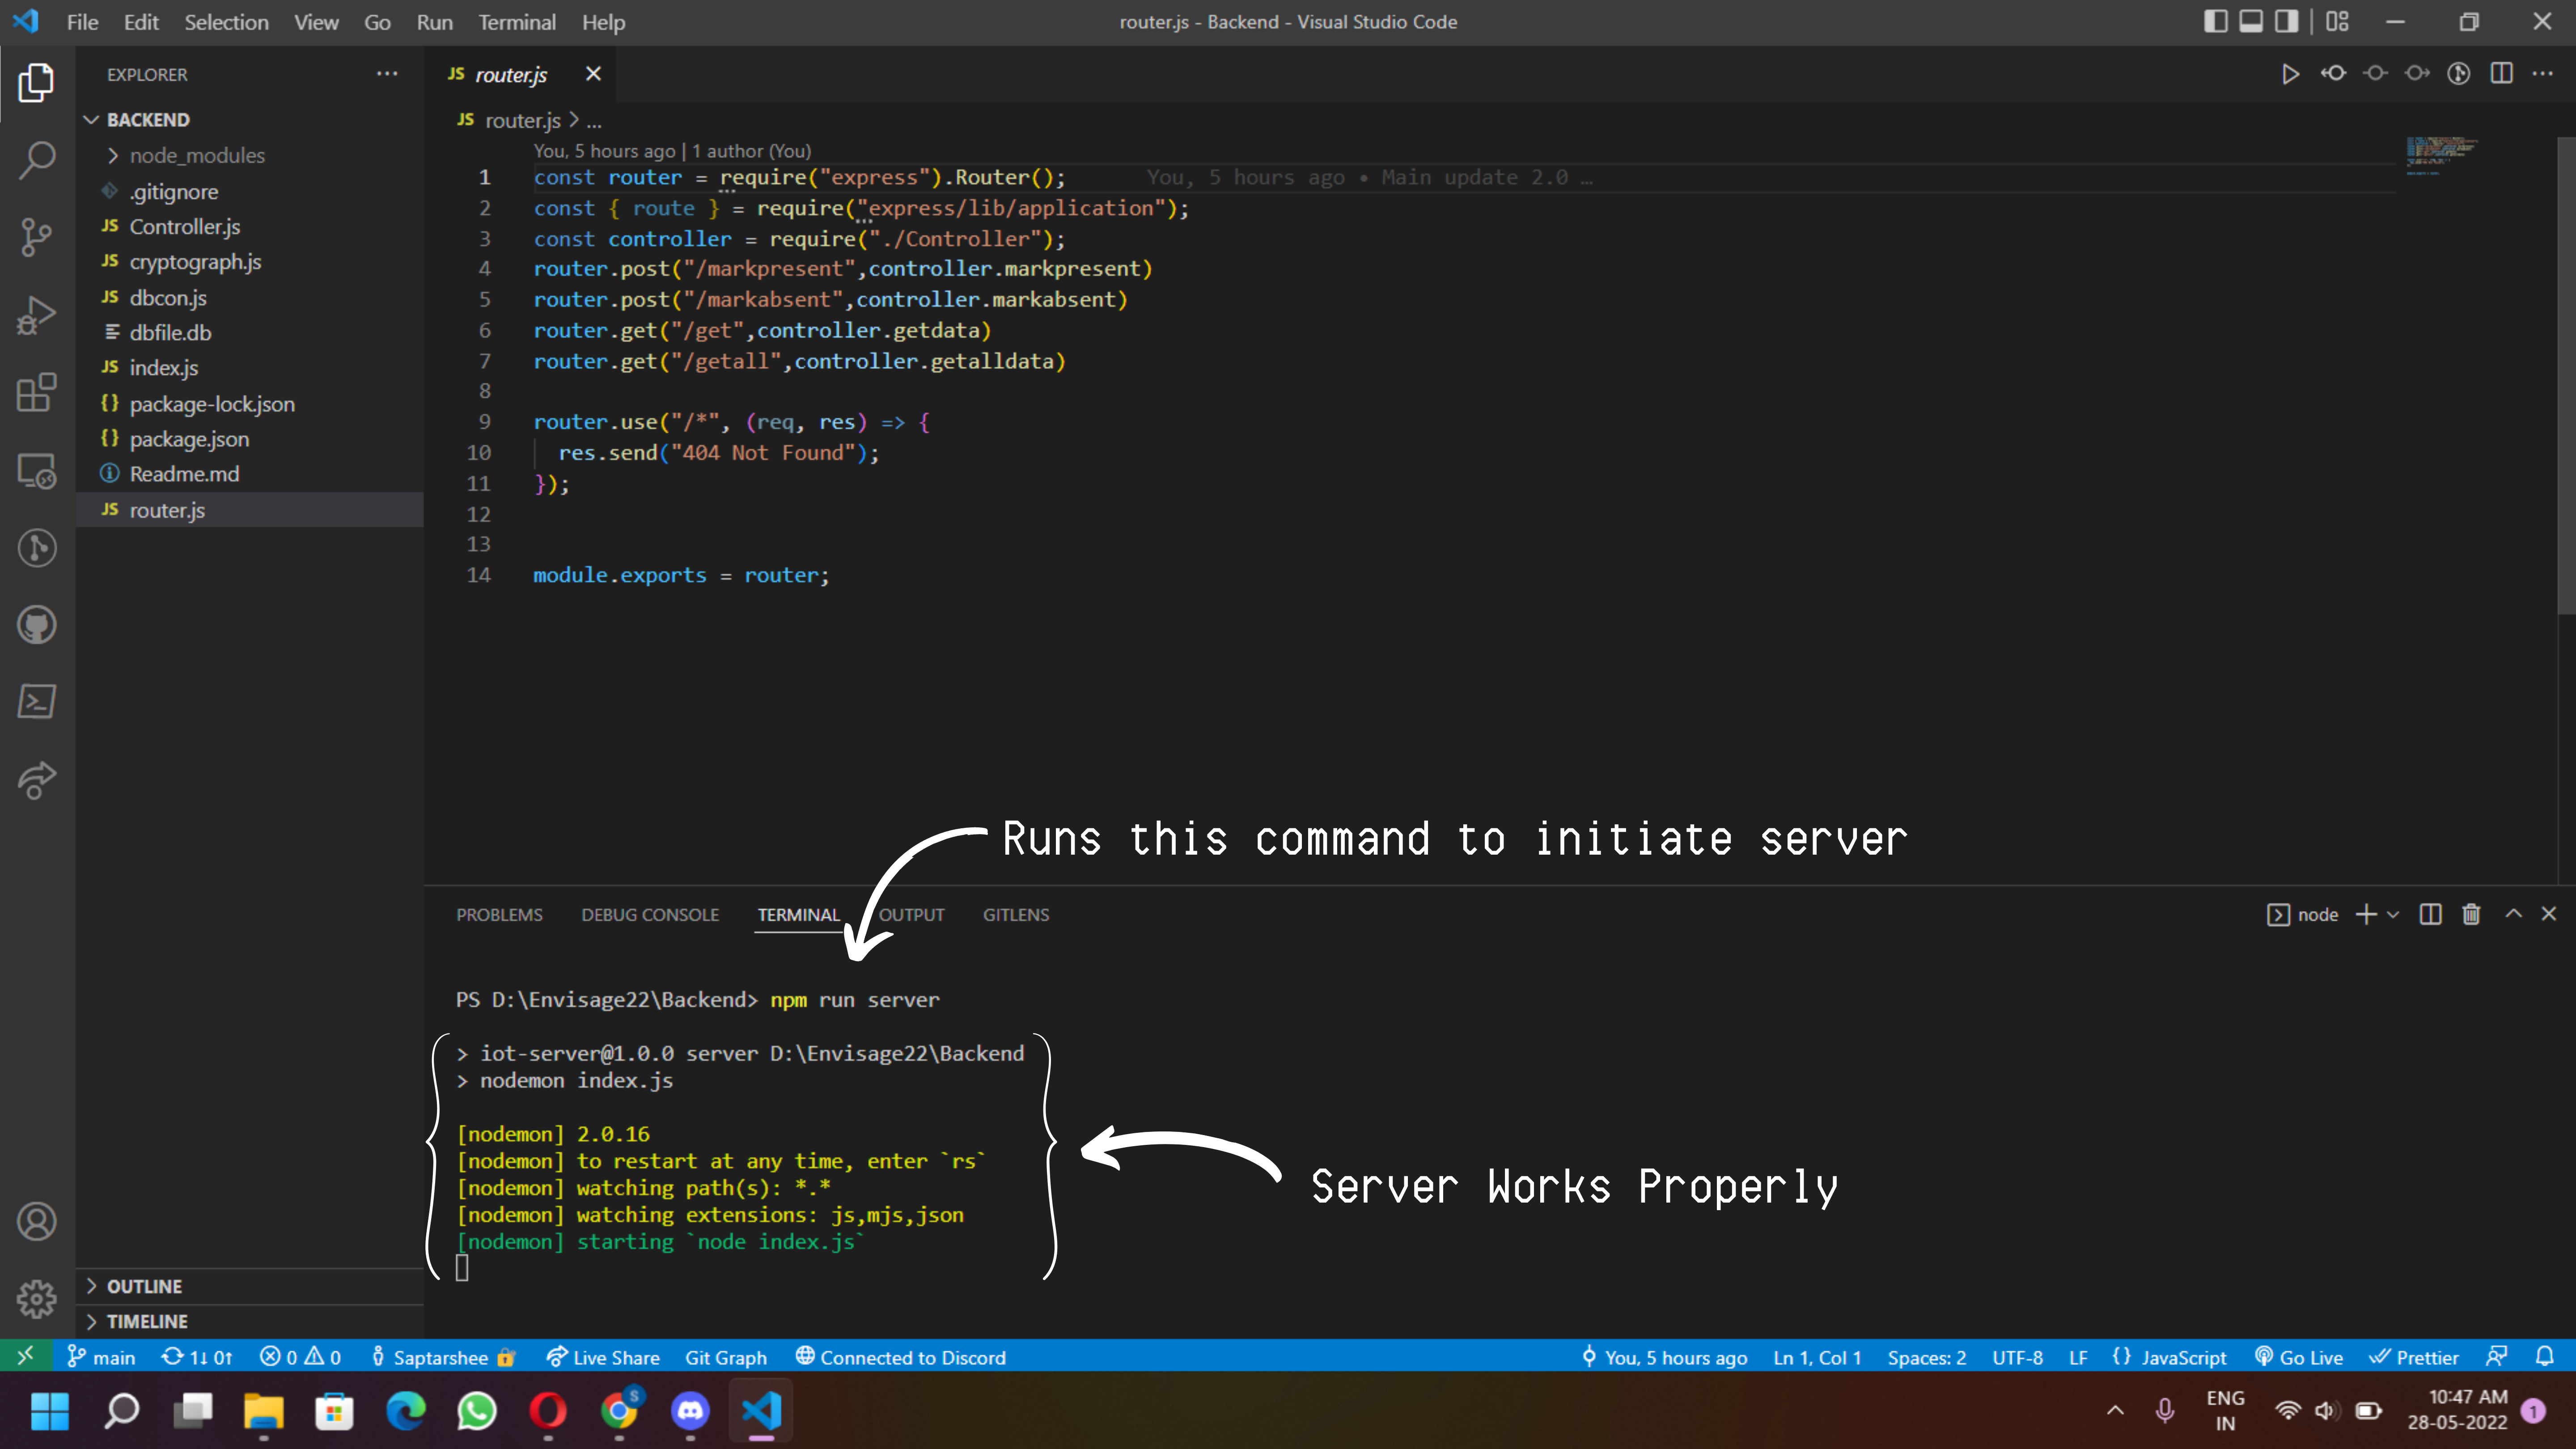
Node Server start
-

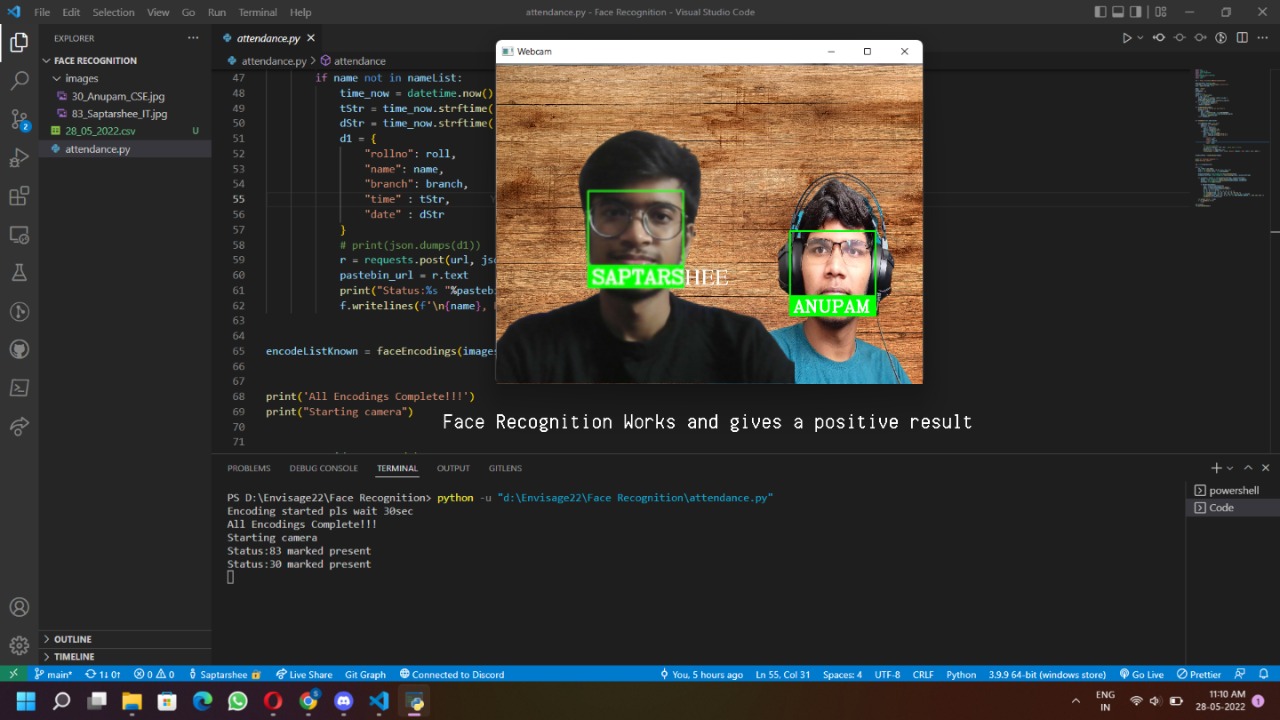
Face Recognition working
-
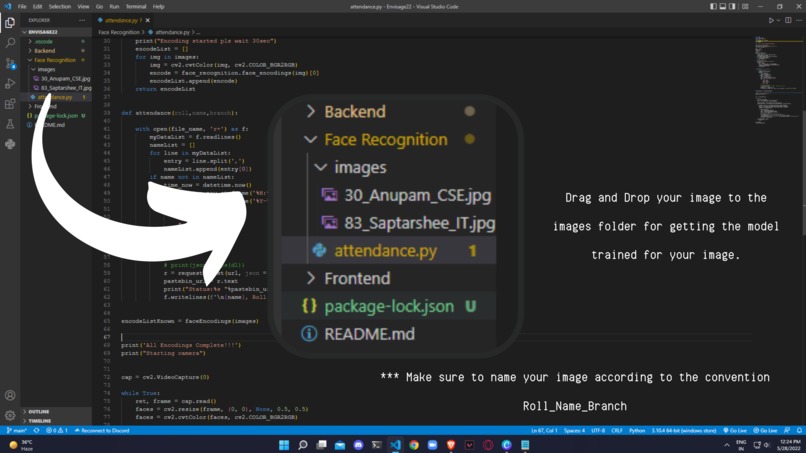
Add Students
-

Attendance Details
Hands-free Attendance System
EVG IDs:
- Vinit Agarwal: 22EVGVZR226433
- Achyut Vardhan: 22EVGEVV570567
- Anupam Moharana: 22EVG2YZ480746
- Saptarshee Mitra: 22EVGPKB426094 (Leader)
For better readme view please open our github repo

Description :point_left:
This system was created to provide a simple and secure method of recording attendance. The software initially takes a picture of all of the authorised people and stores it in a database. The image is then stored by mapping it into a face coordinate structure by the system. Whenever a registered person enters the premises, the system recognises him and records his time and attendance.
Credentials for frontend login page
Username: admin Password: admin
Prerequisites
- [x] Node.js 14 or later - install from https://nodejs.org/
- [x] Python 3.x or later - install from https://www.python.org/
Installing python packages:
- Open the Terminal (Linux & MacOS) or PowerShell (Windows)
- Type "pip install numpy" after it gets installed.
- Type "pip install opencv-python" after it gets installed.
- Type "pip install requests" after it gets installed. #### Installing Face_Recognition module
- Type "pip install cmake" after it gets installed.
- Type "pip install dlib" after it gets installed.
- Type "pip install face_recognition" after it gets installed.
- Now if all the modules got installed correctly attendance.py should run correctly.
Installing packages:
- Download the repository
git clone https://github.com/saptarsheemitra/Envisage22.git - Open the Terminal (Linux & MacOS) or PowerShell (Windows) and change directory to the project folder.
- Type ‘npm install’ in the Terminal (PowerShell) and press Enter. All the dependencies would be installed.
- Now make sure you are in backend folder. To open the application, type ‘npm run server’ and press Enter in the terminal.
- The application should be live on the local port 8080.
- Now go to face recognition folder and open attendance.py. #### **If all the packages got installed currectly the program should run without any problem.
How to use it :book:
Node Server
Open terminal in VS Code then type "npm run server". This should start your node server if you have installed all the packages

Face Detection working
Open Face Recognition folder then open attendance.py and run the file.

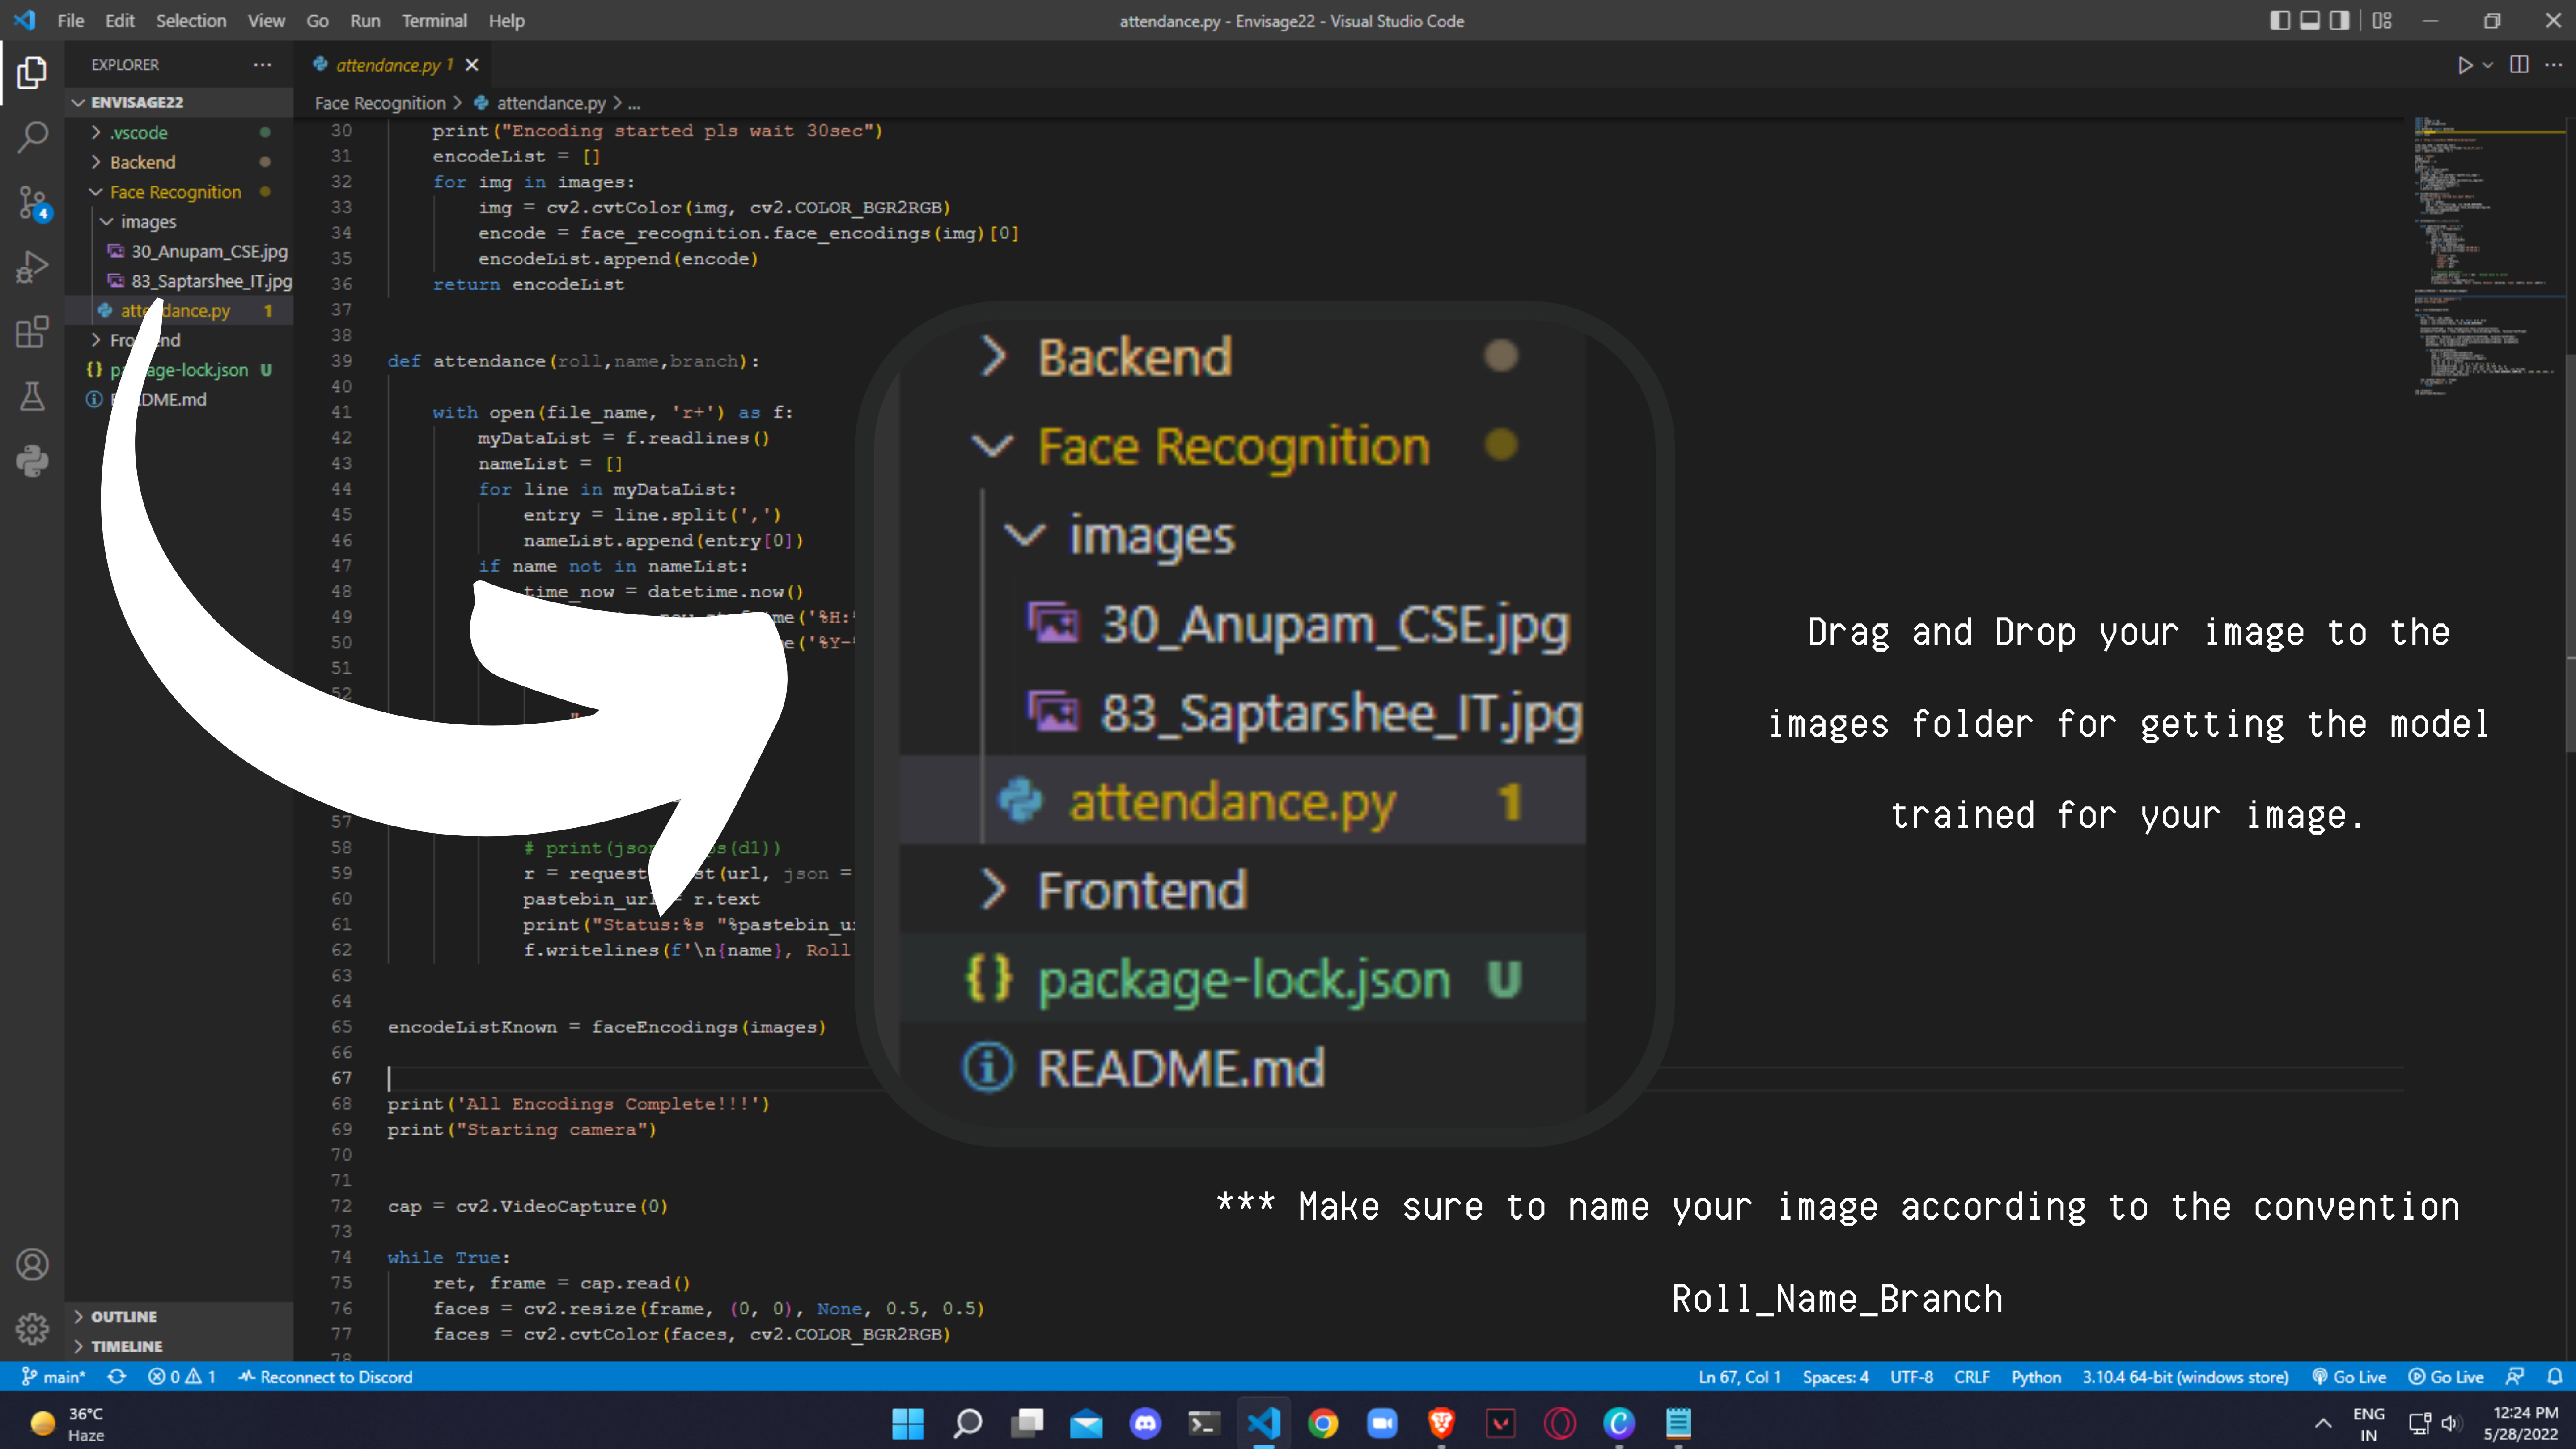
How to add new students
To add a new student copy the picture of the student into the image folder with this convention "Roll_Name_branch.jpg"

How to access frontend
Open Frontend folder then oprn index.html. Now a login page should popup.

Login Page
Username: admin Password: admin Now enter Username & Password to proceed to the attendace details.

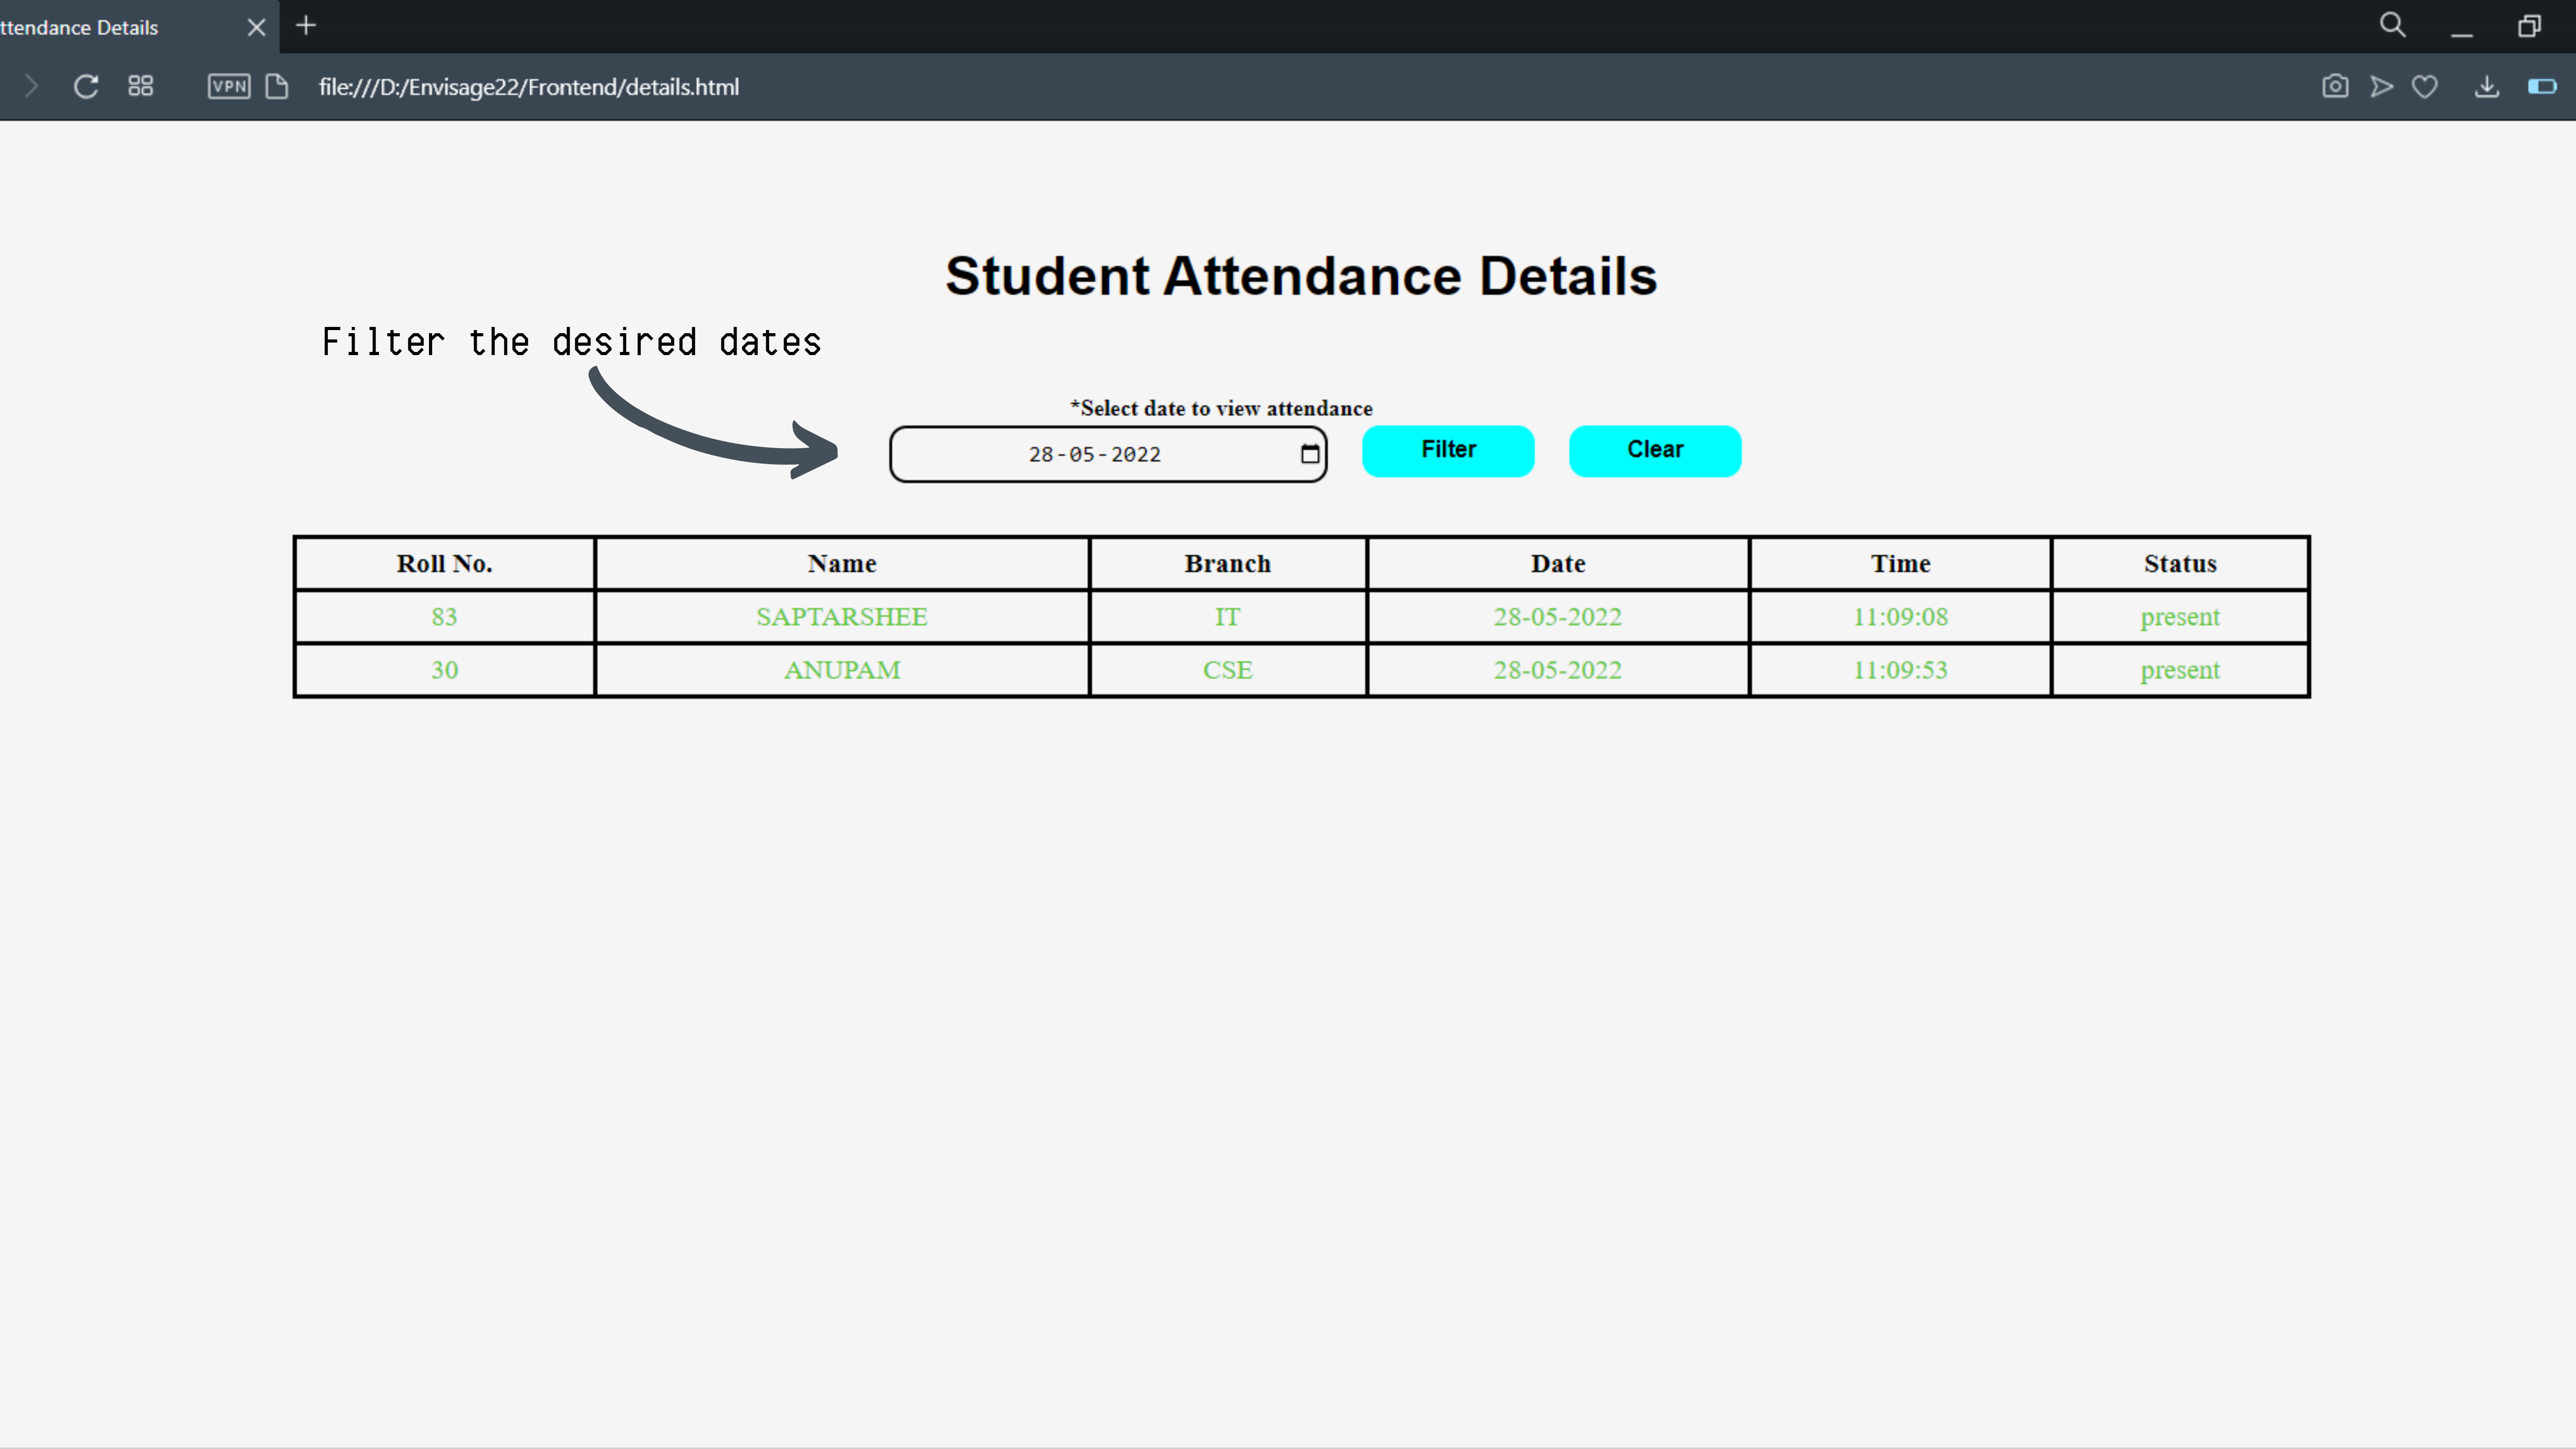
Student Attendance Details page
Now to view student attendance details select a valid date and press filter.

Technologies Used
Backend

Frontend

Database

Training models

License
You must not reproduce and distribute copies of the work or derivative works thereof in any medium, with or without modifications, and in Source or Object form.
Team Members
- Saptarshee Mitra: saptarshee08@gmail.com
- Anupam Moharana: anupam205@outlook.com
- Vinit Agarwal: vinitagarwal.garg@gmail.com
- Achyut Vardhan: achyutvardhan234@gmail.com

Log in or sign up for Devpost to join the conversation.