-
-

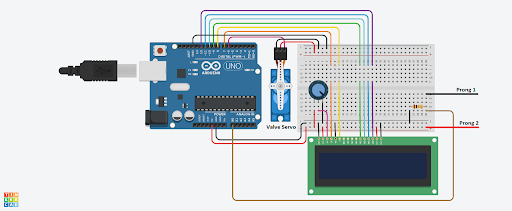
Circuit Board
-

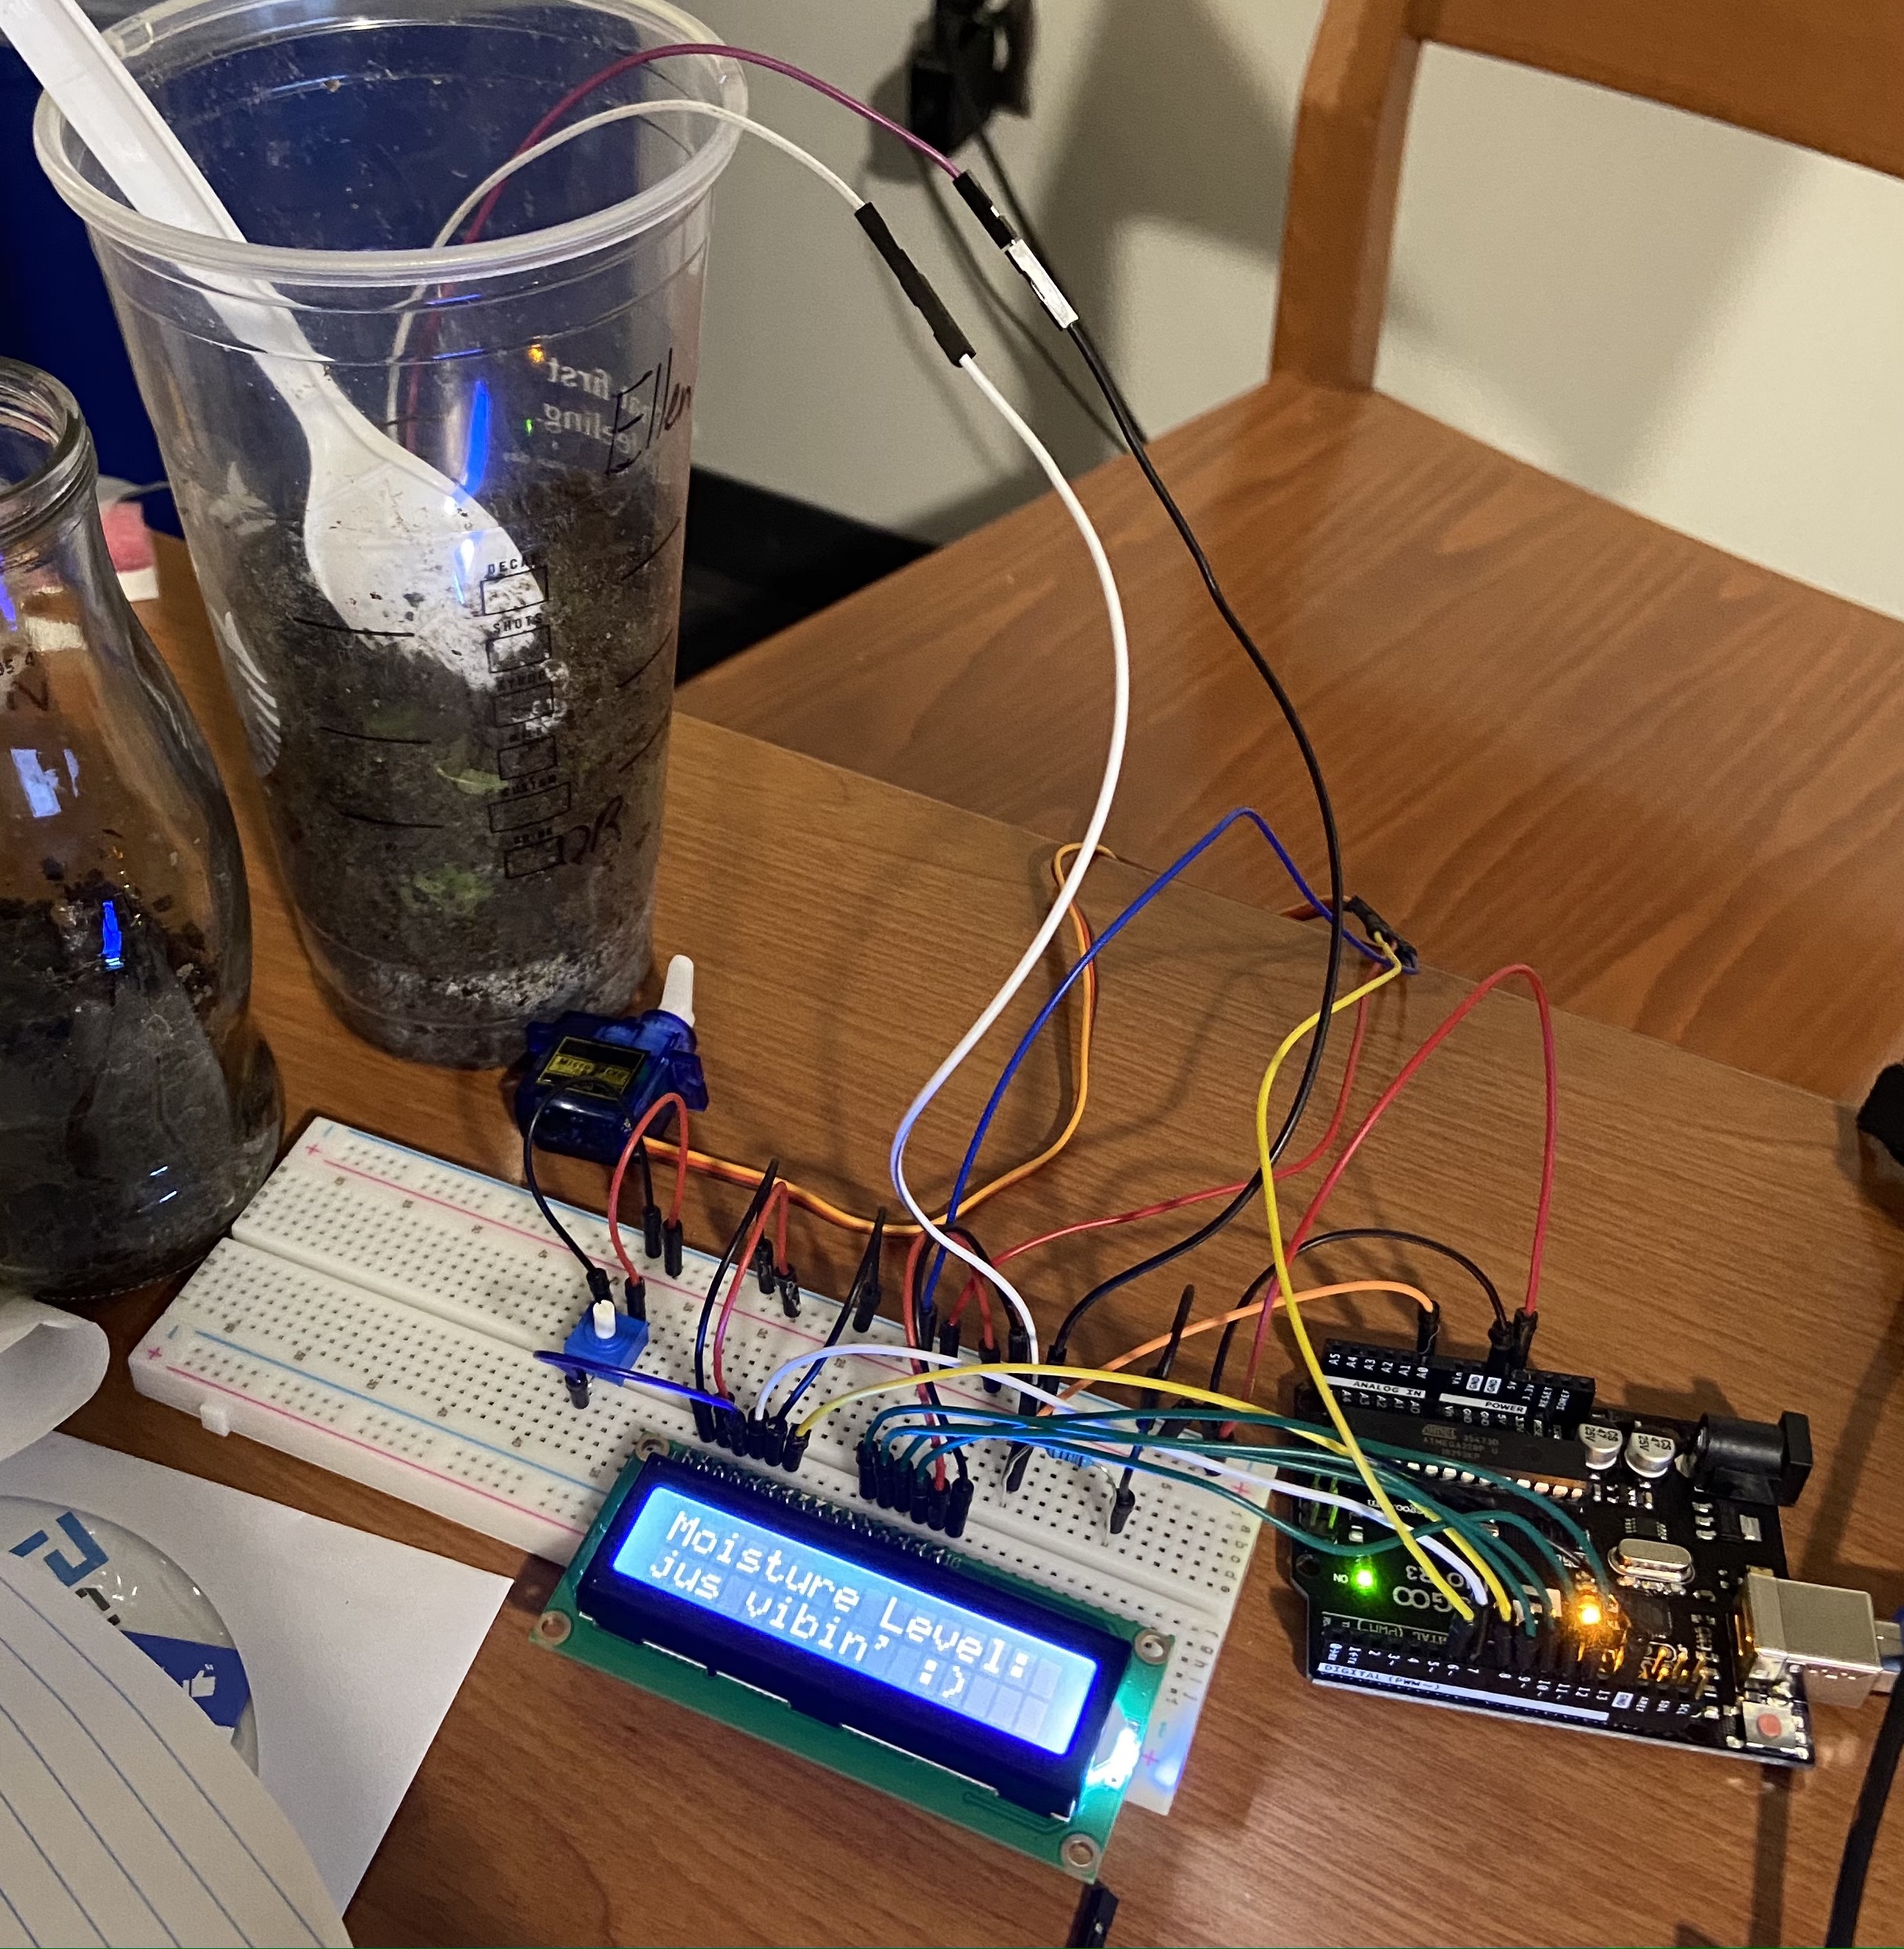
Physical Circuit Board
-
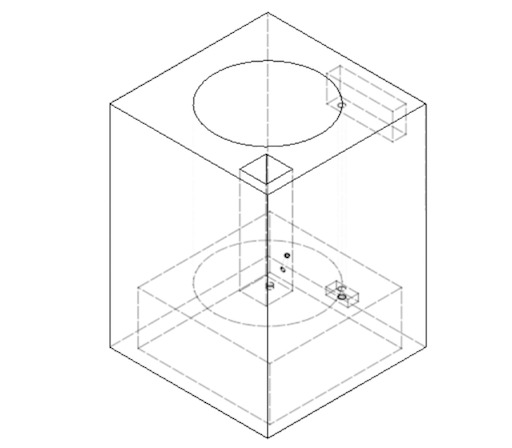
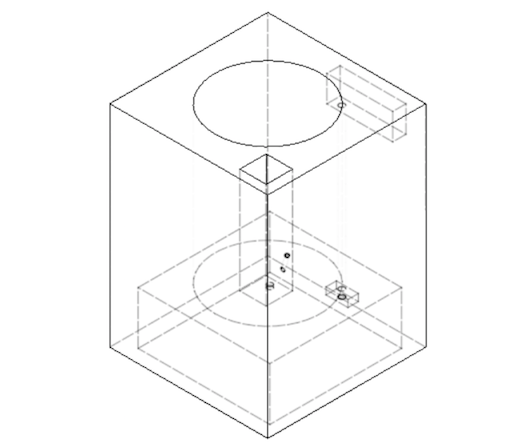
Wire Frame of Plant Watering Box
-
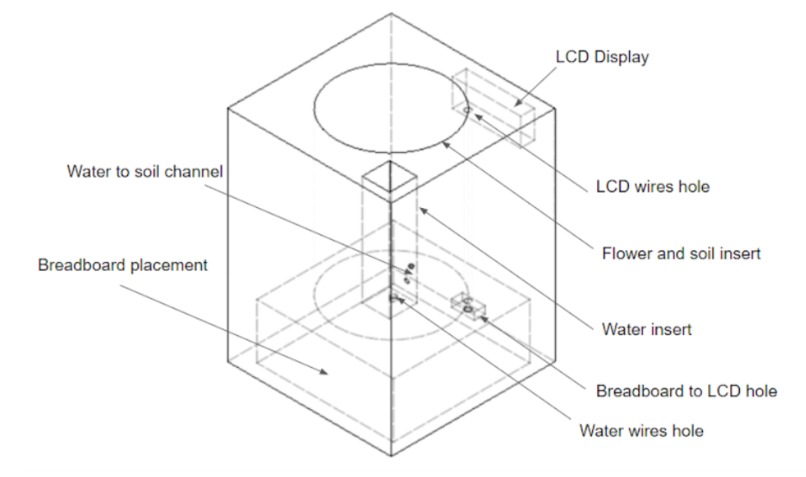
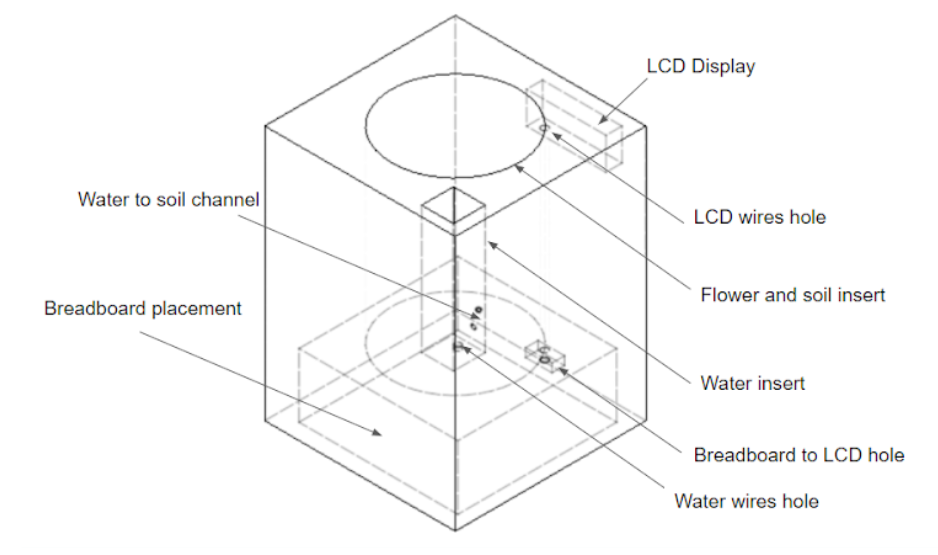
Labelled Wire Frame of Plant Watering Box
-
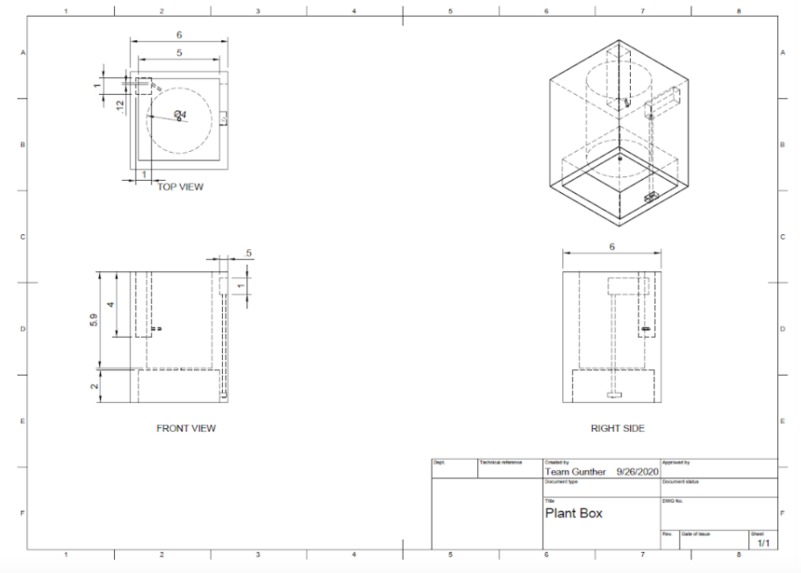
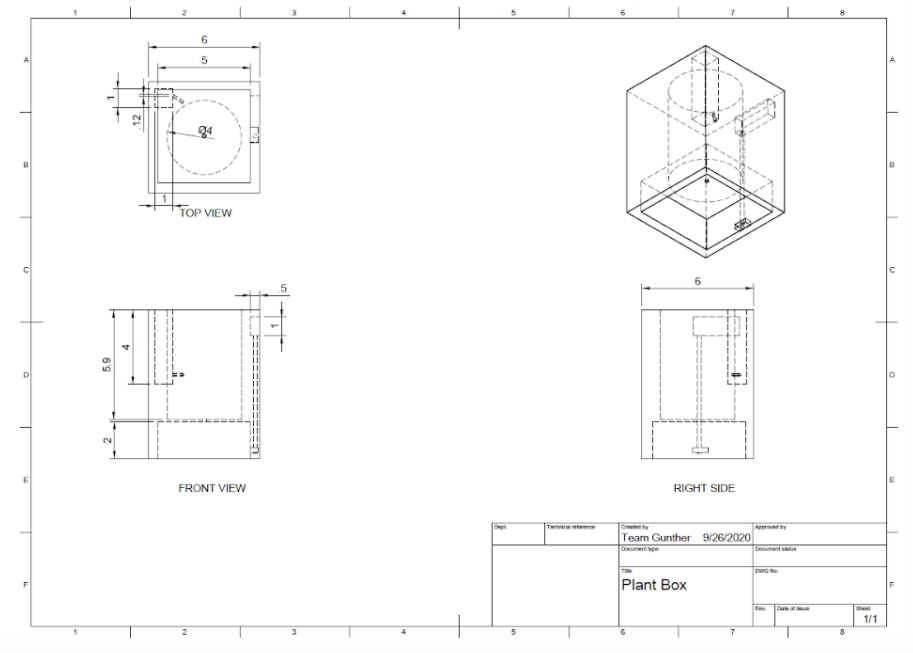
Blueprint of Plant Watering Box
-
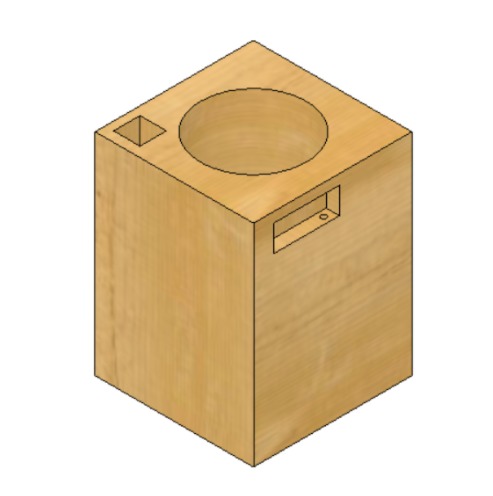
Solid Plant Watering Box

Inspiration
Our team wanted to address the social challenge presented by our community member who wanted to find a hands free way to water her orchid plant, Gunther. We wanted to deliver the optimal amount of water house plants need at any given time throughout the day. The soil moisture sensors are based on a project called DIY Plant Moisture Sensors found on the Arduino project hub!
What it does
Gunther addresses the social challenge by programming a circuit board using Arduino to detect moisture levels in a plant and then display the plant’s current moisture state on a connected display board. We also designed a plant box to act as a vessel for the circuit board which has a container for water and a container for the plant. When the probes that are connected to the plant detect low levels of moisture, this event signals the opening of the water valve, which releases water into the container holding the plant, thus waters the plant without the user input.
How we built it
Our team programmed an Elegoo Arduino UNO R3 to sense moisture levels in the soil of an Orchid potted plant, display on an LCD the level of moisture it currently contains, and open/close a “valve” servo based on the moisture level to release water based on its needs.
The moisture sensor was implemented using two “prongs” created by stripping two jumper wires to create bigger conduction surfaces. Prong 1 was connected to the 5V power supply and prong 2 to an analog input pin A0 on the Arduino. We read prong 2’s voltage reading using the Arduino function analogread(), which we set as int variable “WetVal.” We based the moisture level of the soil based on the conductivity of the soil. The “WetVal” value for maximum moisture saturation was determined experimentally by adding water until it barely started pooling at the bottom of the pot. This maximum “WetVal” value was measured to be approximately 375, which is about 1.83 volts.
Based on our research, optimal soil moisture content for orchids is approximately 50%-70%, so we created conditional if loops for the Arduino to react to different moisture levels, with “WetVal”=375 being 100% saturation. We used comparative operators to separate LCD output conditions. In total, there are 4 “WetVal” thresholds and 5 moisture level “states” the soil could be in. The thresholds were 25%, 50%, 75%, and 100% moisture. Conditional if loops were used to tell the LCD what to display based on which moisture level the sensors read. The if loops also adjust the servo's position. If the moisture level is <50%, the servo is set to an open (0 degree) position, but if the moisture level is >50%, it is set to close (90 degree). The servo is meant to control a panel that opens and closes a pipe that streams water from the tank to the soil if the soil is too dry.
We will insert the circuit board onto the bottom of the plant box we created using Autodesk Fusion 360. The plant box consists of one large structure with hollow tunnels that act as channels for the wires from the circuit board, to the plant and wires from the circuit board to the water. The design of the plant box also consists of smaller parts that act as lids to conceal the circuit boards, wires, and probes from the general user.
Challenges we ran into
This was our first hackathon as a team and we all had varying levels of experience.
Accomplishments that we're proud of
We were able to build a working moisture detector to give it some personality using an LCD display.
What we learned
We learned how to program a circuit board using Arduino and use Autodesk Fusion 360 to design an intricate plant box model with inner channels.
What's next for Gunther
We hope to create a physical plant box based on the Autodesk Fusion 360 wireframes and assemble the product to produce a working model. Having the plant box work with other plants that have varying optimal moisture levels is also a future idea we have for Gunther!


Log in or sign up for Devpost to join the conversation.