Inspiration
With the advancement of AI today, fighting robots in the virtual world could be a good idea to create a video game that allows different combat mechanisms. For example, shooting robots while they chase you through the scene.
What it does
By using the controls, the user activates the event trigger by taking a cube that appears by default. This will cause a key to appear that allows you to open doors. To survive in the scene, you must avoid the robots that chase you.
How we built it
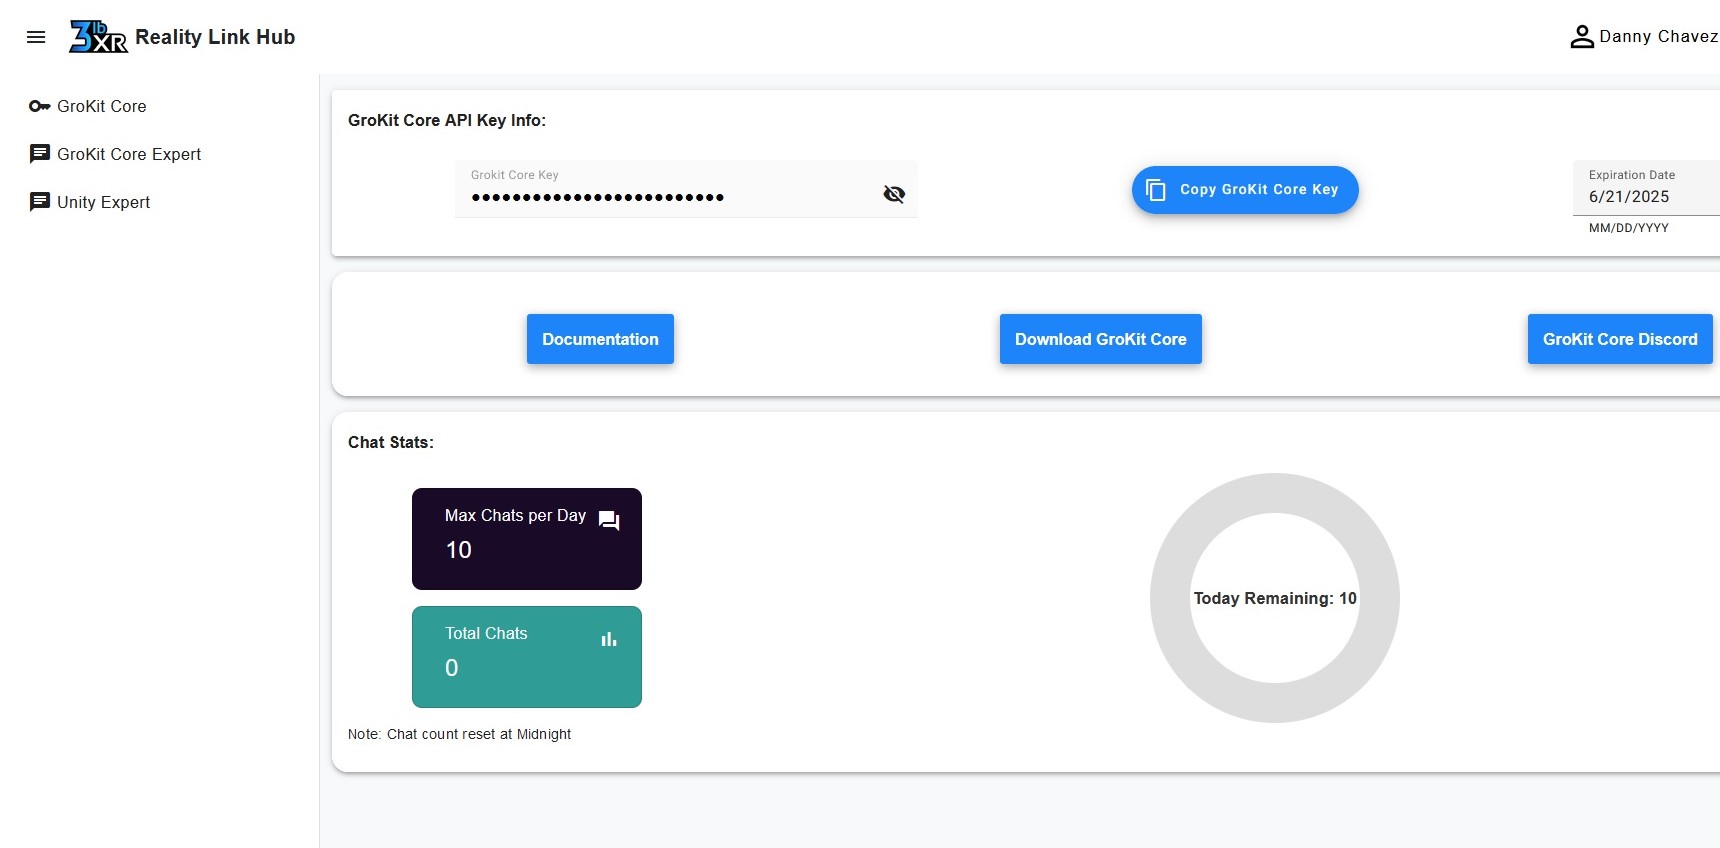
You need to create an account to have access to the beta version of Grokit (https://3lbxr.com/grokit-core/). After you have created the account, you need to log in to obtain the Grokit Core Key that will later be used within your Unity project.
Open Unity Hub and create a new project with the name you want.
Then your Unity project must have the following packages that can be incorporated from the Package Manager within Unity. The requirements are: com.unity.render-pipelines.universal, com.unity.inputsystem and com.unity.editorcoroutines
Then within the Unity project, it is important to configure the environment to work with the meta quest glasses. So it will be necessary to add the Meta SDK called Meta XR All-in-One SDK (https://assetstore.unity.com/packages/tools/integration/meta-xr-all-in-one-sdk-269657). Version 71 is the one available
Then in the Project Setting section, we install the XR Plug-in Management. In our case it is OpenXR
To add Grokit Core to our Unity project we must go to the account that we have previously created where we obtained the Grokit Core Key. We click where it says Download Grokit Core and it will take us to a window in our browser (https://3lbxr.com/grokit-core/). This window is practically the welcome window for beta users. Here we have the option to download a pre-configured project or simply download the package. In our case we download the package so we click where it says** Download Grokit Core Unity Package.** Then, in our Unity work environment, we go to the Assets section, right click and select the option that says Import Package. Then we look for where we have downloaded the package and select the import option.
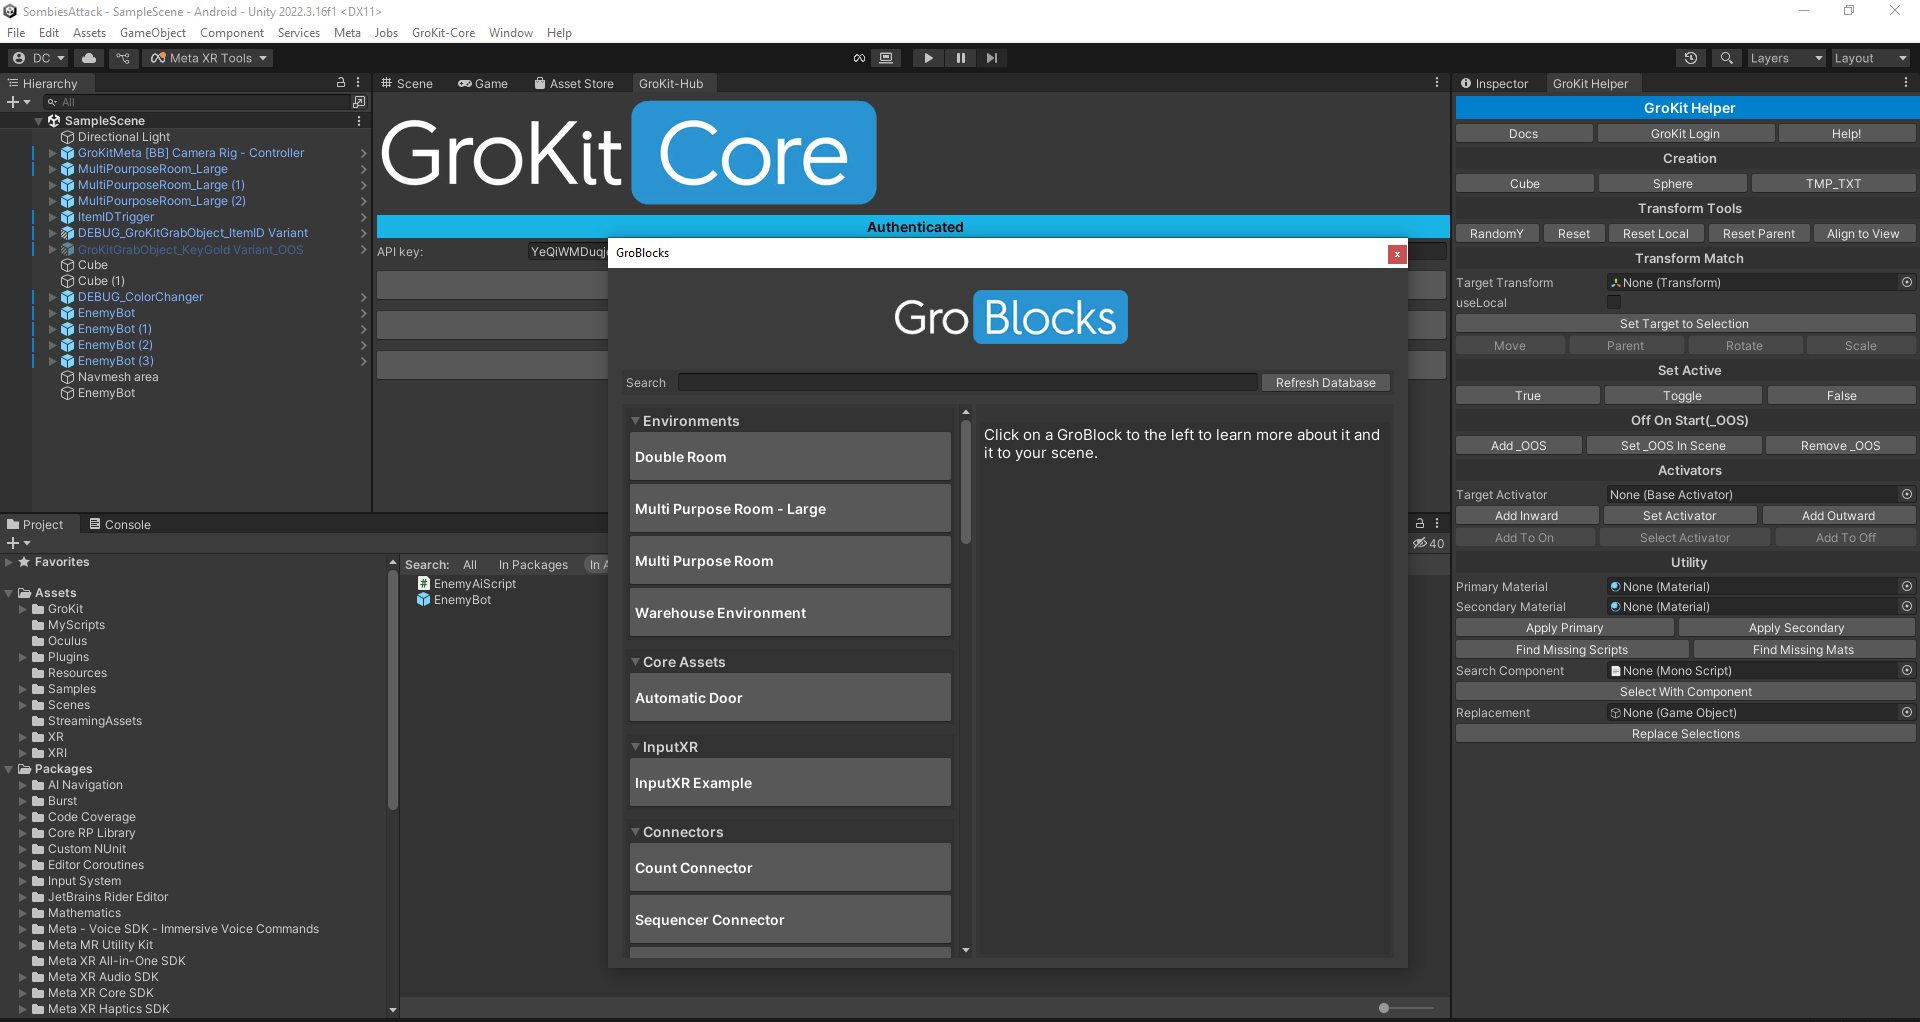
Then we will see in the top bar of our menu the option that says GroKit-Core next to the Window option. We select the option that says GroKit-Hub and where it says API key we paste the key that we previously have available within our Grokit. We select the option that says Authenticate to be able to have access to the GroKit modules.
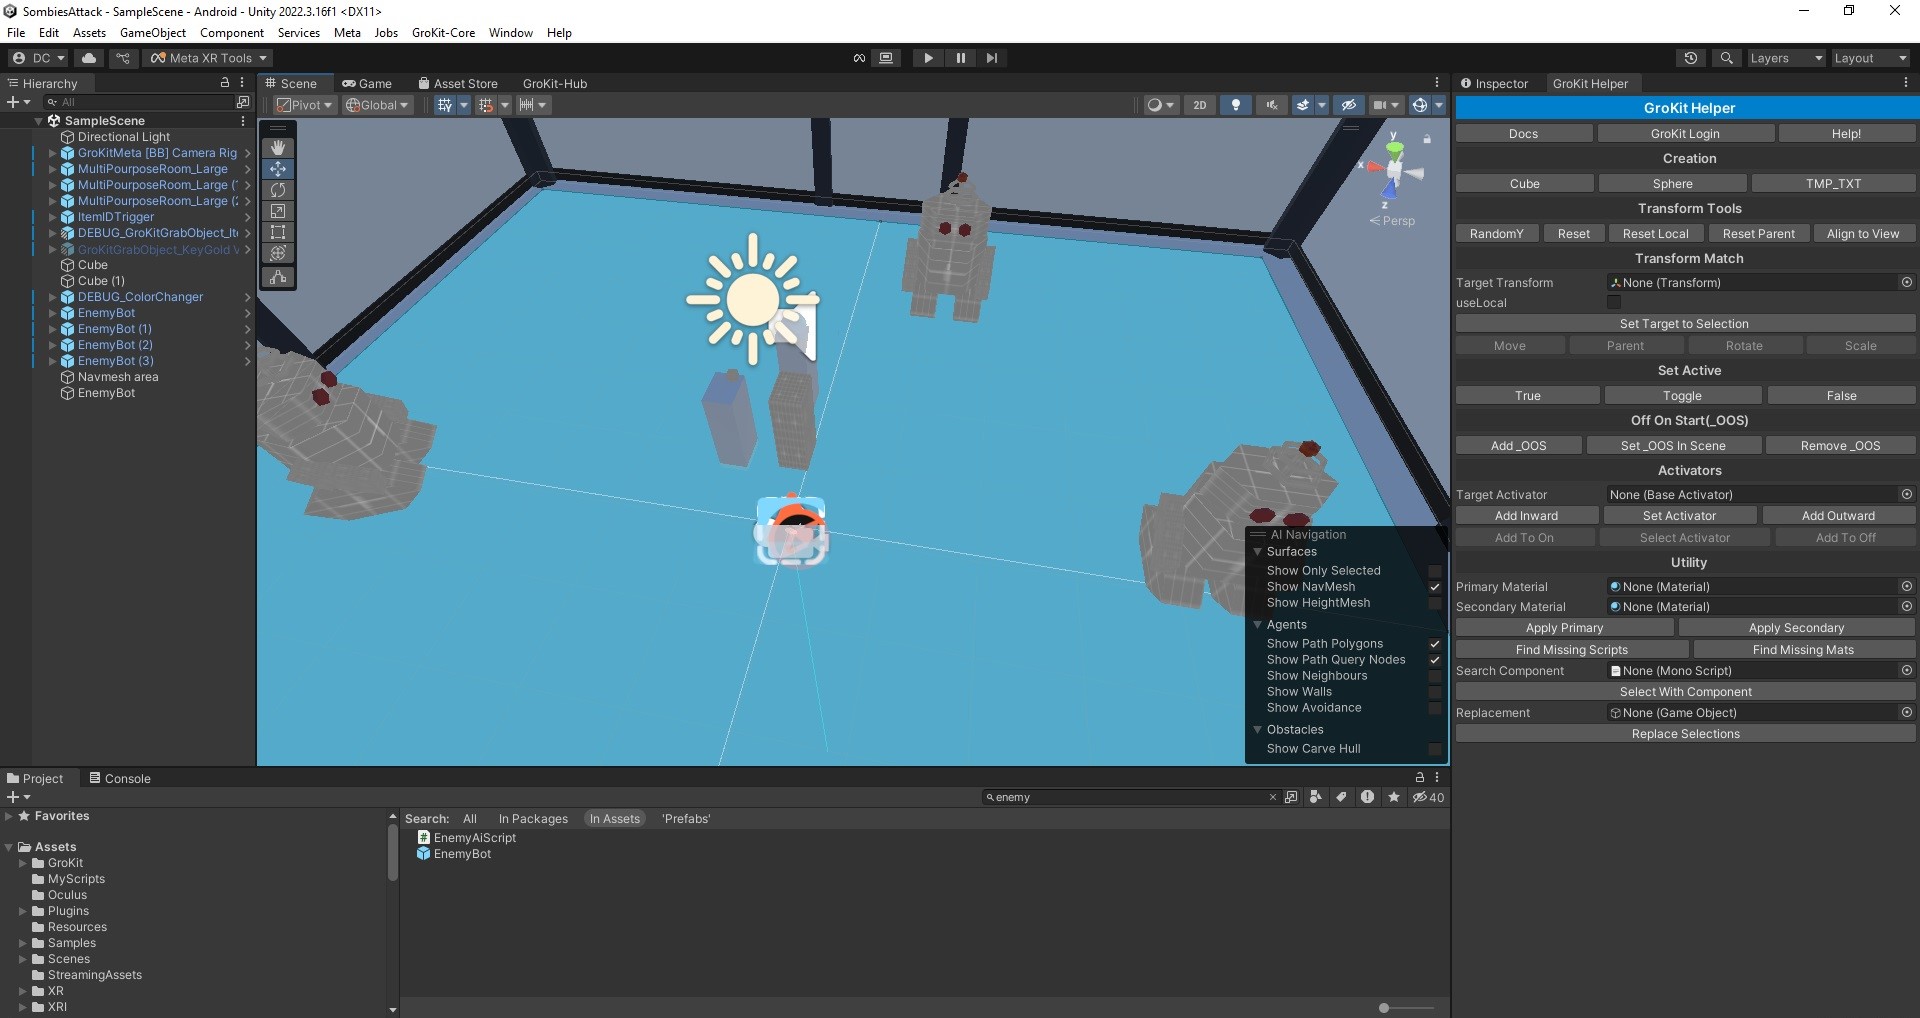
Once we are authenticated then we can choose the option that says GroBlocks. This window works similarly to the Meta Building Blocks window. In this window, you will find the blocks previously configured to simply add them to our Unity project scene. Among the blocks that were used in our case, we have:
GroKitMeta [BB] Camera Rig – Controller
MultiPourposeRoom_Large
ItemIDTrigger
DEBUG_GroKitGrabObject_ItemID Variant
DEBUG_ColorChanger
Challenges we ran into
To make the enemies follow the user, we tried to implement NavMesh in such a way that there is an AI and in that way create the kind of tracking. This implementation was done by programming a certain script. However, it seems that there is already a NavMesh type module that should be studied to learn more about its implementation and configuration mechanism.
Another error that I observed was if you try to add the native GroKit package without having previously installed the SDK within our Unity project, a message appears saying that the Entry-Points cannot be validated. Therefore, to resolve this error it is important to first install the Meta SDK and then proceed to import the Grokit package within the Unity project.
Regarding the API key, I found the error that sometimes when the user is already logged in, the modules in the GroBlocks window do not appear. In this case, we have the option to click where it says Refresh Database but the problem may persist. So another way I found to fix it was to close the Unity project and open it again. Then I checked if I was still authenticated and I saw that I wasn't. It was as if the connection had been lost so I had to log in again and then check if the modules appeared so they could be added to the Unity scene.
Another problem was when I added any prefabs from the Environments modules, the texture they had was purple. To solve this problem I had to change the Shader Graph and leave it as Standard.
Accomplishments that we're proud of
Create a small scenario using Grokit and its modules for virtual environments that can be run on Meta glasses
What we learned
Adding Grokit Core to a Unity Project Adding Grokit modules to a Unity scene Testing compatibility on different headsets such as Quest 2, Quest 3, and Pro Using the prefabs in the Grokit package to create a pre-built scene. This helps speed up the development process.
What's next for Grokit Invation
Redesign the entire scene Incorporate the option of Hand tracking and collider to grab objects Add the option of Teleporting either using the controls or the hands. Add VFX, sound, and a bit of UI design Redesign the game mechanics from scratch. This includes adding loading new scenes since Grokit has the option of moving from one scene to another scene It would be interesting to try an option within the game that is multiplayer and its configuration base has been through the Grokit modules

Log in or sign up for Devpost to join the conversation.