-
-

Rendered view from side
-
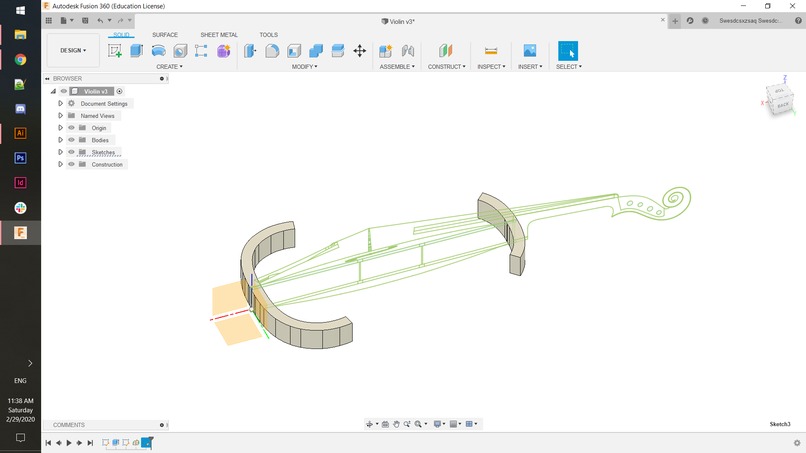
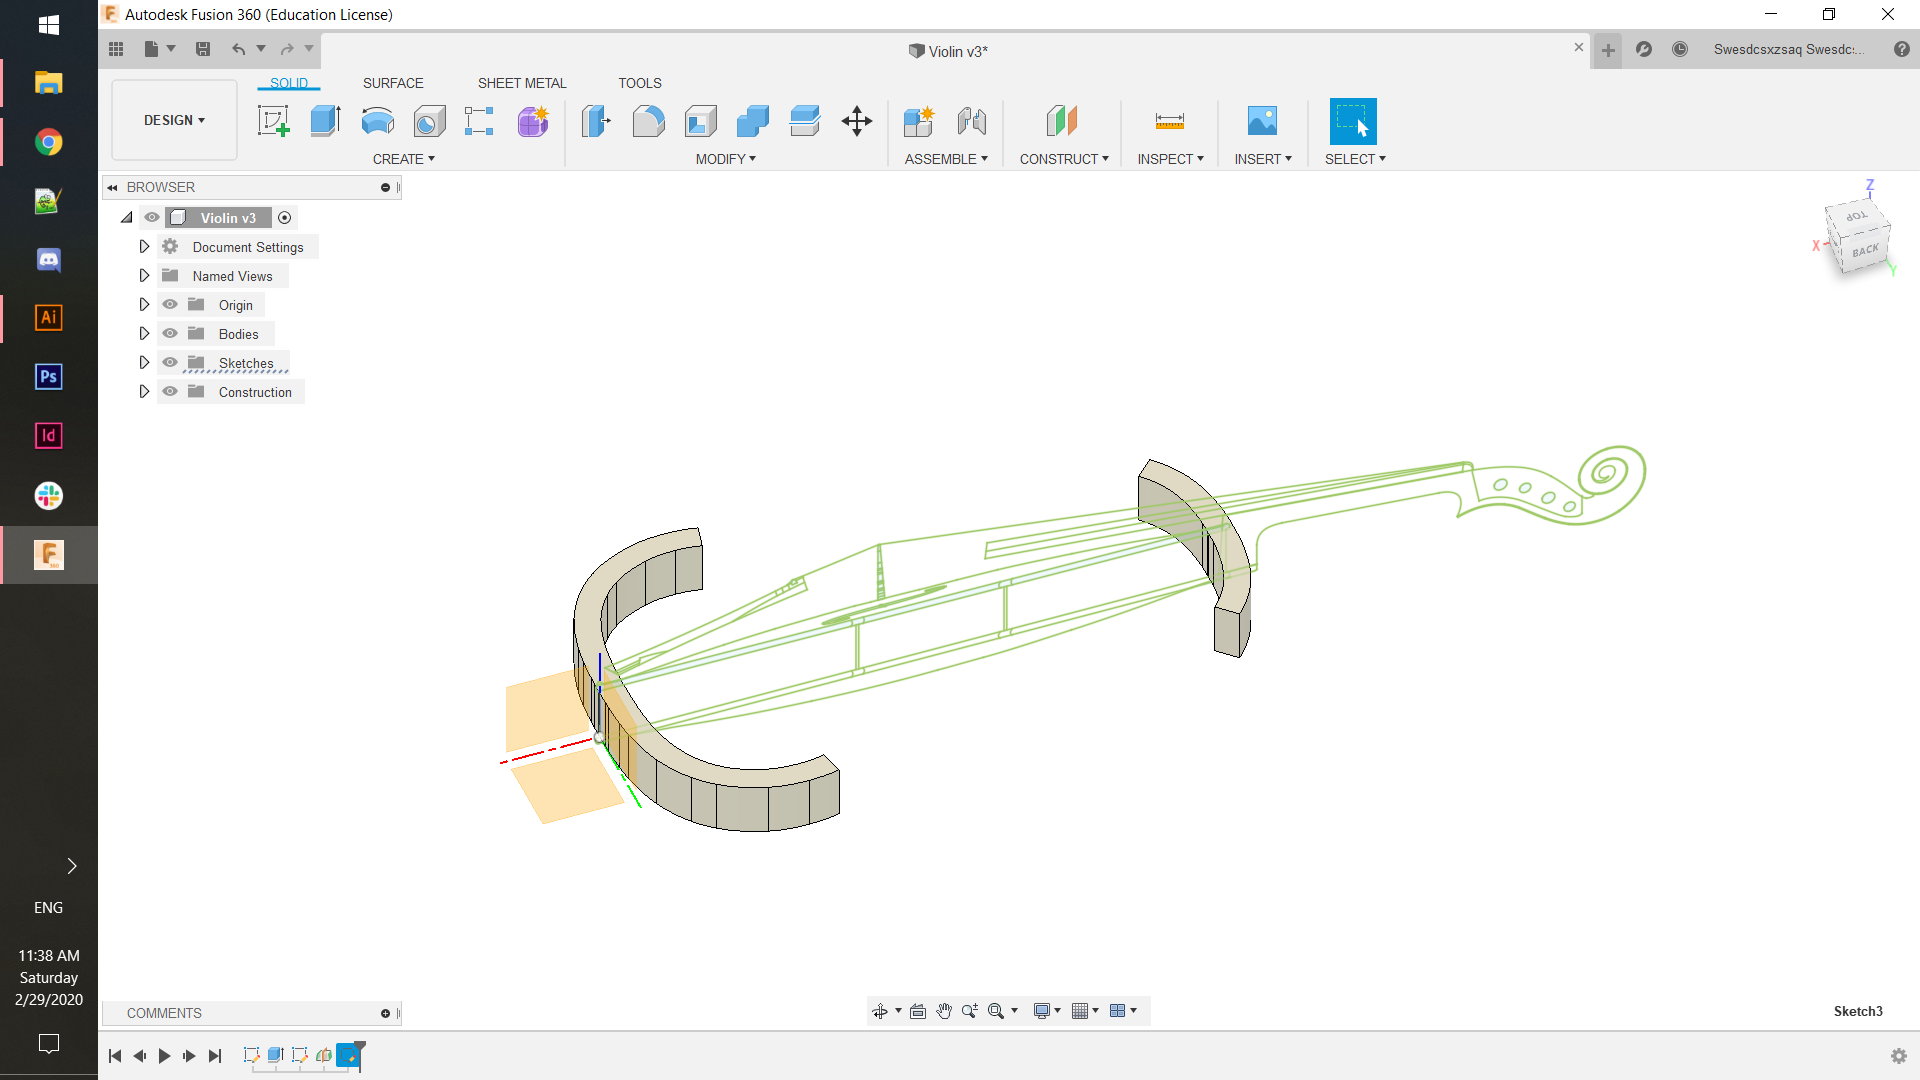
Initial sketches of the violin on two planes to serve as a guideline for the preserve geometry
-
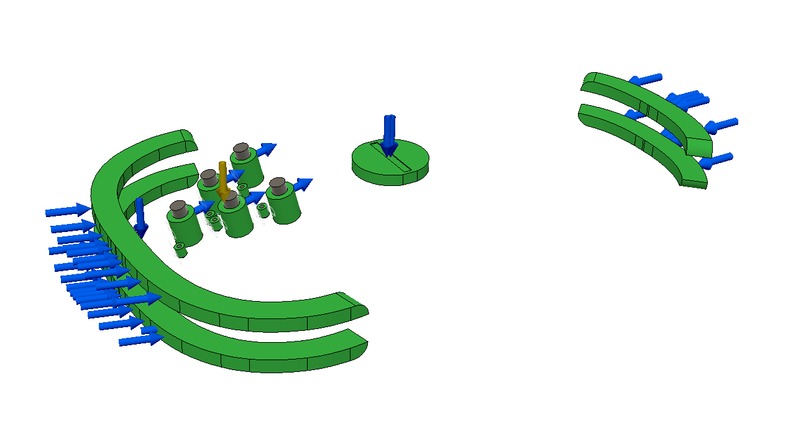
All the preserve geometry (what is kept), load cases, and constraints are shown.
-
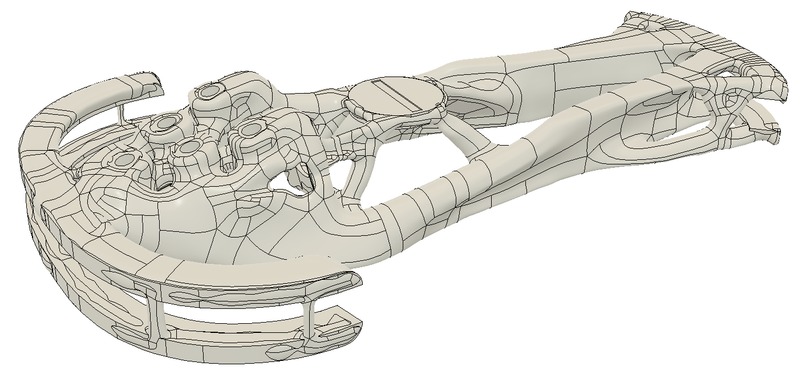
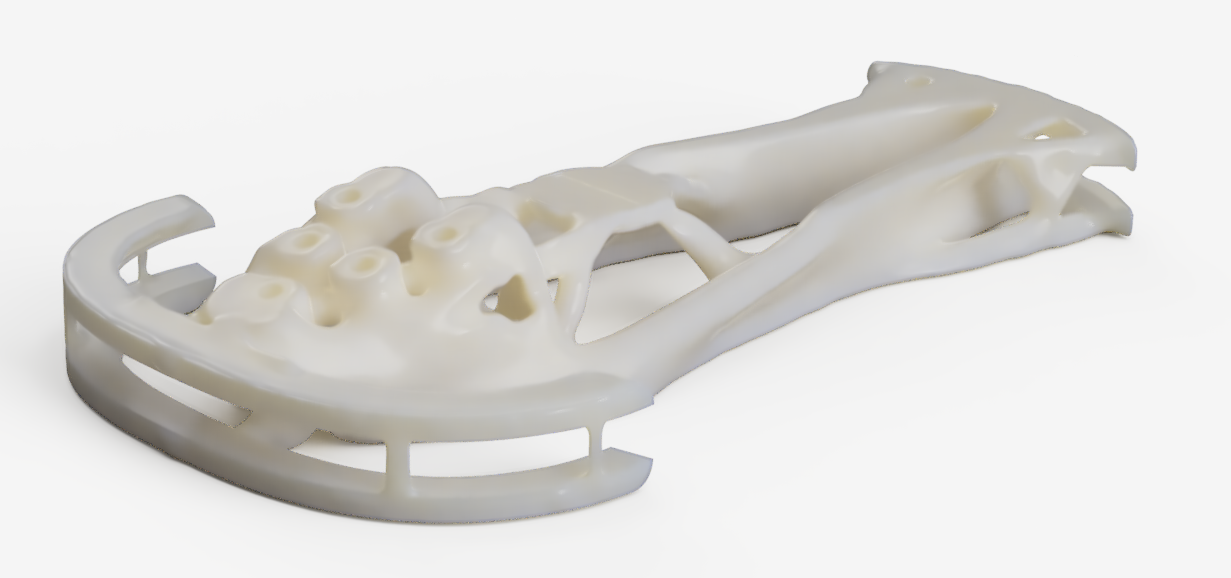
This iteration was selected out of six different outcomes that averaged about 20 iterations each. Here it is in mesh view.
-

Same shape but in solid body view.
-
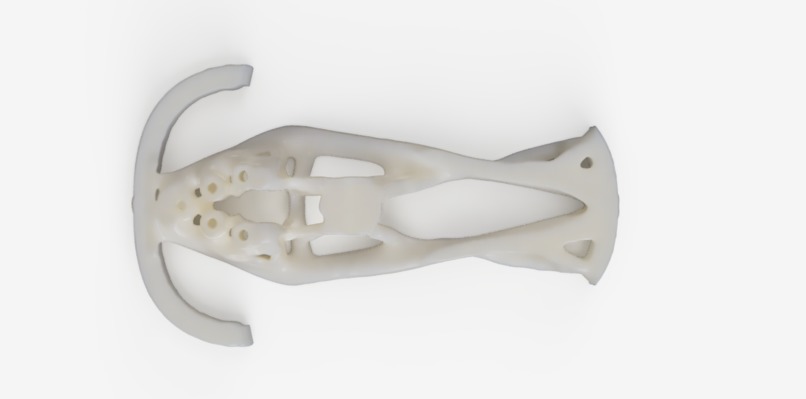
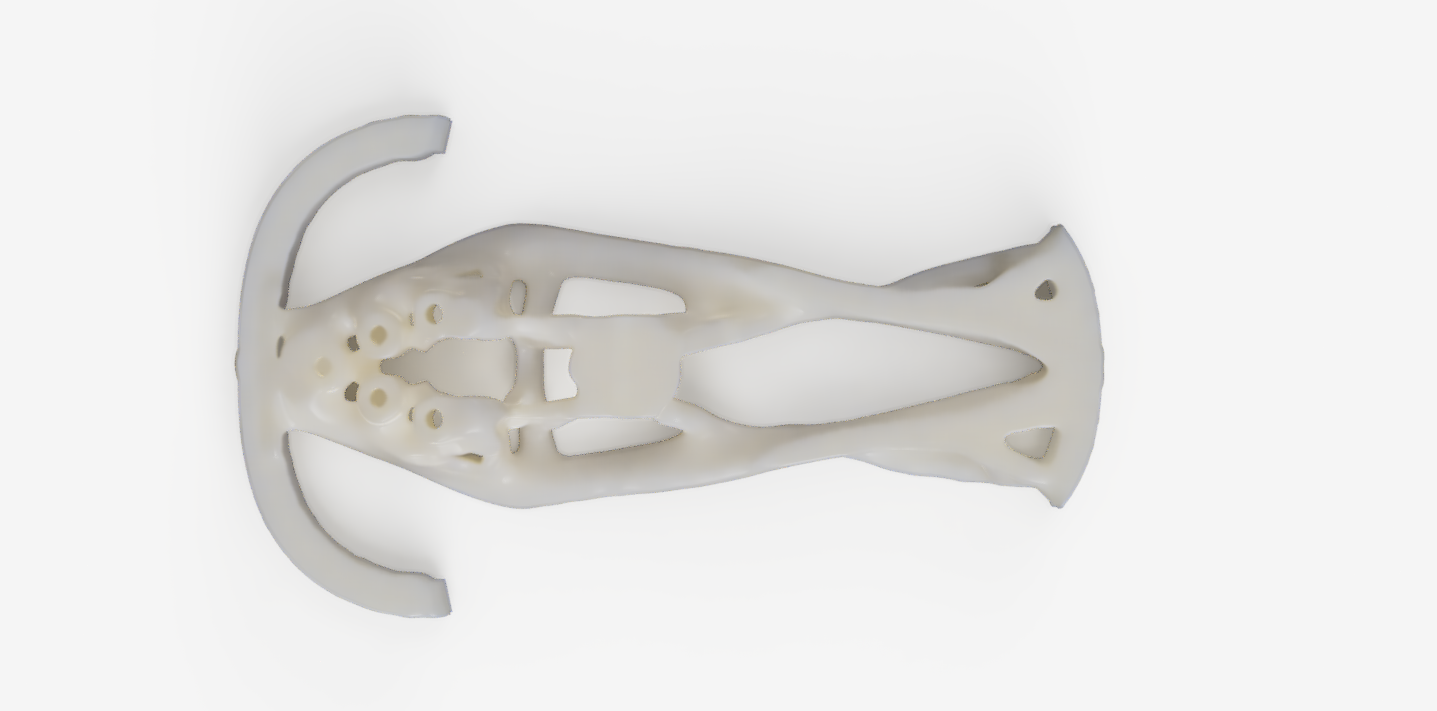
Rendered view from top
-

An example of the raw material of the violin neck ordered off of AliExpress
-
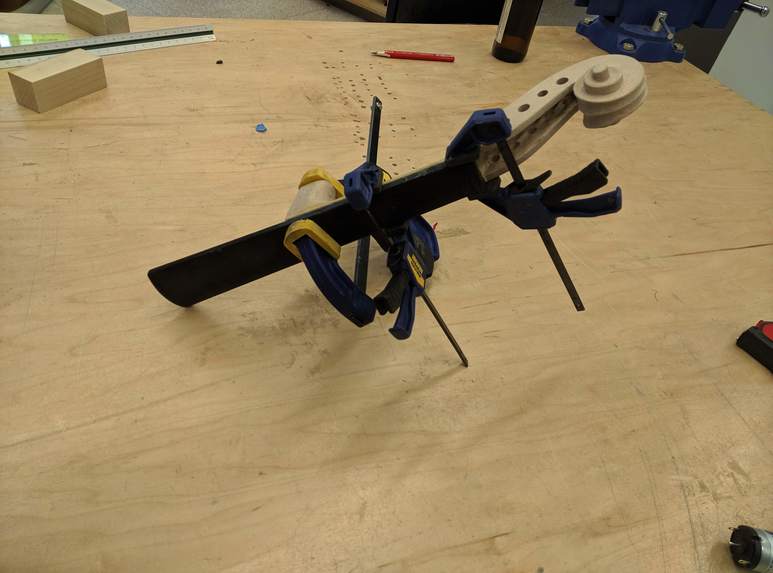
Neck of the violin being glued together
-

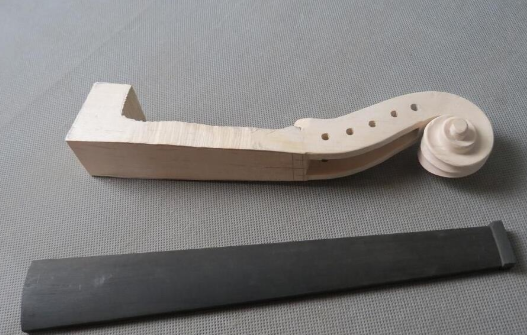
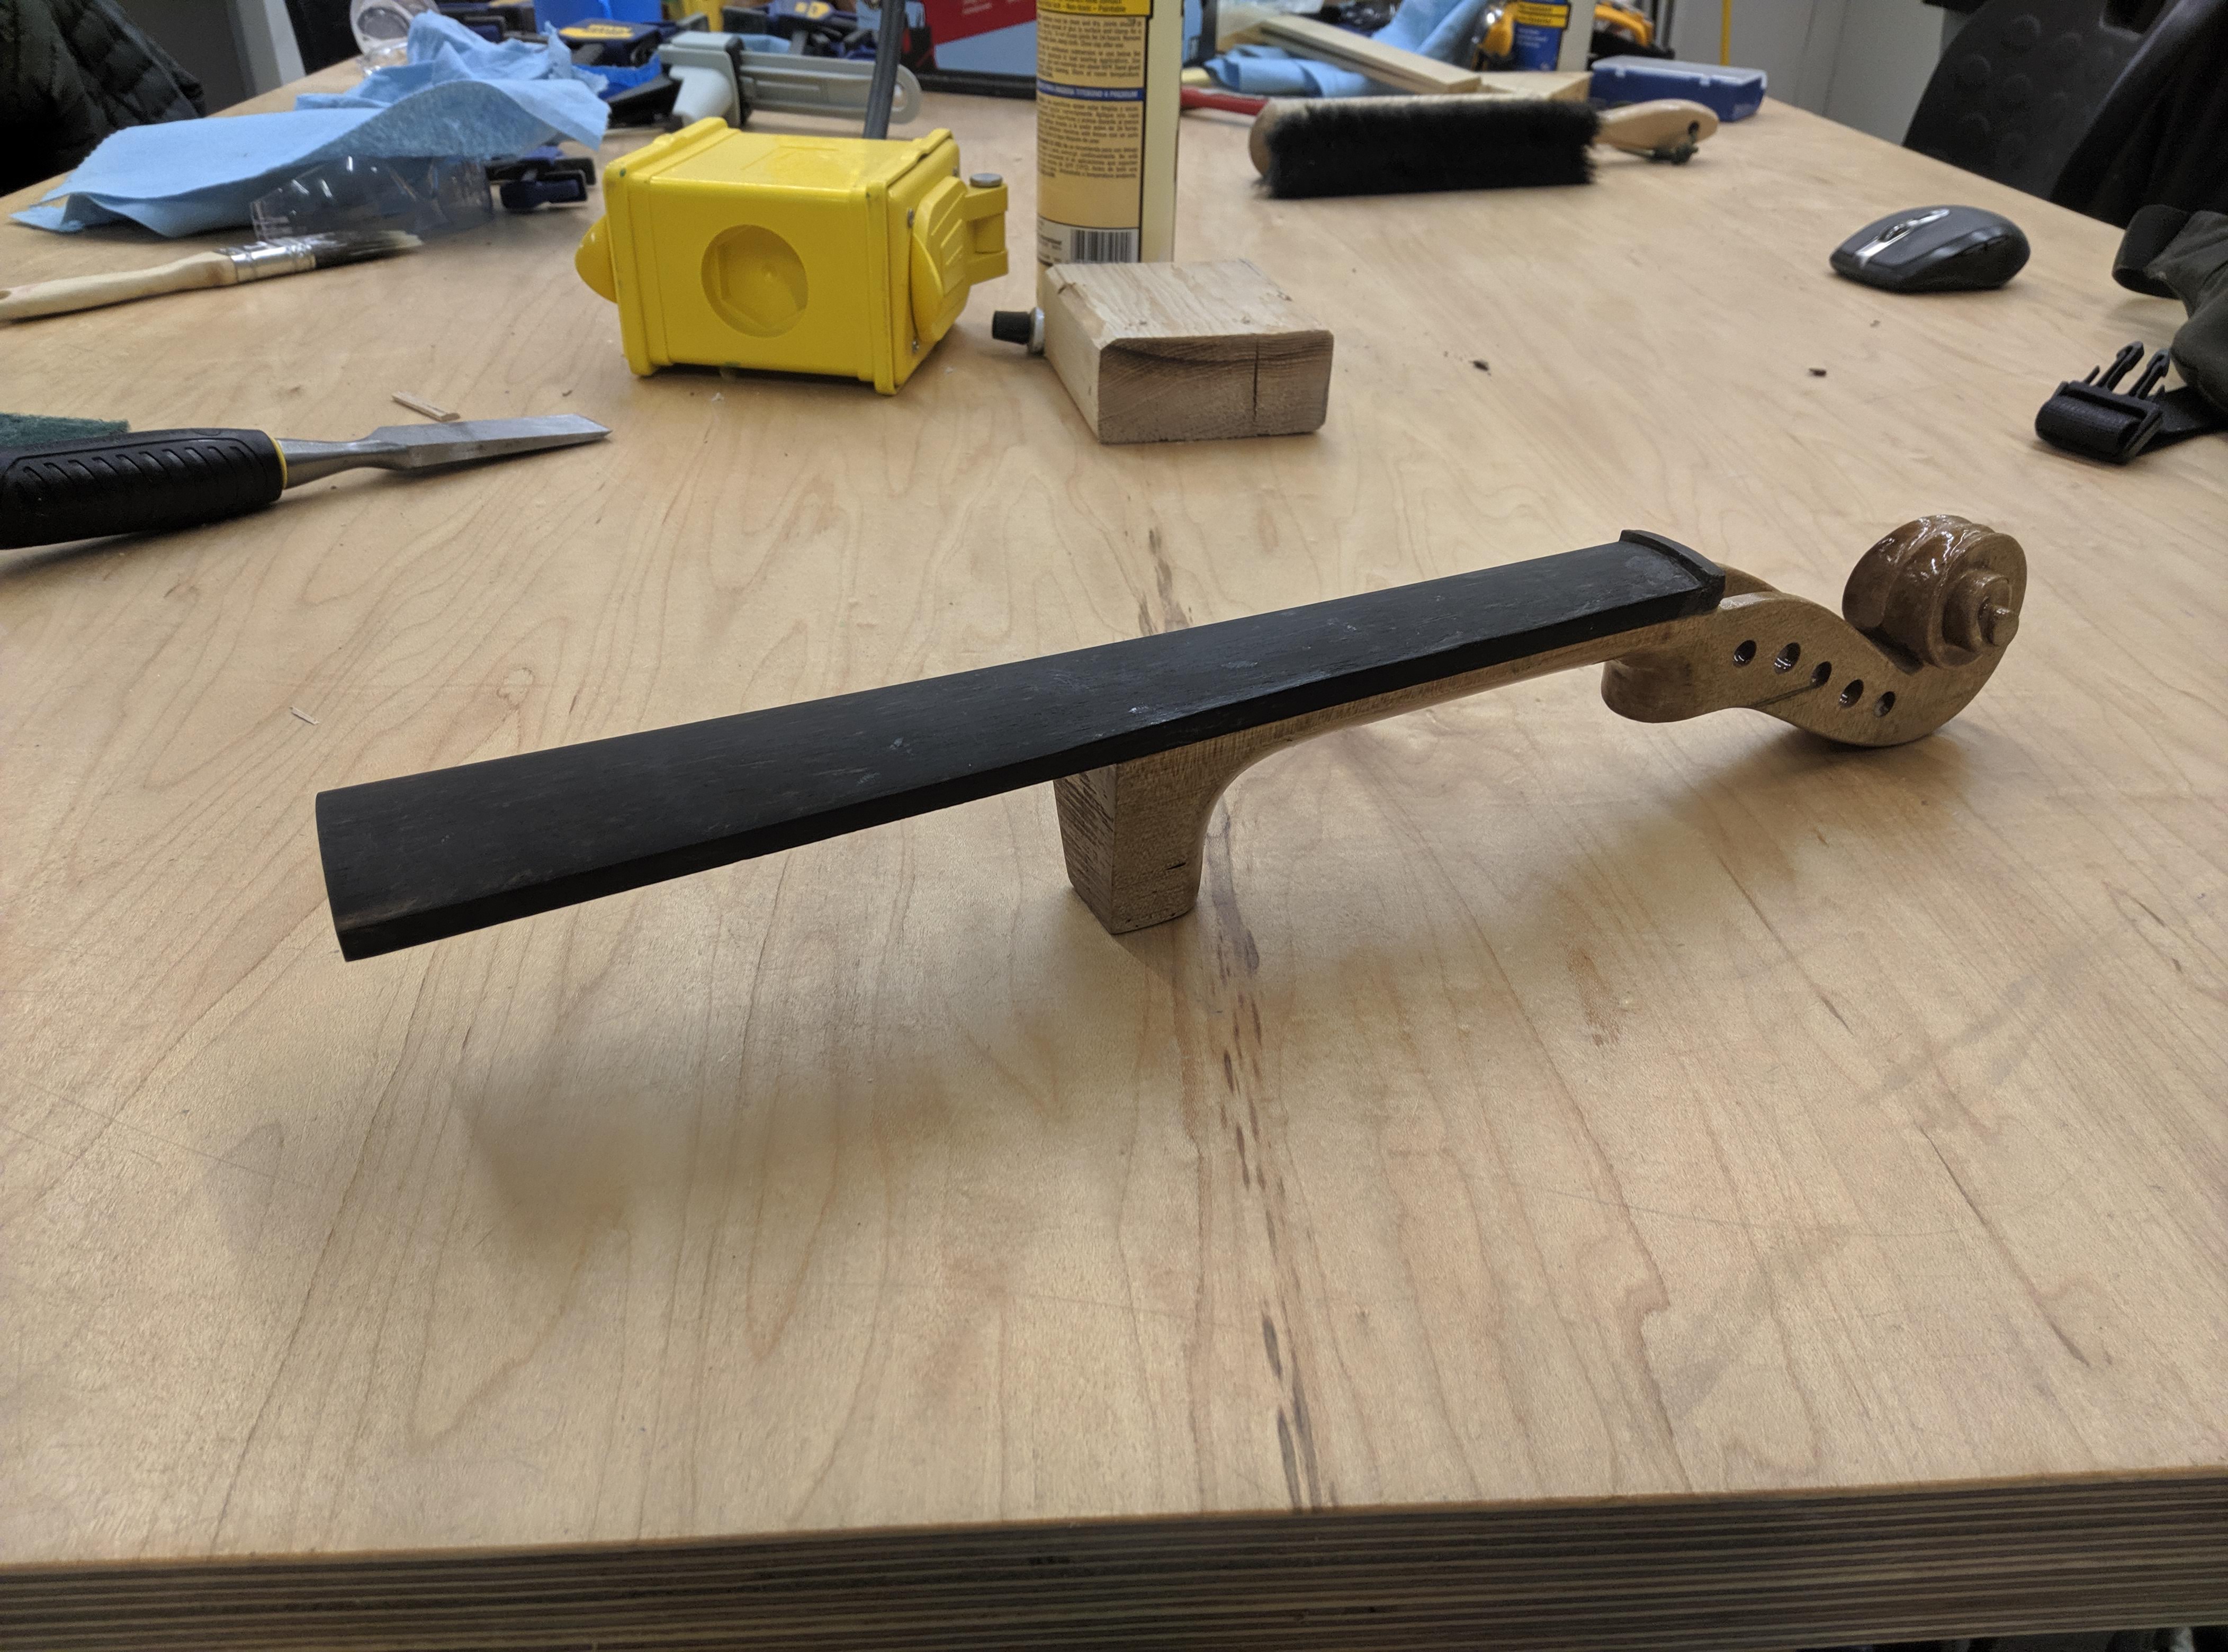
The neck, sanded and finished


Inspiration
After making 3D Printed Instruments and modeling violins in Solidworks as previous projects, I wanted to take it to the next level with this one. In today's day and age, we are able to create designs unimaginable in years before with the help of technologies such as 3D Printing and Generative Design. In this project, the goal is to hone in on creating a new-age violin body that optimizes specific properties.
These properties are: - Total mass less than 400g - A body that resonates at 130.66 Hz, the lowest string (C) on a 5-stringed violin
Some other modern features are that it uses gear-based tuners rather than pegs and 5 strings to improve the range of the instrument. As a callback to the violin's traditional roots, it also features a wooden neck. Though part is plastic and part is wood, both are art-like and organic in nature. We wanted to explore the theme of how technology can meld with art, and we feel that this duality of the violin perfectly represents that.
Background on Generative Design
Generative design is a tool that optimizes for a specific loads given initial condition. Our initial conditions were the parts of the violin that are most essential. (1) The part where the neck joins the body, (2) The part where the tuners sit in the instrument, (3) The base of the violin where a chin rest and shoulder rest go, and (4) The part where the bridge meets the instrument. Generative design also has constraints, which are locations that it is not allowed to generate parts. The constraint in this project was simply whatever was outside the standard shape of the violin. The normal shape of a violin serves as a bounding box so that this generative designed violin will also fit in a case. The optimization was a simple selection of options: 'reduce mass' and 'set a natural frequency for the body.'
The joint types are 'fixed,' 'frictionless,' and 'pin,' It's suitable to choose a fixed joint type for the things that shouldn't move, such as the tuning peg holes and the bridge. The loads were where the strings meet the bridge, which exert a combined force of about 300 Newtons, and the other loads were laterally on the pegs on the violin, at about 315 Newtons total. It's interesting to note that different strings will have different loads--the E string has a lot more tension than the C string, for example. Some studies showed more thickness on the E side than the other side, though the one we chose was mostly symmetrical for appearance reasons. After specifying all the preserves, constraints, optimizations, loads, and joint types, Fusion 360 generates multiple outcomes and runs multiple iterations of them. We had a total choice of >120 designs that we could have chosen!
What it does
These properties mentioned above are important for the following reasons: - A violin by nature of how it's held can't be too heavy. - A piezoelectric pickup (used in electric violins) differs from the magnetic pickup used in guitars, as the piezoelectric pickup will sense all vibrations. This means that despite being electrically amplified, the shape of the body and its resonance has important acoustical properties.
The violin functions normally as an electric violin does. It will be connected by a 3.5mm jack to an amplifier and can be held by a standard chin rest and shoulder rest. The addition of a C string increases its bass range.
How we built it
Neck: The violin neck was bought of off AliExpress in two pieces. Maggie sanded down both pieces and combined them with wood glue to make one solid neck. Additionally, the neck was found to not have enough space for the strings to fit through them, so she tapped the peg holes and increased the groove within the pegbox. Finally, she put a clear coat finish on the piece.
Body: I am working on the body in Fusion 360's Generative Design workspace and designed the setup and geometry. I started out with an Adobe Illustrator trace of the violin, making sure that the dimensions are to spec. Next, I imported the sketches into the X and Z planes to serve as a reference guide for making the solid body. A few CAD operations later, I worked in the generative design workspace and set up the constraint geometry (what parts we keep, green), the obstacles, and put in load cases for the violin.
Challenges
Measuring out the dimensions of the nut (little bump near the pegbox), bridge, and tuners proved to be a large challenge. Too wide, and the strings don't fit on the fingerboard. Too narrow, and you can't play one string without touching the other one. In order to test this, we will need to print parts of the design to iterate on it and make adjustments.
Accomplishments
The violin neck got completed during this weekend, so that's about 1/3rd of the violin! The generative design is coming along. We are at a good stage and are set to complete this by the end of the semester.
What I learned
The generative design workspace is deceivingly simple. Though it only has three constraint cases (pin, fixed, and frictionless), it requires a large amount of thought as to where it should be applied since the canvas is the entire 3D model. Contrast this with your introductory statics class, where we are given the problem that is already set up.
What's next for Generative Designed Violin
Todo shortlist: - 3D Print the body design after refining the design some more - Add the bridge onto the violin and solder it to the output jack - Tap a hole in the violin neck and connect it to the body with a machine screw
After the whole design is done, the plan is to invite a guest violinist to come busking on Skiles Walkway to promote the project and raise awareness. Stay tuned!
Built With
- 3d-printing
- autodesk-fusion-360
- woodworking
Log in or sign up for Devpost to join the conversation.