-
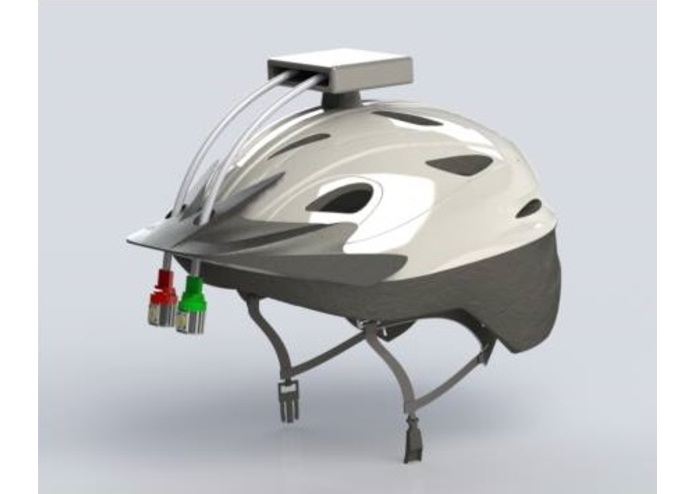
A rendering of our prototype.
-
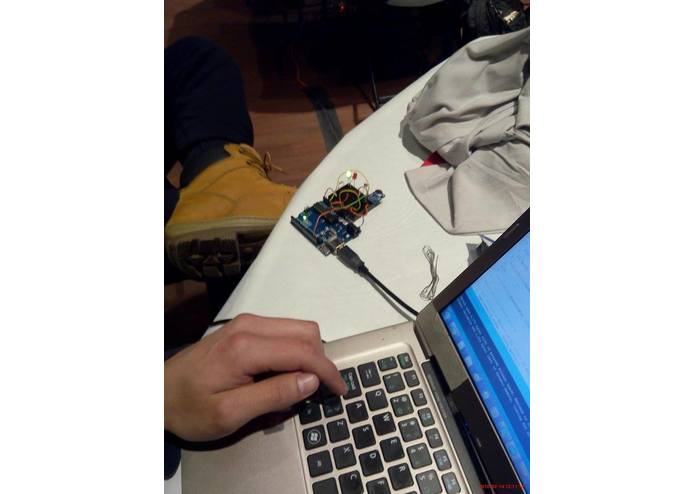
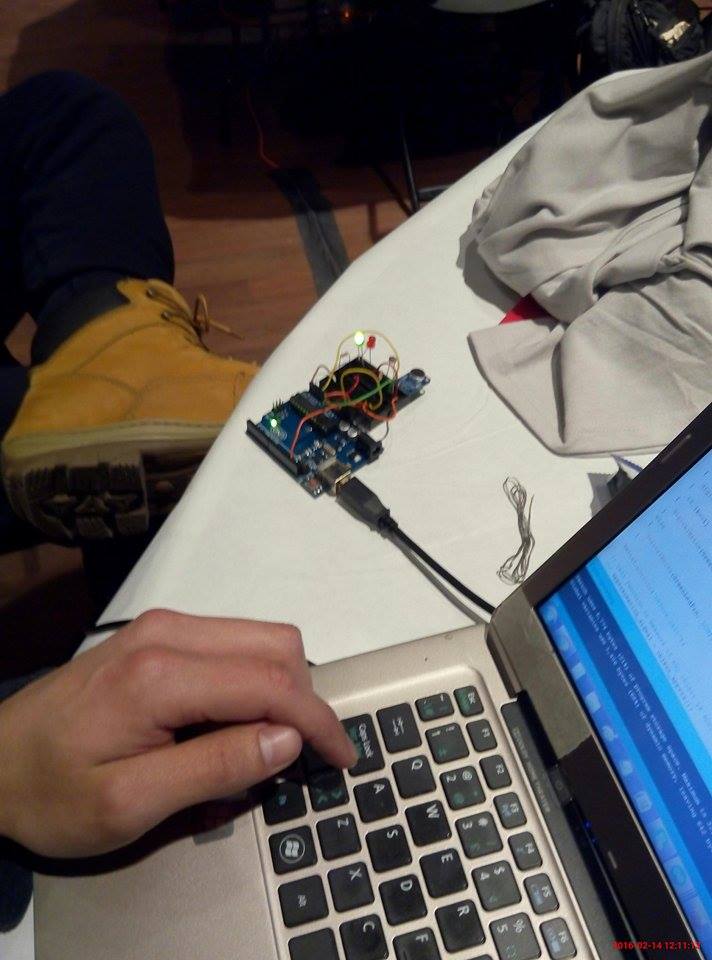
Our combined Arduino systems.
-
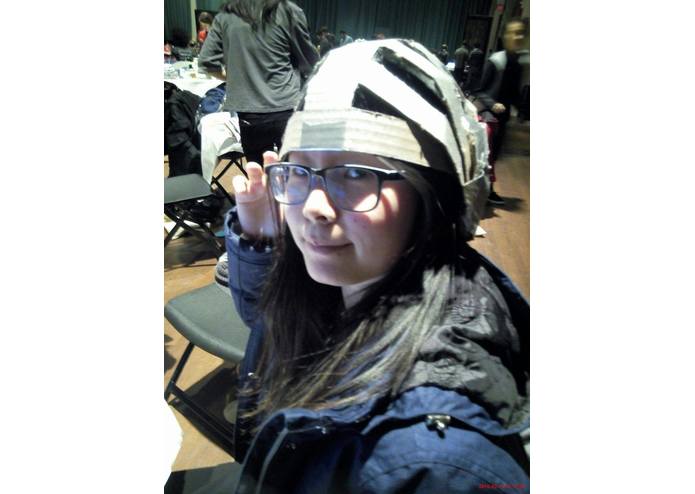
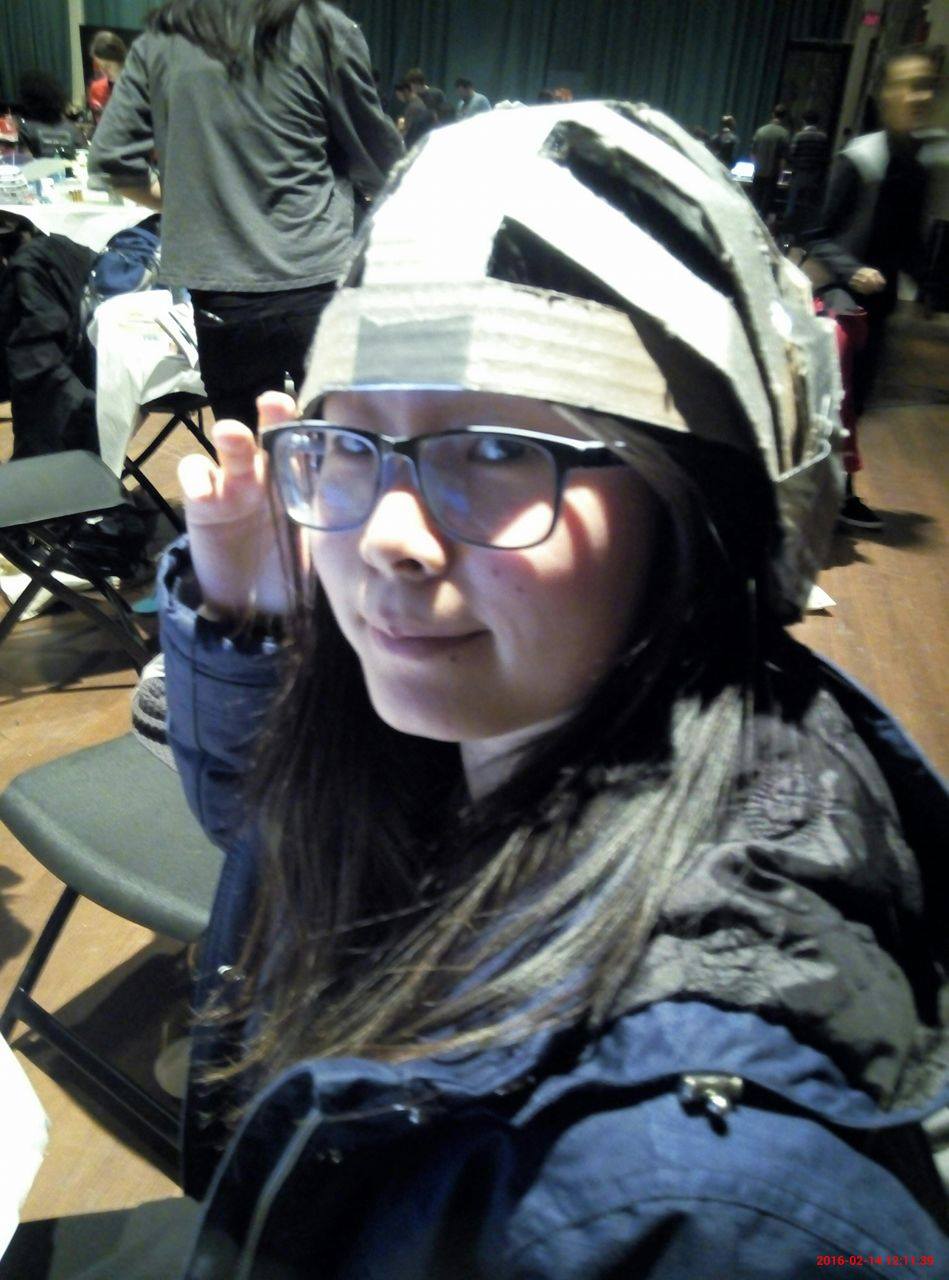
Our cardboard prototype on Crystal!
Inspiration
Being rear ended on a motorcycle changes your perspective on the road. One of our team members has personal experience with being in a road accident, where she wishes she had that 3 seconds in advance to react. Our city, Toronto, has been identified as a “walkable” city, one that promotes and supports walking, cycling, and transit over driving automated vehicles. We extended this experience of auditory isolation and sensory deficiency in a helmet on the roadway to being hearing impaired as a driver. As reported by the Participation and Activities Limitations Survey (PALS) in 2006, 5% of Canadians aged fifteen and older have hearing limitations, 16.8% of which are profoundly Deaf, equating to approximately 200,000 people. Upon research, it was found that multiple deaf cyclist communities exist globally. Wearable technologies and sensing technology are pushing the envelope in innovation globally. The deaf cyclist combined with the motorist community, were communities that we felt we could try to impact at the hardware hackathon.
What it does
The system consists of 2 sensors located in the same housing, mounted on top of a helmet. The housing has module attachment modes for cyclists and motorcyclists alike.
A microphone mounted on the back of the helmet records sounds from behind the cyclist and determines its frequencies using a Fast Fourier Transform through the Arduino. Based on these frequencies, the it is determined if the sound is a bike bell, car horn, or simply noise.
An ultrasound sensor on the back of the helmet computes the velocity of rear approaching traffic by sampling the distance of the traffic for set intervals of time.
Both sensors send signals to the Arduino Uno which relays the signal to 2 LEDs. The red LED lights if the sound frequency or velocity threshold. The green LED lights if a bike bell frequency is sensed.
Mounting the LEDs: The LEDs are contained in a flexible velcro band. The band allows for modularity in any bike helmet attachment. One half of the velcro attaches to the underside of the front of the helmet; the other half contains the LEDs.
How I built it
We started by building the frequency detector and velocity sensor on two separate Arduinos. The frequency detector was based on the code for an Arduino-based music equalizer (linked below), adjusted for sound-based warnings of the road. Meanwhile, the velocity sensor was prototyped using a photoresistor, which determined the position of an object at two locations and calculated its location. As well, the mounting system for the sensors and LEDs was modeled using AutoDesk and prototyped (in the physical world) using a cardboard helmet and the combined Arduino systems for the two types of sensors.
Challenges I ran into
We encountered many, many challenges over the hectic 15 hours, ranging from figuring out the code for the Fast Fourier Transform, debugging circuits, learning AutoDesk/unlearning our bad habits from SolidWorks, grappling with our attempts to make a bluetooth-connected system, and struggling to combine the two Arduino systems.
Accomplishments that I'm proud of
I’m proud that each of us learned new skills as a team and applied it in a way that can benefits a real community facing real problems in our city.
What I learned
Our team learned a ton at this hackathon, from coding in Arduino, debugging circuits, doing CAD in AutoDesk, and working on a team under pressure. We also learned that calibration and assembling physical components is a big deal when our functional prototype is under judging.
What's next for Galea Helmet
Our system, being helmet-mounted, has its own pros and cons. Although the risk of theft is reduced and it requires minimal added purchases for the user, it affects the feel of the helmet and limits our scope to the cyclists that use helmets in the first place. One next step could be to mount the sensors on the bike frame itself and give haptic cues via a vibration on an armband or phone.
Another aspect is that the Galea Helmet uses code from the ffft library from ELM-ChaN and the Piccolo music visualizer from Adafruit. While these resources were a great launchpad for making a prototype of our design, they did have a few problems for our application. For instance, ffft library didn’t specify the units of its output, making calibration pretty difficult. Next time we’ll work on writing/using libraries that better fit our purposes.
Built With
- arduino
- product-design

Log in or sign up for Devpost to join the conversation.