-
-
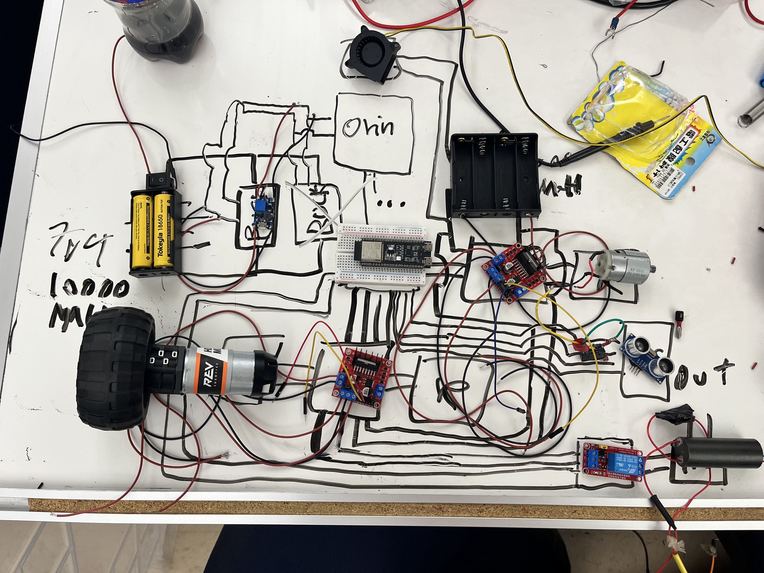
Original Electrical Diagram
-

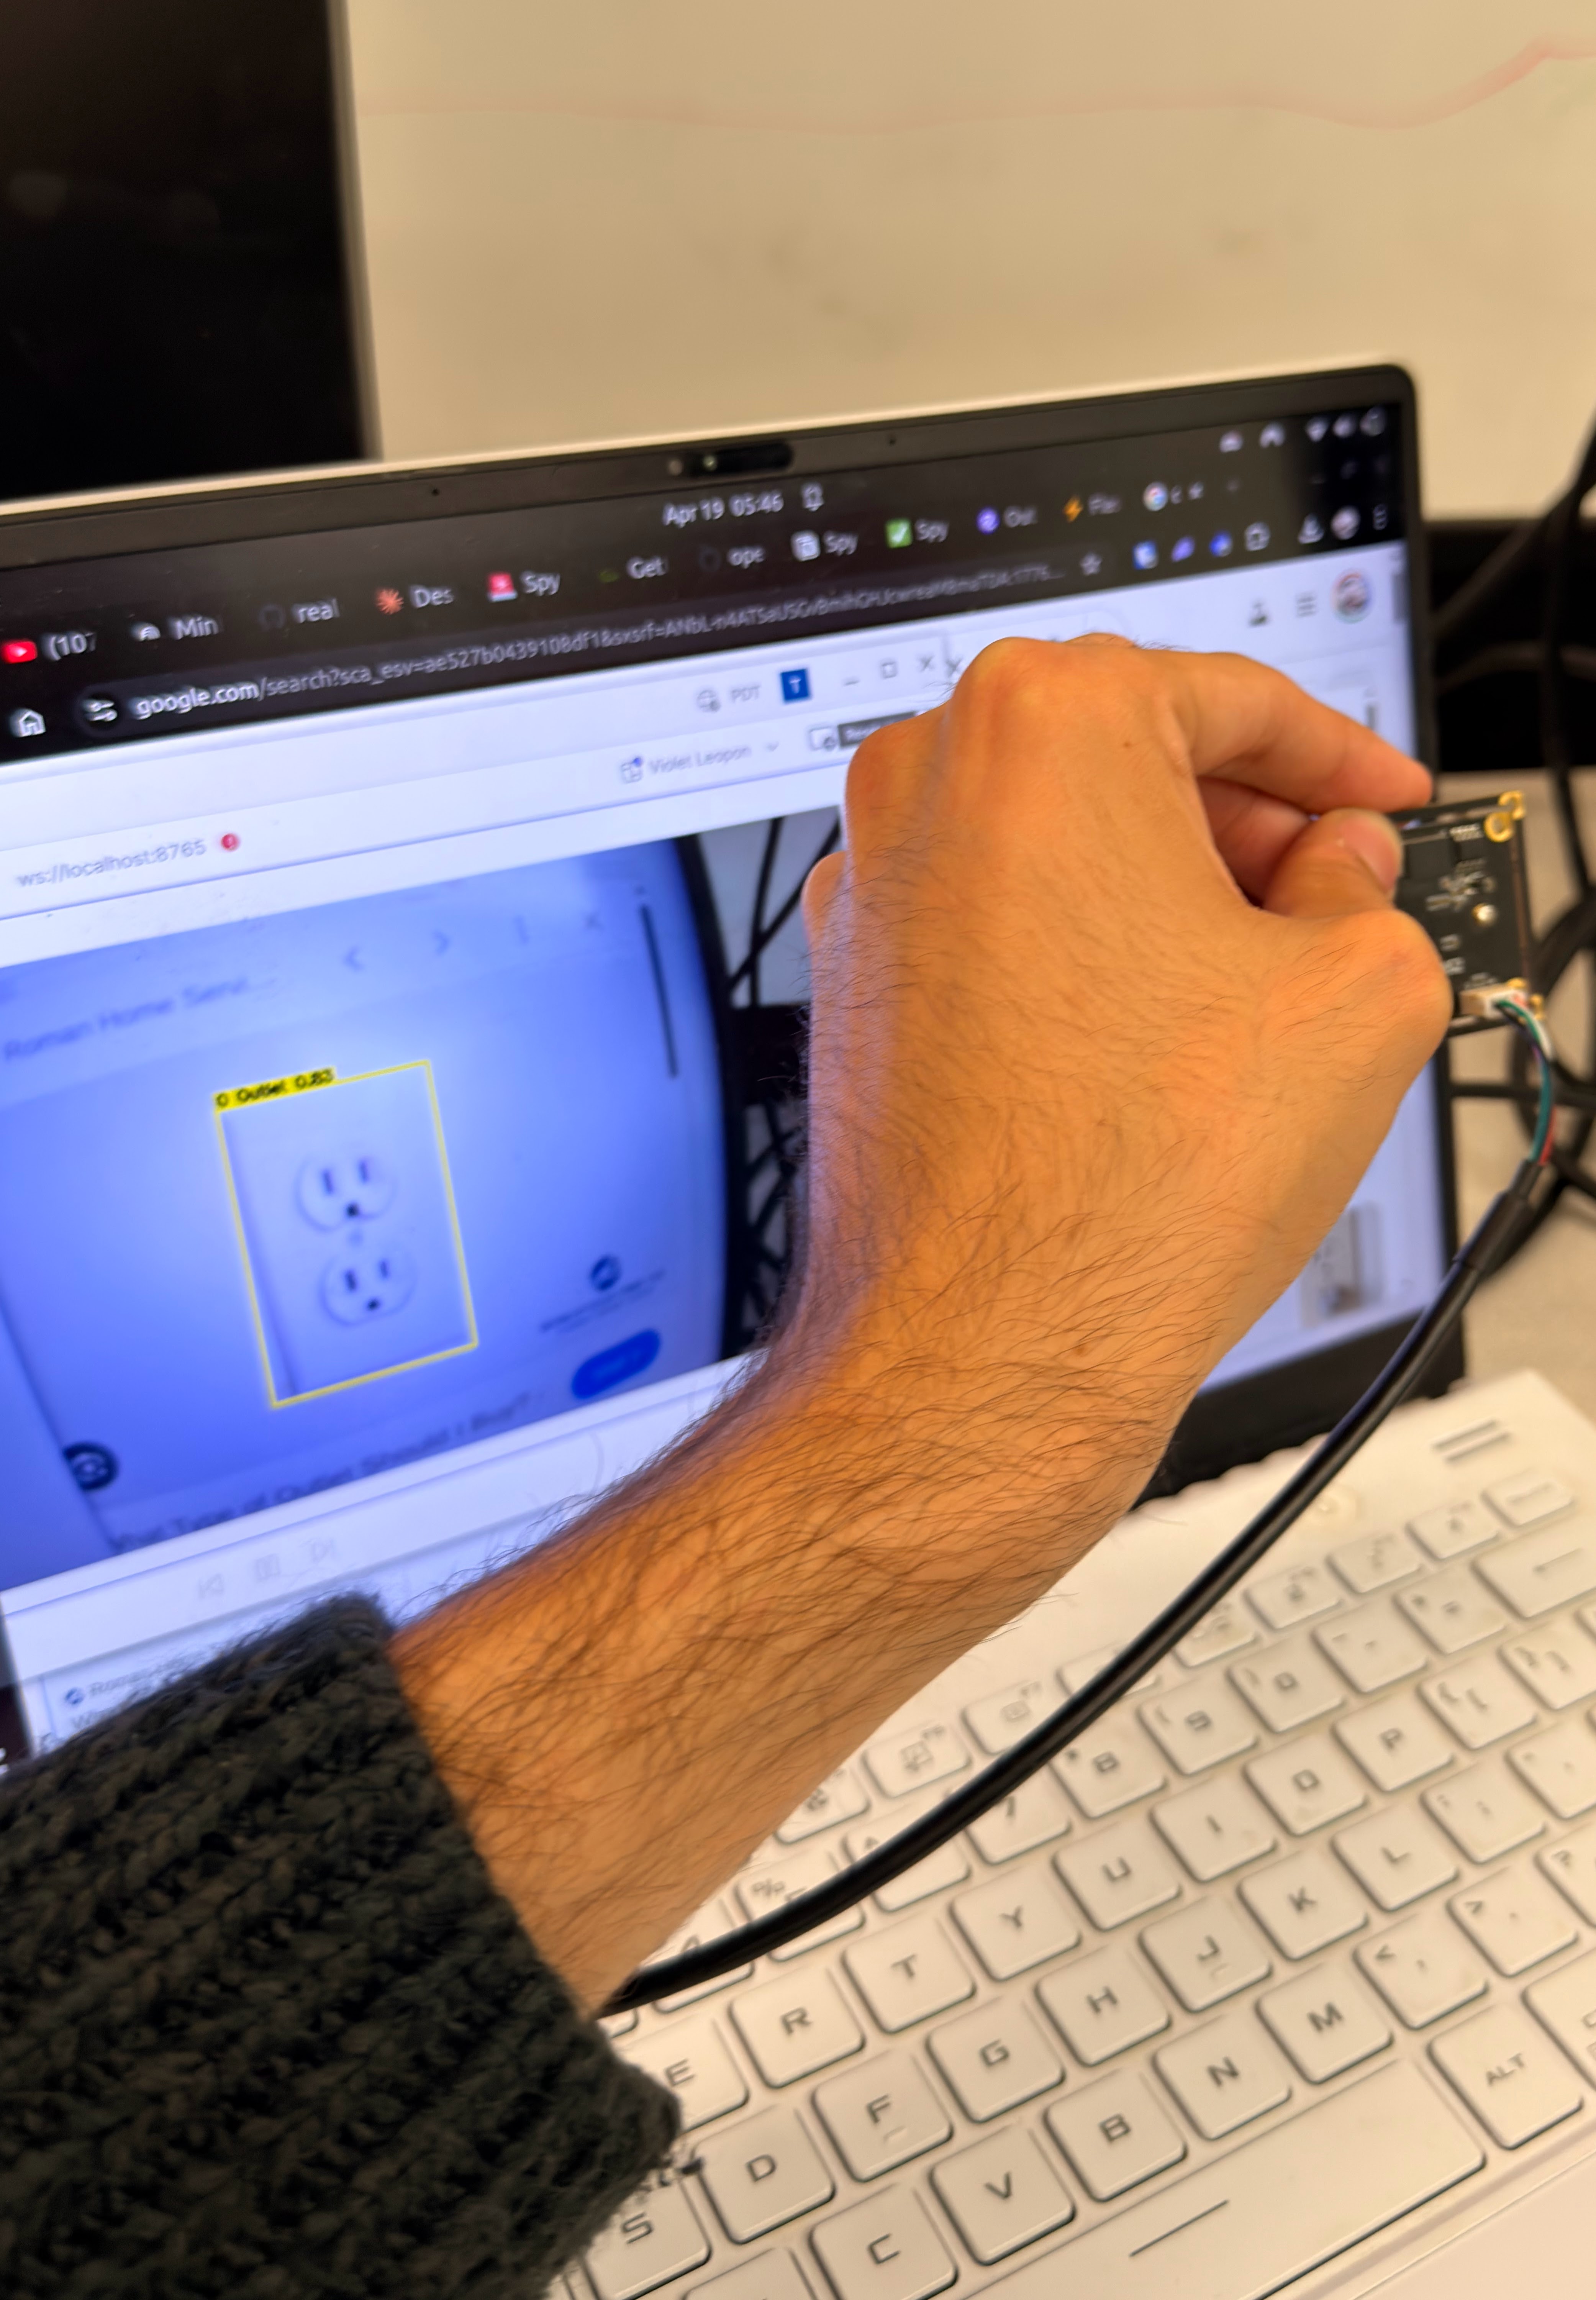
yolo bounding box testing
-

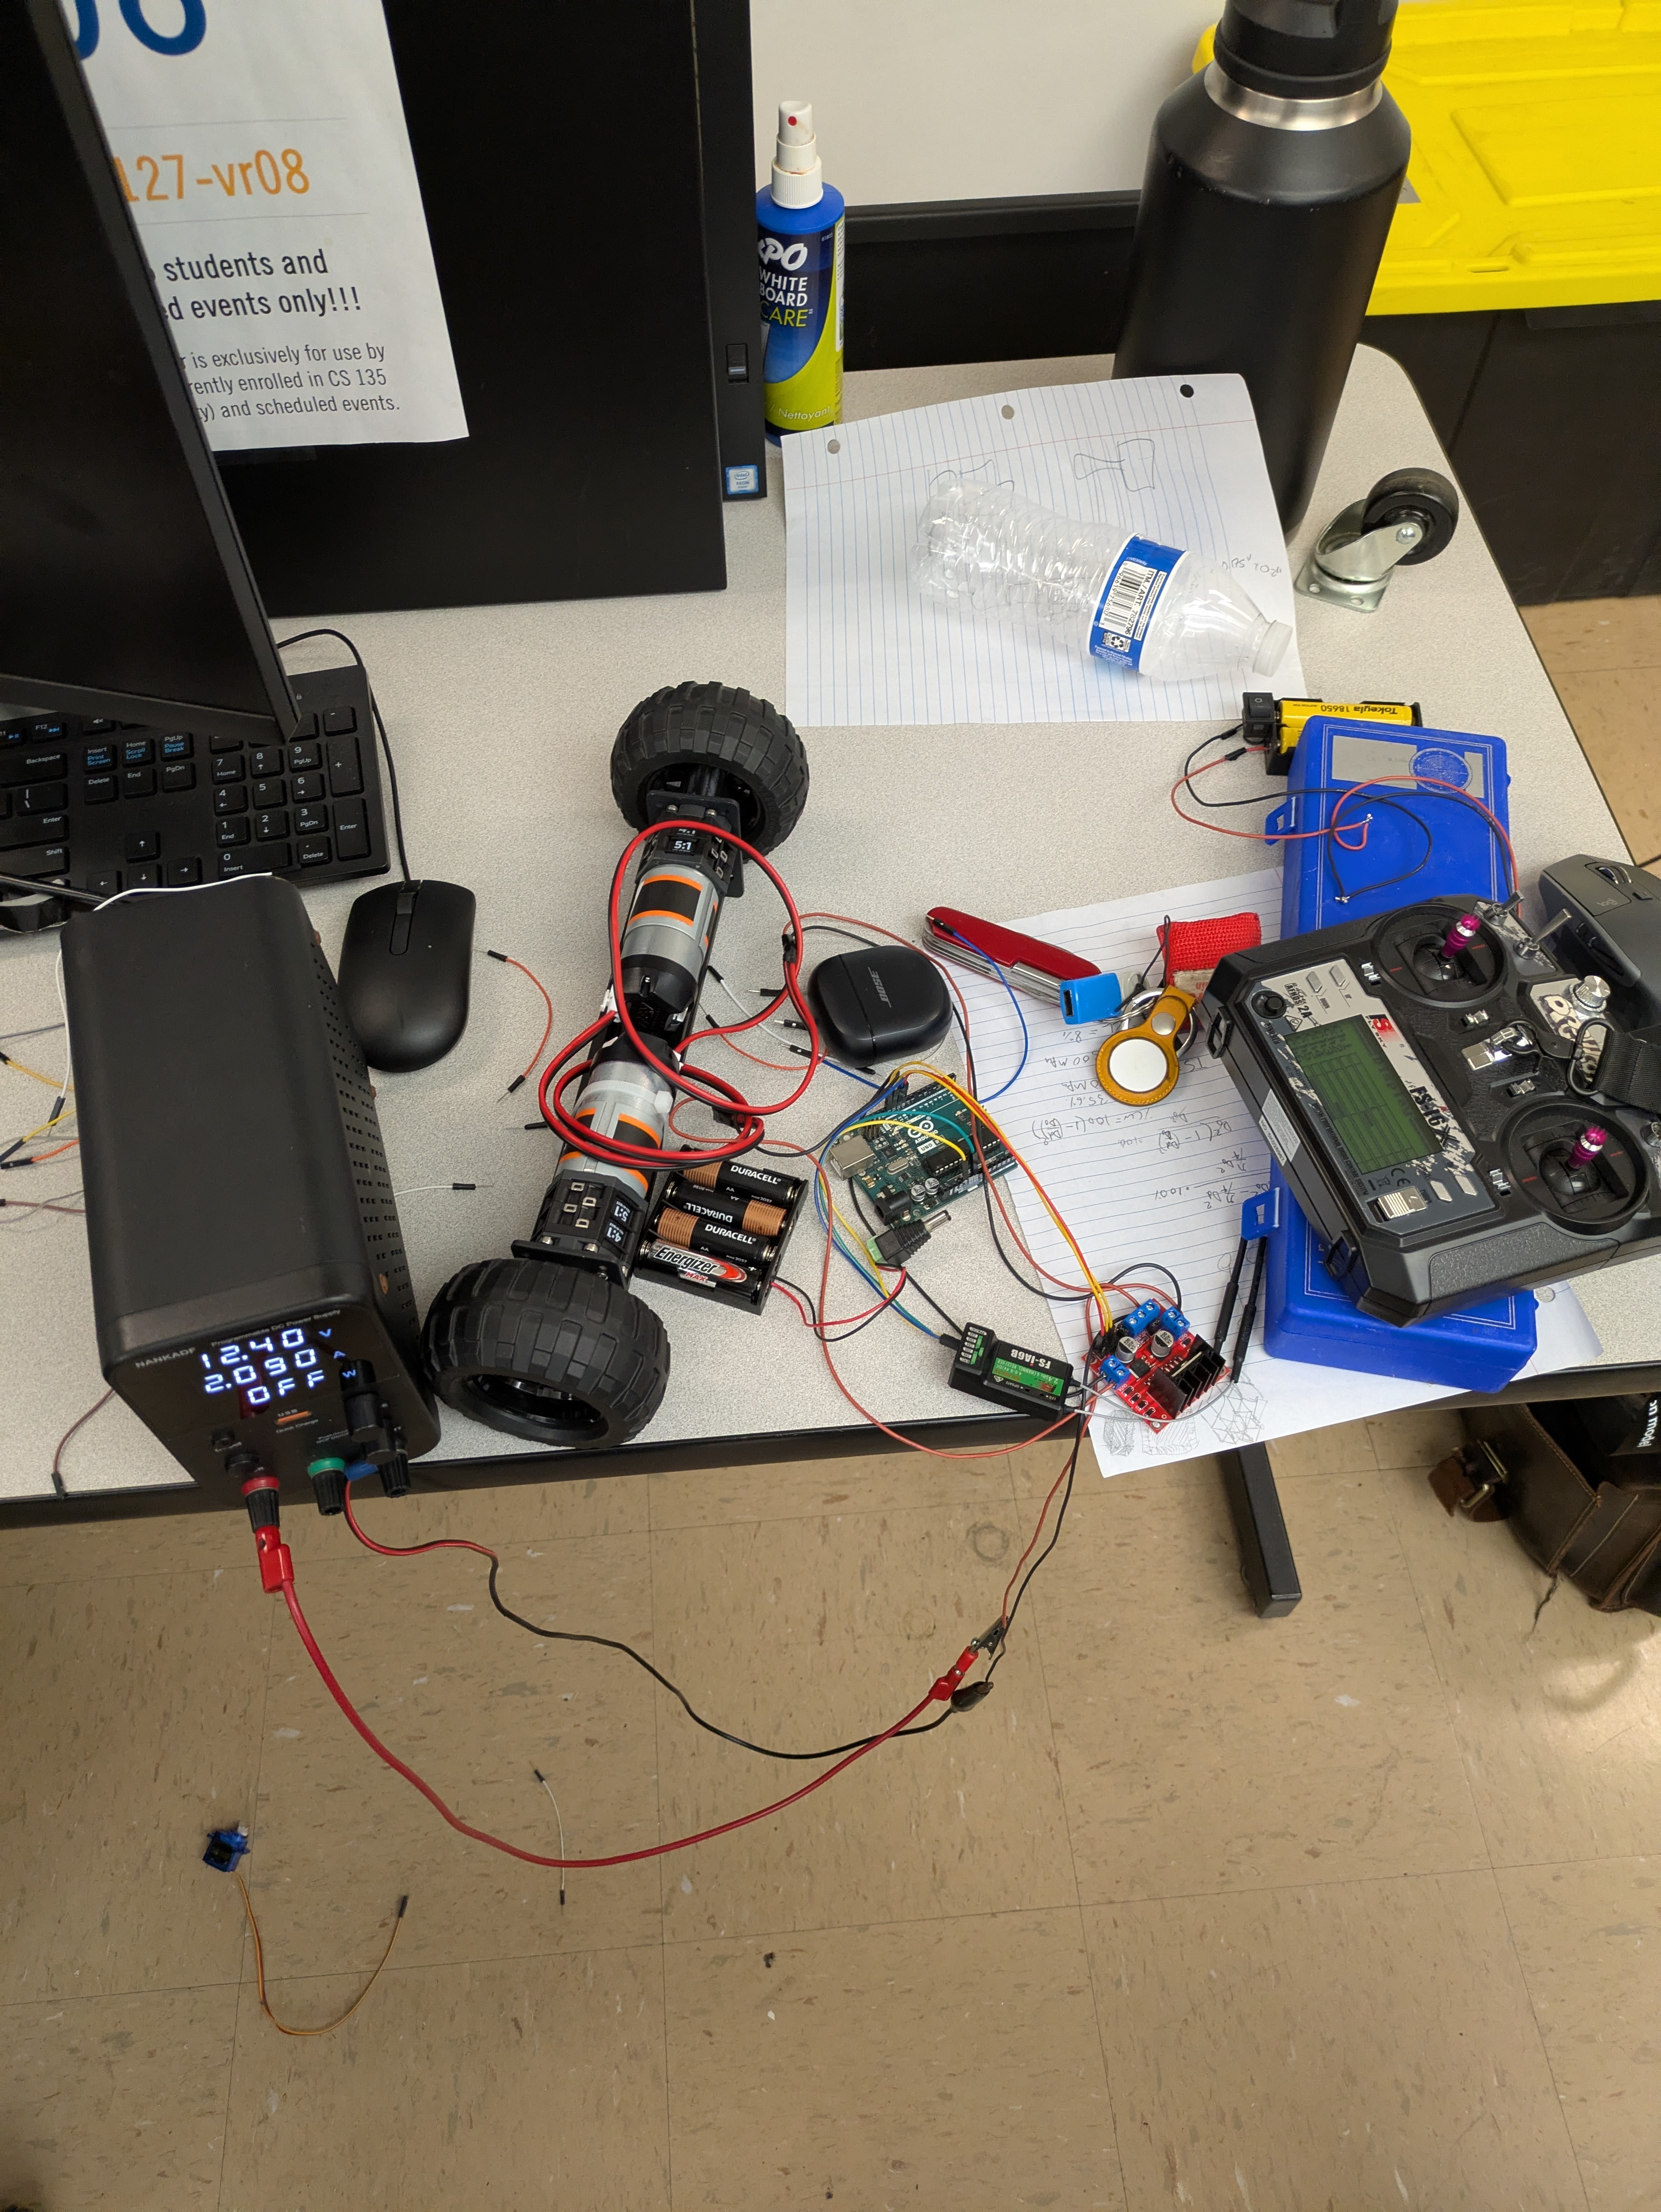
Testing motors
-
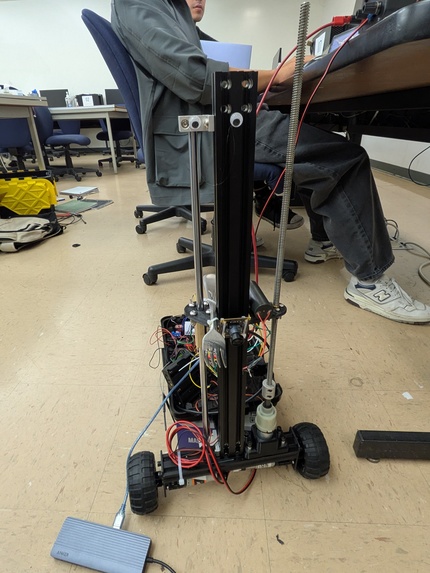
Final robot


What is it
We wanted to build a bot that could short out walls because we thought it was funny. Forkbot was meant to cause a distraction so that spy operators could get out of sticky situations (or sabotage important equipment). Operators can teleoperate ForkBot from anywhere in the world with public internet using Tailscale ip tunneling and Foxglove to sabotage wall outlets and circuitbreakers everywhere. The lead screw end effector can be adjusted to different outlet heights. The caster back wheel in conjunction with our arcade drive makes the robot very agile in small spaces. The robot can be radio operated with a camera with yolo vision allowing the robot (with a laptop sitting on it), to help the operator autonomously detect outlets to go to.
How we built it
Forkbot was primarily from a bunch of scrap that we had laying around at home or our robotics teams lab. We used a few Arduino unos + breakout boards from our robotics teams lab and a box of scrapped 3d printers from Lucius's home.
Challenges:
Programming
Our Jetson Orin was supposed to be the system which ran autonomy in conjunction with an esp32. It ended up corrupting 30 minutes in. It took two Home Depot and Best Buy runs and five hours of troubleshooting before we were forced to switch our main computer to Tyler's laptop. Our Nano began caused more problems down the line. It contained all of our pre-built packages like isaac-ros, and we ended up having to rebuild these packages which took hours on Tyler's laptop. We had to scrap our idea of autonomy since it would take too much time to build, so we pivoted to focus on what compiles fast, such as yololv8 and realsense depth sensing. The depth sensing was broken because of USB problems that bottlenecked our performance, so we setup a new camera system using generic webcams.
Mechanical
We could not find more than two of the same kind of motor, so we adjusted the design of our vehicle to use a three‑wheel swerve drive with a shopping cart wheel. Lucius, our mechnical expert built the entire frame out of 3D printer junk. Most of the time spent for him was figuring out how to mount aluminum extrusions to each other without any other hardware except for nuts and bolts. Our 3D printer was out of service for most of the time, so we worked around that constraint by not using any custom printed parts. We only used two printed parts in total across the entire robot. We took random metal pieces designed for completely different purposes and repurposed them. The plates were made for holding NEMA 17 motors, so he drilled five additional holes in each one to mount them. Lucious ran to the store to buy a drill and a tap kit so he could make his own threads and holes. We had problems with drive and the elevator system which lifted the fork using the lead screw. Our drive was and still is partially crooked due to having no precise floor standing power tools so our extrusions were cut to length by hand using a hacksaw which made our left motor crooked by a few degrees. Also, Lucius had to find a way to couple a lead screw to a ikea drill motor without any of the hardware that was made for doing that. First he tried forcing the gear of the bare drill (with the drills gearbox removed) into an aluminum shaft coupler which made it so whenever the lead screw spun, it created a large cone shape. This joint was weak as well so he opted to repurpose one of his drill bits in order to couple the drill motor with the lead screw.
Electrical
Overall, electrical had the least problems out of everyone during the event. Our initial plan was shafted due to the orin corrupting so we opted to complete manual operation using a radio controller. We used 4 double A's to power the arduino with 6 volts, 4 18650 lipos for the drive and lead screw fork elevator, and 1 18650 for the relay taser system. Andrew didn't want to split the power from a single pack because we didn't have buck converters and he was afraid of the motor drive and taser not being galvanically isololated from the supply for the arduino. After Lucius set up the lead screw mechanism with the planetary gearbox, the gearbox created too much initial friction for the motor to overcome on 2 amps max of current which the h bridges were capped at so Andrew had to parallel two h-bridges to provide 4 amps for the lead screw.
Accomplishments
It works! The chassis is really stable due to the rigid extruded aluminum and everything except the taser can be actuated from the radio controller. Forkbot is grippy and agile. Yolov8 is working, and gives us bounding boxes over outlets to make it more clear.
What we learned
ESP32 + the Zephyr project was overkill for a quick hackathon, not worth debugging for 7 hours. Our laptop had access to ethernet, so we enabled a hotspot that made a private network for our printer and other devices to work. Otherwise, the school Wifi security / architecture would have ended our run from the beginning. The RC remote + transciever ended up being easier than expected, especially since it was our first time using it.
Whats next?
If we had more time we would like to fully set up autonomy and have a full video of the drill and the elevator sticking a fork into a dummy outlet. We ended up finishing at 9:30 am which didn't allow for enough testing footage. Also all of our lipos died during testing so we had to do testing on a coolermaster box while plugged into a power supply. We have a video of it driving around in our google photos linked below.


Log in or sign up for Devpost to join the conversation.