-
-
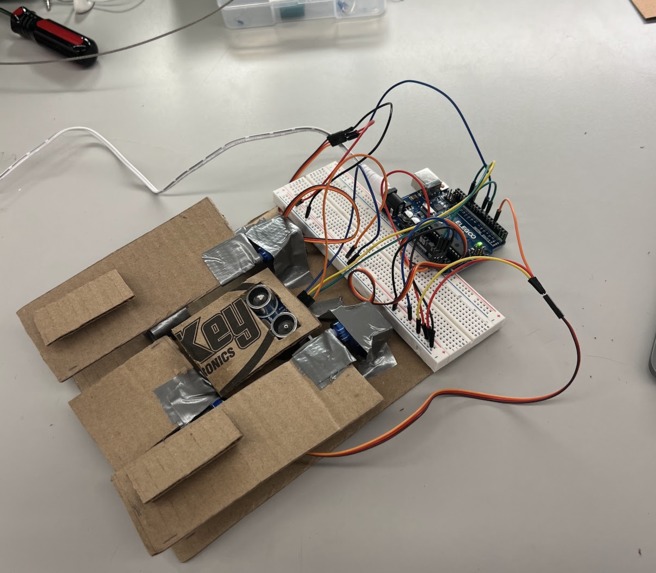
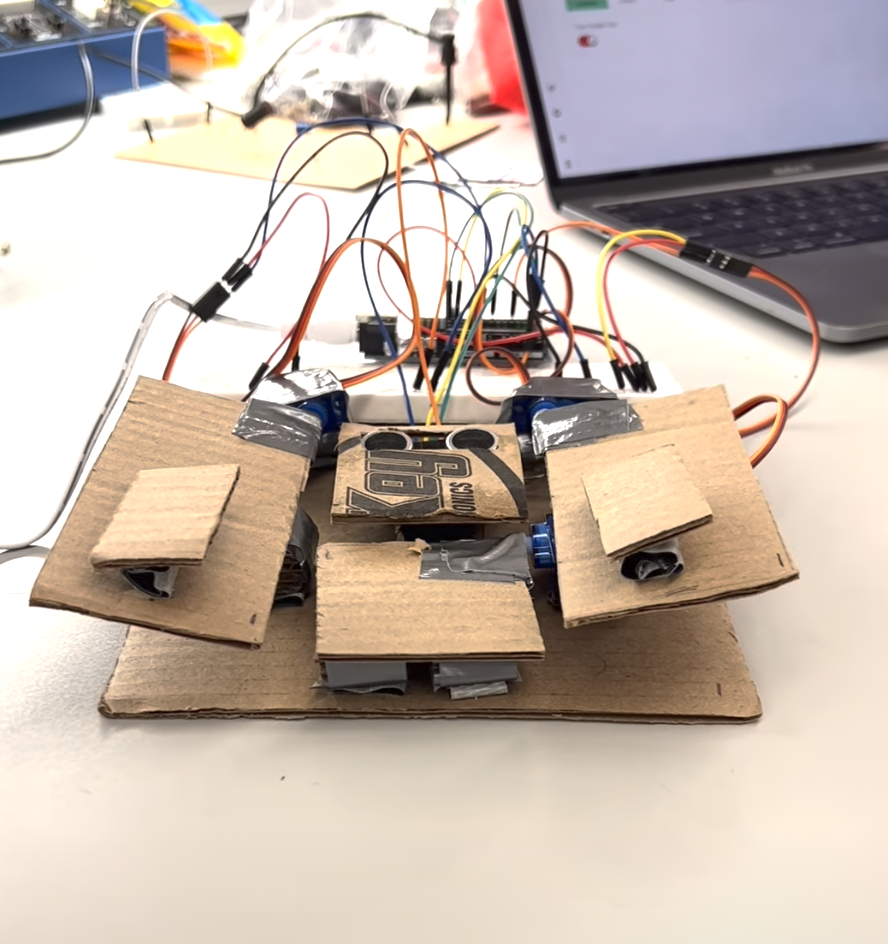
FoldingBuddy View 1
-

FoldingBuddy View 2
-
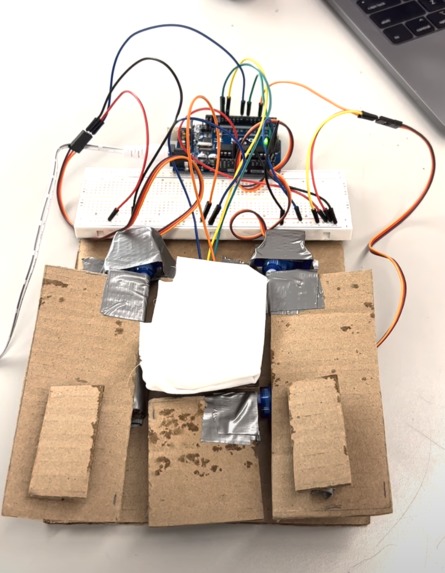
Folded towel!
-
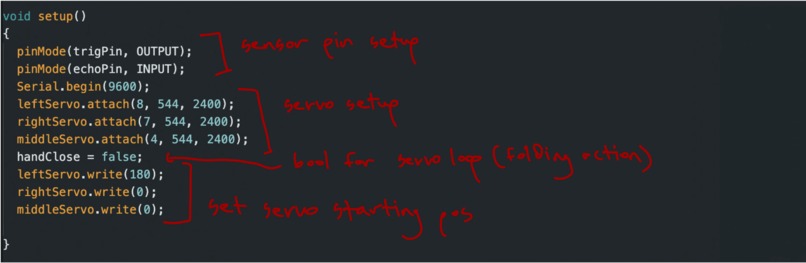
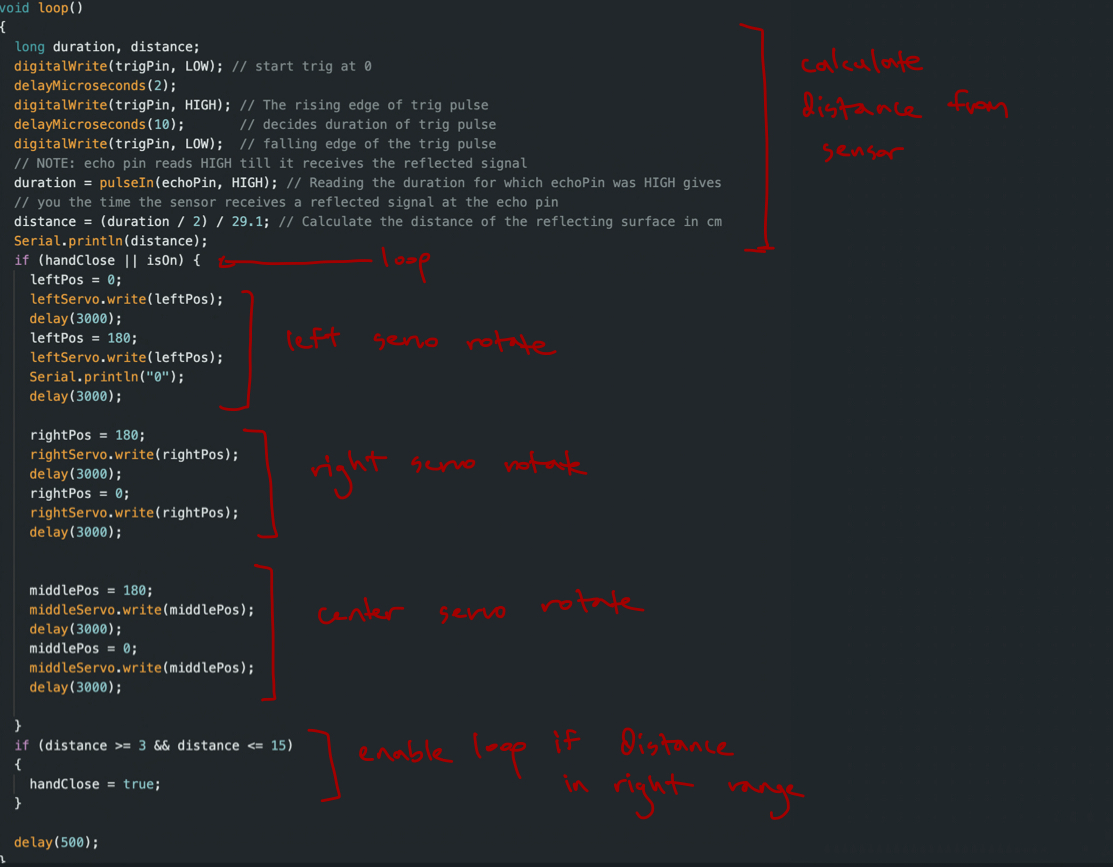
Code (Setup)
-
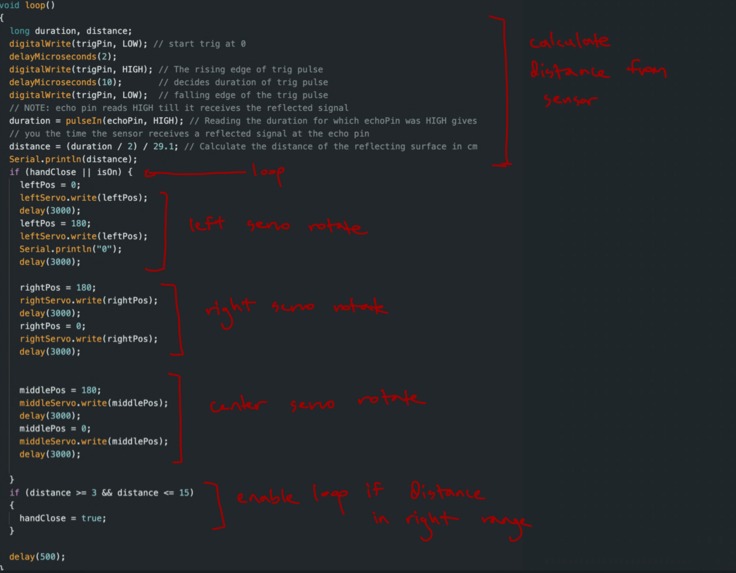
Code (Loop)
-

Slide


Inspiration
I dislike chores and wanted to find a way to automate a chore that particularly bothers me: folding clothes. I did some research and found that there existed foldable boards to help with folding. I decided to make a robot to fold instead (no work required!).
What it does
Place an article of clothing (shirt, towel, etc) face-down on FoldingBuddy. The ultrasonic sensor detects the piece of clothing (you can also wave to start the machine or press a button on your phone), and FoldingBuddy folds the piece of clothing!
After folding, the folded item is on the top center panel. Remove it, and place your next piece of clothing down! FoldingBuddy will continue folding until turned off with a button on your phone.
How I built it (Design Process/Iterations)
I first drew out how I wanted FoldingBuddy to look. I drew inspiration from those folding boards and made some foldable protoypes with paper.
I realized I would need three flaps to fold clothes: a left, right, and center flap. As such, I figured to use three servos.
I made 2 prototypes out of cardboard and duct tape: my goal was to have three cardboard flaps (just like on the folding board) connected to servos, all on a stable base. My first prototype was large...I then decided to downscale to account for servo strength.
After the prototype, I connected all servos to the Arduino and got the flaps to work as desired (i.e. folding in a loop). I got this to work well.
I then cut a rectangle in a cardboard piece that didn't move and put in an ultrasonic sensor because I wanted the robot to detect a hand/article of clothing. I connected the ultrasonic sensor and ensured the servos only moved when desired.
I then worked on the IoT component to enable a button/switch to turn the servos on/off.
Challenges I ran into
I struggled building the cardboard prototype: the servos where difficult to connect to the flaps with duct tape and my base was unstable. I solved this problem by carefully planning the size of my flaps, adding cardboard and duct tape "shims" and wedge for support, and using extra tape for stability.
Accomplishments that I'm proud of
I'm most proud of the mechanical parts of my robot: the flaps, attaching them to servos, the base, the rectangular section for the sensor, etc. This took the most time but was most rewarding when I saw the whole robot work with its moving parts.
What I learned
I learned about the importance of design and planning before jumping in to the project. I also became more proficient at writing my own programs integrating servos, sensors, and IoT with the Arduino.
What's next for FoldingBuddy
FoldingBuddy has many potential next steps. First, I would make it larger scale, so it can actually fold clothing (this would entail more powerful servos and a strong material for the skeleton and flaps). Then, I would introduce functionality to enable it to fold clothing, push the folded clothing onto a stack, and continue folding (effectively further reducing the manual labor required to fold...all one needs to do is put a stack of clothes on the robot).
Technology Description
Parts Used: 3 servos, Arduino, ESP32 and Blynk for IoT, ultrasound sensor, breadboard, jumper wires, base/flaps/folding structure made from cardboard and duct tape
Mechanism: The ultrasound sensor checks to see if an object is within a certain distance. If it was, the movement loop began. Likewise, if the switch on Blynk was turned on, the movement loop began.
In the movement loop, each of the three servos would rotate in to fold the cloth, then rotate back out. The order was: left flap, right flap, then center flap.
The movement loop then continued in a cycle


Log in or sign up for Devpost to join the conversation.