-
-

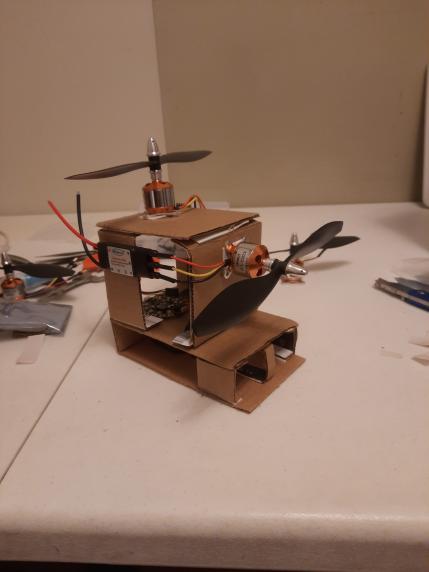
IRL Model (Different Angle)
-
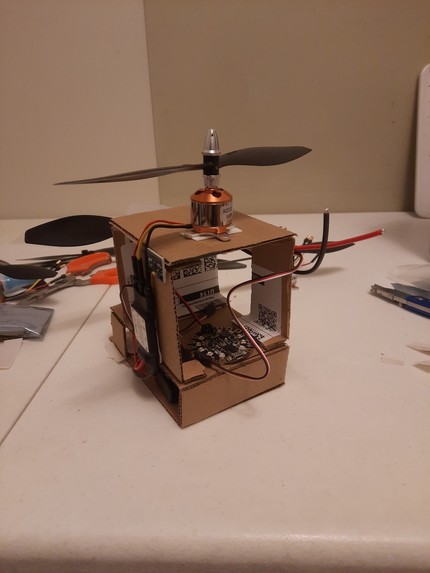
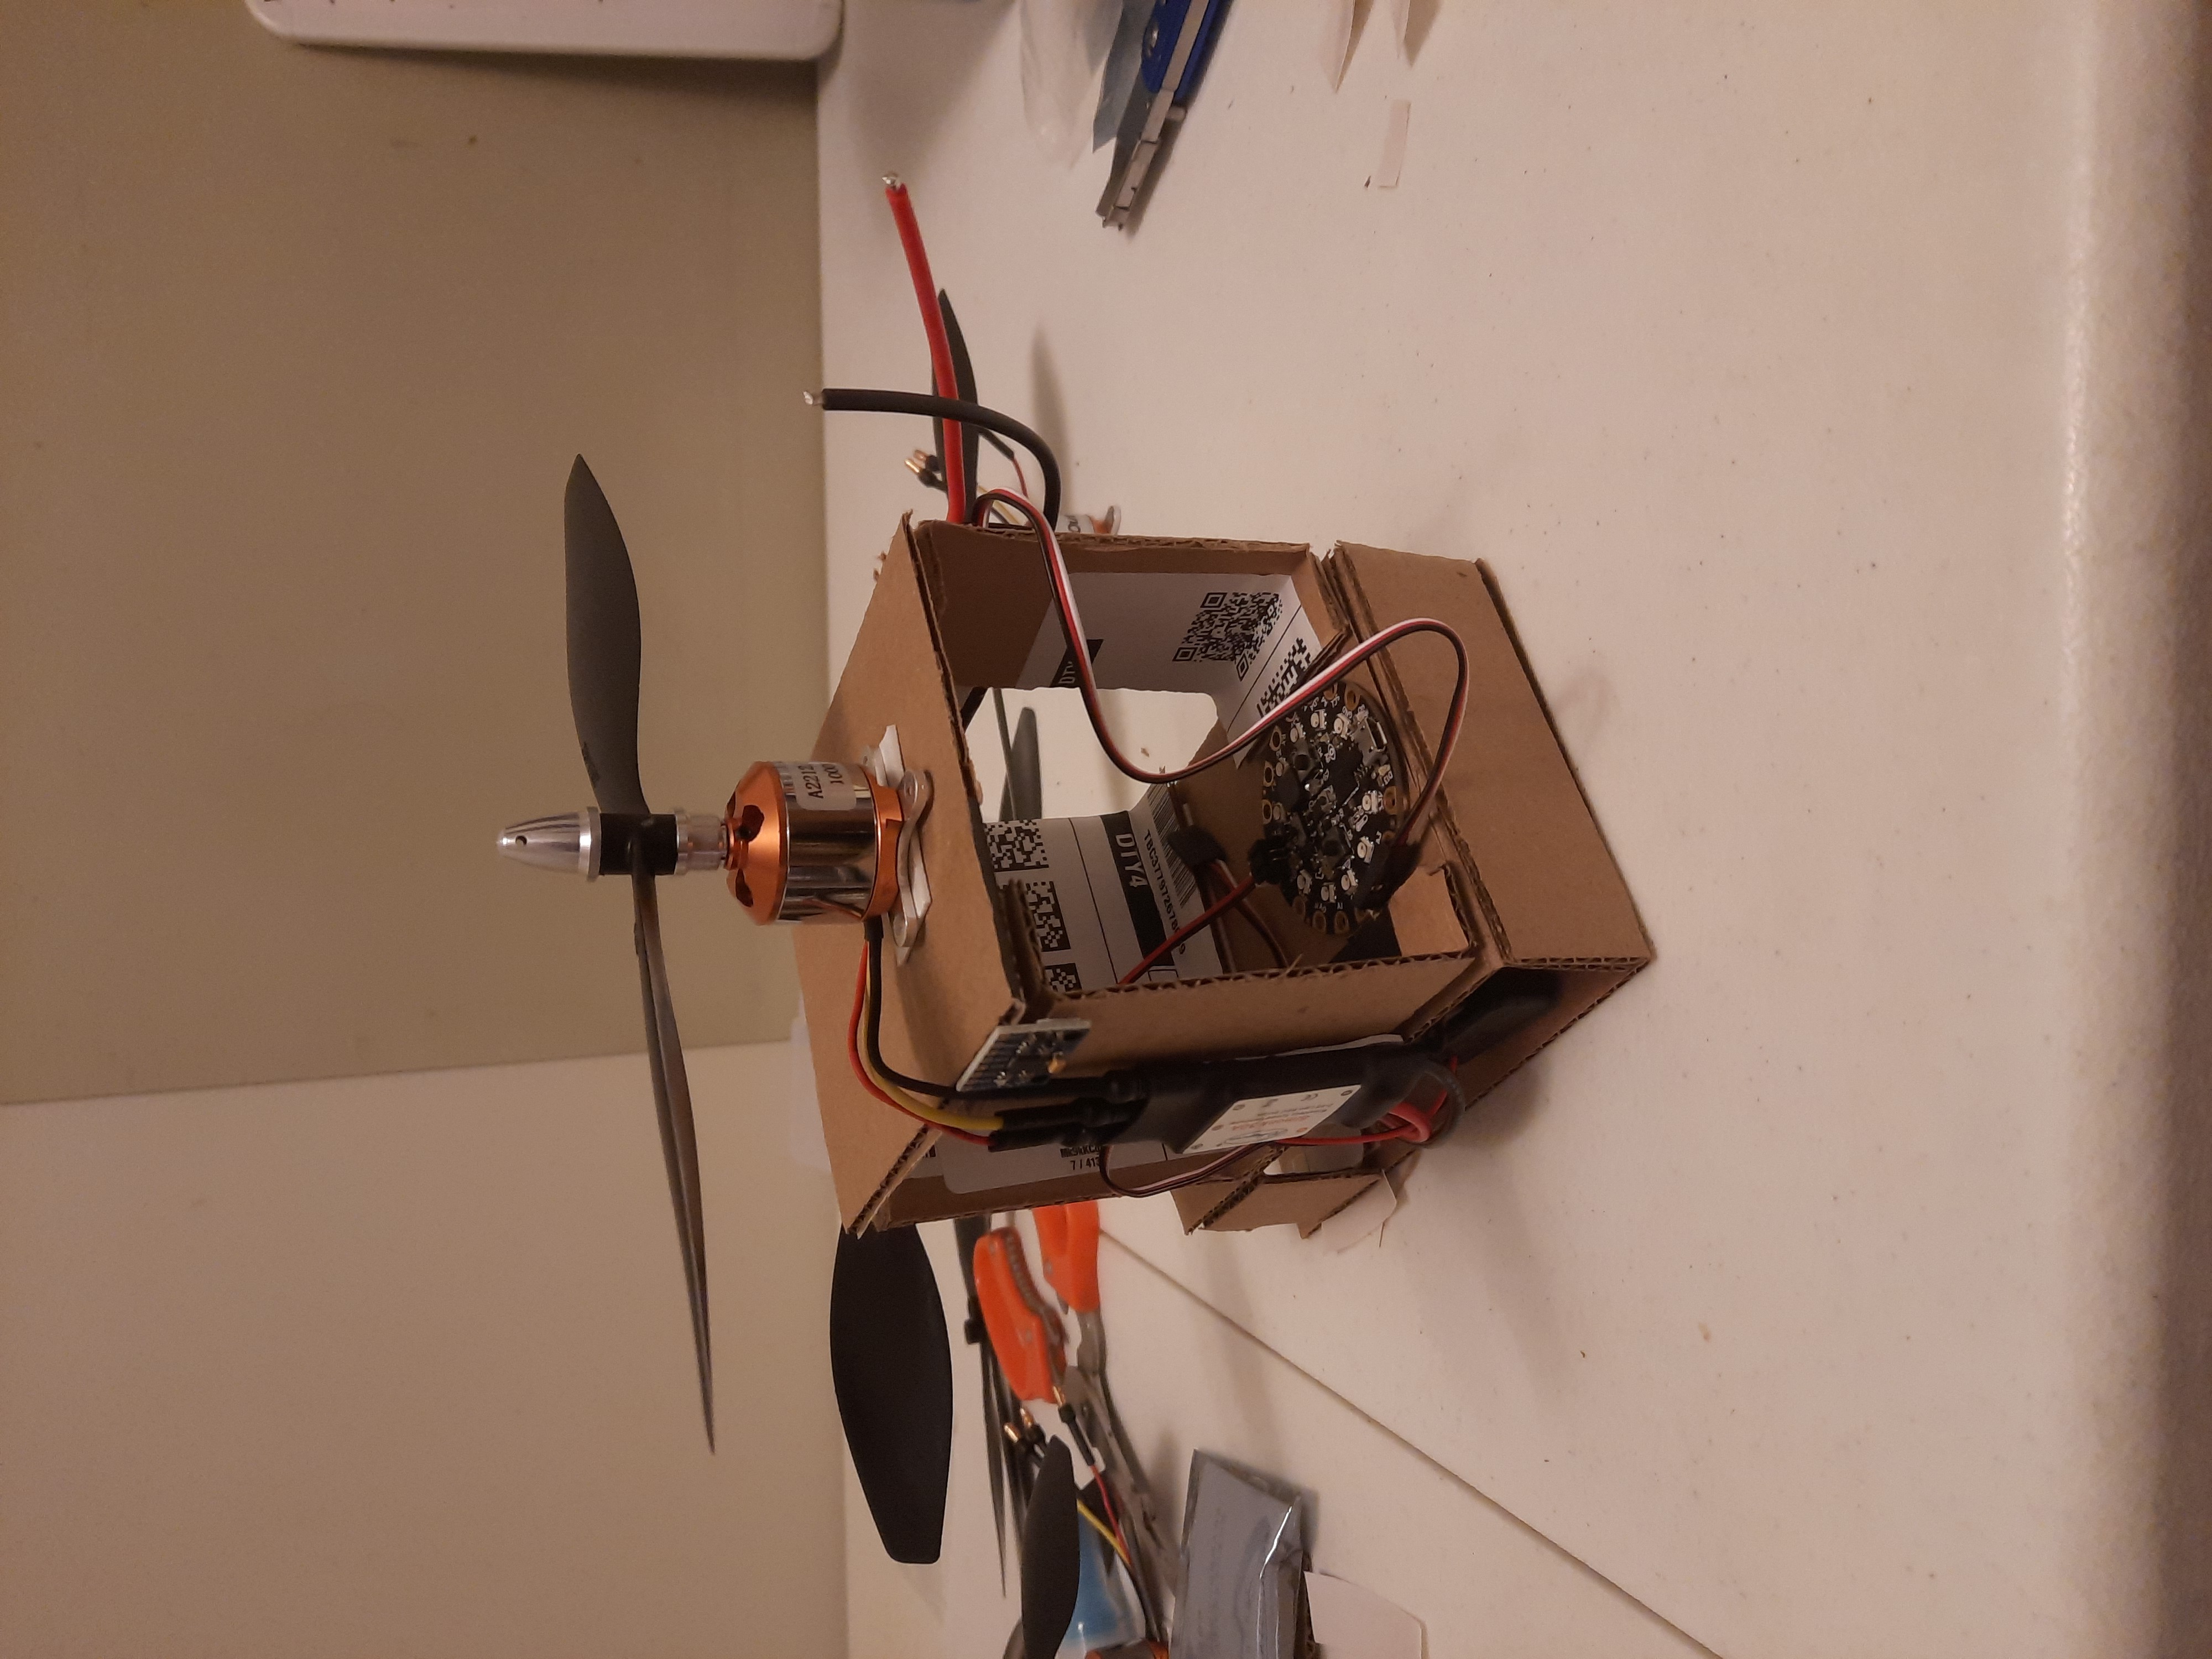
IRL Model
-

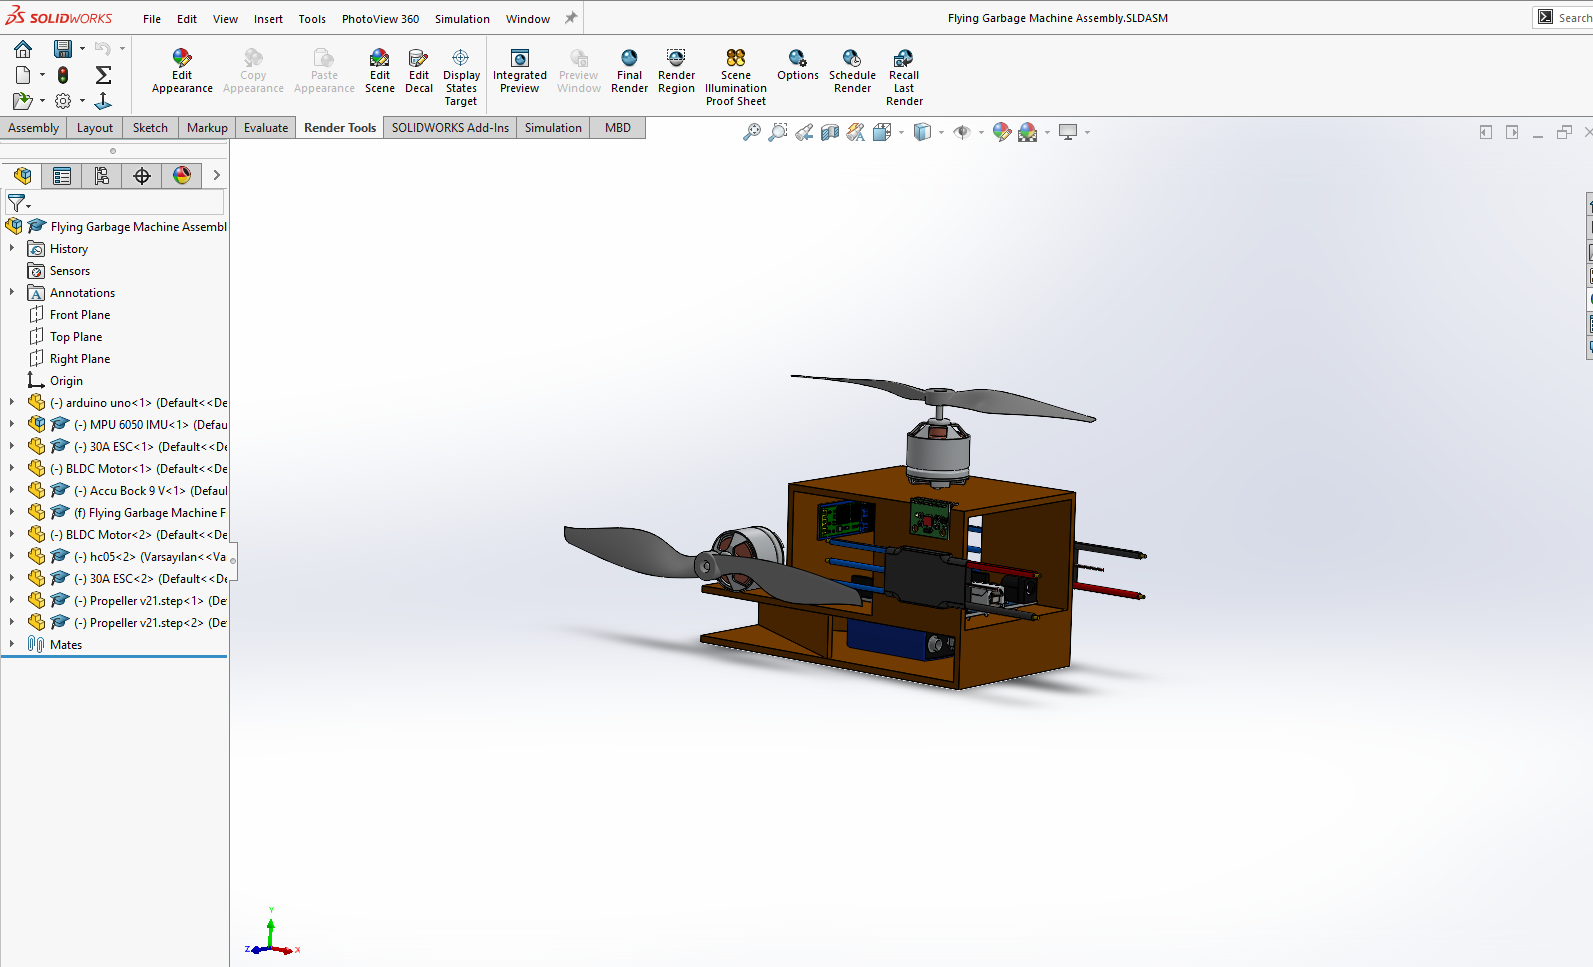
CAD model
Inspiration
We were inspired to learn Arduino and get familiar with microcontrollers and electronics. Some members have a goal of doing embedded programming, and we agreed this would be a great start before moving on to more complex architectures like STM32. At first we wanted to build a quadcopter, but we decided to scale it down a bit to a helicopter to get used to flight controls first.
What it does
The machine is able to communicate - via the bluetooth module, with any suitable bluetooth device connected to the ArduDroid app - an app that allows easy interface between arduino bluetooth devices and the arduino.
Through the ArduDroid app, the user will be able to power on the machine, and have it go vertically up or down with the app’s controls. The user will also be able to power on the tail motor to rotate the device in mid air.
The machine also has an accelerometer sensor which allows for the user to get real time data about the acceleration that the machine experiences.
How we built it
Before any work was done on the machine itself, our group first met up and brainstormed the functionality that we wanted to achieve for this model. We then created a BOM of the various sensors and other equipment that we would need for the project.
After completing the BOM, we then designed a frame that could accommodate for the various pieces of hardware that we had chosen to use. Due to our intentional material limitation of making our frame out of common materials, the frame design incorporated simple shapes that can be easily manufactured.
We then moved on to writing the control software for the machine. By applying our previous knowledge of Arduino programing, and researching into AVR architecture, we were able to create the necessary software needed to interface and effectively control our machine. (More details about our software can also be found in the “What we learned” section).
Finally, with all preliminary designs and software finished, we were able to physically construct our frame, attach our hardware on the frame, and electronically connect all essential electrical components.
Challenges we ran into
A few challenges that we ran into while completing the project include the following:
On the software side, although our group had some experience working with the Arduino IDE, we however, did not have any experience working with specific sensors, such as the bluetooth module, or the accelerometer.
The hardware issue was also a small issue as we had to order various parts that had to arrive within the window of this event. This slightly reduced the hardware that was available for us to use.
Furthermore, due to external circumstances, we were unable to use the Arduino UNO R3 which we originally intended to use for the controller board for our machine.
Accomplishments that we're proud of
Some accomplishments we are proud of include establishing communication between the laptop and the bluetooth module (early test before moving to the ArduDroid app, which we did not get fully working). By treating the bluetooth module like another COM port, we were able to send keystroke data to the Arduino Uno to increase and decrease motor speed via the ESCs. In the same vein, we were able to successfully establish communication with the IMU after several failed attempts, and via formulae were able to process accelerometer and gyroscope data to find roll, pitch, and yaw data.
What we learned
We learned a lot about the AVR architecture and how to make use of an Arduino Uno’s pin configuration to meet certain design needs. For example, we needed to reserve certain analog pins for the inertial measurement unit (IMU) we used in our project for its data and clock lines. We also learned more about electronics speed controllers (ESCs) and how to control them via pulse width modulation (PWM). In general, we gained insight on incoming and outgoing board communication with components like bluetooth modules, ESCs, and IMUs, as well as methods of data transfer like serial communication and the I2C protocol. More importantly, we learned how to better design under material constraints, given that we wanted to honour our initial budget.
What's next for Flying Garbage Machine
Upgrading the chassis. Currently the chassis is not 3D-printed, and the CAD to assembly transition did not fully keep the integrity of the original design.
Finding better propellers. Right now, we had to chip the tail propeller to make it smaller than the top propeller.
Seating the top propeller on a tiltable sheet. This way, the helicopter can actually move forward, backward, and lean in the direction of intended movement due to an imbalance in lift.
Designing a custom control app, and maybe swapping the bluetooth module for a more powerful and faster means of communication.

Log in or sign up for Devpost to join the conversation.