-
-
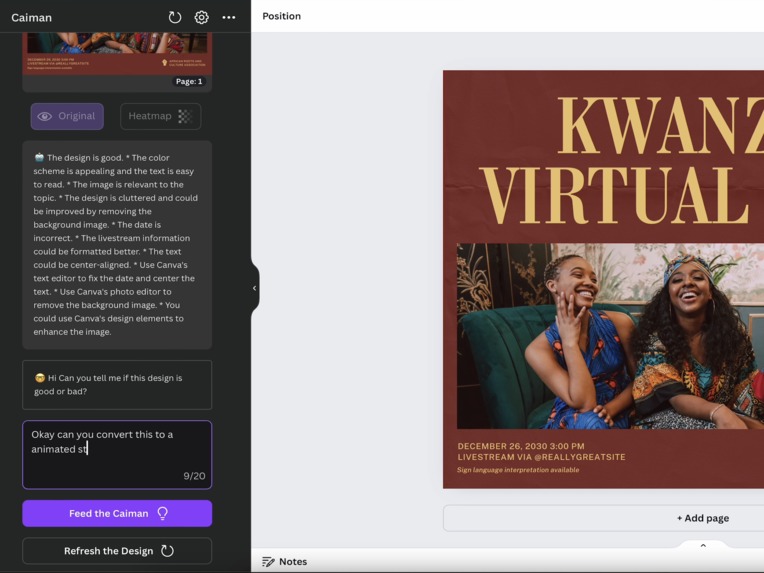
Chatbot that provides quick feedback on flaws and misses in your design
-
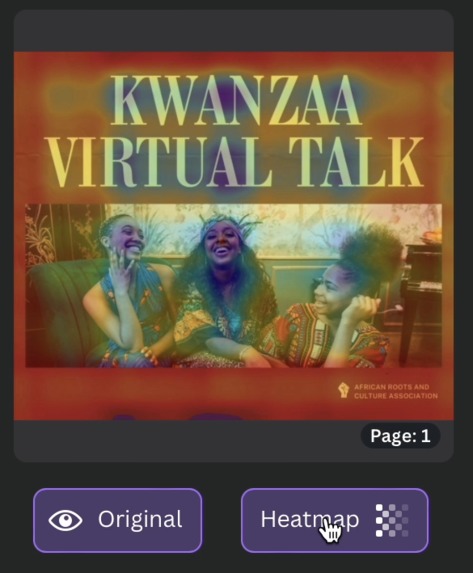
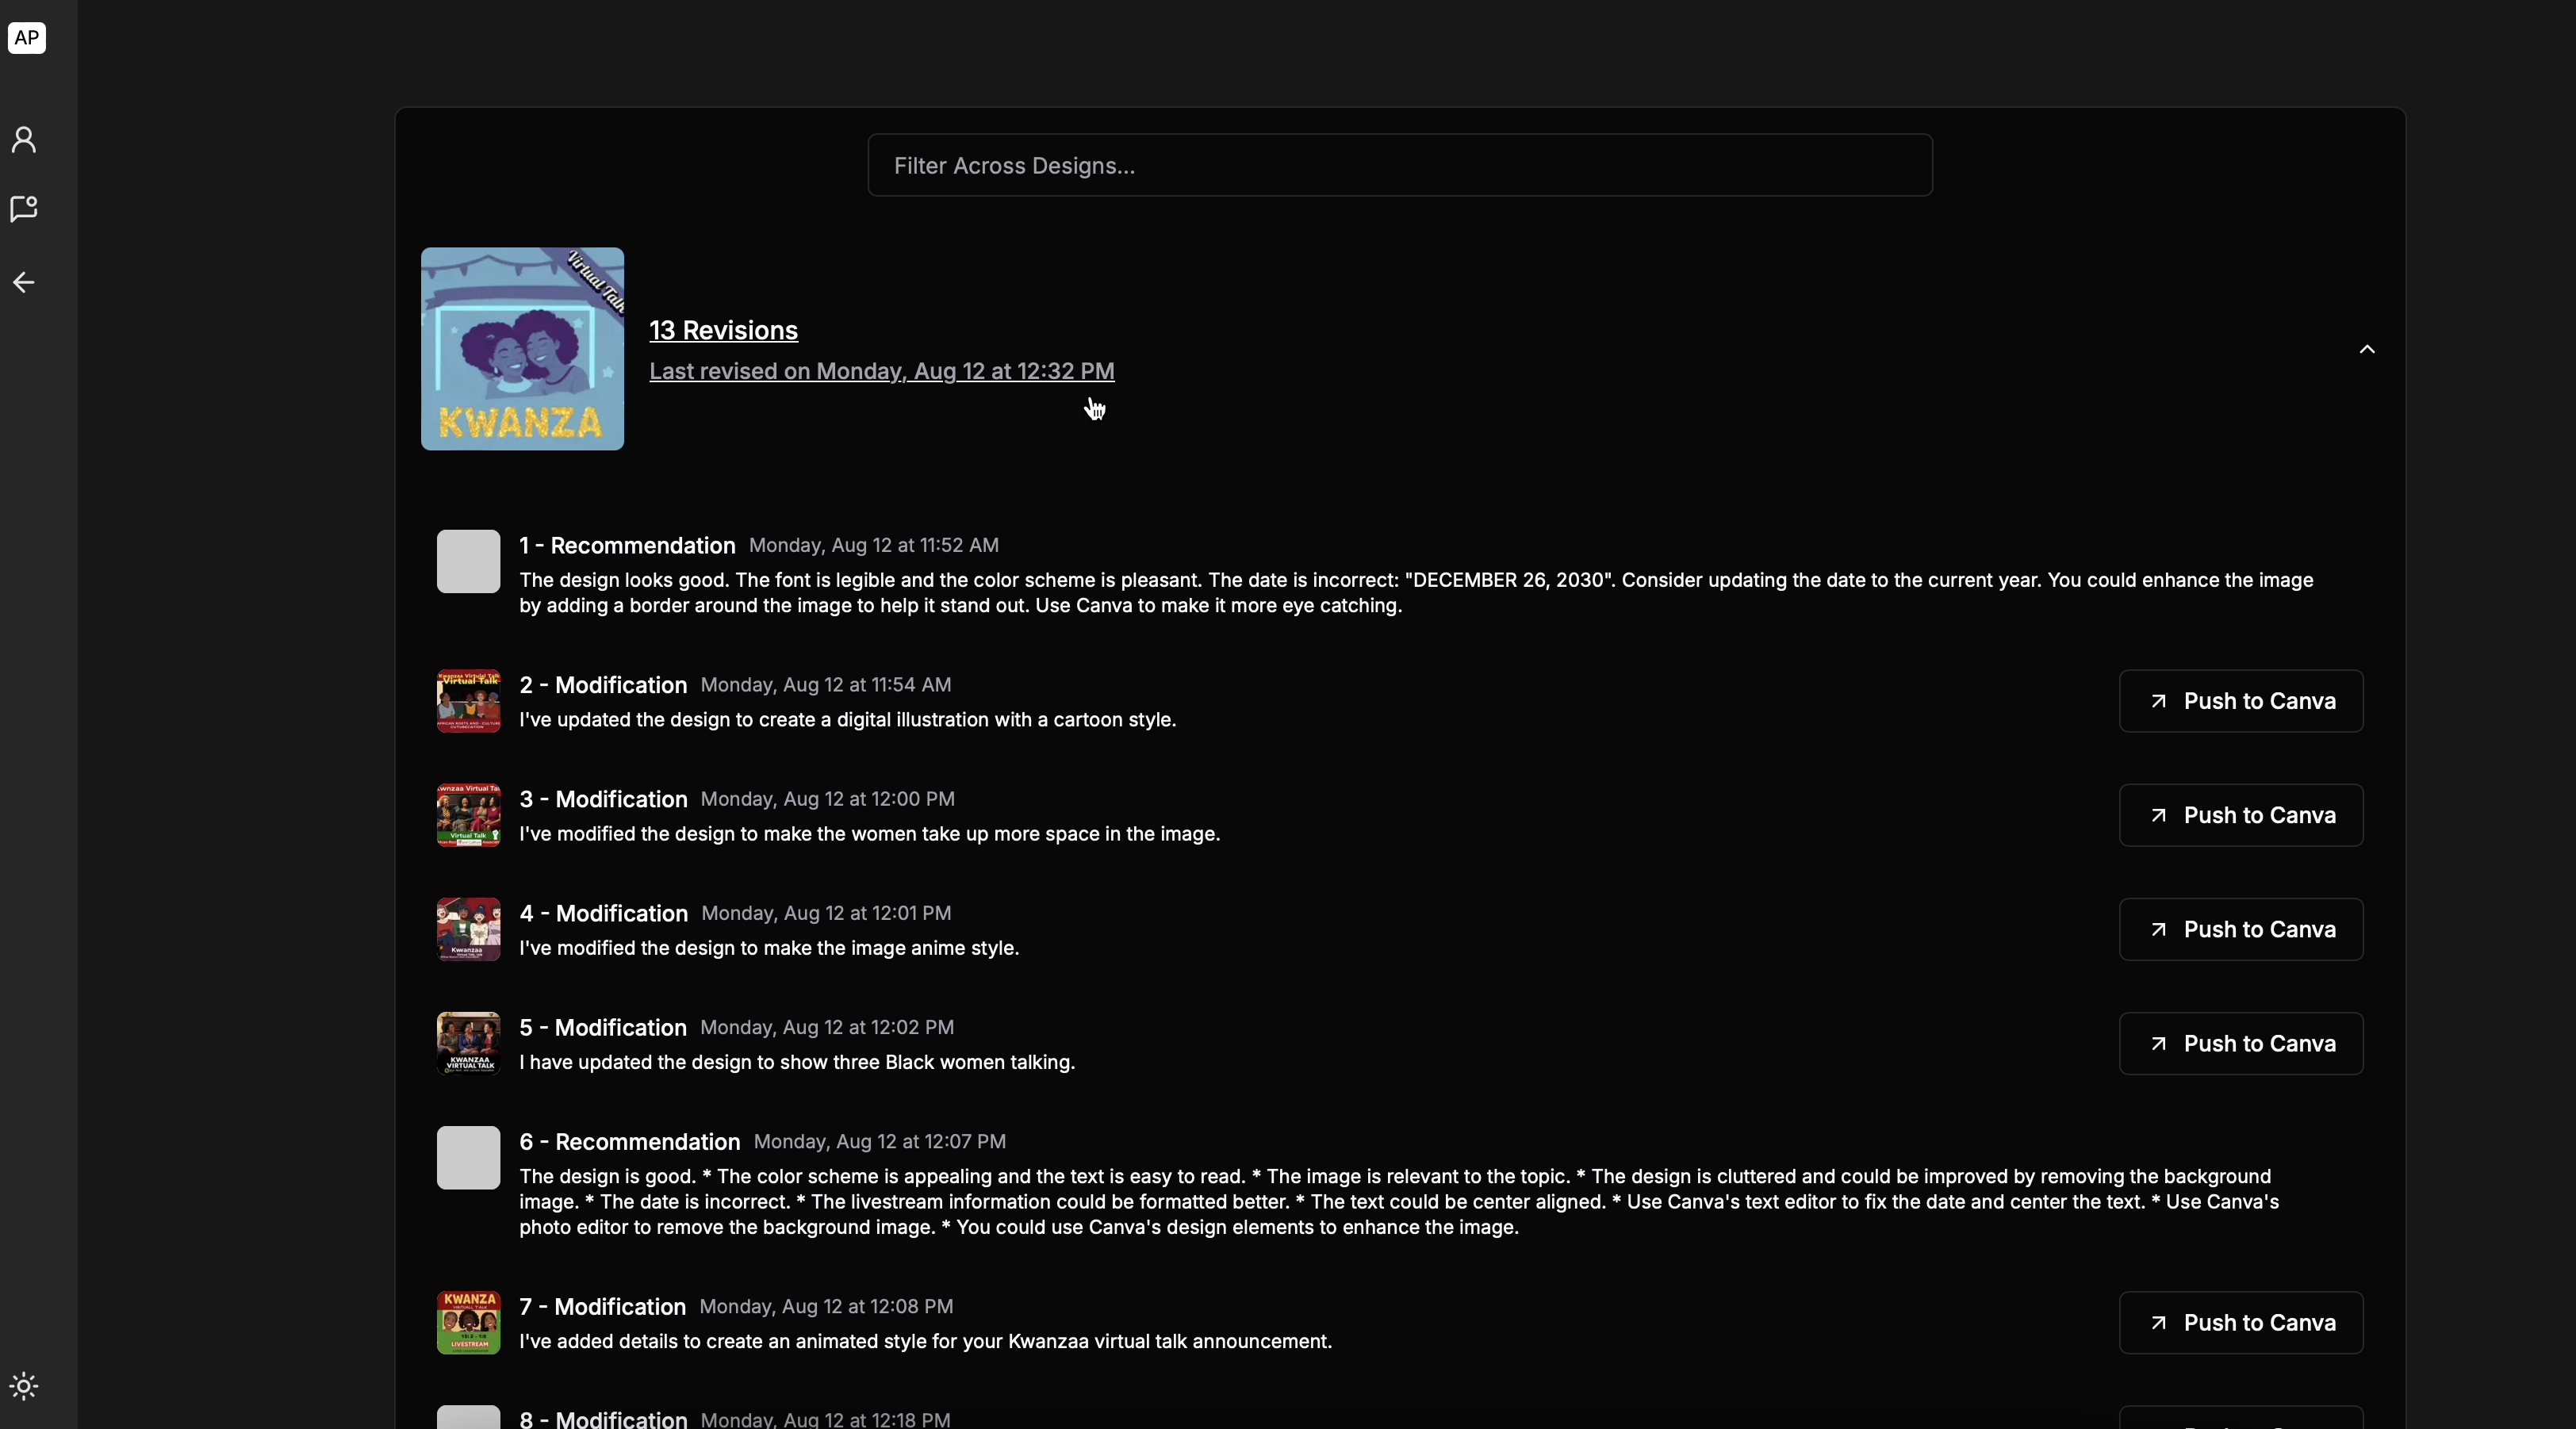
Heatmap for Attention Surfaces on the design
-

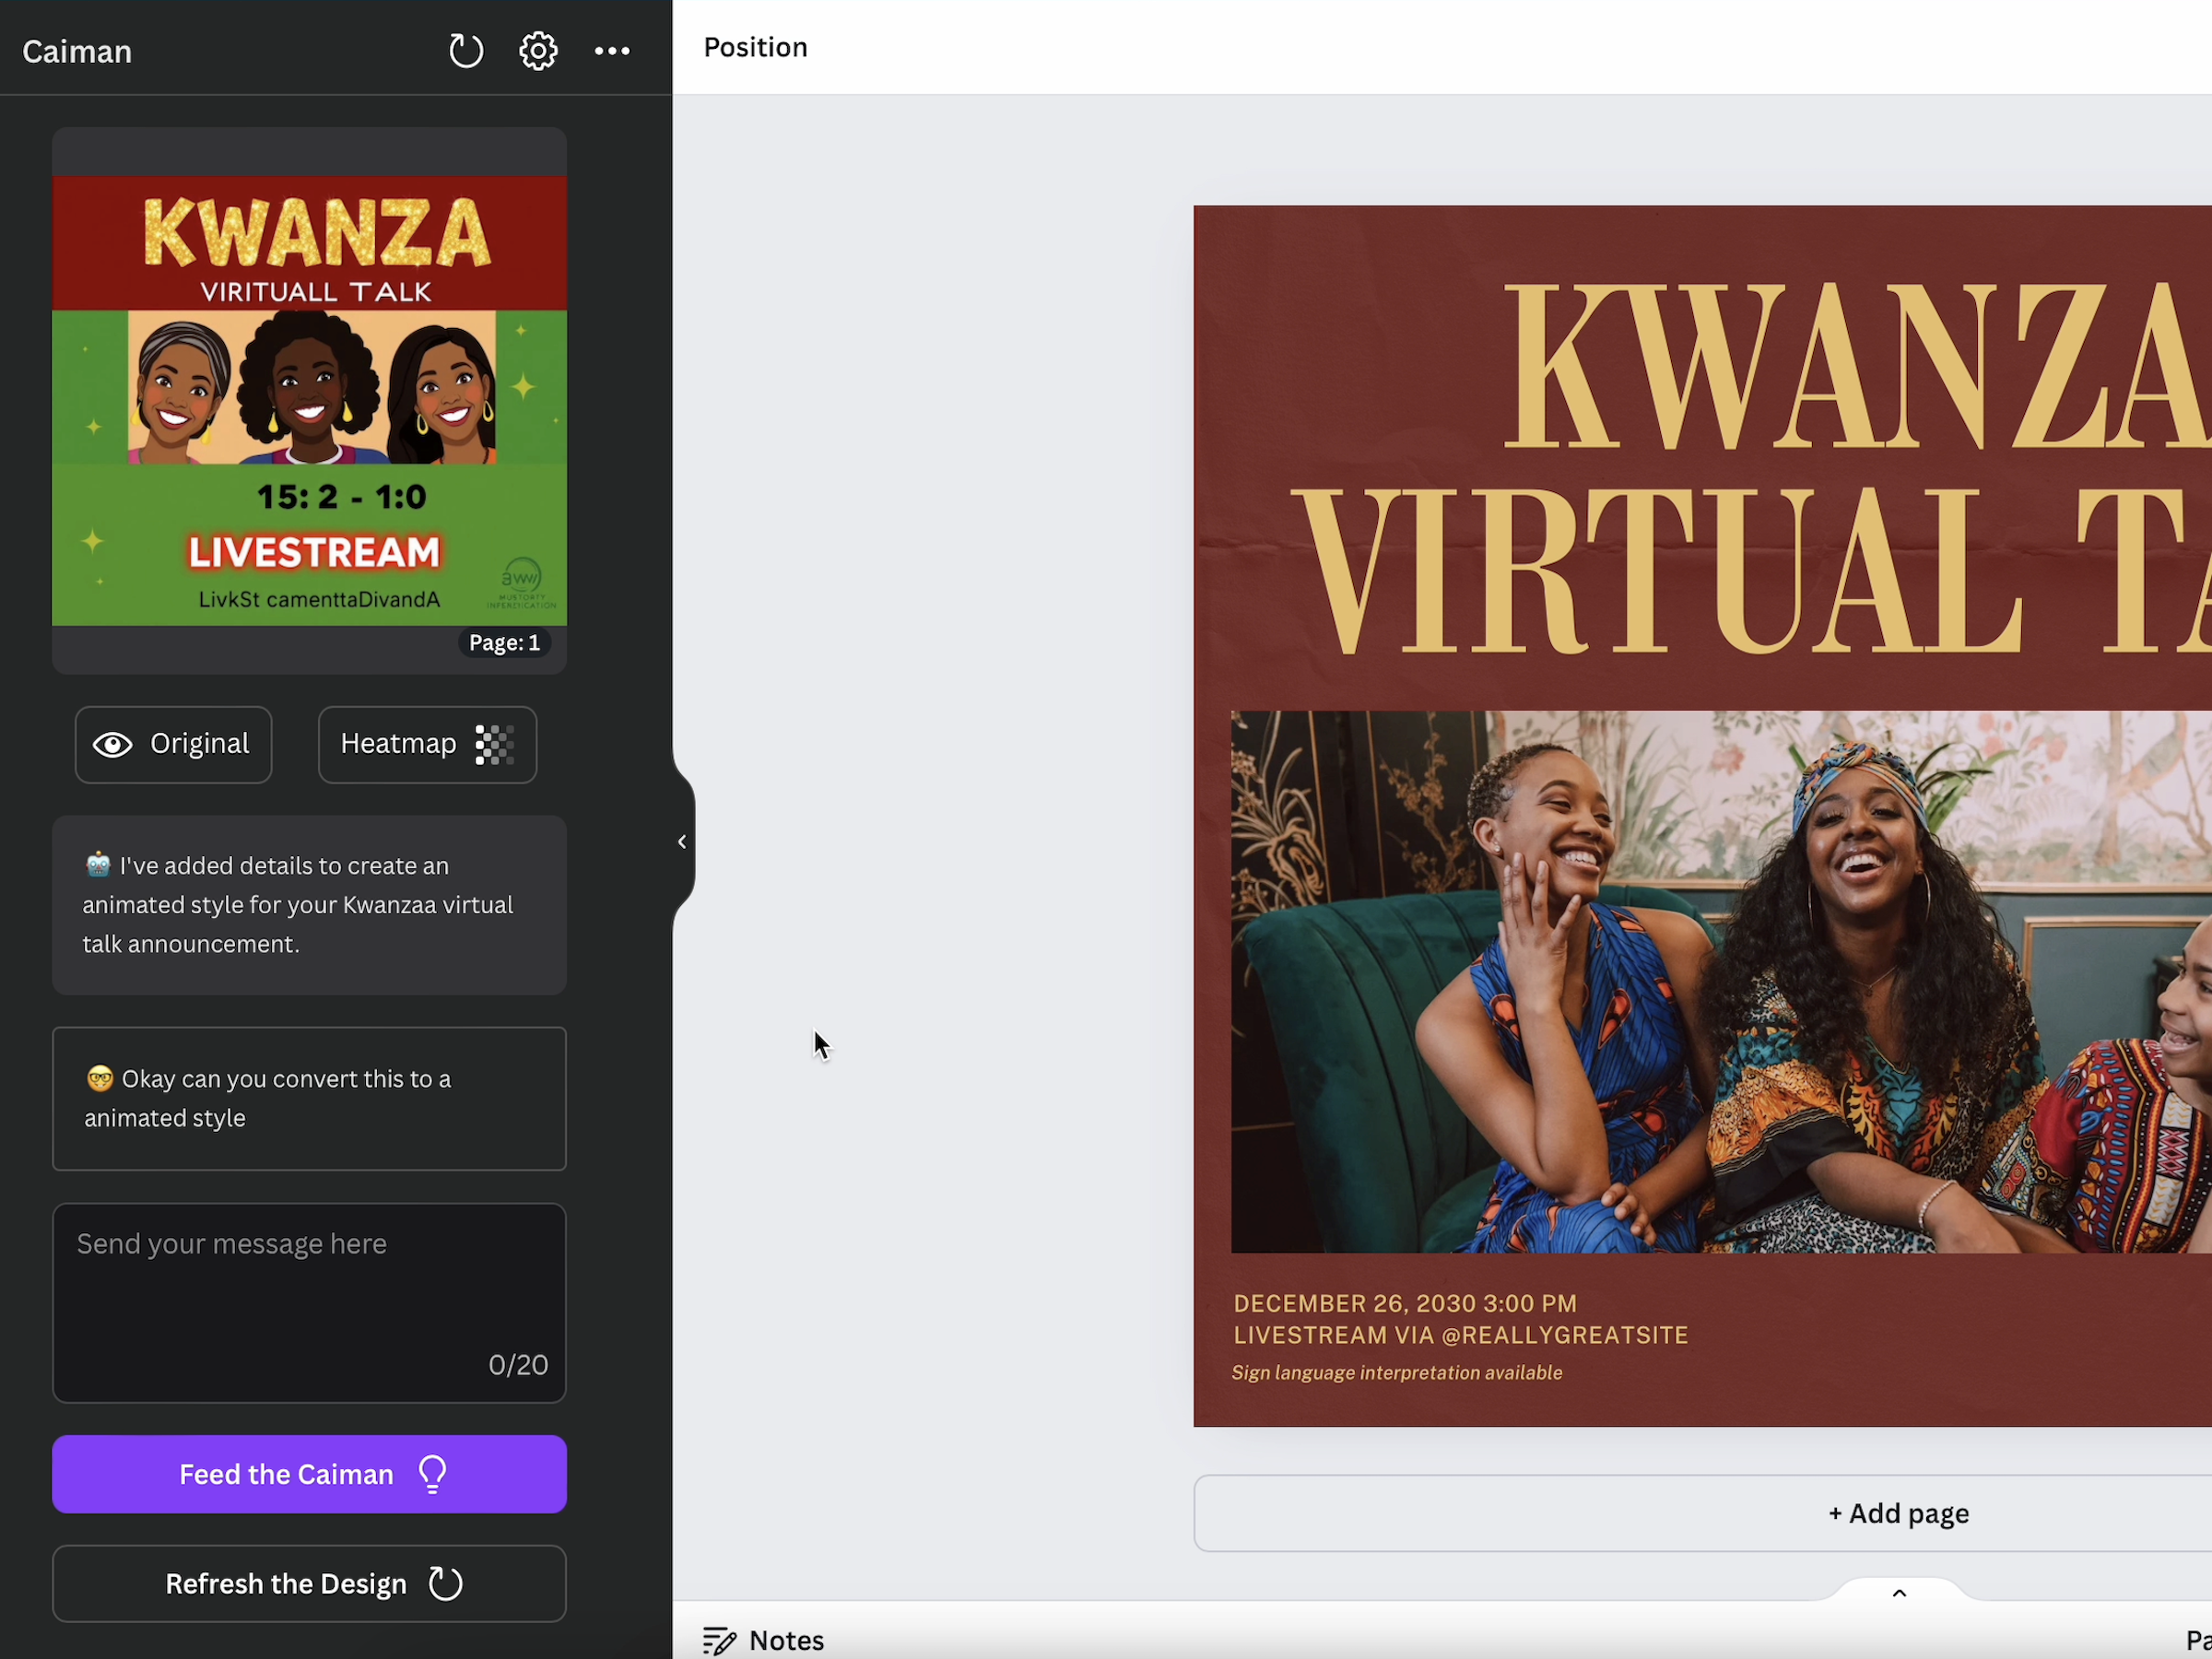
Chatbot reimagines your design, right in the sidebar
-
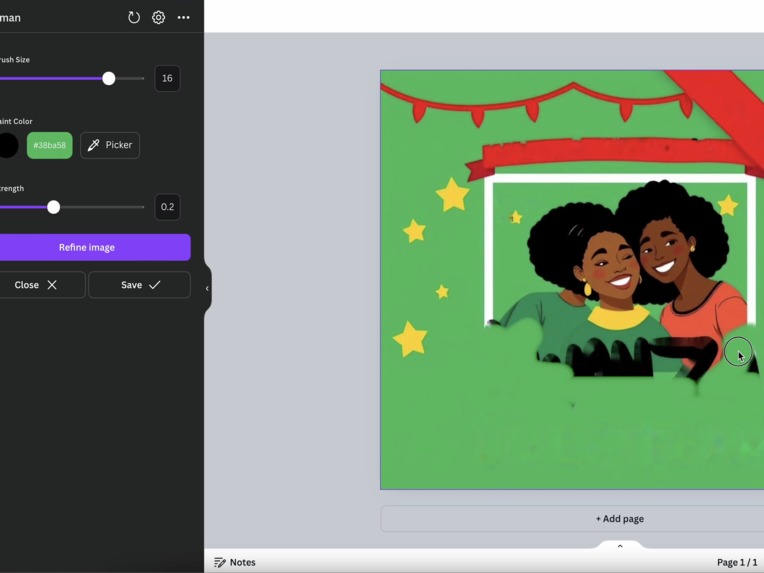
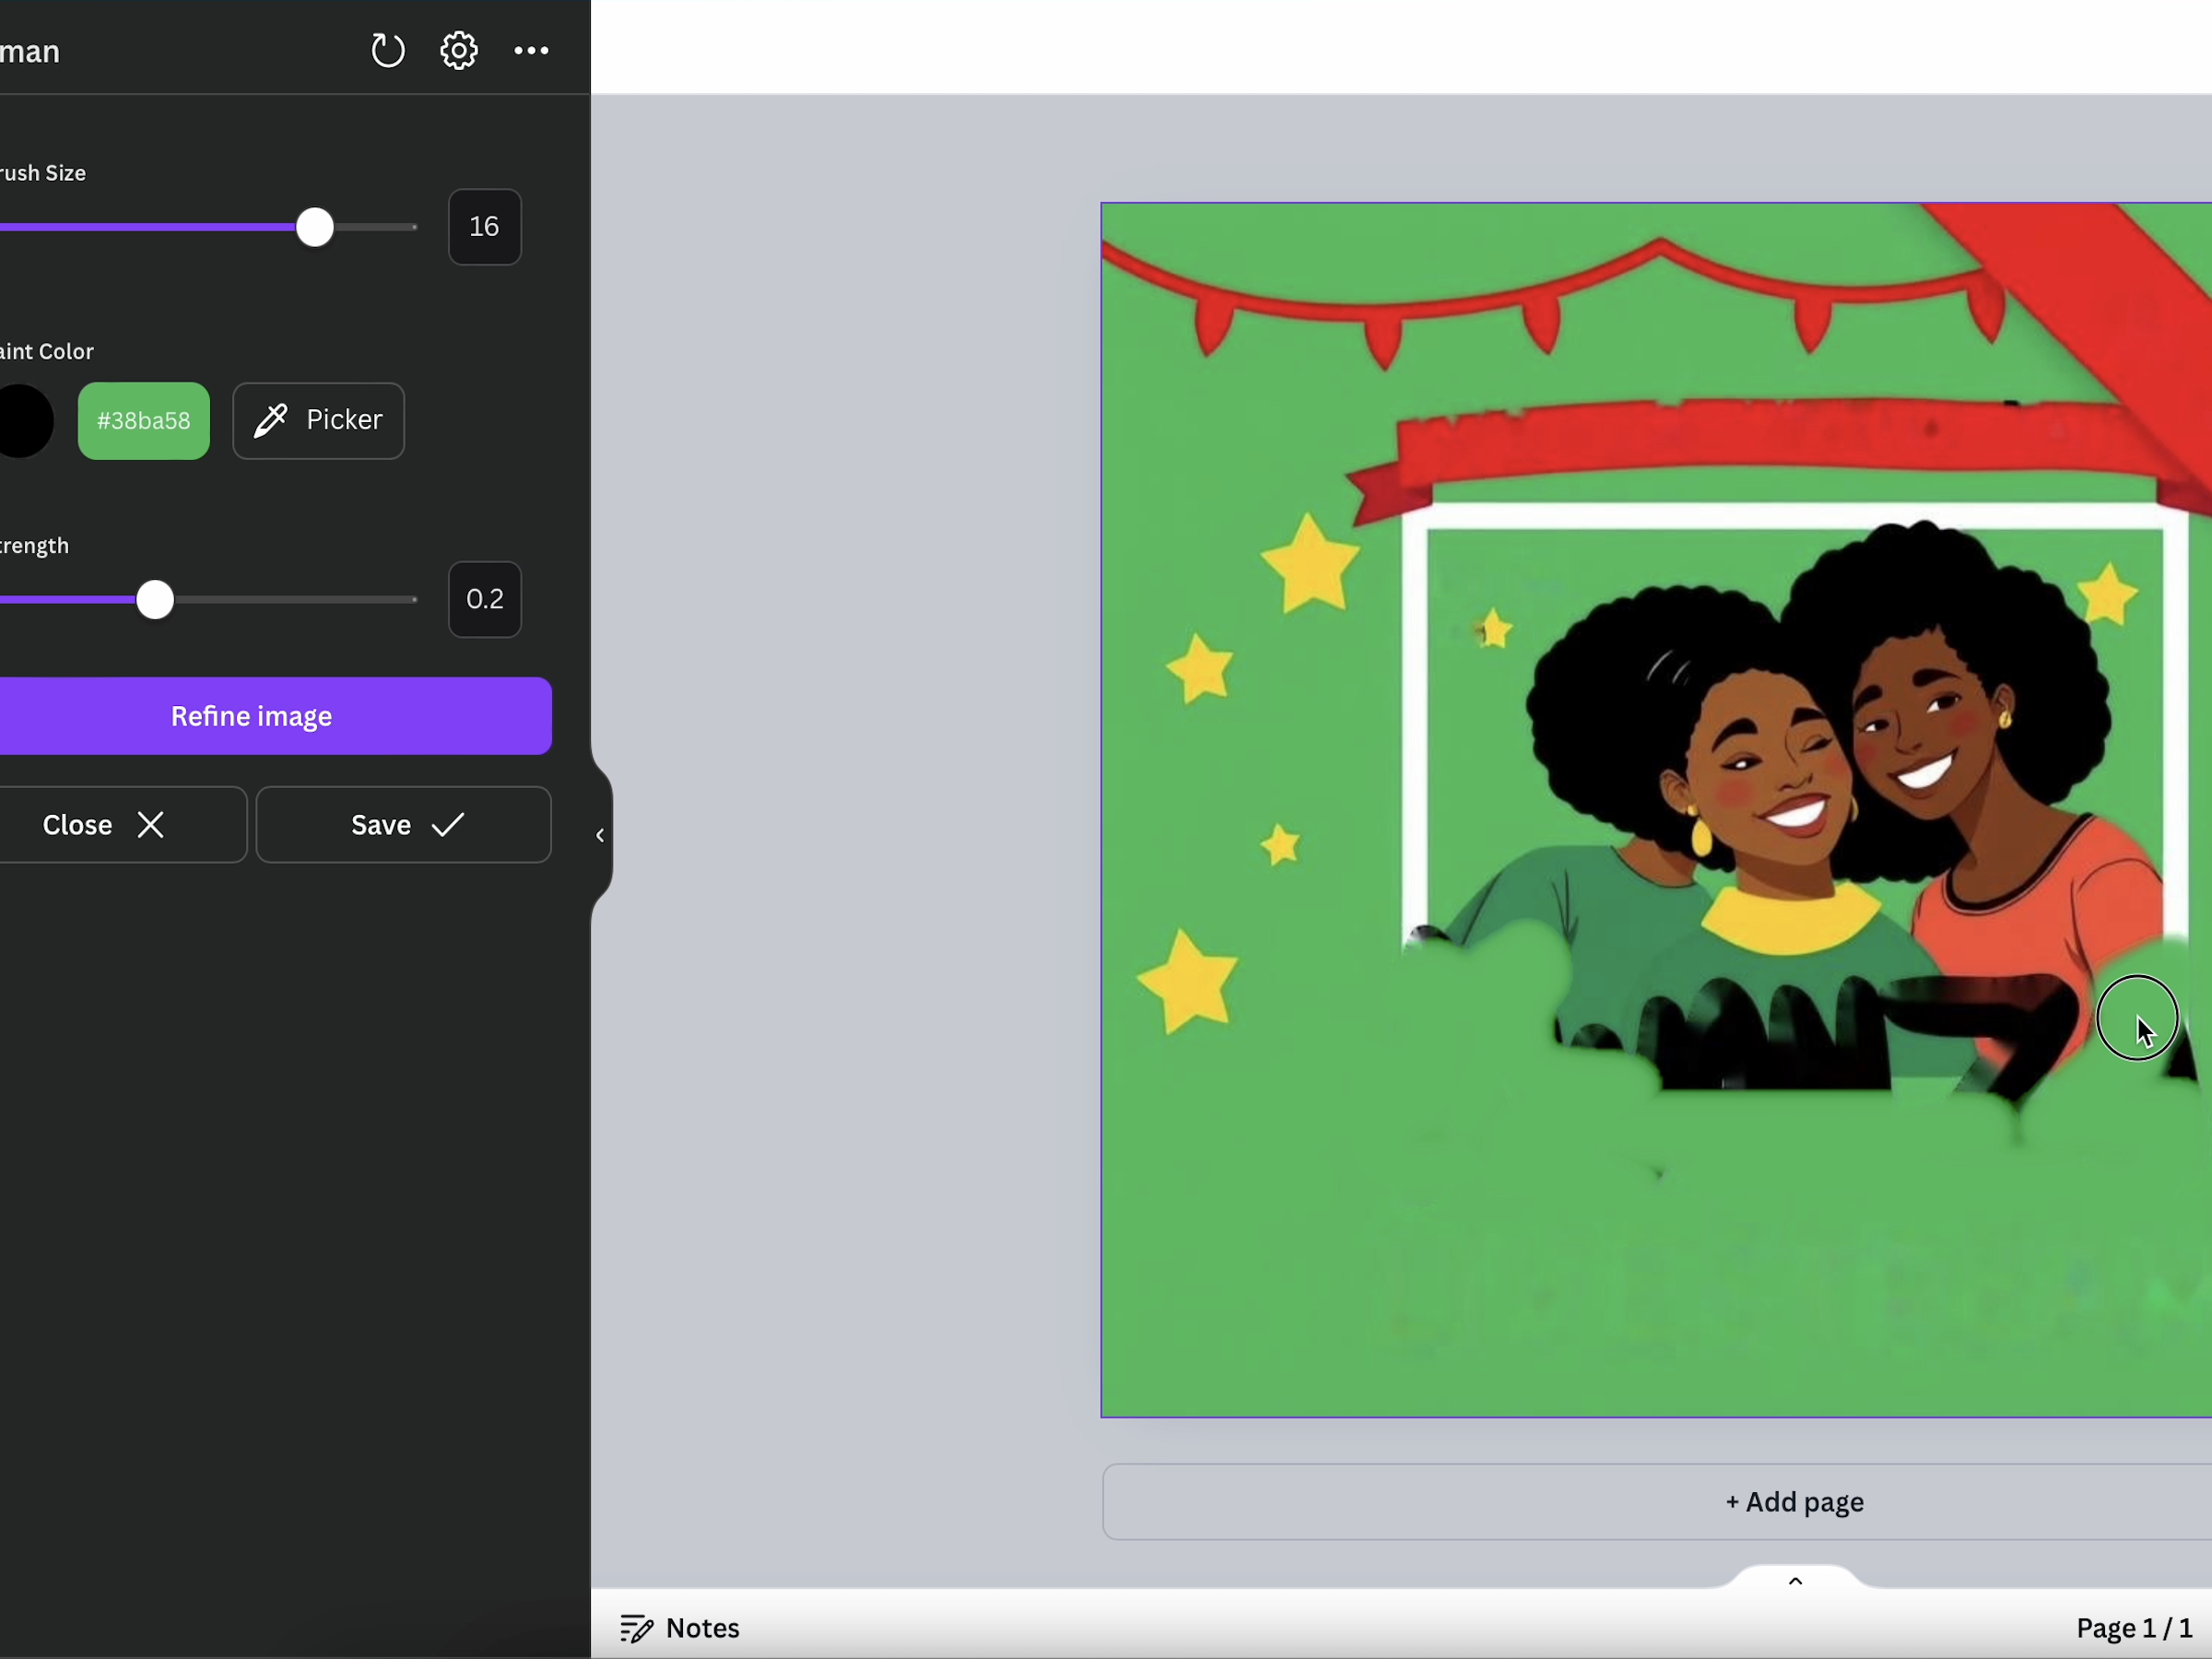
Drag and Drop to Add to design, and refine design by painting over
-
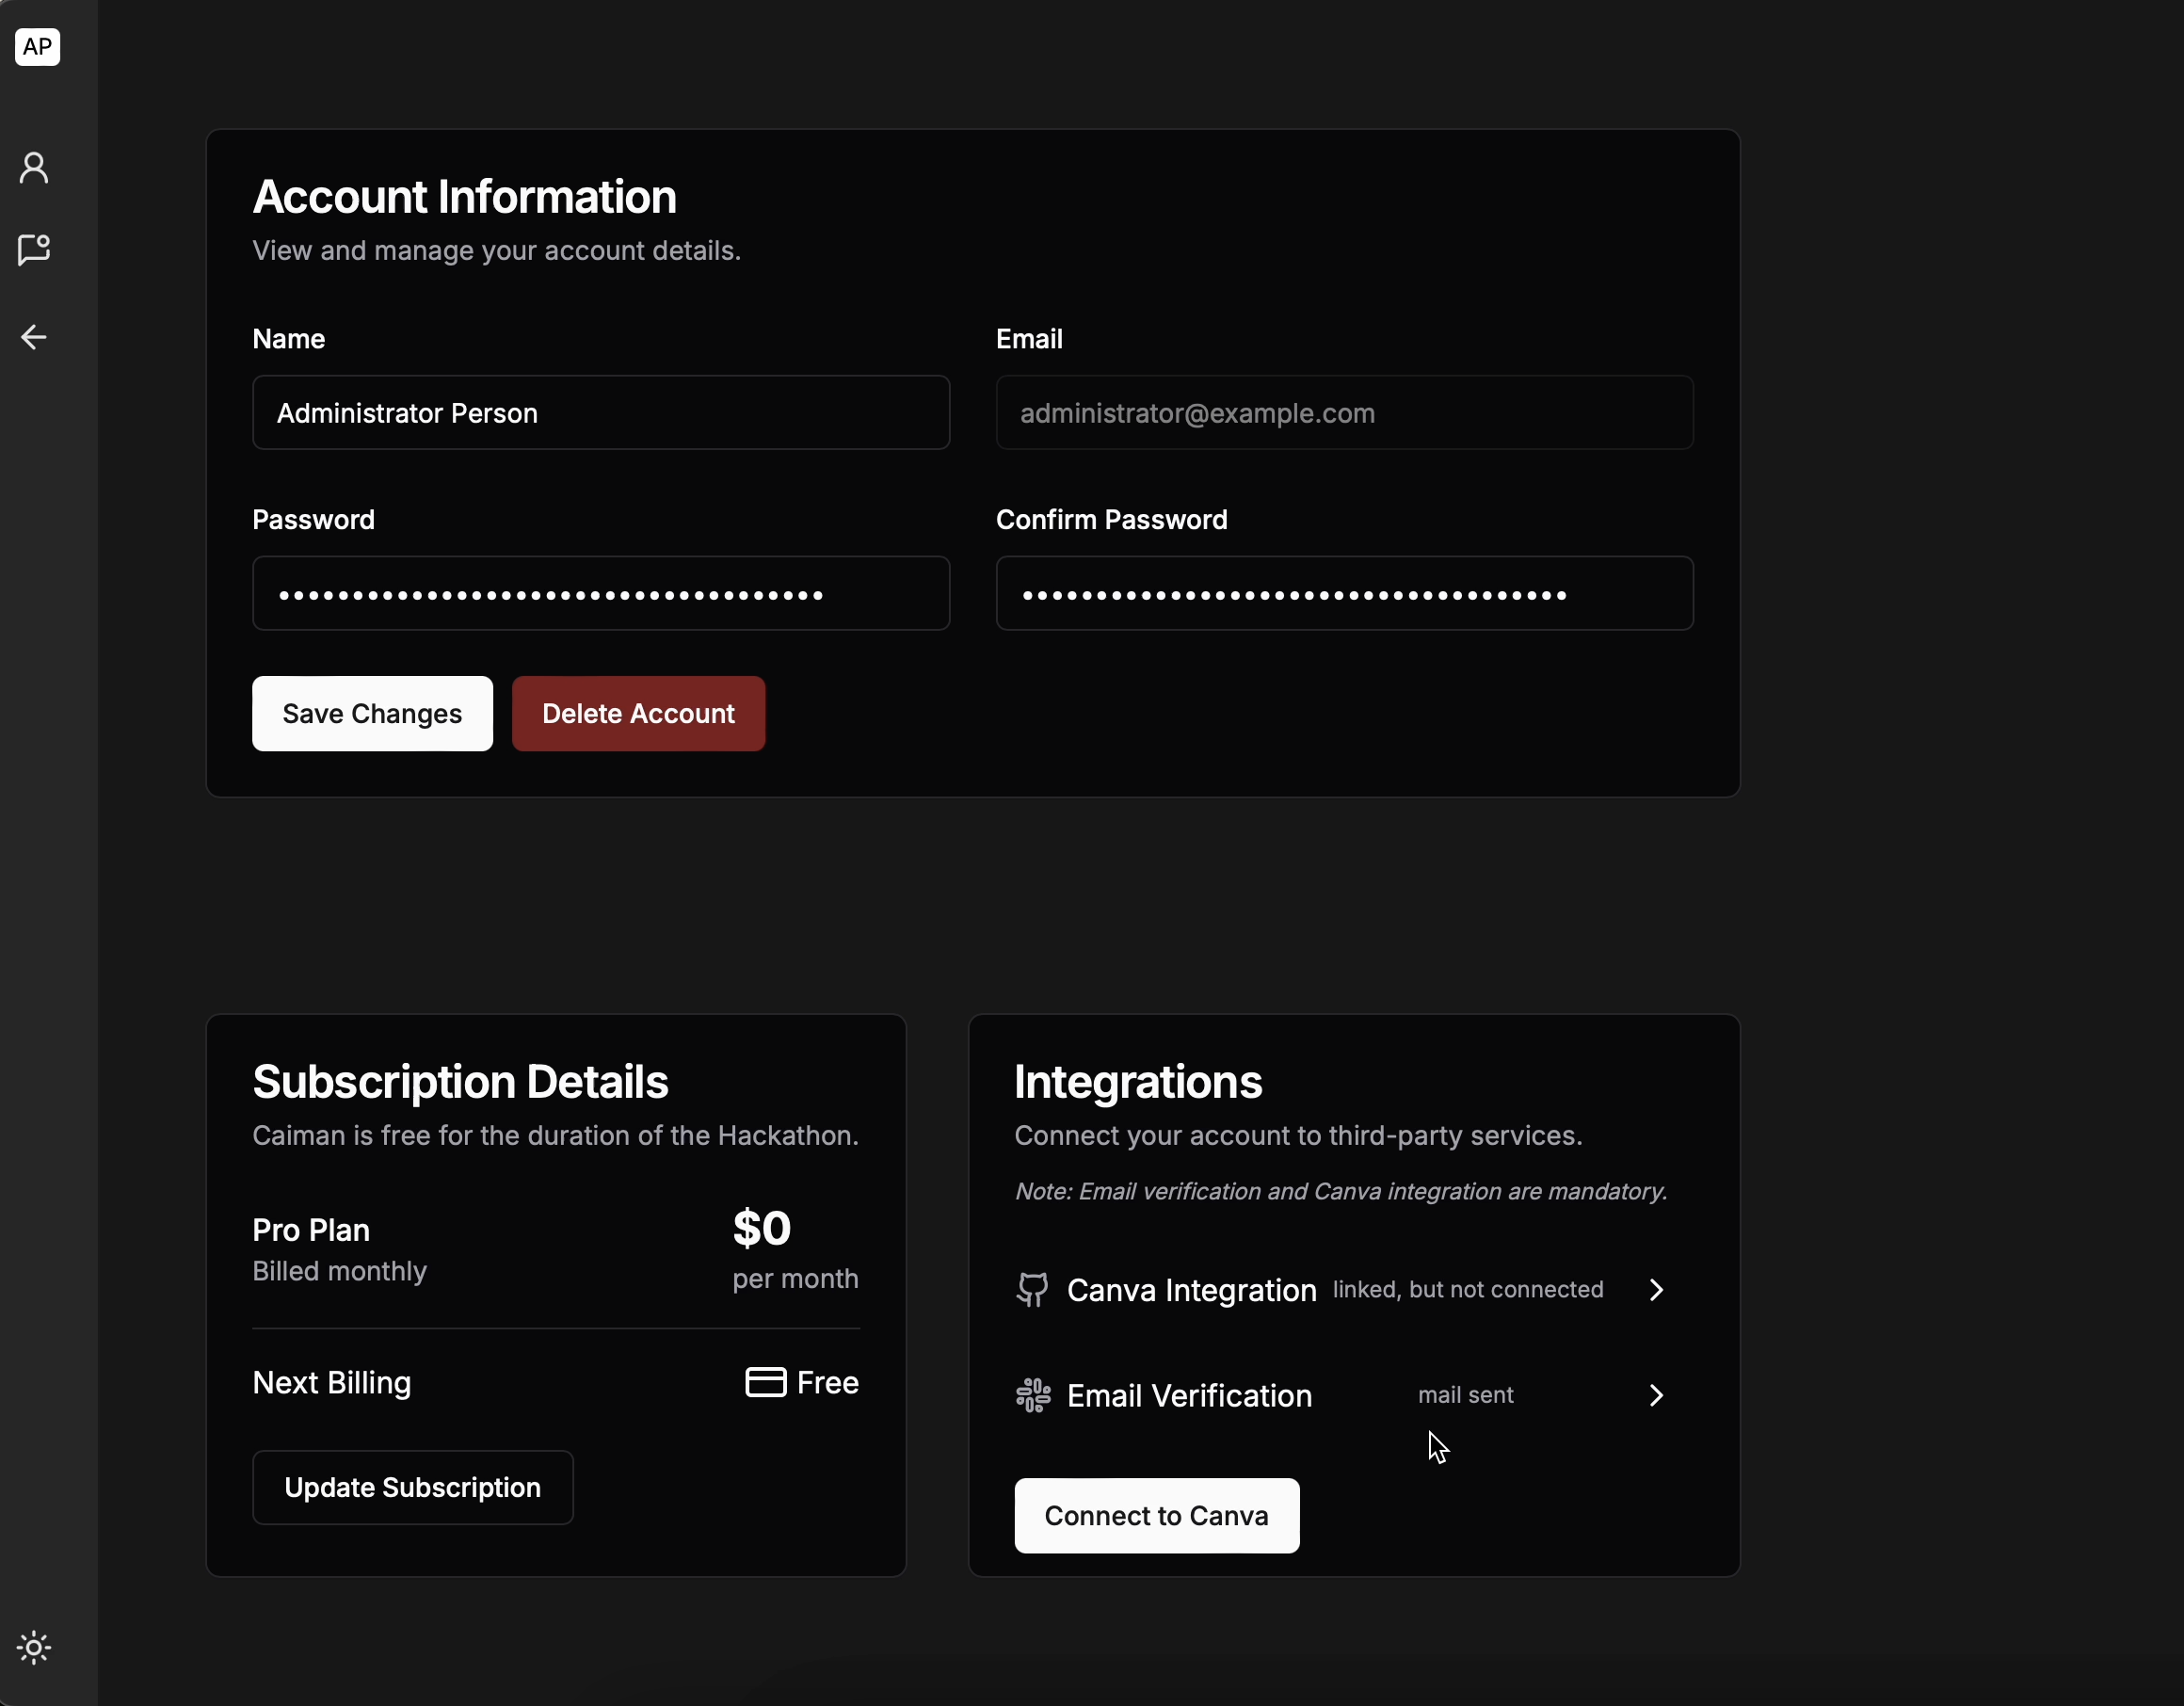
Backend to view interaction history and connect to Canva servers
-
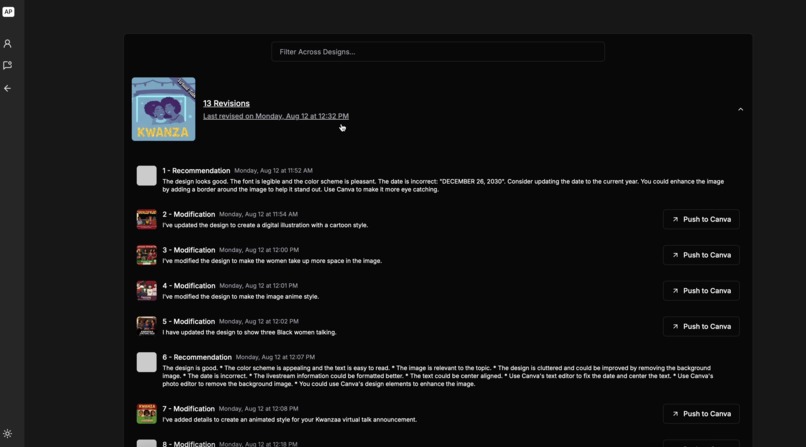
Push back interesting iterations to Canva as Assets to be iterated on
-
Plays well with other canva tools and integrates seamlessly into your workflow


Inspiration
We're avid users of Canva, so when the chance came to extend Canva for this competition we jumped at it! Our Canva workflow normally comprises picking a template, then modifying it with our text and images and exporting it to a JPG or a PDF to print or mail out. For printing we use Printo, a local print service, and they usually layout our images and point out typos. Our inspiration comes from our own pain points, which are, in no particular order:
- 👁️ Tunnel Vision on designs - We usually end up making a design best suited to us, and not for our audience, thanks to our tunnel vision while designing
- 📋 Identified as a Templated Design - Canva has a lot of templates..however, at the end of the day they have only about 1 unique template for about 100k users, which means most people can identify a design as a "Canva Template"
- 😬 Unoriginal or Low Effort - Using Canva and circulating designs among other people who use Canva leads to a perception of being Unoriginal or Low Effort
- 🙊 Lack of Feedback - During the Design process, there's no feedback mechanism that says whether the design is aesthetically pleasing, or gives you an idea about a good alternative
- 💬 Lorem Ipsum and Other Placeholders - We often leave behind placeholder emails, text, even phone numbers in our design, with the source being the original templates
- 🐝 Iterating on the Entire Design or on Single Component - We don't have the flexibility of being able to take a holistic view and iterate on the entire design, or to zoom into individual components, without changing the template
We decided to come up with a holistic solution to not only enhance designs but modify them as well. Hence Caiman, was born 🐊.
What it does
Caiman allows you to iterate infinitely on your designs. It works on a three part process, pick a template, iterate and ideate and refine to finalise.
Here's an extremely simplified Canva workflow diagram below which we followed as a reference while designing our product.
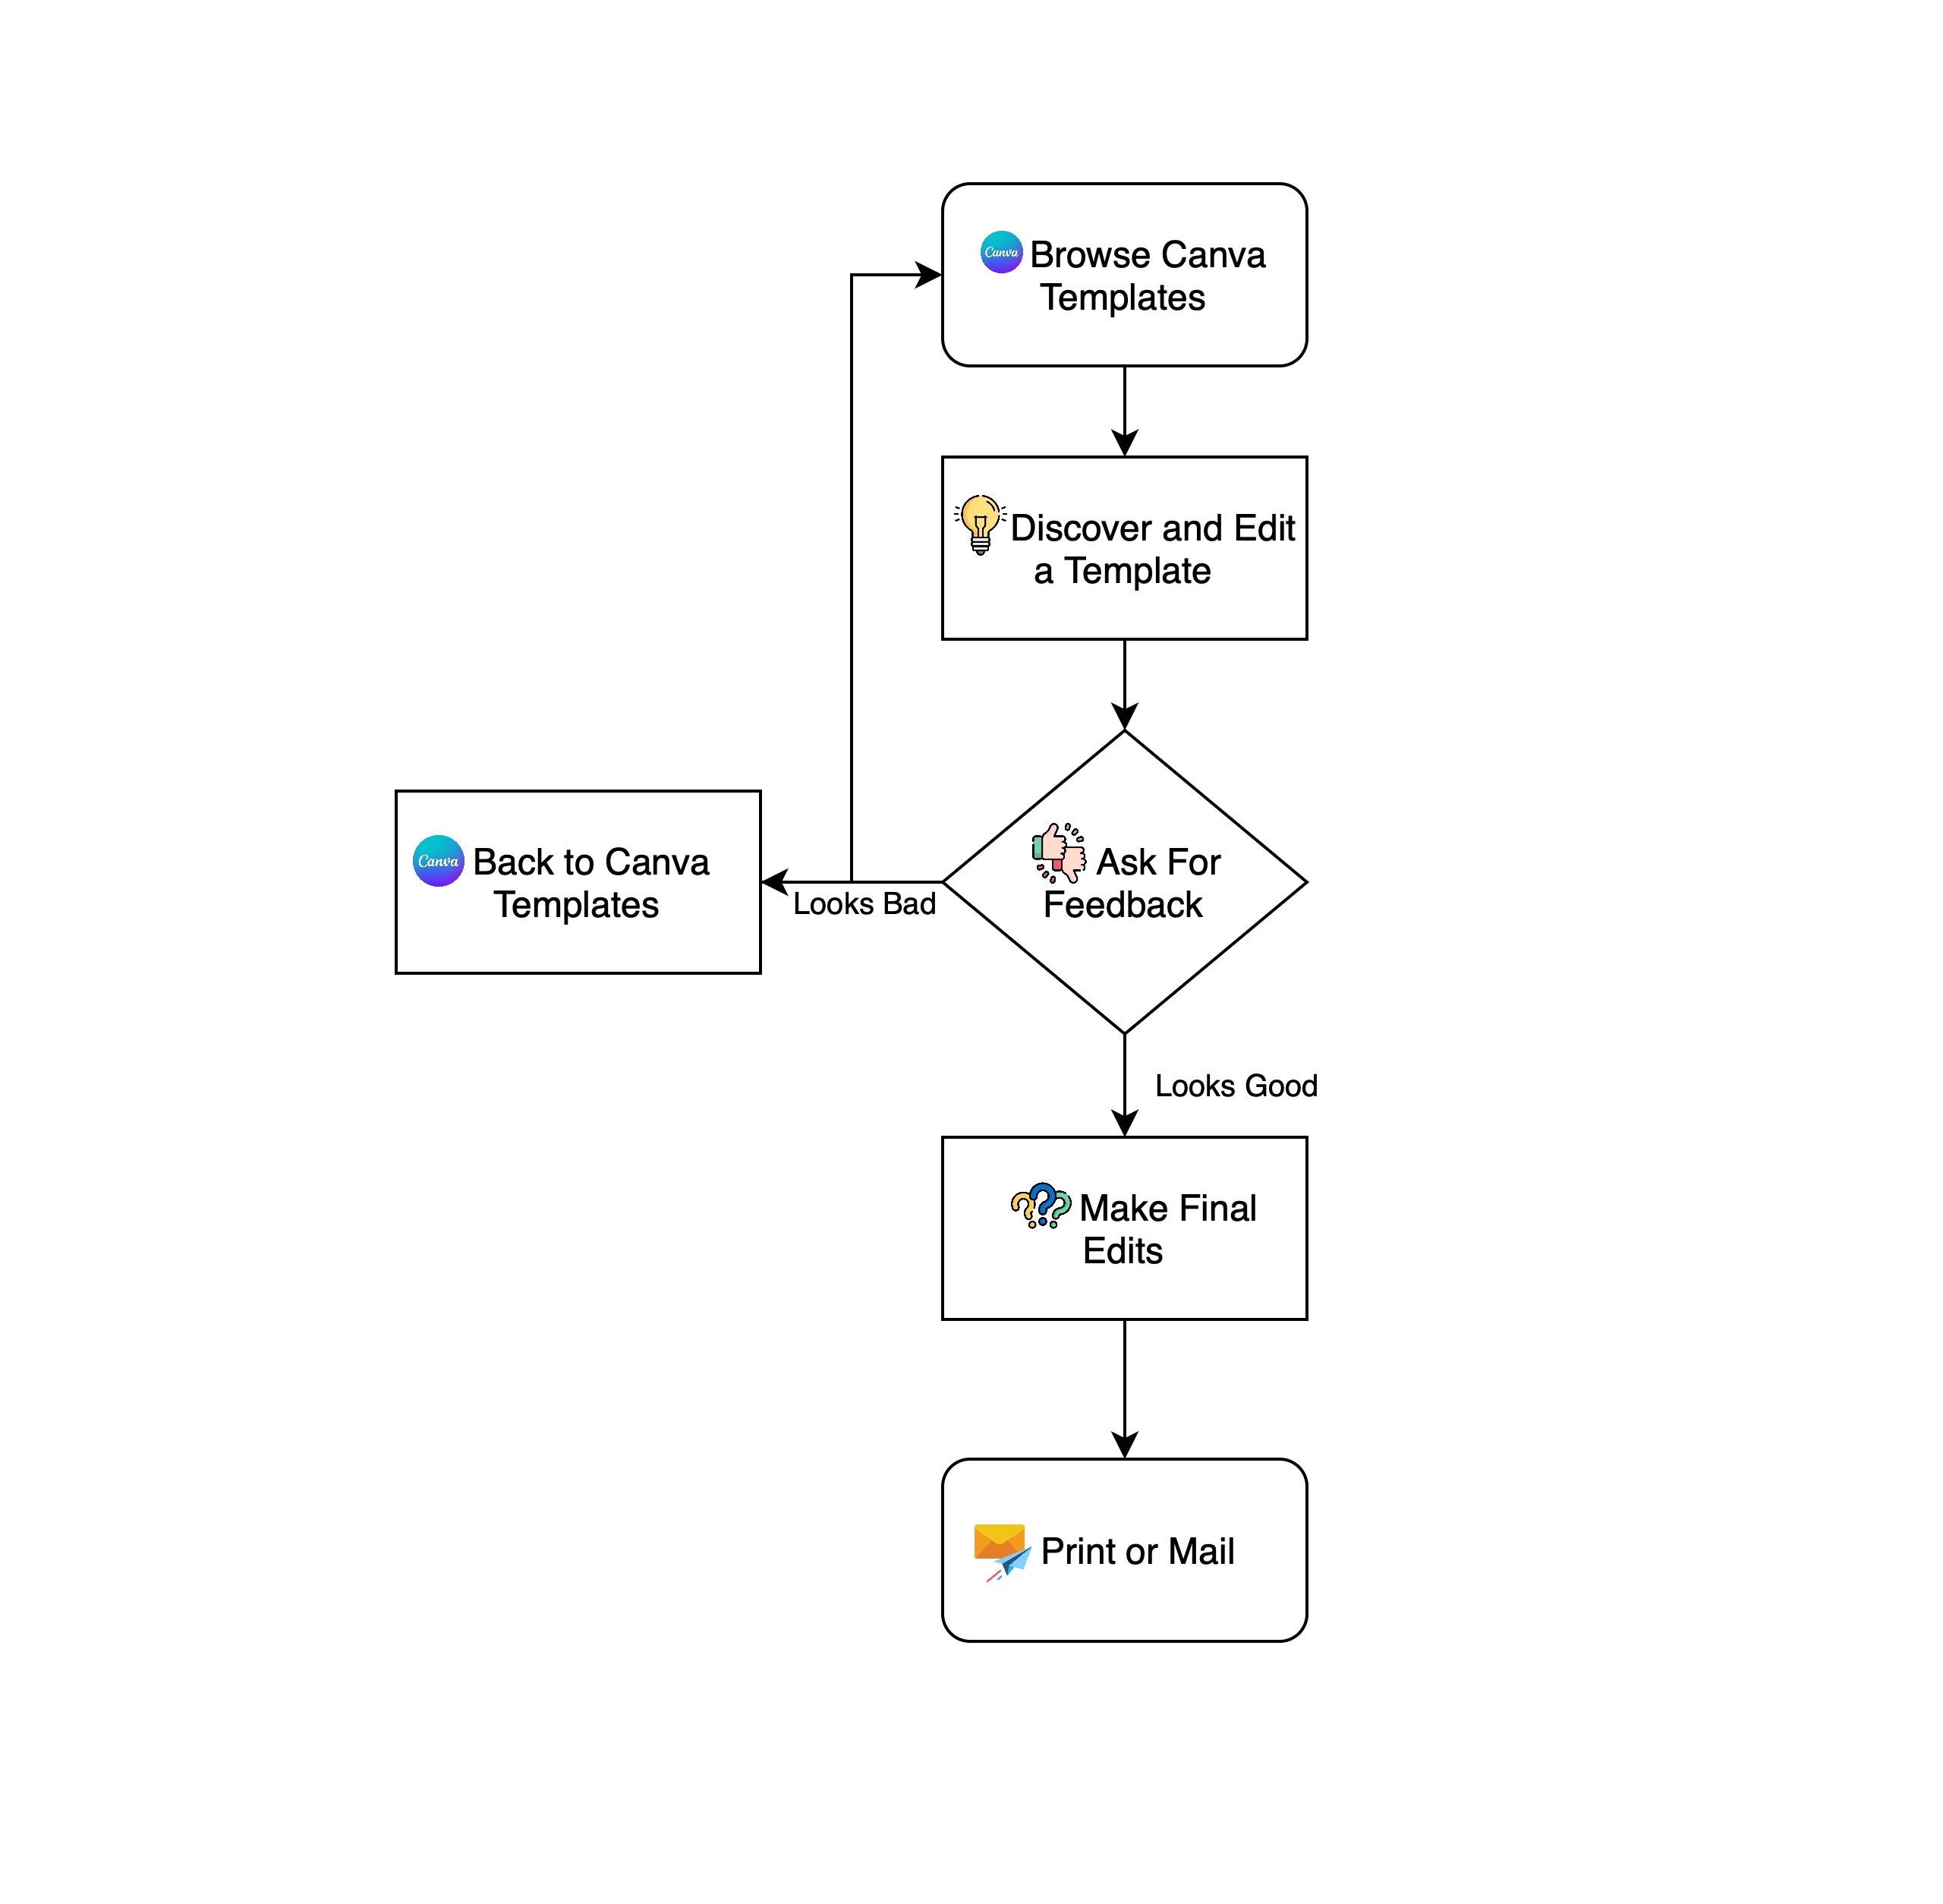
This is a typical workflow that allows Caiman to integrate into Canva with at various points. Caiman works well with existing Canva tools, and augments templates and designs using image and text generation.
1) 💡 Identify and Critique Design Flaws
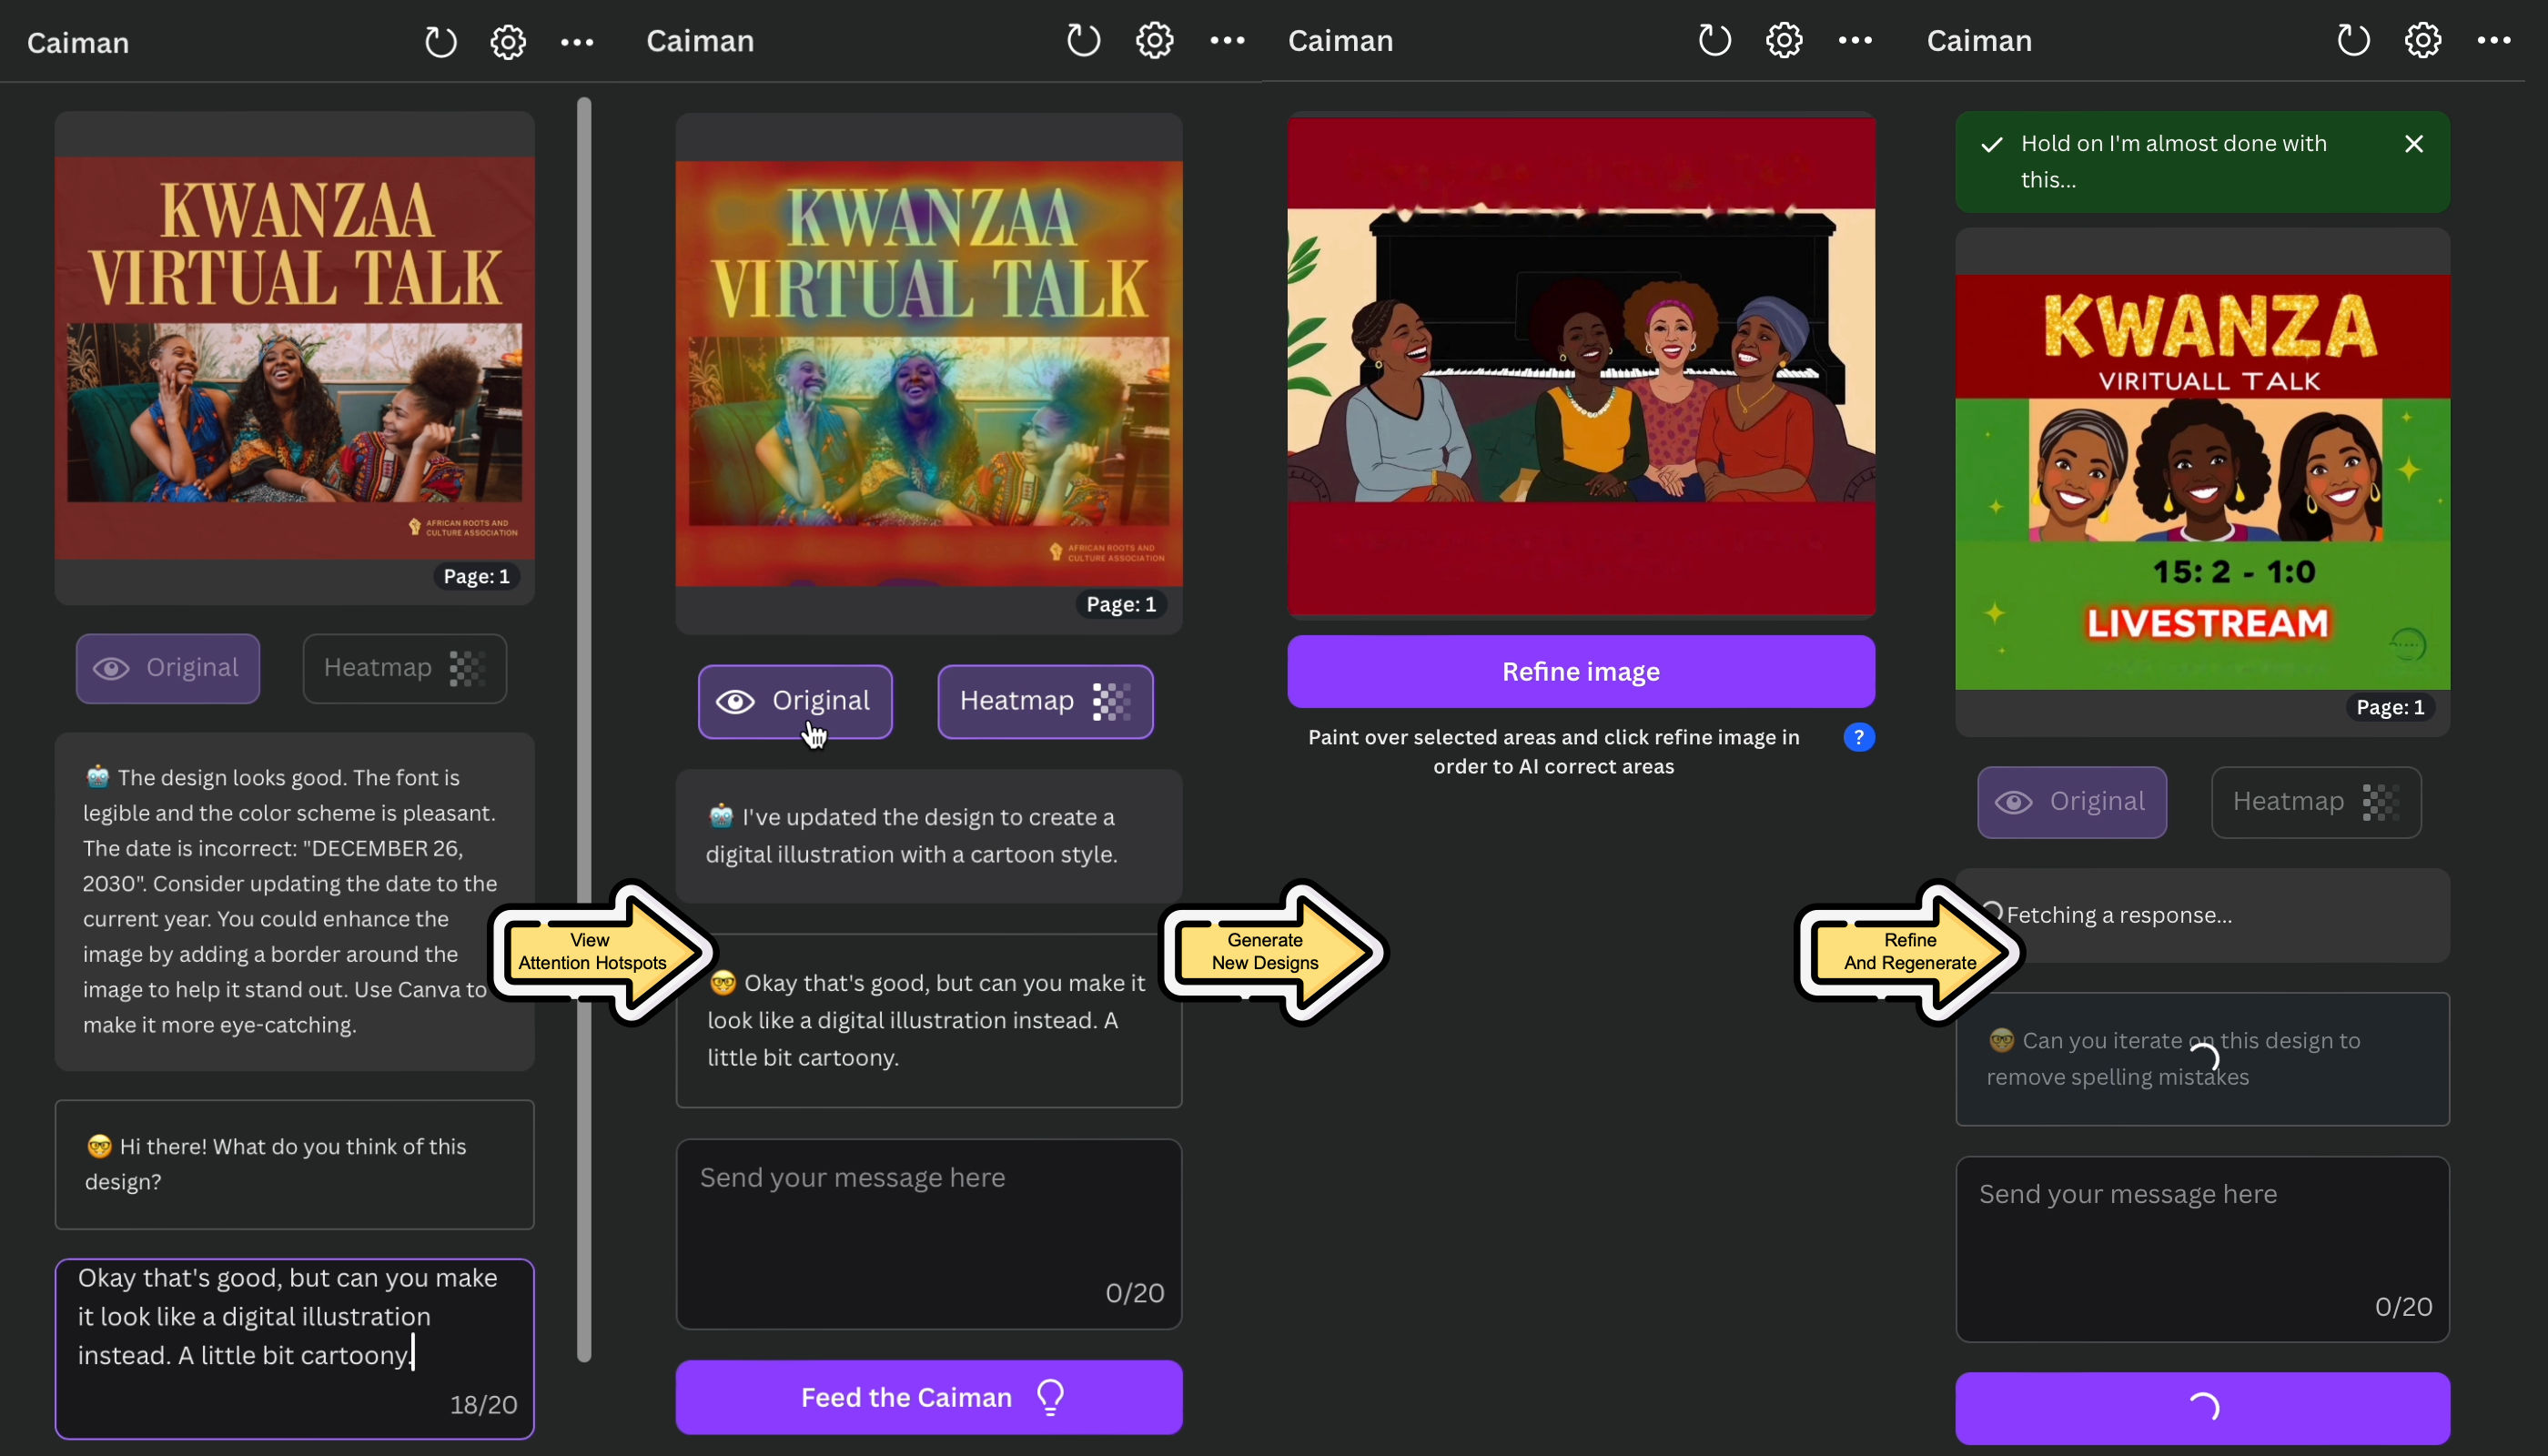
Using the latest SOTA AI, you can simply prompt a chatbot to critique your design. The chatbot is multimodal, and works on a combination of Text and Images in order to identify your design, and any flaws it might have. We also build a classic CNN in order to generate a heat map of the design, which points out areas of attention in the design thumbnail that a human would be most likely to see.
2) 🔄 Iterate over the template in a Holistic Fashion
Transform the entire design using any AI assisted prompt. Simply ask the chatbot to convert the design to look darker, or more anime, or like a dystopian cyberpunk wasteland, and the chatbot generates a prompt for you. This allows you to ideate and choose whichever design is the most original and suited to your taste. The prompt is then converted to an Image, and you can also iterate over this in order to reach your desired Design. The design is exported in two grouped layers, a single Text Layer, and an inpainted Background image.
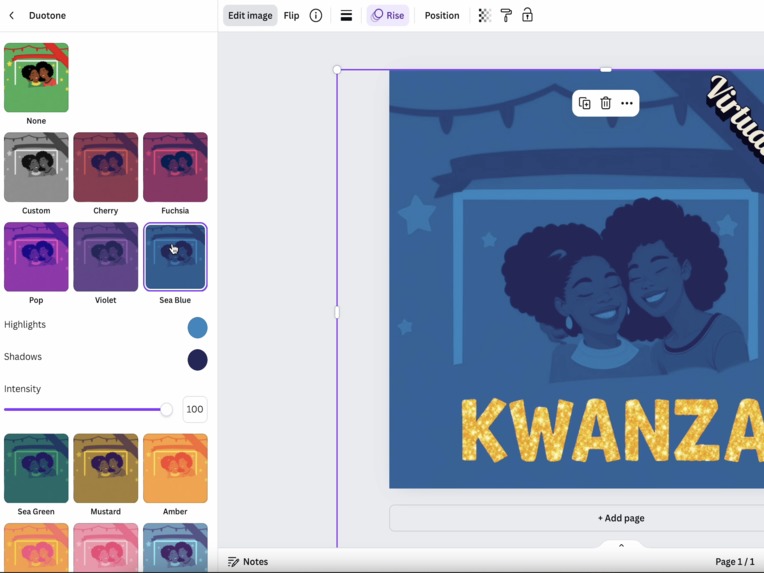
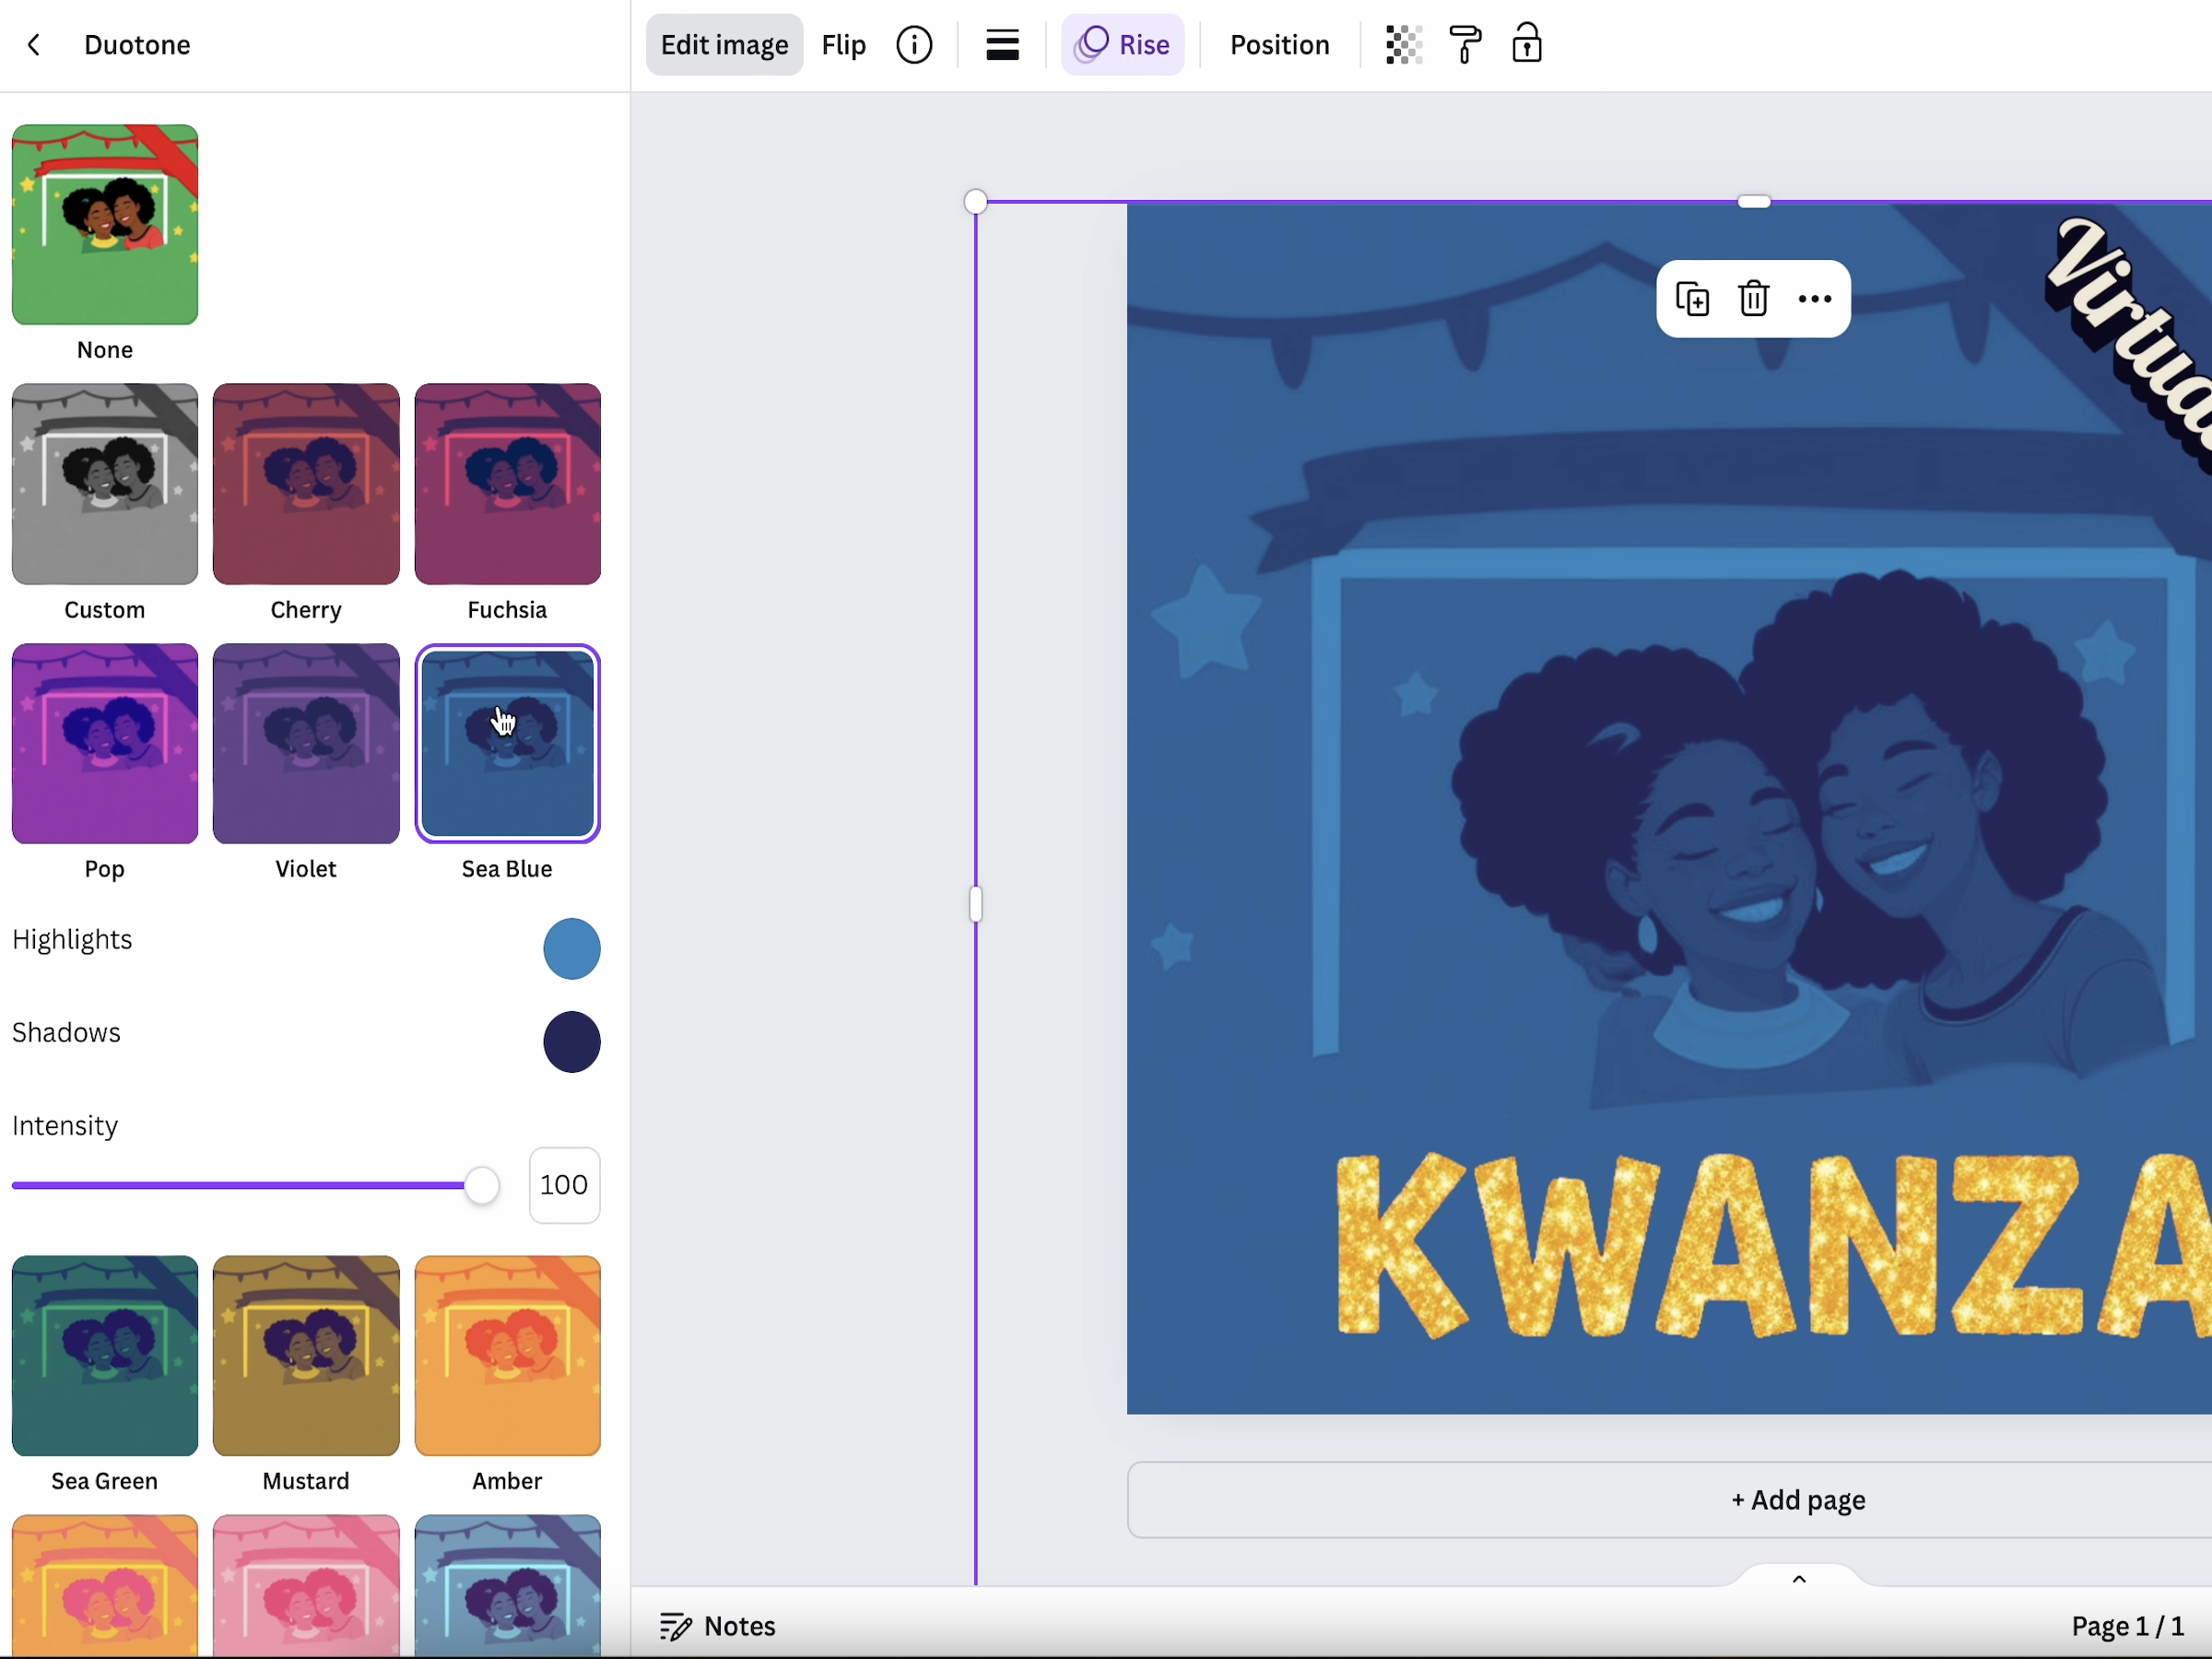
3) ✏️ Refine individual elements in the Design
Once you're done personalising your design, you can modify individual elements of the design by running it through an Image to Image refiner. We allow changing the strength of the modification, so you can touch up tiny fixes or change the image significantly if you want. In case there is still residual text in the image that you would not like, objects that you'd want to remove, simply paint over them and run through the modifier.
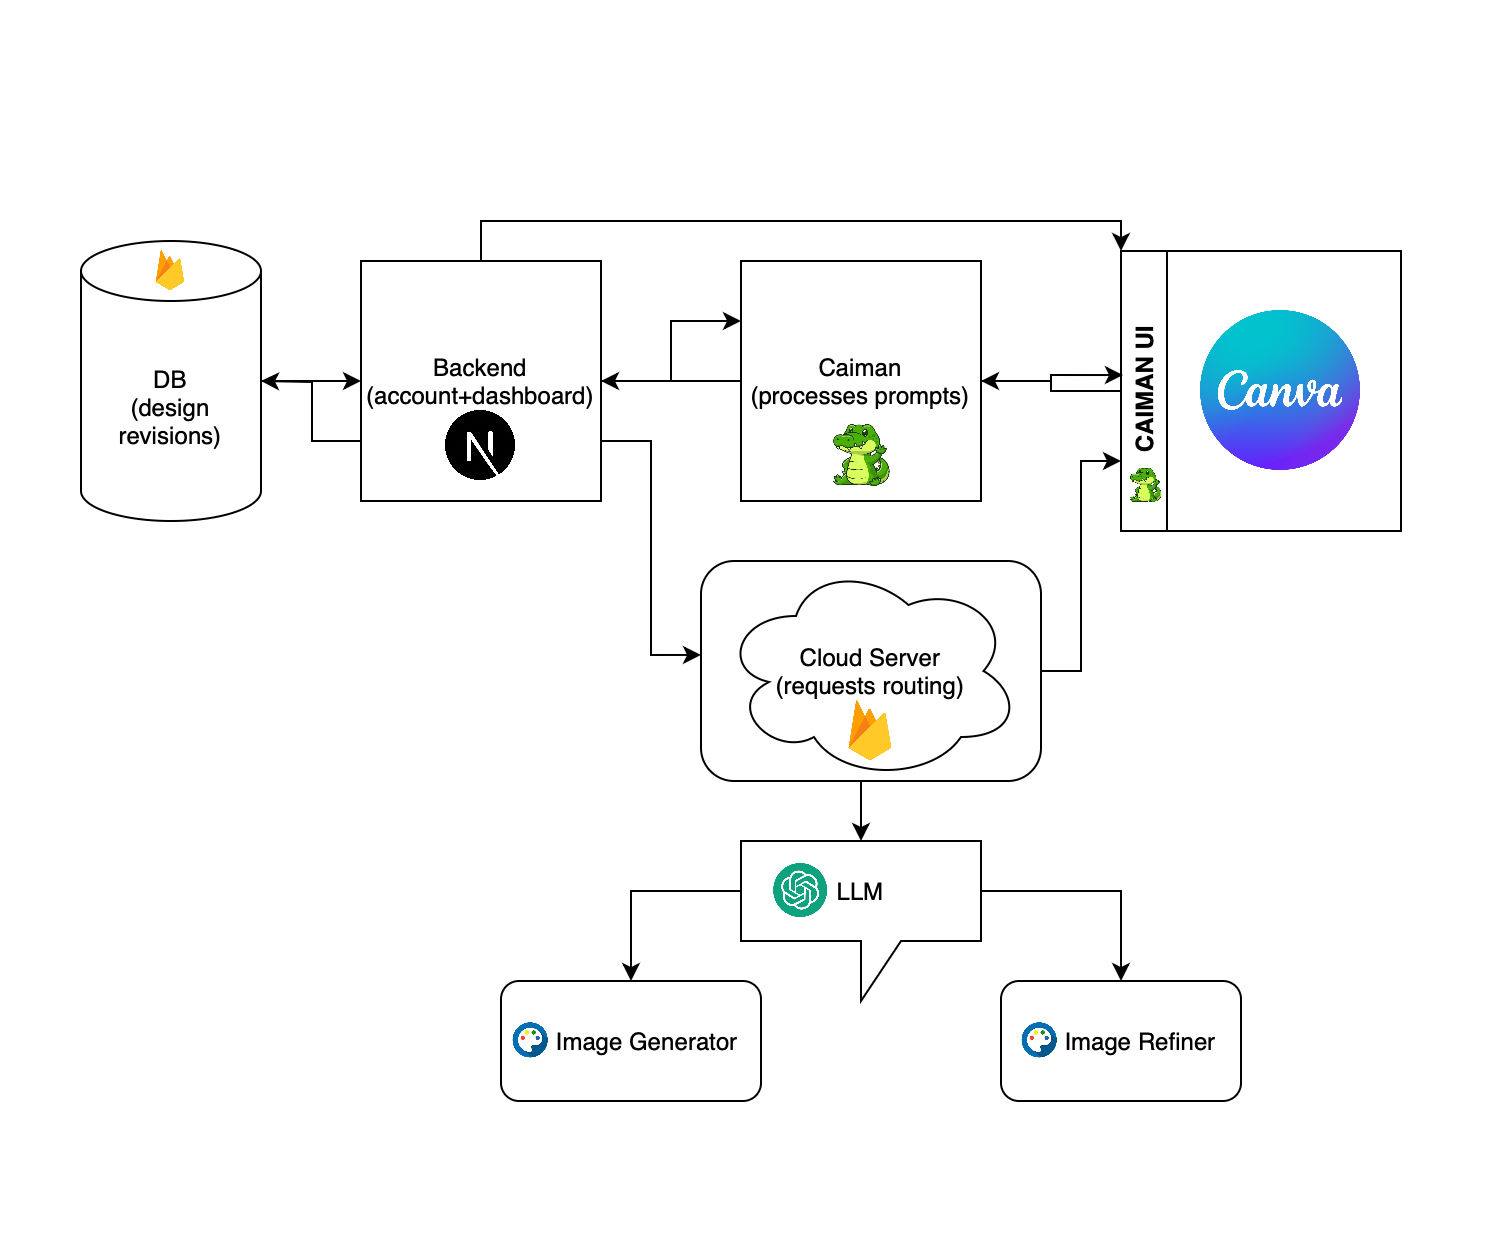
Below is a process diagram of how we integrated various technologies into our idea, and indicates the flow of data from our app through various other sources.
How we built it
The Canva Apps SDK is brilliant, especially with its UI components, and allows a lot of exciting modifications. We loved the fact that an HTTP tunnel allowed us to quickly develop changes on our local machine and see it running live within the Canva sidebar. We used the following technologies to make our entire app run smoothly, and to try and provide a simple and yet powerful interface for the user.
We wanted to incorporate the following functionalities into the App overall:
- 💬 Text NLP and Chat - To talk to the user and uncover insights related to the design. These might be good insights or bad insights in your design
- 🏞️ Image Generation and Refinement - To ideate and iterate on a design, holistically, or on its components, we needed a powerful and fast image generator pipeline
- 🎇 Heatmap Attention - To give a visual idea to the user of which components in the design were the best components, and which ones needed to be iterated on
- 📊 Database and ORM driven Backend - To complete the loop and allow the user to view his history of modifications or critiquing, as well as to push assets back to Canva
- 🤝 Glue User Interface - In order to let the user view their history on the App, as well as to complete the loop by allowing pushes back to Canva of assets etc
- 👩💻 Reactive Frontend - To let the user interact with the Above Components seamlessly
Below is the list of tools we used in order to achieve our requirements
- Apps SDK and App UI Kit for Frontend - We used App UI kit with almost no modifications and just a few custom styles in order to quickly make a usable and beautiful frontend
- We found the UI Kit to be more than sufficient with almost every control we needed
- We used a few really simple CSS classes to highlight some elements
- ChatGPT for the chatbot with System Instructions - We used prompt engineering to get the chatbot to critique designs or generate prompts for the image generator
- Our system instruction logic was not complex, most LLMs work well as a Vision critic
- The LLM does a really good job with JSON outputs deriving structured critique from images
- Next.js on Firebase for the Backend - The backend is a key component, we used Next.js despite our lack of experience on React since it allows for extremely quick scaffolding of APIs and also has a widely supported library of components for UI and UX
- The backend connects to Connect API and uses cookies to retain user sessions on the frontend
- The DB stores version history and modifications in order to push back to Canva later
- No personal data is stored on our backend
- Canva Connect APIs to connect the backend to the frontend and allow us to complete the loop from a user perspective, wherein a single user can see their modifications and recommendations on the backend quite easily, and even push assets back into Canva for further iteration.
- Only design reading and Asset writing permissions are needed from the user
- Pytorch for the Heatmap Generator - We trained a model on about 380 Canva templates marked up with our own tracking data in order to generate attention heatmaps for the design
- The model predicts heatmaps that simulate human attention on a Canva design thumbnail
- For inference we use the full resolution design rather than the low res auto generated one
- Huggingface Diffusers and Stable Diffusion for Image Generation - We used a text to image and image to image pipeline in order to generate and modify designs. We also used a text masker in order to separate text layers.
- We use accelerate and offload to memory in order to keep model footprint low
- Also the fp16 versions of the models and clearing gpu cache aggressively
Challenges we ran into
Surprisingly, the Canva API and SDK is siloed, and a User identified in a Canva Sidebar app does not exist in the API (they have separate User IDs). This was a major challenge, and one we resolved through using our backend to store cookies and connect separately by opening the backend from the Canva sidebar. We realise that this might not be a common use case, but we feel that getting a holistic view of the design is essential for a lot of apps . We also found a few bugs in the Apps SDK, mostly related to cross origin iFrame access. These are listed below in no particular order.
- Tooltip Bug on Badge with Tooltip when developing with a local http tunnel: Call iframe cross origin on hover: Blocked a frame with origin "https://app-aaglvtcv6nu.canva-apps.com" from accessing a frame with origin "https://www.canva.com". Protocols, domains, and ports must match.
- Color Selector: Same bug when developing on local machine, doesn't allow selecting colors and is a bit of a blocker since the color picker is pretty much useless on local development
- Slider: Floating point cannot be formatted to a fixed precision, the values extend upto a very long precision and this causes bad UI
- Connect API: Token for design:content:write does not automatically give design:content:read, while running a job for exporting design, we had to request reading design permissions separately on the refresh token, this seems counter intuitive
However, despite running into a few bugs, it was an extremely impressive developer experience on Canva. Very cool that we could use React in order to design the UI, and very easy to integrate a backend. Awesome stuff and we really enjoyed the entire process.
Accomplishments that we're proud of
We are not React developers, however the Apps SDK and App UI Kit made it super easy for us to make the UI, and also incorporate logic. We also took it as a challenge to develop a backend in Next.js to talk to the Canva backend, and make the entire design process seamless. We loved that the Connect APIs were well documented and that apart from the initial shock of the user ids being different across Connect and Apps SDK we had a smooth process of developing for the platform. We'd just like to list our accomplishments below.
- 🚨 Using React to build both the App and the backend was a solid win for us. We love and use SwiftUI on a regular basis, and actually started out by using Stacks and Spacers in React as well
- 🤖 Using AI and system instructions to make the chatbot actually useful while critiquing designs seemed like an insurmountable task but we got there in the end
- 🔐 We used our own models for the heat map and trained it to within a reasonable degree of accuracy using Canva templates and it was pretty easy since Canva has a whole bunch of templates
What we learned
We developed this entire application over the course of three and a half weekends, and it was a very engaging process. It was quite clear to us that a significant amount of thought had been put into the API and SDK design, and we were extremely impressed by the power of the tools provided to us.
We also believe that in order to operate successfully within a design context, a holistic view of the design is very important. It might not be a common use case within the Apps SDK to get such a holistic view, however, we believe it can be made simpler to unlock a whole host of Use Cases for a lot of Canva developers. For example, repositioning elements across a design to unlock user attention according to an attention map that is AI generated. Or vectoring a single image into a multi layered design. These are use cases that do not seem simple in the current Apps SDK, however, with an additional layer of covering the entire design, it should become fairly easy and also engage more users within the Canva platform through more powerful apps within Canva.
What's next for Caiman: Canva AI to Modify ANy design with Text/Img feedback
Hopefully some recognition for the app. We are committed to building open source and would especially like to export vLLMs for multimodal generation, i.e. one single model that can critique as well as generate designs. We believe that would be useful not just to the Canva community but to plenty of other use cases as well.
Thank you for your time!

Log in or sign up for Devpost to join the conversation.