
Flask (source code) is a Python web framework built with a small core and easy-to-extend philosophy.
Why is Flask a good web framework choice?
Flask is considered more Pythonic than the Django web framework because in common situations the equivalent Flask web application is more explicit. Flask is also easy to get started with as a beginner because there is little boilerplate code for getting a simple app up and running.
How does Flask relate to the Pallets Projects?
Flask was originally designed and developed by Armin Ronacher as an April Fool's Day joke in 2010. Despite the origin as a joke, the Flask framework became wildly popular as an alternative to Django projects with their monolithic structure and dependencies.
Flask's success created a lot of additional work in issue tickets and pull requests. Armin eventually created The Pallets Projects collection of open source code libraries after he had been managing Flask under his own GitHub account for several years. The Pallets Project now serves as the community-driven organization that handles Flask and other related Python libraries such as Lektor, Jinja and several others.
Flask's lack of standard boilerplate via a commandline interface for setting up your project structure is a double edged sword. When you get started with Flask you will have to figure out how to scale the files and modules for the code in your application.
Open source code for learning Flask
There are many open source projects that rely on Flask to operate. One of the best ways to learn how to use this framework is to read how other projects use it in real-world code. This section lists these code examples by class and method in Flask.
How can we built it?
Step 1: Flask Installation and Server Setup We are assuming that you have already installed Python, and it’s up to date. So let’s set up our project and set up a virtual environment.
Why do we need a virtual environment?
A virtual environment is used to create an isolated Python environment for different projects. We create virtual environments because different projects have different dependencies. Also, it helps to keep the global packages folder clean.
So now open the terminal type the below command:
pip3 install virtualenv Once it’s installed, let’s create a directory or folder for your project. We are using flask-test as the folder name, but you can pick any name for your project.
mkdir flask-test Then, change the directory:
cd flask-test Now it’s time to create a virtual environment for our project so that the dependencies don’t mess up the global package folder.
Execute the below command now:
virtualenv . And then,
source bin/activate Explanation: What we are doing here is we are telling the module that the current folder can be used for the virtual environment, and then it is activating the virtual environment in the second step.
Now once you have activated the virtual environment, let’s install the Flask package in that environment.
Now run the below command:
Python3 -m pip install Flask So far, we have created our project folder, installed and created a virtual environment for our project, and installed Flask in the environment. Let’s head towards Step 2.
Step 2: Let’s Write Some Code Now create a file app.py and paste the below code:
from flask import Flask app = Flask(name)
@app.route('/') def hello_world(): return 'This is my first API call!' Make sure to save your app.py file to the current directory.
Code Explanation: First, we are importing the flask module into our application and then defining the API route. The @ is used for defining the API route. We’re passing /, which means this is our base route.
Step 3: Running the Server and Making the First API Call Once you’re done with the coding part, it’s time to run our Flask server and make our first API call.
To run the server, execute the below command:
flask run You should see the below output on the terminal:
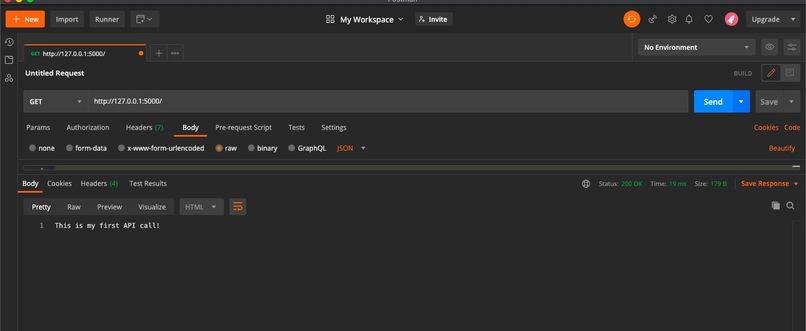
*Environment: production WARNING: This is a development server. Do not use it in a production deployment. Use a production WSGI server instead. *Debug mode: off *Running on http://127.0.0.1:5000/ (Press CTRL+C to quit) Now open your favorite API testing tool. We’ll be using Postman in the tutorial below, but you can pick any of the tools mentioned here. Now copy and paste the URL printed on the terminal and make a GET request. You should see the below output:
TADA! Congratulations, you have made your first API call. Now let’s make some APIs based on different methods like POST.
Step 4: POST APIs Flask makes it very easy to program different commands for various HTTP methods like POST, GET, PUT, etc. In the above code, you can see there’s the function route. The second parameter passed to this function is actually the method of the route. If nothing is passed then, it is GET.
But we also have to import two additional modules named request and jsonify used to fetch the params and JSON conversion.
Now lets define another route for our POST requests. So open the app.py file and replace the existing code with the below code:
from flask import Flask, request, jsonify
app = Flask(name)
@app.route('/') def hello_world(): return 'This is my first API call!'
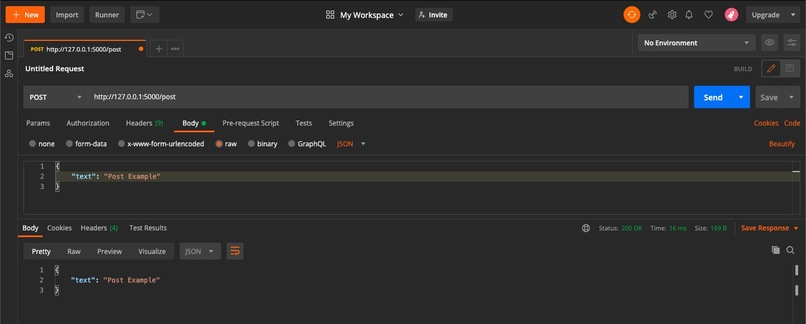
@app.route('/post', methods=["POST"]) def testpost(): input_json = request.get_json(force=True) dictToReturn = {'text':input_json['text']} return jsonify(dictToReturn) Code Explanation: Here, we have imported some more modules from Flask, like request and jsonify. We are using request to get the data which the user is sending, and we’re using jsonify for converting dictionaries to JSON. We have added one more route that is /post and also passing POST as a list and returning back what the user is sending in the parameters.
Now once again head over to the API testing tool and hit URL: http://127.0.0.1:5000/post with parameters:
{ "text": "Post Example" } Since we edited app.py, before you run a POST API call, you will need to restart the virtual server. To do so, (Press CTRL+C to quit), and then enter flask run into the Terminal again.

Log in or sign up for Devpost to join the conversation.