Inspiration
I've inspired by many of the websites and YouTube videos for learning it and applying it.
What it does
It can automate attendance, enhance security, and boost efficiency, allowing educators to focus on teaching in a safe, tech-forward environment.
How we built it
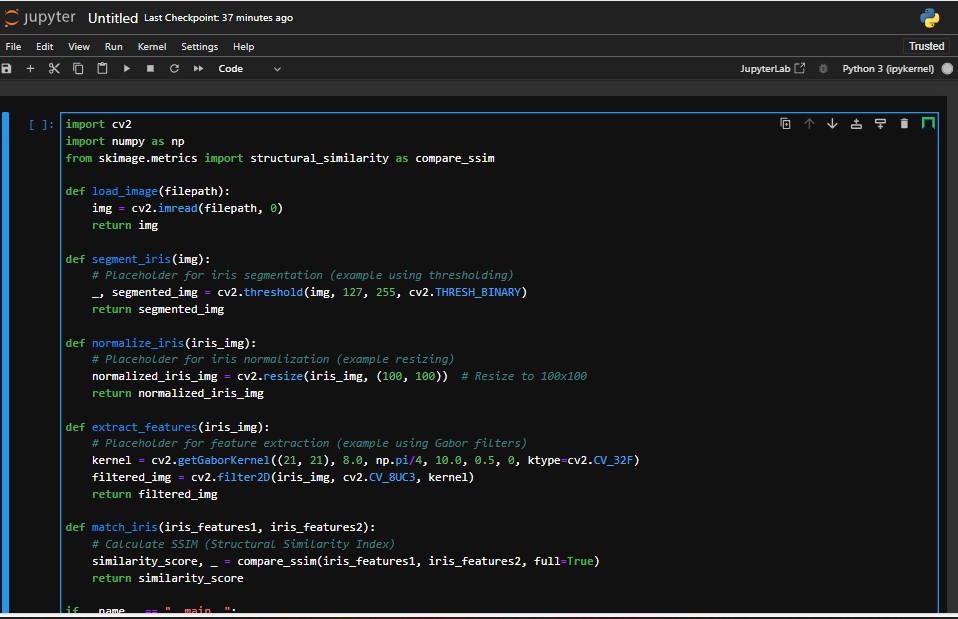
face recognition: import cv2 import numpy as np from skimage.metrics import structural_similarity as compare_ssim
def load_image(filepath): img = cv2.imread(filepath, 0) return img
def segment_iris(img): # Placeholder for iris segmentation (example using thresholding) _, segmented_img = cv2.threshold(img, 127, 255, cv2.THRESH_BINARY) return segmented_img
def normalize_iris(iris_img): # Placeholder for iris normalization (example resizing) normalized_iris_img = cv2.resize(iris_img, (100, 100)) # Resize to 100x100 return normalized_iris_img
def extract_features(iris_img): # Placeholder for feature extraction (example using Gabor filters) kernel = cv2.getGaborKernel((21, 21), 8.0, np.pi/4, 10.0, 0.5, 0, ktype=cv2.CV_32F) filtered_img = cv2.filter2D(iris_img, cv2.CV_8UC3, kernel) return filtered_img
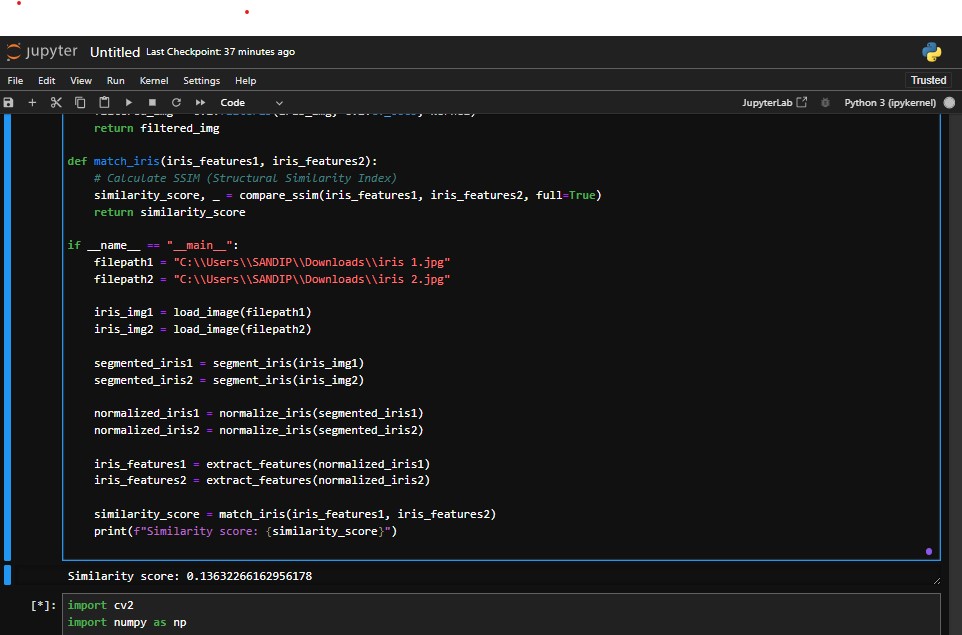
def match_iris(iris_features1, iris_features2): # Calculate SSIM (Structural Similarity Index) similarity_score, _ = compare_ssim(iris_features1, iris_features2, full=True) return similarity_score
if name == "main": filepath1 = "C:\Users\SANDIP\Downloads\iris 1.jpg" filepath2 = "C:\Users\SANDIP\Downloads\iris 2.jpg"
iris_img1 = load_image(filepath1)
iris_img2 = load_image(filepath2)

segmented_iris1 = segment_iris(iris_img1)
segmented_iris2 = segment_iris(iris_img2)

normalized_iris1 = normalize_iris(segmented_iris1)
normalized_iris2 = normalize_iris(segmented_iris2)

iris_features1 = extract_features(normalized_iris1)
iris_features2 = extract_features(normalized_iris2)

similarity_score = match_iris(iris_features1, iris_features2)
print(f"Similarity score: {similarity_score}")
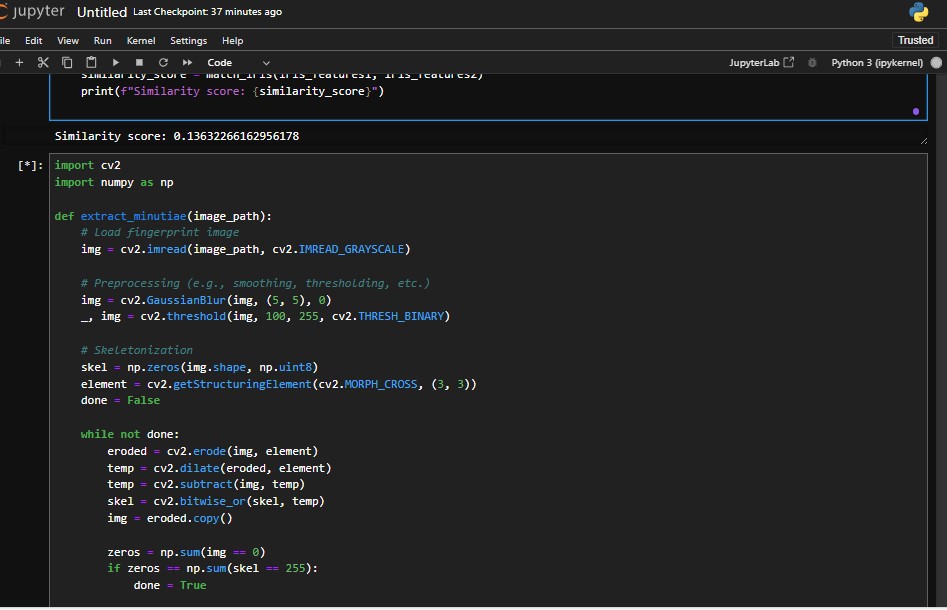
fingerprint recognition: import cv2 import numpy as np
def extract_minutiae(image_path): # Load fingerprint image img = cv2.imread(image_path, cv2.IMREAD_GRAYSCALE)
# Preprocessing (e.g., smoothing, thresholding, etc.)
img = cv2.GaussianBlur(img, (5, 5), 0)
_, img = cv2.threshold(img, 100, 255, cv2.THRESH_BINARY)
# Skeletonization
skel = np.zeros(img.shape, np.uint8)
element = cv2.getStructuringElement(cv2.MORPH_CROSS, (3, 3))
done = False
while not done:
eroded = cv2.erode(img, element)
temp = cv2.dilate(eroded, element)
temp = cv2.subtract(img, temp)
skel = cv2.bitwise_or(skel, temp)
img = eroded.copy()
zeros = np.sum(img == 0)
if zeros == np.sum(skel == 255):
done = True
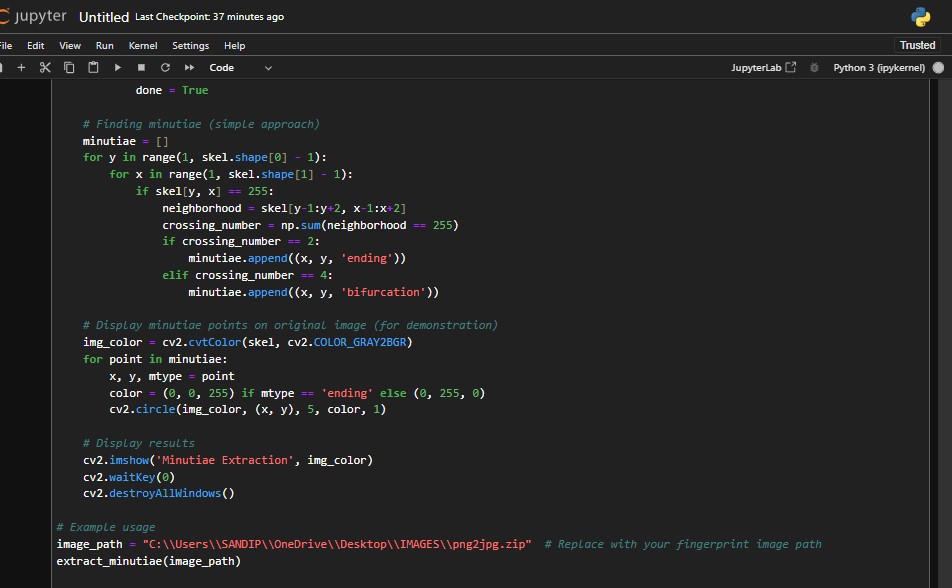
# Finding minutiae (simple approach)
minutiae = []
for y in range(1, skel.shape[0] - 1):
for x in range(1, skel.shape[1] - 1):
if skel[y, x] == 255:
neighborhood = skel[y-1:y+2, x-1:x+2]
crossing_number = np.sum(neighborhood == 255)
if crossing_number == 2:
minutiae.append((x, y, 'ending'))
elif crossing_number == 4:
minutiae.append((x, y, 'bifurcation'))
# Display minutiae points on original image (for demonstration)
img_color = cv2.cvtColor(skel, cv2.COLOR_GRAY2BGR)
for point in minutiae:
x, y, mtype = point
color = (0, 0, 255) if mtype == 'ending' else (0, 255, 0)
cv2.circle(img_color, (x, y), 5, color, 1)
# Display results
cv2.imshow('Minutiae Extraction', img_color)
cv2.waitKey(0)
cv2.destroyAllWindows()
Example usage
image_path = "C:\Users\SANDIP\OneDrive\Desktop\IMAGES\png2jpg.zip" # Replace with your fingerprint image path extract_minutiae(image_path)

Log in or sign up for Devpost to join the conversation.