-

Xplor Pro App
-
Xplor Lite App

Xplor: Explore the Solar System in 3D!
Summary
I have a passion for 3D environment and motion design. I am inspired to use 3D environment and motion design to create a fun way to explore the solar system and learn new facts. Having taken one astrophysics class, I am bothered by the fact that the solar system is often presented in 2D in books when it is a 3-dimensional object. Reading books alone cannot help me imagine how a planet looks like if seen from its surface and how big a planet is compared to us. With that in mind, I decided to create a 3D version of the solar system to help give a better picture of what the solar system and planets look like as seen from the surface. I also created an app that compares the size of space objects with Earth. My hope is that Xplor can inspire future astronauts and students to explore and discover more planets and other celestial objects!
Xplor is a lightweight, interactive, and educative solar system simulator used to demonstrate the solar system, the planets, and their features. Xplor has two applications: Xplor Lite and Xplore Pro.
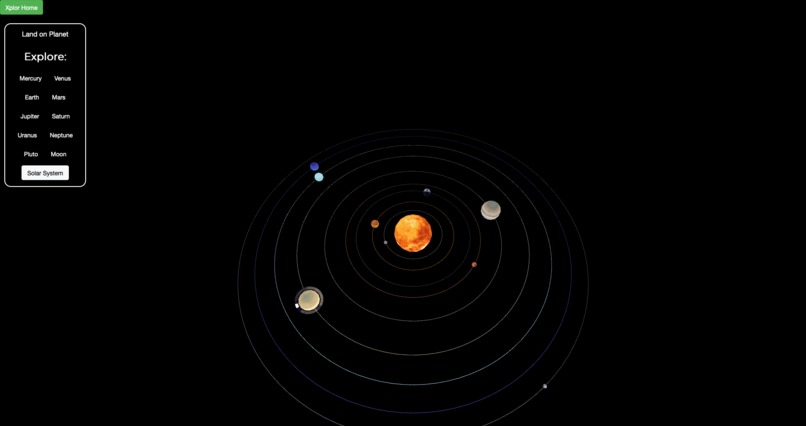
Xplor Lite is designed for people who want to play with the solar system simulator. It comes with 3D models of the 9 (if you count Pluto as a planet) planets of the solar system. The models are made as close to reality as possible. Solation allows its users to land on a planet and look at the planet from the surface, provided that it is safe to land on the planet in reality. This feature allows Xplor users to get a more realistic image of the planets in the solar system, which cannot be presented in books. Xplor presents fun facts both on the solar system and the planets. When a user visits a planet, a fun fact on the visited planet will be presented to the user. This feature allows users to learn about the planet they visit in a more fun, gamified way, which cannot be experienced through books.
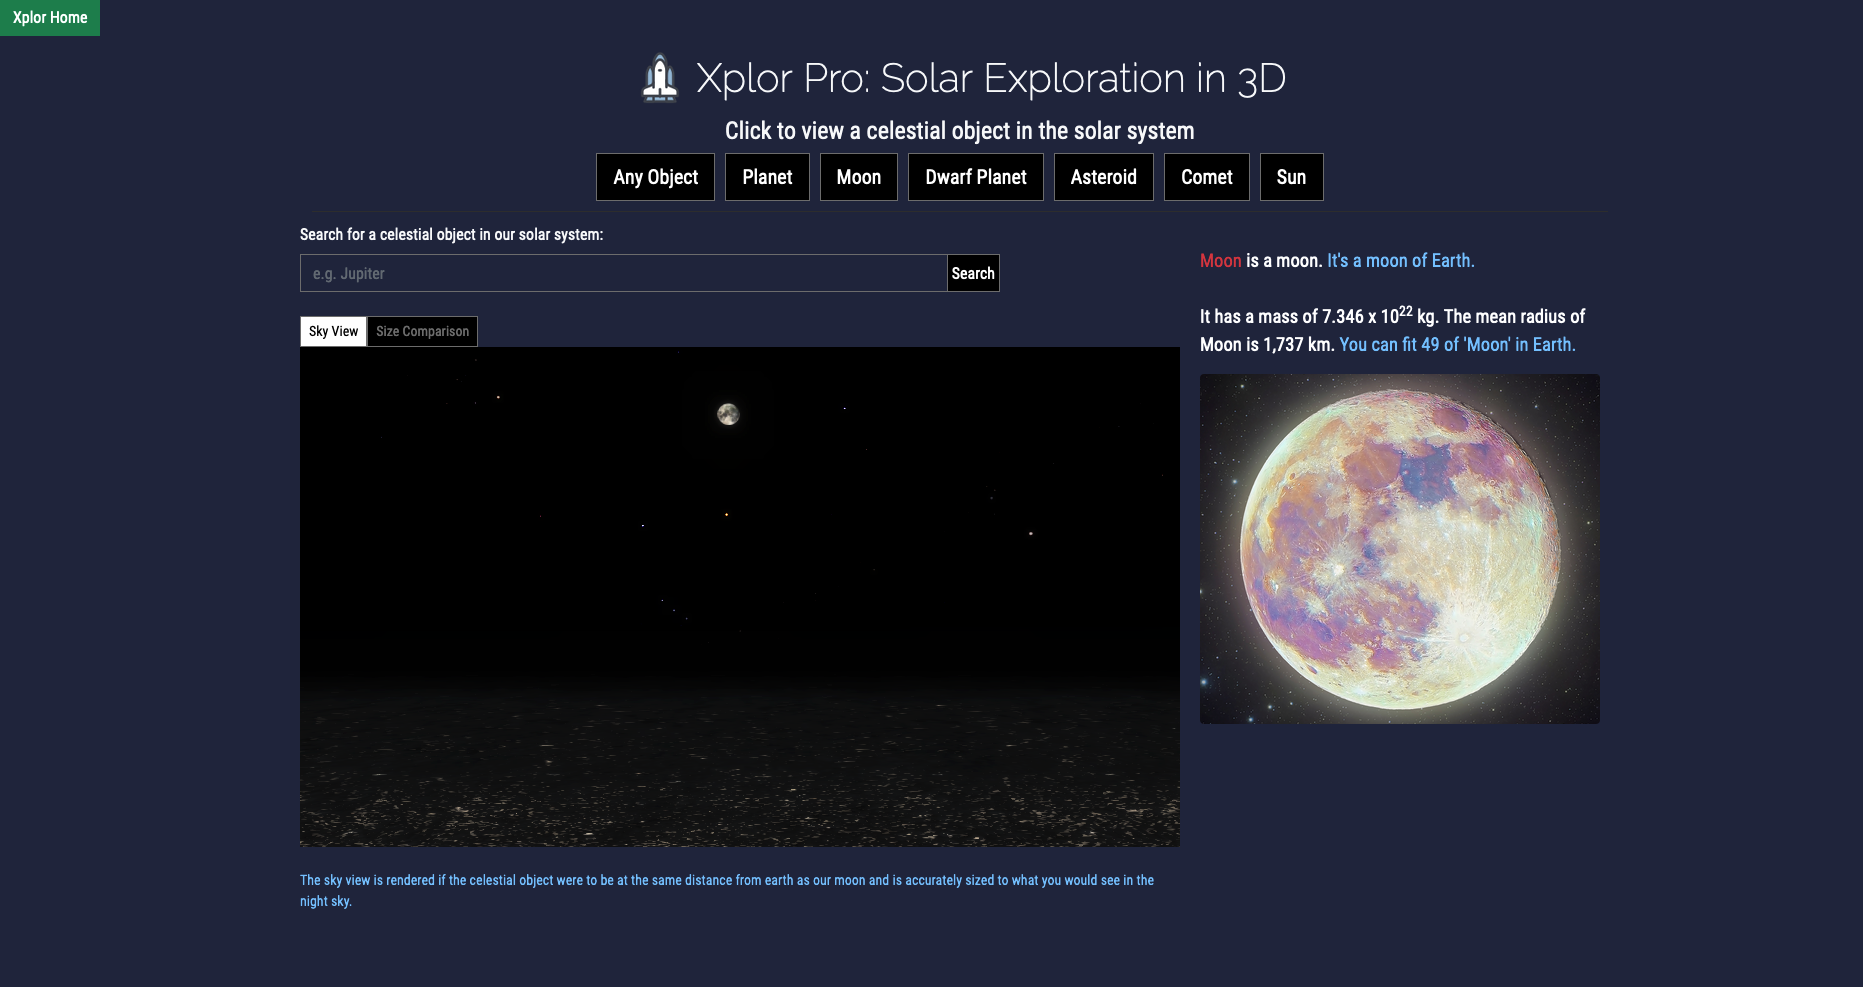
Xplor Pro is designed for people who want to study the solar system and celestial objects at a more seriouus level. Xplor Pro allows users to study celestial objects by presenting facts. It also allows users to get a sense of how big celestial objects by comparing their size to the size of Earth. Xplor Pro has a search feature and can render 3D images quickly.
Contributors List
Mario "mutemathy" Manalu
Where to find the data and code in the repo and an explanation of what key files are
- The code for the home page is in the file called index.html, which can be found in the root folder.
- The code for Xplore Lite can be found in the xplore-lite-app folder:
- The main files are xplore-lite-app.html and app.js. These two files setup the environment, connect the front-end to the back-end, and allows different JavaScripts in the Perspectives folder to work together.
- The Perspective folders contain all the different scripts that control the motion of the planet,s the "looks" of the planet, and the user interactions.
- The Perspectives folder contains all the textures used to give color and material to the planets. Without the textures, the planets are just spheres.
- The code for Xplore Pro can be found in the root folder:
- The main file is called xplore-pro-app.html. This app handles the interaction between front-end and back-end.
- bodies.js contains all the information that is displayed by the front-end.
- planet.js pulls the data from the bodies.js, controls the motion of the planets, and display random celestial objects.
- web_image_search contains scripts that pulls information/data from the internet and saves it into a JSON file.
Instructions on how to run your project
There are two ways one can run the project.
- To directly run the project on the web: Visit explorethesolarsystemwith.tech.
- To run it locally:
- Download the repo.
- Open index.html at the root directory.
Challenges I ran into
I had challenges looking for teammates, mainly because I participate virtually. It took me about 3 hours before I decided to just work on this solo.
The last time I coded in JavaScript and used ThreeJS was last year. So, at first, I had to spend some time opening documentations and switching between my browser and IDE. But, after 1-2 hours, I was able to pick the languages up quickly.
I also had difficulties creating UV maps of planets. I attempted to create the models myself. Luckily, I ran into the open source projects (mentioned below) that provide free resources.
What I learned
- I learned how to combine UV maps to primitive 3D objects in ThreeJS.
- I learned how to control a camera in ThreeJS.
- I learned how to connect a domain.com domain to a GitHub page/Vercel.
Credits
I used the following open source projects to help me with creating the planets and the environment:

Log in or sign up for Devpost to join the conversation.