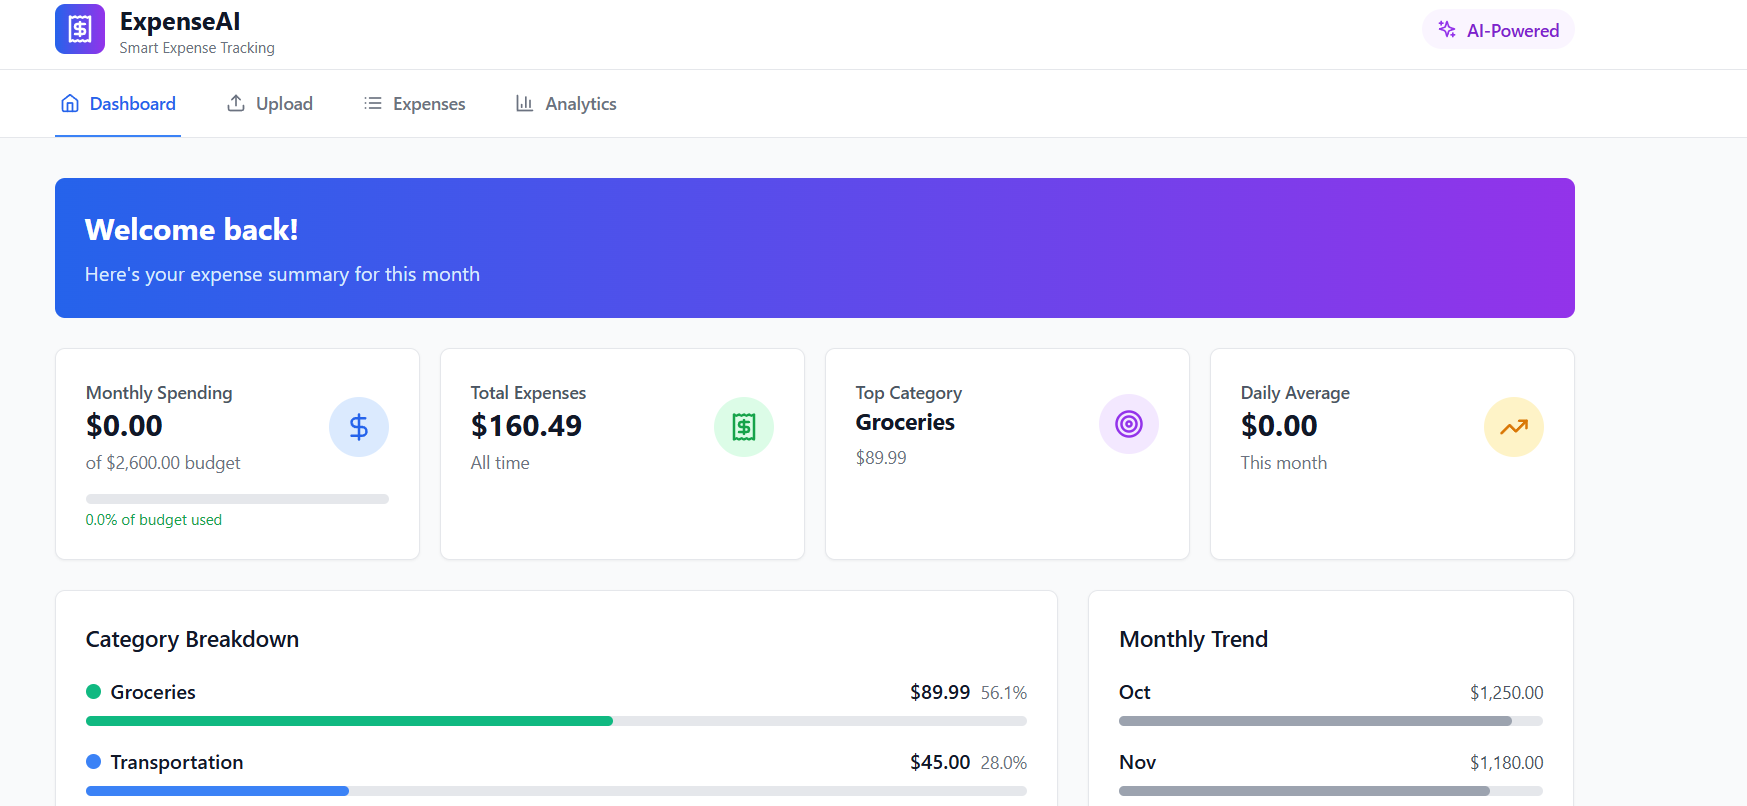
An expense tracker is a fantastic project to work on, offering a lot of opportunities for learning and practical application
1. General Overview of an Expense Tracker Project
An expense tracker project, at its core, is a system designed to help individuals or businesses record, categorize, and analyze their spending habits. It aims to provide a clear financial overview, enabling users to understand where their money goes, manage budgets, identify areas for savings, and ultimately make more informed financial decisions.
Typical Features:
- Transaction Logging: The ability to input individual expenses with details like amount, date, description, and category.
- Category Management: Users can define and manage custom categories for their expenses (e.g., food, transport, entertainment, utilities, salary, etc.).
- Budgeting: Setting spending limits for different categories over a specific period (e.g., monthly budget for groceries).
- Reporting & Analytics: Generating reports (e.g., pie charts, bar graphs) to visualize spending patterns, compare actual spending against budgets, and identify trends.
- Receipt Management: Option to attach or scan receipts to transactions for record-keeping and verification.
- Income Tracking: While primarily for expenses, many trackers also include income logging to provide a complete financial picture.
- User Authentication/Management: For multi-user or personalized systems, secure login and user profile management.
- Data Export: Ability to export financial data (e.g., CSV, PDF) for further analysis or tax purposes.
Benefits of an Expense Tracker:
- Financial Transparency: Clearly see where money is going.
- Budget Management: Helps in creating and sticking to budgets, preventing overspending.
- Identifying Unnecessary Expenses: Pinpoint areas where spending can be reduced.
- Achieving Financial Goals: Facilitates saving for specific goals (e.g., vacation, down payment).
- Tax Compliance: Simplifies tax preparation by organizing deductible expenses.
- Fraud Prevention: Helps in detecting unauthorized transactions quickly.
- Improved Decision-Making: Provides data-driven insights for better financial choices.
- Increased Efficiency: Automates manual tracking, saving time and reducing errors.
2. How to Start Building an Expense Tracker (Project Plan)
Building an expense tracker can be broken down into several phases:
Phase 1: Planning and Requirements Gathering
- Define Scope: What kind of expense tracker will it be? (Personal, business, web, mobile, desktop?) What are the core features you absolutely need?
- Identify Target Users: Who are you building this for? This will influence the UI/UX and specific features.
- User Stories/Use Cases: Write down how users will interact with the system (e.g., "As a user, I want to add a new expense with a category, amount, and date," "As a user, I want to see a monthly report of my spending by category").
- Database Design (Conceptual): Start thinking about the data you'll need to store (users, transactions, categories, budgets).
- Technology Stack Selection: Based on your scope and skills, choose the programming languages, frameworks, and database.
Phase 2: Design
- User Interface (UI) Design: Sketch out the screens and how users will navigate. Focus on intuitiveness and ease of use.
- User Experience (UX) Design: Ensure the flow is logical and user-friendly.
- Database Schema (Detailed): Create tables, define relationships, and specify data types.
- API Design (if applicable): If it's a web or mobile app with a backend, design the API endpoints.
Phase 3: Development
- Set up Development Environment: Install necessary tools, frameworks, and IDEs.
- Database Implementation: Create the actual database based on your schema.
- Backend Development (if applicable):
- API development (for web/mobile).
- Business logic implementation (e.g., calculating totals, managing budgets).
- User authentication and authorization.
- Frontend Development:
- Build the user interface based on your UI designs.
- Implement client-side logic and interactions.
- Connect to the backend API.
- Integration: Ensure frontend and backend (if separate) communicate effectively.
Phase 4: Testing
- Unit Testing: Test individual components or functions.
- Integration Testing: Test how different parts of the system work together.
- User Acceptance Testing (UAT): Have target users test the application to ensure it meets their needs.
- Bug Fixing: Address any issues or errors found during testing.
Phase 5: Deployment and Maintenance
- Deployment: Make the application accessible to users (e.g., deploy to a web server, publish to app stores).
- Monitoring: Keep an eye on performance, errors, and user feedback.
- Maintenance & Updates: Regularly update the application with new features, bug fixes, and security patches.
Resources:
- Online Tutorials: Websites like GeeksforGeeks, freeCodeCamp, Udemy, Coursera offer many tutorials on building various applications, including expense trackers.
- Documentation: Official documentation for your chosen programming languages, frameworks, and databases.
- GitHub/Open Source: Explore existing open-source expense tracker projects for inspiration and learning.
3. Specific Features and Functionalities
Beyond the basic features, here are some more advanced or specific functionalities you might consider:
- Recurring Transactions: Automatically log expenses that occur regularly (e.g., rent, subscriptions).
- Receipt Scanning (OCR): Use Optical Character Recognition to automatically extract details from physical receipts.
- Multi-Currency Support: For users dealing with different currencies.
- Financial Insights and Recommendations (AI/ML based):
- Predict future spending based on past trends.
- Suggest areas for cost-cutting.
- Identify unusual spending patterns.
- Debt Tracking: Monitor loan repayments and credit card balances.
- Savings Goals: Set specific savings targets and track progress.
- Notifications and Alerts:
- Budget alerts (e.g., "You're 80% of the way through your food budget").
- Bill payment reminders.
- Collaboration/Shared Expenses: For families or small teams to track shared spending.
- Integration with Banks/Credit Cards (API): Automatically import transactions from financial institutions (requires robust security and compliance).
- Advanced Reporting: More customizable reports, filtering, and data visualization options.
- Search and Filter: Easily find specific transactions.
- Export to Accounting Software: Integration with tools like QuickBooks, Xero.
- Gamification: Badges, streaks, or challenges to encourage better financial habits.
4. Different Types of Expense Trackers
Expense trackers can be categorized based on their platform and complexity:
- Manual (Spreadsheets): Simple, flexible, but requires manual data entry. Good for personal use or very small businesses. (e.g., Excel, Google Sheets)
- Desktop Applications: Installed on a single computer. Offers more control over data and offline access. (e.g., Quicken, custom-built applications)
- Web-Based Applications: Accessible from any device with a browser. Ideal for multi-device access and collaboration. (e.g., Mint, YNAB, custom web apps)
- Mobile Applications (iOS/Android): Designed for on-the-go tracking, often with features like receipt scanning and real-time updates. (e.g., Wallet, Spendee, custom mobile apps)
- Hybrid Applications: Can be accessed on both web and mobile platforms, often sharing a common backend.
- Business-Specific Expense Management Software: More robust features for corporate expense reporting, approvals, and compliance. (e.g., Expensify, Concur)
5. Technologies Commonly Used for Expense Trackers
The choice of technology depends heavily on the type of expense tracker you want to build and your familiarity with different stacks.
For Web Applications:
- Frontend:
- HTML, CSS, JavaScript: The foundational languages.
- Frameworks/Libraries: React, Angular, Vue.js (for interactive user interfaces).
- UI Libraries: Bootstrap, Material UI (for pre-built components and styling).
- Backend:
- Programming Languages: Python (Django, Flask), Node.js (Express), Ruby (Rails), PHP (Laravel), Java (Spring Boot), Go.
- Databases:
- Relational: PostgreSQL, MySQL, SQLite (for smaller projects), SQL Server.
- NoSQL: MongoDB, Firebase (for real-time data, simpler scaling).
- Cloud Platforms: AWS, Google Cloud Platform (GCP), Microsoft Azure (for hosting and scaling).
For Mobile Applications:
- Native Development:
- iOS: Swift, Objective-C.
- Android: Kotlin, Java.
- Cross-Platform Frameworks:
- React Native: Write once, deploy to iOS and Android using JavaScript/React.
- Flutter: Write once, deploy to iOS and Android using Dart.
- Xamarin: C# for cross-platform development.
- Backend: (Often the same as web application backends, or mobile-specific backend services like Firebase)
For Desktop Applications:
- Python: Tkinter, PyQt, Kivy.
- Java: Swing, JavaFX.
- C#: WPF, Windows Forms (for Windows).
- Electron: Build desktop apps using web technologies (HTML, CSS, JavaScript).
General Technologies/Concepts:
- APIs: RESTful APIs are common for communication between frontend and backend.
- Authentication/Authorization: OAuth, JWT (JSON Web Tokens).
- Version Control: Git (with GitHub, GitLab, Bitbucket).
- Data Visualization Libraries: D3.js, Chart.js (for reports and graphs).
- OCR Libraries/APIs: Tesseract, Google Cloud Vision API, AWS Textract (for receipt scanning).
- Security Best Practices: HTTPS, data encryption, input validation.
Built With
- api
- genai
- http
- javascript

Log in or sign up for Devpost to join the conversation.