
Inspiration
EL - Advanced Design Assistant





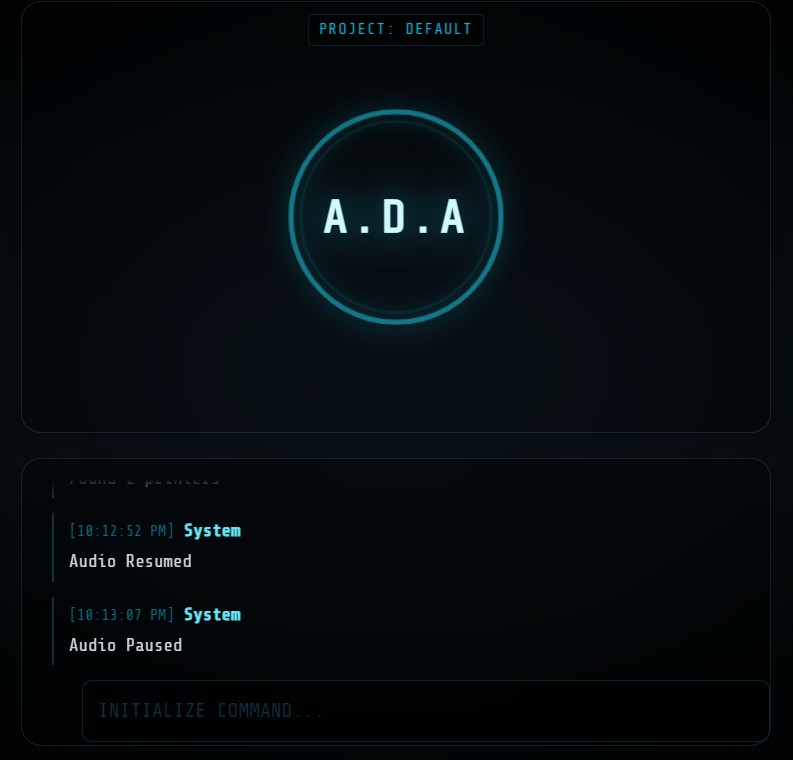
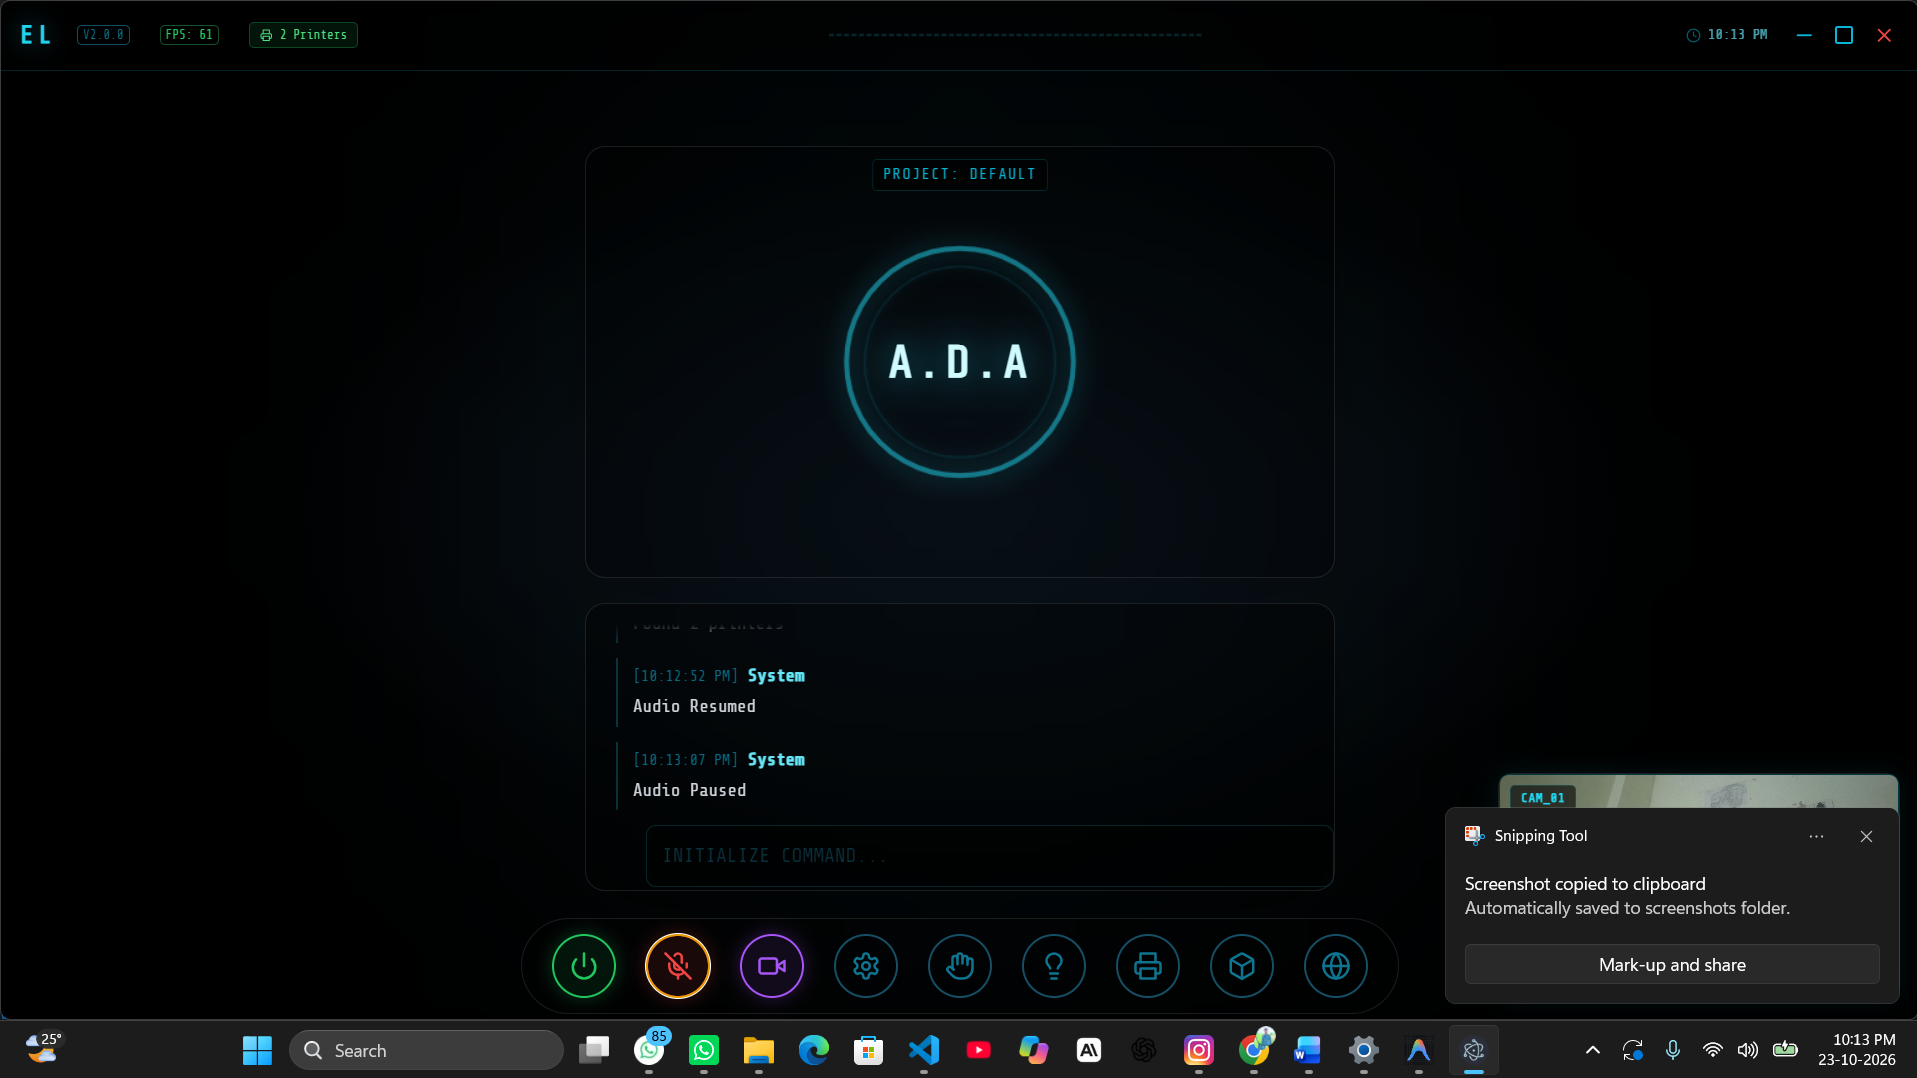
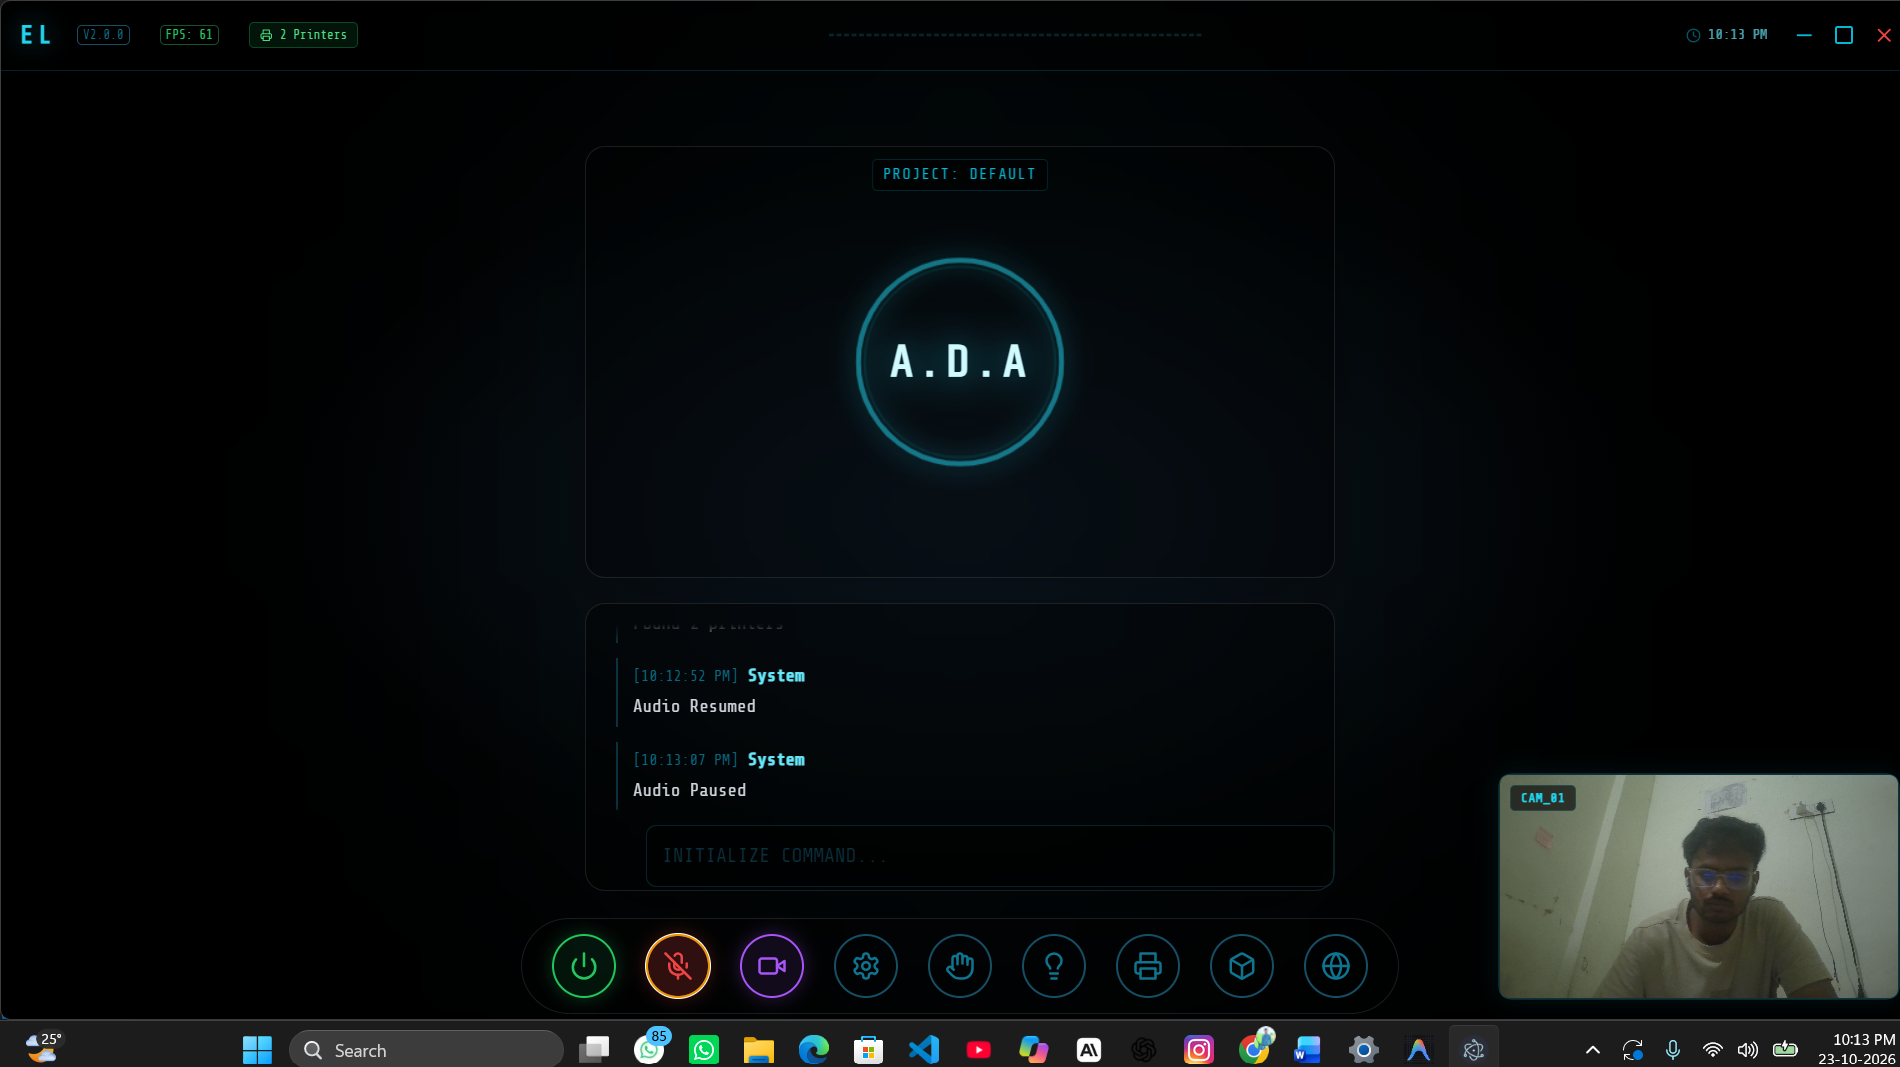
EL V2 is a sophisticated AI assistant designed for multimodal interaction. It combines Google's Gemini 2.5 Native Audio with computer vision, gesture control, and 3D CAD generation in a Electron desktop application.
🌟 Capabilities at a Glance
| Feature | Description | Technology |
|---|---|---|
| 🗣️ Low-Latency Voice | Real-time conversation with interrupt handling | Gemini 2.5 Native Audio |
| 🧊 Parametric CAD | Editable 3D model generation from voice prompts | build123d → STL |
| 🖨️ 3D Printing | Slicing and wireless print job submission | OrcaSlicer + Moonraker/OctoPrint |
| 🖐️ Minority Report UI | Gesture-controlled window manipulation | MediaPipe Hand Tracking |
| 👁️ Face Authentication | Secure local biometric login | MediaPipe Face Landmarker |
| 🌐 Web Agent | Autonomous browser automation | Playwright + Chromium |
| 🏠 Smart Home | Voice control for TP-Link Kasa devices | python-kasa |
| 📁 Project Memory | Persistent context across sessions | File-based JSON storage |
🖐️ Gesture Control Details
ADA's "Minority Report" interface uses your webcam to detect hand gestures:
| Gesture | Action |
|---|---|
| 🤏 Pinch | Confirm action / click |
| ✋ Open Palm | Release the window |
| ✊ Close Fist | "Select" and grab a UI window to drag it |
Tip: Enable the video feed window to see the hand tracking overlay.
🏗️ Architecture Overview
graph TB
    subgraph Frontend ["Frontend (Electron + React)"]
        UI[React UI]
        THREE[Three.js 3D Viewer]
        GESTURE[MediaPipe Gestures]
        SOCKET_C[Socket.IO Client]
    end

    subgraph Backend ["Backend (Python 3.11 + FastAPI)"]
        SERVER[server.py<br/>Socket.IO Server]
        ADA[ada.py<br/>Gemini Live API]
        WEB[web_agent.py<br/>Playwright Browser]
        CAD[cad_agent.py<br/>CAD + build123d]
        PRINTER[printer_agent.py<br/>3D Printing + OrcaSlicer]
        KASA[kasa_agent.py<br/>Smart Home]
        AUTH[authenticator.py<br/>MediaPipe Face Auth]
        PM[project_manager.py<br/>Project Context]
    end

    UI --> SOCKET_C
    SOCKET_C <--> SERVER
    SERVER --> ADA
    ADA --> WEB
    ADA --> CAD
    ADA --> KASA
    SERVER --> AUTH
    SERVER --> PM
    SERVER --> PRINTER
    CAD -->|STL file| THREE
    CAD -->|STL file| PRINTER
⚡ TL;DR Quick Start (Experienced Developers)
Click to expand quick setup commands ```bash # 1. Clone and enter git clone https://github.com/nazirlouis/ada_v2.git && cd ada_v2 # 2. Create Python environment (Python 3.11) conda create -n ada_v2 python=3.11 -y && conda activate ada_v2 brew install portaudio # macOS only (for PyAudio) pip install -r requirements.txt playwright install chromium # 3. Setup frontend npm install # 4. Create .env file echo "GEMINI_API_KEY=your_key_here" > .env # 5. Run! conda activate ada_v2 && npm run dev ```🛠️ Installation Requirements
🆕 Absolute Beginner Setup (Start Here)
If you have never coded before, follow these steps first!
Step 1: Install Visual Studio Code (The Editor)
- Download and install VS Code. This is where you will write code and run commands.
Step 2: Install Anaconda (The Manager)
- Download Miniconda (a lightweight version of Anaconda).
- This tool allows us to create isolated "playgrounds" (environments) for our code so different projects don't break each other.
- Windows Users: During install, check "Add Anaconda to my PATH environment variable" (even if it says not recommended, it makes things easier for beginners).
Step 3: Install Git (The Downloader)
- Windows: Download Git for Windows.
- Mac: Open the "Terminal" app (Cmd+Space, type Terminal) and type
git. If not installed, it will ask to install developer tools—say yes.
Step 4: Get the Code
- Open your terminal (or Command Prompt on Windows).
- Type this command and hit Enter:
bash git clone https://github.com/nazirlouis/ada_v2.git - This creates a folder named
ada_v2.
Step 5: Open in VS Code
- Open VS Code.
- Go to File > Open Folder.
- Select the
ada_v2folder you just downloaded. - Open the internal terminal: Press
Ctrl + ~(tilde) or go to Terminal > New Terminal.
⚠️ Technical Prerequisites
Once you have the basics above, continue here.
1. System Dependencies
MacOS:
# Audio Input/Output support (PyAudio)
brew install portaudio
Windows:
- No additional system dependencies required!
2. Python Environment
Create a single Python 3.11 environment:
conda create -n ada_v2 python=3.11
conda activate ada_v2

# Install all dependencies
pip install -r requirements.txt

# Install Playwright browsers
playwright install chromium
3. Frontend Setup
Requires Node.js 18+ and npm. Download from nodejs.org if not installed.
# Verify Node is installed
node --version  # Should show v18.x or higher

# Install frontend dependencies
npm install
4. 🔐 Face Authentication Setup
To use the secure voice features, ADA needs to know what you look like.
- Take a clear photo of your face (or use an existing one).
- Rename the file to
reference.jpg. - Drag and drop this file into the
ada_v2/backendfolder. - (Optional) You can toggle this feature on/off in
settings.jsonby changing"face_auth_enabled": true/false.
⚙️ Configuration (settings.json)
The system creates a settings.json file on first run. You can modify this to change behavior:
| Key | Type | Description |
|---|---|---|
face_auth_enabled |
bool |
If true, blocks all AI interaction until your face is recognized via the camera. |
tool_permissions |
obj |
Controls manual approval for specific tools. |
tool_permissions.generate_cad |
bool |
If true, requires you to click "Confirm" on the UI before generating CAD. |
tool_permissions.run_web_agent |
bool |
If true, requires confirmation before opening the browser agent. |
tool_permissions.write_file |
bool |
Critical: Requires confirmation before the AI writes code/files to disk. |
5. 🖨️ 3D Printer Setup
ADA V2 can slice STL files and send them directly to your 3D printer.
Supported Hardware:
- Klipper/Moonraker (Creality K1, Voron, etc.)
- OctoPrint instances
- PrusaLink (Experimental)
Step 1: Install Slicer ADA uses OrcaSlicer (recommended) or PrusaSlicer to generate G-code.
- Download and install OrcaSlicer.
- Run it once to ensure profiles are created.
- ADA automatically detects the installation path.
Step 2: Connect Printer
- Ensure your printer and computer are on the same Wi-Fi network.
- Open the Printer Window in ADA (Cube icon).
- ADA automatically scans for printers using mDNS.
- Manual Connection: If your printer isn't found, use the "Add Printer" button and enter the IP address (e.g.,
192.168.1.50).
6. 🔑 Gemini API Key Setup
ADA uses Google's Gemini API for voice and intelligence. You need a free API key.
- Go to Google AI Studio.
- Sign in with your Google account.
- Click "Create API Key" and copy the generated key.
- Create a file named
.envin theada_v2folder (same level asREADME.md). - Add this line to the file:
GEMINI_API_KEY=your_api_key_here - Replace
your_api_key_herewith the key you copied.
Note: Keep this key private! Never commit your
.envfile to Git.
🚀 Running ADA V2
You have two options to run the app. Ensure your ada_v2 environment is active!
Option 1: The "Easy" Way (Single Terminal)
The app is smart enough to start the backend for you.
- Open your terminal in the
ada_v2folder. - Activate your environment:
conda activate ada_v2 - Run:
bash npm run dev - The backend will start automatically in the background.
Option 2: The "Developer" Way (Two Terminals)
Use this if you want to see the Python logs (recommended for debugging).
Terminal 1 (Backend):
conda activate ada_v2
python backend/server.py
Terminal 2 (Frontend):
# Environment doesn't matter here, but keep it simple
npm run dev
✅ First Flight Checklist (Things to Test)
- Voice Check: Say "Hello Ada". She should respond.
- Vision Check: Look at the camera. If Face Auth is on, the lock screen should unlock.
- CAD Check: Open the CAD window and say "Create a cube". Watch the logs.
- Web Check: Open the Browser window and say "Go to Google".
- Smart Home: If you have Kasa devices, say "Turn on the lights".
▶️ Commands & Tools Reference
🗣️ Voice Commands
- "Switch project to [Name]"
- "Create a new project called [Name]"
- "Turn on the [Room] light"
- "Make the light [Color]"
- "Pause audio" / "Stop audio"
🧊 3D CAD
- Prompt: "Create a 3D model of a hex bolt."
- Iterate: "Make the head thinner." (Requires previous context)
- Files: Saves to
projects/[ProjectName]/output.stl.
🌐 Web Agent
- Prompt: "Go to Amazon and find a USB-C cable under $10."
- Note: The agent will auto-scroll, click, and type. Do not interfere with the browser window while it runs.
🖨️ Printing & Slicing
- Auto-Discovery: ADA automatically finds printers on your network.
- Slicing: Click "Slice & Print" on any generated 3D model.
- Profiles: ADA intelligently selects the correct OrcaSlicer profile based on your printer's name (e.g., "Creality K1").
❓ Troubleshooting FAQ
Camera not working / Permission denied (Mac)
Symptoms: Error about camera access, or video feed shows black.
Solution:
- Go to System Preferences > Privacy & Security > Camera.
- Ensure your terminal app (e.g., Terminal, iTerm, VS Code) has camera access enabled.
- Restart the app after granting permission.
GEMINI_API_KEY not found / Authentication Error
Symptoms: Backend crashes on startup with "API key not found".
Solution:
- Make sure your
.envfile is in the rootada_v2folder (not insidebackend/). - Verify the format is exactly:
GEMINI_API_KEY=your_key(no quotes, no spaces). - Restart the backend after editing the file.
WebSocket connection errors (1011)
Symptoms: websockets.exceptions.ConnectionClosedError: 1011 (internal error).
Solution: This is a server-side issue from the Gemini API. Simply reconnect by clicking the connect button or saying "Hello Ada" again. If it persists, check your internet connection or try again later.
📸 What It Looks Like
Coming soon! Screenshots and demo videos will be added here.
📂 Project Structure
ada_v2/
├── backend/                    # Python server & AI logic
│   ├── ada.py                  # Gemini Live API integration
│   ├── server.py               # FastAPI + Socket.IO server
│   ├── cad_agent.py            # CAD generation orchestrator
│   ├── printer_agent.py        # 3D printer discovery & slicing
│   ├── web_agent.py            # Playwright browser automation
│   ├── kasa_agent.py           # TP-Link smart home control
│   ├── authenticator.py        # MediaPipe face auth logic
│   ├── project_manager.py      # Project context management
│   ├── tools.py                # Tool definitions for Gemini
│   └── reference.jpg           # Your face photo (add this!)
├── src/                        # React frontend
│   ├── App.jsx                 # Main application component
│   ├── components/             # UI components (11 files)
│   └── index.css               # Global styles
├── electron/                   # Electron main process
│   └── main.js                 # Window & IPC setup
├── projects/                   # User project data (auto-created)
├── .env                        # API keys (create this!)
├── requirements.txt            # Python dependencies
├── package.json                # Node.js dependencies
└── README.md                   # You are here!
⚠️ Known Limitations
| Limitation | Details |
|---|---|
| macOS & Windows | Tested on macOS 14+ and Windows 10/11. Linux is untested. |
| Camera Required | Face auth and gesture control need a working webcam. |
| Gemini API Quota | Free tier has rate limits; heavy CAD iteration may hit limits. |
| Network Dependency | Requires internet for Gemini API (no offline mode). |
| Single User | Face auth recognizes one person (the reference.jpg). |
🤝 Contributing
Contributions are welcome! Here's how:
- Fork the repository.
- Create a branch:
git checkout -b feature/amazing-feature - Commit your changes:
git commit -m 'Add amazing feature' - Push to the branch:
git push origin feature/amazing-feature - Open a Pull Request with a clear description.
Development Tips
- Run the backend separately (
python backend/server.py) to see Python logs. - Use
npm run devwithout Electron during frontend development (faster reload). - The
projects/folder contains user data—don't commit it to Git.
🔒 Security Considerations
| Aspect | Implementation |
|---|---|
| API Keys | Stored in .env, never committed to Git. |
| Face Data | Processed locally, never uploaded. |
| Tool Confirmations | Write/CAD/Web actions can require user approval. |
| No Cloud Storage | All project data stays on your machine. |
[!WARNING] Never share your
.envfile orreference.jpg. These contain sensitive credentials and biometric data.
🙏 Acknowledgments
- Google Gemini — Native Audio API for real-time voice
- build123d — Modern parametric CAD library
- MediaPipe — Hand tracking, gesture recognition, and face authentication
- Playwright — Reliable browser automation
📄 License
This project is licensed under the MIT License — see the LICENSE file for details.
Built with 🤖 by Nazir Louis
Bridging AI, CAD, and Vision in a Single Interface
