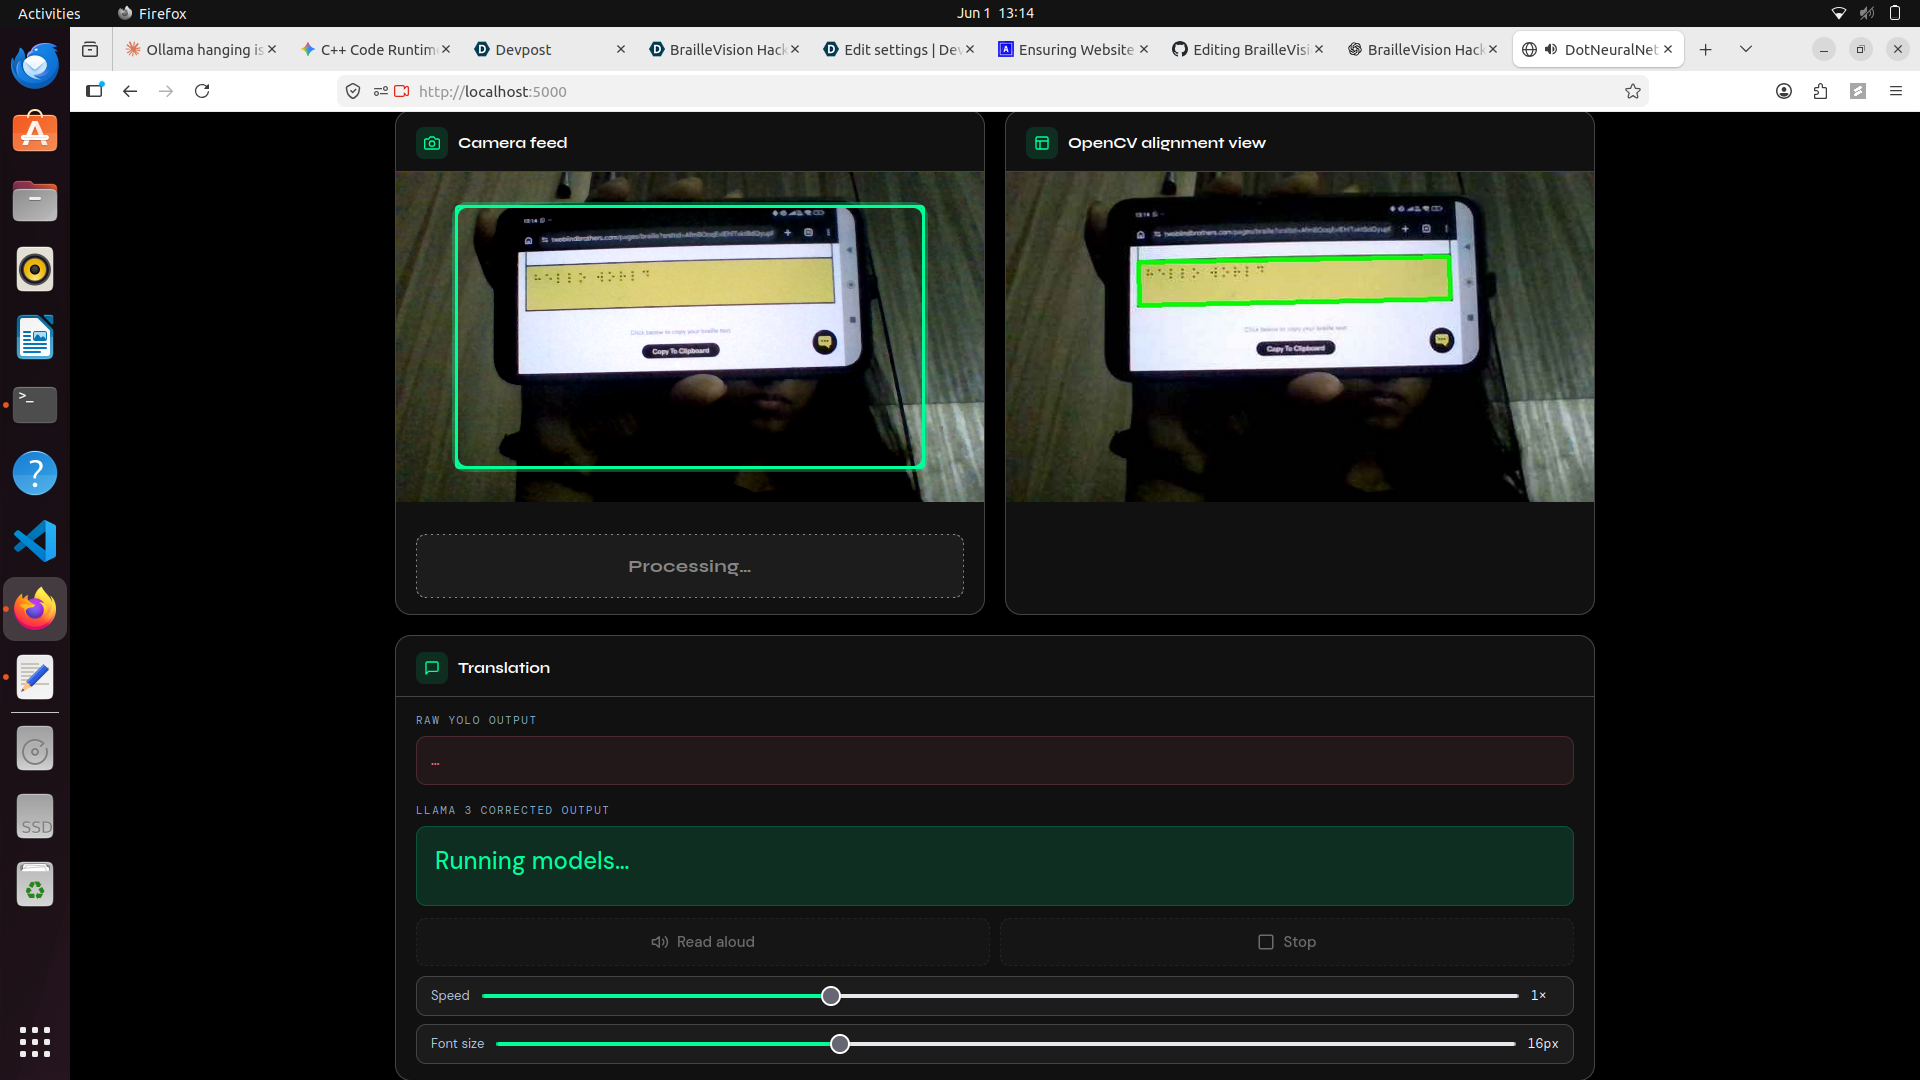
🧠 How It Works
Translating physical Braille dots using a standard 2D webcam is challenging because of uneven lighting and microscopic shadows. BrailleVision addresses this through a three-stage processing pipeline.
1️⃣ OpenCV Alignment & Pre-Processing
The backend continuously scans the webcam feed for a four-point paper contour.
Once detected:
- The document is perspective-corrected using a warp transform.
- Aggressive Gamma Correction (
gamma = 2.5) is applied. - Mid-tone shadows are compressed into black.
- White paper regions are stretched toward pure white (
255).
This converts the tiny 3D shadows created by Braille bumps into high-contrast 2D features that can be reliably detected.
2️⃣ YOLOv8 Object Detection
The processed image is passed through a fine-tuned YOLOv8 model.
To reduce detection "stuttering" caused by overlapping predictions:
- Strict Non-Maximum Suppression (
IoU = 0.15) is applied. - Bounding boxes are sorted spatially:
- Top-to-bottom
- Left-to-right
- Dot patterns are mapped to a Grade 1 Braille dictionary.
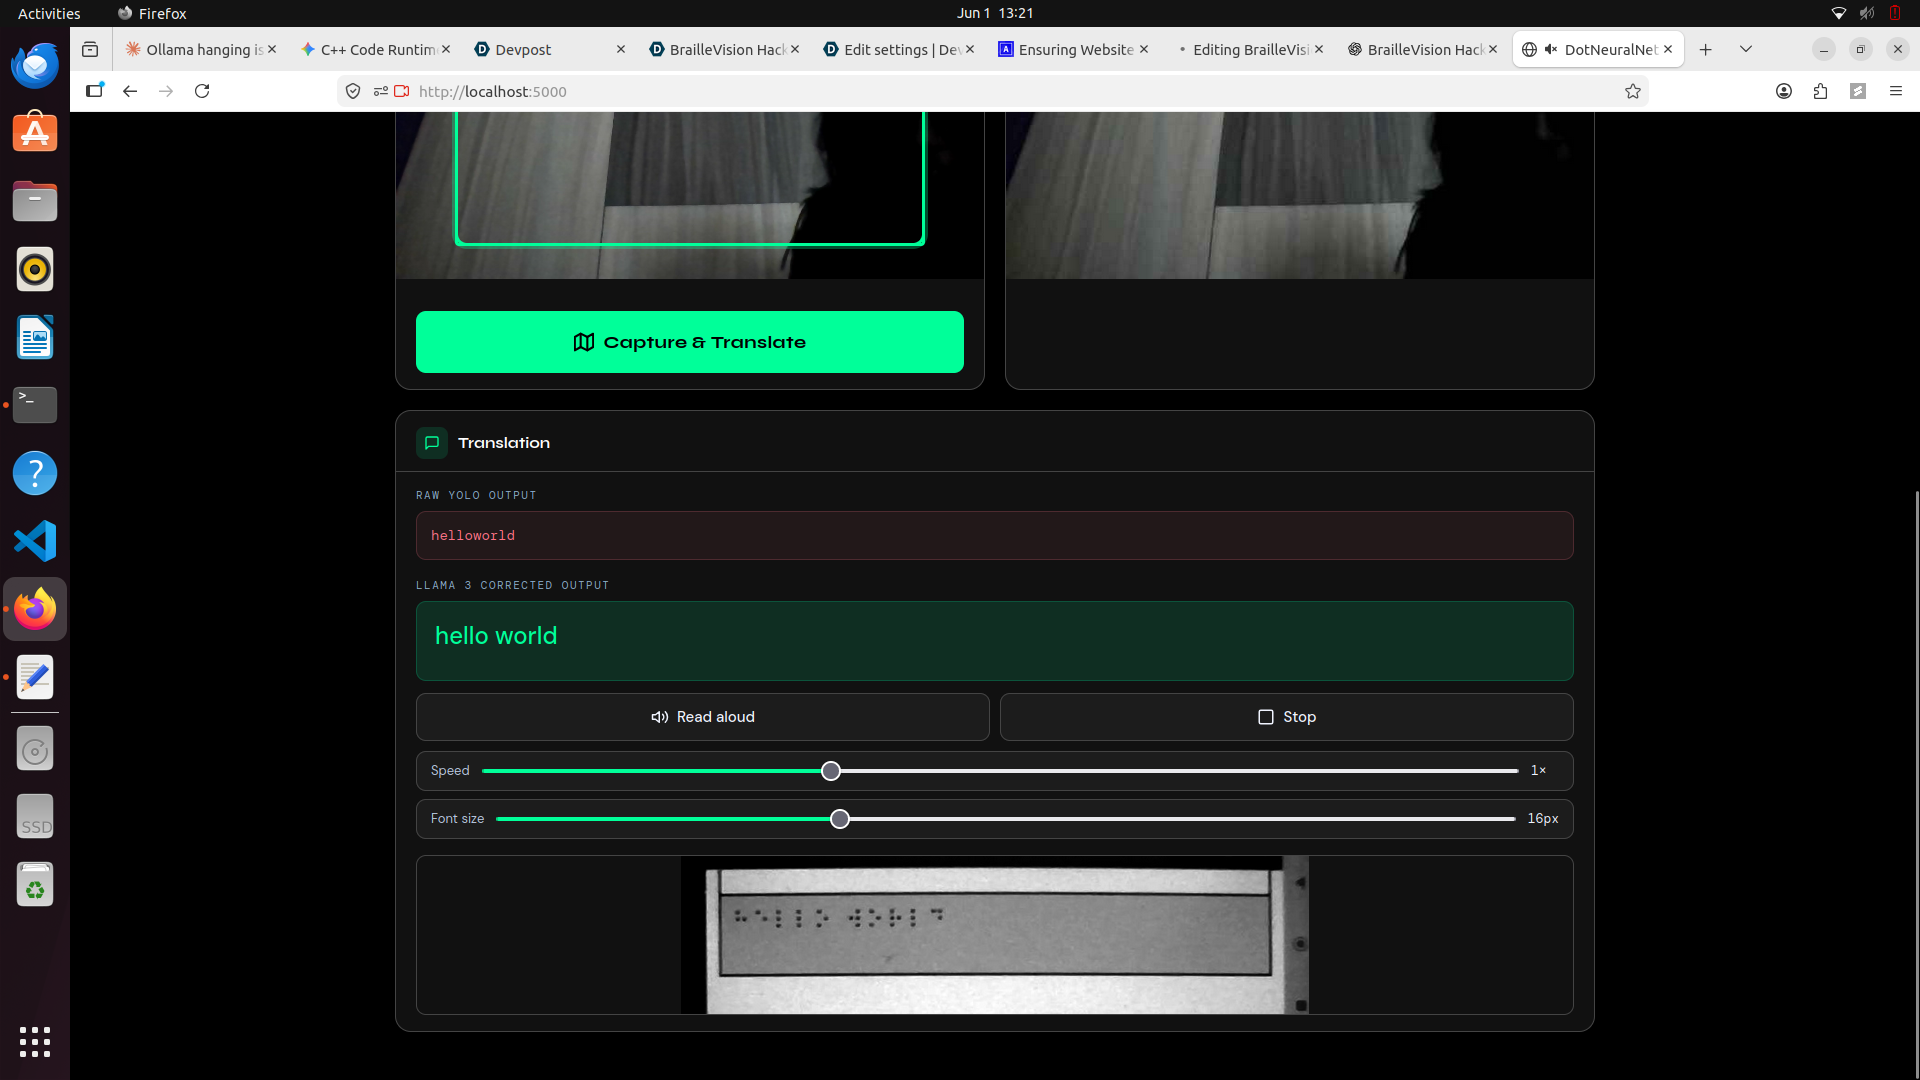
3️⃣ Llama 3 NLP Auto-Correction
Vision-based OCR is rarely perfect.
For example:
Raw OCR Output:
hllowowowld

Corrected Output:
hello world
The raw text is sent to a locally hosted Llama 3 8B model through Ollama.
Using few-shot prompting, the model learns common OCR artifacts and automatically corrects them into coherent English before returning the final translation to the frontend.
♿ Accessibility Features
BrailleVision was designed with visually impaired users as the primary audience.
🔊 Audio Spatial Feedback
- Soft ticking sound while searching for the document.
- Distinct double-beep when the page is correctly aligned.
🗣️ Native Text-to-Speech
- Uses the browser's Web Speech API.
- Reads translated text aloud automatically.
🛠️ Technology Stack
Frontend
- Vanilla JavaScript
- HTML5
- CSS3
- Web Audio API
- Web Speech API
Backend
- Python
- Flask
Computer Vision
- OpenCV
- NumPy
Machine Learning
- PyTorch
- Ultralytics YOLOv8
Natural Language Processing
- Ollama
- Meta Llama 3 (8B)
🚀 How to Run Locally
Because all processing is performed locally for privacy (no cloud APIs), you will need a machine capable of running an 8B parameter language model.
Choose your operating system below for specific setup instructions.
🪟 Windows Setup Guide
1. Clone the Repository & Set Up Environment
Open Command Prompt (cmd) and run:
git clone https://github.com/<your-username>/<your-repo-name>.git
cd <your-repo-name>
It is highly recommended to use a virtual environment on Windows:
python -m venv venv
venv\Scripts\activate
2. Install Dependencies
pip install flask opencv-python numpy ultralytics requests
3. Install & Start Ollama (The AI Brain)
Download and run the Windows installer from:
https://ollama.com/downloadOnce installed, open a new Command Prompt window and run:
ollama run llama3
Leave this terminal window open. It acts as the local API server on port 11434.
4. Start the Vision Server
Go back to your first Command Prompt window (where your virtual environment is active) and run:
python app.py
5. Launch the Application
Open your web browser and navigate to:
http://localhost:5000
Grant camera permissions when prompted and begin scanning.
🐧 Linux (Ubuntu) Setup Guide
1. Clone the Repository & Set Up Environment
Open a terminal and run:
git clone https://github.com/<your-username>/<your-repo-name>.git
cd <your-repo-name>
Optional but recommended:
python3 -m venv venv
source venv/bin/activate
2. Install Dependencies
pip install flask opencv-python numpy ultralytics requests
3. Install & Start Ollama (The AI Brain)
Install Ollama using the official installation script:
curl -fsSL https://ollama.com/install.sh | sh
Once installed, start the Llama 3 model:
ollama run llama3
Leave this terminal window open. It acts as the local API server on port 11434.
4. Start the Vision Server
Open a new terminal window, navigate to the project directory, and run:
python3 app.py
5. Launch the Application
Open your web browser and navigate to:
http://localhost:5000
Grant camera permissions when prompted and begin scanning.
📊 Accuracy & Performance
Hardware Requirements
The current architecture requires relatively powerful hardware.
- Llama 3 8B typically needs around 8 GB+ RAM.
- Real-time performance improves significantly with GPU acceleration.
GPU vs CPU
If no dedicated NVIDIA or AMD GPU is available:
- Ollama falls back to CPU inference.
- NLP correction may take several seconds.
With GPU acceleration:
- Correction is nearly instantaneous.
Vision Accuracy
The YOLO model performs strongly on clean, well-lit Braille.
The custom gamma correction pipeline substantially improves robustness under uneven lighting conditions, though extremely flattened or worn Braille dots may still cause occasional misreads.
🔮 Future Improvements
⚡ Faster NLP Pipeline
Replace the current Llama 3 8B model with:
- Phi-3
- Gemma
- Cloud-hosted inference APIs
to reduce latency and hardware requirements.
📚 Improved Dataset
Expand training data to include:
- Worn Braille pages
- Flattened dots
- Extreme lighting conditions
- Real-world scanning environments
🚀 Full GPU Acceleration
Containerize the entire stack and enable:
- CUDA
- cuDNN
- Simultaneous YOLO + LLM acceleration
for maximum throughput.
🙏 Credits & Acknowledgements
Special thanks to DotNeuralNet for providing the foundational Braille dataset and baseline YOLO weights that helped bootstrap the computer vision pipeline. Info about Model Accuracy, Dataset can be found: https://github.com/snoop2head/DotNeuralNet

Log in or sign up for Devpost to join the conversation.