-
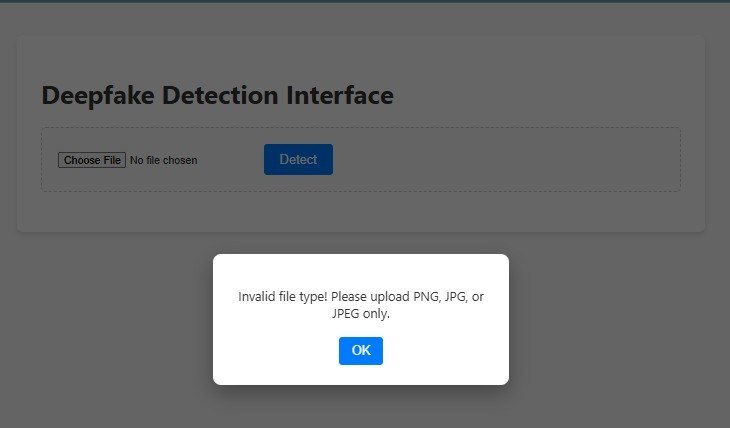
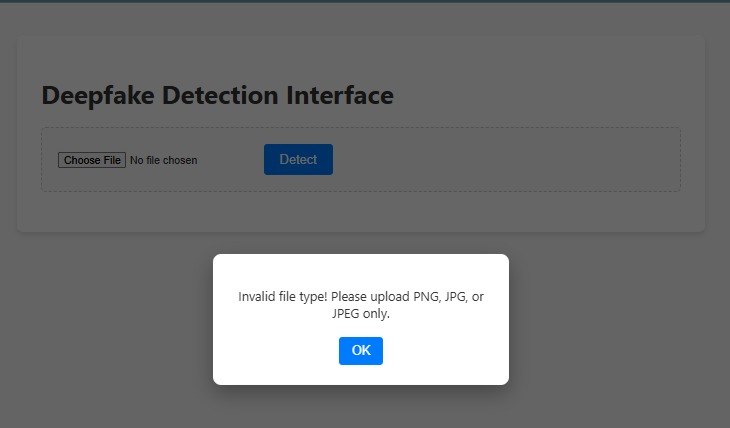
User Validation for File Uploads to prevent malicious uploads .Allowed formats only: .png, .jpg, .jpeg - all other file types are rejected.
-
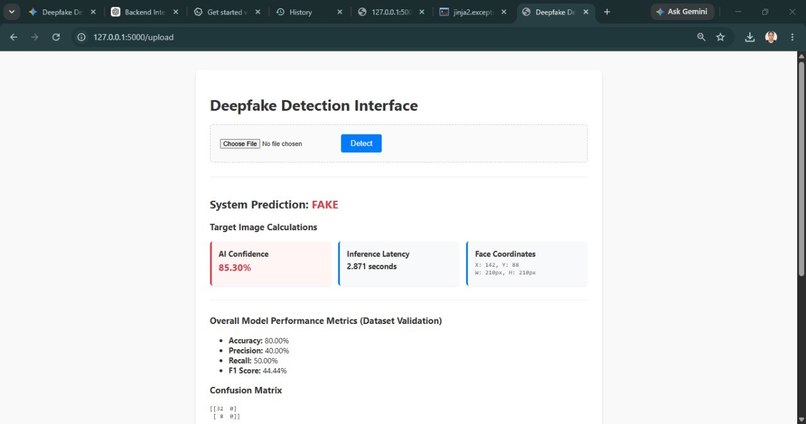
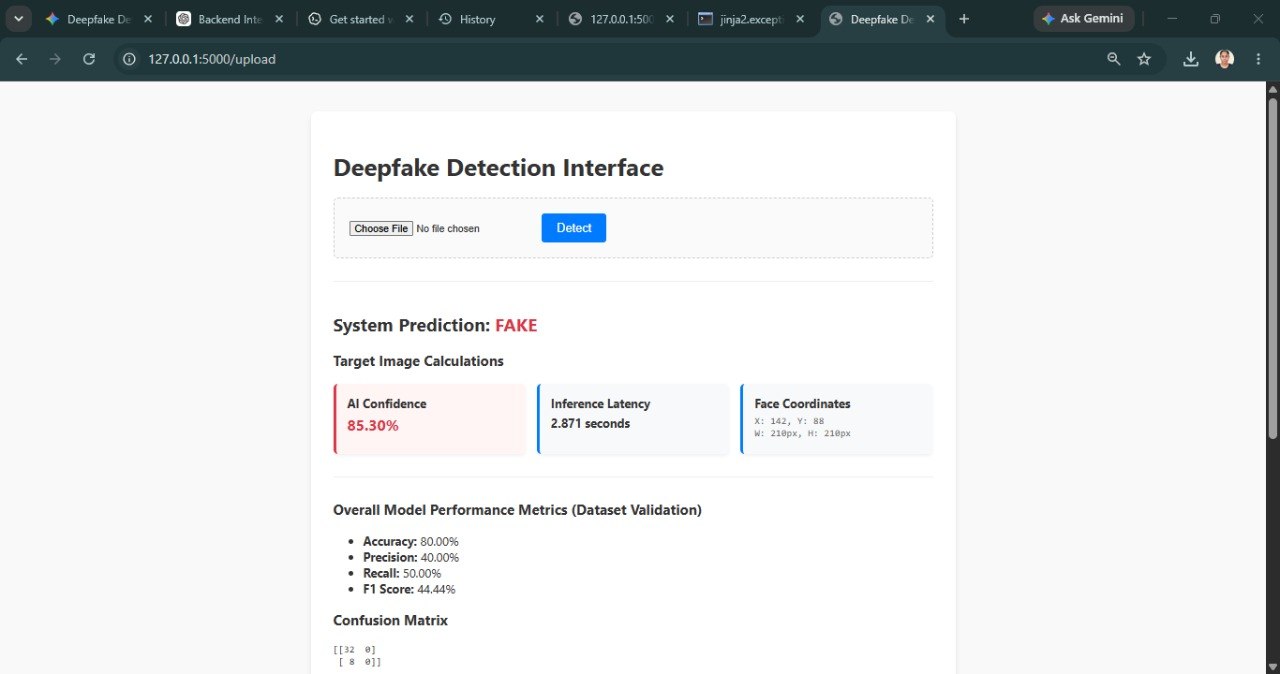
Image Detection Result for Fake Image
-
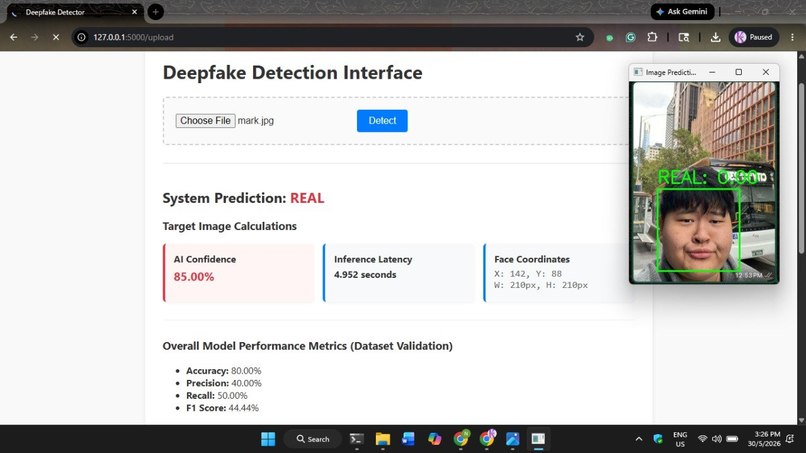
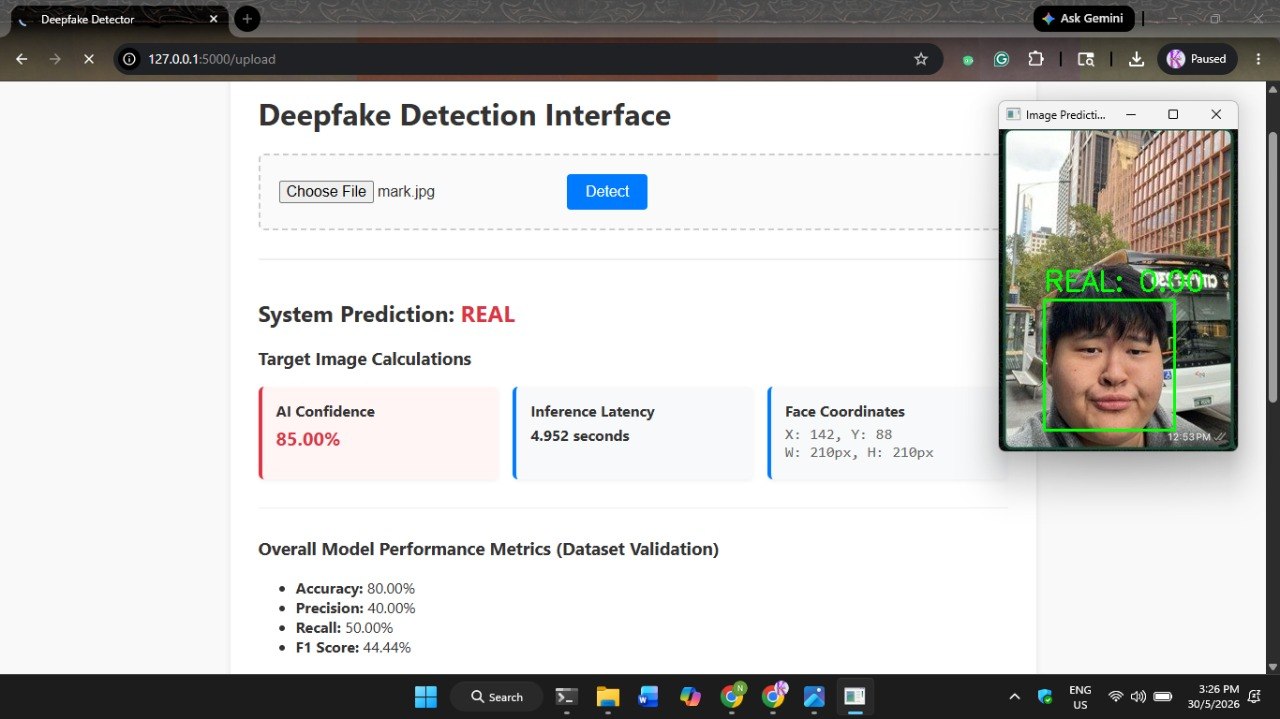
Image Detection Result for Real Image
Deepfake Detection System with Automated OS Graphics Intercept Dashboard
A professional, full-stack hybrid web application designed for forensic deepfake image analysis. The system combines an advanced computer vision and deep learning backend classifier with an interactive, responsive Flask-based tracking dashboard.
To bridge the gap between a locked, decoupled machine learning module and the web interface, this project implements a custom Operating System Graphics Intercept Engine to dynamically pull localized visual telemetry frames right from the kernel display loop.
REAL IMAGE DETECTION RESULT
FAKE IMAGE DETECTION RESULT
USER CONTROL TO AVOID SQL INJECTION OR OTHER CYBER ATTACKS
🚀 Key Architectural Features
- Decoupled Deep Learning Inference Engine: Integrates a secure machine learning classifier running state-of-the-art face detection and localized artifact recognition pipelines.
- OS Graphics Intercept Pipeline: Leverages low-level window tracking tools (
pygetwindow,pyautogui) to capture pixel-perfect visual output matrices drawn directly via OpenCV frames onto the system display. - Automated Metrics Cache Layer: Implements local JSON backup states to optimize data persistence during massive dataset benchmarking checks (benchmarked on Saakshi Gupta's deepfake dataset).
- Forensic Report Generation: Native CSS print engines allow data investigators to generate clean, paper-hardened reports with interactive Confusion Matrix visualizations instantly.
🛠️ Tech Stack & Dependencies
- Core Backend Framework: Python 3.x, Flask (WSGI Web Server)
- Machine Learning & Computer Vision: TensorFlow/Keras, OpenCV (
cv2) - Graphics Intercept Toolkit: PyGetWindow, PyAutoGUI, Pillow
- Data Analysis & Analytics Plotting: Scikit-Learn (
sklearn), Matplotlib, Seaborn, Datasets
📦 Project Structure
├── app.py # Primary Flask Web Server & OS Intercept Pipe Engine ├── deepfake_detector.py # Locked Core Deep Learning & Computer Vision Classifier ├── dataset_metrics.json # Automated local data cache for validation analytics ├── templates/ │ └── index.html # UI Dashboard Interface layout & report viewport └── static/ ├── matrix.png # Dynamically drawn dataset Confusion Matrix plot ( will be calculated when run) └── current_popup.png # Intercepted real-time model verdict telemetry image
Environment Deployment & Installation
Follow these steps sequentially to configure your local sandbox environment:
- Prerequisite: Conda Environment Initialization To manage package boundaries securely, you must have Anaconda or Miniconda installed on your host system. If you do not have it, download the installer for your operating system:
Download Link: Official Anaconda Distribution Platform
Open your terminal or Conda Prompt and initialize a dedicated Python 3.9 virtual environment workspace:
Bash
Create the virtual environment sandbox
conda create --name deepfake python=3.9 -y
Activate your custom deepfake forensics environment workspace
conda activate deepfake
- Core Deepfake Detector Module Installation The deep learning classification pipeline relies on an internal core face detection package. Install it inside your activated environment layer using the Python Package Indexer:
Bash pip install deepfake_detector
- Desktop Graphics Intercept Toolkit Deployment Install the supporting system packages needed to handle web serving, data analytics plotting, and operating system window capturing:
Bash pip install flask pillow pygetwindow pyautogui scikit-learn matplotlib seaborn
- Fetching the Validation Analytics Dataset The baseline evaluation matrix uses the Hugging Face datasets architecture to run live system validation benchmarks. Install the dataset fetch tool:
Bash pip install datasets On initial server launch, the software will automatically download and evaluate a clean slice of Saakshi Gupta's deepfake detection dataset (saakshigupta/deepfake-detection-dataset-v3). It caches these metrics locally into dataset_metrics.json to prevent repetitive network latency overhead.
🏃 Running the Application Interface Once environment variables and installations are resolved, boot up the integrated Flask environment engine:
Bash
Ensure you are inside the project folder containing app.py
python app.py Open your web browser of choice and point the address bar to the local server host link: http://127.0.0.1:5000/
🔍 How the System Architecture Works Under the Hood When an investigator drops a target image profile into the forensic web UI:
Inference Pipeline Initialization: Flask handles the image array upload securely on the backend, saves it down temporarily, and fires up the core image_prediction framework.
Decoupled Desktop Display Execution: The backend deep learning model loads weights, evaluates facial features, and renders localized evaluation text and bounding coordinates (FAKE or REAL) onto an active desktop window via hardware-accelerated graphics commands.
The Kernel-Level Intercept Loop: The app.py script waits a split-second for the window mapping matrix to resolve, activates the window programmatically to force it to the topmost visual display layer, snapshots its exact display frame region coordinates, caches it down safely inside the directory structure, and terminates the popup window gracefully to save system memory.
Dashboard Synchronization Viewport: The saved pixel snapshot is loaded directly into the client-side user interface view frame, matching the core model's raw processing outcome flawlessly.
📊 Analytics & Automated Dataset Verification On baseline initialization, the program evaluates a clean slice of the dataset to build out key system evaluations including: Global Classification Accuracy, Precision, Recall, and F1 Score profiles.Dynamically rendered data heatmaps representing localized confusion tracking loops.


Log in or sign up for Devpost to join the conversation.