
Inspiration
Especially in extreme situations, like the one we all are currently in, people become very creative in finding solutions to all kinds of new challenges - this Hackathon is the best example. The pandemic can best be fought by effective exchange of knowldge and experiences. We provide the community driven platform CoronaOverflow to collect and share these ideas in the context of Corona, so they are easily accessible from all over the world.
People all over the world face themselves in similar situations through the pandemic and through measures to contain it. Many have developed ingenious solutions to larger or smaller problems they faced, be it in professional or daily life. These Corona 'lifehacks' float around the internet in social media and on websites - we give them a dedicated community driven platform.
What it does
CoronaOverflow provides general guidance about safe conduct in times of coronavirus. Users post experiences, solutions and lifehacks in posts, giving public instructions for others to use. Content is rated by the community, which promotes the display of the best solution and prevents spread of misinformation. Posts are aggregated under labels, allowing for an intuitive sorting and browsing experience for users. Highlighting of trends, like posts from important sources (WHO, ...) is offered.
How we built it
We hacked away at a demo application. Starting friday night until sunday we managed to build CoronaOverflow from scratch.
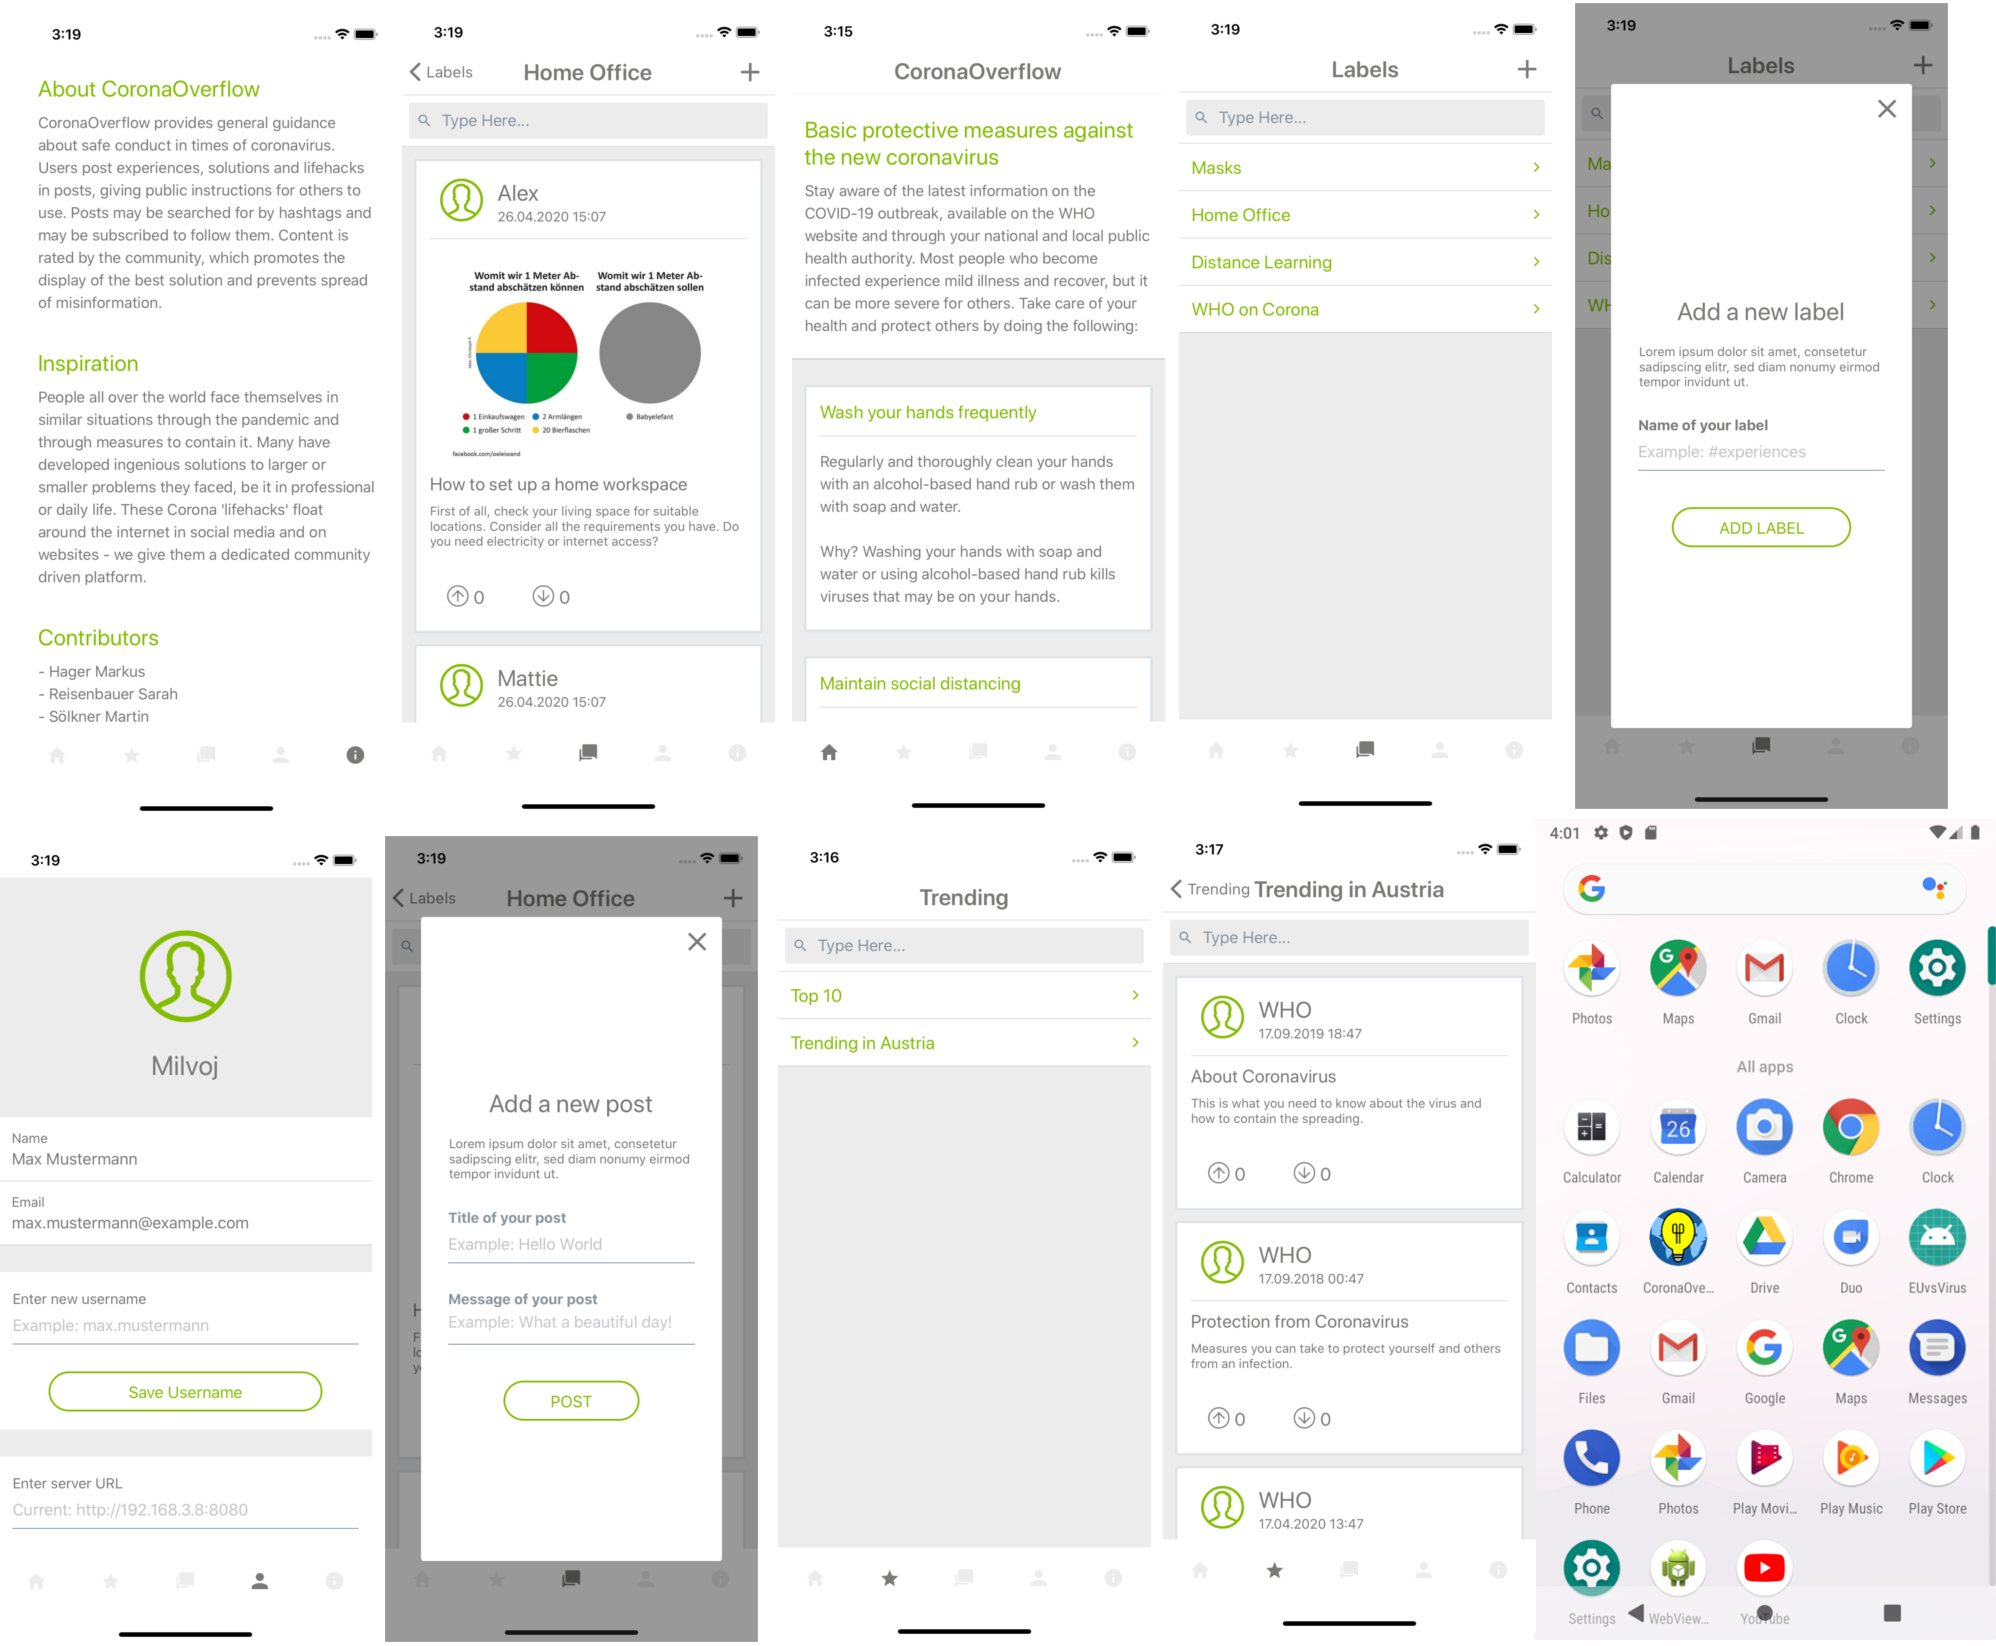
Screenrecording
Screen Recording of the Mobile App (MP4)
Screen Recording of the Mobile App (AVI)
Screens:
The user-interface is presented in an Android/IOS App, developed with React Native (https://reactnative.dev/).
The backend is based on Java, using quarkus (https://quarkus.io/) for a fast spin up. Currently we use an in-memory database for demonstration purposes, but switching to a real database (PostgreSQL, ...) would be possible within minutes thanks to automated database migration and initialisation provided by FlyWay (https://flywaydb.org/).
Communication between app and backend is done via a REST Api, allowing for future addition of different presentation techologies (Angular, ...).
Challenges we ran into
Teamwork: Adapting to a team that never worked together before this challenge. Some members even met (virtually) just before we wrote the first ideas down.
Coordinating frontend/backend: Since our skillset split along those techological boundaries, we had to come up with a seamless integration of frontend and backend. That was a bit unusual, since some of us tend to work as fullstack Java developers.
Accomplishments that we are proud of
A functional mobile app and backend built in two days.
Quick backend spinup times, fractions of a conventional application server. Allows for faster development cycles.
What we learned
Quarkus: It was our first project built on quarkus, although it worked seamlessly most of the time it turned out to change some minor details compared to other techologies we are already familiar with.
What's next for CoronaOverflow
- Posts may be searched for by hashtags and may be subscribed to follow them.
- Additional 'trend' categories, e.g. region based ('Austria Top 10 Posts'),...
- Templates for easy post creation, especially for step-by-step instructions.
How To Run It on your machine:
Requirements:
- Java 8+
- Maven 3.6.2+
- git to checkout the source from https://github.com/meks77/CoronaOverflow.git
To Run the backend: Check out the repository and run the following command to spin up the backend API on port 8080
clean compile quarkus:dev -f co-backend/pom.xml
To Run the Frontend:
Setting up the development environment: For more details about the setup of the development environment visit: https://reactnative.dev/docs/environment-setup
Running the app in dev mode: Execute the following command in the terminal inside of the root directory of your project:
npm run android or npm run ios
- Building APK for Android: The APK (Android Package) is the installation file of the Android app. To build the APK run the following command in the terminal inside of the root directory of your project:
npm run build:android
- The output APK-file will be located in the following directory:
<Project>/android/app/build/outputs/apk/release/app-release.apk
- Install APK on Android device: To install the APK on an Android device you have multiple options. More information: https://www.androidpit.com/android-for-beginners-what-is-an-apk-file


Log in or sign up for Devpost to join the conversation.