Inspiration
I always wanted to design an educational tool that both medical and engineering students would find interesting, as I am interested in both fields, and can see many overlapping themes. I am kinaesthetic learner so I really value the being hands on with models to understand how things work. At medical school, I have seen many cases of poor medication compliance such as for mental health and high blood pressure, and often times, patients would be more compliant if they were to fully understand the pathophysiology of their condition, what the medication does, and how it can help they on the long term. Therefore, I saw this challenge as motivation to finally put my head down to achieve that. I found the heart very interesting organ, as there are a lot of engineering invovled, including fluid mechanics and electrical signals.
What it does
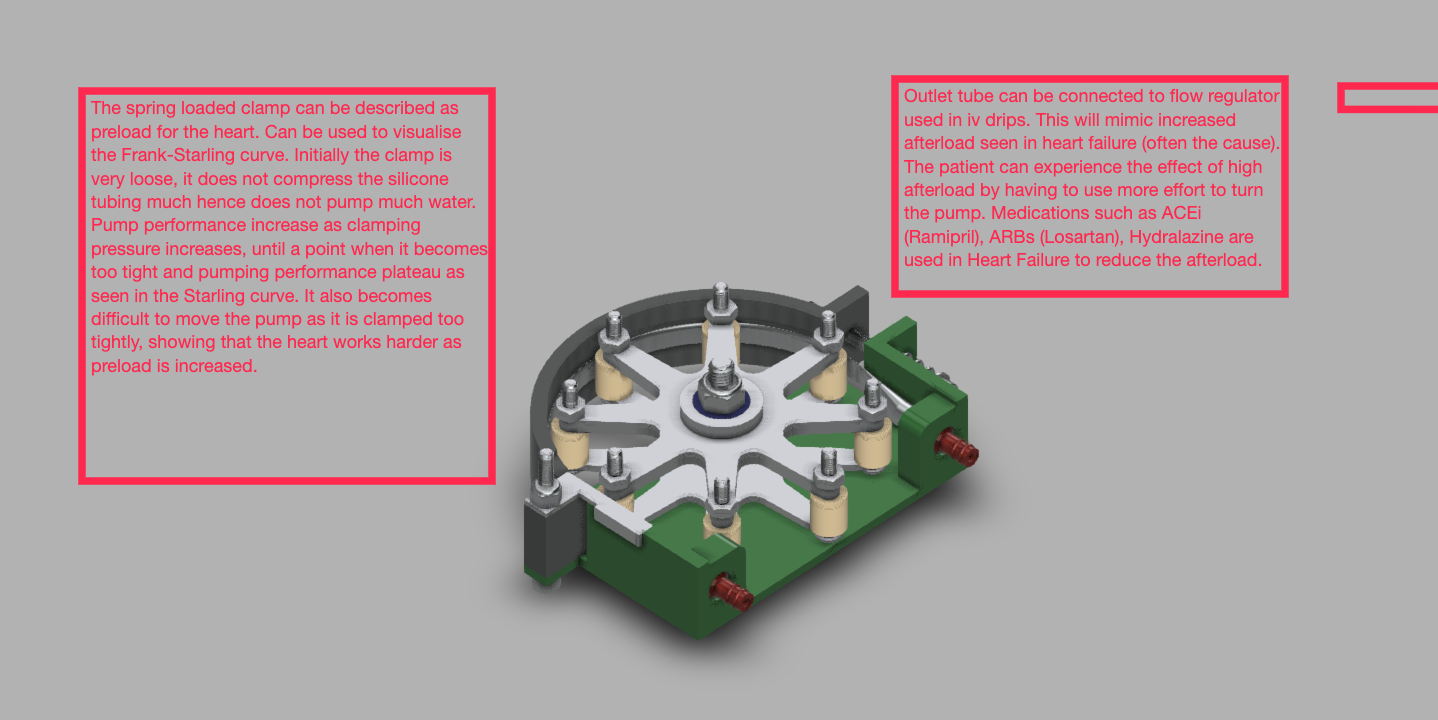
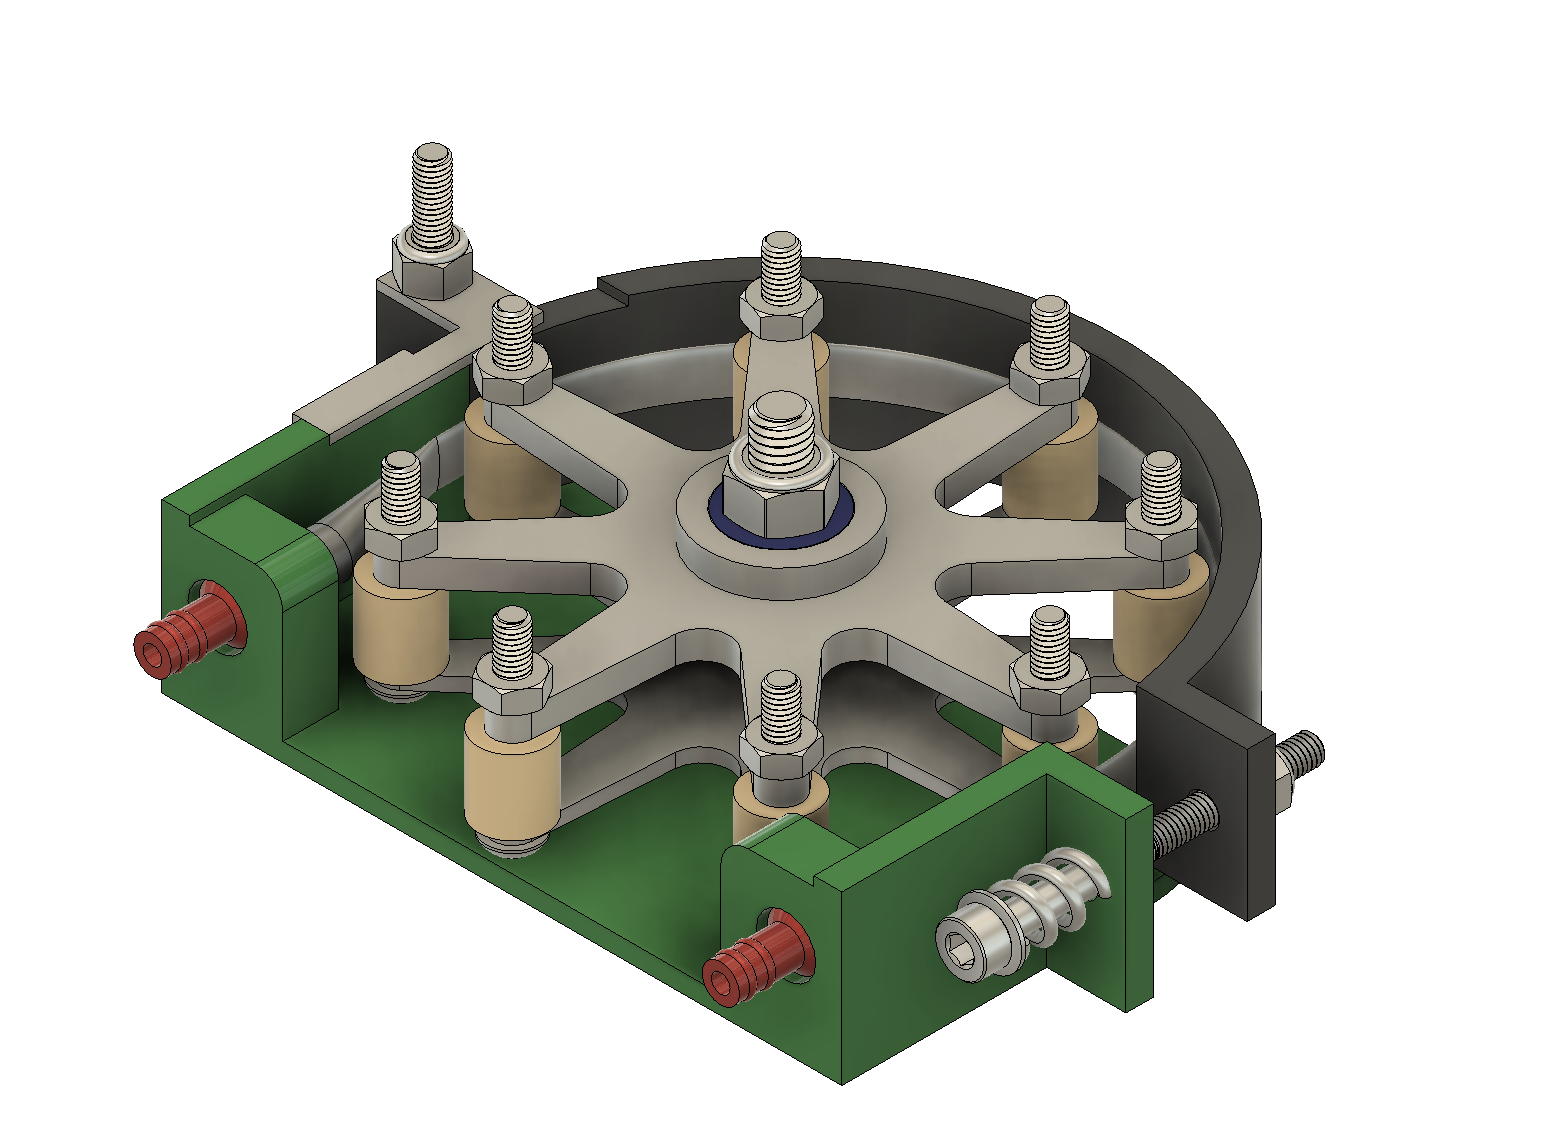
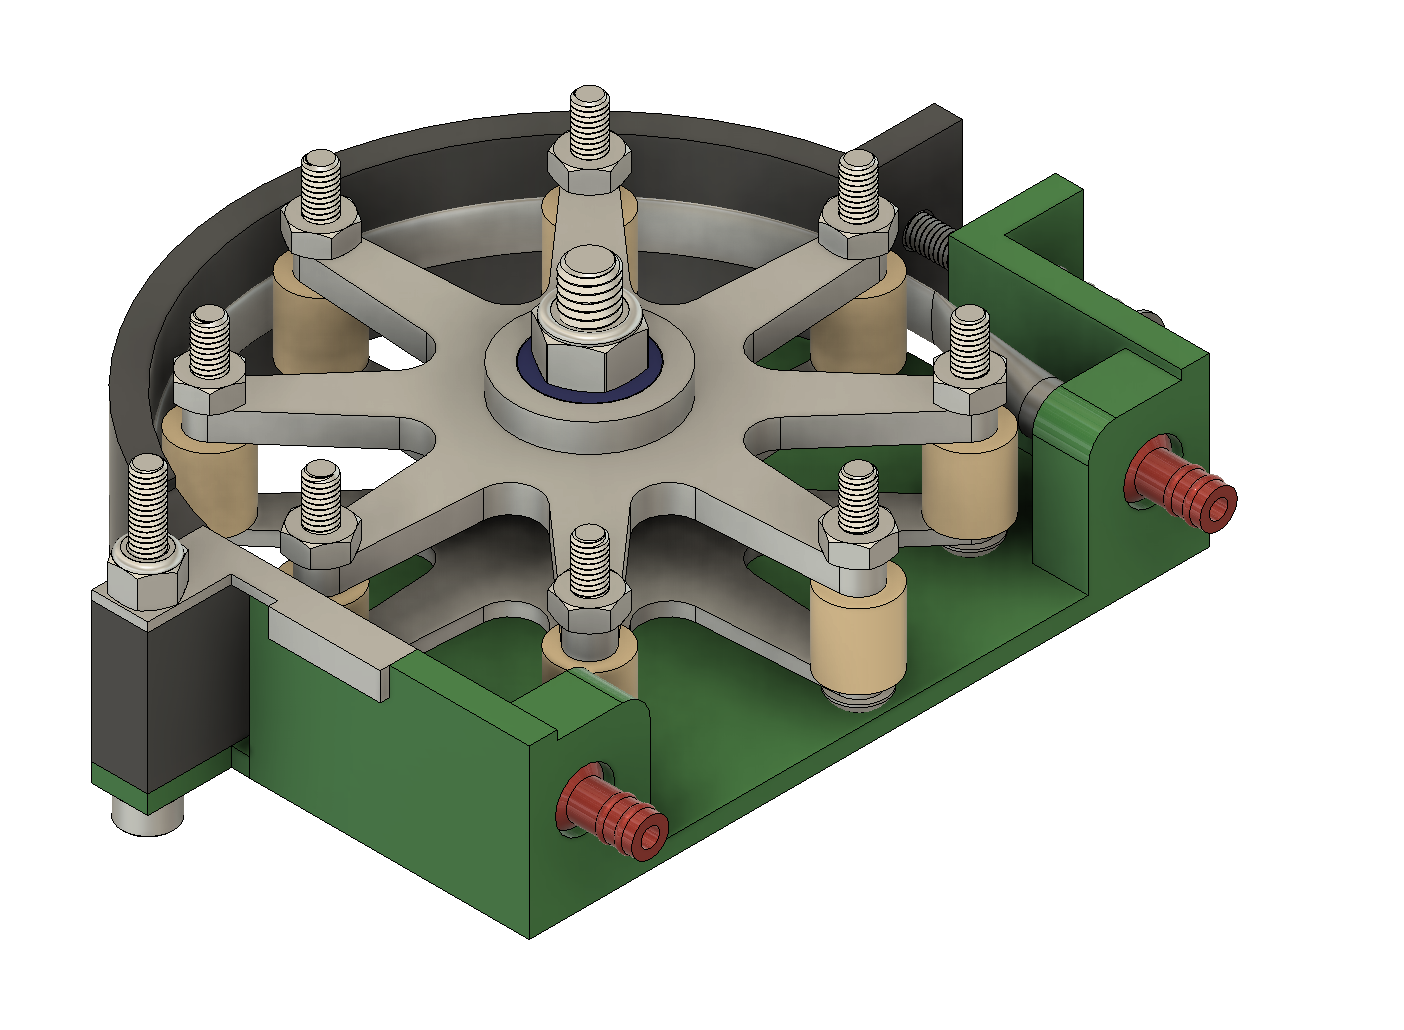
My design essentially is a 3D printed peristaltic pump made with components I had lying around my room. It has 2 main features: adjustable clamping pressure and outlet tube flow regulator. The outlet tube flow regulator works by mimicking the afterload of the heart. A smaller outlet diameter can represent higher systemic vascular resistance, high blood pressure, aortic stenosis etc, which can lead to congestive heart failure. This can help patients understand why they have heart failure, and the pathophysiology. Another importance of understanding afterload, is to understand how common medications work. Medications such as Angiotensin-converting-enzyme inhibitors (Ramipril), ARBs (Losartan) or vasodilators such as hydralazine, work by increasing diameter of blood vessels, to reduce the afterload and make the heart work less hard, improving the survival rate for those with heart failure.
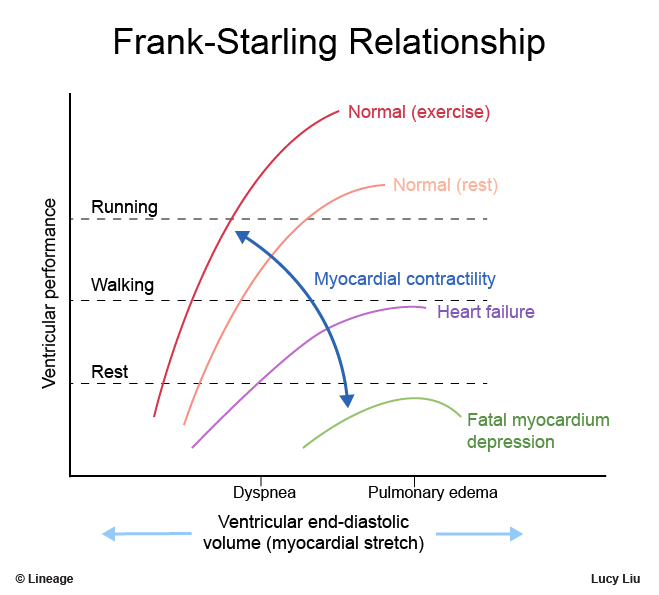
The adjustable clamping pressure can help visualise and experience the concept of Frank-Starling curve. At low clamping pressures/preload (low amount of myocardial fibers stretch), there is low pumping/cardiac output, as you increase the clamping pressure, you get better flow rate/cardiac output at the expense of the 'wheel' being more difficult to turn. At the point on the Frank-Starling curve where the curve plateau, is when the 'wheel' becomes so stiff, yet it doesn't pump much more water/cardiac output. Understanding the Frank-Starling curve is vital for patients, as the normal curve shifts downwards and flattens. The heart's contractility is decreased and less able to respond to increases in preload. Understanding this principle can help patients understand their symptoms they experience, such as fluid oedema, palpitations, and shortness of breath.
How we built it
I started the project with 2 syringes and some silicone tube to brainstorm how I can represent biological mechanisms of heart using these components. I connected 2 syringes with the silicone tube, so as air is compressed it can seem like a stroke volume with diastolic and systolic phases. But it could not easily generate the pulsatile flow which I wanted, which is why I moved on to peristaltic pump design.
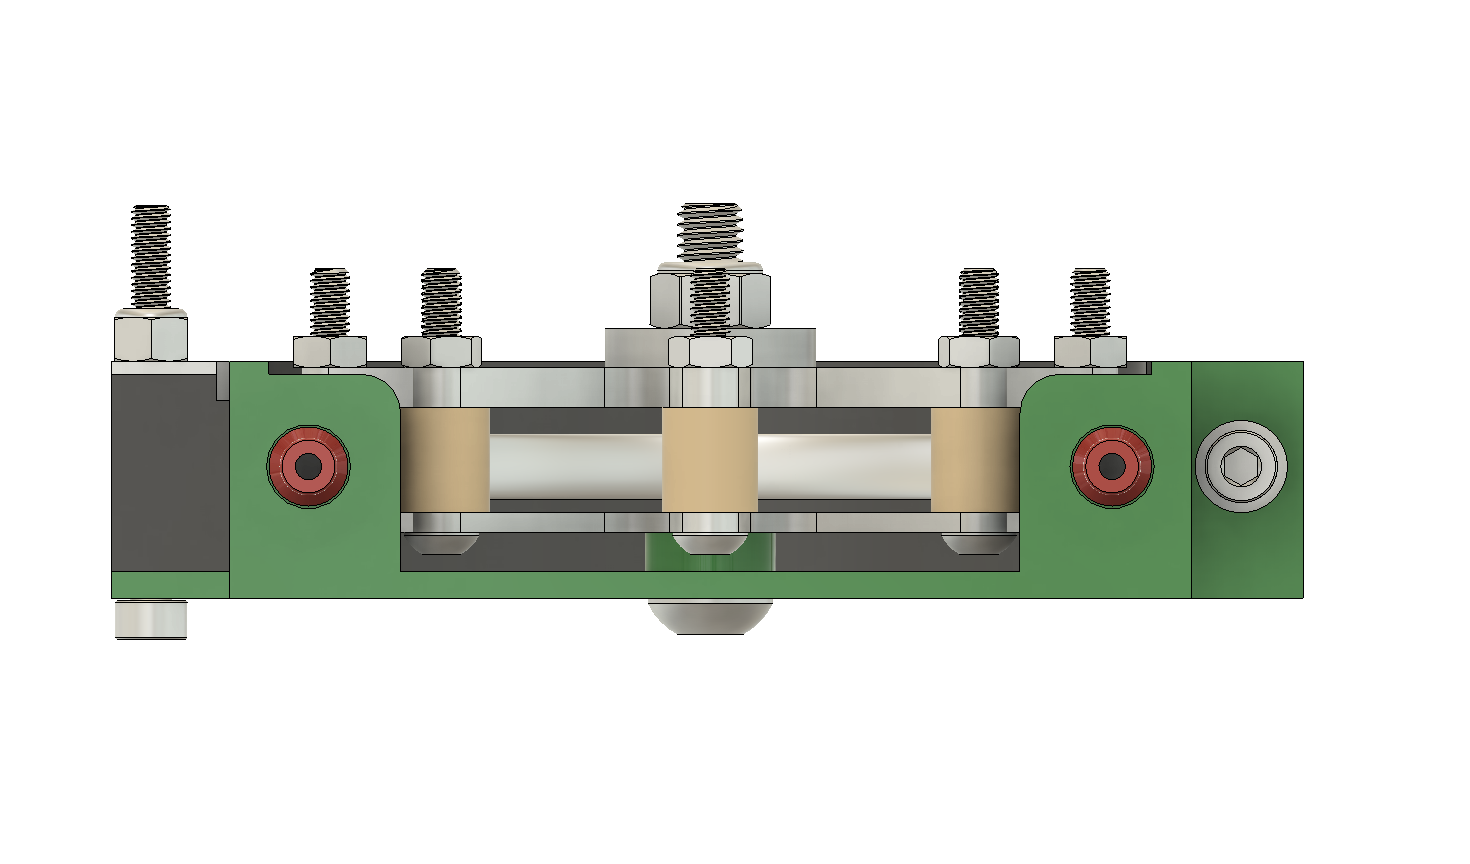
With the time constraints of the competition, I designed the pump as small as possible, around 30mm diameter instead of the current 60mm to reduce 3D print time, as I knew there will be many iterations as I never designed a peristaltic pump before . After I got the proof of concept working, with it being able to pump water, I moved on to designing a full sized pump. I used components lying around my room such as bearings, M3 bolts, nuts, silicone tube and compression spring. It took about 3 iterations to make ths mall pump design working, to find the right tube compression and tolerances, and another 3 iterations to get the full sized pump and clamp mechanism working.
Challenges we ran into
Getting the proof of concept working was the most complicated part of the competition. I started from scratch, based my designs from google images. I also struggled with time, as 3D printing takes a long time, my 3D printer was not fully calibrated and my filament was not fully dry, leading to some failed prints. Time management was an issue, as I had to balance whether some ideas were worth exploring in more depth, and judging whether it will add much to the final idea. For example, I wanted to add the effects of Beta Blockers, which slows down heart rate, but it wasted a lot of time in the end leading to nowhere.
Accomplishments that we're proud of
I'm proud of creating a tool to hopefully inspire future biomedical engineers/doctors with a educational tool which can show them how both fields overlap. I am proud of making this tool to potentially help patients understand their condition better, leading to better compliance for medications and lifestyle changes. Hopefully this would be a neat educational tool for students to have a more in depth understanding of the heart with a physical model.
What we learned
How to incorporate medical knowledge into physical models which people can interact with. 3D modelling tolerances for 3D printing.
What's next for Congestive Heart Failure Patient Education Model
Further features such as modelling regurgitation by removing a few rollers, leading to poorer pump flow, or reversing the 'wheel' to show flow moving back and forth. Make the assembly easier, as currently requires 10 nut and bolts to tighten, can look into using bearings instead of 3D printed rollers to improve performance and reduce assembly time. I want to explore whether I can include effects of beta blockers in my heart model, as it is an important proven drug in heart failure, alongside ACEi or ARBs which improve survival. Other medications such as lasix (furosemide), or vasodilators help with symptoms but not long term survival.
Built With
- 3dprint
- autodesk-fusion-360

Log in or sign up for Devpost to join the conversation.