Inspiration
The idea was born from Younji's vision of creating something interactive and fun, a project that would make computer vision tangible and exciting for people encountering it for the first time. We wanted to go beyond a screen-based demo and create something physical that people could actually control with their body. The classic claw machine felt like the perfect canvas: universally recognizable, inherently fun, and a great challenge to build from scratch. We then pushed the concept further by asking, what if someone with limited hand mobility could play too? That question shaped everything.
What We Learned
- How to use MediaPipe FaceMesh to track 478 facial landmarks in real time and extract meaningful geometric signals like head tilt angle and nose position relative to the ears
- How to build a multi-process pipeline where computer vision, network communication, and hardware control all run simultaneously without blocking each other
- The importance of protobuf version compatibility, mediapipe and viam-sdk required completely different versions of protobuf, forcing us to run them in separate Python virtual environments
- How L298N motor drivers and A4988 stepper drivers work, and the critical difference between 3.3V and 5V control logic
- How to use Raspberry Pi Connect for remote terminal access when SSH wasn't available
- How to set up a lightweight HTTP server on a Raspberry Pi to relay real-time commands from a laptop to an Arduino over WiFi -Looked at the traditional claw designs and figured out how to add characteristics onto existing claws and created something innovative. -Learnt the mechanism of claws inspired by animals such as octopus, geckos, and etc.
How We Built It
The system is built in seven layers:
1. Concept Sketch Before building, we sketched out the design and functions. We added a brief sizing, functionality, design of the product to have everybody on the same page.
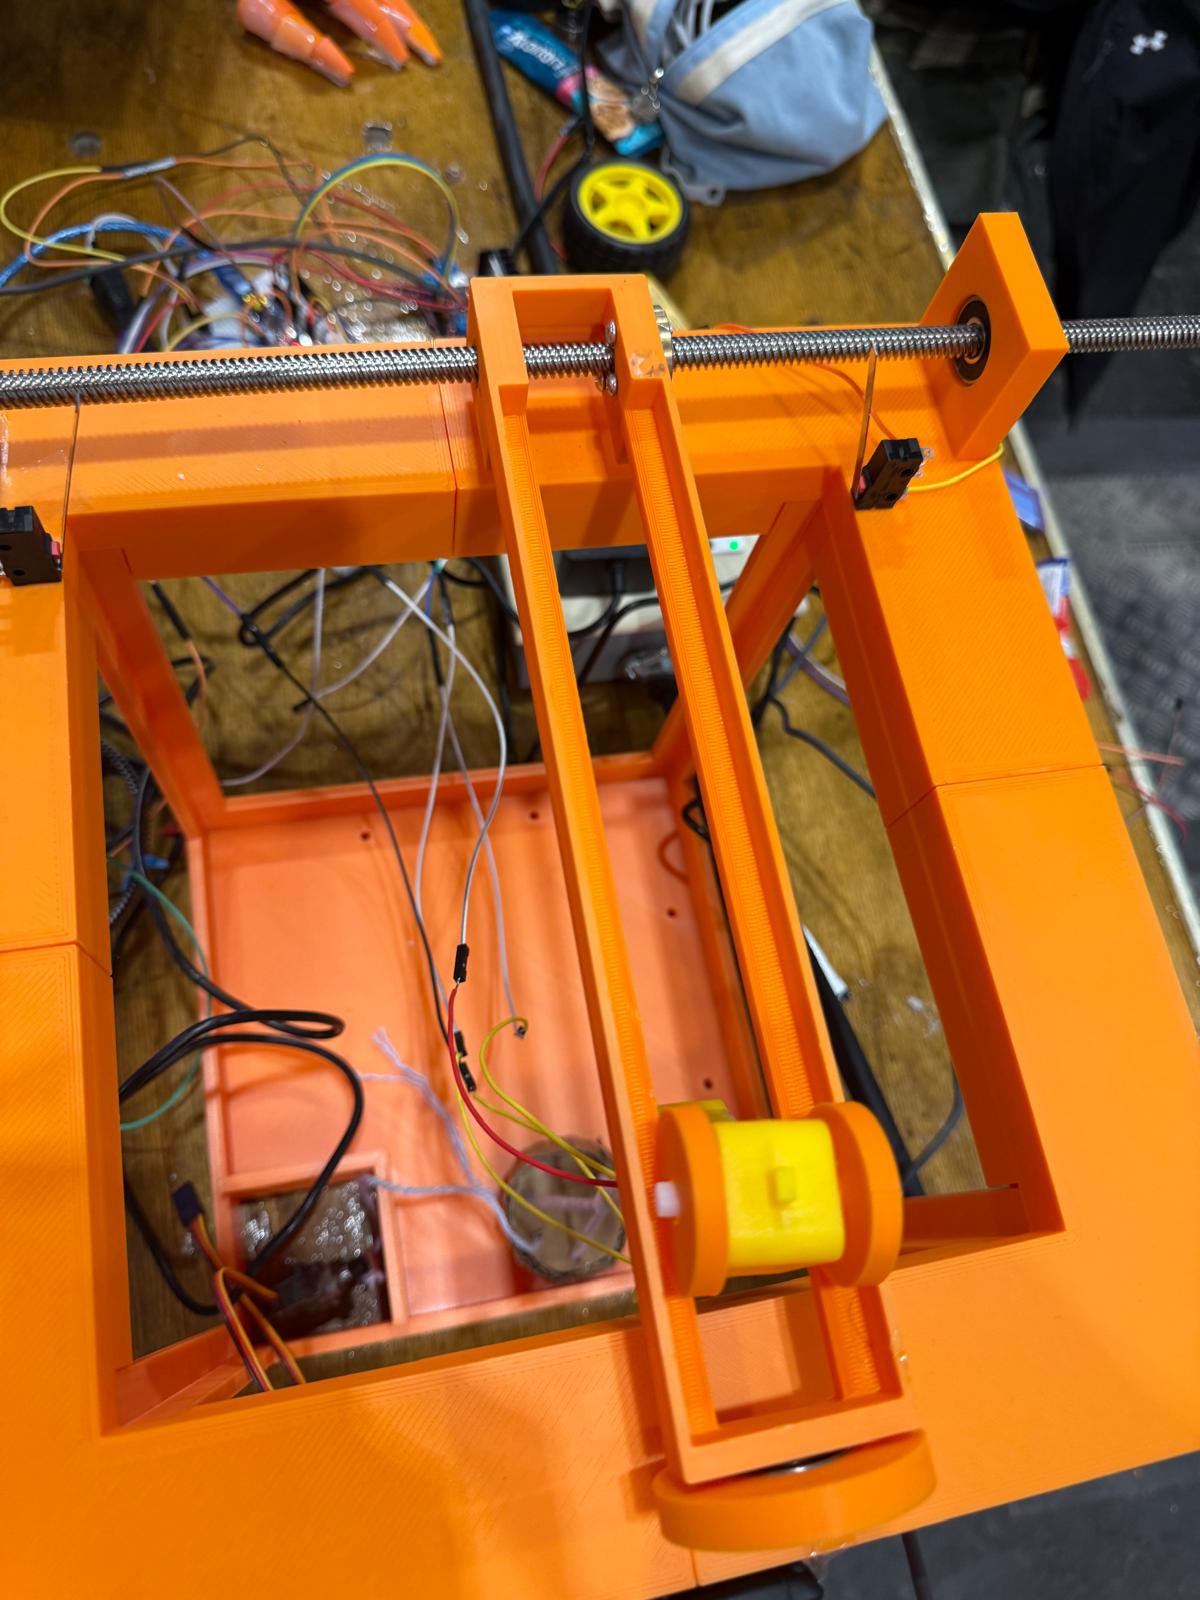
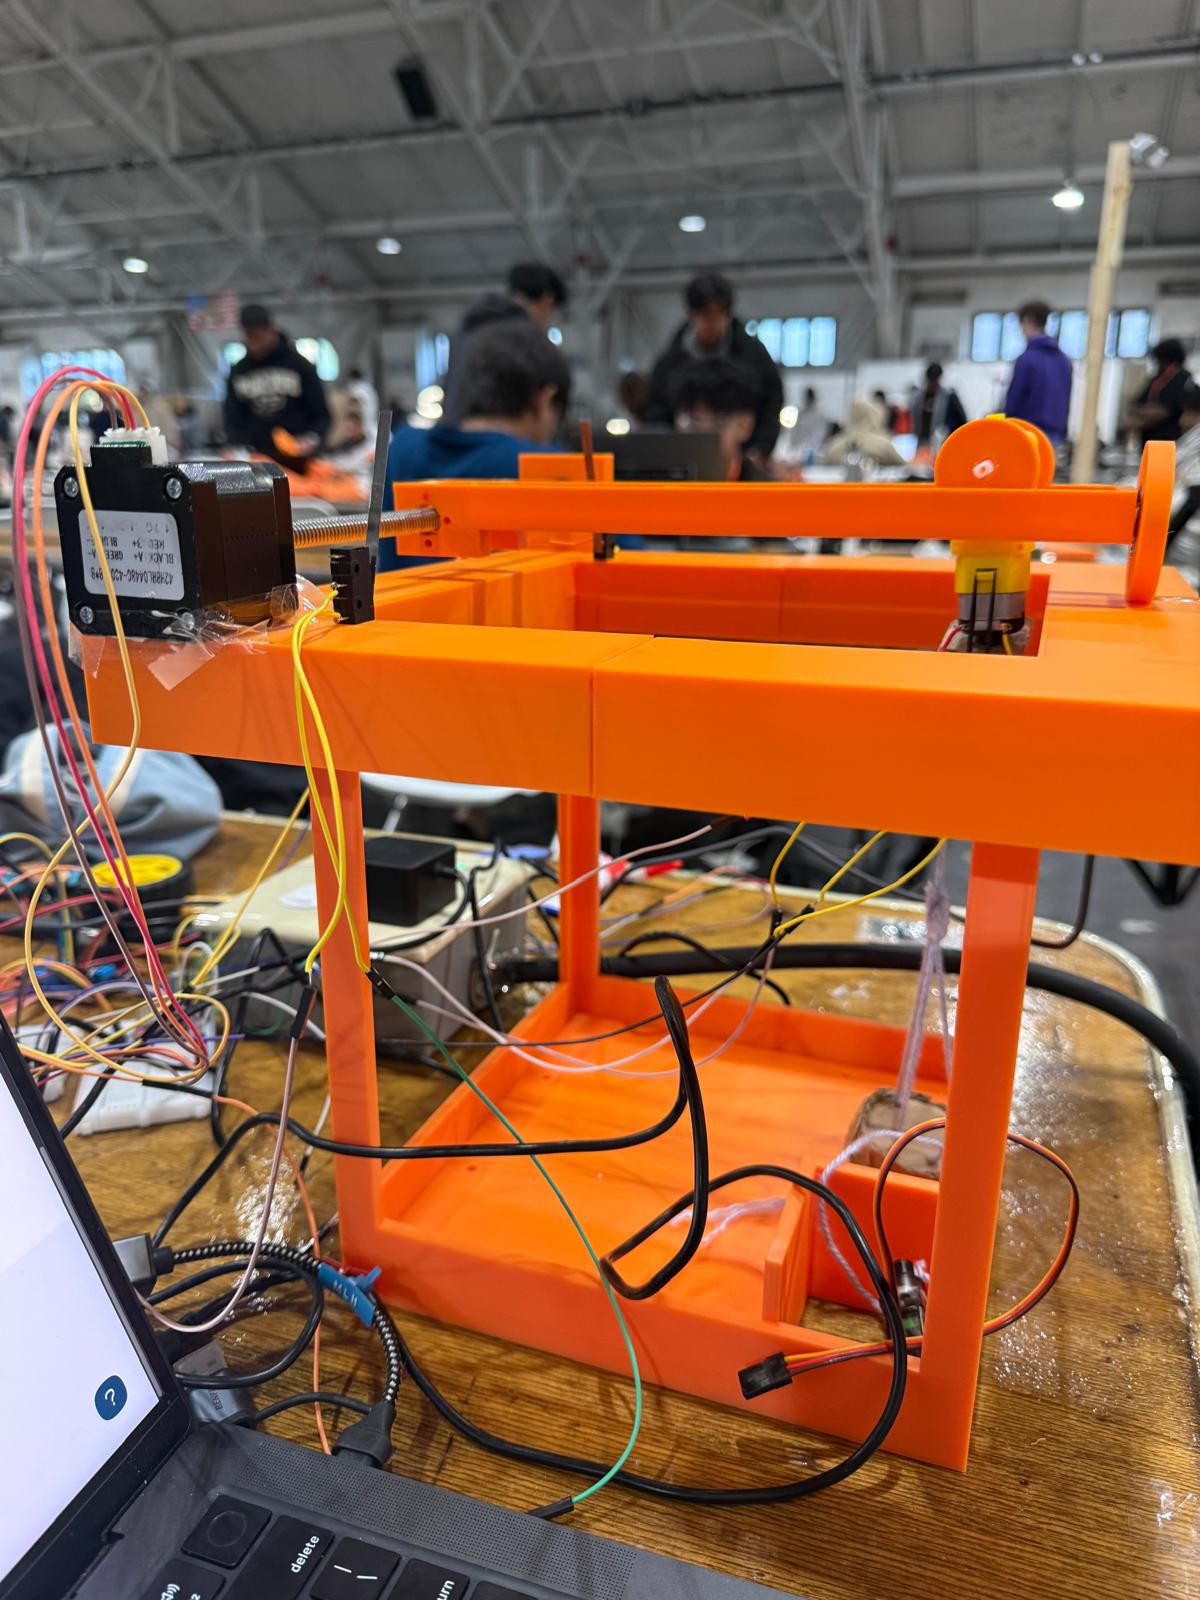
2. Mechanical Design The structure of the claw machine, parts holding up the bearing and shaft, rails used to hold up the DC motor were all designed on Fusion360. After designing, the parts were added into assembly to check if the dimensions were accurate. While designing, a buffer error was given with +- 1mm.
3. 3D Printing The designed parts were printed on the 3D printer, which mostly printed the big structure and parts that are hard to create if it wasn't 3D printing.
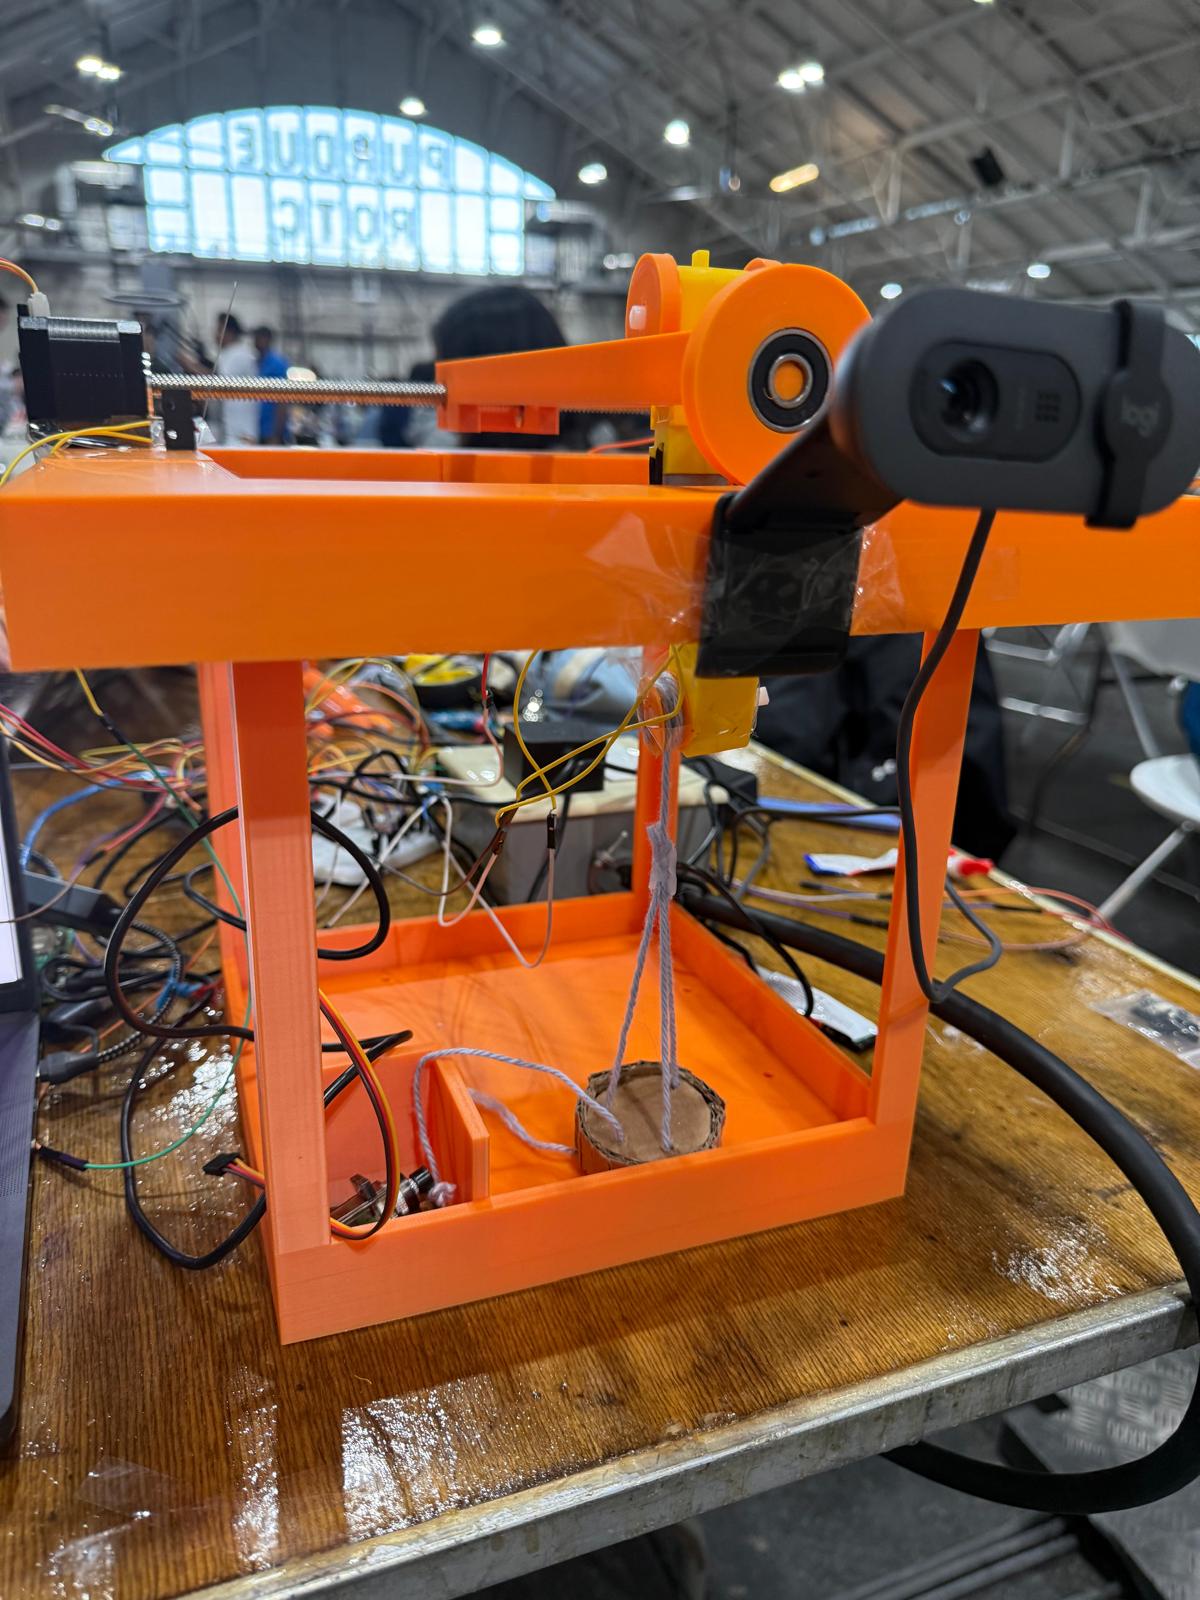
4. Computer Vision (Laptop) We used MediaPipe FaceMesh running on the laptop webcam to detect head orientation in real time. Instead of tracking nose position relative to a fixed screen center, we developed an angle-based approach, measuring the ear-to-ear tilt angle for left/right control, and the nose height relative to the ear midpoint for up/down control. Mouth opening triggers the Z axis for the claws to go up and down. Commands are written to a local file every frame.
5. Command Relay (Laptop → Pi over WiFi)
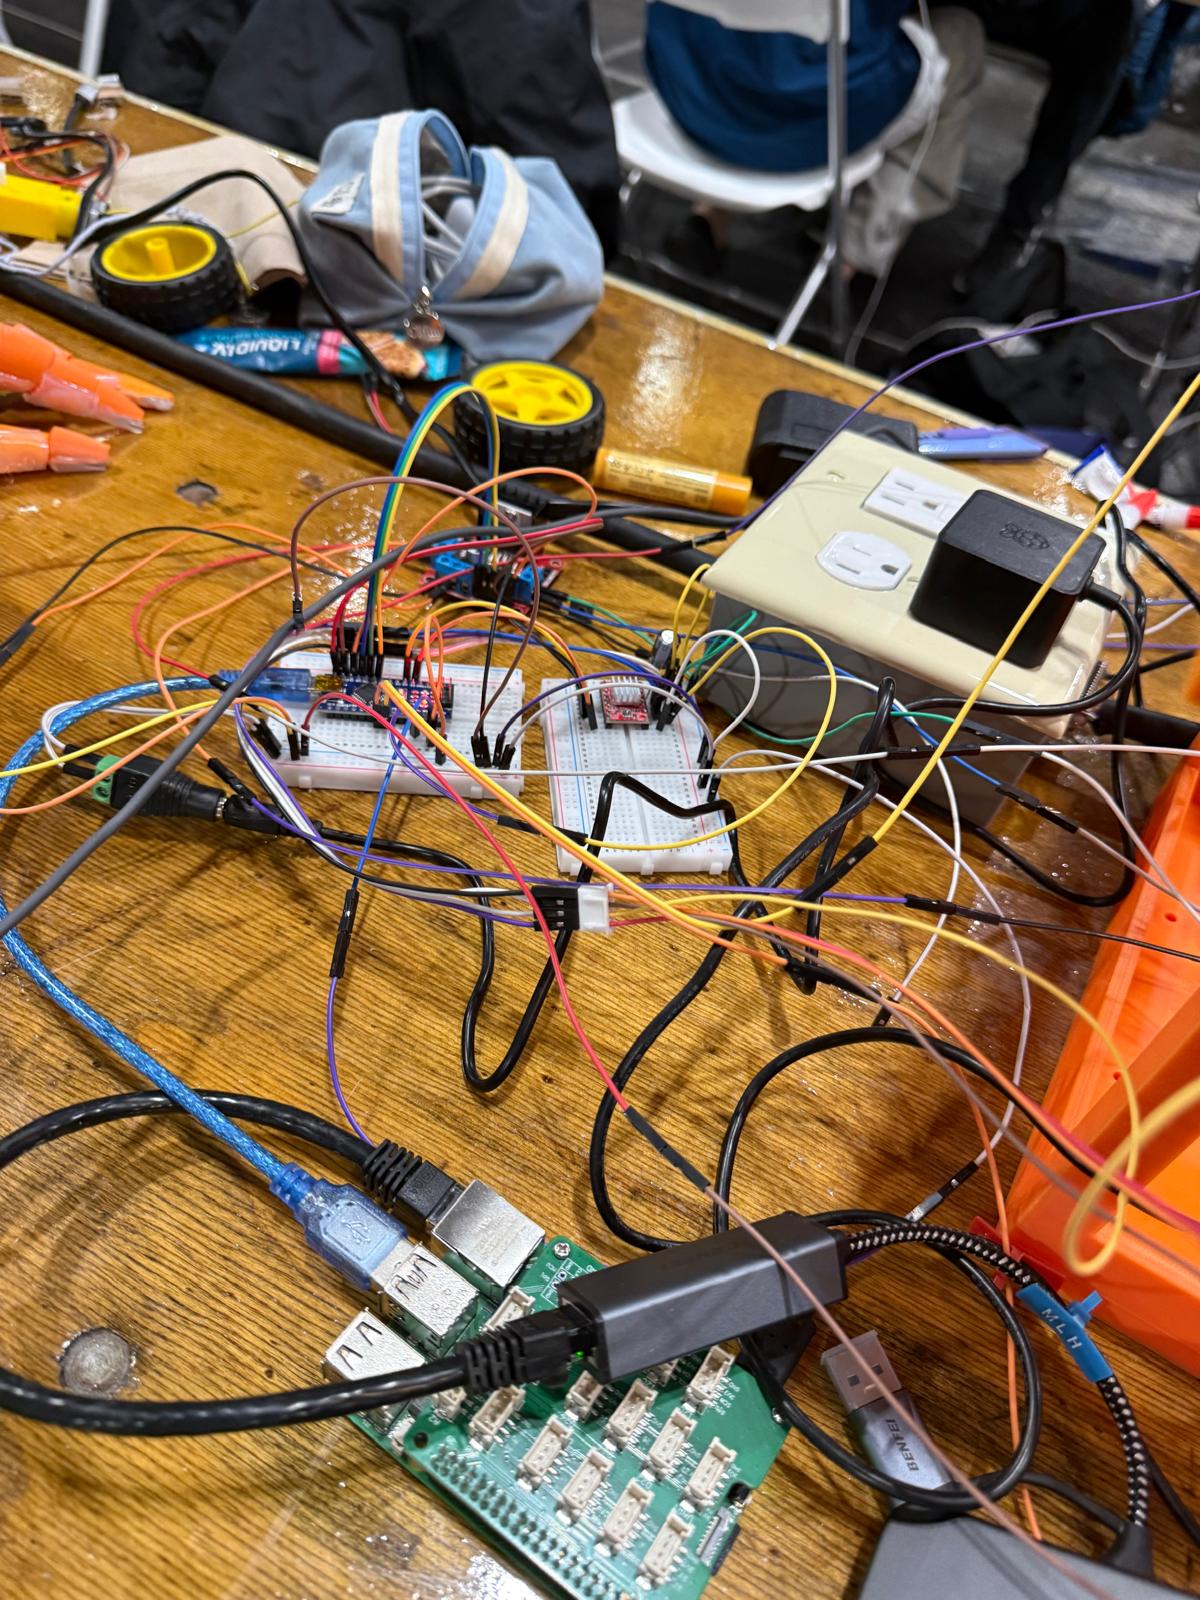
A sender script reads the command file and HTTP POSTs any new command directly to the Raspberry Pi's IP address on port 8888. This replaced an earlier Viam-based approach after we discovered that the generic/fake component in Viam doesn't store state between calls.
6. Bridge (Raspberry Pi) The Pi runs a lightweight HTTP server that receives commands and immediately forwards them to the Arduino via USB serial at 9600 baud. The Pi also runs viam-server for cloud connectivity and remote monitoring.
7. Motor Control (Arduino Nano) The Arduino Nano listens for serial commands and drives three motors: a TT DC motor for the X axis via L298N, a stepper motor for the Y axis via A4988, and a second TT DC motor for the Z axis. Limit switches on the x axis to prevent the stepper from overrunning its range.
Challenges We Faced
The biggest hardware challenge came from Duna's side. We initially used the Arduino UNO Q, but discovered its GPIO control voltage is 3.3V too low to reliably drive the L298N and A4988 motor drivers, which expect 5V logic. We tried filtering the power supply noise with capacitors first, but that didn't resolve the issue. Switching to the Arduino Nano (5V logic) solved it immediately.
On the software side, the toughest problem was the protobuf conflict between mediapipe and viam-sdk, they require incompatible versions of the same library. We solved this by splitting the system into two separate Python virtual environments, each with their own dependencies, communicating through a shared command file.
Getting the nod detection right was also tricky, early versions incorrectly triggered forward/back commands when the user simply turned their head sideways, because the nose-to-chin angle rotates with the head. We fixed this by measuring the nose's vertical position relative to the ear midpoint instead, which remains stable regardless of head rotation.
Furthermore, 3D printing parts that needed correct support and small parts were challenging. We had to try with different settings such sizing, infill, etc to get the right print without failure. With a limited amount of time, we had to try the maximum tries to make the optimal result.
Built With
- 3dprinting
- arduino
- fushion
- http
- mediapipe
- motor
- opencv
- python
- raspberry
- stepper
- viam

Log in or sign up for Devpost to join the conversation.