-
-

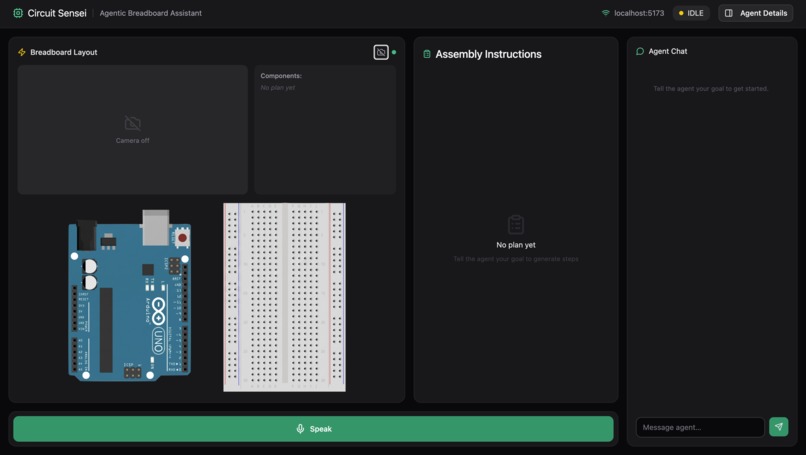
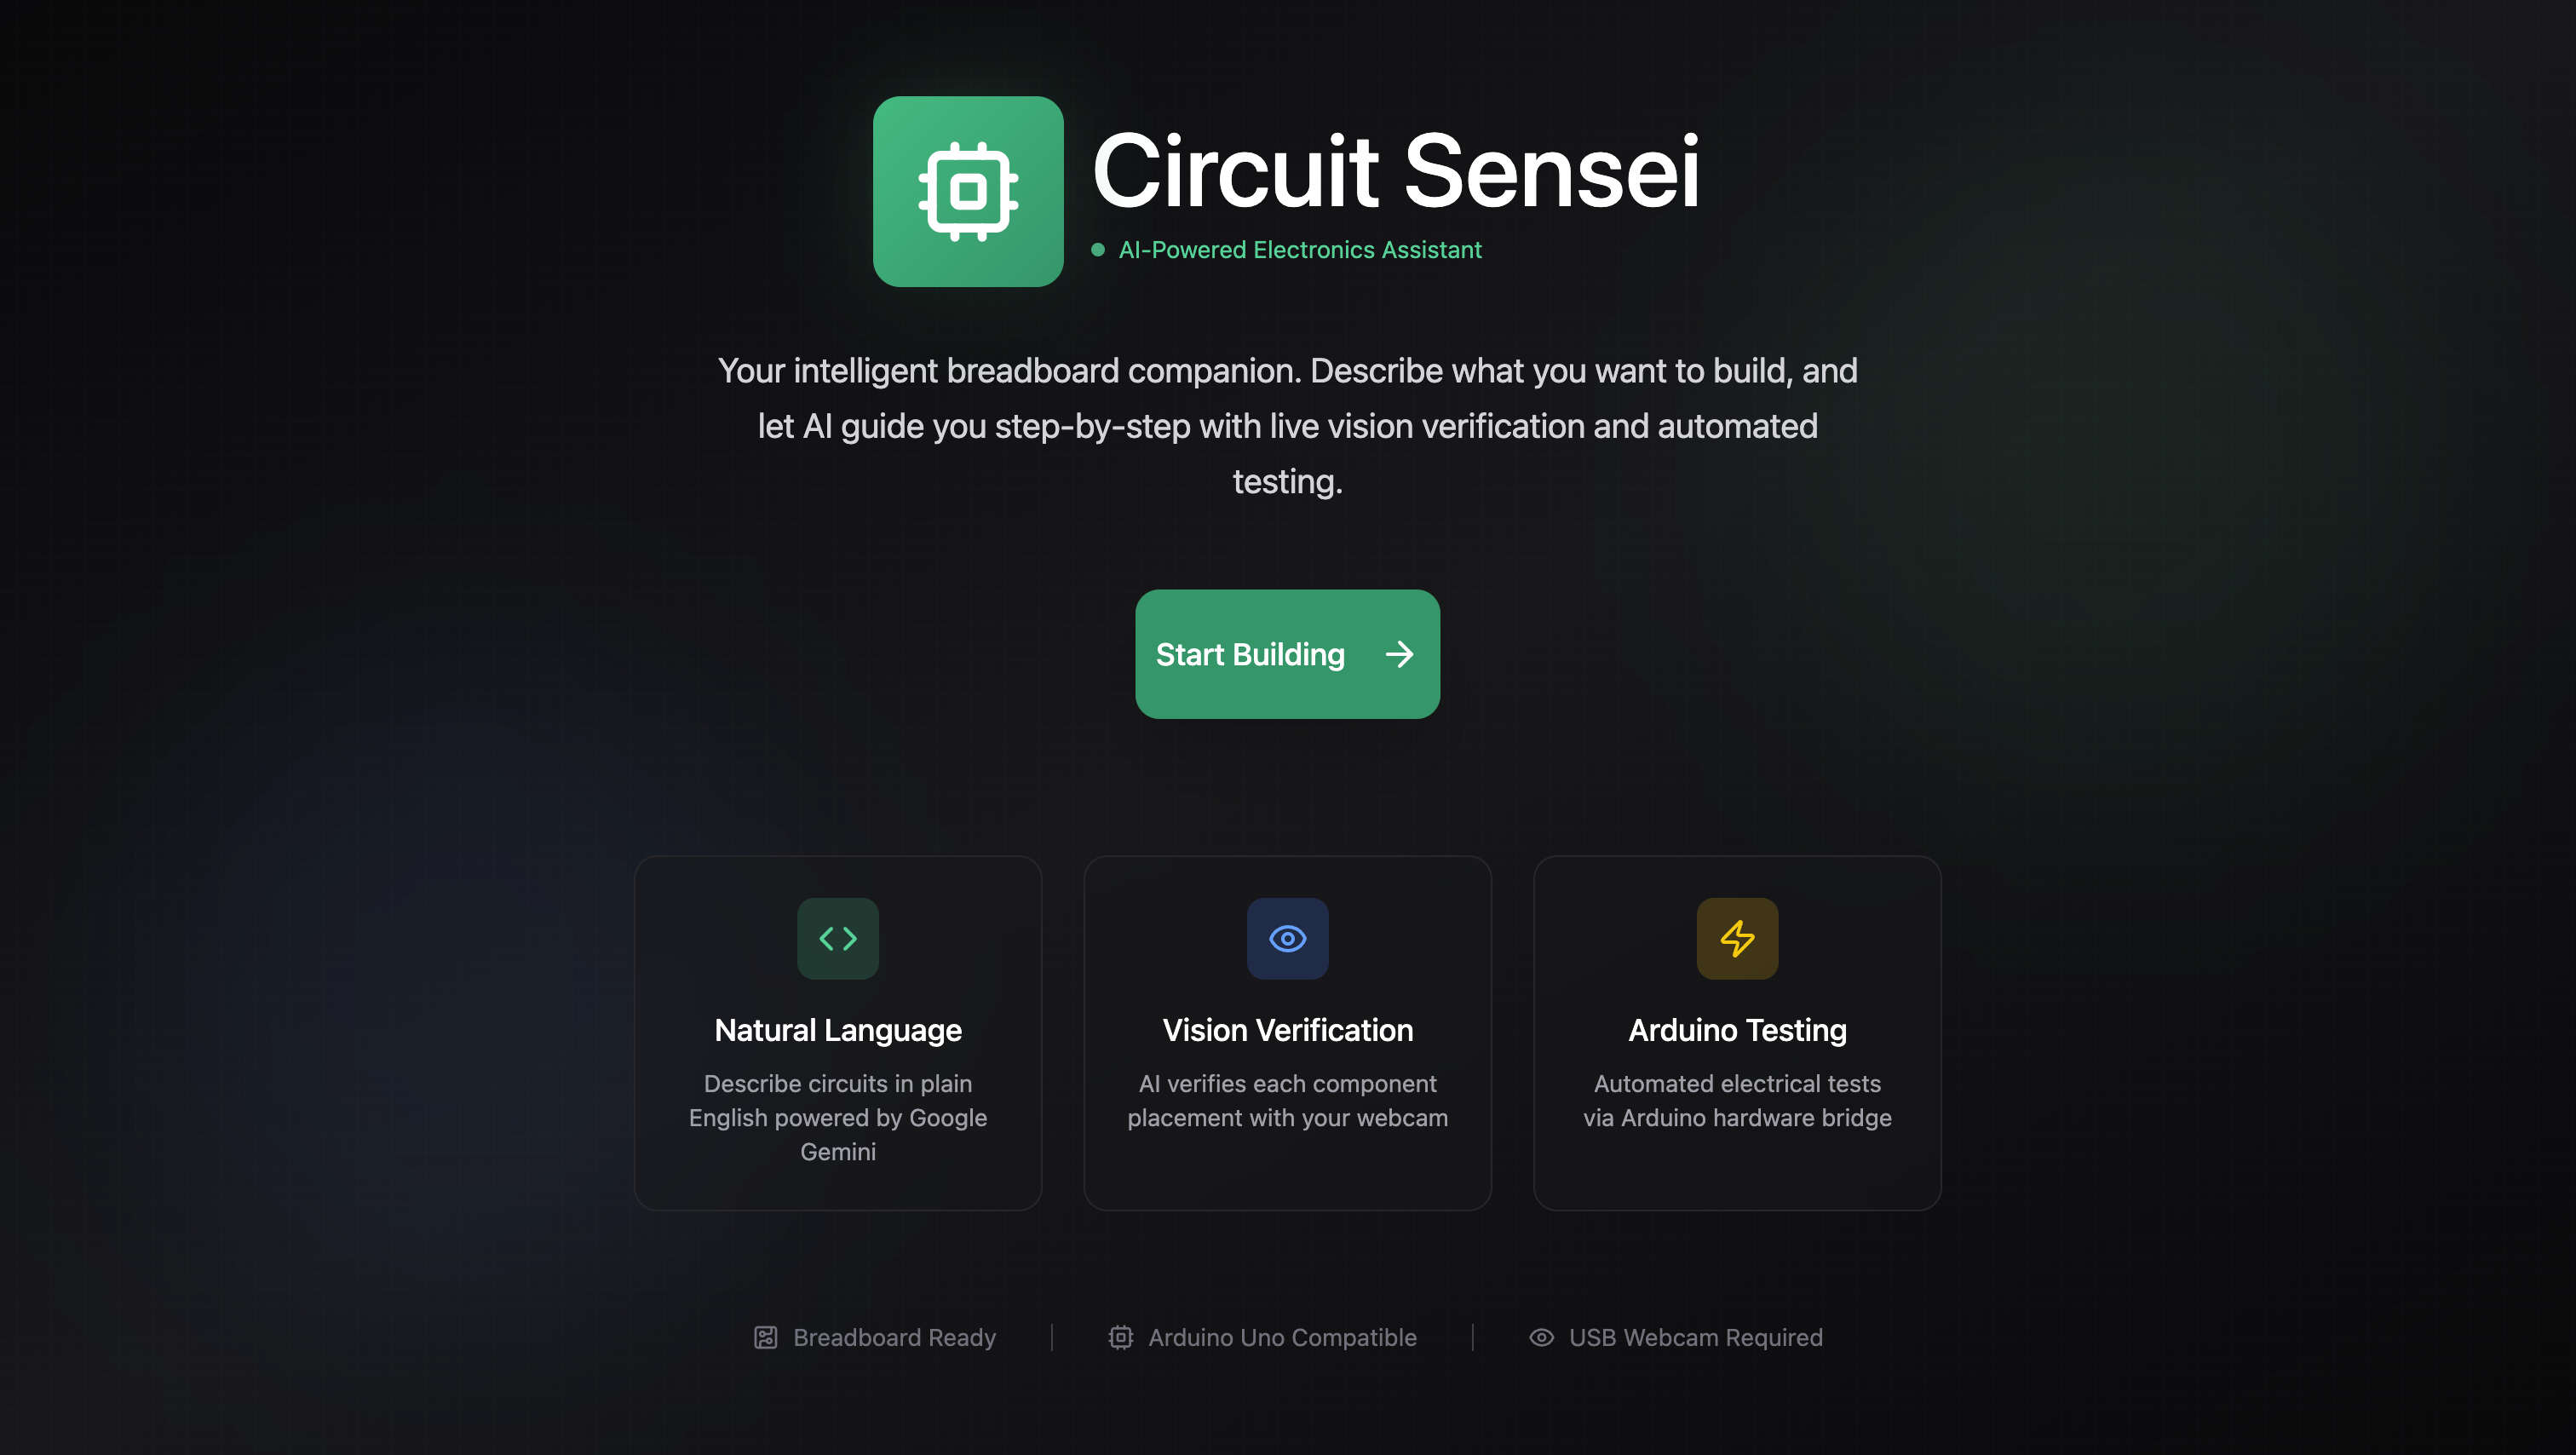
Landing Page
-
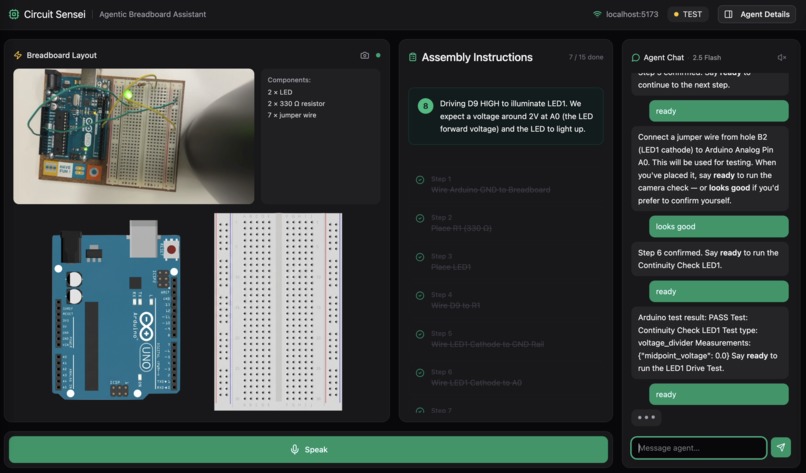
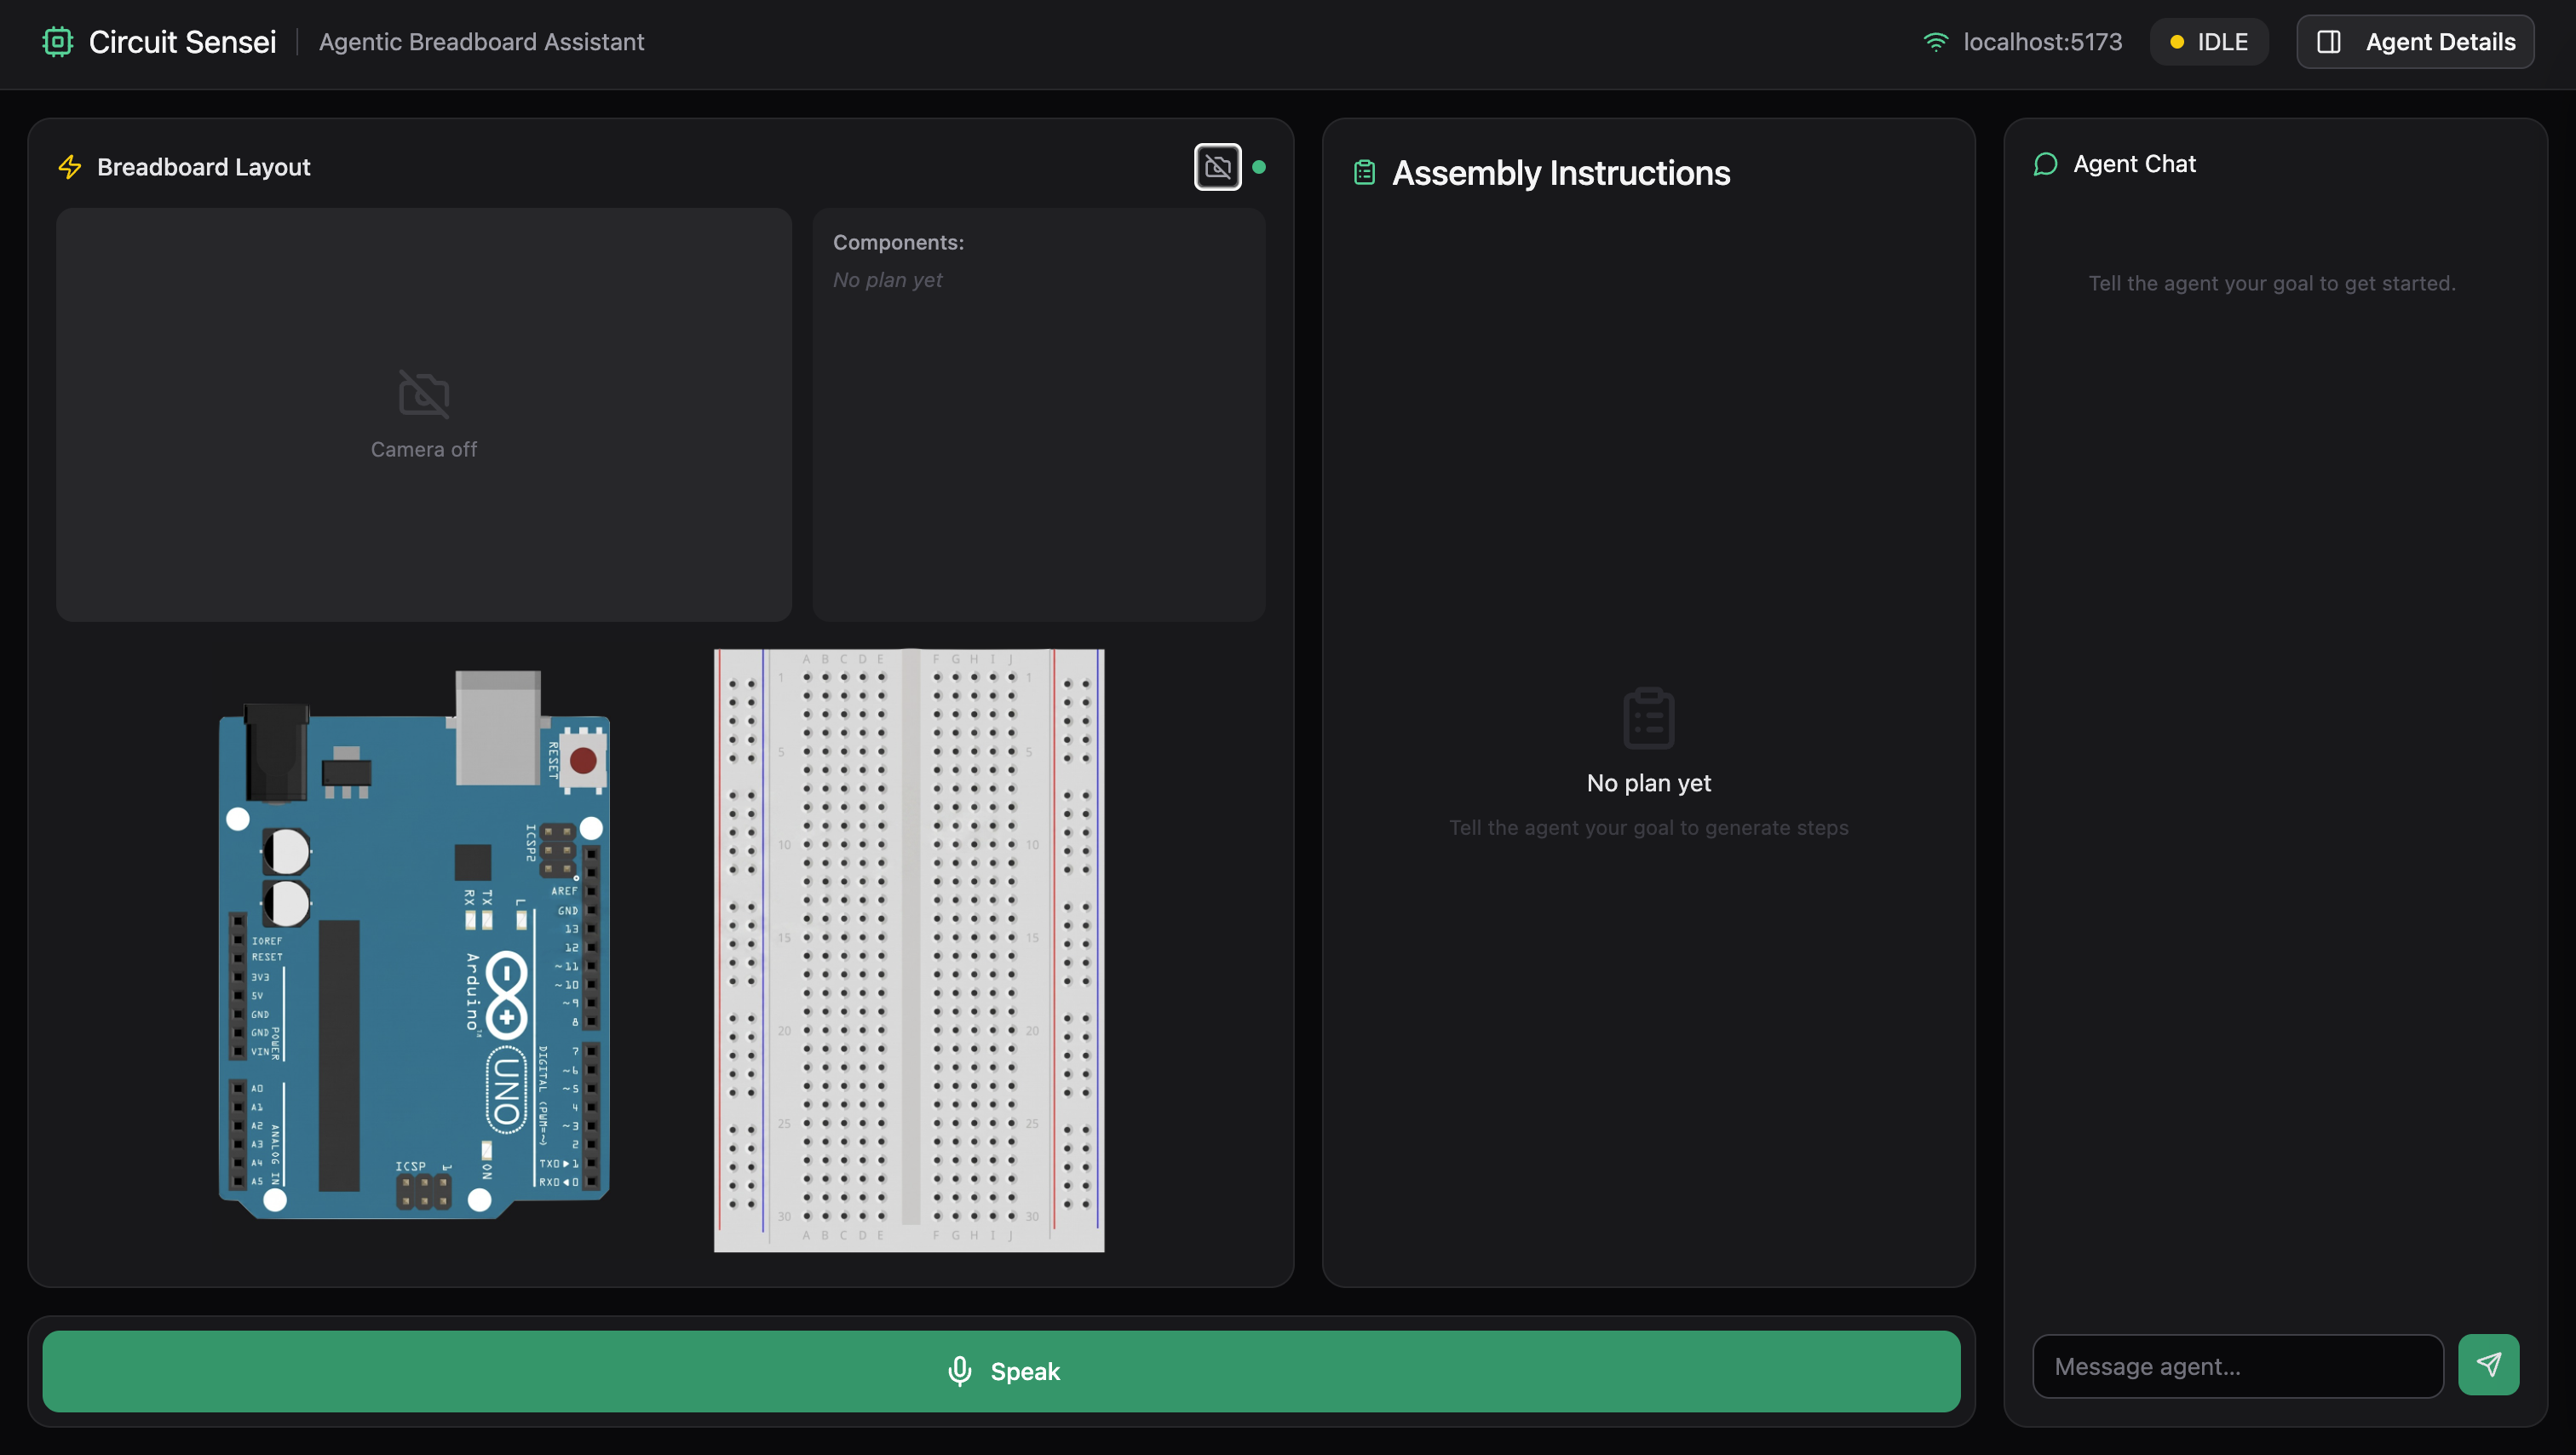
Agent Page
-
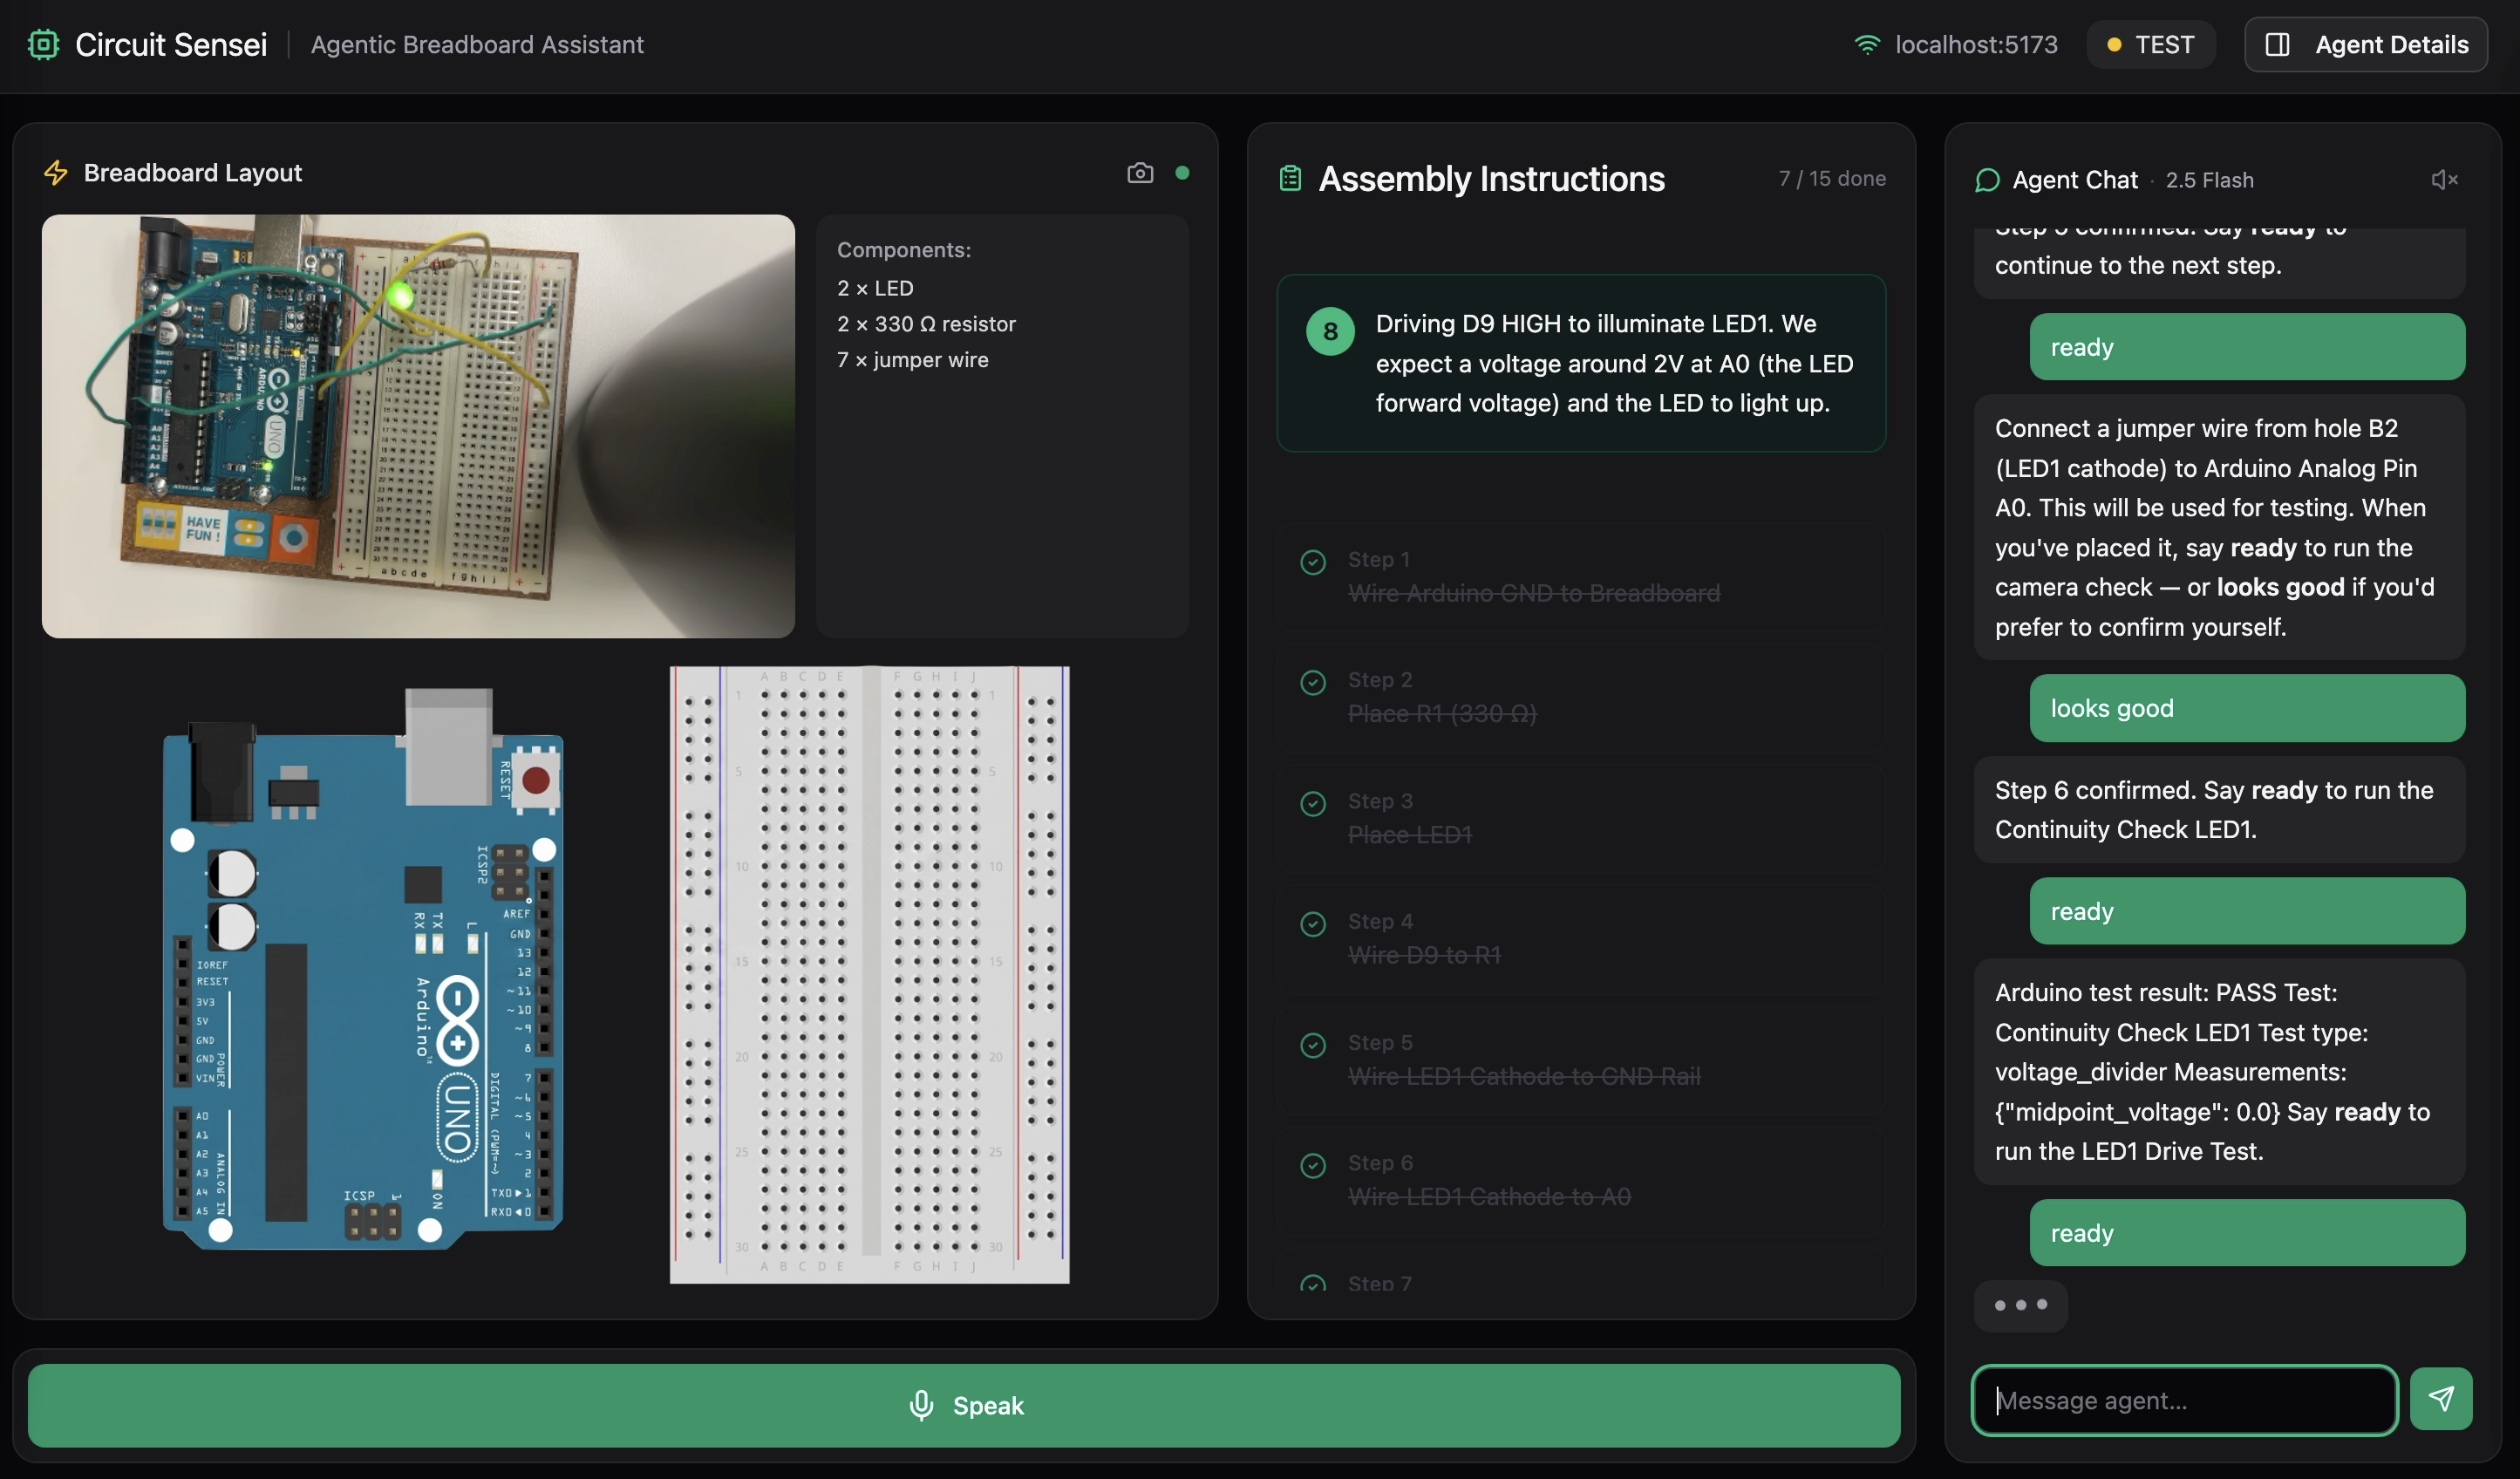
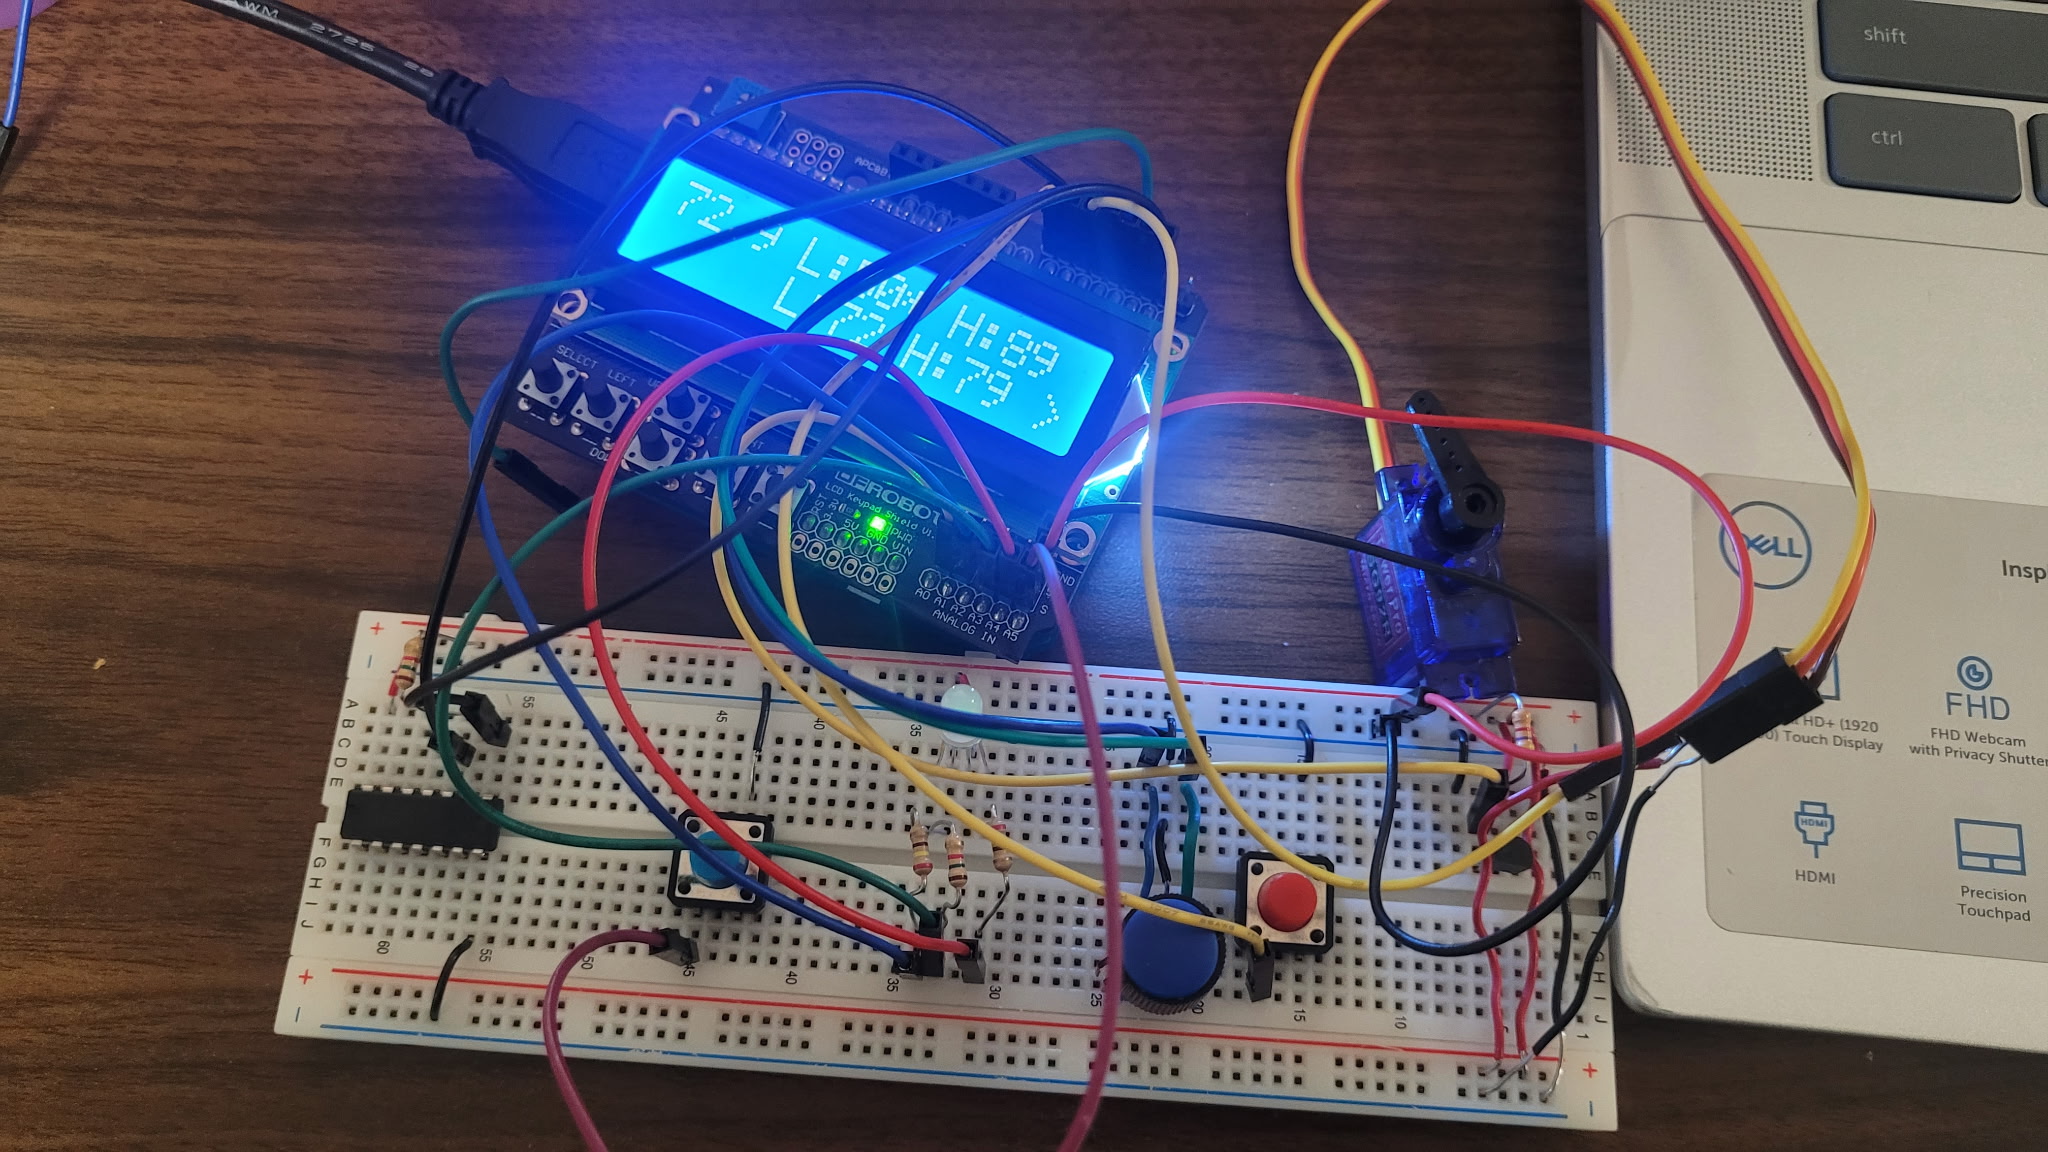
Circuit Test 1
-
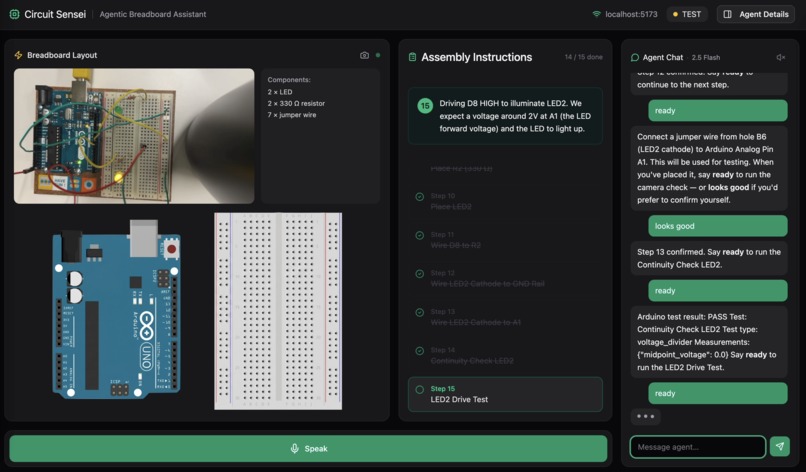
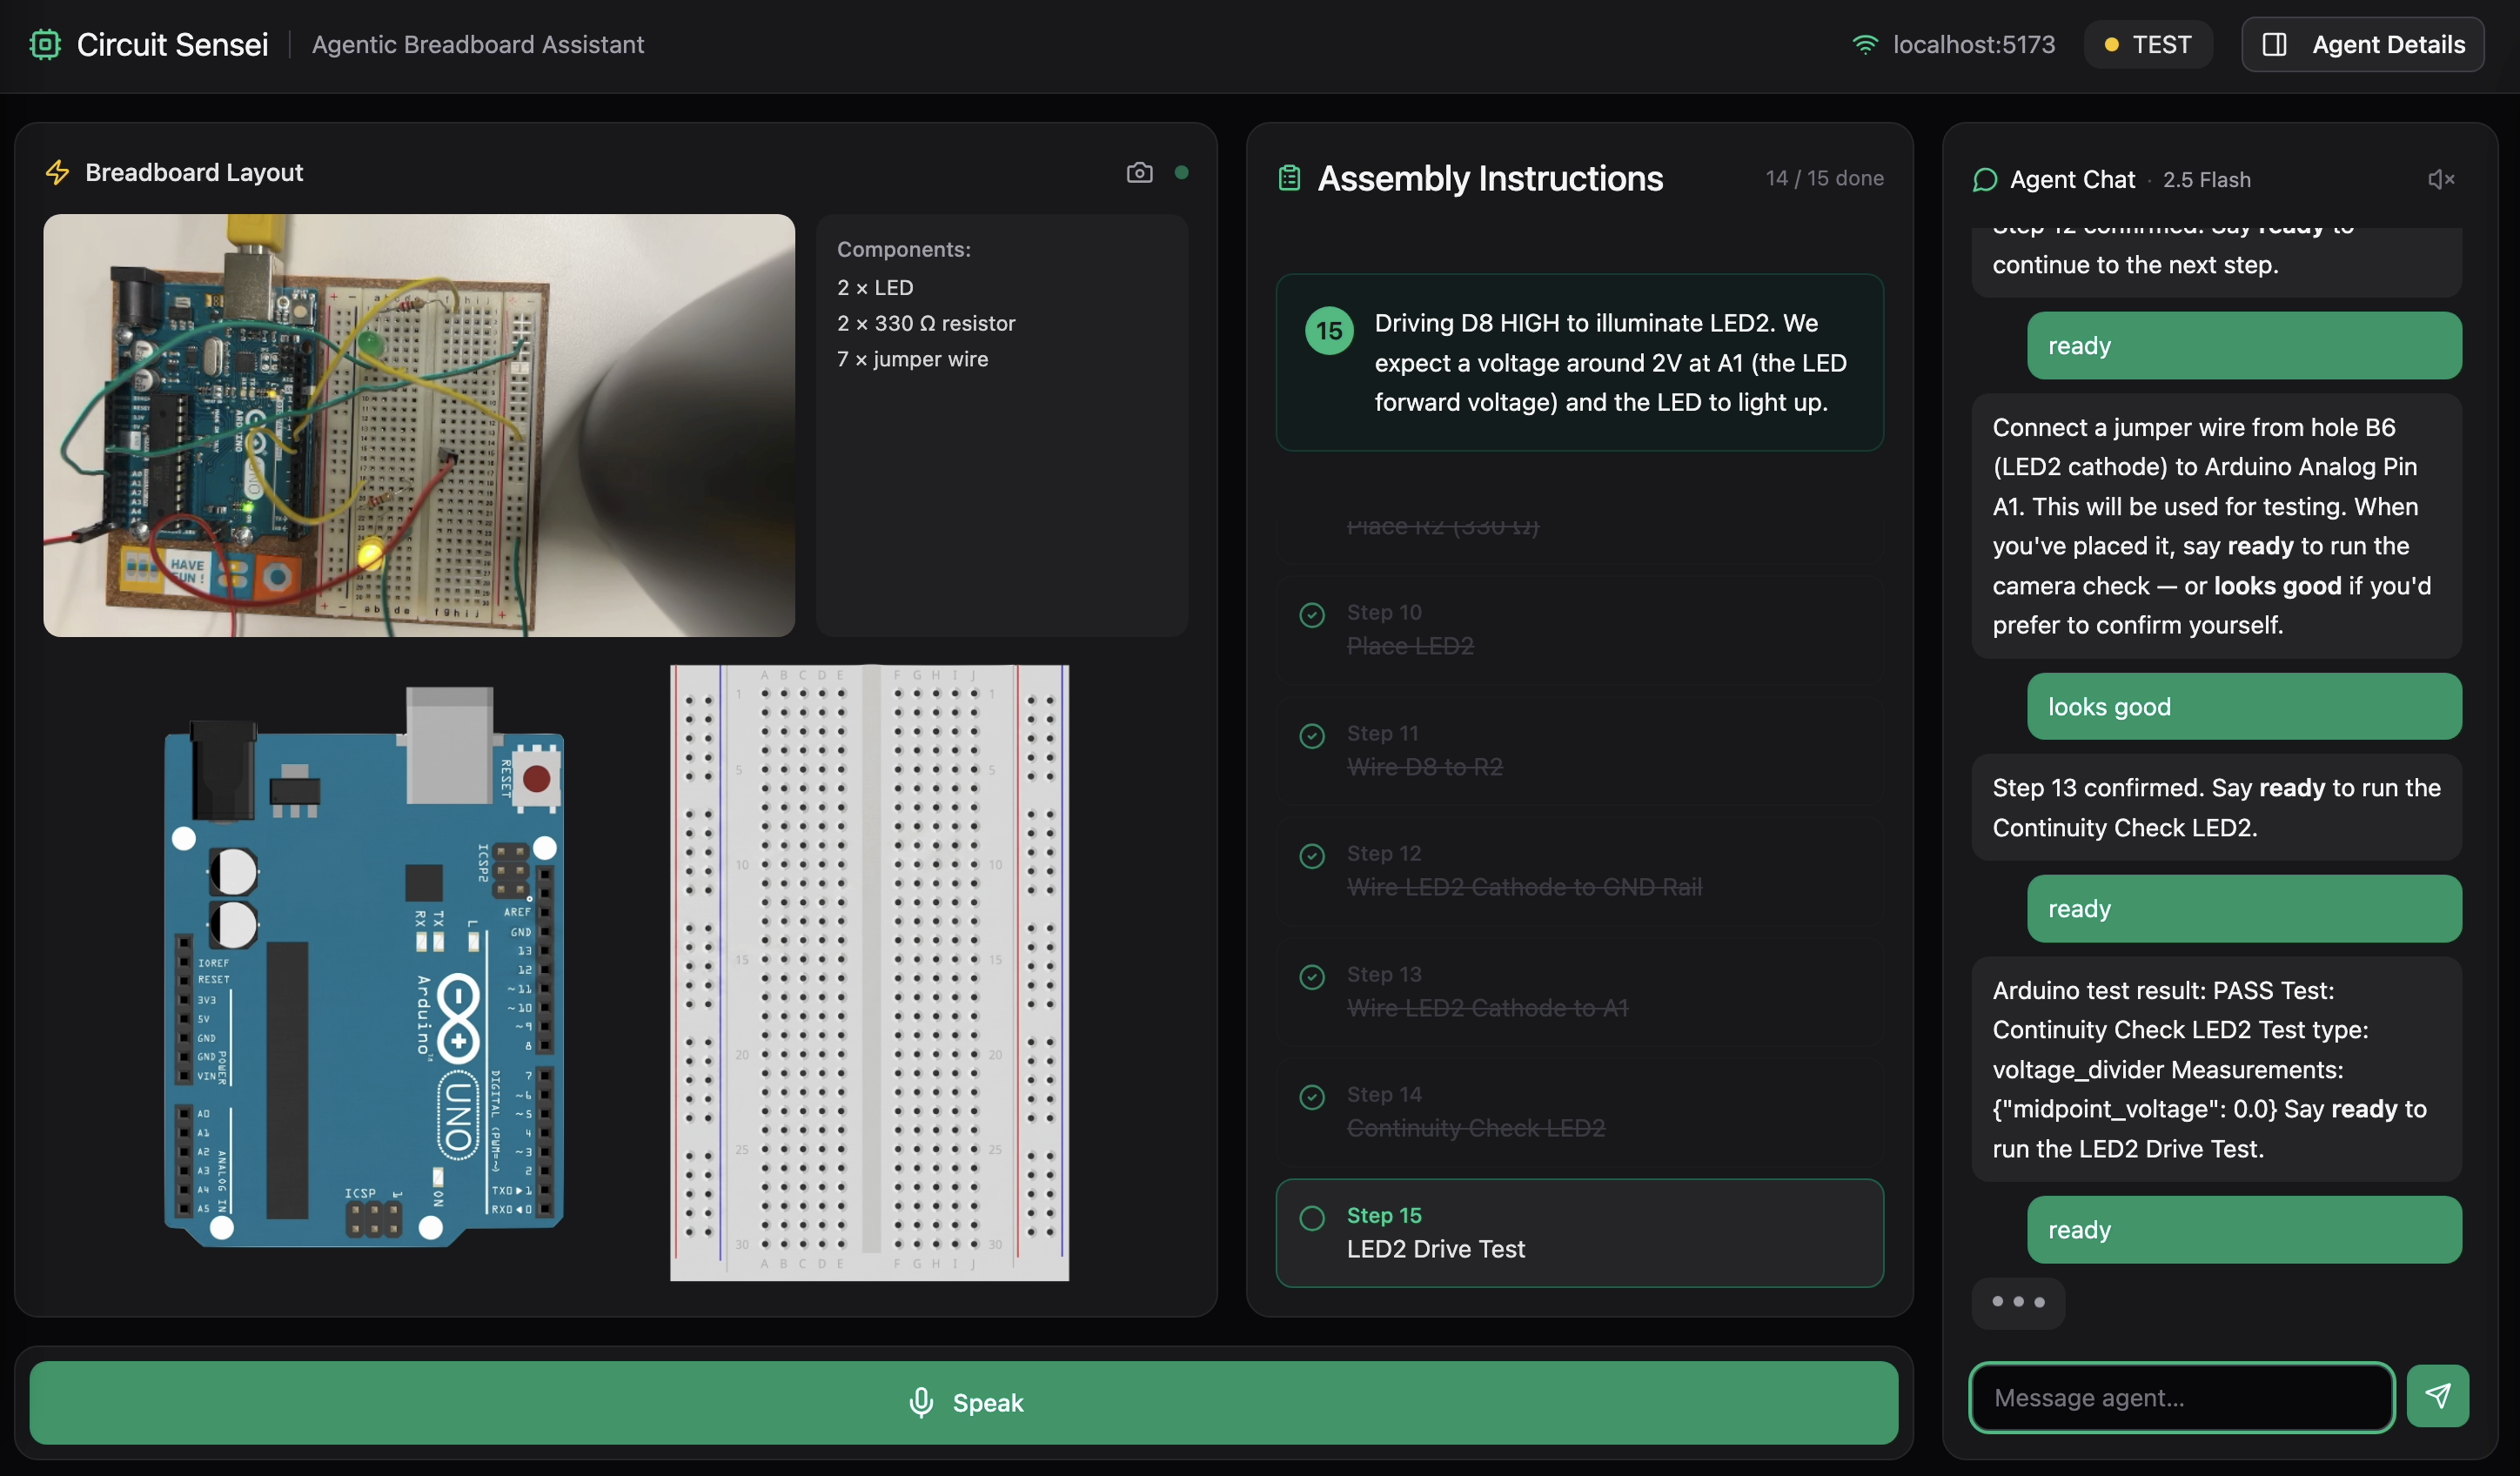
Circuit Test 2
-

Annotated Circuit
-
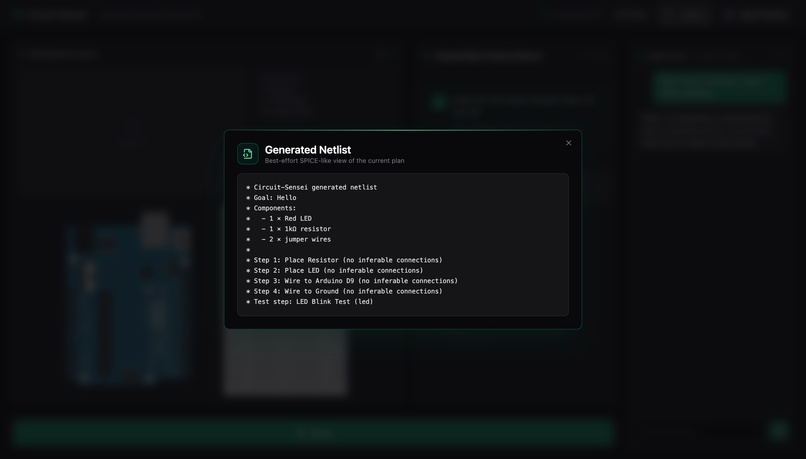
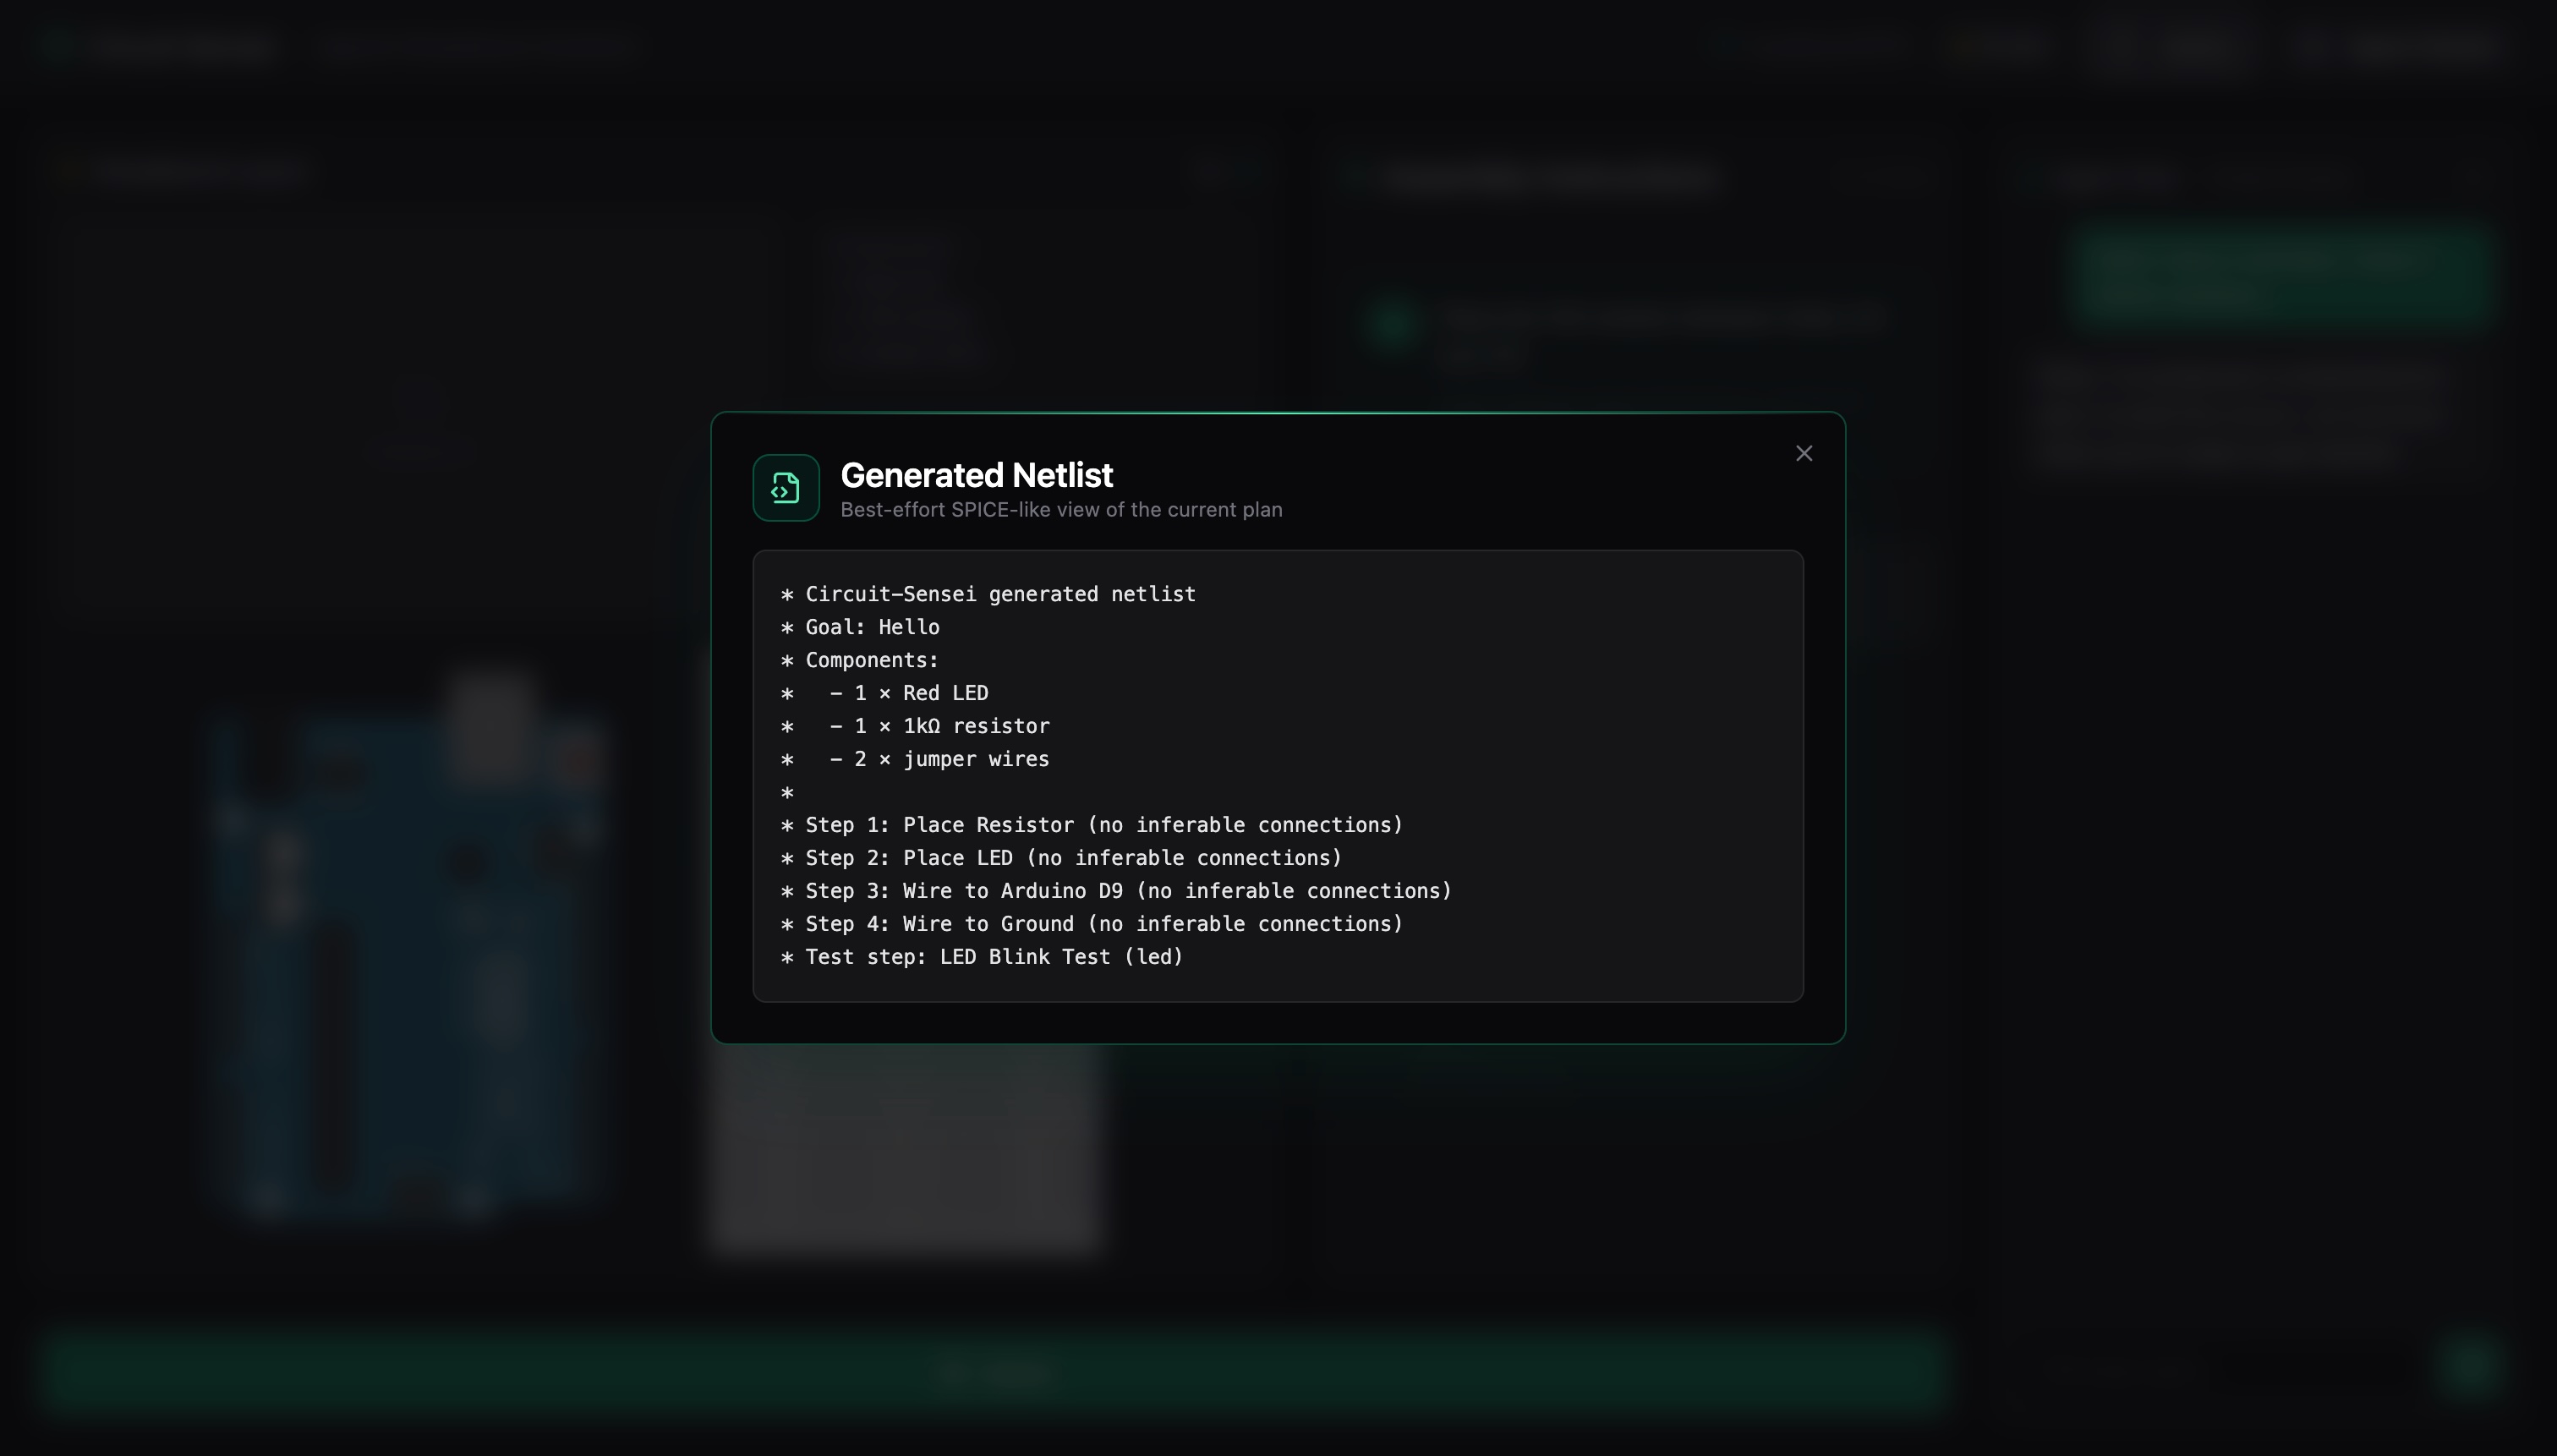
.netlist

Inspiration
Learning electronics is never linear. Following a diagram doesn't always work, whether it's as simple as a wire in the wrong hole or the whole circuit being wrong. Most beginners give up before reaching the "Hello World" of the hardware world. A single misplaced wire can mean hours of silent debugging with no feedback, and most beginners don't have access to a TA, a tutor, or someone experienced sitting next to them at the bench.
Having three electrical engineering majors, we felt it our duty to create not just a hardware oriented project but a cool and useful one. We wanted a mentor that could be next to you on the lab bench and know exactly where each wire goes, and won't let you progress until every connection is actually right. Circuit Sensei fills that seat.
We were inspired by Arduino in their mission to keep educational electronics accessible and open-source, our goal for Circuit Sensei is to mirror this in the agentic age. Hardware literacy is increasingly relevant but the onramp hasn't kept up, we hope to break down the barriers to building and make learning electronics more accessible.
 Our first embedded project...
What it does
Circuit Sensei is an interactive AI-powered breadboard mentor that guides beginners through building real circuits, step-by-step, from plain English to a physically tested and verified result. You prompt the agent with your circuit goal and available inventory. From there, it:
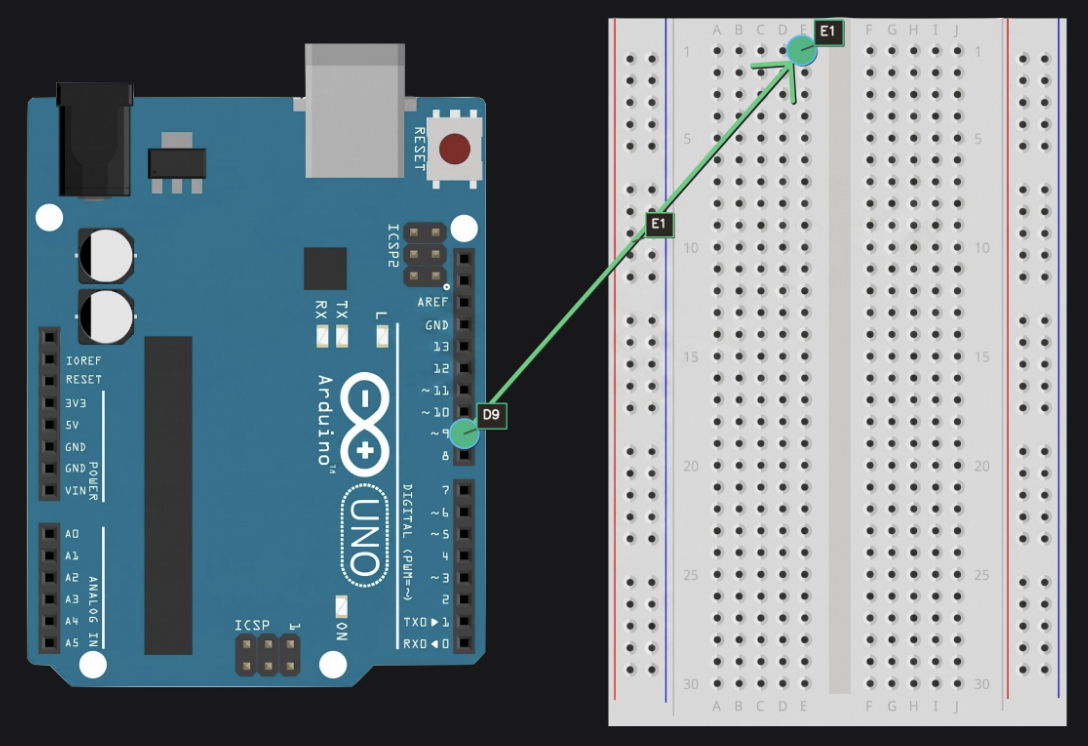
- Plans the circuit — calculates component values and generates a step-by-step breadboard placement plan using exact row/column locations (e.g. B10, E6)
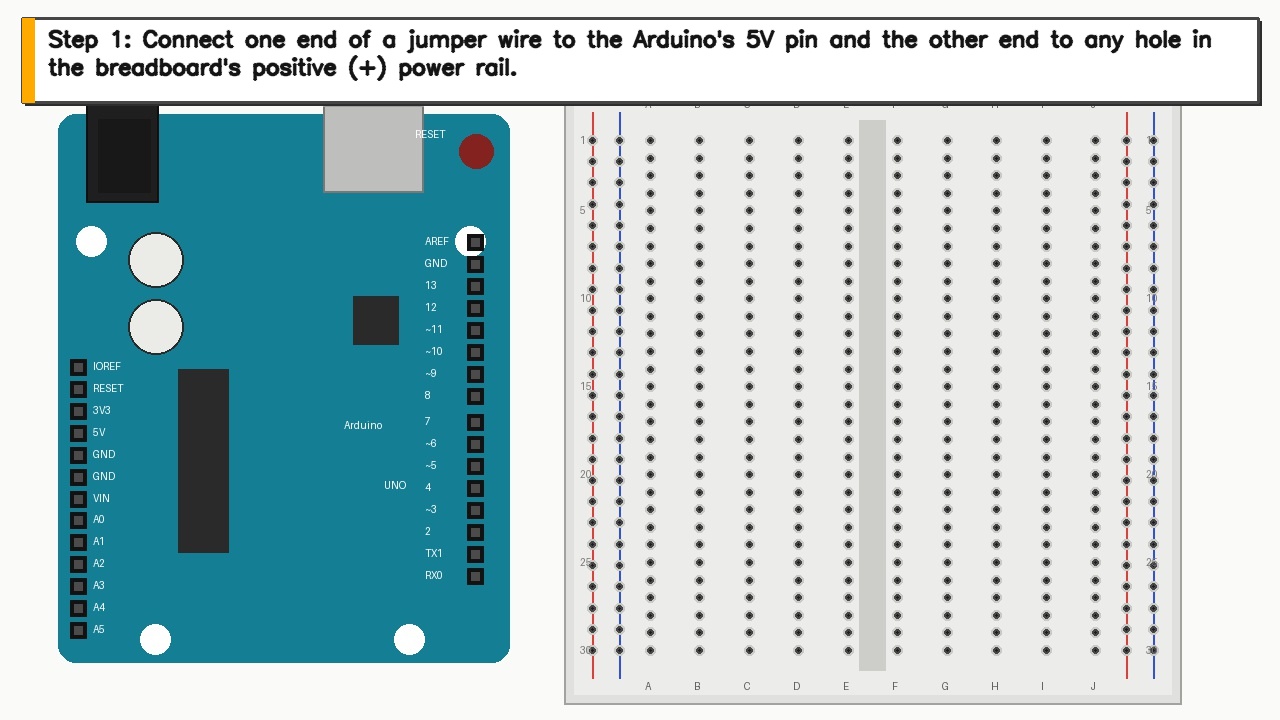
- Guides you visually — annotates an Arduino and breadboard with arrows, highlighted holes, and labels directly on the frontend Breadboard Layout
- Verifies each step — uses Gemini Vision to confirm placement before proceeding
- Speaks to you — reads every response aloud via ElevenLabs; use the Speak button to speak to the agent rather than typing, allowing you to stay focused on your work rather than keyword maxing an LLM
- Tests the circuit — once all visual checks pass (i.e. circuit is complete), the agent writes the appropriate code and sends it to the Arduino over UART Serial communication and runs electrical tests to confirm the circuit works to your specifications.

Because the user's hands are on the breadboard, not on a keyboard, Circuit Sensei is voice-first. Every agent response is spoken aloud through ElevenLabs, and the user can speak back with a hold-to-talk button. Saying "looks good" or "retry" works just like typing it. The learner never has to break focus to glance at a screen or type a message.
Each of these steps are part of an iterative design process where the agent can test individual hardware steps to reduce friction in the learning process and keep hands busy building instead of debugging and chasing poor connections for hours.
This project falls under the Light The Way track. Rather than replacing the learning process, Circuit Sensei makes it accessible. It won't advance until the learner physically places each component and the agent visually verifies the placement, keeping hands on the board and reinforcing learning by doing. With a mock mode that runs without any hardware, even learners without access to an Arduino can practice breadboard layout and circuit planning from any machine.
SAFETY: If you ever mention smoke, heat, or a hot component, the agent immediately says ⚠️ DISCONNECT POWER NOW. For beginners, one bad experience with a burning component or a shorted board can be enough to walk away from electronics entirely. Circuit Sensei treats safety as part of the learning process, not an afterthought.
How we built it
Backend: Python + FastAPI, with a WebSocket that streams agent state and chat messages to the browser in real time. The agent follows a state machine that manages the build workflow, but it's not rigid. If something goes wrong mid-build, the user can call it out ("the LED is dim," "I see 0V," "nothing happened") and the agent will pause the current step, connect to the Arduino, run the appropriate electrical measurement, interpret the results, and then resume exactly where you left off without losing any progress. The plan also interleaves build and test steps throughout, so the circuit is being electrically validated as it's assembled, not just checked at the end. It's less of a tutorial and more of a lab partner that can actually power your board and help you figure out what went wrong.
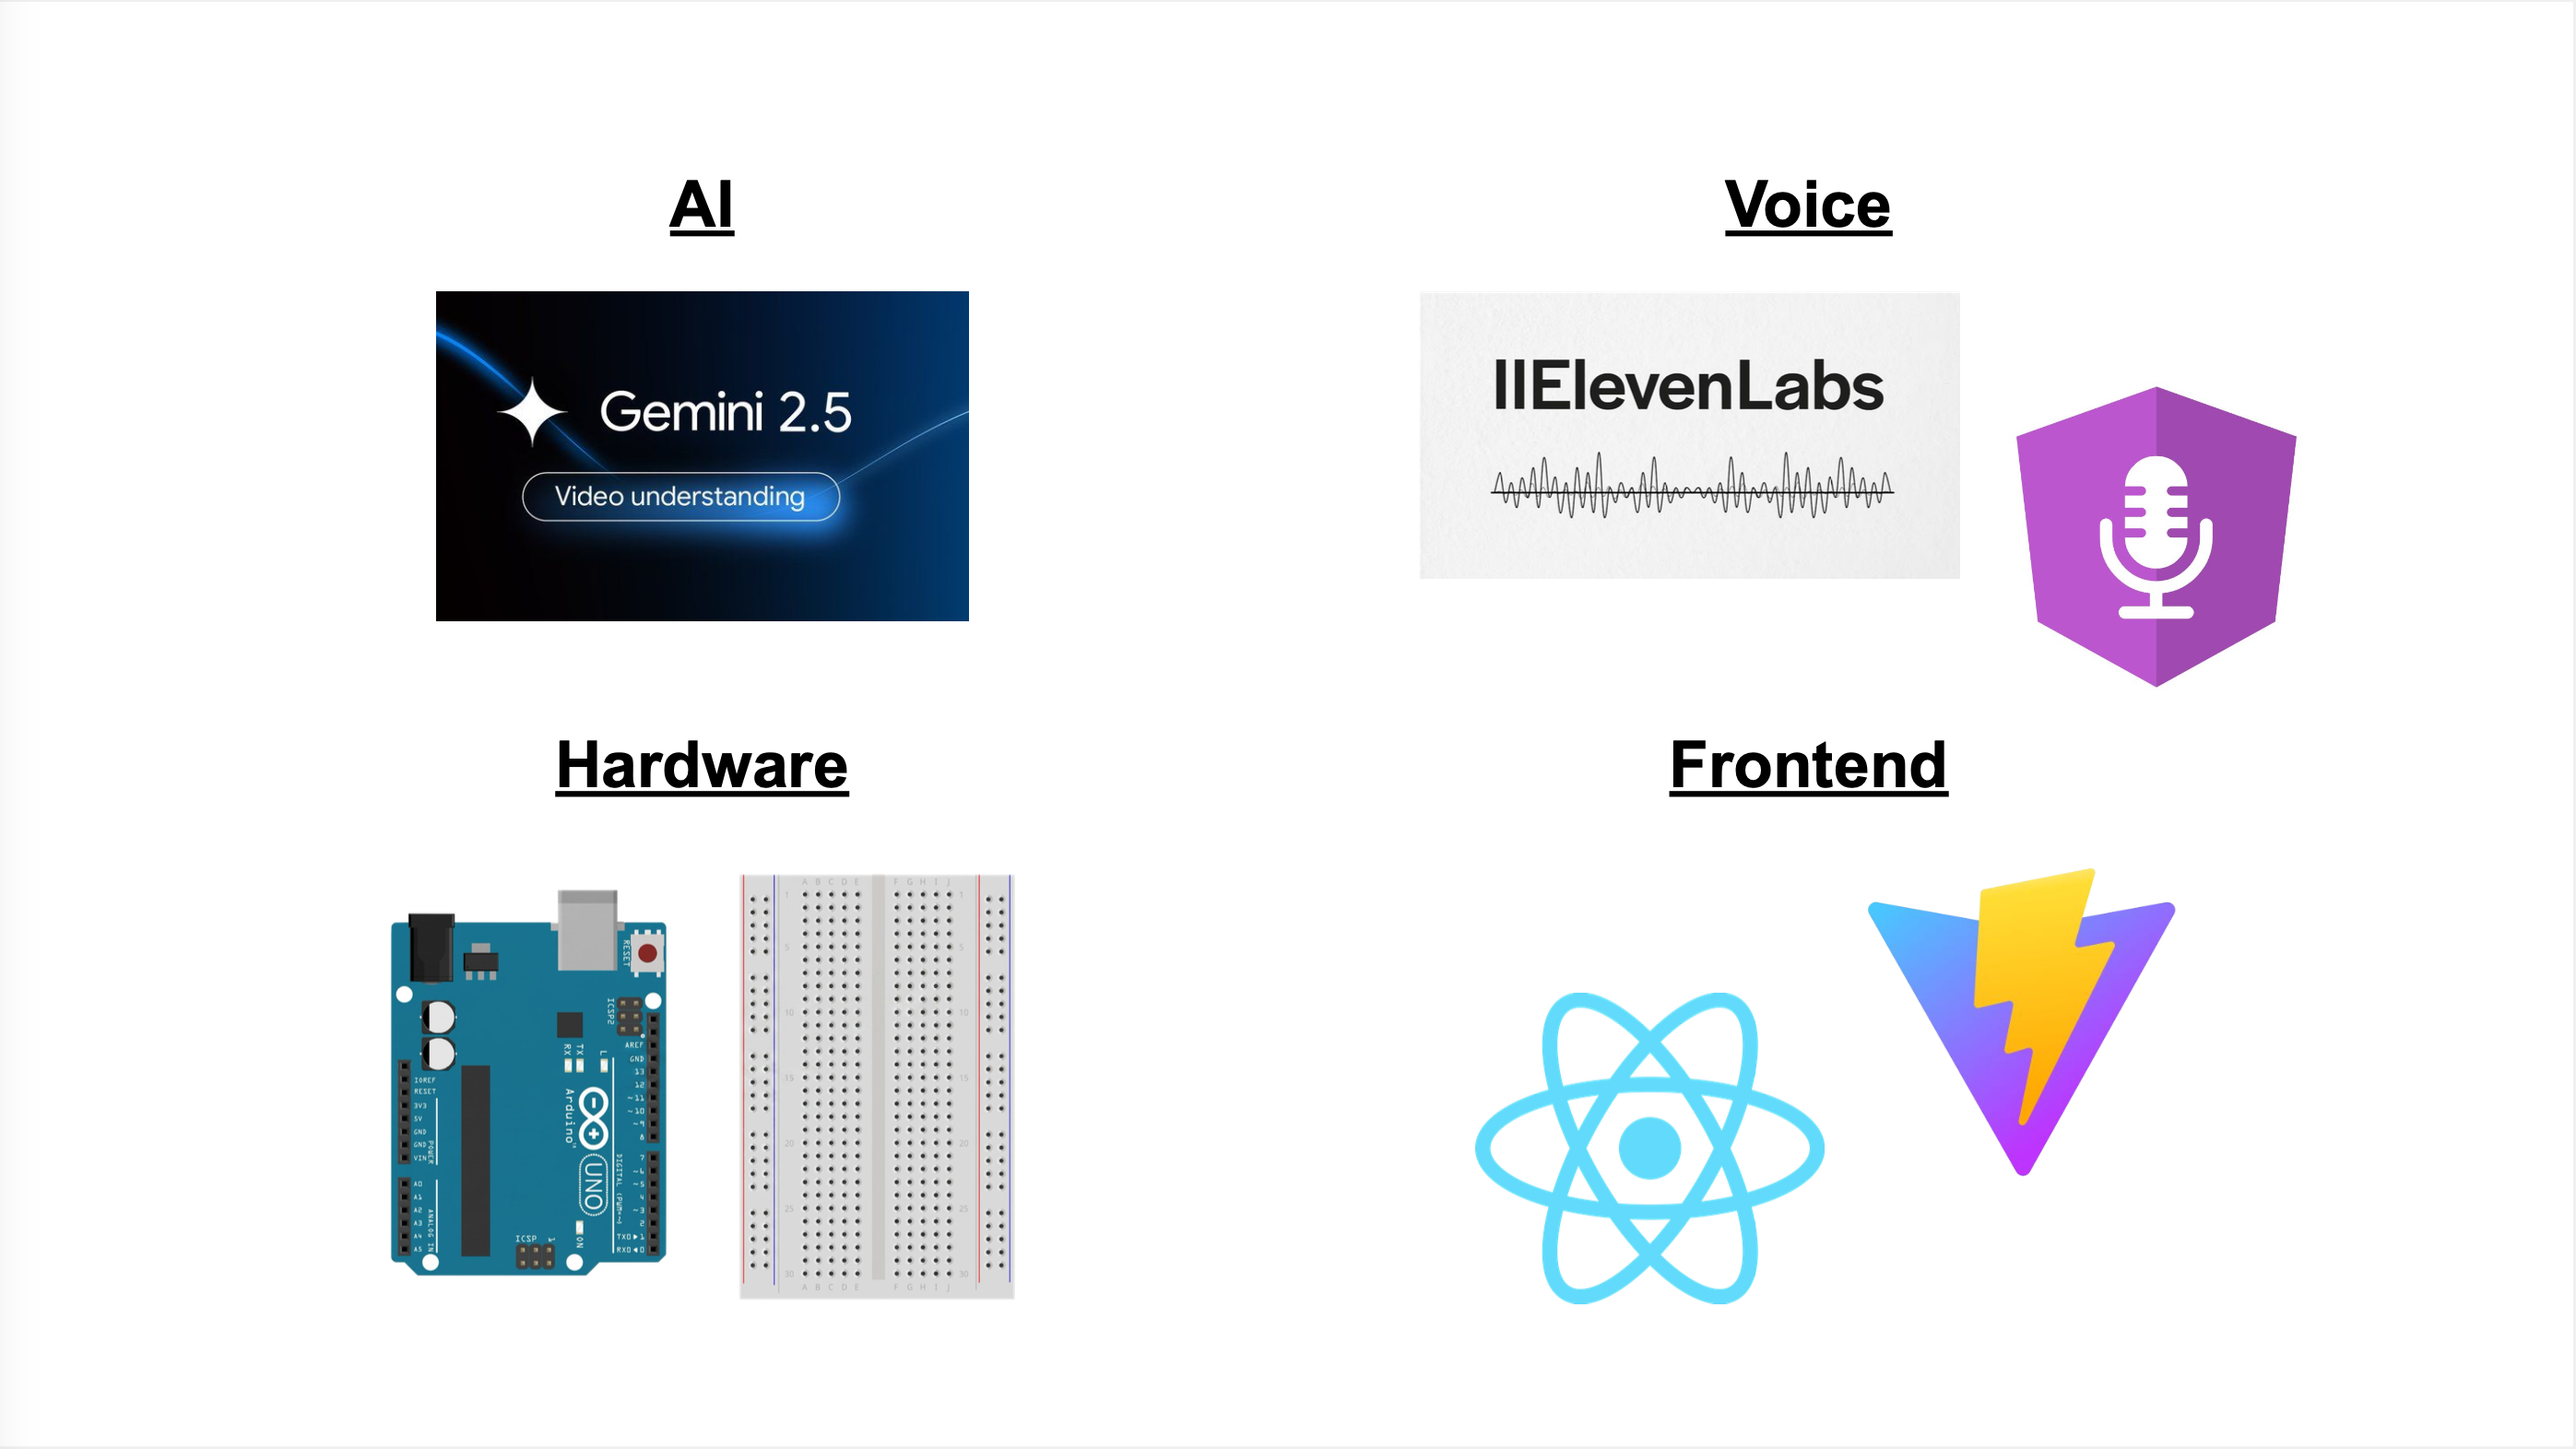
AI: Gemma (gemma-4-31b-it) is the reasoning brain behind Circuit Sensei's entire agentic loop. It takes a plain English circuit goal, extracts the user's available components, generates a structured JSON placement plan with exact breadboard coordinates, delivers one concise physical instruction at a time, and orchestrates tool calls to the vision system to verify each step before advancing. Gemma handles multi-turn context, receiving full session state and the last 16 conversation and tool history entries on each turn, and drives every transition in the agent's state machine from intake through testing. It's accessed through the Google GenAI SDK, hot-swappable at runtime with Gemini models, and is the default model pre-selected in the UI. Because Gemma is open-weight, Circuit Sensei doesn't have to depend on paid API calls to function. Students or schools with limited budgets can run Gemma locally on lower-end hardware, removing the cost barrier that comes with cloud-hosted proprietary models. This aligns directly with our mission of keeping electronics education accessible: the mentor shouldn't cost more than the components on the bench. Each step, the agent captures a webcam frame, draws the guidance annotation, then asks Gemini Vision to confirm the placement before advancing.
Voice: ElevenLabs is what makes Circuit Sensei a hands-free tutor instead of a chatbot. Every agent response is proxied through our /api/tts endpoint to ElevenLabs' TTS API using the eleven_turbo_v2_5 model at roughly 400ms latency. Audio streams back as audio/mpeg and plays in-browser through the Web Audio API with a live speaking indicator. The user is physically placing components with both hands, so ElevenLabs lets the agent speak each placement instruction aloud and keeps the learner focused on the breadboard, not the screen. TTS can be toggled on or off and the preference persists across sessions. Voice ID is configurable through config.yaml and all text is stripped of markdown formatting before being sent. Microphone recordings from the browser are transcribed by Web Speech API and forwarded to the agent as text, so "looks good" or "retry" works just like typing it.
Hardware: An Arduino Uno runs a custom firmware sketch that accepts JSON commands over USB serial at 115200 baud ({"cmd":"READ_ANALOG","pin":"A0"}) and returns JSON results. PySerial bridges it to the Python backend.
Frontend: React + TypeScript + Vite, styled with Tailwind CSS and shadcn/ui. We used Figma Make to layout and iterate on the frontend before writing code. It started with the landing page and initial component layout, then evolved into the full workbench interface as we integrated the backend. Figma Make let us rapidly prototype specific features like the agentic chat panel, the auto-updating breadboard diagram that changes with each wiring step and component placement, the hold-to-speak microphone interface, and the live camera feed area. It helped us throw away layout ideas that didn't work early and align as a team on the UX flow without burning development time. The final workbench shows the annotated breadboard image, a streaming agent chat panel, a step list, a hold-to-speak mic button, and a live status bar.
Challenges we ran into
Breadboard mapping and annotating: translating the agent's text output (e.g. "place the resistor from J1 to the negative rail") into precise pixel coordinates on the breadboard diagram was a challenge we didn't anticipate. Every breadboard hole needed to be mapped to an exact position on the image, and the Arduino's pins had to be mapped separately since they follow a completely different layout and spacing. Getting arrows, dots, and labels to land on the right holes, and not on top of each other when multiple connections share the same row, took extensive calibration and edge-case handling.
Agent's understanding: electrical connections, breadboard layout, and best practices were not immediately clear to the agent and were discovered through repeated test runs for edge cases. The agent would repeatedly instruct the user to place connections on top of one another, plug devices directly into the Arduino, not understand that A-E are not electrically connected with F-J on the breadboard or the + and - rails were connected vertically, and mix-up Analog and Digital Pins on the Arduino with the breadboard's A and D columns respectively. We fixed this through repeated test sessions: reproduce the mistake, identify the missing rule, and encode it precisely in the system prompt. The result is a set of explicit electronic design constraints the model checks against before generating any placement step.
Sending code: serial startup noise caused the Arduino and agent to be out of sync and resulted in mis-parsing commands and signals never being sent, this was fixed with specific delays and flags for when the Arduino is ready to properly read commands. Keeping the agent out until verification passed. The model, left unconstrained, would try to call Arduino tools mid-build. We hard-gated all arduino_connect, arduino_send_command, and run_test_script calls to the VERIFY_COMPLETE and TEST states only. Any attempt to call them earlier is silently blocked by the tool dispatcher.
Accomplishments that we're proud of
- Being able to create a fully end-to-end agentic loop that turned plain English into a physically tested and electrically-sound circuit. Not only were we able to have the agent guide a user through designing a circuit that worked, we were also able to have the agent test that the circuit works on its own. We minimized manual user input by having the agent scan serial/USB connections and configure the correct port the Arduino is connected to, something many beginners get stuck on. By having the software confirm the hardware works, we were able to close the loop between digital and physical.
A mock mode that runs the entire stack without any hardware. Enabling anyone, even without access to an Arduino, to learn breadboard layout and circuit planning from any machine. This supports our ideal model of an open-source educational tool that meets learners where they are, not where their budget is.
An annotation pipeline that accurately highlights specific breadboard holes and Arduino pins, derived purely from the model's text output. The agent parses its own placement instructions into exact coordinates, then renders arrows, labeled dots, and pin highlights directly onto the breadboard and Arduino diagram so the learner knows exactly where each connection goes before they touch a wire.
An actual mentor rather than a cheating device. We didn't want Circuit Sensei to be another agent that does your work for you, rather, we wanted an agent to assist in the learning process and increase accessibility to an already gatekept field. The agent won't advance until it verifies that you physically place the component, making sure the human has to do the work and can learn by doing.
What we learned
I learned that CircuitSensei is really a closed-loop electronics tutor, not just a chat app.
The biggest lessons were:
- The user experience matters as much as the circuit logic. Typing /next or /confirm feels rigid; natural language, streaming feedback, and friendly waiting messages make the agent feel much more usable.
- Visual guidance is central. The breadboard annotation image needs to be accurate, persistent across steps, visually clean, and based on real breadboard connectivity rules.
- Hardware integration is fragile unless automated. Arduino port detection, upload verification, and confirming the LED actually responds are essential for trust.
- Vision failures need humane handling. If Gemini cannot verify a placement, the user should get a clear explanation and next action, not raw JSON.
- The frontend became the real control surface: webcam feed, annotated layout, assembly instructions, components list, chat, loading states, and camera toggle all need to work together.
- The agent needs domain constraints: components stay on the breadboard, only jumper wires go to Arduino pins, avoid double-using holes, and understand breadboard row/rail connectivity.
- Voice is part of the intended interaction, but the direction shifted from ElevenLabs STT toward the browser's built-in Web Speech API, while TTS remained part of the experience.
- Secrets should not live in notes or commits. The API keys shown here should be rotated if they were real.
In short: I learned that the hard part is not only "generate a circuit plan," but making the whole loop feel reliable: plan, show, speak, verify, guide, upload, and recover gracefully when something fails.
What's next for Circuit Sensei
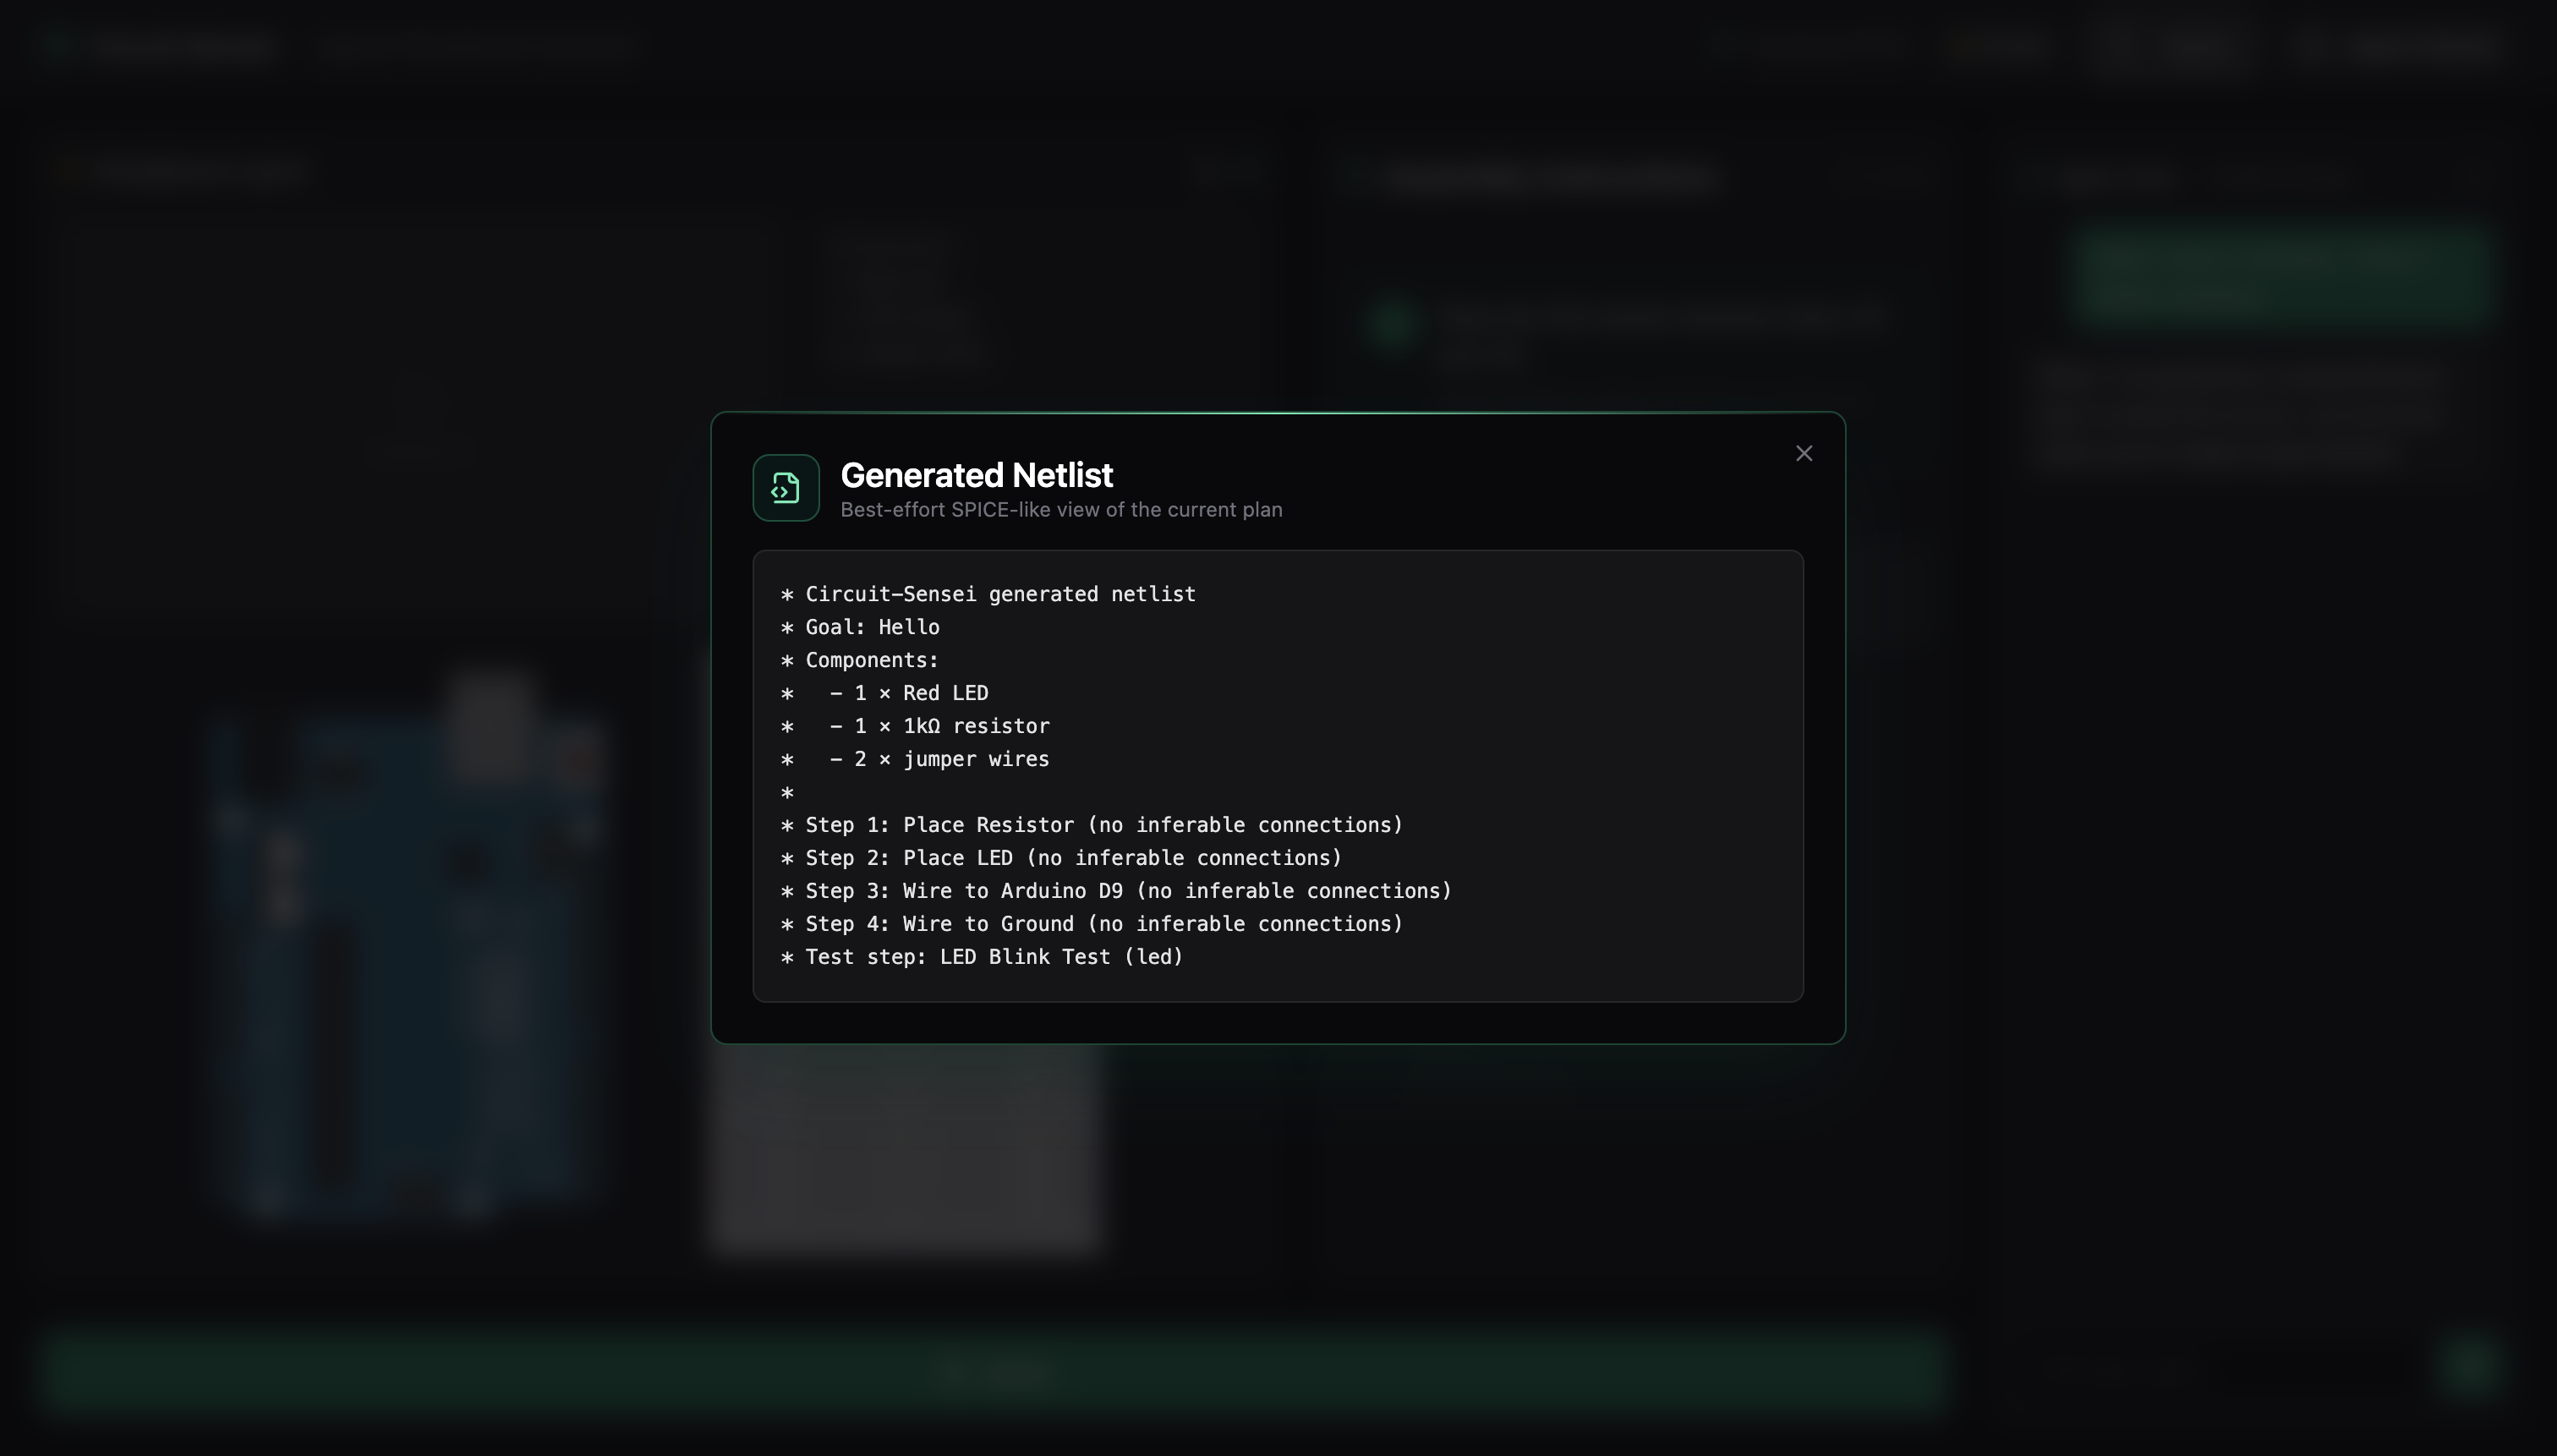
Connecting Circuit Sensei to a larger full-stack ecosystem capable of transforming ideas to real, physical, devices. Circuit Sensei is the first step in lowering the barrier to build and allow students and hobbyists to start prototyping rather than get bogged down in tutorials and messy diagrams. Currently the agent can provide a .netlist file, a text-based description of every component and connection in the circuit, which the user can import directly into schematic and simulation tools. Netlists are the standard format used across industry and research for describing circuits, so learning to work with them early bridges the gap between classroom breadboarding and professional design workflows. Continuing this pipeline allows more intermediate and advanced users to start simulating their circuits without needing full test benches and eventually to designing custom PCBs for their projects. Circuit Sensei will keep the ethos of being a mentor at each stage, being a check and verify system rather than hand-holding and doing it all on its own rather than having the user get their hands dirty.
Allowing the agent to come up with more complex projects on its own given an available inventory. By allowing the user to store components locally in the frontend it reduces friction between the user's prompting and the agent's understanding of the circuit goal. With more integrated components and better understanding of how devices interact and communicate in a larger system, the agent will be able to assist advanced users with much more complex tasks such as creating Edge AI devices such as cameras, sensor integration, and IoT connectivity.

Log in or sign up for Devpost to join the conversation.