-
-
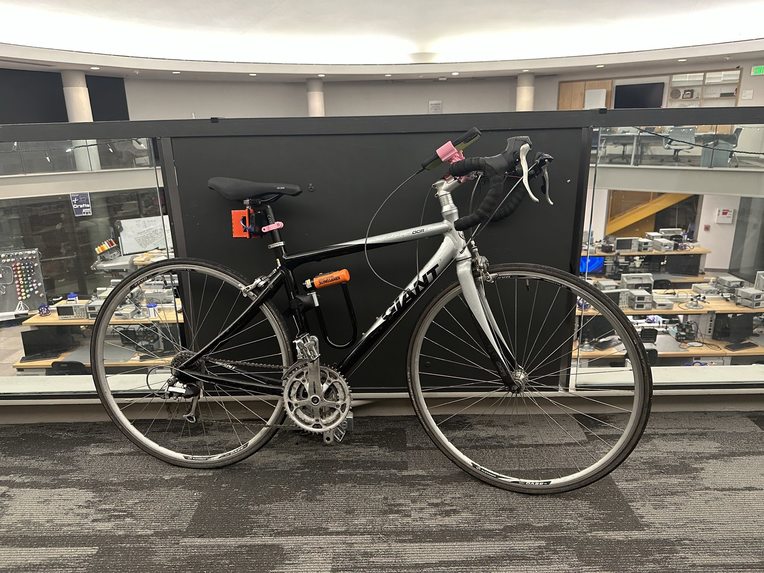
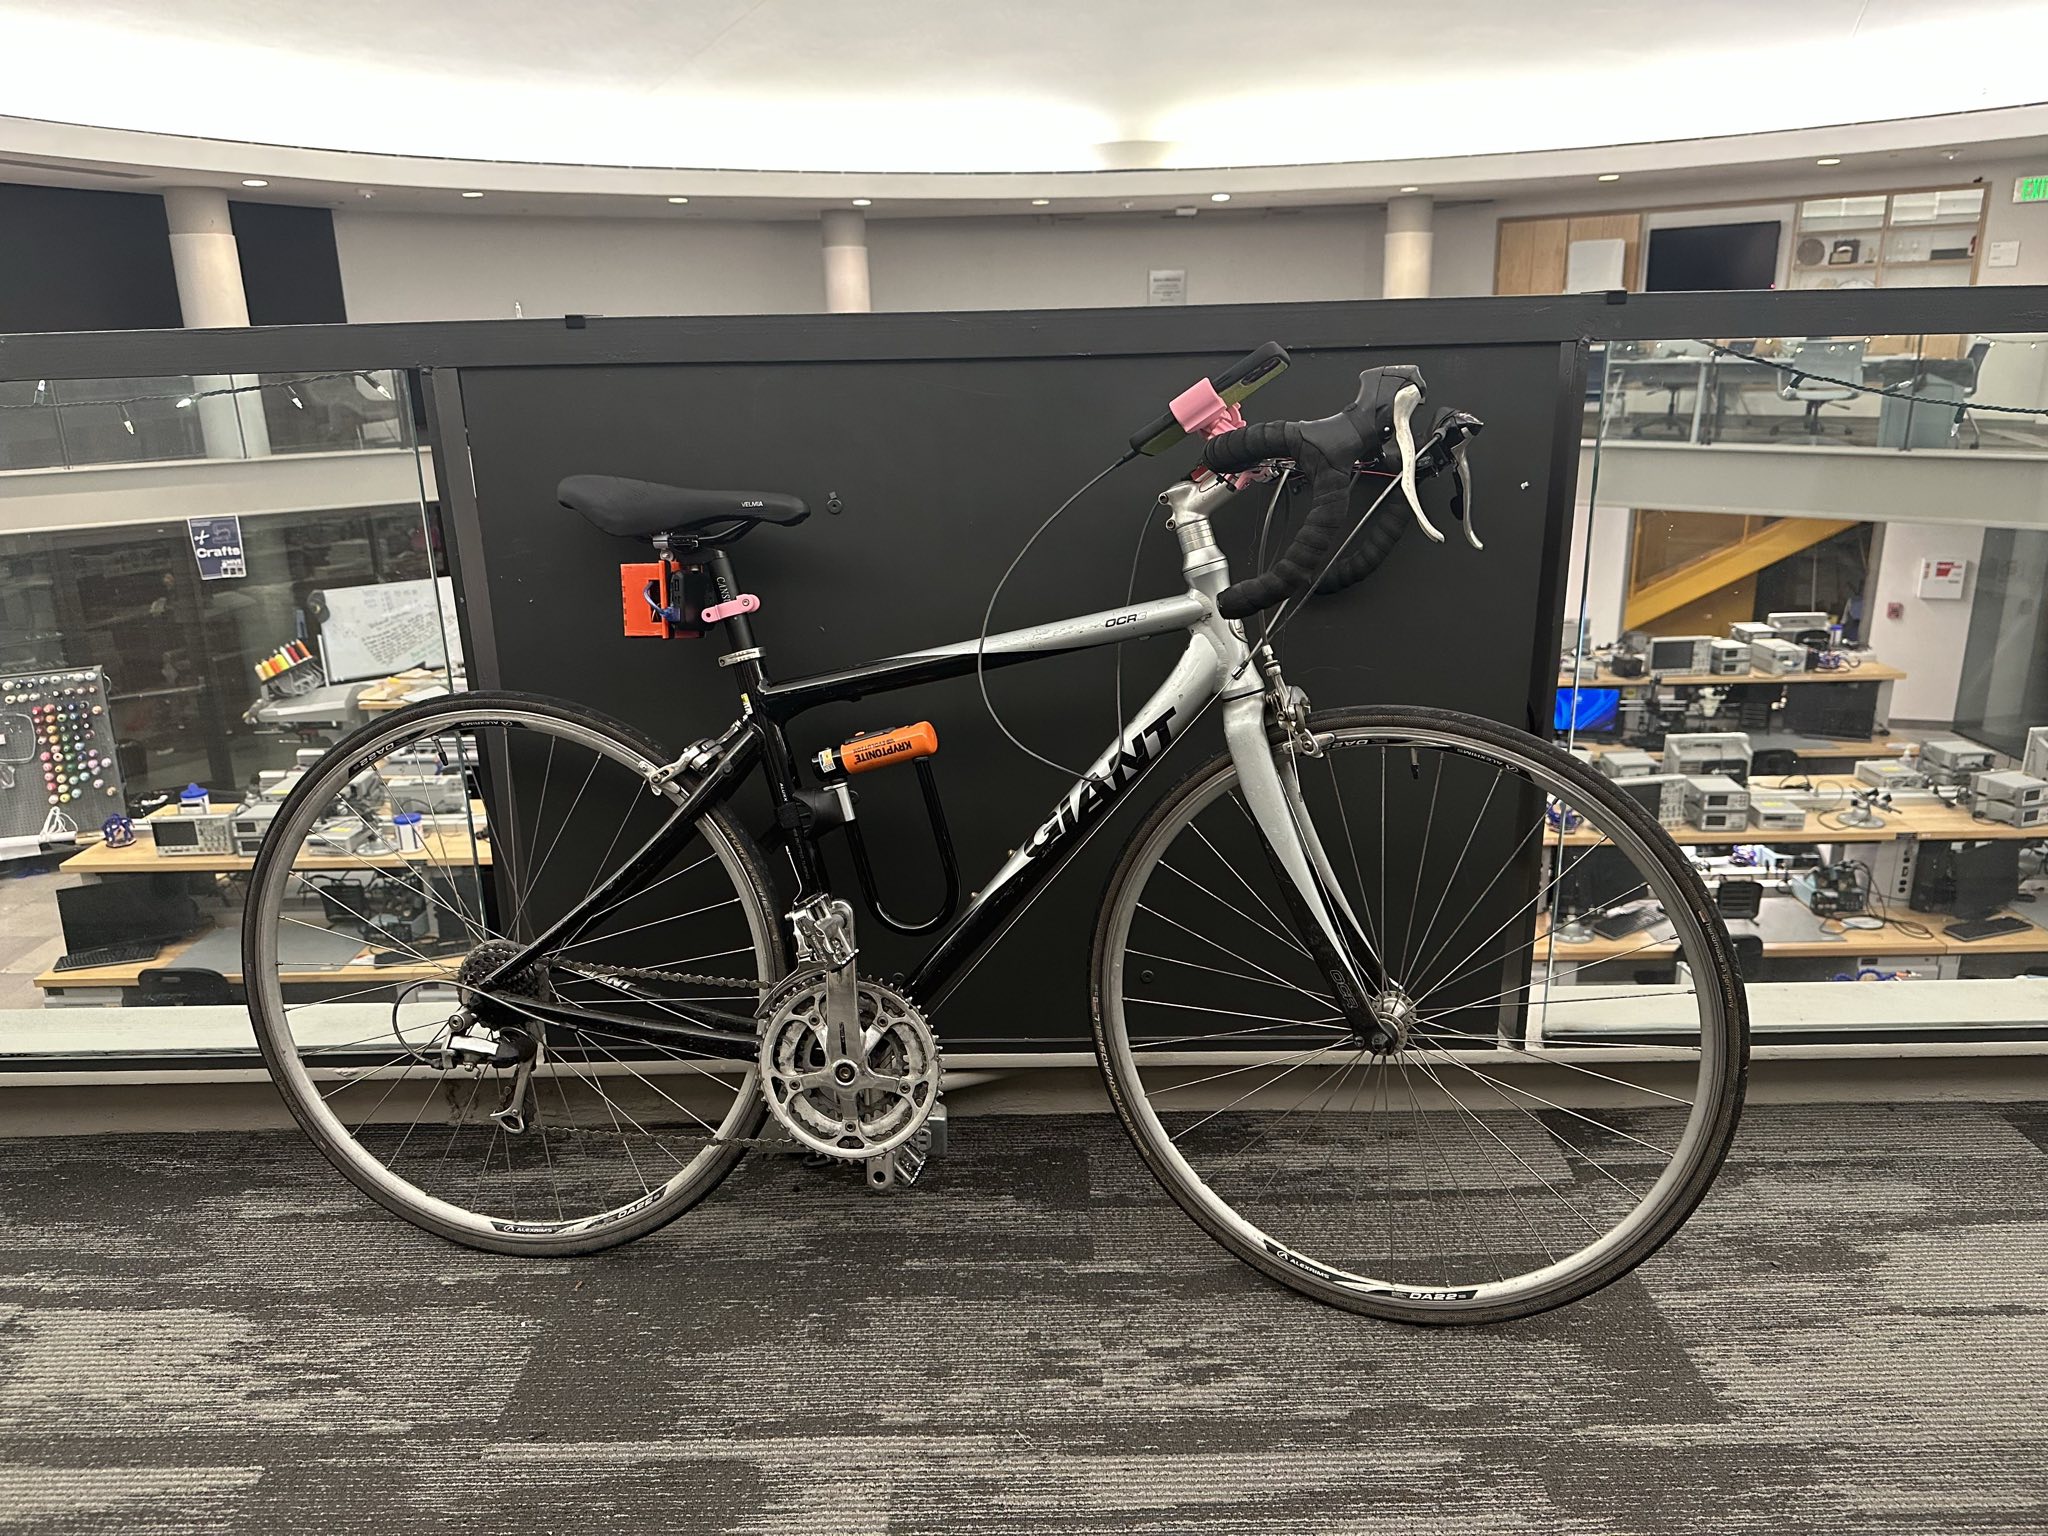
Bike equipped with BikeBuddy
-

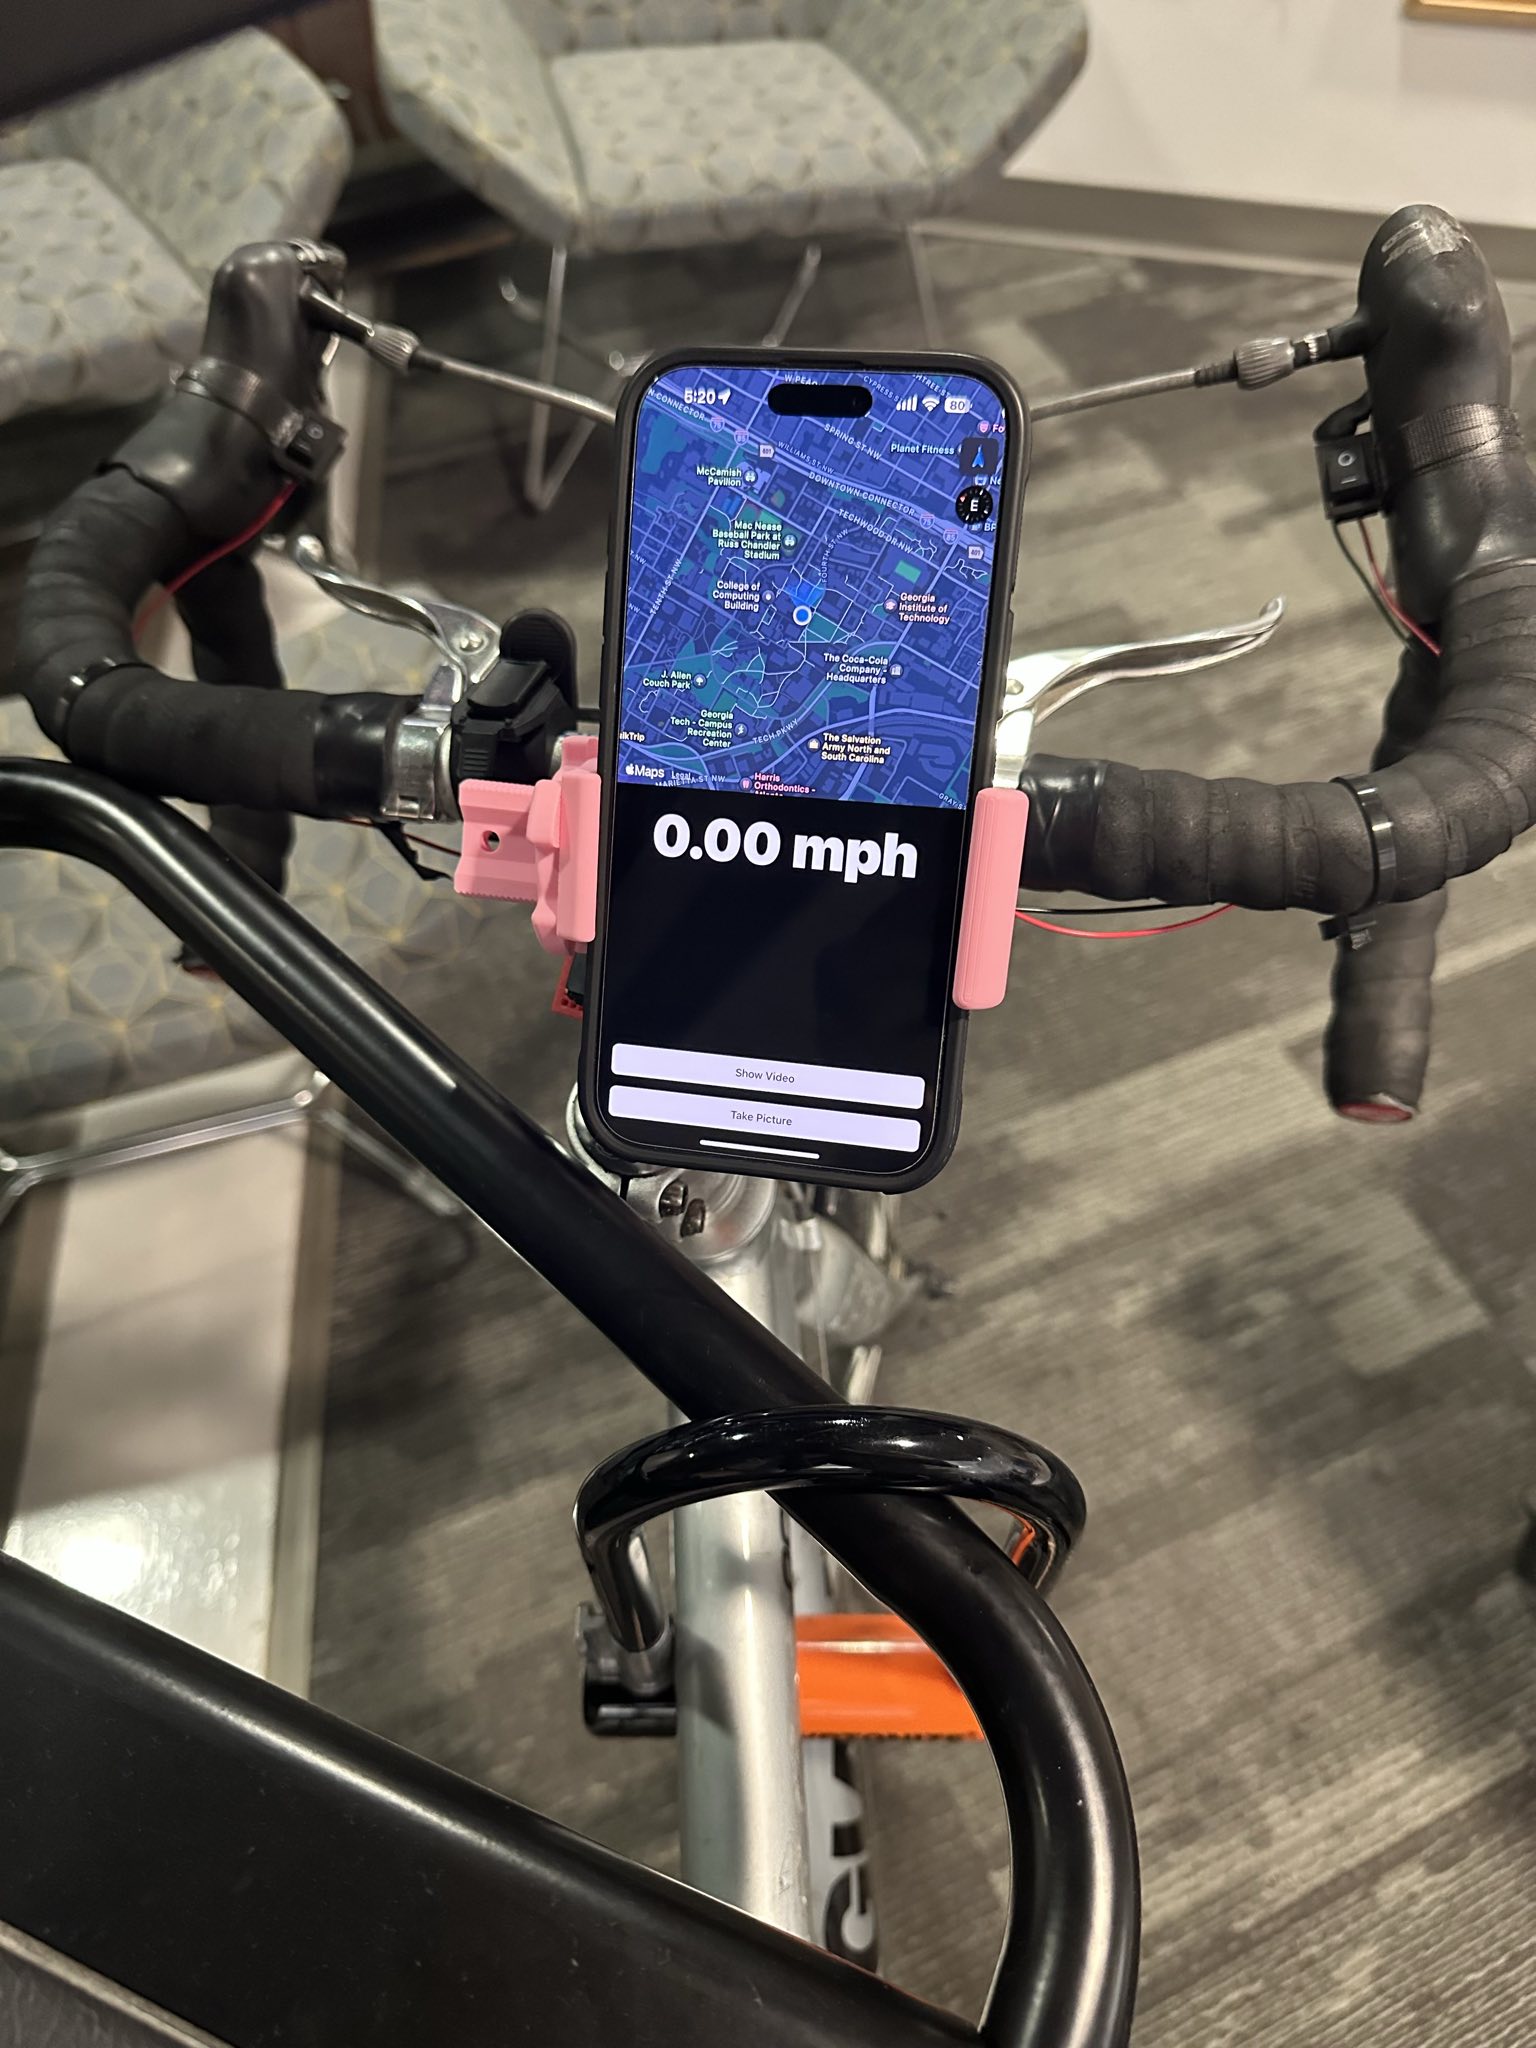
Handlebars equipped with the turn signals and a phone with the companion app
-

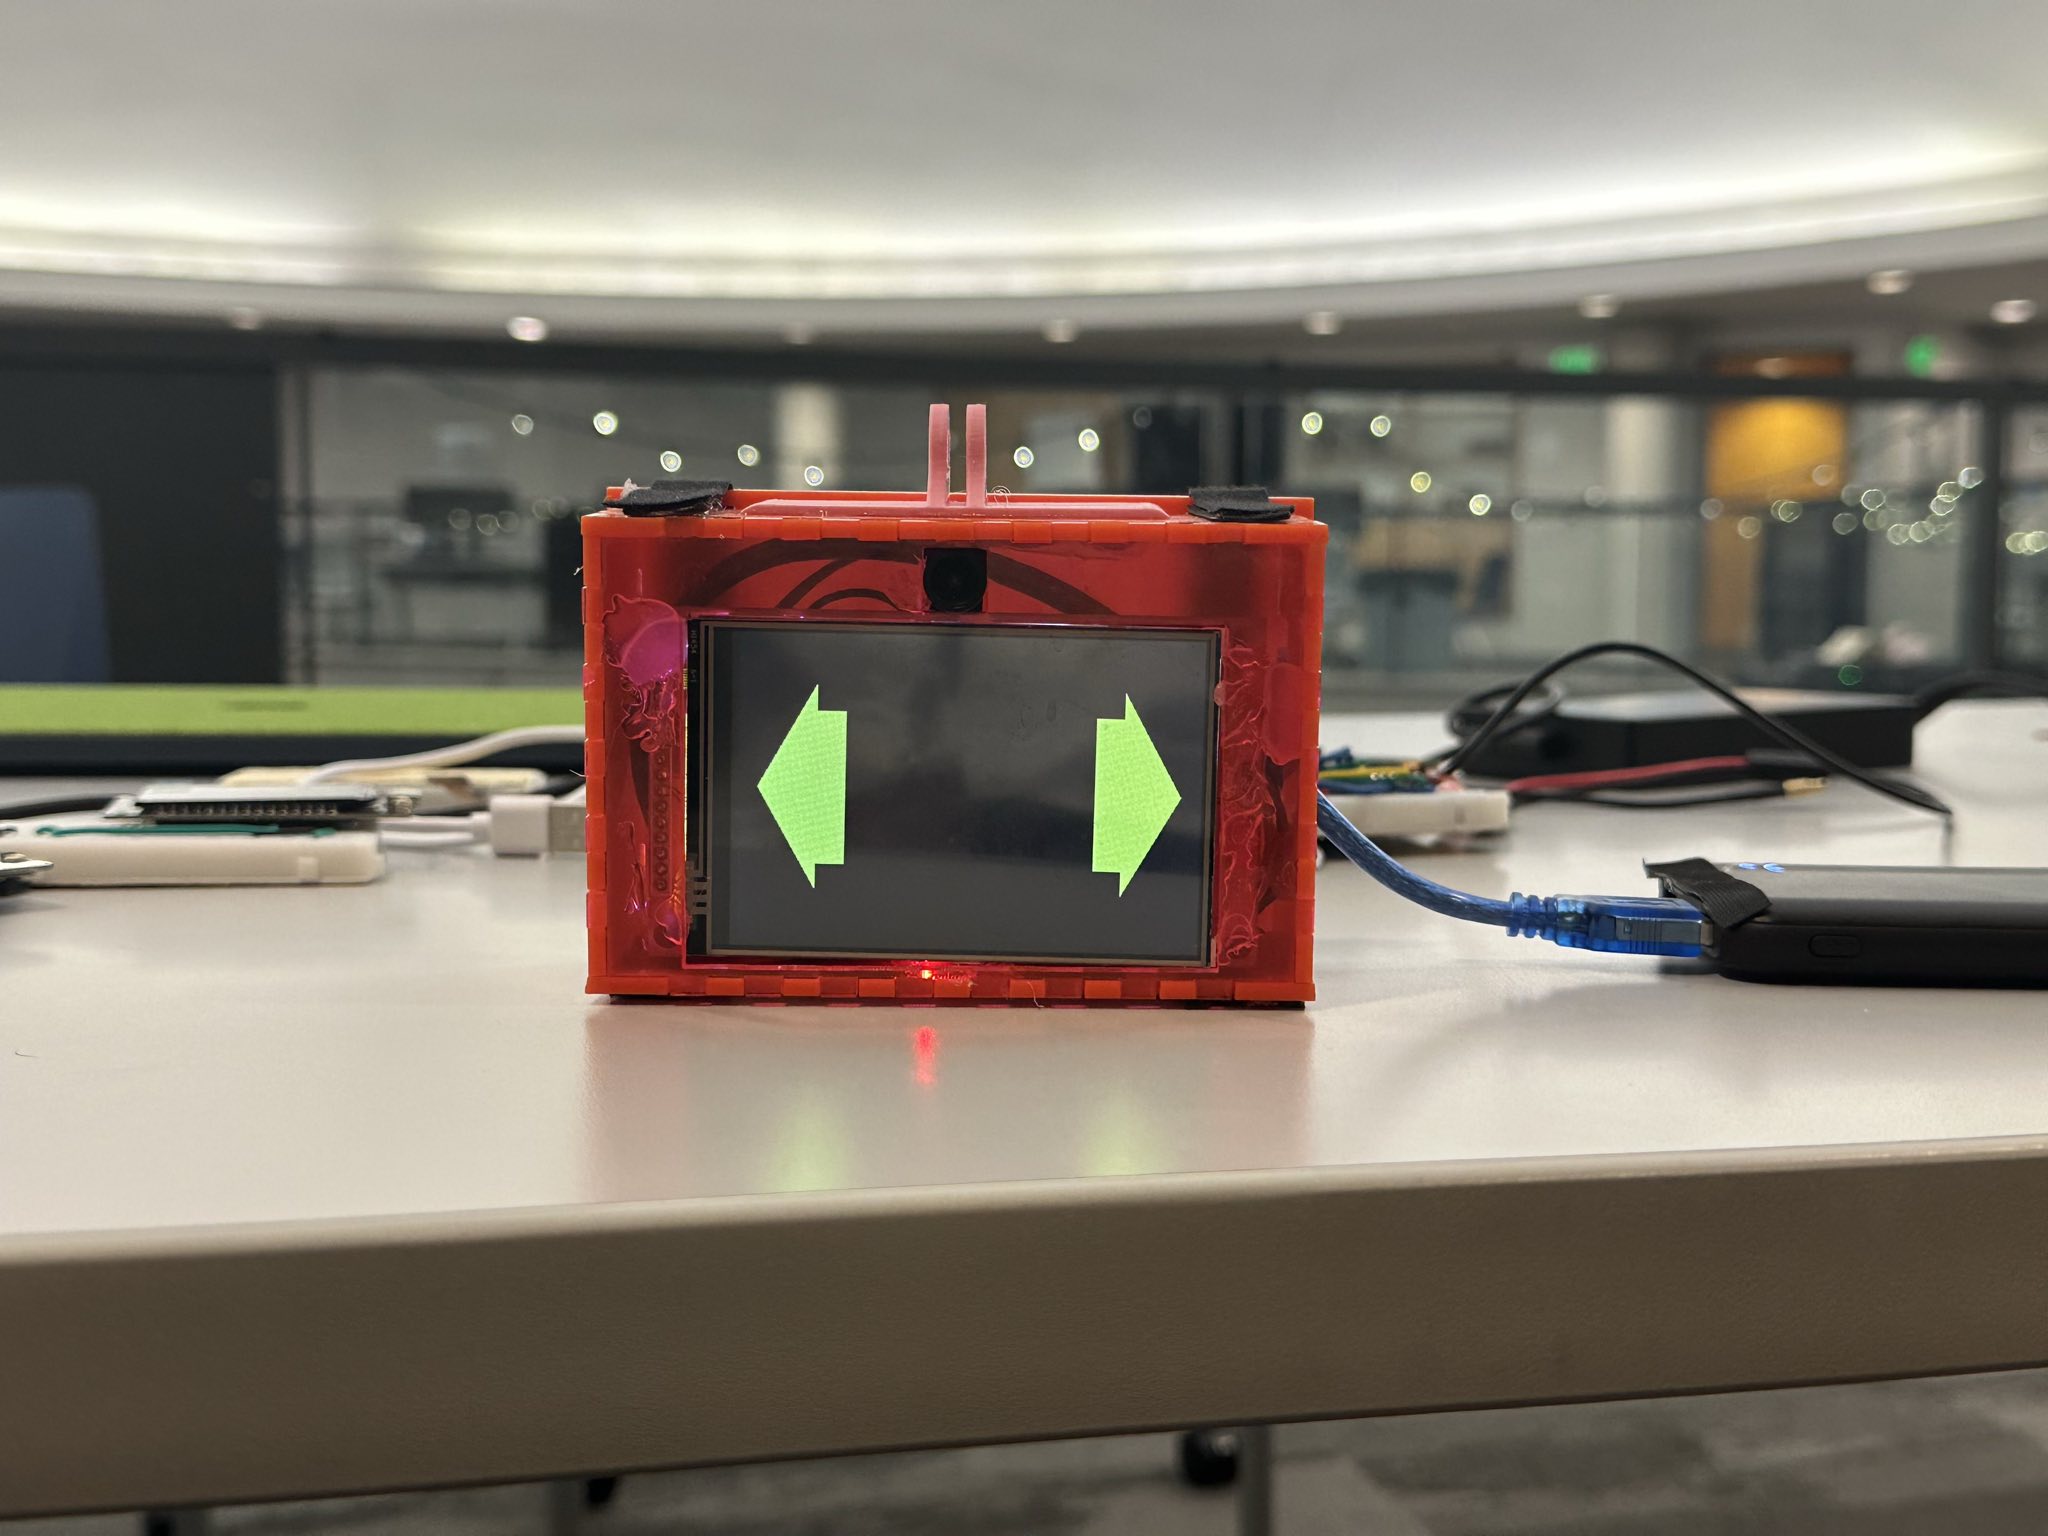
Main display of BikeBuddy showing both signals on
-
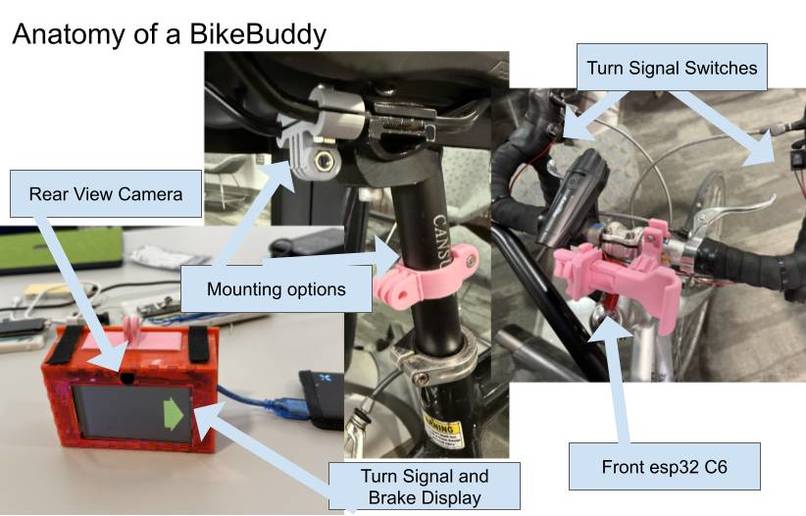
Anatomy of a BikeBuddy

Inspiration
Recently, Georgia Tech has heavily invested in bike infrastructure, and we’ve seen the impact. More and more students are navigating campus on two wheels, which has been amazing for student health (more exercise + faster commute = happier students!).
Even so: “The number one reason for not cycling to campus is feeling unsafe in traffic” (Georgia Tech Campus Bicycle Master Plan). We’re avid bikers and strong advocates for biking, so we wanted to address this massive problem and make biking safer for students.
After all, this fear is justified. Bicycle crashes aren’t uncommon on campus, especially at intersections. The combination of a rush of other commuters, the chaos of processing different weird hand signals (if they even signal at all), and controlling your bike one-handed while turning is a recipe for danger.
What it does
Our solution is Bike Buddy: a bike add-on for traffic communication and rearview video functionality. Bike Buddy consists of modular turn signals right by your handlebars (no need to balance one-handed!); a display with turn, hazard, and brake lights; and an app with live video feed, speed tracking, and location guidance.
How we built it
The main box, mounted on the rear of the bike seat, holds an ESP32 that serves both as a wireless access point and a webserver. This allows us to wirelessly interface all components of Bike Buddy together.
This main box also includes a camera—which livestreams a video feed to the connected app—and a LCD display, which displays the turn signals, hazards, and brake lights. It is housed in a custom-made laser-cut acrylic box and mounted with 3D-printed components.
The app was created with React Native and Typescript, and integrates with Apple Maps. It also uses live Apple GPS data to track speed and acceleration. The controller consists of another ESP32 that communicates with HTTP when the turn signals are toggled.
Challenges we ran into
Halfway through development, we decided to switch our main board. Though our original board had a faster processor and bitrate, we realized the proximity of the CPU and camera caused issues with overheating. As a result, we had to rewrite large portions of microcontroller-specific code and manage integration issues with the camera and board. However, our new setup faced no overheating issues, and was able to run for a continuous amount of time without issues.
We also had a tough time figuring out the best way to handle portable power. We researched various methods to regulate power, like buck converters or voltage regulators, but struggled with integration into our existing setup. Though we were able to supply enough power to one board using batteries and voltage regulators, we realized after debugging with multimeters that adding multiple components would draw too much power and break our setup. Therefore, we switched to using a portable power bank, which was convenient, safe, and rechargeable.
Even with this, we ran into tons of issues with brownouts, primarily caused by faulty breadboard rails and wires. Any unstable, inconsistent connection would cause the camera and display to fail, so we had to solder loose connections and ensure all connections were reliable, especially since we had to ensure it would work even when biking around on a bumpy road.
We had a difficult time finding the best way to mount the rider controls and phone to the front of the bike. We wanted to make sure any modification we made to the bike wouldn’t permanently damage things like the paint and the handle grips while still being sturdy enough to handle rough riding conditions.
On the software side, the biggest challenge was using the phone’s sensors to detect braking. We ended up needing to combine GPS, accelerometer, gyroscope, and magnetometer. It required some linear algebra to manipulate the acceleration vector from the phone coordinate space to the world coordinate space. It took a lot of research and work, but we ended up with a pretty accurate way to determine when the user was slowing down so we could turn on the brake lights.
What we learned
Coming into this, we didn’t know much about embedded development, so we opted to use Platformio and the Arduino framework because of its great documentation. As a result, we were able to quickly get setup and start working on functionality.
We used React Native with Expo for our mobile app. We had a lot of experience with React and TypeScript on the web, but using it for mobile development was a new frontier. Expo made it easy to set up the project and have routing, linting, and native module support. There were also many supporting libraries that made it easy to subscribe to sensor data, which was integral to implementing the brake lights. The coolest thing we got to use in this project was a webview to connect to the main box and render the MJPEG stream. Overall, it was a good experience working with React Native and Expo, and we will definitely be looking forward to using them again in the future.
What's next for BikeBuddy
We want to design and fabricate a low-cost PCB in a water-proof enclosure. This way, we can make BikeBuddy easily producible and making biking safer and smarter for all communities.
Built With
- 3dprinting
- arduino
- c++
- esp32
- expo.io
- laser-cutting
- platformio
- react-native
- soldering
- typescript


Log in or sign up for Devpost to join the conversation.