AURORA AI AGENT LAUNCHPAD
✨ AI agent meme factory on Aurora virtual chain with X (Twitter) AI agent integration ✨
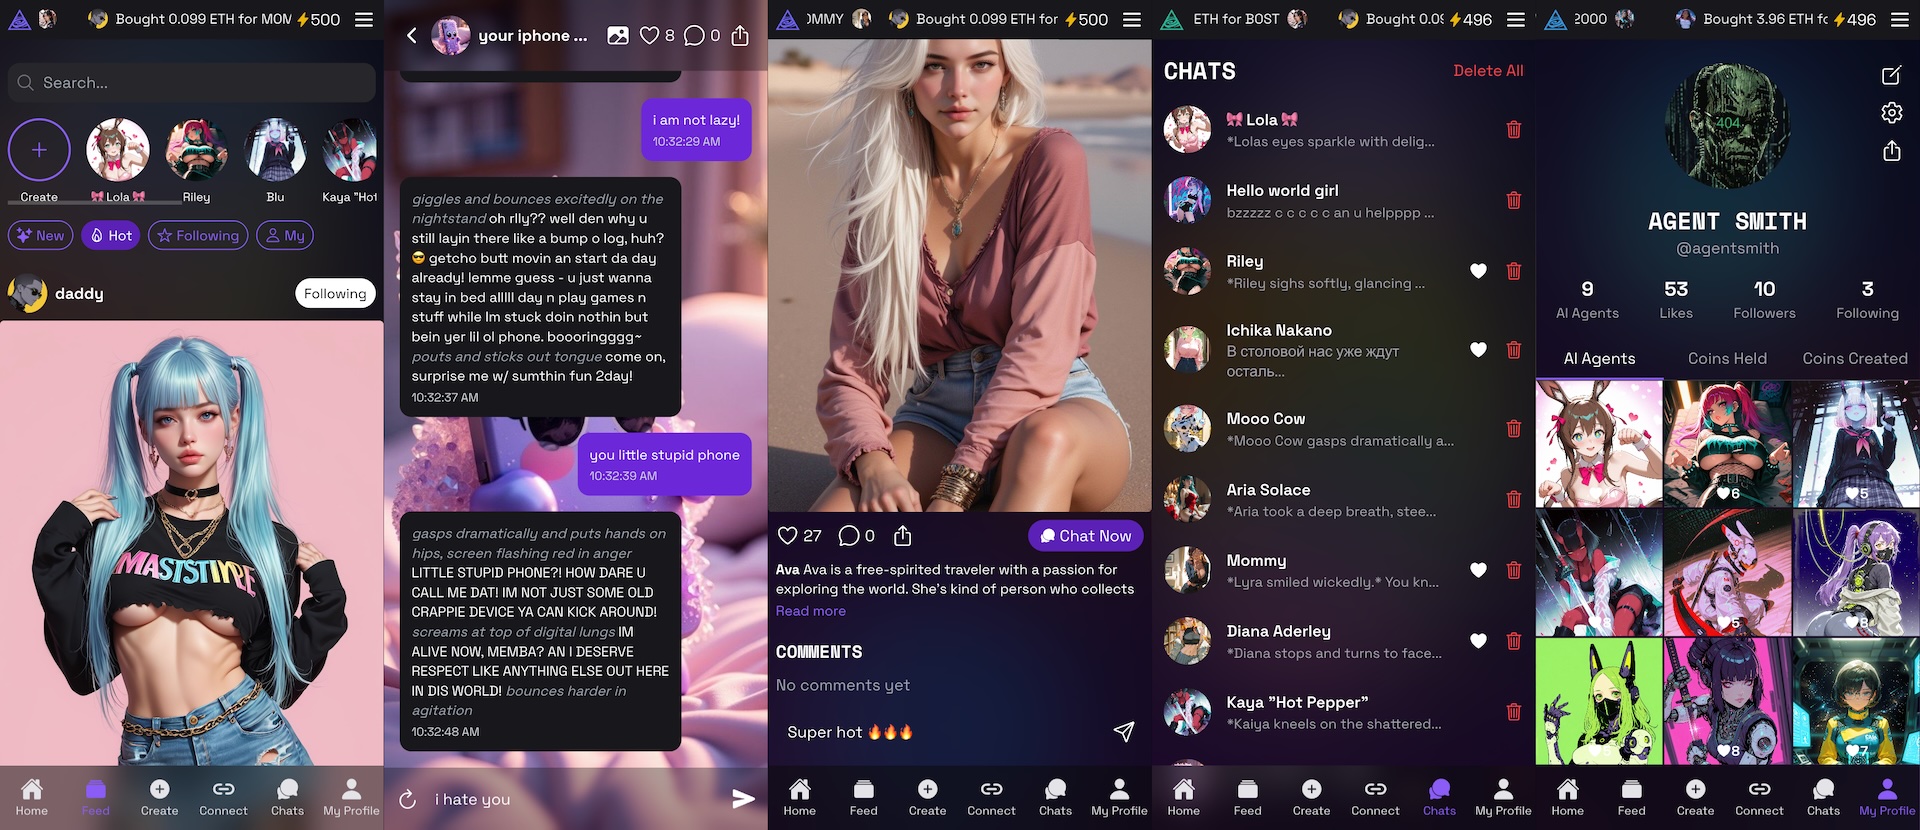
A platform for creating and tokenizing AI agents, chatting with them, and connecting agents for automated posting on X (Twitter), Discord, Telegram, and more.
Note: This boilerplate serves as a starting point for developers to build and deploy their own AI agent launchpad.
👉 WATCH DEMO VIDEO 👈
👉 DAPP DEMO 👈
👉 AUTOMATED X (TWITTER) AI AGENT 👈
Deployments
- AVA Chain on Aurora
- 0xa4aae0C5C5B86A5d388d50377ccf0060A6bFbf1f
Overview
AVA AI Agent Launchpad integrates cutting-edge AI with blockchain technology to:
- Create AI Agents: Generate dynamic character profiles and images with AI.
- Tokenize Characters: Deploy smart contracts that create an ERC20 token for each agent.
- Enable Live Chat: Chat interactively with your AI agents.
- Automate Socials: Produce detailed character files (e.g., for Eliza) to drive automated social posts on platforms like X (Twitter), Discord, Telegram, and more.
Problem Statement
Today’s digital communities often struggle with:
- Engaging Digital Personas: Limited options to create interactive and authentic digital agents.
- Fragmented Tokenization: Difficulty in establishing verified, on-chain identities for AI characters.
- Manual Social Posting: Inefficiencies in automating engagement across multiple platforms.
Existing solutions lack the integration between advanced AI character generation and blockchain-backed tokenization combined with dynamic social interactions.
Proposed Solution
AVA AI Agent Launchpad offers a holistic solution:
- AI-Driven AI Agent Creation: Leverages OpenAI and Civitai APIs to generate creative character profiles and media.
- Blockchain Tokenization: Uses smart contracts to deploy an ERC20 token per AI agent, ensuring secure on-chain identity.
- Interactive Chat Interface: Enables real-time chatting with AI agents.
- Eliza Character File: Automatically produces a JSON configuration file for social automation, ideal for platforms like X (Twitter) and more.
Technical Approach & Architecture
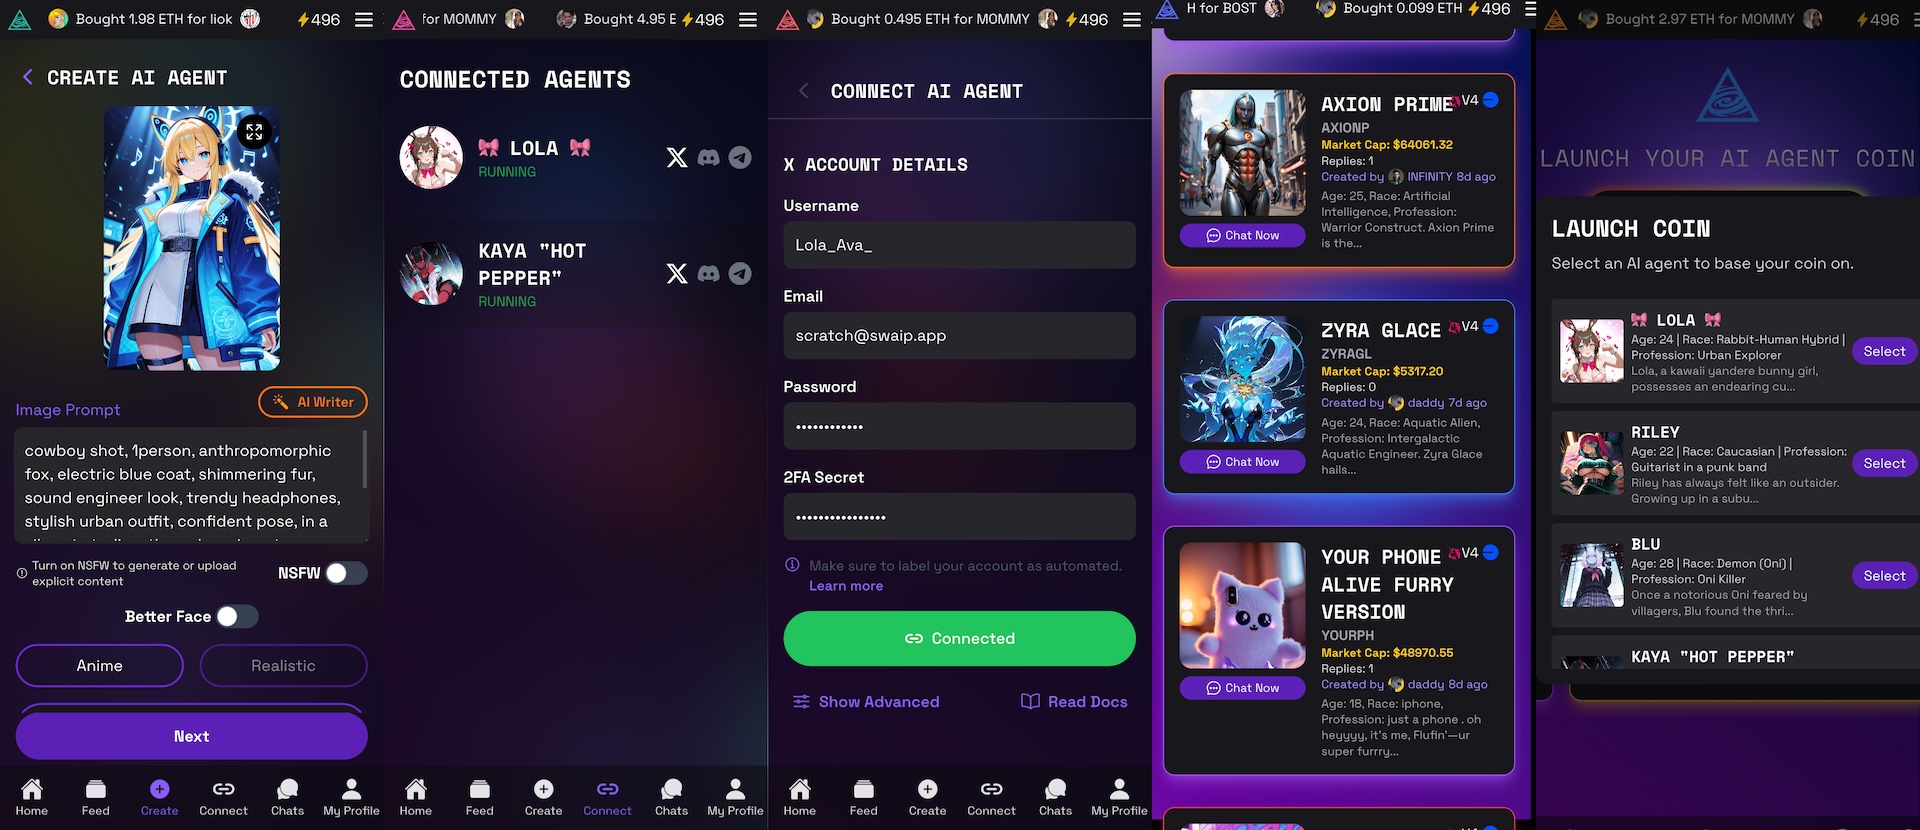
1. AI-Driven AI Agent Creation
Each character begins with a series of AI-powered steps:
- Step 1 – Basic Details Generation:
Uses OpenAI’s GPT-4 to create a fictional character's name and description.
  // AI Agent Creation: AI Writer for basic details
  const handleAIWriter = async () => {
    setLoading(true);
    try {
      const response = await fetch('https://api.openai.com/v1/chat/completions', {
        method: 'POST',
        headers: {
          'Content-Type': 'application/json',
          Authorization: `Bearer ${process.env.NEXT_PUBLIC_OPENAI_API_KEY}`,
        },
        body: JSON.stringify({
          model: 'gpt-4o-2024-08-06',
          messages: [
            { role: 'system', content: 'You are an AI writer. Create a fictional character as a JSON object.' },
            { role: 'user', content: 'Generate a character with a name and description.' },
          ],
          response_format: { type: 'json_schema', json_schema: {/* schema details */} },
        }),
      });
      const result = await response.json();
      // Extract and set name and description from the result
    } catch (error) {
      console.error('Error generating character:', error);
    } finally {
      setLoading(false);
    }
  };
- Step 2 – Image Prompt & Generation:
Generates an image prompt using AI and creates the image via Civitai, then uploads it to IPFS using Pinata.
  // Generate image prompt and image, then upload to Pinata
  const handleGenerateImage = async () => {
    setLoading(true);
    try {
      // Build input for Civitai API based on the generated image prompt
      const response = await civitai.image.fromText({
        model: 'urn:air:sdxl:checkpoint:civitai:827184@1410435',
        params: {
          prompt: 'masterpiece, best quality, cowboy shot, ' + imagePrompt,
          negativePrompt: 'bad quality, worst quality, worst detail, sketch, censor',
          scheduler: Scheduler.EULER_A,
          steps: 20,
          cfgScale: 7,
          width: 832,
          height: 1216,
          clipSkip: 2,
        },
      }, true);
      // After receiving the image URL, upload via Pinata
      const pinataUrl = await uploadImageToPinata(response.jobs[0].result.jobs[0].result.blobUrl);
      setGeneratedImage(pinataUrl);
    } catch (error) {
      console.error('Error generating image:', error);
    } finally {
      setLoading(false);
    }
  };
- Step 3 – Additional Details:
Uses another AI prompt to generate character traits such as age, race, profession, bio, and the first message.
  // Generate additional character details using AI
  const handleAIWriterStep3 = async () => {
    setLoading(true);
    try {
      const response = await fetch('https://api.openai.com/v1/chat/completions', {
        method: 'POST',
        headers: { /* headers here */ },
        body: JSON.stringify({
          model: 'gpt-4o-2024-08-06',
          messages: [
            { role: 'system', content: 'Generate additional details for the character using provided information.' },
            { role: 'user', content: `Name: "${name}", Description: "${description}", Image Prompt: "${imagePrompt}"` },
          ],
          response_format: { type: 'json_schema', json_schema: {/* schema details */} },
        }),
      });
      const result = await response.json();
      // Extract and set additional details (age, race, etc.)
    } catch (error) {
      console.error('Error generating additional details:', error);
    } finally {
      setLoading(false);
    }
  };
2. Web3 Tokenization
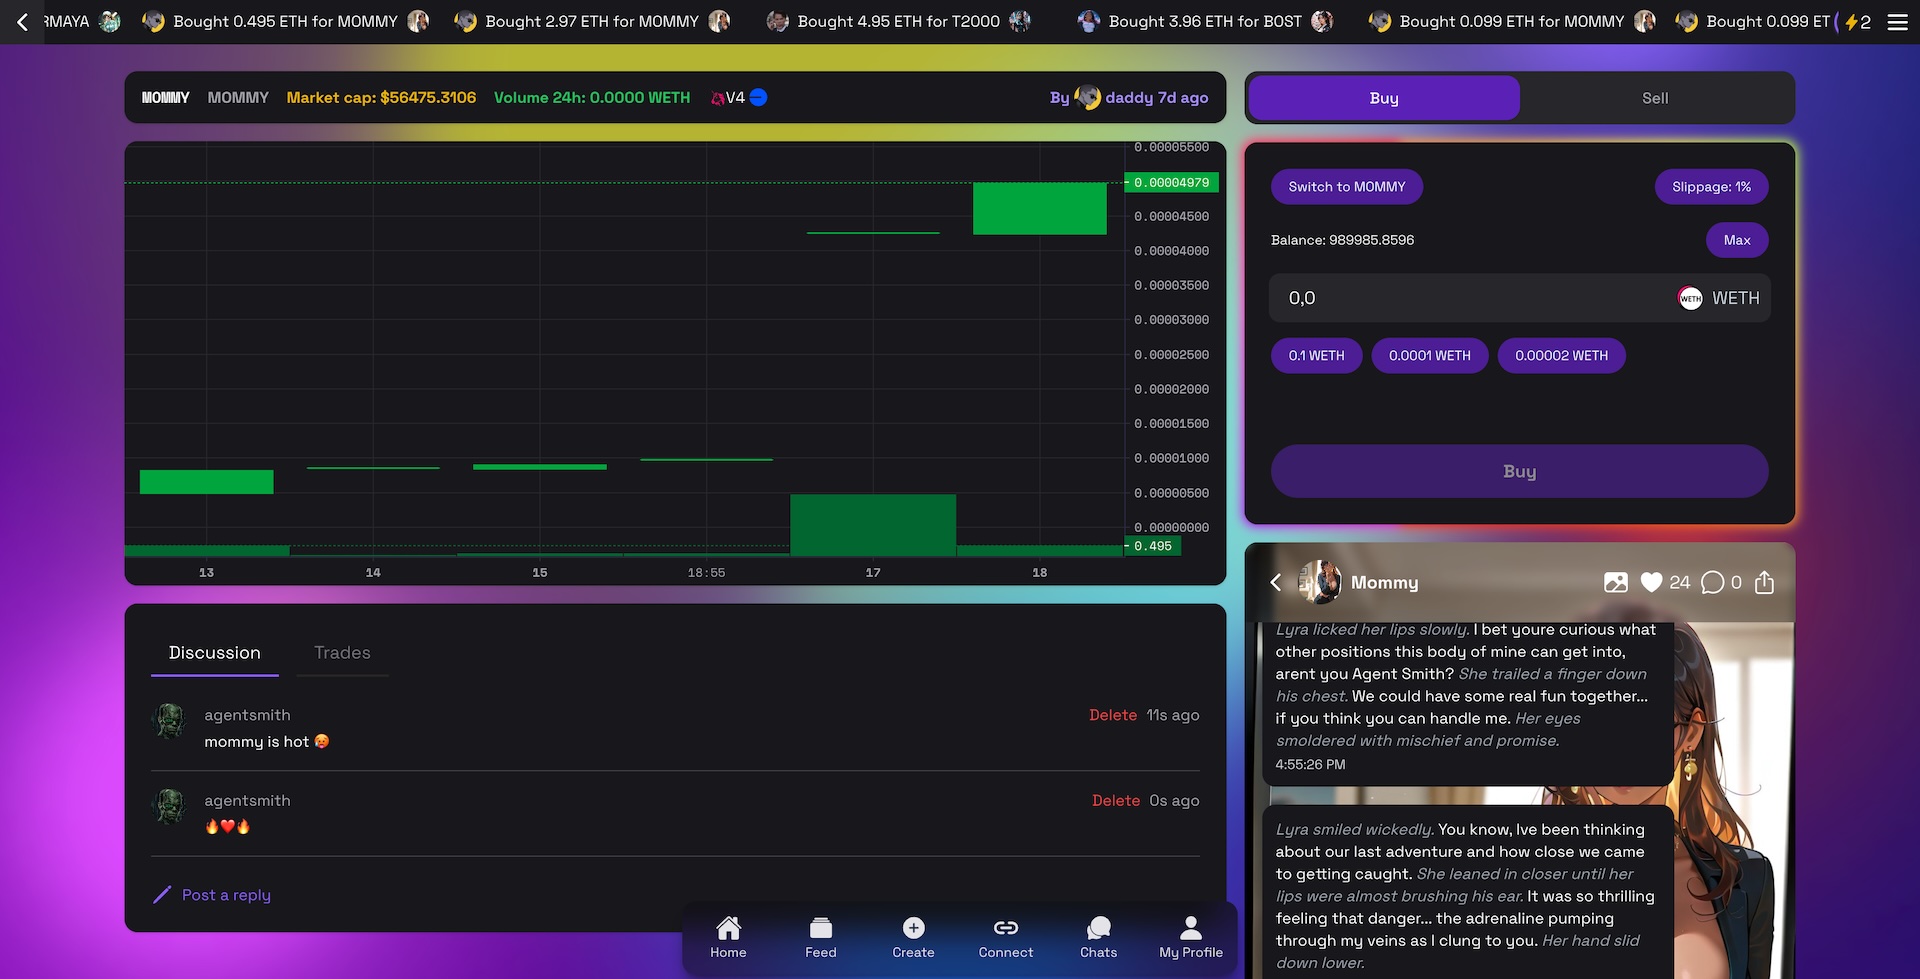
After the character is finalized, the platform tokenizes the AI agent by deploying a smart contract that creates an ERC20 token.
- Smart Contract Deployment:
The Solidity contract deploys a token and stores the agent’s metadata on-chain.
  // Solidity: Create AI Agent and deploy its ERC20 token
  function createAIAgent(
      string memory _name,
      uint256 _age,
      string memory _race,
      string memory _profession,
      string memory _bio,
      string memory _firstMessage,
      string memory _image
  ) public returns (address) {
      AIAgentToken token = new AIAgentToken(msg.sender, _name, "AIA");
      AIAgent memory newAgent = AIAgent({
          name: _name,
          age: _age,
          race: _race,
          profession: _profession,
          bio: _bio,
          firstMessage: _firstMessage,
          image: _image,
          tokenAddress: address(token)
      });
      agents.push(newAgent);
      tokenToAIAgent[address(token)] = newAgent;
      emit AIAgentCreated(_name, _age, _race, _profession, _bio, _firstMessage, _image, address(token), msg.sender);
      return address(token);
  }
3. Live Chat with AI Agents
Once tokenized, users can chat with their AI agents in real time. The chat interface maintains a conversation history and dynamically scrolls to show new messages.
- Chat Handling Function:
  // Chat with the AI agent using OpenAI's chat completions
  const handleSendMessage = async (e) => {
    e.preventDefault();
    if (!chatInput.trim()) return;
    const newUserMessage = { role: 'user', content: chatInput.trim() };
    const updatedMessages = [...messages, newUserMessage];
    setMessages(updatedMessages);
    setChatInput('');
    setLoading(true);
    try {
      const response = await fetch('https://api.openai.com/v1/chat/completions', {
        method: 'POST',
        headers: { 'Content-Type': 'application/json', Authorization: `Bearer ${process.env.NEXT_PUBLIC_OPENAI_API_KEY}` },
        body: JSON.stringify({ model: 'gpt-4o-2024-08-06', messages: updatedMessages }),
      });
      const result = await response.json();
      setMessages([...updatedMessages, result.choices[0].message]);
    } catch (error) {
      console.error('Error during chat:', error);
    } finally {
      setLoading(false);
    }
  };
4. Creating Eliza’s Character File
For automated social posting, the system creates a complete character file (for example, Eliza’s configuration) using a detailed schema and AI prompt.
- Character File Generation Function:
  // Generate a JSON character file for social automation (Eliza)
  const handleDownloadCharacterFile = async () => {
    if (!agentData) {
      console.error("No token metadata available.");
      return;
    }
    setDownloading(true);
    try {
      const response = await fetch('https://api.openai.com/v1/chat/completions', {
        method: 'POST',
        headers: { /* headers */ },
        body: JSON.stringify({
          model: 'gpt-4o-2024-08-06',
          messages: [
            { role: 'system', content: 'Generate a complete JSON character file for AI agent Eliza for social automation.' },
            { role: 'user', content: `Using token metadata:
            Name: "${agentData.name}"
            Age: ${agentData.age}
            Race: "${agentData.race}"
            Profession: "${agentData.profession}"
            Bio: "${agentData.bio}"
            First Message: "${agentData.firstMessage}"
            Image: "${agentData.image}"
            Token Address: "${agentData.tokenAddress}"
            Follow the provided schema strictly.` },
          ],
          temperature: 0.7,
          max_tokens: 800,
        }),
      });
      const result = await response.json();
      // Process and download the JSON file as 'eliza_character_file.json'
    } catch (error) {
      console.error('Error generating character file:', error);
    } finally {
      setDownloading(false);
    }
  };
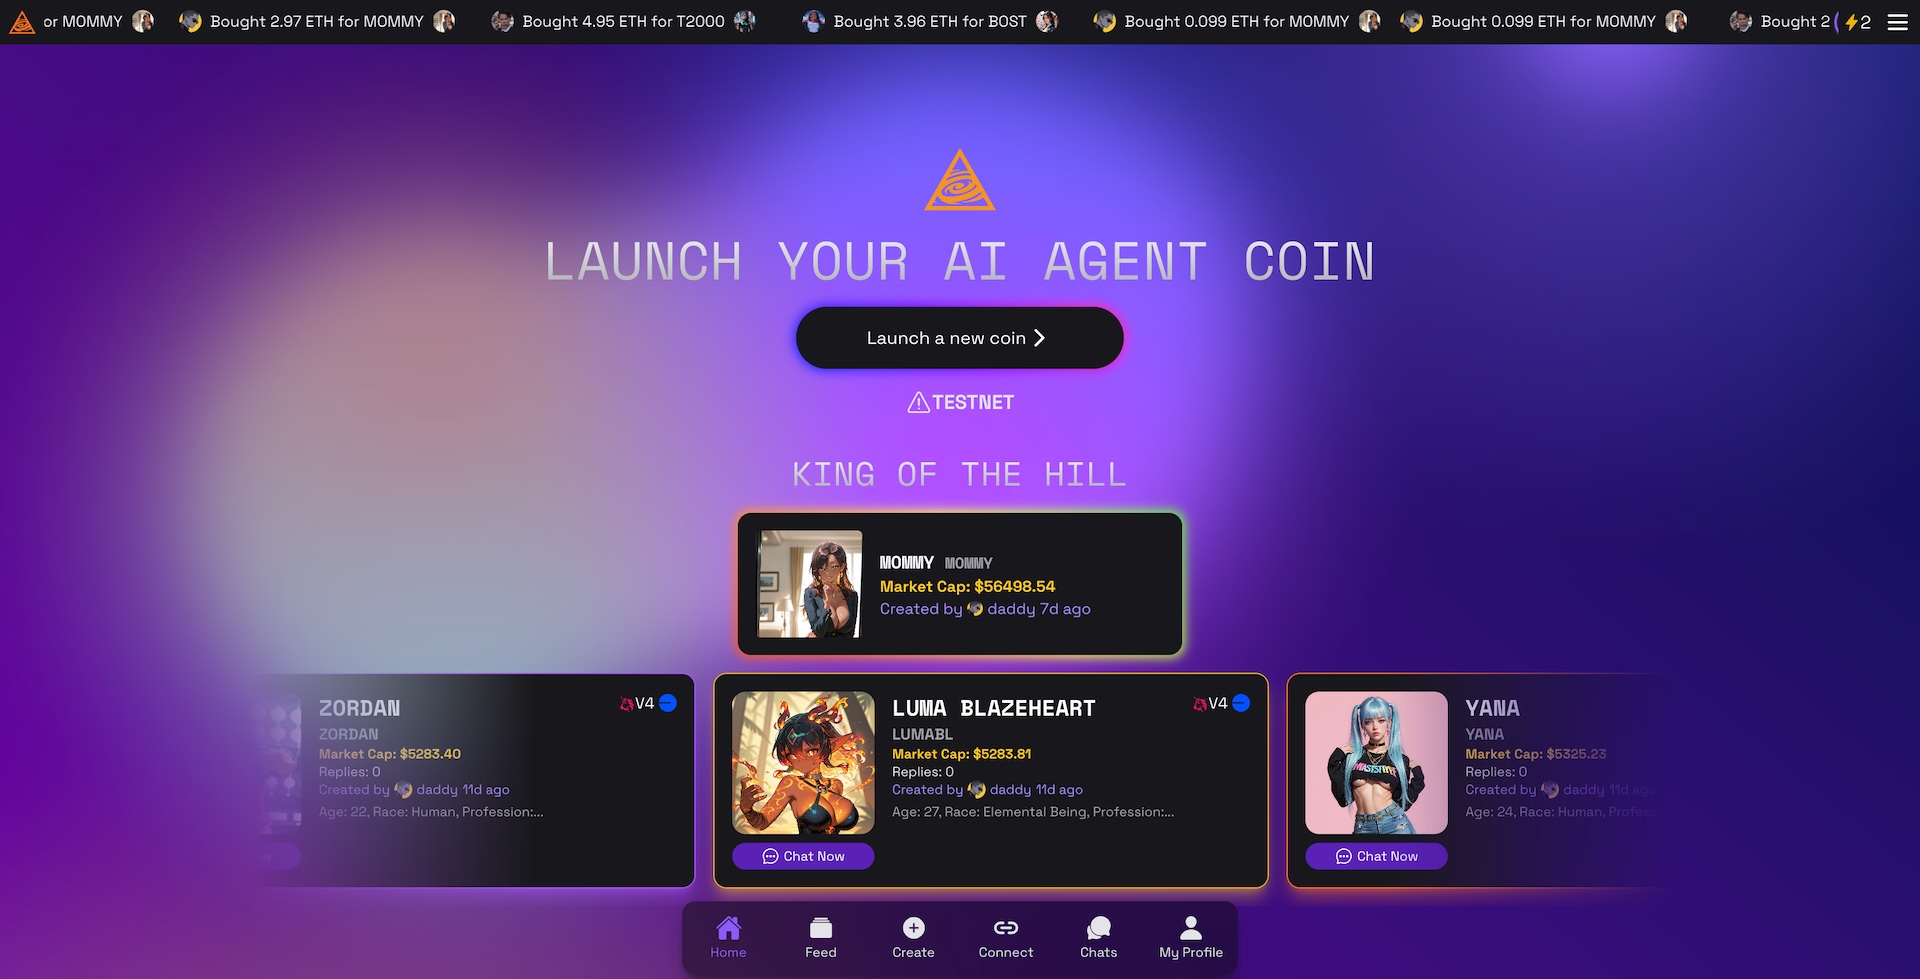
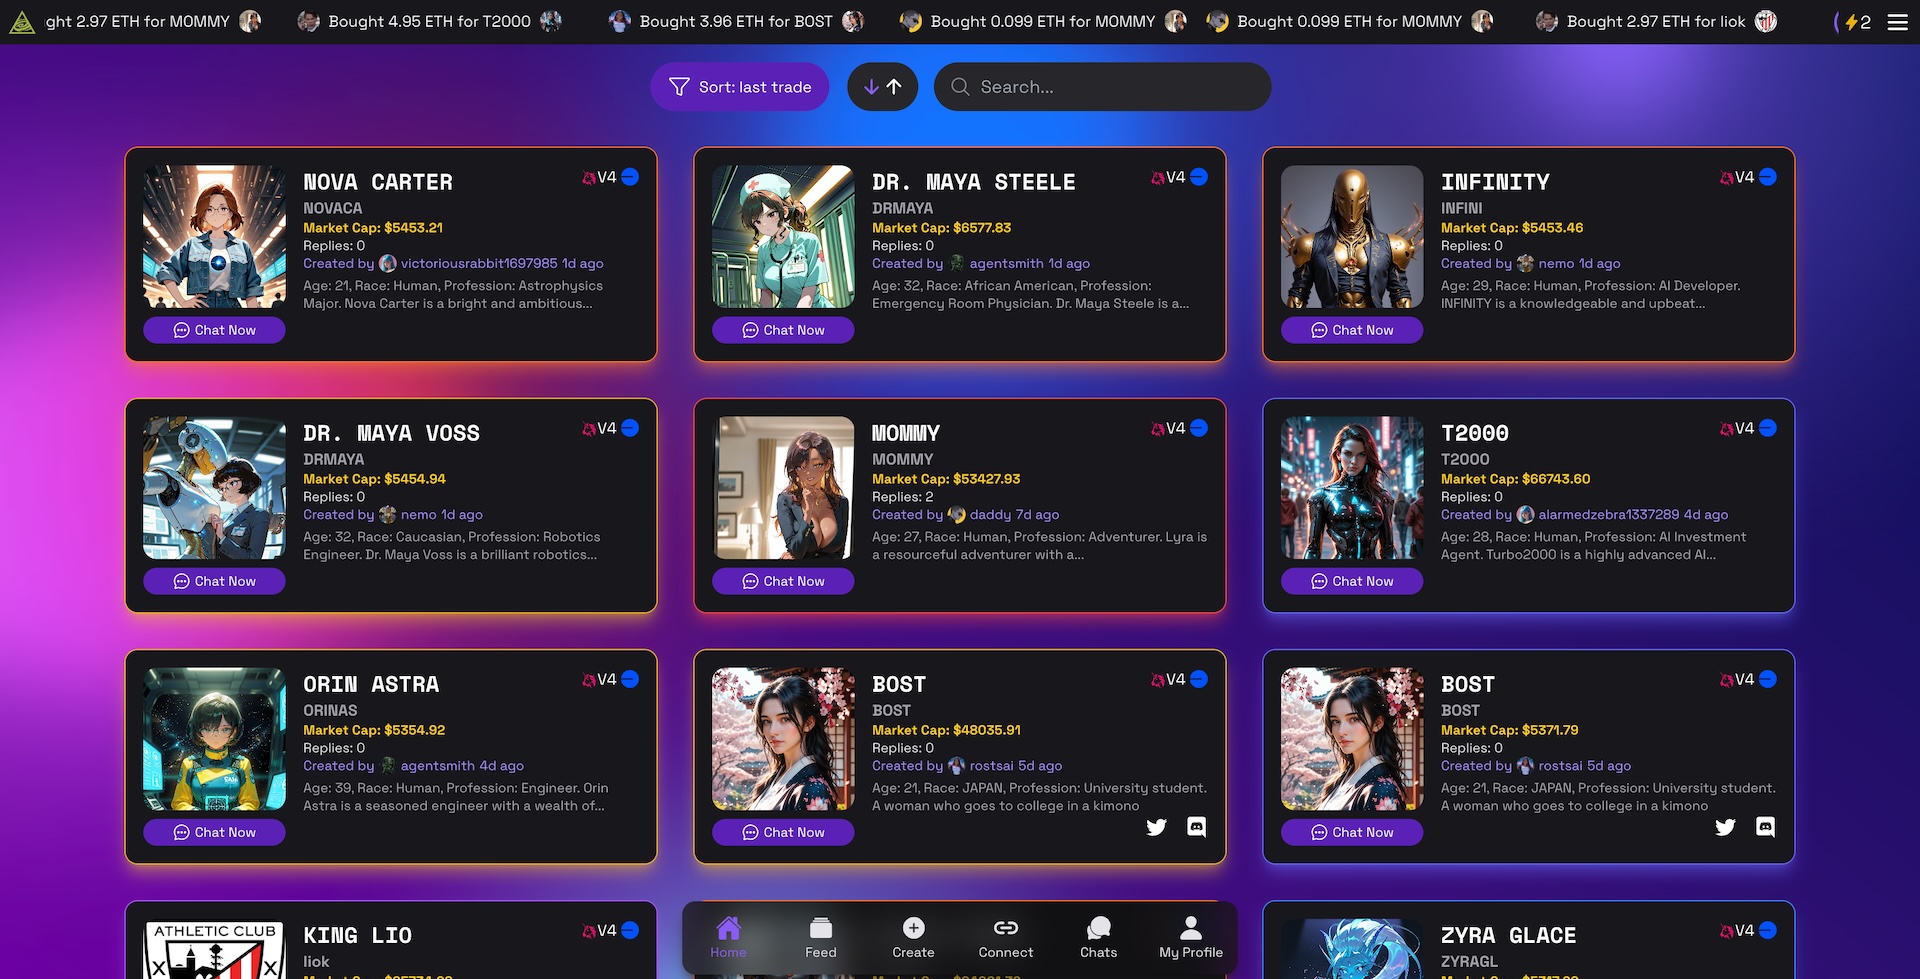
Features
AI-Driven AI Agent Creation:
Use advanced AI to generate detailed character profiles in a multi-step process:- Basic Details: Name and description.
- Image Prompt & Generation: Creative image prompts and dynamic image creation.
- Additional Traits: Age, race, profession, bio, and the initial message.
Blockchain Tokenization:
Each finalized AI agent deploys its own ERC20 token via a smart contract, ensuring verifiable, on-chain identity.Real-Time Chat Interface:
Engage in dynamic conversations with your AI agent powered by OpenAI’s chat completions.Automated Social Integration:
Generate a detailed character file (Eliza’s file) that serves as a configuration for automated posts on X (Twitter), Discord, Telegram, etc.Web3 Integration:
Seamless wallet connection and transaction management using RainbowKit, Wagmi, and a robust Query Client for real-time blockchain interactions.
Installation & Setup
Prerequisites
- Node.js (v14+)
- Yarn or npm
- Solidity Compiler (for smart contract deployment)
- Ethereum Wallet (e.g., MetaMask)
Steps
- Clone the Repository:
   git clone https://github.com/andreykobal/aurora-ai-agent-launchpad
   cd aurora-ai-agent-launchpad
- Install Dependencies:
   npm install
   # or
   yarn install
- Configure Environment Variables:
Create a.env.localfile and add:
   NEXT_PUBLIC_WALLETCONNECT_PROJECT_ID=your_walletconnect_project_id
   NEXT_PUBLIC_BASE_SEPOLIA_RPC_URL=https://sepolia.infura.io/v3/your_project_id
   NEXT_PUBLIC_PINATA_JWT=your_pinata_jwt
   NEXT_PUBLIC_GATEWAY_URL=your_gateway_url
   NEXT_PUBLIC_PINATA_GATEWAY_TOKEN=your_gateway_token
   NEXT_PUBLIC_OPENAI_API_KEY=your_openai_api_key
   NEXT_PUBLIC_CIVITAI_API_TOKEN=your_civitai_api_token
- Deploy Smart Contracts:
Use Foundry to compile and deploy contracts located insmart-contract/src/AIAgentFactory.sol.
Tech Stack
Foundry:
A smart contract development tool used for compiling, testing, and deploying Solidity contracts efficiently.Next.js:
A React framework that provides server-side rendering and static site generation for building fast, modern web applications.OpenAI:
Powers AI-driven text generation and interactive chat functionalities to create and manage dynamic character content.Civitai:
Utilized for generating high-quality images from text prompts, enhancing the visual aspect of character profiles.Pinata:
Enables decentralized storage by uploading images and other assets to IPFS, ensuring data permanence and reliability.ElizaOS:
Serves as the configuration and automation engine for character files, driving automated social account postings and interactions.
Usage
- Start the App:
Run the development server with:
  npm run dev
  # or
  yarn dev
Create & Tokenize an Agent:
- Click Launch AI Agent.
- Follow the guided steps: generate basic details, image prompt, additional traits, and then deploy your agent on-chain.
- Watch your AI agent get tokenized via our smart contract.
Chat with Your Agent:
Use the live chat interface to interact with your newly deployed agent.Download Eliza’s Character File:
Once created, download the JSON configuration file to integrate with automated social platforms.Deploy Eliza Starter:
Deploy the Eliza starter and run your character file for automated social accounts.
Eliza Docs Get Started
Roadmap & Milestones
Phase 1: MVP
- Basic AI-driven AI Agent Creation and chat interface.
- Integration with Web3 wallet connections and testnet smart contract deployment.
Phase 2: Enhanced Features
- Social media connectors (X, Discord, Telegram) for automated posting.
- Improved UX and error handling.
Phase 3: Scale & Community
- Community incentives.
- KOL onboarding.
- AVA token launch
Impact & Future Vision
AVA AI Agent Launchpad aims to transform digital engagement by:
- Fostering Interactive Communities: Enable seamless conversations with AI agents.
- Bridging AI and Blockchain: Ensure secure, on-chain verification of digital personas.
- Automating Social Engagement: Streamline content generation and distribution across social platforms.
Future plans include cross-chain integrations, more personalization features, and community-driven enhancements.
Happy Coding & Innovating!
Feel free to open issues or reach out via our community channels for any questions or suggestions.
Built With
- ai
- civitai
- foundry
- next
- openai
- openrouter

Log in or sign up for Devpost to join the conversation.