-
-
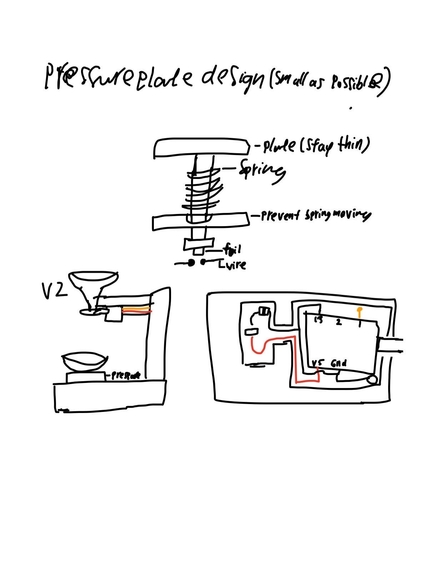
This is the drawing of the first design for the Auto-Feeder, but the plan wasn't followed due to some material limitation.
-

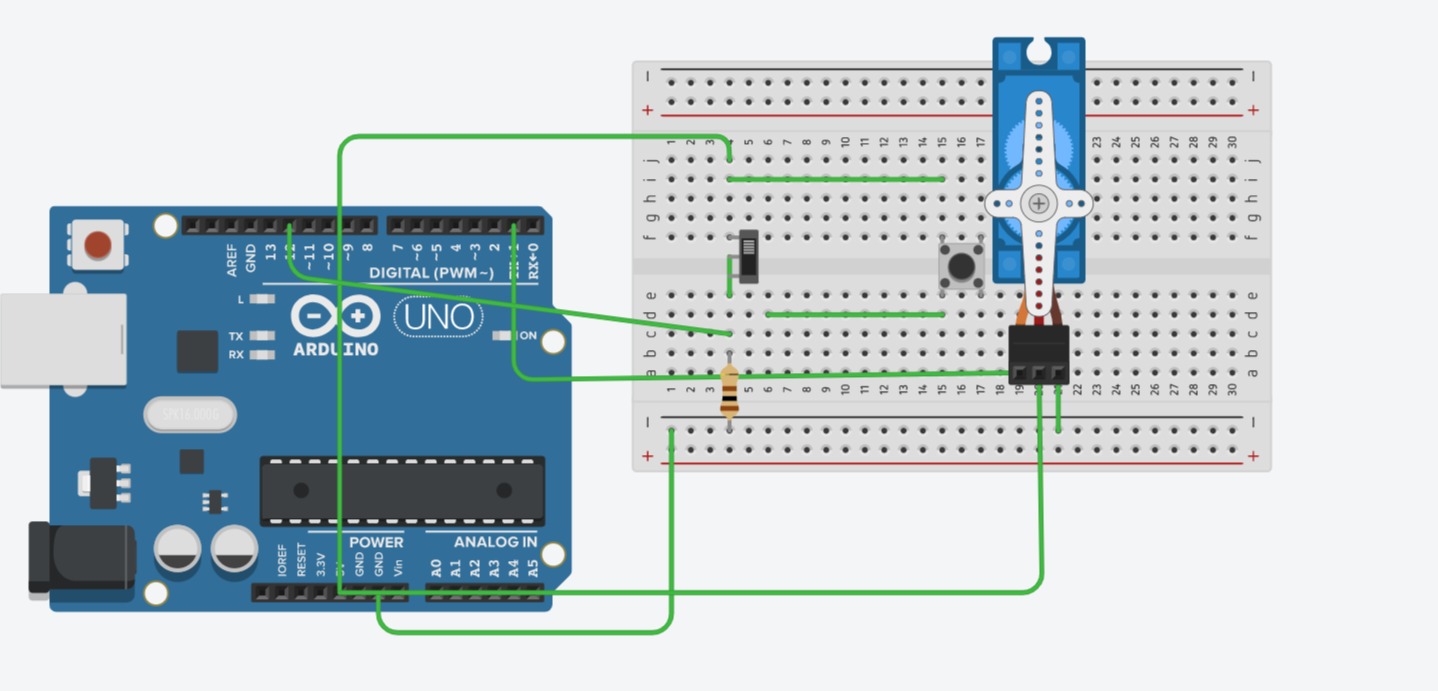
This was design of the circuit made in tinkercad.
-
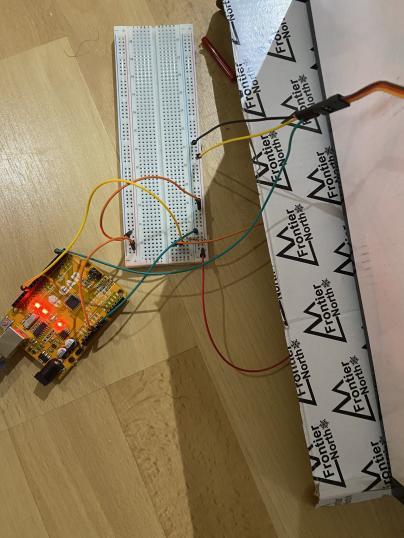
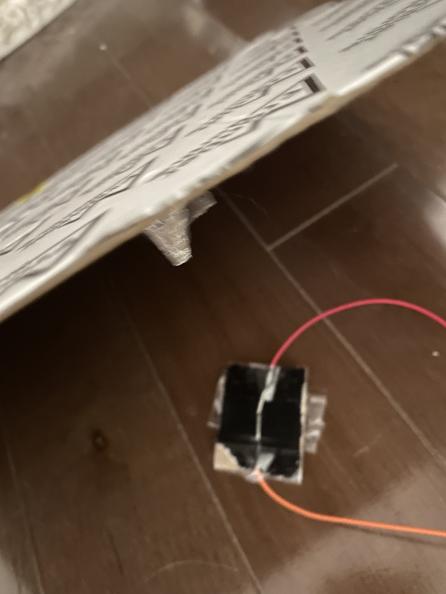
The look of the wiring at the finished product. The wire on the box
-

When the box bends down, the tin foil will connect the two wires under the tin foil. Being a signal to the Arduino that the bowl is full.
-
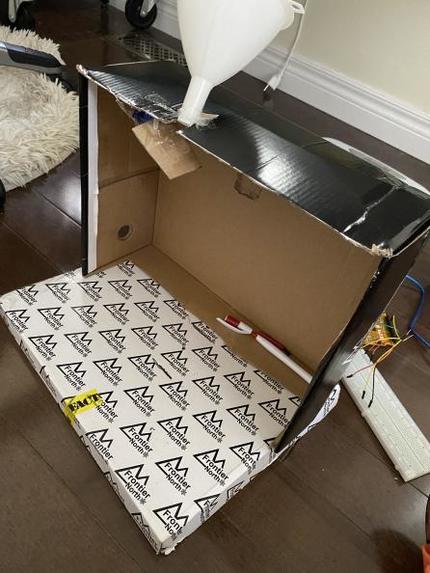
This is the final look of the Auto-Feeder. The funnel contains the food and the servo motor keeps it closed.


Inspiration
The idea of the machine first started with my pet rabbit. Every time when the food bowl is empty I have to open the cage and put the food in the cage. It is a daily routine, but I want to know if there is a solution. Then I remembered that automatic food dispenser that people can buy. I started to wonder if I can make a very easy version which I can, so I started working on the Auto-Feeder project. Hoping to create a machine that can dispense food automatically.
What it does
The purpose of Auto-Feeder is to dispense food automatically when the food bowl is empty. How it does it is simple. The bowl will be on a pressure plate and below the pressure plate is two connected wire by the pressure plate. When the pressure plate is lifted up because the bowl isn’t heavy enough it disconnects the wires. The Arduino will notice this and send a signal to the servo motor to rotate. Allowing the food to come out, making the bowl heavier. The Arduino board will detect it and tell the servo motor to rotate again to stop the food from dispensing.
How I built it
The planning
When I had the general idea of how the machine works I used tinkercad to make a testing version to see if it can work. I also used it as a way to my study how a servo motor works. A very important part of the Auto-Feeder.
The coding
The coding was easy at first, putting in the statements and the if statements to get the machine working, but then having a problem with how the servo motor will rotate. Which I will explain in the Challenges section.
The physical look
After I had everything planned out, the wiring and coding. I started to draw where everything go. I planned out the Arudino to be below the Auto-Feeder so the pets wouldn’t bite the Arduino board. Drawing out where the wire will go and such. Finally, I drew what the pressure plate would at the end look like.
The building process
After having everything ready to go I finally started working on the physical look of the machine, but due to some problems, I had to cut down what the machine will look like. Using a shoe box, pen and duct tape to make the Auto-Feeder. Using the cover of the box as the pressure plate. Put tin foil below to connect the two wires when the box bends. The body of the box is used to hold the funnel that will hold the food and the servo motor to control when food is dispensed. Finally having the wiring done quickly and the Auto-Feeder is finally done.
Challenges I ran into
I first planned everything to build out of wood as I had experience with wood cutting tools, but school was soon ending. Meaning I had to think of a simple idea. I talked with the executive of my school’s engineering club and they said just use cardboard boxes. It took me some time to decide as I was scared that the cardboard wouldn’t be able to support the servo motor’s weight. I ended up using cardboards which worked well. It allowed me to work on the project at home and ging me more time.
I have struggled for a long time during the coding phase of this project. After I have typed out everything that I think is needed the servo motor did turn, but it keeps going back and forth. I have tried some ideas like seeing if I typed the code wrong and searching up answers online, but it didn’t work at all. When I went to the workshop and had a chance to talk to a mentor about my problem. They told me about bool something that I have just learned. I will talk about it further in what I learned section. After the workshop, the code did what it was supposed to do and the motor actually did what I wanted it to do.
The original plan for the pressure plate was the most difficult part. I had to find a spring that can be used for the pressure plate. I used an old pen that no one uses and took out the spring, but then another problem came up. The pressure plate wasn’t balanced at all, so I had to cut a hole on the side of the pressure plate the create pillars to support it. The final thing that made the pressure plate idea completely useless is the spring wasn’t strong enough to push the bowl back up when it gets light. This got me panicking really hard and thinking of giving up. Then I remembered the very first plant that I had, using a flexible object like a piece of a plastic bucket as a pressure plate. This idea was inspired by the YouTuber Micheal Reeves who has used that strategy to substitute for a normal pressure plate. Then I noticed that the cover of the box bends towards. Meaning I can just use the cover as a pressure plate. Putting tin foil below the box.
Accomplishments that I am proud of
I am really proud of the first official plan that I had for the Auto-Feeder. It was the most detailed plan that I have made so far. The design of the pressure plate was something that I was really proud of. It is a shame that I didn’t get to see work because of some limitations. The design of the machine’s look also is really good. It is very nice and simple and safe for pets to use. Having the Arudino board is below the Auto-Feeder and has the least amount of wires exposed.
The simple change from using the original design of the pressure plate to using the shoe box cover was a great change. It may have been something small, but it was the thing that allowed me to continue this challenge. Let me continue building the Auto-Feeder and finishing it.
What I learned
I learned how the servo motor works. It is a very simple machine, but it was difficult to understand, but with some bits of help I was able to learn how to use it.
The bool statement that I have learned from the mentor has helped me a lot in the coding. This knowledge will definitely help me in the future. Especially when I need a signal sent once.
Finally I have learned that everything doesn’t have to be too complicated. The pressure plate idea was great, but the simple box cover idea has saved me from spending too much time trying to fix the pressure plate. From that experience, I will find a way to keep the machine as simple as possible.
What's next for Auto-Feeder
I want to make a website where the user can control when and the amount of food dispensed out of the machine. I am thinking the website has a button that sends the signal to the auto-feeder. Below the button would be a number that represents how much food the user wishes to dispense.
Built With
- arduino
- breadboard
- laptop
- resistor
- servomotor
- wire

Log in or sign up for Devpost to join the conversation.