Inspiration
Because all of our teammates live in condos, we are deeply aware of how food delivery can be busy and crowded during rush hours(dining times). The congestion is not just a matter of inconvenience; it also poses a security risk with the increasing incidents of 'takeout thefts' stealing our meals. Our meal has been stolen many times. This shared experience sparked an innovative idea among us: the creation of an 'Last-Meter' Automated Food Delivery System with an automatic food delivery car and security cameras, By integrating that, we aim not only to enhance the efficiency of food delivery services but also to address and mitigate safety concerns. Our goal is to streamline the delivery process, ensuring that meals reach their rightful recipients securely and swiftly, redefining the last leg of the food delivery journey.
What it does
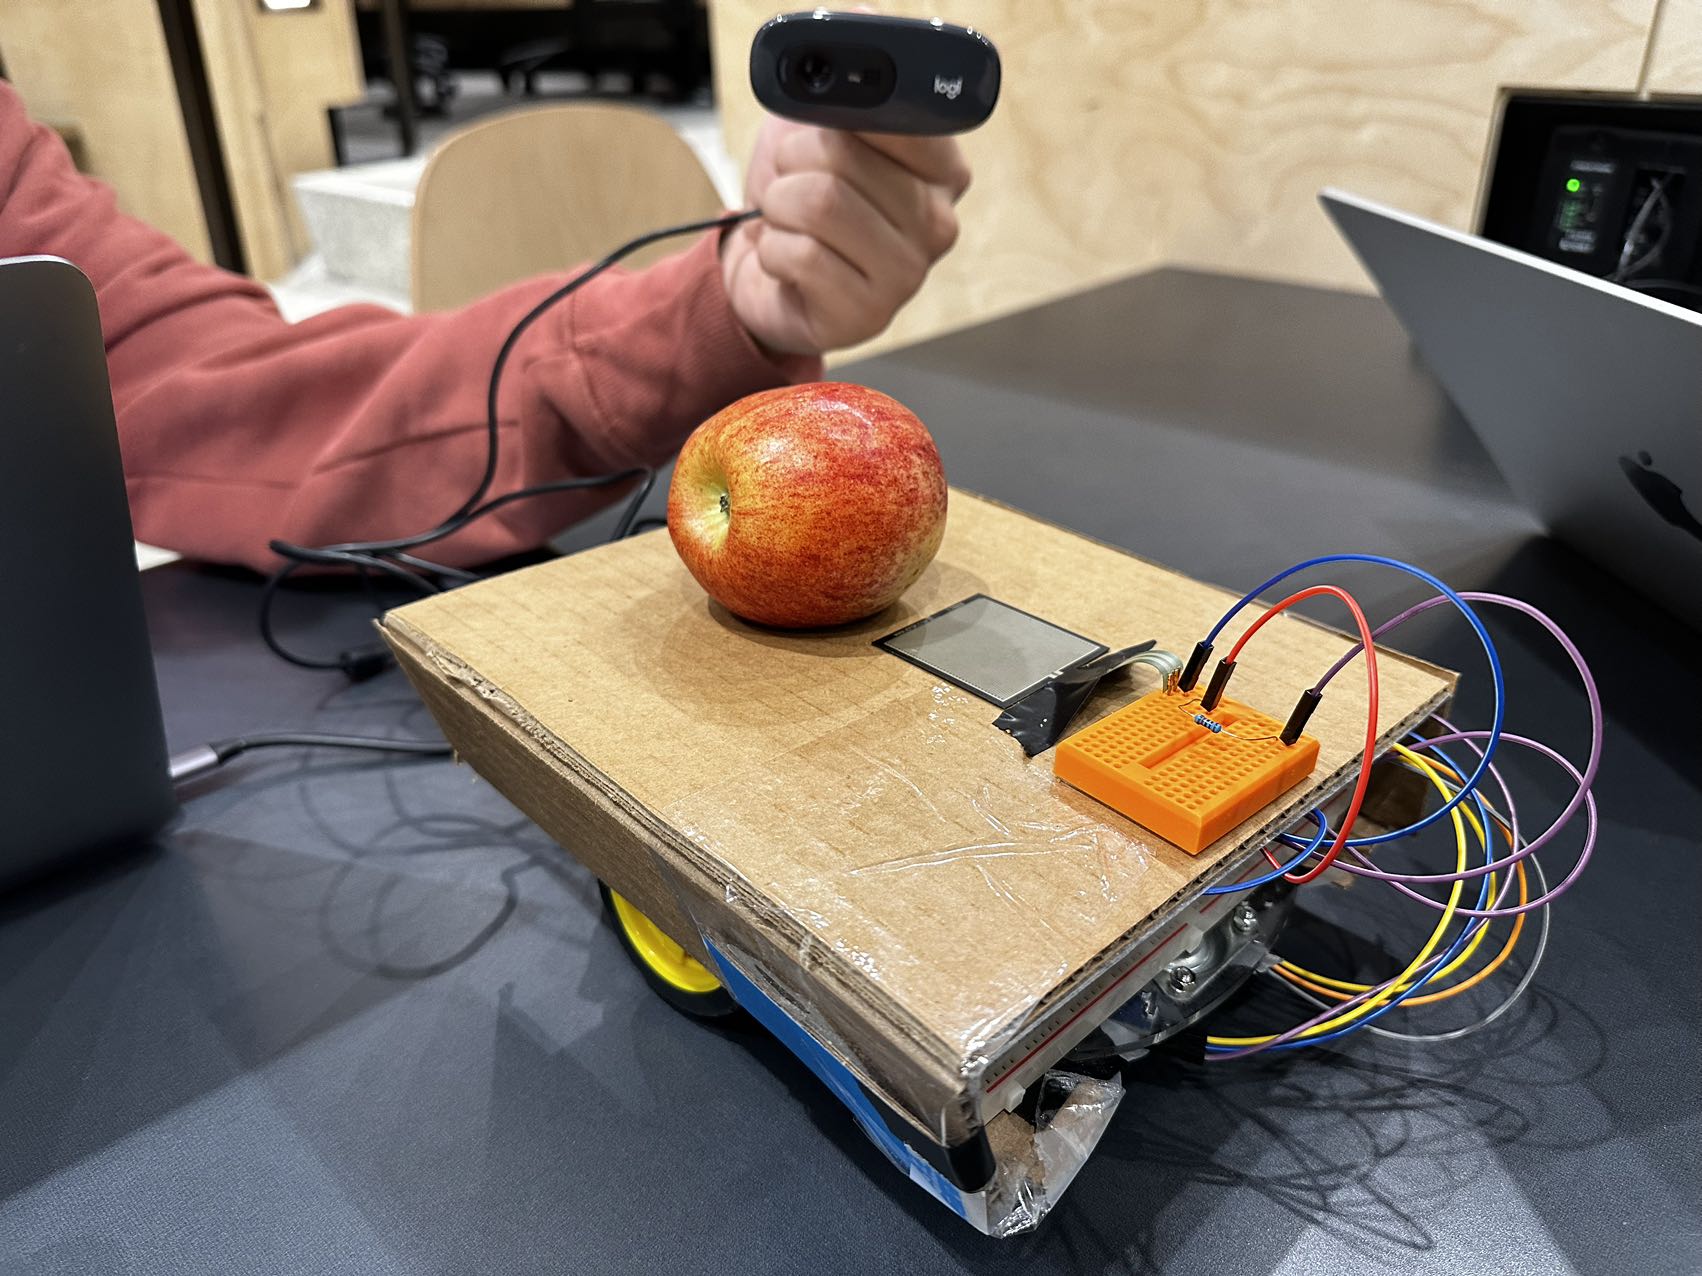
This "last meter" delivery and safety system contains an automatic car that finds its own way, starts at the drop station stops at the pick-up station, and then goes into a cycle. We build a simulated environment of the lobby and automatically detect food on the car. The logic of the car is first, the car is static at the drop station waiting for food to be put on the car. Once it detects the food is being put on the car by the force sensor, the car will automatically start to run, it will stop at the pickup station for customers or custodians to pick up the food. Once the sensor detects that the food is removed from the car, the car will start running and go back to the drop station, and be ready for the next loop. We also have a security camera empowered by openCV in the system, which can automatically detect any people's face picking up the food and record the time of the pickup. That way, the person who lost the food can easily track when and who stole the food.
How we built it
First part which is the car, we used a PVC car frame and a recyclable paper box as the frame, two gear motors with wheels connected by a L298N Motor Driver and 9V battery set to drive the motor, and a Raspberry Pi Pico at the center managing the whole system. We have two IR sensor at the bottom, separated by a appropriate distance to detect the lines, the logic is that whenever the left IR reads "1", which means it detected black lines, then the car will turn left by stop the right motor and only run left motor to adjust itself to the middle, same principle for the right IR sensor, If both sensors does not detect black, then the car will just move forward. We also connect a force sensor at the top, if both IR sensor read 1 and if the force sensor detected any change, the car knows that it has to stop and go. Here is the code for it: At first, we import the modules needed. The ADC is for force sensor, since it outputs an analog signal.
from machine import Pin,PWM,ADC #importing PIN and PWM and ADC
import time #importing time
import utime
Then, we define the motor settings to the output pinouts. There are two motors, each can both move forward and backward, so we define four motors.
motor1=Pin(10,Pin.OUT)
motor2=Pin(11,Pin.OUT)
motor3=Pin(12,Pin.OUT)
motor4=Pin(13,Pin.OUT)
# Defining enable pins and PWM object
enable1=PWM(Pin(6))
enable2=PWM(Pin(7))
# Defining  right and left IR digital pins as input
right_ir = Pin(2, Pin.IN)
left_ir = Pin(3, Pin.IN)
# Defining frequency for enable pins
enable1.freq(1000)
enable2.freq(1000)
# Setting maximum duty cycle for maximum speed
enable1.duty_u16(65025)
enable2.duty_u16(65025)
Define the output power of the motors and the threshold for the force sensor. The values of these variables are obtained from constant experimentation with functions better.
half_speed = 30000
threshold = 3000
Define the function for motors to move forward, move backward, turn right and turn left. Motor1 and Motor2 refers to the left motor, in which Motor1 means moving forward, and Motor2 means moving backward. Motor3 and Motor4 refers to the left motor, in which Motor4 means moving forward, and Motor3 means moving backward. The read_adc() function will read the output of a specific ADC pinout that we are connecting the force sensor to.
# Forward
def move_forward():
    motor1.high()
    motor2.low()
    motor3.low()
    motor4.high()
    enable1.duty_u16(half_speed)
    enable2.duty_u16(half_speed)

# Backward
def move_backward():
    motor1.low()
    motor2.high()
    motor3.high()
    motor4.low()
    enable1.duty_u16(half_speed)
    enable2.duty_u16(half_speed)

# Turn Right
def turn_right():
    motor1.high()
    motor2.low()
    motor3.high()  # Right wheel moving backward
    motor4.low()
    enable1.duty_u16(half_speed)
    enable2.duty_u16(half_speed)
# Turn Left
def turn_left():
    motor1.low()
    motor2.high()  # Left wheel moving backward
    motor3.low()
    motor4.high()
    enable1.duty_u16(half_speed)
    enable2.duty_u16(half_speed)

# Stop
def stop():
    motor1.low()
    motor2.low()
    motor3.low()
    motor4.low()
    enable1.duty_u16(0)
    enable2.duty_u16(0)

def read_adc():
    adc = ADC(Pin(26))
    reading = adc.read_u16()
    return reading
Both IR sensors detect white means the car is moving on the right path. If only one IR sensor detect white, the car will turn right or left according to the position of the IR sensor. When both IR sensors detect black (when the car hits the stop line,) the code will cycle through the difference in force for one second. If the difference in force is greater than a certain threshold, the car will move forward until it crosses the stop line.
while True:
    right_val=right_ir.value() #Getting right IR value(0 or 1)
    left_val=left_ir.value() #Getting left IR value(0 or 1)
    print(str(right_val)+"-"+str(left_val))
    # Controlling robot direction based on IR value
    if right_val==0 and left_val==0:
        move_forward()
    elif right_val==1 and left_val==0:
        turn_right()
    elif right_val==0 and left_val==1:
        turn_left()
    elif right_val==1 and left_val==1:
        stop()
        previous_value = read_adc()
        time.sleep(1)
 #check if the difference in force is greater than the threshold
        if abs(read_adc() - previous_value) > threshold:
            move_forward()
            time.sleep(0.7)  #The car will move 0.7s forward to cross the stop line
            stop()
And here is the code for OpenCV empowered cam: There are two major sections to this program. For one of them, it identifies human faces that appear in the live stream video from the camera through using the cascade classfier and encircles the human face found using rectangles. For the second section of this program, the major purpose of it is that every certain amount of time after the camera has been turned on, it uses the face recognition library to identify where the face it and saves that facial image into a file in a large folder. The file for these images are named according to the time when they were taken using the pytz library. Finally, the final piece of code bascially allows for the user to stop running the program by pressing down the “q” letter on the keyboard.
import face_recognition
import cv2
import numpy as np
import time
import os
import pytz
from datetime import datetime

# Initialize the camera
cap = cv2.VideoCapture(0)
face_cascade = cv2.CascadeClassifier(cv2.data.haarcascades + 'haarcascade_frontalface_default.xml')

# Variable to hold the timestamp when the last face image was saved
last_save_time = time.time()
face_save_interval = 5  # Interval between face saves (in seconds)

# Directory to save face images
save_directory = "FaceImages"
os.makedirs(save_directory, exist_ok=True)
face_id = 0
toronto_tz = pytz.timezone('America/Toronto')
while True:
    # Capture frame-by-frame
    ret, frame = cap.read()
    if not ret:
        break

    # Read the frame
    _, img = cap.read()

    # Convert to grayscale
    gray = cv2.cvtColor(img, cv2.COLOR_BGR2GRAY)

    faces = face_cascade.detectMultiScale(gray, 1.1, 4)

    # Get the current time
    current_time = time.time()

    # Check if it's time to save a new face
    if current_time - last_save_time >= face_save_interval:
        # Find all face locations in the current frame
        face_locations = face_recognition.face_locations(frame)

        # If faces are detected, save the first one
        if face_locations:
            # Update the last saved time
            last_save_time = current_time

            # Increment the face ID
            face_id += 1

            toronto_time = datetime.now(toronto_tz)

            # Format the timestamp for the filename
            timestamp = toronto_time.strftime('%B %d, %Y -> %I hours %M minutes %S seconds').lower()

            # Save the image of the face to a file
            top, right, bottom, left = face_locations[0]
            face_image = frame[top:bottom, left:right]
            save_path = os.path.join(save_directory, f"Face_{timestamp}.jpg")
            cv2.imwrite(save_path, face_image)
            print(f"Saved face_{face_id}.jpg")

    # Display the resulting frame
    # Draw the rectangle around each face
    for (x, y, w, h) in faces:
        cv2.rectangle(img, (x, y), (x+w, y+h), (255, 0, 0), 2)

    # Display
    cv2.imshow('img', img)

    # Break the loop when 'q' is pressed
    if cv2.waitKey(1) & 0xFF == ord('q'):
        break

# Release the webcam and destroy all active windows
cap.release()
cv2.destroyAllWindows()
Challenges we ran into
We ran into many challenges, like wifi connection and many other problems, but we do not have any time to finish any of our thoughts.
Accomplishments that we're proud of
Although we only designed a prototype at limited amount of time, we are still very proud that we made the frame of the system, and we are very proud of its extensibility. We can add a lot more functions on to the frame we have and make this system more developed and mature. We are very excited about that and wish to make this system a fully-functioal system.
What we learned
We learned so much from this event. The four of us are all first-time-hackers and had little experience on hardware, coding or any of these stuffs, we all learned and build everything at the same time. We learned to wire the boards, learned what does each pin stands for on each board, learned how the logic works on the board, learned MicroPython, debugging, learned to use glue guns, leaned opencv and so many new things. We can definitely do further and better for the next Makeuoft contest!
What's next for 'Last-Meter' Automated Food Delivery System
We plan to add more modules to the car, including automatic obstacle avoidance using an IR sensor, a stabilizer using a touch module to make sure the food is stable and then run, a more powerful energy system for the car, a more intelligent line-following logic, a more properly balanced car frame, a more developed system of opencv which can automatically compare the occupants with the face detected, and last but not least, a bigger basket for food of course!


Log in or sign up for Devpost to join the conversation.